
HTB5571DG - Home Theater System PHILIPS - Free user manual and instructions
Find the device manual for free HTB5571DG PHILIPS in PDF.


| Product Type | Home Theater System |
| Model | HTB5571DG |
| Brand | Philips |
| Channels | 5.1 |
| Total Power Output | 1000 W RMS |
| Main Unit Dimensions (W x H x D) | 435 x 58 x 310 mm |
| Main Unit Weight | 3.5 kg |
| Speaker Dimensions (Front) | 115 x 280 x 125 mm |
| Subwoofer Dimensions | 230 x 365 x 310 mm |
| Speaker Weight (Front) | 1.2 kg each |
| Subwoofer Weight | 4.5 kg |
| Power Consumption | 150 W (standby < 0.5 W) |
| Power Supply | AC 100-240 V, 50/60 Hz |
| HDMI Inputs | 2 |
| HDMI Output (ARC) | 1 |
| USB Playback | Yes (MP3, WMA, DivX, JPEG) |
| Bluetooth | Yes (A2DP) |
| FM Radio | Yes |
| Optical Input | 1 |
| Coaxial Input | 1 |
| Cleaning Instructions | Wipe with a soft, dry cloth. Do not use solvents. |
| Safety Precautions | Do not expose to water or moisture. Unplug during storms. |
| Spare Parts Availability | Contact Philips support for replacement parts. |
| Reparability Rating | 6/10 (limited user replaceable parts) |
Frequently Asked Questions - HTB5571DG PHILIPS
User questions about HTB5571DG PHILIPS
0 question about this device. Answer the ones you know or ask your own.
Ask a new question about this device
Download the instructions for your Home Theater System in PDF format for free! Find your manual HTB5571DG - PHILIPS and take your electronic device back in hand. On this page are published all the documents necessary for the use of your device. HTB5571DG by PHILIPS.
USER MANUAL HTB5571DG PHILIPS
Always there to help you
Register your product and get support at
www.philips.com/support

HTB5541DG
HTB5571DG
User manual
PHILIPS
Contents
1 Important 2
Safety 2
3D health warning 3
Care for your product 3
Care of the environment 3
2 Your home theater 4
Main unit 4
Remote control 4
Connectors 5
3 Connect and set up 7
Connect speakers 7
Connect to TV 8
Connect digital devices through HDMI 9
Connect audio from TV and other devices 10
Set up speakers 11
Set up EasyLink (HDMI-CEC control) 11
Connect and set up a home network 12
4 Use your home theater 14
Access the home menu 14
Discs 14
Play audio through Bluetooth 16
Data files 16
USB storage devices 17
Audio, video, and picture options 18
Radio 19
MP3 player 20
iPod or iPhone 20
Smartphone control 20
Browse PC through DLNA 21
Karaoke 23
Choose sound 24
5 Change settings 26
Language settings 26
Picture and video settings 26
Audio settings 26
Parental control settings 27
Display settings 27
Energy saving settings 27
Speaker settings 27
Restore default settings 28
6 Update software 29
Check software version 29
Update software through USB 29
Update software through the Internet 30
7 Product specifications 31
8 Troubleshooting 35
9 Notice 38
Copyright 38
Open source software 38
RMVB end user agreement 38
Trademarks 39
10 Language code 41
11 Index 42
1 Important
Read and understand all instructions before you use your product. If damage is caused by failure to follow instructions, the warranty does not apply.
Safety
Risk of electric shock or fire!
- Never expose the product and accessories to rain or water. Never place liquid containers, such as vases, near the product. If liquids are spilt on or into the product, disconnect it from the power outlet immediately. Contact Philips Consumer Care to have the product checked before use.
- Never place the product and accessories near naked flames or other heat sources, including direct sunlight.
- Never insert objects into the ventilation slots or other openings on the product.
- Where the mains plug or an appliance coupler is used as the disconnect device, the disconnect device shall remain readily operable.
- Batteries (battery pack or batteries installed) shall not be exposed to excessive heat such as sunshine, fire or the like.
- Disconnect the product from the power outlet before lightning storms.
- When you disconnect the power cord, always pull the plug, never the cable.
Risk of short circuit or fire!
- Before you connect the product to the power outlet, ensure that the power voltage matches the value printed on the back or bottom of the product. Never connect the product to the power outlet if the voltage is different.
Risk of injury or damage to the home theater!
- For wall-mountable products, use only the supplied wall mount bracket. Secure the
wall mount to a wall that can support the combined weight of the product and the wall mount. Koninklijke Philips Electronics N.V. bears no responsibility for improper wall mounting that results in accident, injury or damage.
- For speakers with stands, use only the supplied stands. Secure the stands to the speakers tightly. Place the assembled stands on flat, level surfaces that can support the combined weight of the speaker and stand.
- Never place the product or any objects on power cords or on other electrical equipment.
- If the product is transported in temperatures below 5°C, unpack the product and wait until its temperature matches room temperature before connecting it to the power outlet.
- Visible and invisible laser radiation when open. Avoid exposure to beam.
- Do not touch the disc optical lens inside the disc compartment.
- Parts of this product can be made of glass. Handle with care to avoid injury and damage.
Risk of overheating!
- Never install this product in a confined space. Always leave a space of at least four inches around the product for ventilation. Ensure curtains or other objects never cover the ventilation slots on the product.
Risk of contamination!
- Do not mix batteries (old and new or carbon and alkaine, etc.).
- Danger of explosion if batteries are incorrectly replaced. Replace only with the same or equivalent type.
- Remove batteries if they are exhausted or if the remote control is not to be used for a long time.
- Batteries contain chemical substances, they should be disposed of properly.
Risk of swallowing batteries!
- The product/remote control may contain a coin/button type battery, which can be swallowed. Keep the battery out of reach
of children at all times! If swallowed, the battery can cause serious injury or death. Severe internal burns can occur within two hours of ingestion.
- If you suspect that a battery has been swallowed or placed inside any part of the body, seek immediate medical attention.
- When you change the batteries, always keep all new and used batteries out of reach of children. Ensure that the battery compartment is completely secure after you replace the battery.
- If the battery compartment cannot be completely secured, discontinue use of the product. Keep out of reach of children and contact the manufacturer.

This is CLASS II apparatus with double insulation, and no protective earth provided.
3D health warning
- If you or your family has a history of epilepsy or photosensitive seizures, consult a medical professional before exposing yourself to flashing light sources, rapid image sequences or 3D viewing.
- To avoid discomfort such as dizziness, headache or disorientation, we recommend not watching 3D for extended periods of time. If you experience any discomfort, stop watching 3D and do not immediately engage in any potentially hazardous activity (for example driving a car) until your symptoms have disappeared. If symptoms persist, do not resume watching 3D without consulting a medical professional first.
- Parents should monitor their children during 3D viewing and ensure they do not experience any discomfort as mentioned above. Watching 3D is not recommended
for children under six years of age as their visual system is not fully developed yet.
Care for your product
- Do not insert any objects other than discs into the disc compartment.
- Do not insert warped or cracked discs into the disc compartment.
- Remove discs from the disc compartment if you are not using the product for an extended period of time.
- Use only microfiber cloth to clean the product.
Care of the environment

Your product is designed and manufactured with high quality materials and components, which can be recycled and reused. Never dispose of your product with other household waste. Please inform yourself about the local rules on the separate collection of electrical and electronic products and batteries. The correct disposal of these products helps prevent potentially negative consequences on the environment and human health. Your product contains batteries, which cannot be disposed of with normal household waste. Please inform yourself about the local rules on separate collection of batteries. The correct disposal of batteries helps prevent potentially negative consequences on the environment and human health. Please visit www.recycle.philips.com for additional information on a recycling center in your area.
2 Your home theater
Congratulations on your purchase, and welcome to Philips! To fully benefit from the support that Philips offers(e.g. notification of product software upgrade), register your product at www.philips.com/welcome.
Main unit
This section includes an overview of the main unit.

① ▲(Open/Close)
Open or close the disc compartment.
② ▶ II (Play/Pause)
Start, pause or resume play.
③ ■ (Stop)
Stop play.
④ SOURCE
Select an audio, video, radio source or Bluetooth mode for the home theater.
⑤ + / - (Volume)
Increase or decrease volume.
⑥ ⏻ (Standby-On)
Switch the home theater on or to standby.
Remote control
This section includes an overview of the remote control.

① ⏻(Standby-On)
- Switch the home theater on or to standby.
- When EasyLink is enabled, press and hold for at least three seconds to switch all connected HDMI CEC compliant devices to standby.
② (Home)
Access the home menu.
③ Source buttons
- DISC/POP-UP MENU : Switch to disc source.Access or exit the disc menu when you play a disc.
• RADIO : Switch to FM radio. - SOURCE : Select an audio input source or Bluetooth mode.
④ ← BACK
- Return to a previous menu screen.
- In radio mode, press and hold to erase the current preset radio stations.
⑤ Navigation buttons
- Navigate menus.
- In radio mode, press left or right to start auto search.
- In radio mode, press up or down to tune the radio frequency.
⑥ OK
Confirm an entry or selection.
⑦ ◀/▶(Previous/Next)
- Skip to the previous or next track, chapter or file.
- In radio mode, select a preset radio station.
⑧ ■ (Stop) / ▲(Eject/Open/Close)
- Stop play.
- Press and hold for three seconds to open or close the disc compartment, or eject the disc.
⑨ ◀◀ / ▶(Fast Backward / Fast Forward)
Search backwards or forward. Press repeatedly to change the search speed.
⑩ Δ + / - (Volume)
Increase or decrease volume.
⑪ SMART TV
This function is not available on this model.
⑫ Alphanumeric buttons
Enter values or letters (using SMS style entry).
⑬ AUDIO
Select an audio language or channel.
⑭ TOP MENU
Access the main menu of a disc.
⑮ ≡ OPTIONS
- Access more play options while playing a disc or a USB storage device.
• In radio mode, set a radio station.
⑯ ▶ (Play)
Start or resume play.
⑰ II(Pause)
Pause play.
⑱ (Mute)
Mute or restore volume.
19
Access or exit sound options.
⑳ SUBTITLE
Select subtitle language for video.
②1 Color buttons
- Select tasks or options for Blu-ray discs.
- Select iPod/iPhone source.
Connectors
This section includes an overview of the connectors available on your home theater.
Front connectors
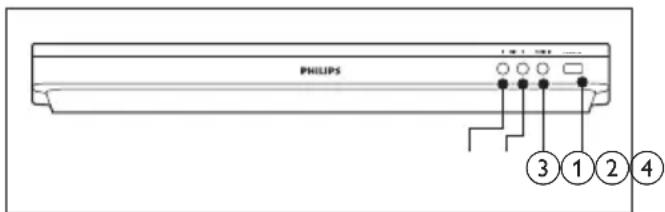
① MIC 1
Audio input from a microphone.
② MIC 2
Audio input from a microphone.
③ AUDIO IN
Audio input from an MP3 player (3.5mm jack).
④ iPod/iPhone (USB)
• Audio, video or picture input from a USB storage device.
- Connect to an iPod or iPhone.
- Connect a USB mass storage to access BD-Live.

Note
- When you connect an MP3 player to the home theater with a 3.5mm audio cable, make sure that you connect the MP3 player to the AUDIO IN connector, not to the MIC 1 or MIC 2 connector, to ensure normal function of the home theater.
Rear connectors

① AC MAINS
Fixed AC power cable.
② SPEAKERS
Connect to the supplied speakers and subwoofer.
③ Wireless Rear Audio
Connect to a Philips wireless module. (Model: Philips RWSS5512, optionally available in your region)
④ DIGITAL IN-COAXIAL
Connect to a coaxial audio output on the TV or a digital device.
⑤ AUDIO IN-AUX
Connect to an analog audio output on the TV or an analog device.
⑥ HDMI IN1 / HDMI IN2
Connect to the HDMI output on a digital device.
⑦ (USB)
Audio, video or picture input from a USB storage device.
⑧ VIDEO OUT
Connect to the composite video input on the TV.
⑨ DIGITAL IN-OPTICAL
Connect to an optical audio output on the TV or a digital device.
⑩ HDMI OUT (ARC)
Connect to the HDMI input on the TV.
⑪ LAN
Connect to the LAN input on a broadband modem or router.
⑫ FM ANTENNA
Connect to the supplied FM antenna.
3 Connect and set up
This section helps you connect your home theater to a TV and other devices, and then set it up.
For information about the basic connections of your home theater and accessories, see the quick start guide.

Note
- For identification and supply ratings, see the type plate at the back or bottom of the product.
- Before you make or change any connections, make sure that all devices are disconnected from the power outlet.
Connect speakers
The speaker cables are color-coded for easy connection. To connect a speaker to your home theater, match the color on the speaker cable to the color on the connector.
Speaker position plays a critical role in setting up a surround sound effect. For best effect, position all the speakers towards the seating position and place them close to your ear level (seated).

* The actual speaker shapes may vary from the illustration above.

Note
- Surround sound depends on factors such as room shape and size, type of wall and ceiling, windows and reflective surfaces, and speaker acoustics. Experiment with the speaker positions to find the optimum setting for you.
Follow these general guidelines for speakers placement.
1 Seating position:
This is the center of your listening area.
2 FRONT CENTER (front center) speaker:
Place the center speaker directly in front of the seating position, either above or below your TV.
3 FRONT LEFT (front left) and FRONT RIGHT (front right) speakers:
Place the left and right speakers in the front, and at equal distance from the center speaker. Make sure that the left, right, and the center speakers are at equal distance from your seating position.
4 REAR LEFT (rear left) and REAR RIGHT (rear right) speakers:
Place the rear surround speakers to the left and right side of your seating position, either in line with it or slightly behind it.
5 SUBWOOFER (subwoofer):
Place the subwoofer at least one meter to the left or right of the TV. Leave about 10-centimeter clearance from the wall.
Make your rear speakers wireless
Connect the rear speakers to your home theater wirelessly using a wireless module accessory. For details, see the wireless module user manual.
What you need
- A Philips wireless module. (Model: Philips RWSS5512, optionally available in your region)
1 Connect the wireless transmitter to the Wireless Rear Audio connector on your home theater.

2 Connect the rear speakers to the wireless receiver.
3 Connect the wireless receiver to the power supply.

Connect to TV
Connect your home theater to a TV to watch videos. You can listen to the TV audio through your home theater speakers.
Use the best quality connection available on your home theater and TV.
Option 1: Connect to TV through HDMI (ARC)
Best quality video
Your home theater supports HDMI version with Audio Return Channel (ARC). If your TV is HDMI ARC compliant, you can hear the TV audio through your home theater by using a single HDMI cable.

1 Using a High Speed HDMI cable, connect the HDMI OUT (ARC) connector on your home theater to the HDMI ARC connector on the TV.
- The HDMI ARC connector on the TV might be labeled differently. For details, see the TV user manual.
2 On your TV, turn on HDMI-CEC operations. For details, see the TV user manual.
- HDMI-CEC is a feature that enables CEC compliant devices that are connected through HDMI to be controlled by a single remote control, such as volume control for both the TV and the home theater. (see 'Set up EasyLink (HDMI-CEC control)' on page 11)
3 If you cannot hear the TV audio through your home theater, set up the audio manually. (see 'Set up the audio' on page 12)
Option 2: Connect to TV through standard HDMI
Best quality video
If your TV is not HDMI ARC compliant, connect your home theater to the TV through a standard HDMI connection.

1 Using a High Speed HDMI cable, connect the HDMI OUT (ARC) connector on your home theater to the HDMI connector on the TV.
2 Connect an audio cable to hear the TV audio through your home theater (see 'Connect audio from TV and other devices' on page 10).
3 On your TV, turn on HDMI-CEC operations. For details, see the TV user manual.
- HDMI-CEC is a feature that enables CEC compliant devices that are connected through HDMI to be controlled by a single remote control, such as volume control for both the TV and the home theater. (see 'Set up EasyLink (HDMI-CEC control)' on page 11)
4 If you cannot hear the TV audio through your home theater, set up the audio manually. (see 'Set up the audio' on page 12)

Note
- If your TV has a DVI connector, you can use an HDMI/DVI adapter to connect to TV. However, some of the features may not be available.
Option 3: Connect to the TV through composite video
Basic quality video
If your TV does not have HDMI connectors, use a composite video connection. A composite connection does not support high-definition video.

1 Using a composite video cable, connect the VIDEO OUT connector on your home theater to the VIDEO IN connector on the TV.
- The composite video connector might be labeled AV IN, COMPOSITE, or BASEBAND.
2 Connect an audio cable to hear the TV audio through your home theater (see 'Connect audio from TV and other devices' on page 10).
3 When you watch TV programs, press SOURCE on your home theater repeatedly to select the correct audio input.
4 When you watch videos, switch your TV to the correct video input. For details, see the TV user manual.
Connect digital devices through HDMI
Connect a digital device such as a set-top box, games console, or camcorder to your home theater through a single HDMI connection. When you connect the devices in this way and play a file or game, the
• video is automatically displayed on your TV, and
- audio is automatically played on your home theater.
1 Using a High Speed HDMI cable, connect the HDMI OUT connector on your digital device to the HDMI IN 1/2 on your home theater.
2 Connect your home theater to TV through HDMI OUT (ARC).
- If the TV is not HDMI CEC compliant, select the correct video input on your TV.
3 On the connected device, turn on HDMI-CEC operations. For details, see the user manual of the device.
- If you cannot hear the digital device audio through your home theater, set up the audio manually. (see 'Set up the audio' on page 12)
- You can also press SOURCE on your home theater repeatedly to select the correct HDMI input.
Connect audio from TV and other devices
Play audio from TV or other devices through your home theater speakers.
Use the best quality connection available on your TV, home theater, and other devices.

Note
- When your home theater and TV are connected through HDMI ARC, an audio connection is not required (see 'Option 1: Connect to TV through HDMI (ARC)' on page 8).
Option 1: Connect audio through a digital optical cable
Best quality audio

1 Using an optical cable, connect the OPTICAL connector on your home theater to the OPTICAL OUT connector on the TV or other device.
- The digital optical connector might be labeled SPDIF or SPDIF OUT.
Option 2: Connect audio through a digital coaxial cable
Good quality audio

1 Using a coaxial cable, connect the COAXIAL connector on your home theater to the COAXIAL/DIGITAL OUT connector on the TV or other device.
• The digital coaxial connector might be labeled DIGITAL AUDIO OUT.
Option 3: Connect audio through analog audio cables
Basic quality audio
1 Using an analog cable, connect the AUX connectors on your home theater to the AUDIO OUT connectors on the TV or other device.

Set up speakers
Set up the speakers manually to experience customized surround sound.
Before you start
Make the necessary connections described in the quick start guide, and then switch the TV to the correct source for your home theater.
1 Press (Home).
2 Select [Setup], and then press OK.
3 Select [Audio] > [Speaker Setup].
4 Enter the distance for each speaker, and then listen to the test tones and change the volume. Experiment with the speaker positions to find the ideal setting.
Set up EasyLink (HDMI-CEC control)
This home theater supports Philips EasyLink, which uses the HDMI-CEC (Consumer Electronics Control) protocol. EasyLink-
compliant devices that are connected through HDMI can be controlled by a single remote control.

Note
- Depending on the manufacturer, HDMI-CEC is known by many names. For information on your device, see the user manual of the device.
• Philips does not guarantee 100% interoperability with all HDMI-CEC devices.
Before you start
- Connect your home theater to the HDMI-CEC compliant device through HDMI connection.
- Make the necessary connections described in the quick start guide, and then switch the TV to the correct source for your home theater.
Enable EasyLink
1 Press (Home).
2 Select [Setup], and then press OK.
3 Select [EasyLink] > [EasyLink] > [On].
4 On your TV and other connected devices, turn on HDMI-CEC control. For details, see the user manual of the TV or other devices.
- On your TV, set the audio output to 'Amplifier' (instead of TV speakers). For details, see the TV user manual.
EasyLink controls
With EasyLink, you can control your home theater, TV, and other connected HDMI-CEC compliant devices with a single remote control.
• [One Touch Play] (One-touch play): When a video disc is in the disc compartment, press ▶ (Play) to wake up the TV from standby, and then play a disc.
• [One Touch Standby] (One-touch standby): If one-touch standby is enabled, your home theater can switch to standby
with the remote control of the TV or other HDMI-CEC devices.
- [System Audio Control] (System audio control): If system audio control is enabled, the audio of the connected device is output through your home theater speakers automatically when you play the device.
- [Audio Input Mapping] (Audio input mapping): If system audio control does not work, map the connected device to the correct audio input connector on your home theater. (see 'Set up the audio' on page 12)

Note
- To change the EasyLink control settings, press (Home), select [Setup] > [EasyLink].
Set up the audio
If you cannot hear the audio output of a connected device through your home theater speakers, do the following:
- Check that you have enabled EasyLink on all the devices, (see 'Set up EasyLink (HDMI-CEC control)' on page 11) and
- on your TV, set the audio output to "Amplifier" (instead of TV speakers). For details, see the TV user manual, and
- setup the EasyLink audio control.
1 Press (Home).
2 Select [Setup], and then press OK.
3 Select [EasyLink] > [System Audio Control] > [On].
- To play the audio from the TV speakers, select [Off], and skip the following steps.
4 Select [EasyLink] > [Audio Input Mapping].
5 Follow the onscreen instructions to map the connected device to the audio inputs on your home theater.
- If you connect your home theater to the TV through an HDMI ARC connection, make sure that the TV audio is mapped to the ARC input on your home theater.
Connect and set up a home network
Connect your home theater to a network router for a network setup, and enjoy:
- Streamed multimedia content (see 'Browse PC through DLNA' on page 21)
• Smartphone control (see 'Smartphone control' on page 20) - BD Live applications (see 'BD-Live on Blu-ray' on page 15)
- Software update (see 'Update software through the Internet' on page 30)

Caution
- Familiarize yourself with the network router, media server software and networking principles. If necessary, read documentation that accompanies the network components. Philips is not responsible for lost, damaged, or corrupt data.
Before you start
- For software updates, make sure that the network router has access to the Internet with high-speed connection and is not restricted by firewalls or other security systems.
- Make the necessary connections described in the quick start guide, and then switch the TV to the correct source for your home theater.
Set up the wired network
What you need
• A network cable (RJ45 straight cable).
• A network router (with DHCP enabled).

1 Using a network cable, connect the LAN connector on your home theater to the network router.
2 Press (Home).
3 Select [Setup], and then press OK.
4 Select [Network] > [Network installation] > [Wired (Ethernet)].
5 Follow the onscreen instructions to complete the setup.
- If connection fails, select [Retry], and then press OK.
6 Select [Finish], and then press OK to exit.
- To view the network settings, select [Setup] > [Network] > [View network settings].
Set up the wireless network
Your home theater has a built-in Wi-Fi for easy access to a wireless network.
What you need
- A network router (with DHCP enabled). For best wireless performance, coverage, and compatibility, use 802.11n router.

1 Press (Home).
2 Select [Setup], and then press OK.
3 Select [Network] > [Network installation] > [Wireless (Wi-Fi)], and then press OK.
4 Follow the onscreen instructions to select and set up the wireless network.
- If connection fails, select [Retry], and then press OK.
5 Select [Finish], and then press OK to exit.
- To view the network settings, select [Setup] > [Network] > [View wireless settings].
Personalize the network name
Name your home theater to easily identify it on your home network.
1 Press (Home).
2 Select [Setup], and then press OK.
3 Select [Network] > [Name your Product:].
4 Press the Alphanumeric buttons to enter the name.
5 Select [Done], and then press OK to exit.
4 Use your home theater
This section helps you use the home theater to play media from a wide range of sources.
Before you start
- Make the necessary connections described in the quick start guide and the user manual.
- Complete the first-time setup. First-time setup appears when you turn on your home theater for the first time or if you do not complete the setup.
- Switch the TV to the correct source for your home theater (for example, HDMI, AV IN).
Access the home menu
The home menu provides easy access to connected devices, setup and other useful features in your home theater.
1 Press (Home).
→ The home menu is displayed.
2 Press the Navigation buttons and OK to select the following:
• [play Disc]: Start disc play.
- [browse USB]: Access the USB content browser.
- [iPod Music]: Access music files from iPod or iPhone.
- [browse PC]: Access the computer content browser.
- [HDMI 1]: Select the digital device connected to HDMI IN 1 on your home theater.
- [HDMI 2]: Select the digital device connected to HDMI IN 2 on your home theater.
- [Setup]: Access menus to change video, audio and other settings.
3 Press (Home) to exit.
Discs
Your home theater can play DVDs, VCDs, CDs, and Blu-ray discs. It can also play discs that you've made at home, such as CD-R discs of photos, videos, and music.
1 Insert a disc into the home theater.
2 If the disc does not play automatically, press DISC or select [play Disc] from the home menu.
3 Use the remote control to control play (see 'Play buttons' on page 14).
- It is normal to hear a little noise when you play a Blu-ray disc. This does not mean that your home theater is faulty.
Play buttons
| Button Action | |
| Navigation buttons | Navigate menus.Up/Down: Rotate the picture clockwise or counter-clockwise. |
| OK Confirm an entry or selection. | |
| ► (Play) Start or resume play. | |
| || | Pause play. |
| ■/▲ | Stop play.Press and hold for three seconds to open or close the disc compartment. |
| ◄/► | Skip to the previous or next track, chapter or file. |
| ◄◄ / ►► | Search fast backwards or forward.When a video is paused, search slow backwards or forward. |
| REPEAT | Select or turn off repeat mode. |
| SUBTITLE | Select subtitle language for video. |
| DISC/POP-UPMENU | Access or exit the disc menu. |
Button Action
OPTIONS Access the advanced options when you play your audio, video, or media files (see 'Audio, video, and picture options' on page 18).
Synchronize picture and sound
If the audio and video are not synchronized, delay the audio to match the video.
1 Press ttt
2 Press the Navigation buttons (left/right) to select [Audio sync], and then press OK.
3 Press the Navigation buttons (up/down) to synchronize the audio with the video.
4 Press OK to confirm.
Play Blu-ray 3D disc
Your home theater can play Blu-ray 3D video. Read the 3D health warning before playing a 3D disc.
What you need
• A 3DTV
- A pair of 3D glasses that are compatible with your 3D TV
• A 3D Blu-ray video
• A high speed HDMI cable
1 Using the high speed HDMI cable, connect your home theater to a 3D compatible TV.
2 Make sure that the 3D video setting is enabled. Press ⬆ (Home), select [Setup] > [Video] > [Watch 3D video] > [Auto].
- To play 3D discs in 2D mode, select [Off].
3 Play a Blu-ray 3D disc and put on the 3D glasses.
- During video search and in certain play modes, the video is displayed in 2D. The video display returns to 3D when you resume play.

Note
• To avoid flickering, change the brightness of the display.
Bonus View on Blu-ray
On Blu-ray discs that support the Bonus View, enjoy extra content such as commentaries in a small screen window. Bonus View is also known as picture-in-picture.
1 Enable Bonus View in the Blu-ray disc menu.
2 While you play the movie, press OPTIONS.
→ The options menu is displayed.
3 Select [PIP selection] > [PIP].
- Depending on the video, PIP menu [1] or [2] is displayed.
• To disable Bonus View, select [Off].
4 Select [2nd audio language] or [2nd Subtitle Language].
5 Select the language, and then press OK.
BD-Live on Blu-ray
Access additional features on the Blu-ray discs with BD-Live content, such as internet chats with the director, the latest movie trailers, games, wallpaper, and ringtones.
BD-Live services and content vary from disc to disc.
What you need
• Blu-ray disc with BD-Live content
- a USB storage device, with at least 1 GB of memory
1 Connect your home theater to a home network with Internet access (see 'Connect and set up a home network' on page 12).
2 Connect a USB storage device to the ✉ (USB) connector at the front of your home theater for BD-Live download.
3 Press ⬆ (Home) and select [Setup] > [Advanced] > [BD-Live security] > [Off].
• To disable BD-Live, select [On].
4 Select the BD-Live icon in the disc menu, and then press OK.
→ BD-Live starts to load. The loading time depends on the disc and your internet connection.
5 Press the Navigation buttons to navigate BD-Live, and then press OK to select an option.

Note
- To clear the memory on the storage device, press ⬆ (Home), select [Setup] > [Advanced] > [Clear memory].
Play audio through Bluetooth
Through Bluetooth, connect the home theater with your Bluetooth device (such as an iPad, iPhone, iPod touch, Android phone, or laptop), and then you can listen to the audio files stored on the device through your home theater speakers.
What you need
- A Bluetooth device which supports Bluetooth profile A2DP, and with Bluetooth version as 2.1 + EDR.
- The operational range between the home theater and a Bluetooth device is approximately 10 meters (30 feet).
1 Press SOURCE repeatedly to select Bluetooth mode.
→ BT is displayed on the display panel.
2 On the Bluetooth device, switch on Bluetooth, search for and select the name of your home theater to start connection (see the user manual of the Bluetooth device on how to enable Bluetooth).
- If prompted for a password, enter "0000".
3 Wait until BT_READY is displayed on the display panel.
When the Bluetooth connection succeeds, BT_READY is displayed on the display panel.
→ If the connection fails, BT on the display panel is still displayed.
4 Select and play audio files or music on your Bluetooth device.
- During play, if a call is coming, music play is paused.
- If music streaming is interrupted, place the Bluetooth device closer to the home theater.
5 To exit Bluetooth, select other source.
- When your switch back to Bluetooth mode, Bluetooth connection remains active.

Note
- The music streaming may be interrupted by obstacles between the device and home theater, such as wall, metallic casing that covers the device, or other devices nearby that operate in the same frequency.
- If you want to connect your home theater with another Bluetooth device, press and hold ▶ on the remote control (or ▶ on the main unit) to disable the currently connected Bluetooth device.
- Philips does not guarantee 100% compatibility with all Bluetooth devices.
Data files
Your home theater can play pictures, audio and video files contained in a disc or a USB storage device. Before you play a file, check that the file format is supported by your home theater (see 'File formats' on page 31).
1 Play the files from a disc or USB storage device.
2 To stop play, press ■
- To resume the video from where you stopped, press ▶ (Play).
• To play the video from the start, press OK.

Note
- To play DivX DRM protected files, connect your home theater to a TV through an HDMI cable.
Subtitles
If your video has subtitles in multiple languages, select a subtitle language.

Note
- Make sure that the subtitle file has the exact same name as the video file. For example, if the video file is named 'movie.avi', name the subtitle file as 'movie.srt' or 'movie.sub'.
- Your home theater supports the following file formats: .srt, .sub, .txt, .ssa, .ass, smi, and .sami. If the subtitles do not appear correctly, change the character set.
1 While playing video, press SUBTITLE to select a language.
2 For DivX or RMVB/RM videos, if the subtitles do not appear correctly, continue the following steps to change the character set.
3 Press OPTIONS.
→ The options menu is displayed.
4 Select [Character set], and then select a character set that supports the subtitle.
Asia Pacific and China
| Character Set Language | |
| [Standard] | Albanian, Danish, Dutch, English, Finnish, French, Gaelic, German, Italian, Kurdish (Latin), Norwegian, Portuguese, Spanish, Swedish, Turkish |
| [Chinese] | Simplified Chinese |
| [Chinese-Traditional] | Traditional Chinese |
| [Korean] | English and Korean |
VOD code for DivX
Before you purchase DivX videos and play them on your home theater, register the home theater on www.divx.com using the DivX VOD code.
1 Press ⬆(Home).
2 Select [Setup], and then press OK.
3 Select [Advanced] > [DivX® VOD Code].
→ The DivX VOD registration code for your home theater is displayed.
USB storage devices
Enjoy pictures, audio, and video stored on a USB storage device such as an MP4 player or digital camera.
What you need
- A USB storage device that is formatted for FAT or NTFS file systems, and complies with the Mass Storage Class.
• A media file in one of the supported file formats (see 'File formats' on page 31).

Note
- If you use a USB extension cable, USB HUB, or USB multi-reader, the USB storage device may not be recognized.
1 Connect a USB storage device to the (USB) connector on your home theater.
2 Press ⬆(Home).
3 Select [browse USB], and then press OK.
→ A content browser is displayed.
4 Select a file, and then press OK.
5 Press the play buttons to control play (see 'Play buttons' on page 14).
Audio, video, and picture options
Use advanced features when you play pictures, audio and video files from a disc or a USB storage device.
Audio options
While playing audio, repeat an audio track, a disc, or a folder.
1 Press OPTIONS repeatedly to cycle through the following functions:
- Repeat the current track or file.
- Repeat all the tracks on the disc or the folder.
- Turn off the repeat mode.
Video options
While watching video, select options such as subtitles, audio language, time search, and picture settings. Depending on the video source, some options are not available.
1 Press OPTIONS.
→ The video options menu is displayed.
2 Press the Navigation buttons and OK to select and change:
• [Audio language]: Select audio language for video.
- [Subtitle Language]: Select subtitle language for video.
- [Subtitle shift]: Change the subtitle position on the screen.
- [Info]: Display information about what is playing.
- [Character set]: Select a character set that supports the DivX subtitle.
- [Time search]: Skip to a specific part of the video by entering the time of the scene.
• [2nd audio language]: Select the second audio language for Blu-ray video.
- [2nd Subtitle Language]: Select the second subtitle language for Blu-ray video.
• [Titles]: Select a specific title.
• [Chapters]: Select a specific chapter. - [Karaoke]: Change the karaoke settings.
• [Angle list]: Select a different camera angle. - [Menus]: Display the disc menu.
- [PIP selection]: Display Picture-in-Picture window when playing a Blu-ray disc that supports the Bonus View.
- [Zoom]: Zoom into a video scene or picture. Press the Navigation buttons (left/right) to select a zoom factor.
• [Repeat]: Repeat a chapter or title. - [Repeat A-B]: Mark two points within a chapter or track to repeat play, or turn off the repeat mode.
• [Picture settings]: Select a predefined color setting.
Picture options
While viewing a picture, zoom into the picture, rotate it, add animation to a slideshow, and change the picture settings.
1 Press OPTIONS.
→ The picture options menu appears.
2 Press the Navigation buttons and OK to select and change the following settings:
• [Info]: Display picture information.
- [Rotate +90]: Rotate the picture 90 degree clockwise.
- [Rotate -90]: Rotate the picture 90 degree counter-clockwise.
- [Zoom]: Zoom into a video scene or picture. Press the Navigation buttons (left/right) to select a zoom factor.
• [Duration per slide]: Select the display speed for each picture in a slide show.
- [Slide animation]: Select animation for the slide show.
• [Picture settings]: Select a predefined color setting.
• [Repeat]: Repeat a selected folder.
Musical slideshow
If the picture and audio files are from the same disc or USB storage device, you can create a musical slideshow.
1 Select an audio track, and then press OK.
2 Press BACK, and go to the picture folder.
3 Select a picture, and then press ▶ (Play) to start the slideshow.
4 Press ■o stop slideshow.
5 Press ■gain to stop music.

Note
- Make sure that the picture and audio formats are supported by your home theater (see 'File formats' on page 31).
Radio
Listen to FM radio on your home theater, and store up to 40 radio stations.

Note
• AM and digital radio are not supported.
- If no stereo signal is detected, you are prompted to install the radio stations again.
1 Connect the FM antenna to the FM ANTENNA on your home theater.
- For the best reception, place the antenna away from your TV or other sources of radiation.
2 Press RADIO on the remote control to switch to radio source.
→ If you have already installed the radio stations, the last channel that you listened to is played.
→ If you have not installed any radio stations, the message AUTO
INSTALL...PRESS PLAY appears on the display panel. Press ▶ (Play) to install radio stations.
3 Use the remote control to listen or to change radio stations.
Play buttons
| Button Action | |
| orAlphanumeric buttons | Select a preset radio station. |
| Navigation buttons | Left/Right: Search for a radio station.Up/Down: Fine tune a radio frequency. |
| Press to stop the installation of radio stations. | |
| BACK Press and hold to erase the preset radio station. | |
OPTIONS Manual:
| 1) Press OPTIONS. 2) Press ◀/▶I to select your preset.3) Press OPTIONS again to store the radio station.Automatic: Press and hold for three seconds to reinstall the radio stations. | |
| SUBTITLE | Toggle between the stereo and mono sounds. |
Tuning grid
In some countries, you can toggle the FM tuning grid between 50 kHz and 100 kHz.
1 Press RADIO on the remote control to switch to radio source.
2 Press ■
3 Press and hold ▶(Play) to toggle between 50 kHz or 100 kHz.
MP3 player
Connect a MP3 player to play audio files.
What you need
- An MP3 player.
• A 3.5mm stereo audio cable.
1 Using the 3.5mm stereo audio cable, connect the MP3 player to the AUDIO-IN connector on your home theater.
- If you use 6.5mm stereo audio cable, connect the MP3 player to your home theater using a 3.5mm - 6.5mm converter jack.
2 Press SOURCE repeatedly until AUDIO-IN appears on the display panel.
3 Press the buttons on the MP3 player to select and play audio files.
iPod or iPhone
Through the home theater, you can play audio files from your iPod or iPhone.
1 With an iPod/iPhone USB cable, connect your iPod or iPhone to the iPod/iPhone (USB) connector at the side panel of your home theater.
2 Press iPod/iPhone on the home theater remote control.
- Charge your iPod/iPhone while the home theater is in iPod/iPhone mode.
3 Browse your iPod or iPhone screen to select the music.
4 Play the music on your iPod or iPhone.
→ The music is heard on your home theater.

Note
- The USB connector at the back of the home theater is 500mA and not for Apple devices.
- A device with more than 500mA cannot be charged via the USB connector at the back of the home theater.
Smartphone control
Use your mobile device such as iPhone (iOS 3.1.3 and above), Android phone (2.1 and above), iPad, or tablet to:
• Control your home theater
- Browse a data disc or USB storage device
- Stream and share content from the devices on your home network
Before you start
- Connect your home theater, mobile device, and other DLNA-compatible devices to the same home network.
- For better video quality, use wired connection whenever possible.
- Personalize the network name for your home theater (see 'Personalize the network name' on page 13).
- Download Philips MyRemote application on your mobile device.
- For iPhone or iPad, search for the app in App Store (App Store).
- For Android based phone or tablet, search for the app in Market (Market).
Control your home theater
1 On the mobile device, access MyRemote application.
2 Select your home theater (by its network name) from the home screen.
A browsing bar is displayed at the bottom of the screen.
- If your home theater is not found, check the network connection or tap the Devices tab on your mobile device to search again.
3 Select one of the following tabs to access more options.
- To return to the previous screen, press back button.
Option Action
| AppHome | Return to the home screen of your device. |
| Media DISC: | Browse and play a file stored on a data disc. |
| USB:Browse and play a file stored on a USB storage device. | |
| Remote | Access the remote control on your mobile device. Swipe the screen to the left or right to access more buttons. Only the relevant buttons are enabled on your mobile device. Some functions such as switch-on from standby and long press, are not available on the mobile device. |
4 Follow the onscreen instructions to select an option or complete the set up.
Stream multimedia content (SimplyShare)
Philips SimplyShare allows you to use your smartphone to stream multimedia content (such as pictures, audio and video files), and play through your home theater or any DLNA-compatible device in the same home network.
Before you start
• Install a DLNA-compliant media server application on your mobile device, such as Twonky Media Server.
- Enable media sharing of files. For details, check the user manual of the media server software software.
1 On the mobile device, launch the media server application. For iPhone or Android phone, access MyRemote application.
2 From the menu of your mobile device, select SimplyShare.
→ Your home theater and other devices on the home network are
automatically detected and displayed on the screen.
3 Select a device on the network.
The folders in the selected device are displayed. Depending on the media server, the folder names may vary.
- If you cannot see the folders, make sure that you enable media sharing on the selected device so that the content is available for sharing.
4 Select a media file to play.
5 From the menu on your mobile device, select the home theater to stream the media file to your home theater.
- Some media files may not display or play due to compatibility issues. For your home theater, check the supported file formats.
6 Use your mobile device to control play.
Browse PC through DLNA
Access and play the pictures, audio and video files from a computer or media server on the home network through your home theater.
Before you start
• Install a DLNA-compliant media server application on your device. Make sure that you download an application that works best for you. For example,
• Windows Media Player 11 or higher for PC
• Twonky Media Server for Mac or PC
- Enable media sharing of files. For ease of use, we have included the steps for the following applications:
- Windows Media Player 11 (see 'Microsoft Windows Media Player 11' on page 22)
- Windows Media Player 12 (see 'Microsoft Windows Media Player 12' on page 22)
- Twonky Media for Mac (see 'Macintosh OS X Twonky Media (v4.4.2)' on page 23)

Note
- For additional help on these applications or other media servers, check the user manual of the media server software software.
Set up media server software
To enable media sharing, set up the media server software.
Before you start
- Connect your home theater to a home network. For better video quality, use wired connection whenever possible.
- Connect the computer and other DLNA-compatible devices to the same home network.
- Make sure that your PC firewall allows you to run Media Player programs (or the firewall's exemption list has the media server software included).
- Switch on your computer and the router.
Microsoft Windows Media Player 11
1 Start Windows Media Player on your PC.
2 Click the Library tab, and then select Media Sharing.
3 The first time you select Media Sharing on your PC, a pop-up screen appears. Check the Share my media box and click OK.
→ The Media Sharing screen is displayed.
4 In the Media Sharing screen, make sure that you see a device marked as Unknown Device.
If you don't see an unknown device after a minute or so, check that your PC firewall is not blocking the connection.
5 Select the unknown device and click Allow. → A green tick appears next to the device.
6 By default, Windows Media Player shares from these folders: My Music, My Pictures, and My Videos. If your files are in other folders, select Library > Add to Library.
→ The Add to Library screen is displayed.
- If necessary, select Advanced options to display a list of monitored folders.
7 Select My folders and those of others I can access, and then click Add.
8 Follow the onscreen instructions to add the other folders that contain your media files.
Microsoft Windows Media Player 12
1 Start Windows Media Player on your PC.
2 In Windows Media Player, click the Stream tab, and then select Turn on media streaming.
→ The Media streaming options screen is displayed.
3 Click Turn on media streaming. → You return to Windows Media Player screen.
4 Click the Stream tab and select More streaming options.
→ The Media streaming options screen is displayed.
5 Make sure that you see a media program in the Local network screen.
If you don't see a media program, check that your PC firewall is not blocking the connection.
6 Select the media program and click Allowed.
A green arrow appears next to the media program.
7 By default, Windows Media Player shares from these folders: My Music, My Pictures, and My Videos. If your files are in other folders, click the Organize tab and select Manage libraries > Music.
→ The Music Library Locations screen is displayed.
8 Follow the onscreen instructions to add the other folders that contain your media files.
Macintosh OS X Twonky Media (v4.4.2)
1 Visit www.twonkymedia.com to purchase the software, or download a free 30-day trial to your Macintosh.
2 Start Twonky Media on the Macintosh.
3 In the Twonky Media Server screen, select Basic Setup and First Steps.
→ The First steps screen is displayed.
4 Type a name for your media server, and then click Save changes.
5 Back in the Twonky Media screen, select Basic Setup and Sharing.
→ The Sharing screen is displayed.
6 Browse and select folders to share, and then select Save Changes.
Your Macintosh rescans the folders automatically so that they are ready to share.
Play files from your PC

Note
- Before you play multimedia content from the computer, make sure that the home theater is connected to the home network, and the media server software is properly set up.
1 Press (Home).
2 Select [browse PC], and then press OK.
A content browser is displayed.
3 Select a device on the network.
→ The folders in the selected device are displayed. Depending on the media server, the folder names may vary.
- If you cannot see the folders, check that you have enabled media sharing on the selected device so that the content is available for sharing.
4 Select a file, and then press OK.
- Some media files may not play due to compatibility issues. Check the file formats supported by your home theater.
5 Press the play buttons to control play (see 'Play buttons' on page 14).
Karaoke
Play a Karaoke disc on your home theater and sing along with the music.
What you need
• A Karaoke microphone.
- Karaoke discs.

Note
- To prevent loud feedback or unexpected noise, turn the microphone volume to the minimum before you connect the microphone to your home theater.
Play karaoke music
1 While playing a karaoke disc, press :≡ OPTIONS.
→ The options menu is displayed.
2 Press the Navigation buttons to select [Karaoke], and then press OK.
→ The karaoke setup menu is displayed.
3 Press the Navigation buttons (up/down) and OK to change the following settings:
- [Microphone]: Turn the microphone on or off.
• [Microphone volume]: Change the microphone volume.
• [Echo]: Change the echo level.
• [Key]: Change the pitch to match your voice.
• [Vocal support]: Select an audio mode, or turn the vocal on or off.
Choose sound
This section helps you choose the ideal sound for your video or music.
1 Press ttt
2 Press the Navigation buttons (left/right) to access the sound options on the display.
| Sound options | Description |
| [Surround] Select surround sound or stereo sound. |
| [Sound] Select a sound mode. | |
| [Audio sync] | Delay the audio to match the video. |
| [Auto volume] | Reduce sudden changes in volume, for example, during TV commercials. |
3 Select an option, and then press OK.
4 Press BACK to exit.
- If you do not press a button within a minute, the menu exits automatically.
Surround sound mode
Experience an immersive audio experience with surround sound modes.
1 Press ttt
2 Select [Surround], and then press OK.
3 Press the Navigation buttons (up/down) to select a setting from your display:
- [Auto]: Surround sound based on the audio stream.
• [Multi-channel]: Traditional 5.1 channel for a more relaxing cinematic experience.
• [5-channel stereo]: Enhanced stereo sound. Ideal for party music. - [Stereo]: 2-channel stereo sound. Ideal for listening to music.
4 Press OK to confirm.
Sound mode
Select predefined sound modes to suit your video or music.
1 Make sure that audio post processing is enabled at the speakers (see 'Speaker settings' on page 27).
2 Press ttt
3 Select [Sound], and then press OK.
4 Press the Navigation buttons (up/down) to select a setting on the display:
• [Auto]: Automatically select a sound setting based on the sound stream.
• [Balanced]: Experience the original sound of your movies and music, without added sound effects.
• [Powerful]: Enjoy thrilling arcade sounds, ideal for action-packed videos and loud parties.
• [Bright]: Spice up your dull movies and music with added sound effects.
• [Clear]: Hear every detail in your music and clear voices in your movies.
• [Warm]: Experience spoken words and music vocals in comfort.
• [Personal]: Personalize the sound based on your preferences.
5 Press OK to confirm.
Equalizer
Change the high frequency (treble), mid frequency (mid), and low frequency (bass) settings of the home theater.
1 Press ttt
2 Select [Sound] > [Personal], and then press Navigation buttons (right).
3 Press the Navigation buttons (up/down) to change bass, mid or treble frequency.
4 Press OK to confirm.
Auto volume
Turn on auto volume to reduce sudden changes in volume, for example, during TV commercials.
1 Press ttt
2 Select [Auto volume], and then press OK.
3 Press the Navigation buttons (up/down) to select [On] or [Off].
4 Press OK to confirm.
5 Change settings
The home theater settings are already configured for optimal performance. Unless you have a reason to change a setting, we recommend that you keep the default setting.

Note
• You cannot change a setting that is grayed out.
- To return to the previous menu, press BACK. To exit the menu, press (Home).
Language settings
1 Press ⬆(Home).
2 Select [Setup], and then press OK.
3 Select [Preference], and then press OK.
4 Press the Navigation buttons and OK to select and change:
- [Menu language]: Select a display language for menu.
• [Audio]: Select an audio language for discs.
- [Subtitle]: Select a subtitle language for discs.
- [Disc menu]: Select a menu language for discs.

Note
- If your preferred disc language is not available, select [Others] from the list, and enter the 4-digit language code found at the end of this user manual (see 'Language code' on page 41).
- If you select a language that is not available on a disc, the home theater uses the default language of the disc.
Picture and video settings
1 Press ⬆(Home).
2 Select [Setup], and then press OK.
3 Select [Video], and then press OK.
4 Press the Navigation buttons and OK to select and change:
- [Tv type]: If the video does not appear correctly, select a TV type (color system).
- [TV display]: Select a picture format to fit the TV screen.
- [HDMI video]: Select the resolution of video signal that is output from HDMI OUT (ARC) on your home theater. To enjoy the selected resolution, make sure that your TV supports the selected resolution.
- [HDMI Deep Color]: Recreate the natural world on your TV screen by displaying vivid images using billion colors. Your home theater must be connected to a Deep Color enabled TV through an HDMI cable.
• [Picture settings]: Select pre defined color settings for the video display.
- [Watch 3D video]: Set HDMI video to support 3D or 2D video.

Note
- If you change a setting, make sure that the TV supports the new setting.
Audio settings
1 Press (Home).
2 Select [Setup], and then press OK.
3 Select [Audio], and then press OK.
4 Press the Navigation buttons and OK to select and change:
- [Night mode]: For quiet listening, decrease the volume of loud sounds on your home theater. Night mode is only available in DVDs and Blu-ray discs with Dolby Digital, Dolby Digital Plus, and Dolby True HD soundtracks.
- [HDMI Audio]: Set the HDMI audio output from your TV, or disable HDMI audio output from the TV.
- [Speaker Setup]: Set up speakers for best surround sound experience.
- [Default sound settings]: Restore the equalizer settings of all the sound modes to the default values.
Parental control settings
1 Press ⬆(Home).
2 Select [Setup], and then press OK.
3 Select [Preference], and then press OK.
4 Press the Navigation buttons and OK to select and change:
- [Change Password]: Set or change your password for parental control access. If you do not have a password or have forgotten your password, enter 0000.
- [Parental control]: Restrict access to discs that are recorded with age ratings. To play all discs, irrespective of the ratings, select 8 or [Off].
Display settings
1 Press ⬆(Home).
2 Select [Setup], and then press OK.
3 Select [Preference], and then press OK.
4 Press the Navigation buttons and OK to select and change:
- [Auto subtitle shift]: Enable or disable automatic repositioning of subtitles on TVs that support this feature.
- [Display panel]: Set the brightness of the home theater front panel display.
- [VCD PBC]: Enable or disable the content menu navigation of VCD and SVCD discs with Play Back Control feature.
Energy saving settings
1 Press ⬆(Home).
2 Select [Setup], and then press OK.
3 Select [Preference], and then press OK.
4 Press the Navigation buttons and OK to select and change:
- [Screen saver]: Switch the home theater to screen saver mode after 10 minutes of inactivity.
- [Auto standby]: Switch the home theater to standby after 30 minutes of inactivity. This timer works only when a disc or USB play is paused or stopped.
- [Sleep timer]: Set the duration of the sleep timer so that the home theater is switched to standby after the specified period.
Speaker settings
1 Press ⬆(Home).
2 Select [Setup], and then press OK.
3 Select [Advanced], and then press OK.
4 Press the Navigation buttons and OK to select and change:
- [Enhanced audio]: Select [On] to enable audio post processing at the speaker and enable karaoke settings (if your product supports Karaoke). To play the original audio of the disc, select [Off].

Tip
- Enable audio post processing before you select a predefined sound mode (see 'Sound mode' on page 24).
1 Press ⬆(Home).
2 Select [Setup], and then press OK.
3 Select [Advanced] > [Restore default settings], and then press OK.
4 Select [OK], and then press OK to confirm.
Your home theater is reset to its default settings except for some settings such as parental control and DivX VOD registration code.
6 Update software
Philips continually tries to improve its products. To get the best features and support, update your home theater with the latest software.
Compare the version of your current software with the latest version on www.philips.com/support. If the current version is lower than the latest version available on the Philips support website, upgrade your home theater with the latest software.

Caution
- Do not install a lower version of software than the current version installed on your product. Philips is not liable for problems caused due to software downgrade.
Check software version
Check the version of the current software installed on your home theater.
1 Press (Home).
2 Select [Setup], and then press OK.
3 Select [Advanced] > [Version information].
→ The software version is displayed.
Update software through USB
What you need
- A USB flash drive that is FAT or NTFS-formatted, with at least 256MB of memory. Do not use a USB hard drive.
• A computer with Internet access. - An archive utility that supports the ZIP file format.
Step 1: Download the latest software
1 Connect a USB flash drive to your computer.
2 In your web browser, go to www.philips.com/support.
3 At the Philips Support website, find your product and locate the Software and drivers.
→ The software update is available as a zip file.
4 Save the zip file in the root directory of your USB flash drive.
5 Use the archive utility to extract the software update file in the root directory.
→ The files are extracted under the UPG_ALL folder of your USB flash drive.
6 Disconnect the USB flash drive from your computer.
Step 2: Update the software

Caution
- Do not switch off the home theater or remove the USB flash drive during the update.
1 Connect the USB flash drive containing the downloaded file to your home theater. • Make sure that the disc compartment is closed and no disc inside.
2 Press (Home).
3 Select [Setup], and then press OK.
4 Select [Advanced] > [Software update] > [USB].
5 Follow the onscreen instructions to confirm the update. → Update process takes about 5 minutes to complete.
Update software through the Internet
1 Connect your home theater to a home network with a high-speed Internet access (see 'Connect and set up a home network' on page 12).
2 Press (Home).
3 Select [Setup], and then press OK.
4 Select [Advanced] > [Software update] > [Network].
→ If an upgrade media is detected, you are prompted to start or cancel the update.
→ Downloading of the upgrading file may take long, depending on your home network condition.
5 Follow the onscreen instructions to confirm the update.
→ Update process takes about 5 minutes to complete.
Once complete, the home theater automatically switches off and restarts. If it does not, disconnect the power cord for a few seconds and then reconnect it.
7 Product specifications

Note
- Specifications and design are subject to change without notice.
Region codes
The type plate on the back or bottom of the home theater shows which regions it supports.
| Country | DVD | BD | |
| Europe, United Kingdom |  |  |  |
| Asia Pacific, Taiwan, Korea |  |  |  |
| Latin America |  |  |  |
| Australia, New Zealand |  |  |  |
| Russia, India |  |  |  |
 |  |  | |
Media formats
- AVCHD, BD, BD-R/ BD-RE, BD-Video, DVD-Video, DVD+R/+RW, DVD-R/-RW, DVD+R/-R DL, CD-R/CD-RW, Audio CD, Video CD/SVCD, Picture files, MP3 media, WMA media, DivX Plus HD media, USB storage device
File formats
- Audio:
- .aac, .mka, .mp3, .wma, .wav, .mp4, .m4a, .flac, .ogg
• .ra (Available only in Asia Pacific and China)
- Video:
- .avi, .divx, .mp4, .m4v, .mkv, .asf, .wmv, .m2ts, .mpg, .mpeg, .flv, .3gp
- .rmvb, .rm, .rv (Available only in Asia Pacific and China)
• Picture: .jpg, .jpeg, .jpe, .gif, .png
Bluetooth
- Bluetooth profiles: A2DP
• Bluetooth version: 2.1 + EDR
Audio formats
Your home theater supports the following audio files.
(. ra files are supported only in Asia Pacific and China)
| Extension | Container | Audio codec | Bit rate |
| .mp3 | MP3 | MP3 | Upto 320 kbps |
| .wma | ASF | WMA | Upto 192 kbps |
| .aac | AAC | AAC, HE- AAC | Upto 192 kbps |
| .wav | WAV | PCM | 27.648 Mbps |
| .m4a | MKV | AAC | 192 kbps |
| .mka | MKA | PCM | 27.648 Mbps |
| Dolby Digital | 640 kbps | ||
| DTS core | 1.54 Mbps | ||
| MPEG | 912 kbps |
| MP3 Upto 320kbps | ||
| WMA Upto 192kbps | ||
| AAC, HE- AAC | Upto 192kbps | |
| .ra RM AAC | Upto 192kbps | |
| HE- AAC | ||
| Cook 96469 bps | ||
| .flac FLAC FLAC Upto 24 | bps | |
| .ogg OGG Vorbis Variable | bit rate,maximumblock size4096 | |
| MP3 Upto 320kbps | ||
Video formats
If you have a high definition TV, your home theater allows you to play your video files with:
• Resolution: 1920 × 1080 pixels at
• Frame rate: 6 \~ 30 frames per second.
.avi files in AVI container
| Audio codec | Video codec Bit rate | |
| PCM, Dolby Digital, DTS core, MP3, WMA | DivX 3.11, DivX 4.x, DivX 5.x, DivX 6.x | 10 Mbps max |
| MPEG 1, MPEG 2 40 Mbps | ||
| MPEG 4 SP / ASP | 38.4 Mbps | |
| H.264/AVC upto HiP@4.2 | 25 Mbps | |
| WMV9 | 45 Mbps | |
.divx files in AVI container
| Audio codec | Video codec | Bit rate |
| PCM, Dolby | DivX 3.11, | 10 |
| Digital, MP3, | DivX 4.x, DivX 5.x, | Mbps |
| WMA | DivX 6.x | max |
.mp4 or .m4v files in MP4 container
| Audio codec | Video codec | Bit rate |
| Dolby Digital, MPEG, MP3, AAC, HE-AAC, DD+ | MPEG 1, MPEG 2 | 40 Mbps |
| MPEG 4 ASP | 38.4 Mbps | |
| H.264/AVC HiP@4.2 | 25 Mbps |
.mkv files in MKV container
| Audio codec | Video codec | Bit rate |
| PCM, DolbyDigital, DTS core,MPEG, MP3,WMA, AAC, HE-AAC, DD+ | DivX Plus HD | 30 Mbps |
| MPEG 1,MPEG 2 | 40 Mbps | |
| MPEG 4 ASP | 38.4Mbps | |
| H.264/AVCHiP@4.2 | 25 Mbps | |
| WMV9 | 45 Mbps |
.m2ts files in MKV container
| Audio codec | Video codec | Bit rate |
| PCM, Dolby Digital, DTS core, MPEG, MP3, WMA, AAC, HE-AAC, DD+ | MPEG 1, MPEG 2 | 40 Mbps |
| MPEG 4 ASP | 38.4 Mbps | |
| H.264/AVC HiP@4.2 | 25 Mbps | |
| WMV9 | 45 Mbps |
.asf and .wmv files in ASF container
| Audio codec Video codec Bit rate | |
| Dolby Digital, MP3, WMA, DD+ | MPEG 4 ASP 38.4 Mbps |
| H.264/AVC 25 Mbps HiP@4.2 | |
| WMV9 45 Mbps | |
.mpg and .mpeg files in PS container
| Audio codec Video codec Bit rate | ||
| PCM, DTS core, MPEG, MP3 | MPEG 1, MPEG 2 | 40 Mbps |
.flv files in FLV container
| Audio codec | Video codec Bit rate | |
| MP3, AAC | H.264/AVC upto HiP@4.2 | 25 Mbps |
| H.263 38.4 Mbps | ||
.3gp files in 3GP container
| Audio codec | Video codec Bit rate | |
| AAC, HE-AAC | MPEG 4 ASP 38.4 Mbps | |
| H.264/AVC upto HiP@4.2 | 25 Mbps max | |
.rm, .rv, and .rmvb files in RM container (Available only in Asia Pacific and China)
| Audio codec Video codec Bit rate | |
| AAC, COOK RV30, RV40 | 40 Mbps |
Amplifier
• Total output power: 1000W RMS (30% THD)
• Frequency response: 20 Hz-20 kHz / ±3 dB
• Signal-to-noise ratio: > 65 dB (CCIR) / (A-weighted)
- Input sensitivity:
- AUX: 2V
• AUDIO IN: 1 V
Video
• Signal system: PAL / NTSC
• HDMI output: 480i/576i, 480p/576p, 720p, 1080i, 1080p, 1080p24
Audio
• S/PDIF Digital audio input:
• Coaxial: IEC 60958-3
• Optical: TOSLINK
• Sampling frequency:
• MP3: 32 kHz, 44.1 kHz, 48 kHz
• WMA: 44.1 kHz, 48 kHz
- Constant bit rate:
• MP3: 32 kbps - 320 kbps
• WMA: 48 kbps - 192 kbps
Radio
- Tuning range:
• Europe/Russia/China: FM 87.5-108 MHz (50 kHz)
• Asia Pacific/Latin America: FM 87.5-108 MHz (50/100 kHz)
• Signal-to-noise ratio: FM 50 dB
• Frequency response: FM 180 Hz-12.5 kHz / ±3 dB
USB
• Compatibility: Hi-Speed USB (2.0)
• Class support: USB Mass Storage Class (MSC)
• File system: FAT16, FAT32, NTFS
- USB connector:
- Front panel: 5V ---, 1A
• Rear panel: 5V ---, 500mA
Main unit
• Power supply:
• Europe/China: 220-240 V\~, 50 Hz
- Latin America/Asia Pacific: 110-127 V/220-240 V\~, 50-60 Hz
• Russia/India: 220-240 V\~, 50 Hz
• Power consumption: 160 W
• Standby power consumption: ≤ 0.5 W
• Dimensions (WxHxD): 435 × 58 × 280 mm
- Weight: 2.66 kg
Subwoofer
• Output power: 166 W RMS (30% THD)
- Impedance: 4 ohm
- Speaker drivers: 203 mm (8") woofer
- Dimensions (WxHxD): 233 × 365 × 310 mm
- Weight: 4.81 kg
- Cable length: 3 m
Speakers
Center speaker:
• Output power: 166 W RMS (30% THD)
• Speaker impedance: 4 ohm
- Speaker drivers: 1 × 78 mm (3") full range
- Dimensions (WxHxD): 314 × 111 × 83 mm
- Weight: 1 kg
- Cable length: 2 m
Front/Rear speaker:
• Output power: 4 x 166 W RMS (30% THD)
• Speaker impedance: 4 ohm
- Speaker drivers: 1 × 78 mm (3") full range
- Dimensions (WxHxD):
- HTB5541DG: 250 × 1179 × 250 mm (front); 100 × 191 × 125 mm (rear)
- HTB5571DG: 250 × 1179 × 250 mm (front/rear)
- Weight:
• HTB5541DG: 4 kg/each (front); 0.7 kg/each (rear)
• HTB5571DG: 4 kg/each (front); 4 kg/each (rear)
- Cable length:
• HTB5541DG: 4 m (front); 10 m (rear)
• HTB5571DG: 4 m (front); 11 m (rear)
Remote control batteries
- 2 × AAA-R03-1.5 V
Laser
- Laser Type (Diode): InGaN/AlGaN (BD), AlGaInP (DVD/CD)
• Wave length: 405 +7 nm/-7 nm (BD), 655 +10 nm/-10 nm (DVD), 790 +10 nm/-20 nm (CD)
• Output power (Max. ratings): 20 mW (BD), 6 mW (DVD), 7 mW (CD)
8 Troubleshooting

Warning
- Risk of electric shock. Never remove the casing of the product.
To keep the warranty valid, never try to repair the product yourself.
If you have problems using this product, check the following points before you request service. If you still have a problem, get support at www.philips.com/support.
Main unit
The buttons on the home theater do not work.
- Disconnect the home theater from the power supply for a few minutes, then reconnect.
- Make sure that the touch buttons surface is not in contact with any conductive material, like water drop, metal, etc.
Picture
No picture.
• Make sure that the TV is switched to the correct source for the home theater.
No picture on a TV connected through HDMI.
- Make sure that you use a High Speed HDMI cable to connect the home theater and TV. Some Standard HDMI cables do not display properly for some images, 3D video, or Deep Color.
- Make sure that the HDMI cable is not faulty. If it is faulty, replace it with a new cable.
- Press ⬆ (Home) and then 731 on the remote control to restore the default picture resolution.
- Change the HDMI video setting, or wait for 10 seconds for auto recovery (see 'Picture and video settings' on page 26).
Disc does not play high-definition video.
- Make sure that the disc contains high-definition video.
- Make sure that the TV supports high-definition video.
- Use an HDMI cable to connect to the TV.
Sound
No sound from home theater speakers.
- Connect the audio cable from your home theater to your TV or other devices. However, you do not need a separate audio connection when:
- the home theater and TV are connected through an HDMI ARC connection, or - a device is connected to the HDMI IN connector on your home theater.
- Set up the audio for the connected device (see 'Set up the audio' on page 12).
- Reset your home theater to its factory settings (see 'Restore default settings' on page 28), and then switch it off and switch on again.
- On your home theater, press SOURCE repeatedly to select the correct audio input.
Distorted sound or echo.
- If you play audio from the TV through the home theater, make sure that the TV is muted.
Audio and video are not synchronized.
• 1) Press ⬆. 2) Press the Navigation buttons (left/right) to select [Audio sync], and then press OK. 3) Press the Navigation buttons (up/down) to synchronize the audio with the video.
Play
Cannot play a disc.
- Clean the disc.
- Make sure that the home theater supports the type of disc (see 'Media formats' on page 31).
- Make sure that the home theater supports the region code of the disc (see 'Region codes' on page 31).
- If the disc is a DVD±RW or DVD±R disc, make sure that it is finalized.
Cannot play a DivX file.
- Make sure that the DivX file is encoded according to the 'Home Theater Profile' with the DivX encoder.
• Make sure that the DivX file is complete.
DivX or RMVB/RM subtitles do not display correctly.
- Make sure that the subtitle file name is the same as the movie file name (see 'Subtitles' on page 17).
- Select the correct character set: 1) Press OPTIONS. 2) Select [Character set]. 3) Select the supported character set. 4) Press OK.
Cannot read the contents of a USB storage device.
- Make sure that the format of the USB storage device is compatible with the home theater.
- Make sure that the file system on the USB storage device is supported by the home theater.
'No entry' or 'x' sign appears on the TV.
• The operation is not possible.
EasyLink does not work.
- Make sure that the home theater is connected to a Philips brand EasyLink TV, and the EasyLink option is turned on (see 'Set up EasyLink (HDMI-CEC control)' on page 11).
- For TVs from different manufacturers, the HDMI CEC could be called differently.
Check the TV user manual on how to enable it.
When you switch on the TV, the home theater automatically switches on.
- This behavior is normal when you are using Philips EasyLink (HDMI-CEC). To make the home theater work independently, switch off EasyLink.
Cannot access BD-Live features.
- Make sure that the home theater is connected to the network. Use a wired network connection (see 'Set up the wired network' on page 12), or wireless network connection (see 'Set up the wireless network' on page 13).
- Make sure that the network is set up. Use a wired network installation (see 'Set up the wired network' on page 12), or wireless network installation (see 'Set up the wireless network' on page 13).
• Make sure that the Blu-ray disc supports BD-Live features. - Clear memory storage (see 'BD-Live on Blu-ray' on page 15).
My 3D video played in 2D mode.
- Make sure that your home theater is connected to a 3D TV through an HDMI cable.
- Make sure that the disc is a Blu-ray 3D disc, and the Blu-ray 3D video option is on (see 'BD-Live on Blu-ray' on page 15).
TV screen is black when you play a Blu-ray 3D video or a DivX copy protected video.
- Make sure that the home theater is connected to the TV through an HDMI cable.
- Switch to the correct HDMI source on the TV.
Bluetooth
A device cannot connect with the home theater.
- The device does not support the compatible profiles required for the home theater.
- You have not enabled the Bluetooth function of the device. See the user manual of the device on how to enable the function.
- The device is not correctly connected. Connect the device correctly. (see 'Play audio through Bluetooth' on page 16)
- The home theater is already connected with another Bluetooth device. Disconnect the connected device, then try again.
Quality of audio play from a connected Bluetooth device is poor.
- The Bluetooth reception is poor. Move the device closer to the home theater, or remove any obstacle between the device and the home theater.
The connected Bluetooth device connects and disconnects constantly.
- The Bluetooth reception is poor. Move the device closer to the home theater, or remove any obstacle between the device and the home theater.
- Turn off Wi-Fi function on the Bluetooth device to avoid interference.
- For some Bluetooth, the Bluetooth connection can be deactivated automatically to save power. This does not indicate any malfunction of the home theater.
Network
Wireless network distorted or not found.
- Make sure that the wireless network is not disturbed by microwave ovens, DECT phones, or other neighboring Wi-Fi devices.
- Place the wireless router and the home theater within five meters of each other.
- If the wireless network does not work properly, try a wired network installation (see 'Set up the wired network' on page 12).
9 Notice
This section contains the legal and trademark notices.
Copyright

Be responsible Respect copyrights
This item incorporates copy protection technology that is protected by U.S. patents and other intellectual property rights of Rovi Corporation. Reverse engineering and disassembly are prohibited.
This product incorporates proprietary technology under license from Verance Corporation and is protected by U.S. Patent 7,369,677 and other U.S. and worldwide patents issued and pending as well as copyright and trade secret protection for certain aspects of such technology. Cinavia is a trademark of Verance Corporation. Copyright 2004-2010 Verance Corporation. All rights reserved by Verance. Reverse engineering or disassembly is prohibited.
Cinavia notice
This product uses Cinavia technology to limit the use of unauthorized copies of some commercially-produced film and videos and their soundtracks. When a prohibited use of an unauthorized copy is detected, a message will be displayed and playback or copying will be interrupted.
More information about Cinavia technology is provided at the Cinavia Online Consumer Information Center at http://www.cinavia.com. To request additional information about Cinavia by mail, send a postcard with your mailing address to: Cinavia Consumer Information Center, P.O. Box 86851, San Diego, CA, 92138, USA.
Open source software
Open source software
Philips Electronics Hong Kong Ltd. hereby offers to deliver, upon request, a copy of the complete corresponding source code for the copyrighted open source software packages used in this product for which such offer is requested by the respective licenses.
This offer is valid up to three years after product purchase to anyone in receipt of this information. To obtain source code, please contact open.source@philips.com. If you prefer not to use email or if you do not receive confirmation receipt within a week after mailing to this email address, please write to "Open Source Team, Philips Intellectual Property & Standards, P.O. Box 220, 5600 AE Eindhoven, The Netherlands." If you do not receive timely confirmation of your letter, please email to the email address above.
RMVB end user agreement
Notes to End User:
By using this product with RealNetworks software and services, the end user agrees to the following terms of REALNETWORKS, INC:
- End User may only use the software for private, non-commercial use in accordance with the terms of RealNetworks EULA.
- End User is not allowed to modify, translate, reverse engineer, decompile, dissemble or use other means to discover the source code or otherwise replicate the functionality of the Real Format Client Code, except to the extent that this restriction is expressly prohibited by applicable law.
• RealNetworks Inc. disclaims all warranties and conditions other than those set forth in this Agreement which are in lieu of all other warranties, whether express and implied, including but not limited to any implied warranties or conditions of
merchantability and fitness for a particular purpose; and effectively exclude all liability for indirect, special, incidental and consequential damages, such as but not limited to lost profits.
Trademarks

"Blu-ray 3D ™" and "Blu-ray 3D ™ logo are trademarks of Blu-ray Disc Association.

'DVD Video' is a trademark of DVD Format/Logo Licensing Corporation.

Java and all other Java trademarks and logos are trademarks or registered trademarks of Sun Microsystems, Inc. in the United States and/or other countries.

Manufactured under license under U.S. Patent Nos: 5,956,674; 5,974,380; 6,226,616; 6,487,535; 7,392,195; 7,272,567; 7,333,929; 7,212,872 & other U.S. and worldwide patents issued & pending. DTS-HD, the Symbol, & DTS-HD and the Symbol together are registered trademarks & DTS-HD Master Audio | Essential is a trademark of DTS, Inc. Product includes software. © DTS, Inc. All Rights Reserved.

Manufactured under license from Dolby Laboratories. Dolby, Pro Logic, and the double-D symbol are trademarks of Dolby Laboratories.
DIVX + HD
DivX ® , DivX Certified ® , DivX Plus ® HD and associated logos are trademarks of Rovi Corporation or its subsidiaries and are used under license.
ABOUT DIVX VIDEO: DivX® is a digital video format created by DivX, LLC, a subsidiary of Rovi Corporation. This is an official DivX Certified® device that plays DivX video. Visit divx.com for more information and software tools to convert your files into DivX videos. ABOUT DIVXVIDEO-ON-DEMAND: This DivX Certified® device must be registered in order to play purchased DivX Video-on-Demand (VOD) movies. To obtain your registration code, locate the DivX VOD section in your device setup menu. Go to vod.divx.com for more information on how to complete your registration.
DivX Certified to play DivX and DivX Plus * HD (H.264/MKV) video up to 1080p HD including premium content.

The terms HDMI and HDMI High-Definition Multimedia Interface, and the HDMI Logo are trademarks or registered trademarks of HDMI Licensing LLC in the United States and other countries.

Bluetooth®
The Bluetooth ® word mark and logos are registered trademarks owned by Bluetooth SIG, Inc. and any use of such marks by Philips is under license. Other trademarks and trade names are those of their respective owners.

RealNetworks, Real, the Real logo, RealPlayer, and the RealPlayer logo are trademarks or registered trademarks of RealNetworks, Inc.

10 Language code
| Abkhazian | 6566 | |
| Afar | 6565 | |
| Afrikaans | 6570 | |
| Amharic | 6577 | |
| Arabic | 6582 | |
| Armenian | 7289 | |
| Assamese | 6583 | |
| Avestan | 6569 | |
| Aymara | 6589 | |
| Azerhaijani | 6590 | |
| Bahasa Melayu | 7783 | |
| Bashkir | 6665 | |
| Belarusian | 6669 | |
| Bengali | 6678 | |
| Bihari | 6672 | |
| Bislama | 6673 | |
| Bokmål, Norwegian | 7866 | |
| Bosanski | 6683 | |
| Brezhoneg | 6682 | |
| Bulgarian | 6671 | |
| Burmese | 7789 | |
| Castellano, Español | 6983 | |
| Catalán | 6765 | |
| Chamorro | 6772 | |
| Chechen | 6769 | |
| Chewa; Chichewa; Nyanja | 7889 | |
| 中文 | 9072 | |
| Chuang; Zhuang | 9065 | |
| Church Slavic; Slavonic | 6785 | |
| Chuvash | 6786 | |
| Corsican | 6779 | |
| Česky | 6783 | |
| Dansk | 6865 | |
| Deutsch | 6869 | |
| Dzongkha | 6890 | |
| English | 6978 | |
| Esperanto | 6979 | |
| Estonian | 6984 | |
| Euskara | 6985 | |
| Ελληνικά | 6976 | |
| Faroese | 7079 | |
| Français | 7082 | |
| Frysk | 7089 | |
| Fijian | 7074 | |
| Gaelic; Scottish Gaelic | 7168 | |
| Gallegan | 7176 | |
| Georgian | 7565 | |
| Gikuyu; Kikuyu | 7573 | |
| Guarani | 7178 | |
| Gujarati | 7185 | |
| Hausa | 7265 | |
| Herero | 7290 | |
| Hindi | 7273 | |
| Hiri Motu | 7279 | |
| Hrwatski | 6779 | |
| Ido | 7379 | |
| Interlingua (International) | 7365 | |
| Interlingue | 7365 | |
| Inuktitut | 7385 |
| Inupiaq | 7375 | |
| Irish | 7165 | |
| Íslenska | 7383 | |
| Italiano | 7384 | |
| Ivrit | 7269 | |
| Japanese | 7465 | |
| Javanese | 7486 | |
| Kalaallisut | 7576 | |
| Kannada | 7578 | |
| Kashmiri | 7583 | |
| Kazakh | 7575 | |
| Kernewek | 7587 | |
| Khmer | 7577 | |
| Kinyarwanda | 8287 | |
| Kirghiz | 7589 | |
| Komi | 7586 | |
| Korean | 7579 | |
| Kuanyama; Kwanyama | 7574 | |
| Kurdish | 7585 | |
| Lao | 7679 | |
| Latina | 7665 | |
| Latvian | 7686 | |
| Letzeburgesch; | 7666 | |
| Limburgan; Limburger | 7673 | |
| Lingala | 7678 | |
| Lithuanian | 7684 | |
| Luxembourgish; | 7666 | |
| Macedonian | 7775 | |
| Malagasy | 7771 | |
| Magyar | 7285 | |
| Malayalam | 7776 | |
| Maltese | 7784 | |
| Manx | 7186 | |
| Maori | 7773 | |
| Marathi | 7782 | |
| Marshallese | 7772 | |
| Moldavian | 7779 | |
| Mongolian | 7778 | |
| Nauru | 7865 | |
| Navaho; Navajo | 7886 | |
| Ndebele, North | 7868 | |
| Ndebele, South | 7882 | |
| Ndonga | 7871 | |
| Nederlands | 7876 | |
| Nepali | 7869 | |
| Norsk | 7879 | |
| Northern Sami | 8369 | |
| North Ndebele | 7868 | |
| Norwegian Nynorsk; | 7878 | |
| Occitan; Provencal | 7967 | |
| Old Bulgarian; Old Slavonic | 6785 | |
| Oriya | 7982 | |
| Oromo | 7977 | |
| Ossetian; Ossetic | 7983 | |
| Pali | 8073 | |
| Panjabi | 8065 | |
| Persian | 7065 | |
| Polski | 8076 | |
| Português | 8084 | |
| Pushto | 8083 | |
| Russian | 8285 | |
| Quechua | 8185 | |
| Raeto-Romance | 8277 | |
| Romanian | 8279 | |
| Rundi | 8278 | |
| Samoan | 8377 | |
| Sango | 8371 | |
| Sanskrit | 8365 | |
| Sardinian | 8367 | |
| Serbian | 8382 | |
| Shona | 8378 | |
| Shqip | 8381 | |
| Sindhi | 8368 | |
| Sinhalese | 8373 | |
| Slovensky | 8373 | |
| Slovenian | 8376 | |
| Somali | 8379 | |
| Sotho; Southern | 8384 | |
| South Ndebele | 7882 | |
| Sundanese | 8385 | |
| Suomi | 7073 | |
| Swahili | 8387 | |
| Swati | 8383 | |
| Svenska | 8386 | |
| Tagalog | 8476 | |
| Tahitian | 8489 | |
| Tajik | 8471 | |
| Tamil | 8465 | |
| Tatar | 8484 | |
| Telugu | 8469 | |
| Thai | 8472 | |
| Tibetan | 6679 | |
| Tigrinya | 8473 | |
| Tonga (Tonga Islands) | 8479 | |
| Tsonga | 8483 | |
| Tswana | 8478 | |
| Türkçe | 8482 | |
| Turkmen | 8475 | |
| Twi | 8487 | |
| Uighur | 8571 | |
| Ukrainian | 8575 | |
| Urdu | 8582 | |
| Uzbek | 8590 | |
| Vietnamese | 8673 | |
| Volapuk | 8679 | |
| Walloon | 8765 | |
| Welsh | 6789 | |
| Wolof | 8779 | |
| Xhosa | 8872 | |
| Yiddish | 8973 | |
| Yoruba | 8979 | |
| Zulu | 9085 |
11 Index
2
2nd audio language 15
2nd subtitle language 15
3
3D disc in 2D mode 15
3D safety 3
3D video 15
5
5.1 speakers 7
A
advanced settings 27
amplifier 33
audio connection (analog cable) 11
audio connection (HDMI ARC) 8
audio formats 31
audio from other devices 10
audio language 26
audio options 18
audio post processing 27
audio settings 26
auto standby 27
auto subtitle shift 27
auto volume 25
B
batteries 34
BD-Live 15
Blu-ray 14
Bonus View 15
brightness 27
C
change password 27
character set 17
clear BD-Live memory 15
connect a digital device (HDMI) 9
connect to TV 8
connectors 5
control buttons (disc) 14
control buttons (USB) 14
D
data files 16
deep color 26
default settings 28
device name 13
disc language 26
disc menu 26
display panel 27
DivX 16
E
Easylink (HDMI-CEC) 11
eject disc 4
enhanced audio 27
F
factory settings 28
file formats 31
H
HDMI ARC 8
HDMI audio 26
HDMI-CEC 11
home menu 14
home network 12
|
internet 12
iPod or iPhone 20
L
language code 41
M
main unit 4
manual setup 11
media formats 31
media sharing 21
menu language 26
musical slideshows 19
N
network 12
night mode 26
O
one-touch play 11
one-touch standby 11
options 18
P
parental control 27
PBC (play back control) 27
picture options 18
picture resolution 26
picture settings 26
picture-in-picture 15
play disc 14
play from iPod 20
play from PC 23
play USB storage device 17
power settings 27
predefined sound mode 24
preference 26
R
region codes 31
remote control 4
repeat 18
S
shuffle 18
sleep timer 27
slide animation 18
software update 29
software version 29
sound 24
speaker position 7
speaker setup 11
speaker specifications 31
subtitle language 26
subtitle position 27
surround sound 24
synchronize picture and sound 15
T
troubleshooting (network) 37
troubleshooting (picture) 35
troubleshooting (play) 36
troubleshooting (sound) 35
tuning grid 19
U
update software (through Internet) 30
USB storage device 17
V
VCD 27
video connection (composite video) 9
video connection (HDMI ARC) 8
video connection (standard HDMI) 9
video formats 33
video options 18
video settings 26
VOD code (DivX) 17
W
watch 3D 15
wired network 12
wireless network 13
wireless rear audio 8
wireless speakers 8
| 部件名称Name of the Parts | 有毒有害物质或元素Hazardous/Toxic Substance | |||||
| 铅(Pb, Lead) | 汞(Hg, Mercury) | 镉(Cd, Cadmium) | 六价铬(Chromium 6+) | 多溴联苯(PBB) | 多溴二苯醚(PBDE) | |
| Housing外壳 | O O O | O O O | ||||
| Subwoofer超重低音箱 | O O O | O O O | ||||
| Loudspeakers喇叭单元 | O O O | O O O | ||||
| PWBs电路板组件 | X O O | O O O | ||||
| Accessories(Remote control & cables)附件(遥控器,电源线,连接线) | X O O | O O O | ||||
| Batteries in Remote Control(ZnC)遥控器电池 | X O O | O O O | ||||
○:表示该有毒有害物质在该部件所有均质材料中的含量均在SJ/T11363 - 2006 标准规定的限量要求以下。
O: Indicates that this toxic or hazardous substance contained in all of the homogeneous materials for this part is below the limit requirement in SJ/T11363 - 2006.
×:表示该有毒有害物质至少在该部件的某一均质材料中的含量超出SJ/T11363 - 2006 标准规定的限量要求。X: Indicates that this toxic or hazardous substance contained in at least one of the homogeneous materials used for this part is above the limit requirement in SJ/T11363 - 2006.

环保使用期限 Environmental Protection Use Period
This logo refers to the period (10 years) during which the toxic or hazardous substances or elements contained in electronic information products will not leak or mutate so that the use of these [substances or elements] will not result in any severe environmental pollution, any bodily injury or damage to any assets.
电池标识 Battery labeling logo

环保使用期限 Environmental Protection Use Period
This logo refers to the period (5 years) during which the toxic or hazardous substances or elements contained in the battery will not leak or mutate so that the use of these [substances or elements] will not result in any severe environmental pollution, any bodily injury or damage to any assets.

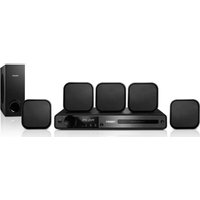

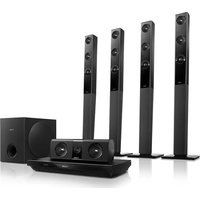
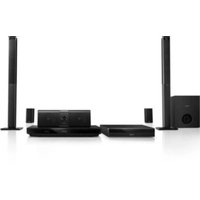

- ALWAYS THERE TO HELP YOU
- CONTENTS
- IMPORTANT
- YOUR HOME THEATER
- CONNECT AND SET UP
- USE YOUR HOME THEATER
- CHANGE SETTINGS
- UPDATE SOFTWARE
- PRODUCT SPECIFICATIONS
- TROUBLESHOOTING
- NOTICE
- LANGUAGE CODE
- INDEX
- SAFETY
- RISK OF ELECTRIC SHOCK OR FIRE
- RISK OF SHORT CIRCUIT OR FIRE
- RISK OF INJURY OR DAMAGE TO THE HOME THEATER
- RISK OF OVERHEATING
- RISK OF CONTAMINATION
- RISK OF SWALLOWING BATTERIES
- D HEALTH WARNING
- CARE FOR YOUR PRODUCT
- CARE OF THE ENVIRONMENT
- MAIN UNIT
- REMOTE CONTROL
- ③ SOURCE BUTTONS
- ④ ← BACK
- ⑤ NAVIGATION BUTTONS
- ⑥ OK
- ⑦ ◀/▶(PREVIOUS/NEXT)
- ⑧ ■ (STOP) / ▲(EJECT/OPEN/CLOSE)
- ⑨ ◀◀ / ▶(FAST BACKWARD / FAST FORWARD)
- ⑩ Δ + / - (VOLUME)
- ⑪ SMART TV
- ⑫ ALPHANUMERIC BUTTONS
- ⑬ AUDIO
- ⑭ TOP MENU
- ⑮ ≡ OPTIONS
- ⑯ ▶ (PLAY)
- ⑰ II(PAUSE)
- ⑱ (MUTE)
- ⑳ SUBTITLE
- ②1 COLOR BUTTONS
- CONNECTORS
- ① MIC
- ② MIC
- ③ AUDIO IN
- NOTE
- CONNECT SPEAKERS
- SUBWOOFER (SUBWOOFER)
- MAKE YOUR REAR SPEAKERS WIRELESS
- WHAT YOU NEED
- CONNECT TO TV
- OPTION 1: CONNECT TO TV THROUGH HDMI (ARC)
- BEST QUALITY VIDEO
- OPTION 2: CONNECT TO TV THROUGH STANDARD HDMI
- OPTION 3: CONNECT TO THE TV THROUGH COMPOSITE VIDEO
- BASIC QUALITY VIDEO
- CONNECT DIGITAL DEVICES THROUGH HDMI
- CONNECT AUDIO FROM TV AND OTHER DEVICES
- OPTION 1: CONNECT AUDIO THROUGH A DIGITAL OPTICAL CABLE
- OPTION 2: CONNECT AUDIO THROUGH A DIGITAL COAXIAL CABLE
- OPTION 3: CONNECT AUDIO THROUGH ANALOG AUDIO CABLES
- BASIC QUALITY AUDIO
- SET UP SPEAKERS
- BEFORE YOU START
- SET UP EASYLINK (HDMI-CEC CONTROL)
- ENABLE EASYLINK
- EASYLINK CONTROLS
- SET UP THE AUDIO
- CONNECT AND SET UP A HOME NETWORK
- CAUTION
- SET UP THE WIRED NETWORK
- SET UP THE WIRELESS NETWORK
- PERSONALIZE THE NETWORK NAME
- ACCESS THE HOME MENU
- DISCS
- BUTTON ACTION
- SYNCHRONIZE PICTURE AND SOUND
- PLAY BLU-RAY 3D DISC
- BONUS VIEW ON BLU-RAY
- BD-LIVE ON BLU-RAY
- PLAY AUDIO THROUGH BLUETOOTH
- DATA FILES
- SUBTITLES
- VOD CODE FOR DIVX
- USB STORAGE DEVICES
- AUDIO, VIDEO, AND PICTURE OPTIONS
- AUDIO OPTIONS
- VIDEO OPTIONS
- PICTURE OPTIONS
- MUSICAL SLIDESHOW
- RADIO
- CONNECT THE FM ANTENNA TO THE FM ANTENNA ON YOUR HOME THEATER
- PRESS RADIO ON THE REMOTE CONTROL TO SWITCH TO RADIO SOURCE
- USE THE REMOTE CONTROL TO LISTEN OR TO CHANGE RADIO STATIONS
- TUNING GRID
- MP3 PLAYER
- IPOD OR IPHONE
- SMARTPHONE CONTROL
- CONTROL YOUR HOME THEATER
- SELECT ONE OF THE FOLLOWING TABS TO ACCESS MORE OPTIONS
- STREAM MULTIMEDIA CONTENT (SIMPLYSHARE)
- SELECT A DEVICE ON THE NETWORK
- SELECT A MEDIA FILE TO PLAY
- FROM THE MENU ON YOUR MOBILE DEVICE, SELECT THE HOME THEATER TO STREAM THE MEDIA FILE TO YOUR HOME THEATER
- USE YOUR MOBILE DEVICE TO CONTROL PLAY
- BROWSE PC THROUGH DLNA
- SET UP MEDIA SERVER SOFTWARE
- MICROSOFT WINDOWS MEDIA PLAYER
- MACINTOSH OS X TWONKY MEDIA (V4.4.2)
- PLAY FILES FROM YOUR PC
- KARAOKE
- PLAY KARAOKE MUSIC
- CHOOSE SOUND
- SURROUND SOUND MODE
- SOUND MODE
- EQUALIZER
- AUTO VOLUME
- LANGUAGE SETTINGS
- PICTURE AND VIDEO SETTINGS
- AUDIO SETTINGS
- PARENTAL CONTROL SETTINGS
- DISPLAY SETTINGS
- ENERGY SAVING SETTINGS
- SPEAKER SETTINGS
- TIP
- CHECK SOFTWARE VERSION
- UPDATE SOFTWARE THROUGH USB
- STEP 1: DOWNLOAD THE LATEST SOFTWARE
- STEP 2: UPDATE THE SOFTWARE
- UPDATE SOFTWARE THROUGH THE INTERNET
- REGION CODES
- MEDIA FORMATS
- FILE FORMATS
- BLUETOOTH
- AUDIO FORMATS
- VIDEO FORMATS
- AMPLIFIER
- VIDEO
- AUDIO
- USB
- SUBWOOFER
- SPEAKERS
- CENTER SPEAKER
- FRONT/REAR SPEAKER
- REMOTE CONTROL BATTERIES
- LASER
- WARNING
- THE BUTTONS ON THE HOME THEATER DO NOT WORK
- PICTURE
- NO PICTURE
- NO PICTURE ON A TV CONNECTED THROUGH HDMI
- DISC DOES NOT PLAY HIGH-DEFINITION VIDEO
- SOUND
- NO SOUND FROM HOME THEATER SPEAKERS
- DISTORTED SOUND OR ECHO
- AUDIO AND VIDEO ARE NOT SYNCHRONIZED
- PLAY
- CANNOT PLAY A DISC
- CANNOT PLAY A DIVX FILE
- DIVX OR RMVB/RM SUBTITLES DO NOT DISPLAY CORRECTLY
- CANNOT READ THE CONTENTS OF A USB STORAGE DEVICE
- NO ENTRY' OR 'X' SIGN APPEARS ON THE TV
- EASYLINK DOES NOT WORK
- WHEN YOU SWITCH ON THE TV, THE HOME THEATER AUTOMATICALLY SWITCHES ON
- CANNOT ACCESS BD-LIVE FEATURES
- MY 3D VIDEO PLAYED IN 2D MODE
- TV SCREEN IS BLACK WHEN YOU PLAY A BLU-RAY 3D VIDEO OR A DIVX COPY PROTECTED VIDEO
- QUALITY OF AUDIO PLAY FROM A CONNECTED BLUETOOTH DEVICE IS POOR
- THE CONNECTED BLUETOOTH DEVICE CONNECTS AND DISCONNECTS CONSTANTLY
- NETWORK
- WIRELESS NETWORK DISTORTED OR NOT FOUND
- COPYRIGHT
- BE RESPONSIBLE RESPECT COPYRIGHTS
- CINAVIA NOTICE
- OPEN SOURCE SOFTWARE
- RMVB END USER AGREEMENT
- NOTES TO END USER
- TRADEMARKS
- DIVX + HD
- BLUETOOTH®
- A
- B
- C
- D
- E
- F
- H
- L
- M
- N
- O
- P
- R
- S
- T
- U
- V
- W
- 环保使用期限 ENVIRONMENTAL PROTECTION USE PERIOD
- 电池标识 BATTERY LABELING LOGO
Brand : PHILIPS
Model : HTB5571DG
Category : Home Theater System