
CX 82 Sola - Radio SCOTT - Free user manual and instructions
Find the device manual for free CX 82 Sola SCOTT in PDF.


| Product Type | Portable Radio |
| Brand | SCOTT |
| Model | CX 82 Sola |
| Power Source | Solar panel and 3x AA batteries (not included) |
| Battery Life | Up to 20 hours on a full charge (depending on usage) |
| Radio Bands | AM / FM |
| Frequency Range | FM: 87.5-108 MHz, AM: 520-1710 kHz |
| Dimensions | 150 x 80 x 30 mm (approx.) |
| Weight | 200 g (approx.) |
| Solar Panel | Integrated monocrystalline panel for charging |
| Additional Features | LED flashlight, USB output for charging mobile devices |
| Speaker | Built-in 3W speaker |
| Headphone Jack | 3.5mm stereo |
| Antenna | Telescopic for FM, built-in ferrite for AM |
| Material | ABS plastic with rubberized grip |
| Water Resistance | IPX4 (splash resistant) |
| Cleaning | Wipe with a soft, dry cloth. Do not use liquid cleaners. |
| Safety | Keep away from excessive heat and moisture. Do not disassemble. |
| Spare Parts | Battery compartment door, solar panel cover (contact support) |
| Repairability | Batteries replaceable; other repairs by qualified technician |
Frequently Asked Questions - CX 82 Sola SCOTT
User questions about CX 82 Sola SCOTT
0 question about this device. Answer the ones you know or ask your own.
Ask a new question about this device
Download the instructions for your Radio in PDF format for free! Find your manual CX 82 Sola - SCOTT and take your electronic device back in hand. On this page are published all the documents necessary for the use of your device. CX 82 Sola by SCOTT.
USER MANUAL CX 82 Sola SCOTT
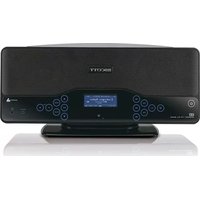
Dual Alarm Clock Radio with Digital Display
CE
Instruction Manual
PACKAGE INCLUDES:
-
The unit
-
Instruction manual
LOCATION OF CONTROLS
- ALARM/SLEEP OFF button
- ALARM button
- TIME button
- SNOOZE button
- FAST button
- SLOW button
- SLEEP button
- ALARM 1/1+2/2 switch
- TUNING knob
- LED display
- VOLUME/OFF BUZZER knob
- ON/OFF/AUTO switch
- Clock back up battery cover
- FM antenna wire and AC power cord

INSTALLING BATTERIES
Installing the clock back up battery
Clock back up
The clock and alarm time can be maintained during a power failure with a 9V "6F22" battery (not supplied). During power failures, the clock time may gain or lose a few minutes per hour and may require resetting.
Battery insertion
- Remove the battery cover on the bottom of the unit, by pressing the top edge.
- Insert a 9V "6F22" battery (an alkaline battery is recommended) into the battery compartment, following the correct polarities marked inside the battery compartment.
- Replace the battery cover.
Note: For optimum performance, the battery should be replaced every 6 months.
Precautions when using batteries
- Use only the size and type of battery specified.
- Ensure you follow the correct polarities when installing the battery, as indicated in the battery compartment. A reversed battery may damage the unit.
- An exhausted battery must be removed to prevent possible battery leakage.
- Dispose of batteries properly according to environmental regulations.
Notes on clock back up battery
Please note that this unit will not operate fully by battery power alone. The battery provides a back up system only in the event of an interruption of the AC power supply.
GB-1
PRECAUTIONS
Follow the advice below for safe and appropriate operations.
INSTALLATION
- Do not use the unit in places which are extremely hot, cold, dusty, or humid.
- Place the unit on a flat and even surface.
- Do not restrict the airflow of the unit by placing it in a place with poor airflow, by covering it with a cloth, or by placing it on a carpet.
SAFETY
- When connecting and disconnecting the AC power cord from the AC mains outlet, pull the plug and not the cord itself. Pulling the cord may damage it and may be dangerous.
• The mains plug must remain readily operable. - When you are not going to use the unit for a long period of time, disconnect the AC power cord from the AC mains outlet.
AC VOLTAGE
- Before use, check that the rated voltage of your unit matches your local voltage.
CONDENSATION
- When there is condensation inside the unit, the unit may not function normally.
- Let it stand for 1 to 2 hours before turning the power on, or gradually heat the room up and dry the unit before use.
- Ensure a minimum distance of 5 cm around the apparatus for sufficient ventilation.
- Ensure that the ventilation is not impeded by covering the ventilation openings with items such as newspapers, tablecloths, curtains, etc.
- Do not place naked flame sources such as lighted candles on the apparatus.
• Pay attention to the environmental aspects of battery disposal. - Use the apparatus only in moderate climates (not in tropical climates).
- Do not expose the apparatus to dripping or splashing.
- Do not place objects filled with liquids, such as vases, on the apparatus.
- Mains plug is used as the disconnect device. It shall remain readily operable and should not be obstructed during intended use. To be completely disconnected the apparatus from supply mains, the mains plug of the apparatus shall be disconnected from the mains socket outlet completely.

The lightning flash with an arrowhead symbol within a triangle is a warning sign alerting the user to the presence of "dangerous voltage" inside the unit.
CAUTION
RISK OF ELECTRIC SHOCK DO NOT OPEN
ATTENTION: To reduce the risk of electric shock, do not remove the cover. There are no user serviceable parts inside the unit. Refer all servicing to qualified personnel.

The exclamation mark within a triangle is a warning sign alerting the user to the presence of important instructions accompanying the product.
In case of malfunction due to electrostatic discharge, the apparatus has to be reset by disconnecting it from mains supply.
The marking plate is located on the bottom enclosure.
OPERATING INSTRUCTIONS
Connecting the power supply
Insert the AC power cord into the AC mains outlet with a 230V AC \~ 50Hz power source. The LED display will flash.
Clock setting
- Press and hold down the TIME and FAST buttons to set the clock quickly.
- Press and hold down the TIME button and press the SLOW button repeatedly to set the clock precisely, minute by minute.
Alarm operation
The unit allows you to wake up to the buzzer or radio.
Set the alarm time 1
- Adjust the ON/OFF/AUTO switch to AUTO. The alarm indicator(s) will light up.
- Adjust the ALARM 1/1+2/2 switch to 1. The AL1 LED indicator will light up.
- Press and hold down the ALARM and FAST buttons to set the alarm time 1 quickly.
- Press and hold down the ALARM button and press the SLOW button repeatedly to set the alarm time 1 precisely.
Set the alarm time 2
Follow the same steps in the section "Set the alarm time 1", but adjust the ALARM 1/1+2/2 switch to the 2 position. The AL2 LED indicator will light up.

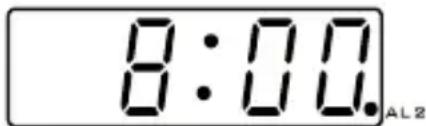

Wake to Buzzer
- Turn the VOLUME/OFF BUZZER knob to "BUZZ" until a click sound is heard.
- Adjust the ON/OFF/AUTO switch to AUTO. The alarm indicator(s) will light up.
- Adjust the ALARM 1/1+2/2 switch to select alarm 1, 2 or both (1+2). The corresponding alarm indicators will light up on the LED display.
- When the preset alarm time is reached, the buzzer will sound.
- To stop the alarm, press the ALARM/SLEEP OFF button. The alarm will sound again the next day at the same time.
Wake to Radio
Turn on and adjust the volume to desired level using the VOLUME/OFF BUZZER knob and follow steps (2) to (5) in the section "Wake to Buzzer" for alarm operation.
Snooze function
When the alarm sounds, press the SNOOZE button to stop the alarm temporarily and it will sound again after 7 minutes. To cancel the SNOOZE function, press the ALARM/SLEEP OFF button. The alarm will sound again the next day at the same time.
GB-3


Sleep function
This function allows you to program the radio to turn off automatically after a certain amount of time (up to 59 minutes).
- In OFF/AUTO mode, press and hold down the SLEEP button, and "0:59" is displayed. The radio turns on. Note: The sleep function does not work when the ON/OFF/AUTO switch is in the ON position.
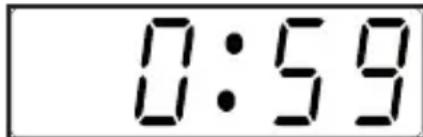
-
Hold down the SLEEP button and press the FAST or SLOW button to adjust the minutes quickly or precisely from 59 to 0 mi
-
When the preset sleep duration elapses, the radio turns off automatically.
-
To cancel the Sleep function before the preset sleep duration elapses, press the ALARM/SLEEP OFF button to turn off the radio immediately.
RADIO OPERATION
Listen to the radio
- Adjust the ON/OFF/AUTO switch to ON.
- Turn the TUNING knob to receive a station.
- Adjust the volume level by turning the VOLUME/OFF BUZZER knob.
- To turn off the radio, adjust the ON/OFF/AUTO switch to OFF.
Achieve optimum reception
In FM mode, extend and position the FM antenna to achieve optimum reception.
MAINTENANCE
Care and maintenance
To clean the cabinet, unplug the unit and wipe off dust and stains with a soft cloth moistened with a mild soap and water solution only. Do not use benzene, thinner or similar chemicals to clean the casing.

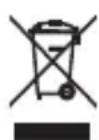
If at any time in the future you should need to dispose of this product, please note that waste electrical products should not be disposed of with household waste. Please recycle where facilities exist. Check with your local authority or retailer for recycling advice. (Waste Electrical and Electronic Equipment Directive)

TECHNICAL SPECIFICATIONS
Radio
Tuning range FM: 87.5 – 108 MHz
Antenna FM: wire antenna
General
Output power 300 mW
Power consumption 3 W
Speaker 2 1/4" (57 mm) diameter, 8 ohm impedance
Power source AC 230V \~ 50Hz
Clock back up battery 9V "6F22" (not supplied)
Dimension 40 (H) x 175 (W) x 145 (D) mm
Weight 580 g
Note: Due to continuing improvements, the technical specifications are subject to change without notice
GB-4



- DUAL ALARM CLOCK RADIO WITH DIGITAL DISPLAY
- CE
- INSTRUCTION MANUAL
- PACKAGE INCLUDES
- LOCATION OF CONTROLS
- INSTALLING BATTERIES
- INSTALLING THE CLOCK BACK UP BATTERY
- CLOCK BACK UP
- BATTERY INSERTION
- PRECAUTIONS WHEN USING BATTERIES
- NOTES ON CLOCK BACK UP BATTERY
- PRECAUTIONS
- INSTALLATION
- SAFETY
- AC VOLTAGE
- CONDENSATION
- CAUTION
- RISK OF ELECTRIC SHOCK DO NOT OPEN
- OPERATING INSTRUCTIONS
- CONNECTING THE POWER SUPPLY
- CLOCK SETTING
- ALARM OPERATION
- SET THE ALARM TIME 1
- SET THE ALARM TIME 2
- WAKE TO BUZZER
- WAKE TO RADIO
- SNOOZE FUNCTION
- SLEEP FUNCTION
- RADIO OPERATION
- LISTEN TO THE RADIO
- ACHIEVE OPTIMUM RECEPTION
- MAINTENANCE
- CARE AND MAINTENANCE
- TECHNICAL SPECIFICATIONS
- RADIO
- GENERAL
Brand : SCOTT
Model : CX 82 Sola
Category : Radio