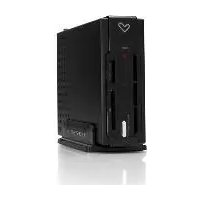
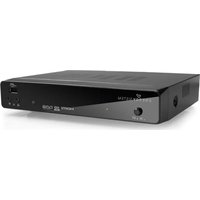
ENERGY SISTEM T3300 - Media player

T3300 - Media player ENERGY SISTEM - Free user manual and instructions

Find the device manual for free T3300 ENERGY SISTEM in PDF.

📄 20 pages English EN Download 💬 AI Question 10 questions ⚙️ Specs
Notice ENERGY SISTEM T3300 - page 2
Pick your language and provide your email: we'll send you a specifically translated version.
Product Type Portable Media Player
Brand Energy Sistem
Model T3300
Dimensions Approx. 10 x 5 x 1 cm
Weight Approx. 80 g
Display Color TFT LCD
Storage Built-in flash memory, expandable via microSD
Audio Formats MP3, WMA, WAV, FLAC
Video Formats AVI, MP4, RMVB
Image Formats JPEG, BMP, GIF
FM Radio Yes, with presets
Voice Recorder Built-in microphone
Battery Rechargeable lithium-ion, 500 mAh
Playback Time Up to 20 hours audio
Charging USB 2.0, 5V
Headphone Jack 3.5 mm
USB Connector Micro USB
Supported Languages Multi-language menu
Maintenance Keep dry; clean with soft cloth
Safety Avoid extreme temperatures and moisture
Spare Parts / Repairability Battery replaceable by service center

Frequently Asked Questions - T3300 ENERGY SISTEM

How do I charge the Energy Sistem T3300?
Connect the device to a computer or USB power adapter using the included micro USB cable. The battery indicator will show charging status. A full charge takes about 2-3 hours.
What file formats are supported?
Audio: MP3, WMA, WAV, FLAC. Video: AVI, MP4, RMVB. Image: JPEG, BMP, GIF. For optimal performance, use formats listed in the manual.
How do I transfer music to the device?
Connect via USB. The device will appear as a removable drive. Drag and drop files into the appropriate folders (Music, Video, etc.). Safely eject before disconnecting.
Can I expand the storage?
Yes, the T3300 supports microSD cards up to 32 GB. Insert the card into the slot located on the side of the player.
How do I reset the device if it freezes?
Press and hold the Power button for about 10 seconds until the device restarts. If that fails, connect to a USB power source to reset.
What is the battery life?
Audio playback up to 20 hours (varies with volume and format). Video playback up to 5 hours. Charging time is approximately 2-3 hours.
How do I use the FM radio?
Go to the Radio menu. The device will automatically scan and save stations. Use the previous/next buttons to switch between saved stations. For best reception, connect earphones as antenna.
Can I record voice?
Yes, select the Voice Recorder function from the menu. Press record to start, stop to save. The recordings are saved as WAV files.
Is the device compatible with Linux or Mac?
Yes, it appears as a mass storage device, so it works with Windows, macOS, and Linux without drivers. For media syncing, use drag-and-drop.
How do I clean the player?
Wipe the exterior with a soft, dry cloth. Do not use liquids or abrasive cleaners. Keep the USB port and headphone jack free of dust.

User questions about T3300 ENERGY SISTEM

0 question about this device. Answer the ones you know or ask your own.

Ask a new question about this device

The email remains private: it is only used to notify you if someone responds to your question.

No questions yet. Be the first to ask one.

Download the instructions for your Media player in PDF format for free! Find your manual T3300 - ENERGY SISTEM and take your electronic device back in hand. On this page are published all the documents necessary for the use of your device. T3300 by ENERGY SISTEM.

USER MANUAL T3300 ENERGY SISTEM

User manual

1. INTRODUCTION

Thank you for purchasing this Energy™ T3300. First of all, welcome to the Energy DVB-T receivers world. The following sections provide an overview of your new device and its basics features. Please read everything carefully before start using the product.

2. ImpORTaNT SafeTy INSTRUCTIONS

ENERGY SISTEM T3300 - ImpORTaNT SafeTy INSTRUCTIONS - 1

To ensure your safety and the safety of others, please ensure that you read all the safety information before operating this product.

Keep this information in a safe place for future reference.

ENERGY SISTEM T3300 - ImpORTaNT SafeTy INSTRUCTIONS - 2

This symbol indicates that this product incorporates double insulation between hazardous mains voltage and user accessible parts.

WARNING: To reduce the risk of fire or electric shock, do not expose this apparatus to rain or moisture.

Safety ConSiderationS.

  • Position the cables so that they cannot be walked on or pinched by items placed on or against them.
    Do not remove the cover or back. There are no user-serviceable parts inside. Refer servicing to qualified personnel.
  • Do not expose your T3300 to water (dripping or splashing).
    No objects filled with liquids, such as vases, should be placed on the unit.
    Keep the product away from direct sunlight and heat source such as radiators or stoves.
    Do not place the product on unstable cart, stand, tripod, bracket or table. The unit may fall, resulting in possible damage or injury.
    Do not let the device drop or shock.

We recommend you to unplug the power from the outlet when the unit is not in use. Ventilation

The slots and openings on the set top box are for ventilation. Do not cover or block them as it may cause overheating.

NEVER let children push anything into the holes or slots on the case.

SerViCinG

There are no user serviceable parts in this set top box.

Battery diSpoSal

Please ensure batteries are disposed of safely.

Never dispose of batteries in a fire or with other household waste.

Check with your local authority for disposal regulations.

Cleaning

ALWAYS unplug the set top box before you clean it.

Do not use liquid or aerosol cleaners.

Clean the set top box with a soft, damp (not wet) cloth.

t3300 handling and Care
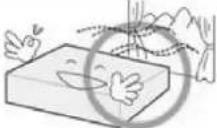
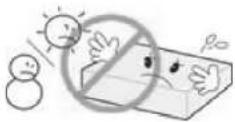
Place the product in a well-ventilated area Don't install it in the cold or under direct sunlight
ENERGY SISTEM T3300 - SerViCinG - 1ENERGY SISTEM T3300 - SerViCinG - 2
Leave a minimum 10cm gap all around the productDo not disassemble, repair,or reorganize the product
ENERGY SISTEM T3300 - SerViCinG - 3ENERGY SISTEM T3300 - SerViCinG - 4
Don't place cups with water or other liquidson the top of the productDon't place objects on the top of the product
ENERGY SISTEM T3300 - SerViCinG - 5ENERGY SISTEM T3300 - SerViCinG - 6

3. GeNeRaL Vl eW

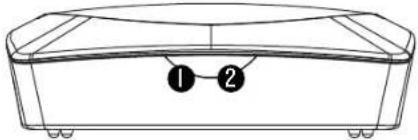
3.1. FRONT paNeL
Line drawing of a rectangular box with two labeled points (1 and 2) on its side, no text or symbols present.

  1. STANDBY INDICATOR: Used to visually show the power state of the set top box; green LED will show if is turned on the set top box and red LED will be light if the set top box entered standby mode.
  2. REMOTE CONTROL SENSOR: Used to receive the signal from the remote control.

Line drawing of a portable electronic device with ports and a control panel (no text or symbols)

  1. USB CONNECTOR: Used to connect to an external USB device.

3.2. RealR paNeL
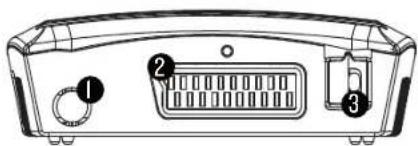
Diagram of a device rear panel showing labeled ports and connectors (no text or symbols beyond labels)

  1. RF IN: This socket connects to your external aerial.
  2. TV SCART: This socket connects to your TV.
  3. MAINS CABLE: This is used to connect to your main power supply.

4. RemOTe CONTROL

4.1. BUTTON DeSCRIPTIONS
STANDS BY MUTE INFO PLAY/PAUSE OK HI EPO MENU CH+ EXIT VOL OK VOL RELLIET CH- FAVORITE 1 2 3 GAME 4 5 6 RECALL 7 8 9 0 TIRASIO AUDIO BUBTITLE TEXT SLEEP LIST MSM TIP RECORD STOP REV FWD ENERGY SISTEM

NOTE: SUBTITLES/TEXT/AUDIO may not be available for all channels.

  1. STANDBY: Switch the set top box between on and standby mode.
  2. MUTE: Mute/unmute the sound.
  3. MENU: Open the main menu window.
  4. CH+/-: Move around the menu screens or change the channels in normal play mode.
  5. VOL+/-: Move around the menu screens or change the volume in normal play mode.
  6. RECLIST: Show the recorded programs list.
  7. NUMBER KEYS: Select channel numbers or input numbers in menus.
  8. TV/RADIO: Switch between TV channels and Radio station
  9. AUDIO: Select the available audio track or set the sound mode as LR(stereo), LL(left), RR(right).
  10. COLOR KEYS (RED/GREEN/YELLOW/BLUE): Operate different functions in TEXT screen or other menus.
    RED: SLEEP function (adjustable timer).
    GREEN: LIST function.
    YELLOW: MSM - Multi Screen Mosaic.
    II. RECORD: Record the program manually.
  11. STOP: Stop the current recording if exists or stop the playback and return to DTV mode.
  12. INFO: Display information about the channel being viewed or further information about the program when in normal play mode.
  13. PLAY/PAUSE: Pause or playback the program being viewed.
  14. EPG: Display information about the program being viewed and what's on next.
  15. EXIT: Return to the previous screen or menu.
  16. OK: Confirm a selection within a menu.
  17. FAVORITE: Access your favourite channels.
  18. GAME: Select an accessory: Gomoku, Calendar or
    Calculator.
  19. RECALL: Switch between the last two viewed channels.
  20. SUBTITLE: Switch among different subtitles that are broadcasted.
  21. TEXT: Display teletext (if available in the broadcasted stream).
  22. REV: Fast backward at selectable speeds.
  23. FWD: Fast forward at selectable speeds.

4.2. INSTaLLING THE BaTTeRleS

Remove the battery cover from the remote control and put 2xAAA size batteries inside the compartment.

The diagram shows the correct way to install the batteries inside the battery compartment.

  1. Open the cover
    ENERGY SISTEM T3300 - INSTaLLING THE BaTTeRleS - 1

  2. Install the batteries
    ENERGY SISTEM T3300 - INSTaLLING THE BaTTeRleS - 2

  3. Close the cover
    ENERGY SISTEM T3300 - INSTaLLING THE BaTTeRleS - 3

  4. Keep batteries out of reach of children. If someone swallows a coin cell or battery must receive immediate medical attention.
    Do not attempt to reactivate the batteries using heat, loading, or by other means. Never dispose of batteries in fire, or disassemble or short circuit. Replace batteries at least once a year to avoid spillage.

  5. Replace both batteries at the same time and replace them with the same type.
    When not using the remote control for a long time, remove the batteries.

4.3. USING THE RemOTe CONTROL

To use the remote control point it towards the front of the digital set top box.

The remote control has a range of up to 7 metres from the set top box at an angle of up to 60 degrees.
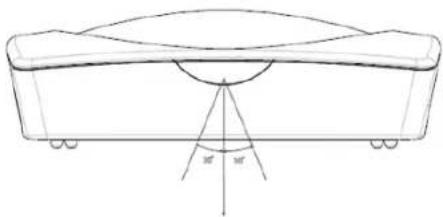
Technical line drawing of a curved object with measurement annotations (no text or symbols present)

The remote control will not operate if its path is blocked.

Sunlight or very bright light will decrease the sensitivity of the remote control.

5. CONNECTIONS

CAUTION: Make sure to check that the voltage of the wall outlet has the same rating than the receiver.

To prevent the risk of electric shock, do not open the cover or the back of the receiver.

5.1. CONNeCTING TO a TV Set
TV Aerial TV TV SCART AC IN-

When connecting the receiver to other equipment (e.g. TV, VCR and amplifier) make sure to refer to relevant user manual for instruction. Also, make sure you disconnect all the equipments from the mains supply before the connection.

6. USeR INTeRfaCe - malN meNU

Note that the first time you use T3300 it will automatically show the Setup->Installation screen in order to scan for TV and radio channels. Please refer to Setup->Installation in page 10.

Once the channel scan is finished and all the channels are stored into the database, you can start to watch the digital terrestrial TV channel or listen to the radio broadcast, some typical operations are given in this chapter.

Press

to enter Main Menu. See Figure I.

Press to display T3300 version information.

Add Settings Add Settings Remove Settings Remove Settings Set Default Bill Update

Figure I. Main Menu - Setup

6.1.SeTUp

Set the system settings. See Figure I.

6.1.1. Installation

Antenna Setting Audio Setting GSD Language Audio Language Subtable Language ECN OFF English English OFF OFF

Figure 2. SETUP - Installation.

Auto Time Zone 00:15:00 16:00 Time Zone + 00:00 Auto Time Zone Control

Figure 3. SETUP - Installation (continued)

Set the receiving and playing program settings of T3300. See Figure 2, Figure 3.

Antenna Setting

Set the antenna power on or off to supply +5V power to antenna or not.

Note: The default is OFF, set this option to ON only if T3300 is connected to an active antenna which amplifies the received RF signal, otherwise please set it to OFF.

Country Setting

Set the country for Auto Scan, Manual Scan and Time Zone.

Note: Change the Country Setting will automatically change the default Time Zone and set the default Frequency and Bandwidth for Auto Scan.

OSD Language

Set the On Screen Display Language.

Audio Language

Set the audio language for watching a program (availability depends on channel broadcaster).

Subtitle Language

Set the language for displaying subtitle program (availability depends on channel broadcaster).

LCN

Set the Logical Channel Number to ON or OFF.

Note: LCN is a number that uniquely identifies a logical channel, which is popular in some European countries such as England or France.

Auto Time Zone / Time Zone

Allows you to enable or disable auto time zone update. If you know the GMT (Greenwich Mean Time) time zone offset of your location, set the Auto Time Zone to OFF and select an appropriate Time Zone, otherwise set it to ON and let the system update the time zone automatically according to the transport stream. See Figure 3.

Note: Some Countries are covered with more than one Time Zone.

Auto Scan

Auto Scan will erase the database first, and scan default frequency and bandwidth by Country Setting.

Press button to start Auto Scan.

Press button to confirm clear action and start Auto Scan.

It costs time to do Auto Scan, you can press button to exit at anytime. See Figure 4, Figure 5.

Database Selection Database Name: 100% Counter: 100% English Database will be changed. Continue? Language: YES/GET Satellite Language: English LCH: ON 4 Blue 9 Black 52 More Start More Start

Figure 4. Clear database message.

Dial-Channel Signal List: 2 Progress D1 TO 100% Security 83 HD, MWh Benchmark 8 MWh Dial-Channel: 21 TV, 8 MHz Data Entry, Phone Grid TXG / BGS -HOT TXG HD TXG 304 CATALUMPA RADIO CATALUMPA INFO/ADO CATALUMPA MODE SHE TIN

Figure 5. Auto Scan Finished.

Manual Scan

Press button to start Manual Scan.

Manual Scan adds the scanning results into database, it doesn't erase the database. But you have to indicate the Frequency and Bandwidth for scanning. If you scan the same Frequency and Bandwidth more than once, the previous programs will be overwritten.

Press button to enter Manual Scan Page.

Press button to select Frequency option.

Press <0-9> button to input the Frequency value.

Press button to select Bandwidth option.

Press button to set Bandwidth value.

Press button to start scan or exit. See Figure 6, Figure 7.

Channel No Frequency Bandwidth Strength 60 % Quality 94 % Move More Save Save

Figure 6. Manual Scan edit.
CHANNEL NAME: SNPs Channel No.: 24-20 Frequency: INTIME MHz Out Channel: 1. TV, 2 Radio Radio Spring: Phone Mail

Figure 7. Manual Scan finished

6.1.2. TV Setup

Setup the display mode for TV. See Figure 8.

TV Format 43 L8 Play Mode PSL GSD Transparency x Betwe Display Time 3.5 Video Output CyOS+R106 Video Enhancement Off

Figure 8. TV Setup.

TV Format

4:3LB (LetterBox): Typically for wide screen content on conventional 4:3 TV with black bars above and below the picture.
4:3PS (PanScan): Typically for wide screen content on conventional 4:3 TV with left and right edges cropped.
16:9PB (PillarBox)/16:9 AUTO: Typically for wide screen 16:9 TV.

TV Mode

Set PAL, NTSC or AUTO for display. AUTO will switch PAL or NTSC by program content. This setting should be matched with user's TV.

OSD Transparency

Set the On Screen Display transparency. "I" is the most transparent.

Banner Display Time

Set Banner display time. Banner does not automatically disappear when set as "Always" and disappears at timeout when set to other values.

Video Output

Set the video output mode to TV: RGB or CVBS.

Video Enhancement

Set the Video Enhancement. See Figure 9.

Press button to select Video Enhancement option.

Press button to set Video Enhancement.

Press button to select Flesh Tone or Black/White Expansion.

Press button to set Flesh Tone and Black/White Expansion.

Back White Off Back/White Expansion OFF

Figure 9. Video Enhancement.
Media Lock OFF Channel Lock OFF Censorship Lock No Black Change Password NO

Figure 10. Password page

6.1.3. Password

Set password for menu, channel or censorship lock. And the user can change password here, the default Password is 6666. See Figure 10.

Menu Lock

Password-lock the menus.

Channel Lock

Lock the channel which has been set to lock status when turning on the Channel Lock. Please see section "Lock" on page 17 for details.

Censorship Lock

Lock the program by password and censorship threshold. The censorship info is in program content. Under the censorship rating, user has to enter the right password for watching program.

Change Password

To change the Password, select this option, press button to trigger changing password and <0-9> buttons to enter old password, new password and confirm new password. If succeed, the Password Changed message will be displayed, otherwise the Password Error message will be displayed.

6.1.4. Advance Timer

User can set timer for watching the program by date and time manually or from the TV/Radio Guide(see section "Guide" on page 18). When scheduled date/time arrives, T3300 will automatically switch to the scheduled program. Press any key except button, T3300 will ask you to abort it or not when watching booked program. You can delete the event while it is not running.

6.1.5. Set Default

Restore T3300 to factory default settings. All user settings will be restored to factory default values and the TV/radio channel database will be erased together.

6.1.6. SW Update

Updates T3300 firmware by USB.

6.2. TV/RADIO

There are two types of programs: TV and Radio.

The operation of the List and Guide of TV and Radio are almost the same. Herein take TV as an example.

6.2.1. List
File List All No. Program Name B01 CT 0007 B02 - AppUser/AMT B03 CT 1 B04 CT 2 B05 CT 3 B06 CT 4 B07 - MAA B08 - MAA B09 - MAA B10 - MAA B11 - MAA B12 - MAA B13 - MAA B14 - MAA B15 - MAA B16 - MAA B17 - MAA B18 - MAA B19 - MAA B20 - MAA B21 - MAA B22 - MAA B23 - MAA B24 - MAA B25 - MAA B26 - MAA B27…

Figure II. TV List

There are several options to manage channels:

Favorites

User can quickly arrange the favourite programs by favourite filter. There are 8 groups of favourite channels: News, Sport, Movie, Music, Shopping, Travel, Boy and Girl. Press <1-8> button to set or clear the favourite group when Favorites option is selected.

Lock

Lock will ask for the password before watching this program when Setup -> Password

->Channel Lock is turned on. Please see section "Channel Lock" on page 16 for details. Press button to set or clear lock status when Lock option is selected.

Edit

You can edit the program name, maximum length is 20 characters.

Press button to select Edit option and button to select the program. Press button to display program info and press it again to edit program name.

Press button to select the character.

Press button to finish the editing and return to previous program info page.

Press button to save the editing and return to List or press button to return to List without saving.

Move

Move will allow you to move the position of the channels in the list.

Note: This option will not appear when SETUP->Installation->LCN is set to ON.

Sort

Sort will allow you to sort the channels by A<->Z or Pay<->Free.

Note: This option will not appear when SETUP->Installation->LCN is set to ON.

Skip

Skip will skip the program when changing a program by CH+/-. Press button to set or clear skip status when Skip option is selected.

delete

Delete will delete the program permanently from the database. You must rescan to recover it.

Press button to set delete one or delete all when Delete option is selected.

Search

User can search the program name by partial keyword.

Press button to select Search option.

Press button to entry search page.

Press button to input keyword.

Press button to Search and return List. The matched program will be focused.

Press button to the next or previous matched program.

6.2.2. Guide

Guide is also known as EPG (Electronic Program Guide). See Figure 12, Figure 13.

Press button to select program or EPG event.

Press button to change event or date.

Press button to exit all the menus or show the detailed information of a selected event (availability depends on channel broadcaster).

Press button to exit to previous menu.

Press button to enter Book page and button to save after edition. If it's in conflict with itself or other event, a conflict message will be displayed. The successful booking will be added to Main Menu-> Setup-> Advanced Timer(see section 6.1.4 on page 16).

Mac OS X/S Name: Mac OS X/S Date: 19 Wind: 2001 FVY17 Gains: 18 19 20 21 22 23 11:30 Par Le Madama 2007 12:15 No Eventor 14:00 Informative Madrid 2007 14:30 Caracan De Cheré 2007 15:00 Telebanie 1° Edifice 2007

Figure 12. Guide - Event

File Edit No. 10000000000000000000000000000000000000000000000000000000000000000000000000000000 Data Win: 29/27 16/13 Detail Programa semicase presentale per Jacete Captain, the cada programa, dos comunitantes interdacion become la mayor certificado 1 / 2 ▶ Page 1 Page 2 Page 3

Figure 13. Guide - Event (detail).

6.3. MULTIMEDIA

Multimedia must be used with external USB device inserted, otherwise the "Device is not ready!" message will be displayed. If you remove the USB device a "Device is removed!" message will be shown and the system will return to Main Menu.

6.3.1. My Album

Use this option to view JPEG/BMP/GIF files. If there are photos in the device root folder it will start in Thumbnail mode, otherwise it will start in Folder mode. Press button to switch to Folder mode and button to return to Thumbnail mode again.

The info (width x height and date) of selected photo will be displayed at the left bottom in Thumbnail mode and right up in Folder mode. See Figure 14, Figure 15.

My Album - Thrainoff 01/07/2008 11:24 1024 x 768 2005.11.26 3 / 3 Move Move Time RT FLOOR

Figure 14. My Album - Thumbnails

My Album - Folder 1800 x 1200 2005-12-17 Photo103.jpg .160x1200.jpg .70x570.jpg .003 PhotoPla - mag01.jpg .004 PhotoPla - mag01.jpg .005 PhotoPla - mag01.jpg .006 PhotoPla - mag01.jpg .007 PhotoPla - mag01.jpg .008 PhotoPla - mag01.jpg .009 PhotoPla - mag01.jpg .010 PC350.bmp .011 PC350.CIF

Figure 15. My Album - Folder

Use to browse folders or files. Press to view the selected photo and press again to start slide show. Press to view the available functions.

Zoom

Press to zoom in / zoom out the photo in view mode. The zoom factor can be:25-50-100-150-200 %

If zoom factor is greater than 100% you can use to move through the zoomed picture.

rotation

Press to rotate clock/counter clockwise and to flip horizontal or vertical direction.

Slide show

Press to view the photo in Thumbnail or Folder mode and press it again to start the slide show.

Press to play/pause the slide show.

Press to set background music while slide show is running.

Press to switch between repeating modes.

Press to set the time gap between photos.

Press to manually select the previous/next photo.

6.3.2.my music

Use this option to listen to MP3/WMA files.

The music jukebox display includes (see Figure 16, Figure 17):

Progress bar with elapsed and total playing time.

Audio spectrum visualizer.

Press to browse folders and files.

Press to play or pause.

Press to stop.

Press to set play mode as Repeat All / Repeat Random / Repeat Off.

Press to set fast forward speed as x2 / x3 / x4 / normal.

Press button to adjust volume while playing.

My Music Songs 2 Rscs(CSB) ...Upper Folder... Music 001: Inh songs 31ms 002: Inh songs 42.8m³

Figure 16. My Music - Browser.

My Music Songs 1 Rscs(.003) ...Layer Folder... music 001: Ink songs 31ms 002: Ink songs 02.mp3 08:08/06:29 Power As MOV Volume Audio OK

Figure 17. My Music - Play

6.3.3.my movie

My Movie can play MPEG2, DivX, Xvid standard-resolution files.*

It displays the playing file name at the top left corner and use the INFO key to get the current playing time and total time information while playing. See Figure 18, Figure 19.

Press INFO button to select device if an external USB hub connected while browsing, and to show the control info bar while playing.

Press to select folders and files during browsing

Press button to select a file to play.

Press button to play or pause while playing.

Press button to play the frame one by one while playing.

Press button to set fast backward speed as x2,x4,x8,x16,x32, normal.

My Movie - Folder 2 Reel(USB) ...Upper Folder... movies B01. at the mountain B02. garden.msc

Figure 18. My Movie - Browser

warden3.4V 00:00:00:00:25

Figure 19. My Movie - Play

* Multimedia files compatibility depends on container file format and audio / video codec.

6.3.4.my Record

Within My Record you can view the programs already recorded and configure recording options. Note: the external storage device file system must be FAT or FAT32.

Recorded List

View or delete recorded programs.

Recording Device

Select the storage device and partition where the recordings will be stored.

Recording Preference

Time Shift Size

Note that Time Shift Size is calculated automatically according to the current storage device or partition and cannot be modified.

Time Shift

Use the TimeShift option to review the program while recoding is in progress. You can use REV or FWD to select the recorded segment you want to watch ore review, while the recording process continues its normal course.

Pause: Timeshift starts when button is pressed.

Auto: Timeshift is continuously active.

Off: Timeshift disabled

One Button recording

On: T3300 starts recording with a simple button press.

Off: After pushing you have to specify the length of the recording.

Default recording period

Specify the default recording period from 15 minutes to 8 hours in 15-minutes steps.

My Device Recorded List Recording Device Security Preference + 1 year + 2 end + 3 end

Figure 20. My Record.

Map Name 0001 Sky Travel, 00017 0002 Sky Travel, 00017 0003 Sky Travel, 00017 0004 Sky Travel, 00017 0005 GEO History, 00017 info Sky Travel, 00017 04/07/17 19:44 12:40 07/01/12

Figure 21. Recorded programs list

File Name: SBS24-DMX Content: 01010.0000 Total: 78111.0000

Figure 22. Recording Device.
One Soft Size 1.028 One Soft 4.712 One Round Recording OUT Off track Recording PDF 0759

Figure 23. Recording Preferences

6.4. ACCESSORY

There are three options: Gomoku, Calendar, Calculator.

6.4.1. Gomoku

Press button to set play mode and difficulty. Press button to start play Gomoku.

Press button to select the position. Press button to place the piece.

6.4.2. Calendar

Displays the year, month and day.

6.4.3.Calculator

For mathematical calculations.

7. NORMAL PLAYBACK

Normal Playblack means T3300 under watching TV or listening to the Radio. See Figure 24, Figure 25.

So these are what you'd call fashion pics?

Figure 24. TV.

0001 New $258 Mon. 03/01/07 06:21 Info

Figure 25. Radio.

7.1. INFORMATION

Press button once to display info banner. Banner displays the program No., favorite setting, current time, program name, now and next event, lock, scramble, subtitle and teletext info. See Figure 26.
2. Press button when banner exists to display detailed info of a present event
3. Press button when detail exist to display current program info. See Figure 27.

0003 New 19:30 Emmarate Creation Sheet info 12/10/07 21:30

Figure 26. Information banner.
Program Info Program Name IV1 Program No 9003 Vilms FD 0917 Charge No 5045 Audio FD 0956 Frequency 80534 PU Bandwidth 3004 WI2 Generation 20M4 Flow rate 0.6x Grant Received 1732 HP Cash Rate 7/8 F2 8x LF Cash Rate 1/2 Strength 02% Quality 99% TVL 1/1/2024 21:24 D003 IV1 Name Enterable 19:24 Centerio…

Figure 27. Program Info.

7.2. SWITCH pROGRAM

-User can switch program by <CH+/-> or input channel number directly. If the input program number doesn't exist, T3300 will ignore the input.

- Press button to switch to the last watched channel from the current program.

7.3. VOLUME

Press button to adjust the volume. Press button to mute. If you adjust the volume while on mute, mute will be cancelled.

7.4. pROGRAM LIST

-Press button to display Program List with No., name and lock/scramble/skip status. See Figure 28.

- Press to change the channel. Press to return to the normal play mode.

0003 I/FV1 I/B1 I/O/Hz 4 I/B2 I/FV1 I/B3 I/FV1 I/B4 I/FV1 I/B5 I/FV1 New I/B6 I/O/Hz 4 I/B7 I/O/Hz 2 I/B8 I/O/Hz 1 I/B9 I/O/Hz 1 B I/B1 I/O/Hz 1 I/B2 I/O/Hz 1 I/B3 I/O/Hz 1 ① ② ③ ④ ⑤ ⑥ ⑦ ⑧ ⑨ ⑩ ⑪ ⑫ ⑬ ⑭ ⑮ ⑯ ⑰ ⑱ ⑲ ⑳ ㉑ ㉒ ㉓ ㉔ ㉕ ㉖ ㉗ ㉘ ㉙ ㉚ ㉛ ㉜ ㉝ ㉞ ㉟ ㉟A ㉟B ㉟C ㉟D ㉟E ㉟F ㉟G ㉟H ㉟I ㉟J ㉟K ㉟L ㉟M ㉟N ㉟O ㉟P ㉟Q ㉟R ㉟S…

Figure 28. Program List.

Audio channel Octane 100% Audio Red 80% Sound Mode LR

Figure 29. Audio Channels

7.5.aUDIO

Switch the sound channel and switch sound mode to LR(stereo) or LL(left) or RR(right). If setting audio language at Setup->Installation->Audio Language, the audio channel default language will be chosen by setting. See Figure 29. Press

Press button to select Channel/Audio PID or Sound Mode option.

- Press button to set the value.

7.6. paUSe

Pause video and audio. It will be cancelled by any input key.

7.7. faVORITeS

User can switch the favourite programs in the same favourite group. About favourites settings, see section "Favorites" on page 17 for details.

Press button to switch to the favourite group in Program list.
Press button to switch to the same favourite program in normal play mode.

7.8.TeLeTeXT

Display teletext on screen, the style of teletext may be different by content provider. See Figure 30, Figure 31.

Press button to display the teletext setting page.
- Press button to select the teletext language if the program has teletext (availability depends on channel broadcaster).
- Press button to exit the teletext setting page.

- Press <0\~9/Up/Down/Left/Right> button to change teletext page (if available).

TELE TEXT ← Teletext Language → org OFF BURNINGS TOMATOPE A101

Figure 30. Teletext settings.
132 ANGENT 132 Thu 10 Mar 31:57:04 NATIONAL NEWS DETAILS Risconsin - Tropical Cyclone Ingrid has caused the far north queensland east in a remote area south of Lochert and is expected to accumulate low lying masses. Carrying destructive winds of amid pays and windings of the inland accompanied by a…

Figure 31. Teletext.

7.9. SUBTITLES

Display subtitles on screen. The style of subtitles may be different by content provider (availability depends on channel broadcaster). See Figure 32, Figure 33.

  • Press button to display subtitle setting page.
    Press button to select subtitle language, if subtitles are available.

- Press button to exit subtitle setting page.

SUBTITLE Subtitle Language org OFF

Figure 32. Subtitle settings.
She was enjoying herself too much. Looks like she's not the only one.

Figure 33. Subtitles

7.10. TeLeTeX SUBTITLE

Display subtitle by teletext, the style of the teletext subtitle may be different by content provider (availability depends on channel broadcaster). See Figure 34, Figure 35.

Press button to display teletext or subtitle setting page.
- Press button to select "TTX Subtitle".
Press button to select teletext subtitle language.
- Press button to exit the setting page.

TELENT Texted Language eng OFF

Figure 34. Teletext language
ENDS STARTS TX Satellite eng OFF

Figure 35. Teletext subtitles.

7.11. GUIDE

-Press button at normal play state, see section "Guide" on page 18 for details.

7.12. LIST

-Press button at normal play state, see section "List" on page 17 for details.

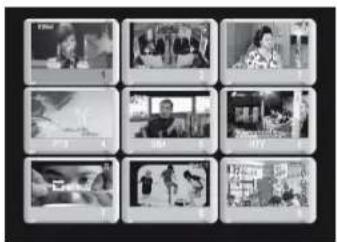
7.13. mSm : mULTI SCReeN mOSaIC - eaSy ZappING

MSM (MultiScreen Mosaic) can display 9 programs on screen at the same time. The highlighted program is playing and the other channels will display a snapshot. See Figure 36. Press button to display MSM.

Press button to browse program.
- Press button to switch program and watch it.
Press button to return normal play mode.

Grid of nine grayscale video thumbnails with Chinese labels, likely from a media or educational app interface.

Figure 36. MultiScreen Mosaic

7.14.meSSaGeS

There are some messages to inform user the current status of the T3300.

No Signal: If T3300 can't get the signal, for example if the antenna cable is disconnected.
- No Service: Program doesn't have any contents to play.
- Encoded Service: Program is encoded for payment, you need to contact with the content provider to know how to decode it.
Antenna Overload: The power of antenna is overloaded.
HDTV Not Support: If the program content is HDTV format, T3300 doesn't support it.
Channel Locked: Program is locked by setting lock (see section "Lock" on page 17) and turning on channel lock in password setting (see section "Channel Lock" on page 16). You must input the correct password to watch the channel. See Figure 37..
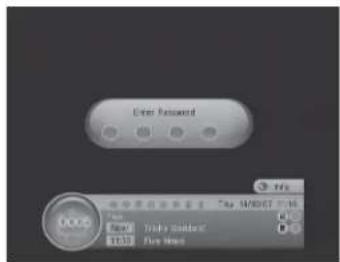
Enter Password DOCS Toby Solder 10:35 True Name

Figure 37. Password-locked channel

8. TROUBLESHOOTING

If you experience problems with this receiver or its installation, in the first instance please read carefully the relevant sections of this User Manual and this Troubleshooting section.

ProblemPossible cause What to do
Standby LED not litMains lead unpluggedCheck mains lead
No signal foundAerial is disconnectedCheck aerial lead
Aerial is damaged/misalignedCheck aerial
Out of digital signal areaCheck with dealer
No picture or soundSCART not connectedCheck the SCART cable connexion
Tuned to digital teletext channelChange to another channel
Mosaic blocks in picture or picture freezesAerial may not be compatibleCheck aerial
Scrambled channel messageChannel is scrambledSelect an alternative channel
Forgotten channel lock codeRe-install channels to cancel channel lock
No response to remote controlReceiver offPlug in and turn on receiver
Remote control batteries are inserted incorrectlyCheck batteries direction
Front panel obstructedCheck for obstructions
Remote control batteries exhaustedReplace remote control batteries
After moving the device to another room can't receive the digital signalThe aerial feed may come through a distribution system which may reduce the digital signalTry a direct feed from antenna
With my device I can see properly most of the channels, but there are some specific channels that I can not tuneYou are trying to tune a channel broadcasting in high definition (HD)Your T3300 has a built in TV channels tuner that displays only the SD channels. When trying to tune a channel in HD, the screen will display only the channel information on a black background. In some cases, you can also hear the audio. Change to another channel.
You are trying to tune to a scrambled channelThe channel is only available to subscribers. A scrambled channel requires a decoder to be viewed with prior authorization and payment. Change to another channel.
  1. SpeCIfICaTIONS
Item Specification
TunerFrequency Range VHF: 174MHz to230MHzUHF: 470MHz to 862MHz
Input Impedance 75 Ohms unbalanced
Signal Input Level -78 ~ -25 dBm
Bandwidth 7 / 8 MHz
DemodulationDemodulator COFDM
OFDM Modulation 2K, 8K FFT, SFN and MFN
Packet Carries 2K / 8K
Guard Interval I/4, I/8, I/16, I/32
ConnectorsRF IN IEC I69-2 female connector
TV SCART Composite video (CVBS), RGB, audio L/R
USB JACK For file playback or software upgrade. Also for recording DVB-T channels in MPEG-2.
PowerInput 100-240V ~50/60Hz
Consumption 8W max / Standby < IW.
DisplayTV mode PAL, NTSC
Resolution720x576 (PAL); 720x480 (NTSC)
Aspect Ratio4:3 (Letterbox, Pan &Scan), 16:9
DecodingVideoMPEG2 Transport MP@ML
AudioMPEG2 Audio Layer I&II
OthersComplianceETSI EN 300 744 DVB-T Compliance
Sound ModeRight, Left, Stereo
Multimedia files playback (in FAT/FAT32 format)Video (DivX, Xvid, AVI, MPG), music (MP3, WMA) and photos (JPEG, BMP, GIF).

10. WARRANTY

Energy Sistem Soyntec S.A. warrants its products to be free from defects in materials and workmanship at the time of purchase.

The warranty period is 36 months from the date of purchase for your DVB-T receiver.

II. WARRANTY PROCEDURE

Visit the Support section at http://support.energysistem.com and select your product to view the FAQ (Frequently Asked Questions). The solution to your problem is very likely to have been already published there. You will also be able to download user manuals, user guides, drivers and updates.

If you cannot find an appropriate solution in the Support section, you may send us your enquiry or warranty service request by email: support@energysistem.com

Alternatively, you may prefer to contact the distributor from which you purchased the product, presenting the purchase receipt or invoice.

Specifications are subject to change without notice.

© 2011 by Energy Sistem®. All rights reserved.

Trademarks

All company, brand and product names are trademarks or registered trademarks of their respective companies.

12. DECLARATION OF CONFORMITY

Manufacturer Name: Energy Sistem Soyntec S. A.

Address: Pol. Ind. Finestrat C/ Calpe esq. C/ Alicante S/N, 03509 Finestrat Alicante

Tel: 902 388 388 Fax: 902 119 034 NIF: A53107488

We declare under our own exclusive responsibility that the product:

Energy Sistem® Multimedia DVB-T Recorder Energy™ T3300

Is in compliance with the essential directives, norms and standards of the European Union 89/336/EEC (EMC Directive).

Manufacturing country: China

This symbol on the product or the instructions means that your electrical and electronic equipment should be disposed at the end of life separately from your household waste. For more information, please contact the local authority or dealer where you purchased the product.

Manual assistant
Powered by Anthropic
Waiting for your message
Product information

Brand : ENERGY SISTEM

Model : T3300

Category : Media player