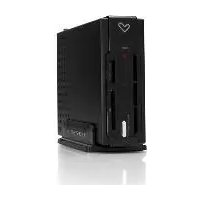
P1350 - Media player ENERGY SISTEM - Free user manual and instructions
Find the device manual for free P1350 ENERGY SISTEM in PDF.


| Brand | Energy Sistem |
| Model | P1350 |
| Product Type | Portable Media Player |
| Dimensions (W x H x D) | 95 mm x 50 mm x 10 mm |
| Weight | 45 g |
| Display | 1.8-inch TFT color screen |
| Storage Capacity | 8 GB internal (expandable via microSD up to 32 GB) |
| Audio Formats Supported | MP3, WMA, WAV, FLAC, APE |
| Video Formats Supported | AVI, RMVB, MP4, FLV, 3GP |
| Image Formats Supported | JPEG, BMP, GIF |
| FM Radio | Yes, with manual and auto search |
| Recording | Voice recording via built-in microphone |
| Battery Type | Rechargeable lithium-ion (300 mAh) |
| Battery Life | Up to 15 hours audio playback |
| Charging | Via USB 2.0 (5V, 500mA) |
| Connectivity | USB 2.0, 3.5 mm headphone jack |
| Additional Features | Equalizer, loop playback, e-book reader (TXT), calendar, clock |
| Care and Cleaning | Wipe with a soft, dry cloth. Do not use liquids or solvents. |
| Safety Warnings | Do not expose to moisture or extreme temperatures. Do not disassemble. Keep away from children. |
| Spare Parts | Replacement battery and USB cable available from manufacturer or authorized dealers. |
| Reparability | Battery is user-replaceable. Other repairs should be performed by qualified technicians. |
Frequently Asked Questions - P1350 ENERGY SISTEM
User questions about P1350 ENERGY SISTEM
0 question about this device. Answer the ones you know or ask your own.
Ask a new question about this device
Download the instructions for your Media player in PDF format for free! Find your manual P1350 - ENERGY SISTEM and take your electronic device back in hand. On this page are published all the documents necessary for the use of your device. P1350 by ENERGY SISTEM.
USER MANUAL P1350 ENERGY SISTEM

| Supported File Video: MPEG1/2/4, DAT, VOB, AVI(Divx 3.x, 4.x, 5.x, Xvid)Resolution: up to 800 x 600 [ QPEL , GMC ] | |
| Audio: MP3, WMA, AC3. | |
| Photo: JPEG (photo size up to 5I20*3480) | |
| Connections USB 2.0 slave port(data transfer rate:480Mbps) | |
| USB HOST | |
| Multicard reader(SD/SDHC/MMC/MS, CF) | |
| AV in/out Video: Component, Composite, S-video | |
| Audio: Stereo RCA, Coaxial, S-PDIF | |
| subtitle Text Subtitle: sub, srt | |
| OS Windows 98SE/ME/2000/XP/Vista, MacOS 9.x/X, Linux 2.4 or later | |
| Hard disk SATAII, FAT32, NTFS | |
| Memory SDRAM: 4 Mbytes, Flash: I Mbyte | |
| Power External I2V/2.5A DC power adapter | |
| Language English, German, Italian, Portuguese, French, Spanish | |
| Dimension 5I(W)XI44(H)X2I7.5(L)mm | |
| Package contents PI350 HDD player, DC power adapter, AC power cable, CD driver, A/Vcable, Remote control, Manual, USB2.0 cable | |
1. PRECAUTIONS
We strongly recommend reading the points below before operating this product.
- Back up the data periodically to another safe media. Under no circumstances there is any liability regarding to data damage or loss in a HDD.
Do not place the player near devices that emit strong magnetic fields. It may cause data damage or loss on the HDD.
Do not disassemble or remodel the device. It may cause damage and/or data loss to the player.
Do not power off the device while a file is playing.
Do not let the player drop or shock: the HDD may suffer unrecoverable data loss or even render it unusable.
Do not use the device under heavy moisture or wet conditions. If any liquid gets in contact with PI350 unplug the power right away.
Do not touch PI350 with wet hands. It may cause electric shock.
The power outlet shall be installed near the equipment and shall be easily accessible.
In hot environments take care of the temperature reached by PI350 because it can overheat if used for long time. The device may stop to preserve integrity in such conditions but if you force PI350 to continue working it may cause damage and/or data loss to the unit.
2. MEDIA
2.1 Internal hard disk
Follow step-by-step the points below for a successful setup. Notice that some steps may vary depending on the operating system you use.
2.1.1 Drive installation

1. Slide off the intermediate brackets. 2. Open the upper cover.
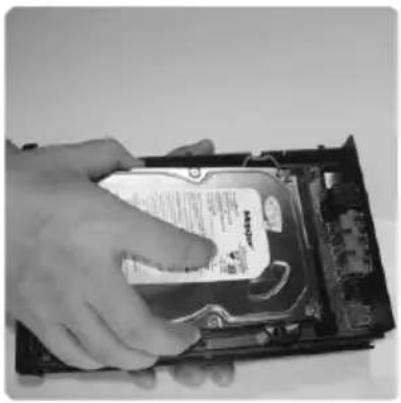
- Insert SATA HDD into enclosure, make sure the HDD fits firmly into the holder.

- Use 4 screws to fix the hard disk drive.

- Slide on the intermediate brackets. 6. Ok, done!

2.1.2 Connection with computer
The device can communicate at USB1.1 (12 Mbps) or USB2.0 (480 Mbps) speeds with the computer. It is recommended to use USB2.0 which allows faster transfer rates. If your computer has a mix of USB1.1 and USB2.0 ports read the corresponding manual to be able to select the appropriate port.
2.1.3 Device detection
2.1.3.1 Windows 98SE
In Windows 98SE, install the device driver included in the CD-ROM.
You can also download the driver at www.energysistem.com.
- Run setup.exe file before connecting the PI350.
- Reboot after finishing installation.
- Connect PI350 to the computer. An 'Add New Hardware' procedure will start; follow the suggested steps.
- Check that the hard disk drive inside the player is listed on the 'Device Manager' tab.
2.1.3.2 Windows Me/2000/XP/Vista, Mac OS X, Linux
These operating systems have built-in support for external USB hard disks so you don't need to install any driver.
2.1.4 Partitioning and Formatting Hard Disk Drive
Newly purchased hard disks are not usually formatted or partitioned. Non-formatted hard disks cannot be detected by PI350; if so follow the steps below to make it usable by PI350.
2.1.4.1 Hard disk structure considerations and recommendations
PI350 supports:
Partition table format: MBR (Master Boot Record). Up to 8 partitions (3 primary + 5 logical units on an extended partition) or 4 primary partitions.
▶ File system: FAT32 and NTFS (NTFS features encryption and compression not supported).
The copy file/folder function performed by PI350 only works if the destination partition/volume is formatted as FAT32 file system. You can copy files or folders between HDD/USB/memory cards as long as the file system restrictions mentioned before are met.
Windows 2000/XP built-in disk manager does not allow FAT32 partitions larger than 32GB. You can use other operating systemes like: Windows 98/Me, Linux, Mac OS X to bypass this restriction.
Mac OS X has built-in read/write support for FAT32 but only read support for NTFS. If you want to write data on NTFS you can install NTFS-3G for Mac OS X [http://www.ntfs-3g.org/] at your own risk (requires MacFUSE [http://code.google.com/p/macfuse/]).
Taking into account all the previous points we recommend partitioning the disk into one FAT32 partition with 32 GB and (at least) one big NTFS partition.
To prevent file system corruption remember to follow the correct steps when disconnecting PI350 from the computer:
Windows: Use the 'Safely remove hardware' procedure
Mac OS: Discard the corresponding Desktop icon into Trash Bin before disconnecting PI350 from USB port.
2.1.4.2 Windows 98/Me

- Select [Start>Programs>MS-DOS] to open a MS-DOS window
- Type [fdisk] in the MS-DOS window and press the [Enter] key

- Say yes to the message 'Do you wish to enable large disk support (Y/N)?' by pressing [Y] and [Enter]

- Select option '5. Change current fixed disk drive' by pressing [5] and [Enter]

- Type the hard disk number for partitioning in 'Enter fixed Disk Drive Number' and press [Enter]. Caution: if the computer has many hard disks connected make sure you select the appropriate number that corresponds to PI350.
![MS-DOS Prompt - FDISK Auto Change Current Fixed Disk Drive Disk Drive Mbytes Fixed Usage 1 0029000 (C) 6519 4811 2 030030 X (1: MByte = $048576 Bytes) Enter Fixed Disk Drive Number (1-2)............[2] Press Esc to return to FDISK Options](/content/2026/05/1067714/images/5b1558fd2b6e670cfb16df931b494b0a3a7b2b69f225821bebcb1a49cadda898.jpg)
- Select option 'I. Create DOS partition or Logical DOS Drive' by pressing [I] and [Enter]
![MS-DOS Prompt - FDISK Auto FDISK Options Current Fixed disk drives: 2 Choose one of the following: 1. Create DOS partition or Logical DOS Drive 2. Set active partition 3. Delete partition or Logical DOS Drive 4. Display partition information 5. Change current Fixed disk drive Enter devices [1] Press…](/content/2026/05/1067714/images/0afa4c497b8fa0a86846e57b0282603ba86c8a477e6a252ab811d621bdfd7280.jpg)
- Select option 'I. Create primary DOS partition' by pressing [I] and [Enter]

- Wait for integrity check to complete
![MS-DOS Prompt - FDISK Auto Create Primary DOS Partition Current Fixed disk drives 2 Do you wish to use the secure available size for a Primary DOS Partition (IAO)............? [V] Press Esc to return to FDISK Options](/content/2026/05/1067714/images/d3dc4bb14543949ecc01201aba9f92efd93d8e495fcc57d3e4ad1adf012ce4cc.jpg)
![MS-DOS Prompt - FDISK Auto Create Primary DOS Partition Current fixed disk drives 2 Do you wish to use the maximum available size for a Primary DOS Partition (Y/N)............? [Y] Primary DOS Partition created, drive letters changed or added Press Esc to continue_](/content/2026/05/1067714/images/9e0c5d68022348ad4c354cb38185cd3818072d906142a6a1fb76d59d665598fe.jpg)

-
Say yes to the message 'Do you wish to use the maximum available size for a primary DOS partition and make the partition active (Y/N)?' by pressing [Y] and [Enter]
-
Type the absolute or relative capacity you want and press [Enter]. If you wish only one partition then type 100%.
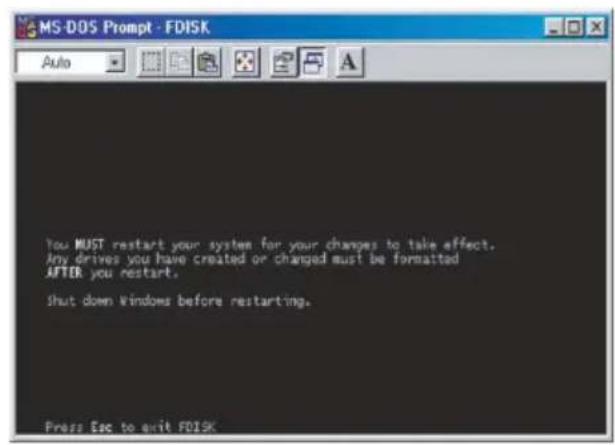
II. Integrity check is started again. After it is completed, a 'Primary DOS partition created, drive letters changed or added' message is displayed. Then press [Esc] to return to fdisk options screen.
-
In fdisk options screen press [Esc]. Then a message is displayed, saying that you must restart your system. Press [Esc] again
-
Type [exit] and [Enter] at the MS-DOS prompt to close the window
-
Disconnect PI350 from computer and then connect it again.
-
The new partition will show inside [My Computer]. Right-click the appropriate icon and select [Format]
-
When formatting is complete PI350 will be ready to use.
2.1.4.3 Windows 2000/XP/Vista
Note: there are slight changes in this procedure depending on the operating system version.

- Select [Start>Control Panel>Management Tools>Computer Management] and then [Disk Management] under [Storage] section
- In the list of connected disks locate the one that corresponds to PI350
- Activate the disk using MBR partition table (GUID partition table is not supported) if it is not already activated.

To create a FAT32 partition:
- Create a new partition by right-clicking an unallocated space in the disk and select [New partition] from the menu that appears

- 'New Partition Wizard' will show. Click [Next] to continue

- Select [Primary Partition] and click [Next] to continue

- Enter the desired partition size and click [Next] to continue

- Assign a drive letter to the partition (you can accept the letter suggested by the wizard), click [Next].

- Select [Format this partition with the following settings]; FAT32 as [File system] and then check [Perform a quick format]. Click [Next] to continue

- Check the settings are correct and click [Finish]
II. Windows will perform the requested operations to create the new FAT32 partition
To create a NTFS partition, follow the steps 4-10 but at step 9 select NTFS as [File system]
2.1.4.4 Mac OS X
You can use the built-in utilities to partition the hard drive (remember to use only MBR partition type and up to 4 primary partitions) and then format the partitions with FAT32 file system (HFS and HFS+ are not supported).
2.2 Memory cards
PI350 has two card readers:
▶ Compact Flash (CF)
- Secure Digital (SD)/SD High Capacity (SDHC), MMC (MultiMedia Card) and MS (MemoryStick)
When inserting a memory card check that the card's orientation is the right one. Do not force cards into the socket.
2.3 USB devices
Connect USB devices to the USBI.I host port.
Caution
Some USB devices (particularly USB-powered 2.5" hard disks) require more electric power than the 500mA specified in the USB standard. In this case, use the separate power adapter which should accompany the power-demanding device.
3. A/V CONNECTIONS
3.1 Video
3.1.1 Composite video (CVBS)

3.1.2 S-Video (separate video)

3.1.3 Component video (Y'PbPr)

3.2 Audio
3.2.1 Analog stereo audio

3.2.2 S/PDIF coaxia digital audio

3.2.3 S/PDIF optica digital audiol

4. REMOTE CONTROL
Do not forget to place the batteries into the remote control as they are not inserted to increase batteries' lifetime.
The remote control needs a clear path between PI350's front panel (where IR receiver is placed) and itself to work properly.
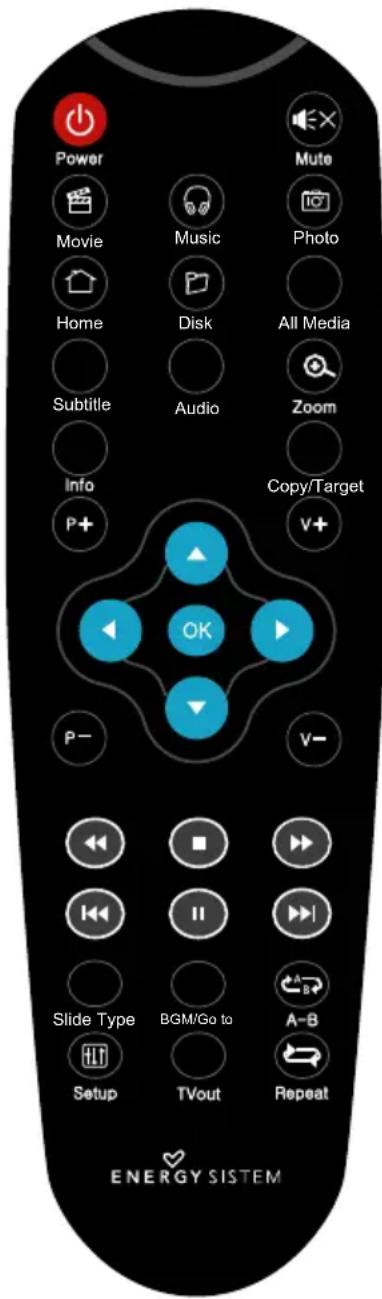
| Power Power | on/off. |
| Mute Mute sound on/off | |
| Movie Show | only movie files in the file selection screen |
| Music Show | only music files in the file selection screen |
| Photo Show | only photo files in the file selection screen |
| Home Go to main menu | |
| Disk Go to media selection screen (HDD, USB, CF/SD/MMC/MS) | |
| All Media Show | how all the files with playable file extensions in the selected media using a hierarchical view (folders) |
| Subtitle Change among subtitle options | |
| Audio Change between Mono left/Mono right/Stereo | |
| Zoom Extend | image to double size |
| Info Change | among showing remaining or elapsed time |
| Copy/Target | 1st press: select destination folder, 2nd press: select source file/folder |
| P+ Move to next page in file list | |
| P- Move to previous page in file list | |
| V+ Volume up | |
| V- Volume down | |
| OK Confirm selection / Play selected file | |
| Seek Next | |
| Fast Forward | |
| Pause | |
| Stop | |
| Seek previous | |
| Fast Reverse | |
| Slide Type | Slideshow transition mode selection |
| BGM/Go to | Background Music. Usable when a folder contains both photos and music. Press this button while a photo file is selected in the browser. |
| A-B | Repeat in section. 1st press: set starting point, 2nd press: set end point |
| Setup Setup | |
| TV out | Progressive or interlaced video output |
| Repeat | Change among repeat options |
5. DEVICE SETUP
5.1 System setup

▶ TV Type: Auto / NTSC / PAL
▶ Resolution: Interlace / Progressive
▶ Audio Out :
Analog / SPDIF/RAW / SPDIF/PCM
Defaults: Reset
5.2 Program Setup

▶ OSD Language
English / French / German / Italian / Spanish / Portuguese
Screen Saver
On / Off
▶ Slideshow Time
1 / 3 / 5 / 10 / 20 seconds
▶ Slideshow Mode
normal / implode / cross fade / random / blind:
T->B
5.3 Exit Exit the Setup menu.
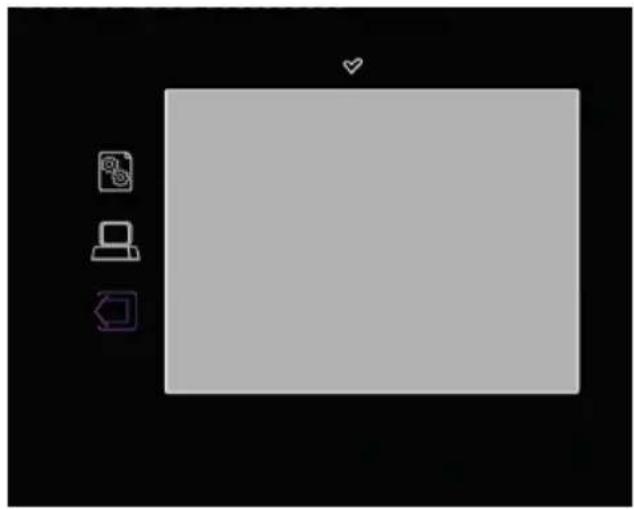
6. OPERATION
6.1 Media Player Main Menu

Movie. Video files list in the current media. Music. Audio files list in the current media. Photo. Photo files list in the current media.
6.2 Movie/Music/Photo Files playback
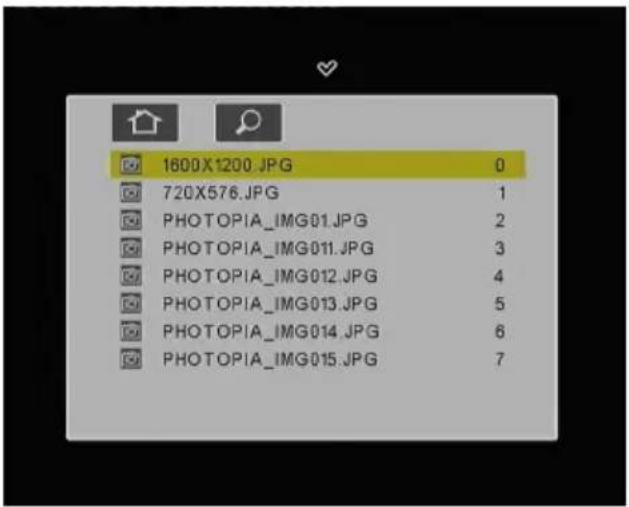
To play or view a file select it and press [OK] button on the remote control.
You can switch between Movie/Music/Photo/All Media views by pressing the matching button on the remote control.
6.3 All supported files playback
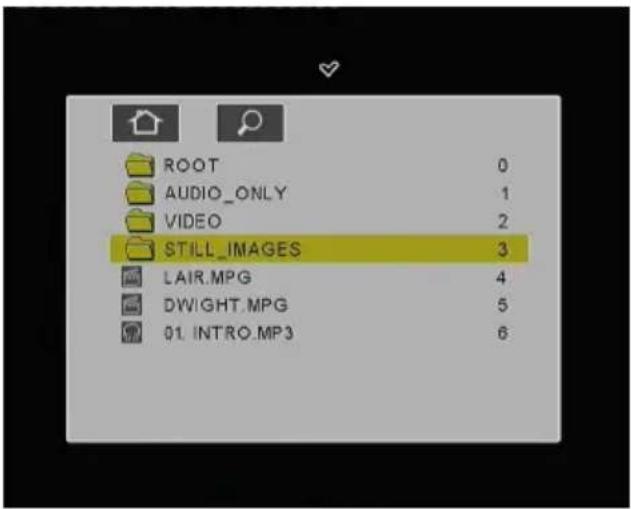
Note that this option is only available when you are in the Movie/Music/Photo list screen. Press [All Media] Button on the remote control or select icon to change view to All Media. In this view you can browse the folders in the selected volume using the arrow buttons.
6.4 Select media

Choose the media from which PI350 plays files. If the internal hard disk is selected you have to choose one partition. The CF, SD/MMC/MS and/or USB icon will show if the corresponding external device is connected to PI350.
6.5 File Copy Function
Note that the destination folder must be hosted in a FAT32 partition (NTFS is not supported).
First select the destination folder (that is, the folder you want the content be copied to) and press [Copy/Target] button. A 'TARGET DRIVE/DIR SET' message will show.
Then select the file or folder you want to copy. You can change the media if the file or folder is not in the media currently selected. Once the desired file/folder is selected you have to press [Copy/Target] button again. To inform of the copy progress the size and the percentage copied of the file currently being duplicated is shown at the top of the screen.
When the copy is done, a 'FINISH' message will be displayed.
If you want to stop the copy process, press the Stop button in the remote controller.
When the copy cannot perform due to storage capacity shortage a 'Failed' message will be displayed.
7. FIRMWARE UPGRADE
- Download the latest firmware from http://www.energysistem.com and copy the ROM file to any media supported by PI350 (internal hard disk, external USB storage device or memory card).
- If you choose to copy the file to the internal hard disk you will have to power on the PI350 in player mode (disconnect USB cable from computer) after that. If you copy the file in an external USB storage device or memory card you can connect those media while the PI350 is operating in player mode. The PI350 will find the ROM file automatically (even if placed in a subfolder) and will show the firmware upgrade screen automatically
WARNING: Do not power off the device while upgrading the firmware. This will render the device unusable.

- At the firmware upgrade screen you can press:
- OK (V). The upgrade process will begin and the PI350 will power off after the process is finished.
- Cancel (X) No modification will take place and the PI350 will power off.
- Once you have upgraded the firmware delete the ROM file from the media; because if a ROM file exists PI350 will automatically show the upgrade firmware screen and will shut down even if you choose Cancel (X).
WARRANTY
Energy Sistem Soyntec S.A. warrants its products to be free from defects in materials and workmanship at the time of purchase.
The warranty period is 36 months from the date of purchase.
WARRANTY PROCEDURE
- Visit the Support section at http://support.energysistem.com and select your product to view the FAQ (Frequently Asked Questions). The solution to your problem is very likely to have been already published there. You will also be able to download user manuals, user guides, drivers and updates.
- If you cannot find an appropriate solution in the Support section, you may send us your enquiry or warranty service request by email: support@energysistem.com
- Alternatively, you may prefer to contact the distributor from which you purchased the product, presenting the purchase receipt or invoice.
Specifications are subject to change without notice.
© 2009 by Energy Sistem®. All rights reserved.
TRADEMARKS
All company, brand and product names are trademarks or registered trademarks of their respective companies.


- PRECAUTIONS
- MEDIA
- 2.1 INTERNAL HARD DISK
- 2.1.1 DRIVE INSTALLATION
- 2.1.2 CONNECTION WITH COMPUTER
- 2.1.3 DEVICE DETECTION
- 2.1.3.1 WINDOWS 98SE
- 2.1.3.2 WINDOWS ME/2000/XP/VISTA, MAC OS X, LINUX
- 2.1.4 PARTITIONING AND FORMATTING HARD DISK DRIVE
- 2.1.4.1 HARD DISK STRUCTURE CONSIDERATIONS AND RECOMMENDATIONS
- PI350 SUPPORTS
- 2.1.4.2 WINDOWS 98/ME
- 2.1.4.3 WINDOWS 2000/XP/VISTA
- 2.1.4.4 MAC OS X
- 2.2 MEMORY CARDS
- 2.3 USB DEVICES
- A/V CONNECTIONS
- 3.1.2 S-VIDEO (SEPARATE VIDEO)
- 3.1.3 COMPONENT VIDEO (Y'PBPR)
- 3.2.2 S/PDIF COAXIA DIGITAL AUDIO
- 3.2.3 S/PDIF OPTICA DIGITAL AUDIOL
- REMOTE CONTROL
- DEVICE SETUP
- 5.1 SYSTEM SETUP
- 5.2 PROGRAM SETUP
- 5.3 EXIT EXIT THE SETUP MENU
- OPERATION
- 6.1 MEDIA PLAYER MAIN MENU
- 6.2 MOVIE/MUSIC/PHOTO FILES PLAYBACK
- 6.3 ALL SUPPORTED FILES PLAYBACK
- 6.4 SELECT MEDIA
- 6.5 FILE COPY FUNCTION
- FIRMWARE UPGRADE
- WARRANTY
- WARRANTY PROCEDURE
- TRADEMARKS
Brand : ENERGY SISTEM
Model : P1350
Category : Media player