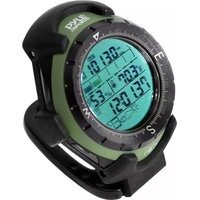
PACT1 - Sports Watch Pyle - Free user manual and instructions
Find the device manual for free PACT1 Pyle in PDF.


| Product Type | Sports Watch |
| Brand | Pyle |
| Model | PACT1 |
| Dimensions | 50 x 40 x 15 mm |
| Weight | 50 g |
| Power Source | CR2032 battery (included) |
| Battery Life | Approximately 12 months |
| Functions | Time, date, stopwatch, countdown timer, alarm, backlight |
| Water Resistance | 50 meters (5 ATM) |
| Display Type | Digital LCD |
| Strap Material | Rubber |
| Color Options | Black, Blue, Red |
| Care & Cleaning | Wipe with a soft, damp cloth. Avoid harsh chemicals. |
| Safety Precautions | Do not press buttons underwater; rinse with fresh water after saltwater use. |
| Spare Parts | Battery replacement (CR2032) available |
| Repairability | Battery replacement by user; other repairs by qualified technician |
| General Information | Ideal for daily wear and water sports; includes user manual |
Frequently Asked Questions - PACT1 Pyle
User questions about PACT1 Pyle
0 question about this device. Answer the ones you know or ask your own.
Ask a new question about this device
Download the instructions for your Sports Watch in PDF format for free! Find your manual PACT1 - Pyle and take your electronic device back in hand. On this page are published all the documents necessary for the use of your device. PACT1 by Pyle.
USER MANUAL PACT1 Pyle
- Unfortunately all altimeter are going to be affected by barometric pressure (unless they are GPS controlled or similar) as this is what they use to calculate their height.
- To offset this barometric effect on altimeter, please keep a check and re-adjust the altimeter when you are at known heights or re-setting the unit to zero at sea-level.
HYGROMETER
- The hygrometer displayed is the humidity of the case inside. Hence, it is influenced by your body.
- To display the actual humidity, the unit must be taken off the hand for about 15 to 30 minutes and must not be exposed to direct sunlight.
THERMOMETER
• The thermometer displayed is the temperature of the case inside. Hence, it is influenced by your body temperature.
- To display the actual temperature, the unit must be taken off the hand for about 15 to 30 minutes and must not be exposed to direct sunlight.
LOW BATTERY INDICATOR
- Please change battery if the Low Battery Indicator display. The Altimeter, Hygrometer and Thermometer need a good battery to operate. Unusually battery and voltage level will affect the accuracy of the sensors.


Art No.: PYLE_SPORTS-PACT1
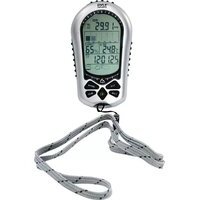
PROFESSIONAL
DIGITAL

ALTIMETER
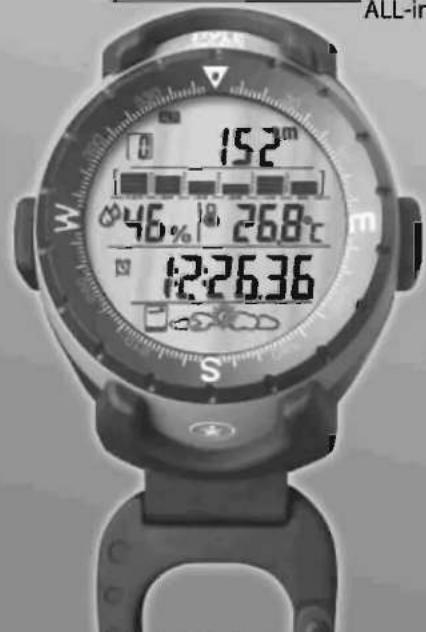
PACT1
INSTRUCTION MANUAL
www.pyleaudio.com
FEATURES
Altimeter
- Altitude Range (-500 to 9000 meter / -1600 to 29500 feet), Resolution of 1 meter / 1 feet
- Max. / Min. memory for Altitude
- Altitude History and Graphical display of the last 12 hour altitude readings
Altitude Alarm
- Stop Watch up to 9 hr 59 min 59.9 sec
-Altitude total gain or loss 44999 meter / feet
Barometer
- Pressure Range 300.0 hPa / mbar to 1100.0 hPa / mbar (8.84 InHg to 32.44 InHg)
- Resolution of 0.1 hPa / mbar (0.01 inHg)
-Max./Min. memory for Pressure
- Pressure History and Graphical display of the last 12 hours pressure readings
- Electronic Pressure Weather Forecast
(Sunny, Slightly Cloudy, Cloudy, Rainy, Storm)
- Pressure Trend Indicators
Thermometer
- Thermometer (-20°C to +60°C)
-°C / °F selectable
- Max. / Min. memory for Thermometer
Hygrometer
- Relative Humidity (20% \~95%)
- Max. / Min. memory for relative humidity
Time Keeping
- Time: Hr, Min, Sec.
- Calendar: Year, Day of Week, Month, Date, Automatic Calendar
-Alarm: 1 daily alarm
BATTERY INSTALLATION
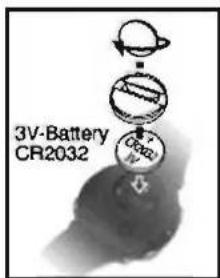
- Remove the battery cover from the bottom of the computer using a small coin. install the 3 V battery (CR2032) with the positive (+) pole facing the battery cover and replace the cover as in Fig. 1.
WARNING, Battery may explode if mistreated. Do not recharge, disassemble or dispose of in fire.
Fig. 1
DISPLAY ICONS & KEYS ILLUSTRATION
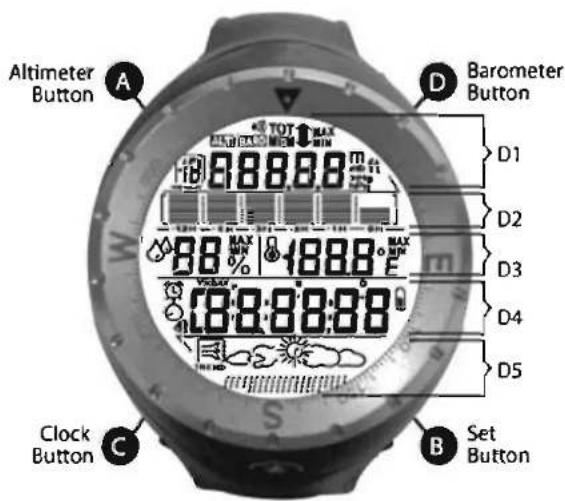
Icons:

TOT - Altitude Total

MEMORY - Memory mode

MAX - Maximum memory

MIN - Minimum memory


m Alumeter Unit

- History Display Window

MAX - Maximum memory

- Minimum memory

- Clock mode


- Weather Forecast Window

- Pressure Trend Indicator

- Battery Low
TO ENTER DIFFERENT MODE

other
| Mode | Value | | ---------------- | ----------- | | Barometer | 12:28.21 | | Clock | 12:35.26 | | Altimeter | 00:00.00 |WAKE UP AND SET YOUR COMPUTER
- Press button A until all segment on or re-install the battery
Altimeter Unit (Meter/Feet) Selection
- Right after all segment on, the "m" digit will start to flicker.
- To select m (Meter) or ft (Feet), press button B and then press button C to confirm.
Barometer Unit (mb / hPa/ inHg) Setting
- Right after the altimeter unit setting, the "mb/hPa" digits will then start to flicker.
- To select mb/hPa or inHg, press button B and then press button C to confirm.
Temperature Unit (°C/°F) Setting
- Right after the Barometer Unit setting, the Celsius digit will then start to flicker
- To select C or F, press button B and then press button C to confirm.
Clock and Alarm Setting
• TIME
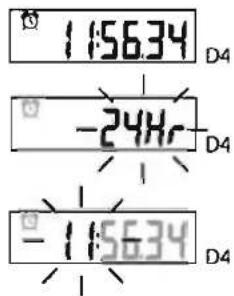
- Press button C to Time mode, press and hold button C until 12/24 flashing, change to 12 Hrs or 24 Hrs by press button B and confirmed by button C.
- Continuing to set the correct time by button B and button C.
- CALENDER
- Press button C to calendar mode, press and hold until 04 (Year) flashing, change to the desired year by press button B.
- Continuing to set the Month and Date by button B and button C.
- The day of week will automatically calculated and shown up.
- ALARM
- Press button C to Alarm mode, the alarm clock icon display at the left top.
- Press and hold button C until the Hr digit flashing, press the button B and button C to set the Hour and Minute.
- After setting the Alarm time, press button B to activate the Alarm function which a bell icon display 🔒 at the left down corner.
- Press button B again to off the Alarm function.


THE BAROMETER
- Press Button D to enter the Barometer Mode.
Barometer and Weather States Adjustment
- To adjust the barometer and weather states, weather forecast function can have a good initialization.
- Press Button D to Normal Mode and then hold Button D again, the barometer digits will start to flicker.
- Press Button B to set and then press Button D to confirm.
- Repeat Step 3 to set your desire digits.
- Right after the barometer digits setting, press the Button B to select different states and then press Button D to confirm.
Weather Forecast
- The unit is capable of detecting atmospheric pressure changes to predict the weather for the forthcoming 8 hours.
- The weather forecast is meant for the next 8 hours. It may not necessarily reflect the current weather situation.
- The accuracy of all general pressure-based technology weather forecast is about 70%, and therefore, cannot be held responsible for any inconveniences so caused by an inaccurate one.

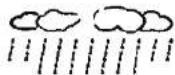
- According to the barometric change, the pressure trend will indicate the weather is going fine (Fig. 1 UP), stable (Fig. 2 Stable) a and nd going worse (Fig. 3 Down). There are five different states: Sunny, Slightly Cloudy, Cloudy, Rainy and Storm
Fig. 1

(Going Fine)
Fig. 2

(Stable)
Fig. 3
(Going Worse)


Sunny

Slightly Cloudy
Cloudy
Rainy

Storm
THE BAROMETER
Maximum and Minimum
- Press Button D to enter the Memory mode.
- The memory of maximum and minimum barometer will be scrolled on the display automatically.
- To reset the memory, press and hold Button B. At the same time, the memory for the hygrometer and the thermometer will be reset also.
- Press Button D to quit or left it return automatically to Normal Mode after 30 seconds.

D1
The Atmospheric Pressure Bar Chart
- Press Button D to enter the Bar Chart Mode
- The atmospheric pressure chart records the atmospheric changes for the past 12 hours and it will be scrolled on the display automatically.
• The history hours are :
0 H = Current - 1 H = Past hour
- 2 H = Past 2 hours
- 3 H = Past 3 hours
-6 H = Past 6 hours
-12H=Past 12 hours - To reset the records, press and hold Button B.
- Press Button D to quit or left it return automatically to Normal Mode after 30 seconds.

D1
THE ALTIMETER
- Press Button A to enter the Altimeter mode.
Setting the Altitude
- To keep a check and re-adjust the altimeter, it will lead to the most accurate reading.
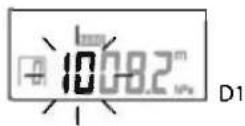
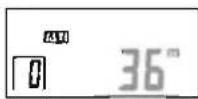
- Press Button A to normal mode and then hold Button A again, the altimeter digits will start to flicker
- Press Button B to set and then press Button A to confirm.
- Repeat Step 3 to set your desire digits
D1

D1
Zeroing the Altitude (Sea-level)
- To re-setting the height at sea-level, press Button A to Normal Mode.
- Hold Button A again until all digits are reset to zero.

D1
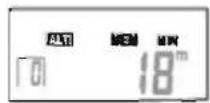
Maximum and Minimum
- Press Button A to enter the Memory mode.
- The memory of maximum and minimum altitude will be scrolled on the display automatically.
- To reset the memory, press and hold Button B. At the same time, the memory for the hygrometer and the thermometer will be reset also.
- Press Button A to quit or left it return automatically to Normal Mode after 30 seconds.

D1
D1
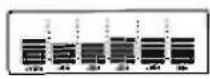
The Altimeter Bar Chart
- Press Button A to enter the Bar Chart Mode.
- The altimeter bar chart records the altitude changes for the past 12 hours and it will be scrolled on the display automatically.
The history hours are:
0 H = Current
-1 H = Past hour
-2 H = Past 2 hours
-3 H = Past 3 hours
-6 H = Past 6 hours - 12 H = Past 12 hours
- To reset the records, press and hold Button B.
- Press Button A to quit or left it return automatically to Normal Mode after 30 seconds.

D1
D2
The Total Altitude Displacement
- Press Button A to enter the Altimeter Normal Mode.
- To start a trip, press Button B to start the trip timer and then the total altitude displacement will be recorded automatically.
-
To stop a trip, press Button B again to stop the trip timer and then the total altitude displacement will be stopped to count.
-
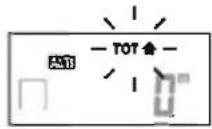
To read the Total Altitude Displacement, press Button A to enter the Total Altitude Displacement Mode and then press Button B to select the total displacement for the gain (TOT ▲) or the loss (TOT ▼).
-
Press Button A to quit or left it return automatically to Normal Mode after 30 seconds.
D1

D1

From A to B. (the gain TOT▲)
Total attitude displacement for the gain (TOT) = d1+d2+d3
From Ⓑ to ⓒ, (the loss T0T▼).
Total altitude displacement for the loss (TOT) = d5+d6+d7
The Altimeter Alarm
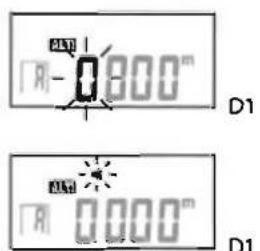
- Press Button A to enter the Altimeter Alarm Mode.
- To set the target altitude for the Alarm, press and hold Button A until the digit starts to flicker.
- Press Button B to set the digits and then press Button A to confirm.
- Repeat Step 3 to set your desire digits.
- After setting the target altitude, press Button B to activate or deactivate the alarm.
- For the Altimeter Alarm sound, it will . Beep..Beep..Beep for 1 minutes and the UP icon flashing; when the altitude come across the target in ascending. . Beep Beep.. Beep Beep.. Beep Beep for 1 minutes and the DOWN icon flashing; when the altitude come across the target in descending.
- To read the target altitude and the alarm setting, press ButtonA to the mode and then press ButtonA to quit or left it return automatically to Normal Mode after 30 seconds.

THE HYGROMETER
- A build-in sensor measure humidity and shows on the display.
- To call the Maximum and Minimum Memory, press Button D to the mode.
- To reset the memory, press and hold Button B. At the same time, the memory for the barometer will be reset also.
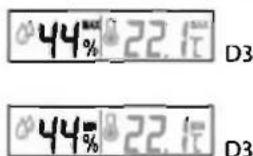
The Thermometer
- A build-In sensor measure temperature and shows on the display.
- To call the Maximum and Minimum Memory, press Button D to the mode.
- To reset the memory, press and hold Button B. At the same time, the memory for the barometer will be reset also.

Back Light
- Press button C to turn on the light.
- HYGROMETER
- THERMOMETER
- LOW BATTERY INDICATOR
- DIGITAL
- ALTIMETER
- PACT1
- INSTRUCTION MANUAL
- FEATURES
- Barometer
- Time Keeping
- BATTERY INSTALLATION
- WAKE UP AND SET YOUR COMPUTER
- THE BAROMETER
- Barometer and Weather States Adjustment
- Weather Forecast
- Maximum and Minimum
- The Atmospheric Pressure Bar Chart
- THE ALTIMETER
- Setting the Altitude
- Zeroing the Altitude (Sea-level)
- The Altimeter Bar Chart
- The Total Altitude Displacement
- The Altimeter Alarm
- THE HYGROMETER
- The Thermometer
- Back Light
Brand : Pyle
Model : PACT1
Category : Sports Watch