
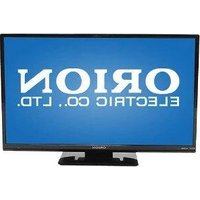
TV32PL690D - Television ORION - Free user manual and instructions
Find the device manual for free TV32PL690D ORION in PDF.


| Product Type | LED TV |
| Screen Size | 32 inches (81 cm) |
| Resolution | HD Ready (1366 x 768) |
| Refresh Rate | 60 Hz |
| Dimensions (without stand) | 732 x 432 x 76 mm (WxHxD) |
| Weight (without stand) | 4.2 kg |
| Power Supply | AC 100-240V, 50/60Hz |
| Power Consumption (typical) | 50 W |
| Standby Power Consumption | < 0.5 W |
| Connectivity | 2x HDMI, 1x USB 2.0, 1x VGA (PC), 1x Composite AV, 1x RF Antenna, 1x Headphone out |
| Built-in Tuner | DVB-T/T2/C, DVB-S/S2 |
| Audio Output | 2 x 8 W speakers, Dolby Digital |
| Smart TV Features | None (basic TV) |
| Remote Control | Yes (batteries not included) |
| Wall Mount Pattern | VESA 200x100 mm |
| Cleaning Instructions | Wipe with soft dry cloth, no abrasive cleaners |
| Safety Features | Anti-tip strap, built-in stand, child lock |
| Spare Parts Availability | Remote control, stand base, screws (contact support) |
| Documentation | User manual (downloadable PDF) |
Frequently Asked Questions - TV32PL690D ORION
User questions about TV32PL690D ORION
0 question about this device. Answer the ones you know or ask your own.
Ask a new question about this device
Download the instructions for your Television in PDF format for free! Find your manual TV32PL690D - ORION and take your electronic device back in hand. On this page are published all the documents necessary for the use of your device. TV32PL690D by ORION.
USER MANUAL TV32PL690D ORION
Operating Instructions
LCD-TV
Model-No.:
TV26PL690
TV32PL690(H)
TV32FX6900(H)
TV40FX6900(H)

DVB
Digital Video Broadcasting
DOLBY.
DIGITAL PLUS
TV32PL690H
TV32FX6900H
TV40FX6900H
Before operating the unit, please read this manual thoroughly.
Features
• 16:9 LCD screen
- On-Screen Language Display in 15 languages (English, Spanish, German, French, Italian, Swedish, Dutch, Russian, Portuguese, Turkish, Greek, Finnish, Polish, Danish or Norwegian)
• NICAM/German A2 STEREO Hyperband cable DVB-T Combi-Tuner
• Electronic Progr. Guide (EPG) for DVB-T
• 2000 Channel position memory
- Videotext – Fastext/TOPtext
- Remote control
- Sleep timer
- Wide-aspect-screen
- Scart socket
- COMPONENT input
• Headphone Jack (for mini plug)
• PC Connection (VGA) (see page 22)
- HDMI-connections
• CE Symbol Guaranteeing Compliance to Currently Effective European Standards
Headphone Warning
Loud music can damage your hearing irreversibly, therefore do not set the volume to a high level when listening through headphones, particularly for extended listening periods.
Battery notice (valid in EU only)
Look after our environment - contact your local authorities for advice on how to safely dispose of exhausted batteries. The crossed out wheelie bin symbol indicates that used batteries should not be disposed of with your normal household waste! A separate collection system for used batteries is in place to allow the correct treatment and recycling in accordance with current legislation. Please contact your local authority for details on collection and recycling schemes in your area.
Information for the DVB-T function
- Any function relative to the digital television (with the DVB logo) is available only within the country or area where such signals are transmitted. Verify with the salesman if it is possible to receive a DVB-T signal in the zone where you live.
- A DVB-T antenna (not supplied) must be connected for DVB-T reception.
- Even if the television conforms to the DVB-T specifications, the compatibility to future digital DVB-T transmissions is not guaranteed.
- Some digital television functions may not be available in some countries.
- The DVB-T system present in this device is FTA (Free to air).

Waste Disposal Tip
This symbol means that your electrical and electronic equipment should be disposed at the end of its life separately from your household waste. There are separate collection systems for recycling in the EU. For more information, please contact the local authority or your retailer where you purchased the product.
Equipment connected to the protective earthing of the building installation through the mains connection or through other equipment with a connection to protective earthing – and to a cable distribution system using coaxial cable, may in some circumstances create a fire hazard. Connection to a cable distribution system has therefore to be provided through a device providing electrical isolation below a certain frequency range. Utstyr som er koplet til beskyttelsesjord via nettplugg og/eller via annet jordtilkoplet utstyr – og er tilkoplet et kabel-TV nett, kan forårsake brannfare.
| Features......2 |
| Contents......3 |
| Important safety information......4 |
| Location of controls......7 |
| Remote Control......8 |
| Antenna connection......10 |
| Auto setup......11 |
| Quick guide for Menu operation......11 |
| Selecting the input source......12 |
| On-screen Language Selection......12 |
| Station search......12 |
| Changing the order of stored channels......12 |
| Update Scan......12 |
| Auto Synchronization......13 |
| Basic Operation......13 |
| Teletext | 13 |
| Stereo reception in analogue cable TV channel mode | 14 |
| Remarks on DVB-T system | 15 |
| Password Setup (Parental lock) | 16 |
| EPG (Electronic Program Guide) | 16 |
| Picture size and resolution | 17 |
| Picture format | 18 |
| Other convenience functions | 19 |
| PC connection | 22 |
| Connecting an HDMI or a DVI device to the HDMI input | 23 |
| Connection to other equipment | 24 |
| Troubleshooting table | 26 |
| Specifications | 26 |
Viewing distance (TV32F.../TV40F...)
Your new FullHD-TV has been designed to display high-resolution HD-signals in the very best quality. Currently the following HD-sources are available:
- DVB-S2-HDTV satellite receiver
- HDTV cable receiver
- Blu-ray player.
Only above sources offer highest-quality HD-video at top-resolution, which your new FullHD-TV lets you enjoy now. To play such signals at full resolution, it is necessary to connect the sources by HDMI-cable (not supplied). The recommended closest viewing-distance for such HD-signals is: 1 meter. You may also watch from greater distance, however you might not catch all the HD-video's details.
Standard video
All other sources offer standard-resolution of max. 576 lines, e.g. analog & digital cable-TV, MPEG-2-DVB-T, DVB-S-satellite receiver, DVD-Player, VHS, etc.
For all 16:9-videos the analog cable-TV transmits only 432 lines. For comparison: HD-sources deliver 1080 lines. Having more than twice the amount of lines, the HD-video looks a lot more detailed compared to analog TV. Or vice versa: analog video supplies a very poor quality if viewed on FullHD-TVs. Thus the recommended closest viewing-distance for analog cable-TV is: 2,50 meters. You may watch from a greater distance though. If, however, you decide to watch such poor signal from a distance closer than recommended, you will notice the signal's inherent poor quality.
How to improve the analog cable-TV's picture-quality.
Actually analog cable has a 60-year history and is now quite old-fashioned. Cable supplier will not improve the analog-video-standard any more. However, you may upgrade to digital-cable-quality for relatively low cost. Please ask your cable-supplier for more detail concerning the low-cost trial-period, free digital receiver, etc.
* DVB and the DVB logos are trademarks of the DVB Project.
* Dolby is a trademark of Dolby Laboratories. (TV26.../TV32.../TV40...)
* Manufactured under license from Dolby Laboratories. Dolby and the double-D symbol are trademarks of Dolby Laboratories. (TV32...H/TV40...H)
* THIS PRODUCT IS LICENSED UNDER THE AVC PATENT PORTFOLIO LICENSE FOR THE PERSONAL USE OF A CONSUMER OR OTHER USES IN WHICH IT DOES NOT RECEIVE REMUNERATION TO (i) ENCODE VIDEO IN COMPLIANCE WITH THE AVC STANDARD ("AVC VIDEO") AND/OR (ii) DECODE AVC VIDEO THAT WAS ENCODED BY A CONSUMER ENGAGED IN A PERSONAL ACTIVITY AND/OR WAS OBTAINED FROM A VIDEO PROVIDER LICENSED TO PROVIDE AVC VIDEO. NO LICENSE IS GRANTED OR SHALL BE IMPLIED FOR ANY OTHER USE. ADDITIONAL INFORMATION MAY BE OBTAINED FROM MPEG LA, L.L.C. SEE HTTP://WWW.MPEGLA.COM
* HDMI
HDMI, the HDMI Logo, and High-Definition Multimedia Interface are trademarks or registered trademarks of HDMI Licensing LLC in the United States and other countries.
Important safety information
This unit has been produced according to all current safety regulations. The following safety tips should safeguard users against careless use and the dangers connected with such use.
- Although this appliance has been carefully manufactured and rigorously checked prior to leaving the factory, as with all electrical appliances it is possible for problems to develop. If you notice smoke, an excessive build-up of heat or any other unexpected phenomena, you should disconnect the plug from the mains power socket immediately.
- Ensure that the unit is sufficiently ventilated! Never place next to or underneath curtains!
- This set should be only be connected to an AC 220\~240V / 50Hz mains power supply - do not attempt to connect it to any other type of supply.
- The socket-outlet must be installed near the equipment and easily accessible.
- Any repairs must be carried out by qualified service personnel only.
- Do not open this unit. A non-expert attempting to repair the unit could be dangerous and potentially cause a fire hazard.
- Keep away from rodents. Rodents (and also cockatiels) enjoy biting into electric flexes.
• The animal can cause a short cut (fire hazard!) and receive a fatal electric shock
- Always hold plug when pulling out plug from power mains supply system. Do not pull on flex. The flex can become overloaded and cause a short cut.
- Never wet clean. Only use a damp cloth, the same as when cleaning furniture.
- Do not submerge in or under water!
- Set up unit so that no one is able to trip over the flex.
- This unit is recommended to be installed on shock-free benches in order to avoid any danger from falling.
• Take note that toddlers can pull the unit down from the table or cupboard by means of its flex. Children can hurt themselves when doing this.
- Do not use the unit near heat sources. The casing and flex could be damaged by the impact of heat.
- Watch out for kiddies copying what adults do! Do not stick any objects through the vents!
- The vents must remain open! No newspapers or covers should be put on the unit!
- The remote control is not a toy! Toddlers could swallow the batteries. If a battery has been swallowed, please seek out a doctor immediately.
- The screen is made of glass and can break if damage is done to it. Be careful when collecting sharp-edged glass splitters.
- You could be hurt or the unit could be damaged.
- If the unit is mounted on the wall, contact the shop where you purchased the unit for advice, and leave the installation work to experts. Incomplete installation work can cause you injuries.
• Taking fall-prevention measures
- If these measures are not taken, the unit can fall and you could be injured
- Contact the shop where you purchased the unit to obtain full details of the measures.
- When a TV stand is used,
- Ensure the unit is fully on the stand and placed in the centre.
- Do not leave the stand doors open.
- You could be hurt as a result of the unit falling or breaking, or your fingers being caught or jammed. Take extra precautions if you have children.
- Avoid placing the unit on any surfaces that may be subject to vibrations or shocks.
- To protect the unit during a thunder storm unplug the AC power cord and disconnect the antenna. Caution: Do not touch the antenna connector.
- When you leave your home for a long period of time, unplug the AC power cord for safety reasons.
- The unit becomes warm when in operation. Do not place any covers or blankets on the unit in order to prevent overheating. The ventilation holes are not to be blocked. Do not set up near radiators. Do not place in direct sunshine. When placing on a shelf leave 10cm free space around the whole unit. Make some space around TV (Correct shelf assembly).
- The apparatus shall not be exposed to dripping or splashing and that no objects filled with liquids, such as vases, shall be placed on the apparatus. Liquids spilled into the unit can cause serious damage. Switch the set OFF and disconnect the mains power supply, then consult a qualified service person before attempting to use the unit again.
Please pay attention to the following instructions in order to avoid receiving a life-threatening electric shock:
- Protect against moisture. Never use in the bath or sauna.
- Never use near a bath, shower or swimming pool.
- Never use the unit if it has got wet. This can also mean condensation moisture, which occurs in the winter when the cold unit is brought into a heated flat. Wait before operating the unit especially after it has been transported in the winter, until the cold unit has adjusted to the room temperature.
- Do not place any heavy objects on the flex. Electrical isolation could be damaged
- Never wrap insulating tape around damaged flexes or on damaged plugs. These should be repaired or replaced by qualified service personnel.
- Never use this unit if the cabinet is defective. Do not make provisional repairs if the cabinet is damaged - this should be replaced by a new cabinet if necessary.
- Unplug the unit from the mains power supply prior to the cleaning of the unit.
Important safety information
How to attach the stand
NOTE:
- Unplug the AC cord from the AC INPUT terminal.
- Before beginning this process, assure that TV is laid on a clean, safe, and cushioned space to avoid any damage to the unit.
- Do not touch or press the TV-screen, glass might break under pressure.
- Be sure to follow the instructions. Incorrect installation of the stand may result in the TV falling over.
1) Place the TV on its front onto a table.
2) Align the stand's bottom-plate (supplied) as seen here. It will fit in only one direction.
3) Hold the unit and attach the stand slowly. Finally secure the bottom-plate with screws (supplied).


NOTE:
To detach the stand, perform these steps in reverse order.
Dismantling the base
For wall mounting, the base must be dismantled. To do this, remove screws (M, see page 10) from the back.5 Take off the base entirely.
Important safety information
WARNING
- To prevent fire, never place any type of candle or open flame on the top or near the TV set.

Moving the unit or carrying by hand
When the unit is moved a long way, unplug the power cord and disconnect the antenna, connecting cables and any fall-prevention apparatus.
- Moving without doing so could result in damage to the power cord, a fire, electric shocks or injuries from dropping the unit.
Ensure that unpacking and transfer of the unit is carried out by two or more people and that the unit stays upright when doing this.
When the TV stand has casters, remove caster cups from the stand and push it while supporting the unit.
- Ensure that you support the unit when the stand is pushed, as this can cause the unit to fall and you could be injured.
- The appliance could leave indentations in wooden tables with extremely soft wooden surfaces due to its heavy weight.
- Furniture polish could corrode and dissolve rubber feet. Black imprints could be visible on the table. You should therefore only use TV benches, which have been constructed for this specific purpose.
Secure the casters when the unit is installed on a TV stand with casters.
- The stand can move and you could be hurt if the casters are not secured.
Remove casters when the stand is placed on a soft surface such as a mat and carpet.
The distance between eyes and the screen should be about 3 \~ 4 times as long as height of the screen.
- Viewing from too close a distance can cause strain for your eyes.
When installing the Monitor on a table, be careful not to place the edge of its stand.
- This may cause the Monitor to fall, causing serious injury to a child or adult, and serious damage to the Monitor.
Possible Adverse Effects on LCD Screen: If a fixed (non-moving) pattern remains on the LCD screen for long periods of time, the image can become permanently engrained in the LCD TV panel and cause subtle but permanent ghost images. This type of damage is NOT COVERED BY YOUR WARRANTY. Never leave your TV on for long periods of time while it is displaying the following formats or images:
- Fixed Images, such as stock tickers, video game patterns, TV station logos, and websites.
- Special Formats that do not use the entire screen. For example, viewing letterbox style (16:9) media on a normal (4:3) display (Black bars at top and bottom of screen); or viewing normal style (4:3) media on a widescreen (16:9) display (Black bars on left and right sides of screen).
Attention!
Cleaning instructions for your LCD TV.
Safety note:
Before you start to clean, switch the set's power off completely and disconnect the plug from the mains power supply.
Be careful not to scratch the plastic coated front panel - it is highly vulnerable to accidental scratching (e.g. by fingernails or other sharp items). (While cleaning, do not wear jewelry) that could cause surface scratching (such as rings, wrist-watch, etc.). Use a lint-free cloth and pure water to clean with, but make sure the cloth is thoroughly wrung out so that it is just damp and not soaking wet - also make sure that the cloth is free from any dirt that could cause scratching to the surface.
Wipe the set clean using minimal pressure.
Do not use standard window cleaning fluid. Its alcohol / ammonia will dissolve the front window's coating. Never use solvent or thinner. Never use special cleaners which are designed for cleaning PC Monitors or CRT TVs. Finally carefully rub dry with a clean dry lint-free cloth.
Do not use paper towels or tissues to clean the set - paper can disintegrate when wet or may leave a trail of dust behind. Some paper can also be abrasive and scratch your screen.
Saving electricity
The backlight's brightness (power) can be set manually to match the surrounding illumination. At bright daylight the backlight's full power is required to perform a brilliant result. During lower illumination, e.g. at night, you set a lower backlight-brightness (see p. 19). Figures lower than 100 reduce the brightness, save energy and offer a dazzlefree fatigueless watching at night.
Location of controls

Description of Indicators and Controls
- Remote sensor
- ⏻ (Standby/On) indicator: The LED indicator lights up red in standby mode, and green in the power ON mode.
- Loudspeakers
- ⏻ (Power)-key: Preparation: Connect power-cable to AC220\~240V/50Hz.
a) If standby-LED is red, you may power-off. To power-off, press power-key 1x and release. For confirmation, standby-LED will change to dark.
b) If standby-LED is off, you may power-on. To power-on, press power-key 1x and release.
For confirmation, standby-LED will change to green.
- (Channel) ↘ buttons: Press to change to a higher numbered channel set into memory. Press √ to change to a lower numbered channel set into memory. In Menu: Setting.
- ▲ (Volume) +/- buttons / In Menu: Setting.
- MENU button: To display the menu screen.
- TV/AV/PC/ENTER button: Select input mode for TV/AV/COMPONENT/HDMI/PC. In Menu : Using as ENTER button.
For complete disconnection from the mains power supply, remove the supplied power cable from the socket.
Remote Control

| Function Page | ||
| Enter standby mode or turn on the power 11 | ||
| Display program information 13 | ||
| Select an input source 12 | ||
| Select picture format 18 | ||
| Select channel | 13 | |
| Select Teletext page | 14 | |
| Enter password | 16 | |
| Select between the available broadcast audio | 13, 14 | |
| Display the EPG (Electronic Progr. Guide) 16 | ||
| Activate menu 11 | ||
| Exit the menu screen | ||
| Cursor buttons | ||
| MemorizeChannel List 13 | ||
| Turn the sound on/off 13 | ||
| Display the subtitle | ||
| Volume | ||
| Still picture | 13 | |
| Hold the text page | 14 | |
| Switches between the present channel and the last selected channel | 13 | |
| Sub Page selection | 14 | |
| Change the TV channel or Teletext page up or down | 13 | |
| Teletext ON / TV+Text / OFF 14 | ||
| Reveal quiz page answers 14 | ||
| Teletext enlargement 14 | ||
| Fasttext/TOPtext buttons 13 | ||
Remote Control
Install the batteries
Use batteries type UM4 (AAA-Size).
Do not use old or weak batteries. The remote control may not work properly with a weak voltage from such batteries. Replace exhausted batteries with new ones. Never try to recharge normal batteries - this could cause an explosion.
Note:
- Exhausted batteries can leak corrosive electrolyte, which may cause damage to the remote control - therefore remove exhausted batteries immediately.
- Batteries should not be exposed to excessive heat such as sunshine, fire or the like.
1 Open the battery compartment.

2 Install the batteries as shown below, ensuring the correct polarity.

3 Close the battery compartment.

Distance of Remote Control Operation

The remote control handset will not work properly in the following cases:


a) If bright sunlight directly beams onto the unit front. b) If an obstacle is placed between the unit and the handset.

d) If the batteries are weak.

c) If the batteries have not been installed according to their polarities.
Antenna connection
Note: Before you connect other appliances:
- To avoid potentially damaging your set, make sure all items are switched off and disconnected from the mains power when you make the connections.
- Arrange the desired connection.
- When you have finished making the connections, reconnect the mains power to the unit and switch it back on.
Connect your antenna as shown below (A). Connections to other equipment is explained further on P.24, 25. If you have problems with reception, consult a specialist of antenna.

(A) DVB-T antenna: Connect a DVB-T antenna if DVB-T is already available in your transmission area. Or connect to an analogue cable connection.
The built-in tuner receives all analogue cable programmes and DVB-T channels.
(B) C.I. slot: for DVB-T-PayTV (if PayTV-provider supports this).
(C) HEADPHONE Jack: Plug headphones with a mini plug (3.5 mm) into this jack.
(D) AV2 input: Input for analogue AV-Signal (Composite) See P.25.
(E) DIGITAL AUDIO COAXIAL output: digital output for DVB-T sound (see page 25).
(F) COMPONENT input: See P.25.
(G) Scart socket (AV1): For the connection of scart cable. See P.24, 25.
(H) PC-INPUT (PC): See P.22.
(I) PC/DVI AUDIO Input: See P.22, 23.
(J) HDMI/DVI (TV32F.../TV40F...: HDMI/DVI1/HDMI2/3 / TV26P.../TV32P...: HDMI/DVI1/HDMI2) input: See P.23.
(K) Power supply: Connect the supplied power cable to an AC 220-240V/50Hz mains power supply only - do not attempt to connect it to any other type of supply. Never try to repair a damaged AC power cord with isolation-tape - this should be repaired by a specialist or replaced. Do not let your pet loose near the cable. Animals biting into the cable could receive a fatal electric shock, and could cause a hazard to others.
(L) Bracket holes: Fix a wall mounting bracket (not supplied) here.
(M) To hang the television on a wall, remove these screws (TV26.../TV32...: x 2/TV40...: x 3) and then remove a stand.
Before performing work spread cushioning over the base area to lay the TV on.
Auto setup
The built-in tuner allows to receive TV-channels from analog cable-tv or DVB-T. If, however, you are receiving TV-channels via separate receiver, no need to run the TV's auto-tuning. Just set your language here and then jump to next chapter.
When initially operating the TV after purchase, the menu: 'Auto Installation' will appear automatically by default. Do start 'Auto Installation' by connect DVB-T antenna-cable, if available. Wait for the TV to save all digital TV-channels. When finished, disconnect digital cable-tv. Now connecting analog cable-tv, if available. Re-run auto-tuning for analog tv-channels (see page 12, update scan).
Note: If analog cable-tv is not available (or you discontinued using), do connect a DVB-T-antenna (not supplied) and start auto-tuning for DVB-T-channels.
Preparation:
Press (Power) on the unit or press (On/Standby) on the remote.
1 Auto Installation menu will appear. Press ▲ or ▶ to select desired language. Then press ▶.

2 Press ▲ or ▶ to select your country. Then press ▶.

3 Press ▲ or ▶ to select Home. Then press ▶.

4 If you cancel Auto Power Off (see page 20), press ▲ or ▶ to select Off. Then press ▶.

5 TV will search for Digital TV-channels at first. Connect your DVB-T antenna now. Continue with ENTER to start auto tuning. The tuning's progress will be displayed in percent for confirmation.

Note: • Please be patient - the Auto Tuning process can take several minutes to complete.
6 When the tuning for Digital TV-channels is completed, you will be asked if you want to proceed to autotuning for Analog TV-channels. If you wish to start autotune Analog TV-channels, connect your Analog cable-TV antenna and press ENTER.
Note:
- If you do not wish to carry out the autotuning for Analog TV-channels, press RETURN to exit the menu.

7 When the display reads 100%, press ENTER to finish.
Note:
- To cancel the auto tuning, press RETURN during the process.
THE AUTOMATIC TUNING PROCESS WILL ONLY START BY ITSELF THE FIRST TIME YOU SWITCH THE SET ON. HOWEVER YOU CAN RESTART THIS PROCESS VIA THE MENU SYSTEM (see page 12).
- If you could not set up a correct pair of language and country in this auto setup process, you will be able to make your preferred language selection as illustrated in page 12 (On-screen Language Selection).
Quick guide for Menu operation
Make sure the antenna connection and power supply are connected as per the description on previous page.
Preparations:
- Turn on the unit with the (Power) button on the unit. The (On/Standby) indicator will light up in green.
Call Menu and for example: Select Auto Scan.
1 Press INPUT SELECT. Select TV. Press MENU.
2 Press ▲ or ▼ to select 📄 then press ▶.
3 Press ▲ or ▼ to select Channel Set Up, then press .

- If the channel which Channel Block (P.16) was set exits. Password entering screen will appear. Then enter the password.
4 Press ▲ or ▼ to select Auto Scan.

... on the following pages the MENU can be called in the same way as here.
5 Press MENU to exit the menu.
Note:
- If no buttons are pressed for more than approx. 60 seconds, the Menu screen disappears automatically.
Selecting the input source
Press INPUT SELECT to view a signal from another device connected to your TV, such as a VCR or DVD player. You can select each input source depending on which input jacks you used to connect your devices.
To select the video input source, press INPUT SELECT or ▲/▼.
Then press ENTER within 6 seconds.
On-screen Language Selection
1 Select (unless you have already selected when the set was first switched on) then press ▶.

2 Press or to select the desired language.
3 Press MENU to exit the menu.
Station search
Warning! All previously saved channels are deleted in Step 2. A new channel search then starts automatically.
Preparation:
Make sure your antenna is connected to the antenna input (see P.10). Select TV (see above). Then press MENU.
1 Select Channel Set Up option in 📄, then press ▶.
2 Select Auto Scan, then press

3 TV will search for Digital TV-channels at first. Continue with ENTER to start auto tuning.

Note:
Press RETURN if you return to step 2.
4 The automatic scanning will search for available Digital TV-channels and should store the channels in the correct order.
5 When all DVB-T programs have been stored (100%), you will be asked if you want to proceed to autotuning Analog TV-channels. If you wish to start the tuning Analog cable-TV channels, connect your Analog cable-TV antenna and press ENTER.

Note:
Press RETURN x 2 if you return to step 2. When all programs have been stored (100%) press MENU to exit the menu.
Changing the order of stored channels
The Automatic station presetting stores the stations in a specific order. However, this order can be changed if you wish.
1 Press MENU. Select Channel Set Up option in , then press ▶
2 Select desired option, then press

Description about the each setting option:
Channel Skip: Press ▲ or ▼ to select the channel that you want to skip, then press ENTER.√mark will appear.
Channel Sort: Press ▲ or ▼ to select the channel that you want to move, then press ENTER.
Press ▲ or ▼ to select the position that you want to move the channel to, then press ENTER.
Channel Edit: Press ▲ or ▼ to select the channel that you want to edit, then press ENTER. Following options are displayed.
- Channel Number: Press 0-9 buttons to enter the desired memory position number, then press ENTER.
- Frequency (only for analogue TV): You can also directly enter the frequency value with Number buttons (0-9), then press ENTER.
- Colour system (only for analogue TV): Colour System has already been preset to Auto. Do not change anything here. Any changes can cause picture or sound disruption.
- Sound system (only for analogue TV): The correct sound system is already installed. Any changes can cause sound disruption.
Fine (only for analogue TV): Already correctly and optimally installed. Do not change anything here. Any changes can cause picture or sound disruption. The video can also be affected.
Signal Status (only for digital TV): You can verify the signal strength and quality of the selected service here. If necessary, adjust the direction of the antenna to obtain the maximum signal strength.
3 Press MENU to exit the menu.
Update Scan
If you wish to search and store only new channel, perform the Update Scan at step 2 of Station search (on the left). The current channel store is remained and only new channel will be stored to channel store.
Auto Synchronization
This feature can display the time based on the DVB signal information.
If you wish to set the time manually, select "Off" as follows and then perform the Date and Time options.
1
Select /Time Setup/Time/Auto Synchronization.
2
Then press or to select Off.
3
Press ▼ to select Date, then enter the date with 0-9 buttons.

4
Then press ▼. Enter the Time same as above.
5
Press MENU to exit the menu.
Basic Operation
Channel selection
With the numbered buttons. Example:
• No. 2: Press 0 and within 2 seconds, press 2.
- No. 29: Press 2 and within 2 seconds, press 9.
• No. 929: Press 9, 2, 9 same as above.
Press P + or – to change up or down a channel. This takes approx. 2 seconds. If the auto search only stored 5 stations, only these 5 will appear. Skipped channels will not appear (see P.12).
Channel List
The Channel List shows a list of all receivable programmes.
Press CH LIST to display the Channel List.
Press ▲ or ▼ to select the desired channel.
Press CH LIST to display the selected channel.
- If you press CH LIST again, the Channel Details will appear.
Information display
Press i. The program information will appear for approx. 4 seconds.
The following figure is an example of DVB-channel reception.

- Channel Name
- Lock status
- DVB Teletext available
- DVB Subtitle available
- Subtitle Language
- Audio Language
- Audio Format
-
Video Format
-
Channel Number
-
There are more than 2 pages.
- Program Detail
- Next Program Duration
- Parental Rating
- Program Duration
- Program Title
Note:
-
If the current watching DVB-channel has more than one audio language or subtitle language, you can change them by each pressing of
AUDIO I/II or .... -
TV26.../TV32.../TV40...: There is no sound output from the main unit's speakers when a DVB-channel with Dolby Digital audio is selected. You can only hear Dolby Digital audio through the amplifier equipped with a Dolby Digital decoder. (see P.25)
- TV32...H/TV40...H: When a DVB-channel with HE-AAC audio is selected, the sound will be output as PCM audio from DIGITAL AUDIO COAXIAL output jack.
- Some DVB-broadcasts may not provide subtitle language service.
QuickView
P↔P button allows you to go back to the last selected TV channel.
• Even in external input mode, it will go back to the last selected TV channel.
MUTE
Press ☑. The sound will be cut off. The muting can be released by pressing ☑ again or + or -.
Still picture
Press FREEZE to make a still picture. To cancel the still picture, press FREEZE again.
Note:
- The still picture function is available only for ATV/DTV-input mode.
- During still picture mode, PICTURE SIZE feature is not available. (still picture mode will be canceled)
Note:
- If the built-in tuner does not receive anything (e.g. if no antenna is connected) during TV-operation, then the TV-unit will change to standby after approx. 15 minutes.
Teletext
Teletext is sent page by page. This unit is able to automatically store up to 1000 pages, but they can only be accessed once they have been stored. This can take a few moments.
The TELETEXT menu allows the installation of the teletext language.
The languages displayed are only those supported by the channel. In Germany this is usually GERMAN.
Fastext/TOPtext
The Fastext/TOPtext is teletext with a special directory.
On the lower part of the screen there are four different coloured fields (red, green, yellow and blue). These fields lead directly to the pages shown within. The coloured buttons on the remote control correspond to the coloured fields. Press the appropriate coloured button in order to activate the desired colour field.
Switch on / off Teletext
Teletext is not transmitted by all channels.
Select a channel that shows teletext.
Press ☐. You will now see a teletext page.
(If "100" is shown without any text information, it may mean that the channel you have selected does not support teletext.)
Press 📄 again. The TV-screen will be split into two and both Teletext information and actual broadcast will be displayed at the same time.
Press 📄 again in order to switch off teletext.
Press 📄 again in order to switch on teletext again.
The last page which was stored is now shown.
Note:
- You cannot select any other channels as long as teletext is switched on. Switch teletext off when you want to switch over to another channel.
Select Page
Press P + or - until the page you desire appears. Or ... enter the requested page number by using the 10
Number Buttons.
And if you mistype something, just enter the complete 3-digit wrong page number then enter the desired number again. Or ... press one of the coloured teletext buttons so that a page from Fastext/TOPtext is shown.
Hold Pages
Some pages are divided up into subpages by the channel.
Subpages are automatically shown in turn, as they are transmitted. In order to hold the page, press ☐.
Press ☑ again in order to display the next subpage.
Directly Select Subpages
You can directly select the subpages if required.
Example:
Page 128 from ARD (German teletext) comprises of 2 subpages.
Press 📄 in order to select subpage 2. 4 asterisks
(S * are shown. Enter 0 0 0 2. It can take a minute before subpage 0002 appears.
Press 📄 again in order to switch off the subpage feature.
You can only select other teletext pages when the subpage feature is switched off.
Enlargement
In order to enlarge the display, press.
Either the upper or lower half of the screen is enlarged.
Each time you press 📄 you switch between the display of the upper or lower half of the screen or the full picture.
Answering Quiz Questions
Some pages contain quiz questions with concealed answers.
Press ☐ in order to show the answers.
Stereo reception in analogue cable TV channel mode
The following types of broadcast are possible with NICAM transmissions
You can see the each signal type in the information display (P.13) when you press i or change a channel
Nicam Stereo broadcast signal

Nicam Mono broadcast signal

Nicam Dual1 broadcast signal

Nicam Dual2 broadcast signal

German A2 stereo broadcast signal

When 2-channel sound reception is available, you can select your preferred audio with the AUDIO I/II button.
Each time you press AUDIO I/II, the sound channel will switch to the alternative channel available.
NICAM 2-channel sound reception (not available in Germany)

2-channel sound reception in Germany

Note:
- In case of bad reception, the stereo sound also can be disturbed.
- The broadcast sound type may not be saved if Power off.
Remarks on DVB-T system
DVB-T is at present still being developed. You can get information regarding the current stage of development from your specialist retailer.
As a digital service DVB-T basically works differently to previous analogue TV reception.
Reception Possibilities:
In contrast to cable TV, DVB-T is received via room or roof antennas. A room antenna is sufficient for reception within the reception area of a DVB-T transmitter. A roof antenna may perhaps be necessary for reception in a fringe area. Existing roof antennas may have to be turned in a different direction.
Contact your specialist retailer to find out about the location of the reception areas or fringe areas. You cannot get DVB-T reception outside the fringe area. Ask a certified antenna specialist for advice on interference with reception. The tuner of this appliance cannot provide active room antennas with operating voltage. Active room antennas have to be equipped with a separate power supply.
Reception Quality:
DVB-T reception principally either works really well or not at all. There is not a smooth transition with a constant reduction in reception quality. Digital interference occurs at maximum reception range:
the image freezes, the picture becomes blocky, the sound breaks up or reception cuts out altogether at times. If you notice interference with DVB-T reception then this is usually not due to a fault on the TV appliance. Please contact an antenna specialist if you have interference with reception. Inspection of the quality of DVB-T reception is not included in the free warranty to be provided by the manufacturer of the TV appliance.
Image and Sound Quality:
An individual transmitter transmits up to 4 TV channels on one transmission frequency. This is possible through compression in accordance with the MPEG standard, which is similar to digital data storage on a DVD. The data rate of DVB-T is just a lot lower; at present the max. video bit rate is approx. 4Mbps and the max. audio bit rate is at 256kbps. Visible interference (e.g. blocky picture) can result at extremely low data rates despite there being excellent reception quality within vicinity of the transmitter. Blocky pictures are no fault of the receiver. They are the result of the low data rate transmitted. The digital DVB-T sound can be transmitted to the digital amplifier via the digital output of your TV set.
Image Format
Images are transmitted in 4:3 format, 4:3 letterbox format (with black bars above and below the picture) and anamorphic 16:9 format (without black bars). The max. transmitted resolution at present is 704x576.
Encryption
Encryption is basically possible, but no DVB-T channels are as yet encrypted. A CAM module and an access card are necessary to receive encrypted channels. You can get CAM modules from your specialist retailer and access cards from the respective broadcasting company. The CI slot in this appliance accepts CAM modules and therefore allows for the reception of encrypted channels. Please note: Pay TV providers are basically free to choose their encryption system. Although this TV set is manufactured according to DVB standards, it can be that a set-top box is nevertheless required to receive the desired pay TV channels. These are available from the pay TV provider.
Child Lock
Like DVDs, DVB-T offers can also provide age-restricted access. At the moment, no channels are equipped with this restriction. This appliance does, however, already offer the feature of setting up password protected age restrictions, which only work when the respective programmes are broadcast.
EPG (Electronic Program Guide)
EPG is part of the DVB-T-signal with 8-days-schedule. This TV can receive and display the EPG-information included into DVB-T. This TV's EPG-Decoder will not work with cable- and Satellite-TV.
Password Setup (Parental lock)
Parental lock is a function of the channel provider. If it is not supported by the channel, parental lock is without function. Currently there are no channels supporting parental lock.
1 Press MENU. Select then press .
2 'Password' will appear. Press '0 0 0 0' using the Number buttons (0-9). (This is the default password.)
3 Select the desired option, then press
Channel Block: Press ▲ or ▼ to select the channel that you want to lock, then press
ENTER. will appear.
Program Block: Press or to select desired parental rating.
Change Password: Enter your chosen new password with Number Buttons (be sure to remember this password). After you have entered the new password, you need to enter the same password again for confirmation.
4 Press RETURN several times to return to the normal screen.
While toggling between channels, if a service which has a parental rating (higher than your setting) is selected, the channel will be locked. Press ENTER to enter the password entering screen. Then enter the password to view that channel. If the channel you are currently watching supports a parental rating then the rating will also be displayed in the Channel information display (see page 13).
EPG (Electronic Program Guide)
The Guide menu shows the available programme listings for the next 8 days only, including today.
1 Press GUIDE (EPG) to display the Guide menu.

Service list :
Lists all the services that are currently available. As you scroll through the service list by pressing ▲ or ▼ the Event list will be refreshed accordingly. To scroll through the service list page by page, press Red or Green Key.
Events list :
List the events in a grid of rows. Press ▶ to enter the Events list. You can press ▲ or ▼ to navigate through the rest of the events. You can easily move to the Previous day or Next day in the Events List by pressing Red or Green key (the date of the programme information you are currently viewing is shown in the top left hand corner).
2 From within the Events list, you can open the Event detail for the currently highlighted programme by pressing Yellow.
The Event detail shows the extended event description of an event.
To return to the Events list, press Yellow. To clear the menu screen, press ENTER or RETURN.
Picture size and resolution
Resolution and picture quality
Broadcast wide screen films in different resolutions. The following table shows the resolution options for wide screen film broadcast media.
| Broadcast media | |||||||
| Resolution of the wide screen signal | Analogue cable TV | Digital cable TV | DVB-T | Satellite (DVB-S) | DVD HD | TV Satellite (DVB-S2) | Blu-ray-Disc |
| 432i x 704 (Letterbox) Yes | Yes Yes Yes | Yes Yes Yes | No | ||||
| 576i x 704 (anamorphic) No | Yes Yes Yes | Yes Yes Yes | No | ||||
| 720 x 1280 (HD) No Yes* | No No No Yes | Yes Yes | |||||
| 1080i x 1920 (HD) No Yes* | No No No Yes | Yes Yes | |||||
* Digital Cable receiver with HDMI output required.
Best picture quality is achieved when the input signal has a resolution of 1920 x 1080i. If a signal with a lower resolution is input (e.g. analogue cable TV), there is a visibly poorer picture quality.
This is understandable as, if the same picture quality were available at a lower resolution, the broadcasting companies would not need to take the trouble to send the signal at the higher resolution.
Why are there different resolutions?
Analogue cable TV uses a standardised TV signal. Each analogue tube TV, however old it is, can process this signal. That is the advantage of standardisation. The disadvantage is that the resolution has not changed since the end of the Second World War. The resolution has been max. 576i x 768, or approx. 0.4 megapixels, for over 60 years. In comparison, modern cameras typically have a resolution of 12 megapixels, e.g. 4000 x 3000.
Why do cameras have high resolutions of 12 megapixels and more?
Photos are for printing. 0.4 megapixels are far too few for a good A4 picture. Even the most expensive printer cannot make a good A4 picture from 0.4 megapixels.
For the same reason HD-TV sets cannot display a good picture from the signal of an analogue cable TV. 16:9 programmes have black frames. The resolution is only 432 x 704. That corresponds to 0.3 megapixels – far too few for HD-TV sets!
Digital cable TVs show 16:9 programmes without black frames. Vertical resolution is increased from 432 lines to 576 lines. This alone already gives a visible picture improvement. A digital cable receiver is necessary for receiving digital cable TV. Please ask your cable provider.
A digital cable receiver with HDMI output allows HD-TV reception of the optimum HD signal at a resolution of 1920 x 1080i.
Picture quality and black bars
Wide screen films come in different formats. The format is the relationship between the width and height of the picture. For example, with a 16:9 film the width to height ratio is 16:9 or 1.78:1. Only 16:9 films can fill a HD-ready screen without black bars. Therefore, black bars are always visible when a format other than 16:9 is received. E.g. 4:3, A 4:3 displays vertical black bars to the right and left.
If a 4:3 picture is increased to 16:9 format then it either appears distorted (see illustration) or some parts of the picture are cropped off at the top and the bottom. This is completely normal and is not a fault in the wide screen TV.
Super Cinemascope films are wider than 16:9 films. They are in the format 2.4:1 or 22:9, for example. This is clearly wider than 16:9. Therefore, Super Cinemascope films display black bars at the top and bottom on any HD-ready TV set.

4:3 picture 1:1 on 16:9 screen

4:3 picture zoomed on 16:9 screen
Picture format and resolution
There is no connection between the picture format and the resolution received. For example, the Super Cinemascope format can be received in all resolutions, even in the HD resolution1080ix1920. For HDTV reception too an HD-ready set may display black bars at the top and bottom.
Picture format
Picture Size
The required picture format can be set by pressing the PICTURE SIZE button. Press PICTURE SIZE until the required format is displayed.
You move through the following formats when you press the button: Auto, 4:3, 16:9, 14:9, Cinema, Real (HDMI mode only).
Auto
The picture is automatically only then shown in a format-filling display when a WSS-TV signal is received.
Example:
If the analogue tuner receives a letterbox image with WSS signal then the resulting image looks like this:

illustration 1:
Letterbox image is increased
WSS:
Public broadcasters include 16:9 identification, the WSS signal (WideScreenSignalling), during transmission in order to ensure automatic conversion to 16:9.
Most private broadcasters do not transmit a WSS signal. Their 16:9 films are always broadcast in letterbox format. Automatic does not recognise anything without WSS signal and does not automatically alter the picture size. Use the PICTURE SIZE button to set the required picture size for private channels.
Other formats
Press PICTURE SIZE until the desired size is reached.
4:3
The picture is displayed in 4:3 format with black bars to the right and left.

16:9
The width of the picture will be zoomed evenly. 16:9 is particularly suitable for DVD players, DVB-T, DVB-C and satellite receivers, which can transmit and show 16:9 feature films without black bars. In the set-up menu of the set, adjust it to show that a 16:9 TV set is connected.
14:9
The picture is increased somewhat but not up to the full screen width. Black bars remain on the right and left and also at the top and bottom.
Cinema
Use Cinema to increase a small 4:3 letterbox signal. How do you recognise whether the broadcasting station / the set operating is using a 4:3 letterbox signal that is too low? Press the PICTURE SIZE button on the remote control until the 4:3 format appears. If the picture is surrounded by a black border as in the illustration, this is a 4:3 letterbox signal. Limited by the broadcasting station / the set operating, this signal is much too low for a 16:9 FullHD screen. Cinema increases this picture that is too small as far as possible. Natural visible poor focus emerges, rather as if a postcard were being increased to poster size. This unfocused appearance is conditioned by input signals that are too low and is in no way a production fault in this TV set.

4:3 Letterbox picture increased to Cinema format.
Real (HDMI mode only)
All images are displayed on the TV screen of 16:9 ratio without overscanning.

Note:
- In PC mode, the picture size feature is available only for 16:9- or 4:3- format.
- External receivers can automatically adjust the picture size via a SCART cable. Please read the instructions for the external receiver.
- If you select Real, the image might become a horizontal expansion according to the signal format. In this case, select an appropriate aspect with PICTURE SIZE.
Other convenience functions
You can change the default settings to convenience use.
| Selected Items | Setup hint | ||
| Picture Preference | |||
| Brightness / Contrast / Colour / Tint / Sharpness You can adjust the picture to your preference. | |||
| Colour Temperature Bluish (Cool) / Neutral (Medium) / Reddish (Warm) / Memory.Adjust R Gain, G Gain and B Gain. | |||
| Advanced Settings | |||
Other convenience functions
| Selected Items | Setup hint | ||
| Country Set the country where you use this product. | |||
| Audio Language Select preferred audio language, if the current watching DTV channel has more than one audio language. • This option is not available for ATV channel. | |||
| Audio Language 2nd Select second preferred audio language, if the current watching DTV channel does not have the language set in Audio Language option above. If the Audio Language 2nd set here is not transmitted in the channel, the first displayed audio language in channel information is automatically selected. This option is not available for ATV channel. • | |||
| Channel Set Up See page 12. | |||
| OSD Language See page 12. | |||
| Power Management This feature controls the power management. If a period of time is elapsed with no video signal in PC mode, the power status is changed to stand by mode automatically. When there is available video signal again, the power status is returned to power on mode automatically. | |||
| Time Setup | |||
Other convenience functions
| Selected Items | Setup hint | ||
| Subtitle | |||
| Teletext | |||
PC connection
Follow these steps: On your PC monitor choose a resolution of 1920 x 1080 at 60Hz and save this configuration. Shut down your PC and connect the shut off LCD TV. Use a screensaver to avoid burning-in of static picture content.
Select PC input
Switch on the LCD-TV.
Select the PC input mode (see page 12).
Note:
- If no signal or a signal with a non-supported resolution is connected, No Signal is displayed
- As this LCD-TV is not a PC monitor correct display cannot be guaranteed for every PC / graphics card.
• Digital PC connection to HDMI-input is not supported. - If by any chance the PC should create a picture on the HDMI-input then there can be no guarantees for its correct representation. Digital PC connection is not an assured function of this TV appliance.
| Supported PC resolutions | |
| resolution fps (Hz) | |
| 640x480 60 | |
| 800x600 60 | |
| 1024x768 60 | |
| 1280x720 60 | |
| 1280x768 60 | |
| 1360x768 60 | |
| 1280x1024 | 60 |
| 1440x900 | 60 |
| 1920x1080 | 60 |
Use a PC-VGA cable (not supplied) to connect the LCD-Monitor to your PC. Make the connections carefully so as not to break or bend the contacts inside the plug.
TV (Rear view)
![graph LR A["PC/DVI AUDIO"] -->|to PC/DVI AUDIO input| B["Audio cable (not supplied)"] A --> C["PC/OUTPUT"] C --> D["VGA Cable (not supplied)"] D --> E["Computer"]](/content/2026/06/1257976/images/ef7b0001fd17cf96ffca917b6aa2cd67348eb0ad62e1d71179d282478708e2c5.jpg)
Example: Adjust the contrast.
1 During PC mode press MENU.

2 Select /Contrast, then press ENTER. Press or to adjust Contrast.
3 Press RETURN several times to return to the normal screen.
| Selected Items | Setup hint | |
| PC | ||
| Auto Adjust | Hor Position, Ver Position, Phase and Clock are adjusted automatically as per the input PC video signal.·When PC-input mode was selected and a PC-signal was input, Auto Adjust will be performed automatically. | |
| Hor Position To | adjust the horizontal placing of the image. | |
| Ver Position To | adjust the vertical placing of the image. | |
| Phase Eliminates | the horizontal (PHASE) interfering lines. | |
| Clock Eliminates | the vertical (CLOCK) interfering lines. | |
Connecting an HDMI or a DVI device to the HDMI input
The HDMI input receives digital audio and uncompressed video from a HDMI equipped device or uncompressed digital video from a DVI equipped device. When you connect to a DVI device with a HDMI-to-DVI adapter cable, it only transfers the video signal, so it is necessary to use separate analogue leads to transfer the audio signals. Select the HDMI input mode (see P.12).
![graph TD A["To DVI output"] --> B["DVI device"] C["To HDMI output"] --> D["HDMI device"] B --> E["HDMI - to - DVI adapter cable (HDMI type A connector) (not supplied)"] D --> F["HDMI cable (type A connector) (not supplied)"] E --> G["To PC/DVI AUDIO input"] F --> G G --> H["TV (Rear view)"] H --> I[…](/content/2026/06/1257976/images/d544782f81b4d34415aca8c76d55fd3be396fb91daddc466643178909a996266.jpg)
![graph TD A["TV40..."] --> B["To DVI output"] B --> C["DVI device"] C --> D["HDMI - to - DVI adapter cable (HDMI type A connector) (not supplied)"] D --> E["To HDMI output"] E --> F["HDMI cable (type A connector) (not supplied)"] F --> G["To PC/DVI AUDIO input"] G --> H["TV (Rear view)"]](/content/2026/06/1257976/images/b88508f0179807927476767f7c78cd5a4984920f54700088ecead65e235a6276.jpg)
Selecting the HDMI signal
1 Select /Advanced Setting/HDMI Mode option.

2 Then press or to select the desired mode.
Auto: Auto (factory setting), can remain in this mode. Change not necessary. PC: PC (for PC), if desired. Video: Video (for Video), if desired.
3 Press MENU to exit the menu.
Note:
- Some devices may not operate properly with the TV.
- Follow the user's manual that came with the HDMI-system, which you try to connect to this TV. If there is no picture available via HDMI-connection, do connect via SCART-cable first. Use the HDMI-system's remote-control to call the HDMI-system's setup-menu onto the screen. Follow the HDMI-system's manual, to set its video-output to HDMI. When successfully set to HDMI, select this TV's HDMI-input, as described on page 12 (Select Video Input).
Connection to other equipment
1. Connecting to other equipment
Attention: Preparation:
- Disconnect all equipment from the AC-supply, to prevent any possible damage.
• Make the necessary connections. - Make sure all connections are safe & secure before reconnecting your equipment the AC-supply.
Please connect your satellite-receiver or DVD player via SCART (AV1). Make sure your SCART cable's cross-section is at least 1 cm or more. SCART cables with less thickness may cause visible noise.
Please make the following settings inside your receiver's / DVD-player's setup-menu:
Video signal: RGB
TV-Format: 16:9
If you miss to make these settings properly, picture quality will be inferior and parts of the picture might be missing. This is not a fault of this TV-set.
In case you need help to make this adjustment with your satellite-receiver / DVD-player, please consult the related instructions or contact the supplier or maker of those apparatus for support.
Please use the satellite's remote-control handset to select Teletext or desired TV-station. Generally it is not possible to store satellite TV-stations into a standard TV.
If the TV does not automatically switch to AV-1, please select INPUT AV1 manually, as seen on page 12.
![graph TD A["Satellite antenna"] --> B["Satellite receiver"] B --> C["Video recorder"] C --> D["TV"] C --> E["(All illustrated SCART cables and antenna cables are not supplied)"] B --> F["VCR"] B --> G["TV"]](/content/2026/06/1257976/images/9439cf1b10c547e340e90db0fa6e6648906de1dedbfd5a64f193caa782446b71.jpg)
2. Connect video recorder (e.g. to record from DVB-T)

Note:
- Programme the video recorder timer to the desired time. The TV appliance cannot switch the video recorder on or off.
- No signals other than a tuner signal are output from SCART (AV1) socket.
Connection to other equipment
3. Connecting an audio system
You can supply the TV sound to the stereo equipment (A) with the scart socket. Use a special scart cable for the connection which sold at the accessory shop. (please consult your hi-fi instructions for details). If you have a surround sound amplifier/decoder (B) with a coaxial digital input, you can connect the Coaxial Digital Audio Output to it, using a suitable coaxial digital lead.
TV (Back side view)
Note:
- The Balance/Bass/Treble adjustments (see P.19) only function with the sound from the TV speakers - it does not affect the audio output sockets.
![graph TD A["TV26.../TV32..."] --> B["OUT"] B --> C["COXIAL COAXIAL OUT"] C --> D["Digital Audio Coaxial OUT"] D --> E["AV1"] E --> F["Scart-RCA cable, not supplied"] F --> G["Surround sound amplifier system"] H["Stereo amplifier"] --> I["Audio input"] I --> F J["Audio input"] --> F](/content/2026/06/1257976/images/001a396d23f76da0bc3622da73fe4e747acdb769c1619dc8846d873661145a86.jpg)
4. Connecting a Video camera or Games console
Connect the Video camera (or Games console, etc.) to the TV with an appropriate AV cable (RCA/Phono) as shown. Select the AV2 input mode to view (see P.12).

5. Connecting to a DVD player or other AV device with Component Video outputs
If your DVD player (or other device) has Component Video output jacks, use a suitable set of leads (RCA/Phono) to connect these to the Component Video inputs on this TV as shown - it can greatly enhance the picture quality and performance. Please remember that you will also need to connect separate leads (RCA/Phono) for the audio signals. Select the COMPONENT input mode (see P.12).
![graph TD A["Component output"] --> B["Video cable (not supplied)"] A --> C["Audio cable (not supplied)"] A --> D["Audio output"] B --> E["TV (Back side view)"] C --> E D --> E E --> F["TV40...TV26.../TV32..."]](/content/2026/06/1257976/images/4432cf1105e8778362a1e6eb60aa4a173898ad3ff10a3848cf4c048d9474a055.jpg)
Note:
- The Component Video input of this unit are for use with equipment which outputs interlaced signals (PAL: 576i/1080i or NTSC: 480i/1080i) and progressive signals (PAL: 576p/720p or NTSC: 480p/720p).
Troubleshooting table
Please check the following list before requesting service.
| Symptom Possible solution Page | ||
| No picture, no sound Switch on | the set.Check that the mains power outlet is properly connected.Select appropriate input mode.Unplug unit for 1 minute, then plug it back in. | 712 |
| No reception Have you tuned in | the TV stations?Press 1 on the remote control.Connect the antenna.Make sure the set is ON and not in Standby mode | 1011 |
| The TV switches off with missing antenna input signal | This is normal.15 minutes after the antenna signal has disappeared, the set will change to standby mode. 13 | |
| In ☐ menu, the Channel option cannot be selected. | The unit is set to AV mode. Press 1 on the remote control. 12 | |
| Wrong Colours Colour and Brightness errors can occur when the viewing angle/ambient air temperature (see technical specifications) are exceeded. | ||
| While viewing a DVB (digital) channel, there is sound but no picture. | Some channel offers audio content only. It is normal. | |
| Blocky image or image stops intermittently. | Check all antenna connections.Move the antenna away from areas of possible interference.Try using an antenna booster. | 10 |
| Some digital channels cannot be viewed. | Contact the service provider to subscribe. | |
| No colour or picture black. AV1 | input set to AUTO. 20 | |
- The LCD panel is a very high technology product, giving you fine picture details. Occasionally, a few nonactive pixels may appear on the screen as a fixed point of blue, green or red. Please note that this does not affect the performance of your product.
Specifications
| TV26... TV32... TV40... | |||
| System Analogue: PAL UK, IR, CCIR, FRENCH System, B/G, D/K, I/I, LDigital: DVB-T (OFDM 2k/8k 16QAM/64QAM), DVB-T HD (H.264) | |||
| Video Colour System | PAL/SECAM/NTSC 3.58/NTSC 4.43/PAL 60 | ||
| Preset channels | Analog 102 Carrier, Digital 69 Carrier (2000 Service) | ||
| Frequency Range | Analogue: IreE2~E4, X~Z+2, S1~S10, E5~E12, S11~S41, E21~E69Digital: E5~E12, ItaD~H2, Fra1~6, Rus6~12, E21~E69 | ||
| Power Supply | AC 220-240V, 50Hz | ||
| Power Consumption Operation: Standby: | approx. 77W at AC230V, 50Hz | approx. 110W at AC230V, 50Hz | approx. 166W at AC230V, 50Hz |
| approx. <0.50W at AC230V, 50Hz | |||
| LCD | 66 cm visible | 80 cm visible | 102 cm visible |
| TFT low-glass Active Matrix Colour LCD, 1920 x 1080 (TV26P.../TV32P...: 1366 x 768) Pixel | |||
| HDMI input | HDMI compliant (type A connector), HDCP compliantSuggested scan rates: PAL: 576i/576p/720p/1080i/1080pNTSC: 480i/480p/720p/1080i/1080pHDMI Audio: 2-channel PCM, 32/44.1/48 kHz sampling frequency16/20/24 bits per sample | ||
| Output Power | approx. 10W (MAX) x 2 | ||
| Surrounding temperature | Operation: 5°C ~ 40°C/Storage: -20°C ~ 60°C | ||
| Operating Humidity | Less than 80%RH | ||
| Dimensions | 63(W) x 48(H) x 22(D) cm | 76(W) x 56(H) x 25(D) cm | 99(W) x 67(H) x 24(D) cm |
| Weight (w/o Accessories) | approx. 6.3 kg | approx. 9.2 kg | approx. 14.4 kg |
| Accessories | 2 batteries (AAA/R3/UM-4)/Remote control unit/AC cord/Stand/Frame Stand/Screws for stand and Frame Stand (TV26.../TV32...: x 5 / TV40...: x 7) | ||
26 Weight and dimensions are approximate. Because we continually strive to improve our products we may change specifications and designs without prior notice.
Information on software license
The following open source software component is included in this product:
Freetype 2.1.9
Portions of this software are copyright © 1996-2002
The FreeType Project (www.freetype.org). All rights reserved.


- LCD-TV
- FEATURES
- HEADPHONE WARNING
- BATTERY NOTICE (VALID IN EU ONLY)
- INFORMATION FOR THE DVB-T FUNCTION
- WASTE DISPOSAL TIP
- VIEWING DISTANCE (TV32F.../TV40F...)
- STANDARD VIDEO
- HOW TO IMPROVE THE ANALOG CABLE-TV'S PICTURE-QUALITY
- HDMI
- IMPORTANT SAFETY INFORMATION
- PLEASE PAY ATTENTION TO THE FOLLOWING INSTRUCTIONS IN ORDER TO AVOID RECEIVING A LIFE-THREATENING ELECTRIC SHOCK
- HOW TO ATTACH THE STAND
- NOTE
- DISMANTLING THE BASE
- WARNING
- ATTENTION
- SAFETY NOTE
- SAVING ELECTRICITY
- LOCATION OF CONTROLS
- DESCRIPTION OF INDICATORS AND CONTROLS
- REMOTE CONTROL
- INSTALL THE BATTERIES
- DISTANCE OF REMOTE CONTROL OPERATION
- ANTENNA CONNECTION
- AUTO SETUP
- PREPARATION
- QUICK GUIDE FOR MENU OPERATION
- PREPARATIONS
- SELECTING THE INPUT SOURCE
- ON-SCREEN LANGUAGE SELECTION
- STATION SEARCH
- CHANGING THE ORDER OF STORED CHANNELS
- UPDATE SCAN
- AUTO SYNCHRONIZATION
- THIS FEATURE CAN DISPLAY THE TIME BASED ON THE DVB SIGNAL INFORMATION
- BASIC OPERATION
- CHANNEL SELECTION
- CHANNEL LIST
- INFORMATION DISPLAY
- QUICKVIEW
- MUTE
- STILL PICTURE
- TELETEXT
- FASTEXT/TOPTEXT
- SWITCH ON / OFF TELETEXT
- SELECT PAGE
- NUMBER BUTTONS
- HOLD PAGES
- DIRECTLY SELECT SUBPAGES
- EXAMPLE
- ENLARGEMENT
- ANSWERING QUIZ QUESTIONS
- STEREO RECEPTION IN ANALOGUE CABLE TV CHANNEL MODE
- THE FOLLOWING TYPES OF BROADCAST ARE POSSIBLE WITH NICAM TRANSMISSIONS
- NICAM STEREO BROADCAST SIGNAL
- NICAM MONO BROADCAST SIGNAL
- NICAM DUAL1 BROADCAST SIGNAL
- NICAM DUAL2 BROADCAST SIGNAL
- GERMAN A2 STEREO BROADCAST SIGNAL
- WHEN 2-CHANNEL SOUND RECEPTION IS AVAILABLE, YOU CAN SELECT YOUR PREFERRED AUDIO WITH THE AUDIO I/II BUTTON
- NICAM 2-CHANNEL SOUND RECEPTION (NOT AVAILABLE IN GERMANY)
- 2-CHANNEL SOUND RECEPTION IN GERMANY
- REMARKS ON DVB-T SYSTEM
- RECEPTION POSSIBILITIES
- RECEPTION QUALITY
- IMAGE AND SOUND QUALITY
- IMAGE FORMAT
- ENCRYPTION
- CHILD LOCK
- EPG (ELECTRONIC PROGRAM GUIDE)
- PASSWORD SETUP (PARENTAL LOCK)
- SERVICE LIST
- EVENTS LIST
- PICTURE SIZE AND RESOLUTION
- RESOLUTION AND PICTURE QUALITY
- WHY ARE THERE DIFFERENT RESOLUTIONS
- PICTURE QUALITY AND BLACK BARS
- PICTURE FORMAT AND RESOLUTION
- PICTURE FORMAT
- PICTURE SIZE
- AUTO
- WSS
- OTHER FORMATS
- 4:3
- 16:9
- 14:9
- CINEMA
- REAL (HDMI MODE ONLY)
- OTHER CONVENIENCE FUNCTIONS
- PC CONNECTION
- SELECT PC INPUT
- CONNECTING AN HDMI OR A DVI DEVICE TO THE HDMI INPUT
- SELECTING THE HDMI SIGNAL
- CONNECTION TO OTHER EQUIPMENT
- CONNECTING TO OTHER EQUIPMENT
- ATTENTION: PREPARATION
- CONNECT VIDEO RECORDER (E.G. TO RECORD FROM DVB-T)
- CONNECTING AN AUDIO SYSTEM
- CONNECTING A VIDEO CAMERA OR GAMES CONSOLE
- CONNECTING TO A DVD PLAYER OR OTHER AV DEVICE WITH COMPONENT VIDEO OUTPUTS
- TROUBLESHOOTING TABLE
- INFORMATION ON SOFTWARE LICENSE
Brand : ORION
Model : TV32PL690D
Category : Television