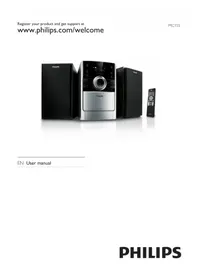
USER MANUAL FWM139 PHILIPS
PHILIPS
CAUTION
Use of controls or adjustments or performance of procedures other than herein may result in hazardous radiation exposure or other unsafe operation.


Environmental information 5
Supplied accessories 5
Safety information 5
Safety information 5
Hearing Safety 6
Preparation
Rear connections 7
Inserting batteries into the remote control ... 8
Controls
Controls on the system and remote control 9
Basic Functions
Switching the system on 10
Power-saving automatic standby 10
Adjusting volume and sound 10
CD/MP3 Operation
Playing a disc 11
Selecting a different track 11
Finding a passage within a track 11
Playing an MP3 disc 11-12
Different play modes: Shuffle and Repeat ..... 12
Programming track numbers 12
Erasing the programme 12
Radio Reception
Tuning to radio stations 13
Tape Operation/Recording
Tape playback 14
General information on recording 14
Synchro start CD recording 14
Recording from the radio 15
Maintenance.... 15
Clock/Timer
Setting the clock 16
Setting the timer 16
Activating and deactivating TIMER 16
Activating and deactivating SLEEP 17
Specifications 17
Troubleshooting 18-19
Supplied accessories
- 2 speaker boxes
- remote control
All unnecessary packaging has been omitted. We have tried to make the packaging easy to separate into three materials: cardboard (box), polystyrene foam (buffer) and polyethylene (bags, protective foam sheet).
Your system consists of materials which can be recycled and reused if disassembled by a specialized company. Please observe the local regulations regarding the disposal of packaging materials, exhausted batteries and old equipment.
●Before operating the system, check that the operating voltage indicated on the typeplate (or the voltage indication beside the voltage selector) of your system is identical with the voltage of your local power supply. If not, please consult your dealer. ●Place the system on a flat, hard and stable surface.
The making of unauthorized copies of copy-protected material, including computer programmes, files, broadcasts and sound recordings, may be an infringement of copyrights and constitute a criminal offence. This equipment should not be used for such purposes.

Be responsible. Respect copyrights.
● Place the system in a location with adequate ventilation to prevent internal heat build-up in your system. Allow at least 10 cm (4 inches) clearance from the rear and the top of the unit and 5 cm (2 inches) from each side. ● The ventilation should not be impeded by covering the ventilation openings with items, such as newspapers, table-cloths, curtains, etc. ● Do not expose the system, batteries or discs to excessive moisture, rain, sand or heat sources caused by heating equipment or direct sunlight. ● No naked flame sources, such as lighted candles, should be placed on the apparatus. ● No objects filled with liquids, such as vases, shall be placed on the apparatus. ● The apparatus shall not be exposed to dripping or splashing. ● Install this unit near the AC outlet and where the AC power plug can be reached easily. - If the system is brought directly from a cold to a warm location, or is placed in a very damp room, moisture may condense on the lens of the disc unit inside the system. Should this occur, the CD player would not operate normally. Leave the power on for about one hour with no disc in the system until normal playback is possible. ● The mechanical parts of the set contain self-lubricating bearings and must not be oiled or lubricated. - When the system is switched to Standby mode, it is still consuming some power. To disconnect the system from the power supply completely, remove the AC power plug from the wall socket.
Hearing Safety
Listen at a moderate volume.
Using headphones at a high volume can impair your hearing. This product can produce sounds in decibel ranges that may cause hearing loss for a normal person, even for exposure less than a minute. The higher decibel ranges are offered for those that may have already experienced some hearing loss. Sound can be deceiving. Over time your hearing "comfort level" adapts to higher volumes of sound. So after prolonged listening, what sounds "normal" can actually be loud and harmful to your hearing. To guard against this, set your volume to a safe level before your hearing adapts and leave it there.
To establish a safe volume level:
- Set your volume control at a low setting. Slowly increase the sound until you can hear it comfortably and clearly, without distortion.
Listen for reasonable periods of time:
Prolonged exposure to sound, even at normally "safe" levels, can also cause hearing loss. Be sure to use your equipment reasonably and take appropriate breaks.
Be sure to observe the following guidelines when using your headphones.
Listen at reasonable volumes for reasonable periods of time. Be careful not to adjust the volume as your hearing adapts. Do not turn up the volume so high that you can't hear what's around you. You should use caution or temporarily discontinue use in potentially hazardous situations. Do not use headphones while operating a motorized vehicle, cycling, skateboarding, etc.; it may create a traffic hazard and is illegal in many areas.

Rear connections
The type plate is located at the back of the system.

Power
Before connecting the AC power cord to the wall outlet, ensure that all other connections have been made.
WARNING!
For optimal performance, use only the original power cable.
Never make or change any connections with the power switched on.

Speakers Connection
Front Speakers
Connect the speaker wires to the SPEAKERS terminals, right speaker to "R" and left speaker to "L", coloured (marked) wire to "+" and black (unmarked) wire to "—".

● Fully insert the stripped portion of the speaker wire into the terminal as shown.
Notes:
- For optimal sound performance, use the supplied speakers.
- Do not connect more than one speaker to any one pair of + / - speaker terminals.
- Do not connect speakers with an impedance lower than the speakers supplied. Please refer to the SPECIFICATIONS section of this manual.
Inserting batteries into the remote control
Insert two batteries type R03 or AAA into the remote control with the correct polarity as indicated by the "+" and "-" symbols inside the battery compartment.

CAUTION!
- Remove batteries if they are exhausted or will not be used for a long time.
- Do not use old and new or different types of batteries in combination.
- Batteries contain chemical substances, so they should be disposed of properly.
Controls on the system and remote control
① LCD Display
– shows the status of the system.
② iR SENSOR
– infrared sensor for remote control.
③ PROGRAM (PROG)
for CD .... programs tracks and reviews the program.
④ STANDBY-ON ⏻ (POWER ⏻)
– switches the system to standby/on.
⑤ ▶ II
for CD/MP3 ..... starts or pauses CD playback.
⑥ TITILE-/+ |◀◀ /▶▶|
for CD/MP3 ..... skips to the beginning of a current track/previous/ next track (title).
(press and hold) fast searches back and forward within a track/disc.
for clock/timer .. adjusts the hours and minutes for clock / timer functions.
⑦ Source selector (CD/ TAPE/TUNER)
– selects the respective sound source for CD/TAPE/TUNER.
⑧ CLOCK/TIMER
- sets the clock or timer function.
⑨ Band selector (MW/FMST/FM)
for Tuner ...... selects waveband: MW, FM (stereo) or FM (mono).
⑩ OPEN/CLOSE
- open/close the CD door.
⑪ STOP ■
for CD/MP3 ..... stops CD playback or erases a CD program.
⑫ TUNING
– tunes to a radio station.
⑬ DISPLAY
– display the current time.
⑭ DBB(Dynamic Bass Boost)
- enhances the bass.
⑮ VOLUME ▲/▼
- adjusts the volume level.
- connect headphones.
⑰ Tape Deck Operation
RECORD ● ...... starts recording.
PLAY ▶ ...... starts playback.
REW ◀◀ /F.FWD ▶▶ fast rewinds/
forwards the tape.
STOP•OPEN ■▲ stops the tape;
opens the tape compartment.
PAUSE II ...... pauses recording or playback.
⑱ REPEAT
for CD/MP3 ..... repeats a track/CD programme/entire CD.
⑲ SHUFFLE
for CD/MP3 ..... plays CD tracks in random order.
⑳ SLEEP
- activates/deactivates or selects the sleeper time.
②1 MUTE
– switches playback sound off and on.
②2 TIMER ON/OFF
- activates/deactivates the timer.
②3 DSC (Digital Sound Control)
– selects sound characteristics: CLASSIC/JAZZ/
POP/ROCK.
⑳ |◀/▶|
for CD/MP3 ..... skips to the beginning of a current track/previous/next track (title).
for CD/MP3 ..... (press and hold) fast searches back and forward within a track/CD.
for clock/timer adjusts the hours and minutes for clock/timer functions.
⑳ ALBUM-/+ ◀◀ /▶▶
for MP3 ...... selects an album.
②6 ALBUM+
for MP3 ...... selects an album upward.

IMPORTANT:
Before you operate the system, complete the preparation procedures.
Switching the system on
- Press STANDBY-ON ⏻ (POWER ⏻ on the remote).
→The system will switch to the last selected source.
Switching the system to Eco Power Standby mode
- Press STANDBY-ON ⏻ (POWER ⏻ on the remote) in the active mode.
→The system enters Eco power standby (the ECO POWER LED is on) or normal standby with clock display.
→The volume level (up to a maximum volume level of 15), interactive sound settings, last selected source and tuner presets will be retained in the player's memory.
- If the system is in normal standby with clock display, press and hold STANDBY-ON ⏻ (POWER ⏻ on the remote) for 3 seconds or more to switch to Eco power standby or vice versa.
Power-saving automatic standby
The power-saving feature automatically switches to standby 30 minutes after a tape or CD playback has ended and no control is operated.
Adjusting volume and sound
1 Press VOLUME ▲/▼ to increase or decrease volume.
→Display shows the volume level U0L and a number from 0-40.
2 Press DBB to switch bass enhancement on or off.
→Display shows: DBB if the DBB is activated.

3 Press DSC on the remote to repeatedly to select the desired sound effect: CLASSIC, JAZZ, POP or ROCK.
4 Press MUTE on the remote control to stop sound playback instantly.
→Playback will continue without sound and the display shows MUTE.
●To start sound playback you can:
- press MUTE again;
- adjust the volume controls.

IMPORTANT:
The lens of the CD player should never be touched.

Playing a disc
This CD player plays Audio Discs including CD-Recordables, CD-Rewritables and MP3 CD.
- CD-ROM, CD-I, CDV, VCD, DVD or computer CDs, however, are not possible.
1 Adjust the source selector to select CD source. 2 Press OPEN/CLOSE on the system to open the CD compartment.
→ OPEN is displayed when you open the CD compartment.
3 Insert a disc with the printed side facing up and press OPEN/CLOSE to close the CD door.
→ rEAD is displayed as the CD player scans the contents of a disc, and then the total number of tracks and playing time (or the total number of albums and tracks for MP3 disc) are shown.
4 Press ▶II to start playback.
→The current track number and elapsed playing time of the track are displayed during disc playback.
5 To pause playback press ▶II. Press ▶II again to resume play.
→The display freezes and the elapsed playing time flashes when playback is interrupted.
6 To stop disc playback, press STOP ■.
Note: CD playback will also stop when;
- the CD door is opened. – the disc has reached the end.
- you select another source: TAPE, TUNER.
- you select standby.
Selecting a different track
- Press TITILE-/+ |◀◀ or ▶▶| (|◀/▶| on the remote) once or repeatedly until the desired track number appears in the display. ●Press ▶II to start playback.
Finding a passage within a track
1 Press and hold down TITLE-/+ or ▶▶ (◀/▶ on the remote). →The disc is played at high speed and low volume. 2 When you find the passage you want, release TITLE-/+ |◀◀ or ▶▶| ( |◀/▶| on the remote). →Normal playback continues.
Playing an MP3 disc
1 Load an MP3 disc.
→The disc reading time may exceed 10 seconds due to the large number of songs compiled into one disc. → "xxx 999" is displayed. xx is the current album number and 999 is the current track number.
2 Press ALBUM+ (ALBUM-/+ ◀◀/▶ on the remote) to select a desired album. 3 Press TITLE-/+ |◀◀ /▶▶| (◀/▶| on the remote) to select a desired track. →The album number will change accordingly as you reach the first track of an album by pressing TITLE- ◀◀◀ (◀ on the remote) or the last track of an album by pressing TITLE+ ▶▶▶I (▶I on the remote). 4 Press ▶II to start playback.
- ISO9660, Joliet, UDF 1.5 – Maximum title number: 511 (depending on filename length) – Maximum album number: 99 – Supported sampling frequencies: 32 kHz, 44.1 kHz, 48 kHz – Supported Bit-rates: 32~256 (kbps), variable bitrates
Different play modes: SHUFFLE and REPEAT
You can select and change the various play modes before or during playback.
REPEAT ...... plays the current track continuously
REPEAT ALL ... repeats the entire disc/programme
SHUF ...... tracks of the entire disc are played in random order
SHUF and REPEAT ALL repeats the entire disc/programme continuously in random order
1 To select your play mode, press SHUFFLE or REPEAT on the remote control before or during playback until the display shows the desired function. 2 Press ▶II to start playback if in the STOP position. 3 To return to normal playback, press SHUFFLE or REPEAT on the remote control until the various SHUFFLE/ REPEAT modes are no longer displayed. - You can also press STOP ■ to cancel your play mode.
Programming track numbers
Programme in the STOP position to select and store your disc tracks in the desired sequence. If you like, store any track more than once. Up to 20 tracks can be stored in the memory.
1 Press PROGRAM (PROG on the remote) to enter the programming mode. 2 Use TITLE-/+ ◀◀ / ▶▶ | (◀/▶| on the remote) to select your desired track number.
→The selected track number and PROG flash on the display panel. 3 Press PROGRAM (PROG on the remote control) to confirm the track number to be stored. 4 Repeat steps 2-3 to select and store all desired tracks. 5 To start playback of your disc programme, press ▶II.
Note:
- If you wish, you can add further tracks to your current program. Make sure you are in the STOP position, and that you have not exceeded 20 tracks.
Erasing the programme
You can erase the programme by:
- pressing STOP ■ once in the STOP mode;
- pressing STOP ■ twice during playback;
- opening the CD compartment; ●selecting another sound source →PROG disappears from the display.

Tuning to radio stations
1 Adjust the source selector to select TUNER
source.
→ [sudis played.
2 Adjust the band selector to select your waveband: MW, FM (mono) or FMST (stereo).
3 Adjust the TUNING control knob to tune to a desired radio frequency.
Note:
- The system is equipped with a built-in MW antenna and a fixed FM antenna. For optimal MW reception, adjust the position of the whole set until the strongest signal is found. For optimal FM reception, fully extend and adjust the position of the FM antenna until the strongest signal is found.

Tape playback
1 Adjust the source selector to select TAPE source.
→Display: shows TAPE throughout tape operation.
2 Press STOP•OPEN ■ ▲ to open the tape door.
3 Insert a recorded tape and close the tape door.
→ Load the tape with the open side downward and the full spool to the left.
4 Press PLAY ▶ to start playback.
5 To pause, press PAUSE II. Press again to resume.
6 Press REW ◀◀ or F.FWD ▶▶ to fast wind tape in either direction.
7 To stop the tape, press STOP·OPEN ■ ▲.
Notes:
- During playback, the keys are automatically released at the end of a tape. To switch off the set, press STANDBY-ON ⏻ (POWER ⏻ on the remote).
- During fast forwarding/rewinding, the keys will not be released at the end of a tape. To stop fast winding, press STOP•OPEN ■▲.
●Recording is permissible insofar as copyright or other rights of third parties are not infringed.
●For recording, use only NORMAL (IEC type I) tapes on which the tabs have not yet been broken. This deck is not suited for recording on METAL (IEC IV) type tapes.
●The best recording level is set automatically. Altering the VOLUME or DBB controls will not affect the recording in progress.
●The recording sound quality might differ depending on the quality of your recording source and the recording tape.
●At the very beginning and end of the tape, no recording will take place during the 7 seconds when the leader tape passes the recorder heads.
● To protect a tape from accidental erasure, have the tape in front of you and break out the left tab. Recording on this side is no longer possible. If, however, you wish to record over this side again, cover the tabs with a piece of adhesive tape.
Synchro start CD recording
1 Adjust the source selector to select CD source.
2 Insert a disc and if desired, programme track numbers.
3 Press STOP·OPEN ■ ▲ to open the tape door.
4 Insert a suitable tape into the deck and close the tape door.
5 Press RECORD ● to start recording.
→Playing of the CD programme starts automatically from the beginning of the CD after 7 seconds. It is not necessary to start the CD player separately.
To select and record a particular passage within a CD track:
- Press and hold down on REW ◀◀ or F.FWD ▶▶. Release the control when you recognize the passage you want. ● To interrupt CD playback press ▶II . ●Recording starts from this exact point in the track when you press RECORD ●. 6 To pause, press PAUSE II. Press again to resume. 7 To stop recording, press STOP·OPEN ■ ▲.
Recording from the radio
1 Tune to the desired radio station (see Tuning to radio stations). 2 Press STOP·OPEN ■ ▲ to open the tape door. 3 Insert a suitable tape into the deck and close the tape door. 4 Press RECORD ● to start recording. 5 To pause, press PAUSE II Press again to resume. 6 To stop recording, press STOP·OPEN ■ ▲.
Maintenance
Cleaning the Cabinet
●Use a soft cloth slightly moistened with a mild detergent solution. Do not use a solution containing alcohol, spirits, ammonia or abrasives.
Cleaning Discs
- When a disc becomes dirty, clean it with a cleaning cloth. Wipe the disc from the centre out. ●Do not use solvents such as benzene, thinner, commercially available cleaners, or antistatic spray intended for analogue records.

Cleaning the disc lens
●After prolonged use, dirt or dust may accumulate at the disc lens. To ensure good playback quality, clean the disc lens with Philips CD Lens Cleaner or any commercially available cleaner. Follow the instructions supplied with cleaner.
Cleaning the Heads and the Tape Paths
● To ensure good recording and playback quality, clean the heads Ⓐ, the capstan(s) Ⓑ, and pressure roller(s) Ⓓ after every 50 hours of tape operation. ●Use a cotton swab slightly moistened with cleaning fluid or alcohol. ●You can also clean the heads by playing a cleaning tape once.

Demagnetising the heads
●Use a demagnetising tape available at your dealer.


Setting the clock
1 In any mode, press CLOCK/TIMER twice.
→The clock digits for the hours flash. 2 Press TITLE-/+ |◀◀ /▶▶| (|◀/▶| on the remote) to set the hours. 3 Press CLOCK/TIMER again.
→The clock digits for the minutes flash. 4 Press TITLE-/+ |◀◀ /▶▶| (◀/▶| on the remote) to set the minutes. 5 Press CLOCK/TIMER to confirm the time.
Note:
- If the clock has not been set, 0:00 will be displayed.
Setting the timer
●The system can be used as an alarm clock. CD or TUNER can be set to switch on at a preset time. The clock time needs to be set first before the timer can be used. - If no button is pressed within 7 seconds during timer setup, the system will exit timer setting mode automatically.
1 In active mode, press and hold CLOCK/TIMER for more than 2 seconds. 2 Press TITLE-/+ |◀◀ /▶▶| (◀/▶| on the remote) to set the hours. 3 Press CLOCK/TIMER again.
→The clock digits for the minutes flash. 4 Press TITLE-/+ |◀◀ /▶▶| (◀/▶| on the remote) to set the minutes. 5 Press CLOCK/TIMER to confirm the time →The timer is now set and activated.
Activating and deactivating TIMER
●In standby or during playback, press TIMER ON/OFF once.
→ Display shows Ⓧ if activated, and disappears if deactivated.
Activating and deactivating SLEEP
The sleep timer enables the system to switch off by itself after a set period of time
● Press SLEEP on the remote control repeatedly to
select desired time before system shuts off.
→Display shows SLEEP and series of time options for selection: 120, 90, 60, 45,30, 15, OFF.

- To deactivate, press SLEEP on the remote control once or more until 'OFF' is shown, or press STANDBY-ON (POWER) on the remote).
Specifications
AMPLIFIER
Output power .... 2 × 20 W RMS
.... 2 × 40W MPO
Signal-to-noise ratio ≥ 62 dBA (IEC)
Frequency response ..... 63 – 16000 Hz, ± 3 dB
Impedance loudspeakers ..... 8 Ω
Impedance headphones .... 32 Ω - 1000 Ω
CD PLAYER
Frequency range 63 – 16000 Hz
Signal-to-noise ratio 65 dBA
TUNER
FM wave range 87.5 - 108 MHz
MW wave range 522 - 1710 kHz
TAPE DECK
Frequency response
Normal tape (type I) ..... 125 – 8000 Hz (8 dB)
Signal-to-noise ratio
Normal tape (type I) 35 dBA
Wow and flutter: ≤ 0.4% DIN
SPEAKERS
Bass reflex system
Dimensions (W × H × D): 190 × 292 × 182 mm
AC Power: 220 - 230 V / 50 Hz
Dimensions (W × H × D): 220 × 292 × 285 mm
Weight (with/without speakers):
approx. 4.9 / 2.3 kg
Subject to modification.
WARNING
Under no circumstances should you try to repair the system yourself, as this will invalidate the warranty. Do not open the system as there is a risk of electric shock.
If a fault occurs, first check the points listed below before taking the system for repair. If you are unable to remedy a problem by following these hints, consult your dealer or service centre.
Problem Solution
CD OPERATION
| “No disc” is displayed. | – Insert a disc.– Check if the disc is inserted upside down.– W ait until the moisture condensation at the lens has cleared.– Replace or clean the disc, see “Maintenance”.– Use a finalised CD-RW, CD-R or MP3 CD. |
RADIO RECEPTION
| Radio reception is poor. | – Increase the distance between the Micro HiFi System and your TV or VCR. |
| Recording or playback cannot be made. | - Clean deck parts, see “Maintenance”. - Use only normal (IEC I) tape for recording. - Apply a piece of adhesive tape over the missing tab space. |
GENERAL
| The system does not react when buttons are pressed. switch on the system again. | – Remove and reconnect the AC power plug and |
| Sound cannot be heard or is of poor – Adjust the volume. quality. – Disconnect the headphones. | – Check that the speakers are connected correctly. – Check if the stripped speaker wire is clamped. |
| The left and right sound outputs are reversed. | – Check the speaker connections and location. |
| The remote control does not function | - Reduce the distance between the remote control and the system.- Insert the batteries with their polarities (+/- signs) aligned as indicated.- R eplace the batteries.- P oint the remote control directly toward IR sensor on the front of the system. |
| The timer is not working. - Set the clock correctly. | - Press TIMER ON/OFF to switch on the timer.- If a recording is in progress, stop the recording. |
| The Clock/Timer setting is erased. | - Power has been interrupted or the power cord has been disconnected. Reset the clock/timer. |
These warranty conditions are valid for the following consumer electronics products: Colour Televisions, Projection TV, Plasma & LCD TV, Video Cassette Recorders, CD Recorders & Players, DVD Players, DVD Recorders, DVD Recorders with HDD, Audio Systems, Home Theatre systems, Digital Set Top Box & Portable Audio products.
The benefits given to the purchaser by this warranty are in addition to all other rights and remedies which the purchaser has in respect of the product under the Trade Practices Act or other Commonwealth or State Law.
Philips Consumer Electronics warrants its products to the purchaser as follows and subject to the stated conditions.
1 Year Free Repair Service - at Philips ASC
Colour Television, Plasma Television, LCD Television, Projection Television, DVDR/VCR Combo, DVD Recorders with Hard Drive, LCD Projectors, Wireless Audio Systems, Audio Systems, Home Theatre Systems & Digital Set-Top-Box.
1 Year free Replacement – at your Retailer
Portable Audio, MP3 Infotainment products, Video Cassette recorders, DVD Player, DVD/VCR Combo Player, DVD Recorder without HDD & Portable DVD/LCD players.
Conditions of Repair Warranty
- All claims for warranty service should be made to your nearest Philips Authorised Service Centre or the Philips Technology Care Centre. Reasonable evidence of date of purchase must be provided.
- This warranty extends only to defects in material or workmanship occurring under normal use of the product when operated in accordance with the instructions.
- If a replacement product is supplied under the repair policy it is warranted, under this warranty, for the remainder of the warranty of the original purchased product only.
- Home service is provided only within the normal service area of one of our recommended Authorised Service Centres (ASC). It will be provided for television receivers only with a screen side of 67cms or above (product includes CRT, LCD TV, PTV, and Plasma TV). Televisions with screen side less than 67cms and all other products types are to be taken or sent by the consumer to the workshop of your nearest Authorised Service Centre, at the Consumer's expense.
- This Manufacturers Warranty is limited to 3 months for the above listed Consumer Electronics products if used in commercial applications.
- Philips may, at its discretion, choose to replace rather than repair any product covered by this warranty.
- Product accessories are covered by the same warranty period. Please contact the Philips Technology
Care Centre for free replacement of faulty accessories.
- This Manufacturer's Warranty is neither transferable nor valid in countries other than Australia.
This warranty does not cover:
a) Mileage or travel outside the normal service area covered by the selected Authorised Service Centre. b) Service costs arising from failure to correctly adjust the controls of the product or to observe the instructions, or inspections that reveal that the product is in normal working order. c) Product failures caused by misuse, neglect, accidental breakage, transit damage, inexpert repairs or modification by unauthorised persons, external fires, lightning strikes, floods, vermin infestation or liquid spillage. d) Cleaning of video or audio heads. e) Inadequate receiving antennae. f) Replacement of worn or used batteries or other consumables. g) Consumer products used in commercial applications (this warranty is limited to 3 months only). h) Second-hand products.
The conditions contained in this warranty card replace and override the provisions of the Philips World-Wide Guarantee for products purchased in Australia and used in Australia.
Service is provided through more than 100 accredited Authorised Service Centres throughout Australia. For direct contact with the nearest recommended Authorised Service Centre in capital and regional cities/towns,
Authorised Service Centre Network 1300 361 392
Customer support is provided in Australia by our trained call centre staff. For assistance with product features and specifications, please call
Technology Care Centre 1300 363 391
Please record the following information for your records and keep it in a safe place. We recommend retaining your purchase receipt to assist with any warranty claim.
Model number:
Serial number:
Date of purchase:......
Retailer:
Philips Consumer Electronics
a division of Philips Electronics Australia Limited
ABN 24 008 445 743,
Level 1, 65 Epping Road NORTH RYDE NSW 2113.
Thank-you for purchasing this quality Philips product.
Philips New Zealand Ltd guarantees this product against defective components and faulty workmanship for a period of 12 months. Any defect in materials or workmanship occurring within 12 months from the date of purchase subject to the following conditions will be rectified free of charge by the retailer from whom this product was purchased.
Conditions
- The product must have been purchased in New Zealand. As proof of purchase, retain the original sales docket indicating the date of purchase.
- The guarantee applies only to faults caused by defective components, or faulty workmanship on the part of the manufacturer.
- The guarantee does not cover failures caused by misuse, neglect, normal wear and tear, accidental breakage, use on the incorrect voltage, use contrary to operating instructions, or unauthorised modification to the product or repair by an unauthorised technician.
- Reasonable evidence (in the form of a sales docket) must be supplied to indicate that the product was purchased no more than 12 months prior to the date of your claim.
- In the event of a failure, Philips shall be under no liability for any injury, or any loss or damage caused to property or products other than the product under guarantee.
This guarantee does not prejudice your rights under common law and statute, and is in addition to the normal responsibilities of the retailer and Philips.
How to claim
Should your Philips product fail within the guarantee period, please return it to the retailer from whom it was purchased. In most cases the retailer will be able to satisfactorily repair or replace the product.
However, should the retailer not be able to conclude the matter satisfactorily, or if you have other difficulties claiming under this guarantee, please contact
The Guarantee Controller
Philips New Zealand Ltd.

P.O. Box 41.021
Auckland

(09) 84 94 160

(09) 84 97 858

FWM139
CLASS 1 LASER PRODUCT