
CX 500 - Hand blender Turmix - Free user manual and instructions
Find the device manual for free CX 500 Turmix in PDF.


| Product type | Immersion blender |
| Brand | Turmix |
| Model | CX 500 |
| Power | 500 W |
| Speeds | 2 speeds + turbo |
| Shaft material | Stainless steel |
| Included accessories | Whisk, measuring cup |
| Cable length | 1.2 m |
| Weight | 0.8 kg |
| Dimensions (L x W x H) | 6 x 6 x 35 cm |
| Power supply type | Mains 220-240 V |
| Frequency | 50/60 Hz |
| Main functions | Blend, emulsify, whisk |
| Maintenance | Removable shaft, dishwasher safe |
| Safety | Automatic shutdown in case of overheating |
| Spare parts | Available on the manufacturer's website |
| Repairability | Repairability index 8/10 |
| Warranty | 2 years |
Frequently Asked Questions - CX 500 Turmix
User questions about CX 500 Turmix
0 question about this device. Answer the ones you know or ask your own.
Ask a new question about this device
Download the instructions for your Hand blender in PDF format for free! Find your manual CX 500 - Turmix and take your electronic device back in hand. On this page are published all the documents necessary for the use of your device. CX 500 by Turmix.
USER MANUAL CX 500 Turmix
Bedienungsanleitung
Mode d'emploi
Istruzioni d'uso
Operating Manual




2
- Überblick

Sonderzubehör

Auf einen Blick
1. Auswurftaste
Wichtiger Hinweis





Remarque importante!
Elimination (recyclage)

Guida rapida




18

For releasing and removing the tools (the ejector button cannot be actuated unless the switch is in the "0" position).
2. 5-step switch + fast and continuous operation
For switching the appliance on and off and adjusting the operating speed:
0/Off = switched off and remove the tools
1, 2 = slowest speed for working in and mixing in
3, 4, 5 = medium to fastest operation for kneading and beating
M = fast and continuous operation (fastest speed). Press to the left and hold in place
3. Apertures for inserting the tools
– Pull out the main plug.
- Insert the required tools into the apertures and depress until they lock into position (note the shape of the plastic parts to prevent mixing them up).
4. Cable rewind
After working, completely wind up the power cord.
5. Rear aperture with catch for inserting accessories, e.g. mixer base or universal cutter:
– Pull out the main plug.
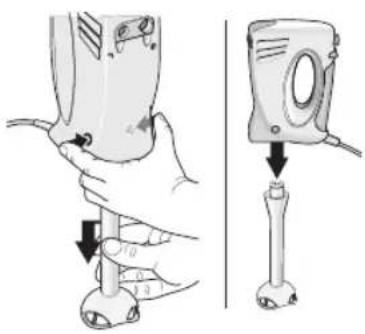
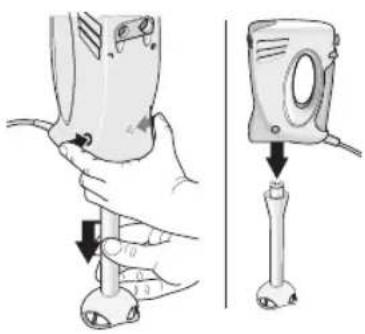
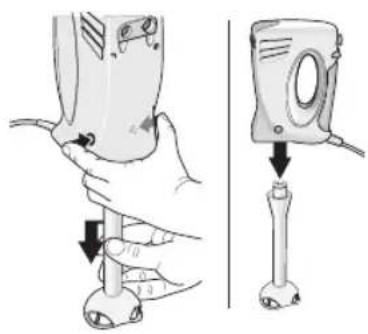
- Push up the catch on the rear aperture until it locks into position. Insert the mixer base and lock into position.
- Press switch to the left for continuous operation "M" and hold in place.
6. Release buttons
For removing the mixer base or the universal cutter from the rear aperture.
- Remove the mixer base by pressing both buttons simultaneously.
- Close the catch on the rear aperture.
7. Tools
a. Stirrers for sauces, beaten egg white, mashed potatoes, creme fraîche, mayonnaise, cream and light dough, e. g. cake mixture.
b. Kneading hook for stiff mixtures such as short pastry, yeast dough and potato dough as well as for mixing heavy mincemeat dough, pasta or bread dough. The maximum processing quantity is 500 g.
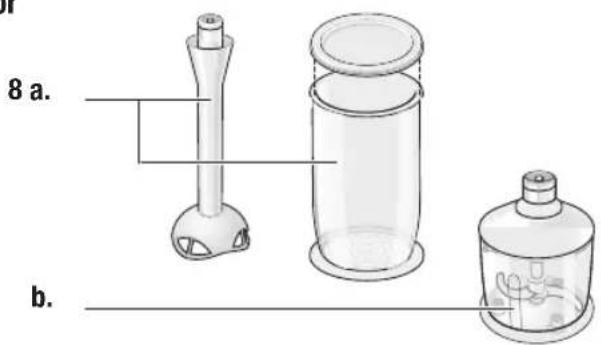
8. Accessories
a. Mixer base incl. blender jug (article no. A31462).
b. Universal cutter; separate operating instructions (article no. A31464).
The universal cutter or mixer base are not supplied as standard, they can be ordered from customer service.
2. Operating the appliance
Operating the appliance
Base unit with tools
Before using the appliance for the first time, clean the appliance and tools. An especially good result is achieved if the tools are used for the following applications:

Stirrers for ...
... sauces, beaten egg white, mashed potatoes, creme fraîche, mayonnaise, cream and light dough, e. g. cake mixture. Stirrers are not suitable for processing heavy dough.
Kneading hooks for ...
... stiff mixtures such as short pastry, yeast dough and potato dough as well as for mixing heavy mincemeat dough, pasta or bread dough. The maximum processing quantity is 500 g.
Important information
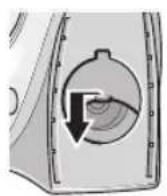
- When the rear aperture is open, the appliance can be operated in fast and continuous operation "M" only. Selector switch 1-5 will not function. Open and close the catch on the rear aperture only when the switch is in the 0/Off position.
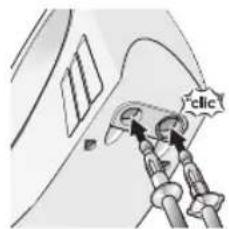
- Completely unwind the power cord.
- Place the required tool on the base unit and depress until it locks into position. Note the shape of the plastic parts to prevent mixing them up!
- Re-insert the main plug.
- Place the food in a suitable bowl.
- Insert tools into the bowl and switch on the appliance at the required setting.
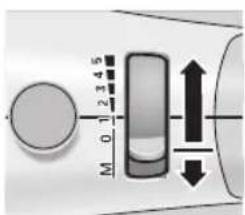
Settings 1, 2: for working in and mixing in.
Settings 3, 4: for kneading and beating.
- After working, set the switch to 0/Off and release and remove the tools with the ejector button.
Attention:
- The ejector button cannot be actuated unless the switch is in the 0/Off position.
Note:
- Always switch off the base unit before taking it out of the blended food.

23

Mixer base (accessories)
- For blending mayonnaises, sauces, soups, mixed drinks, baby food and for crushing ice and cutting cooked fruits and vegetables.
Important information
- When the rear aperture is open, the appliance can be operated in fast and continuous operation "M" only. Selector switch 1-5 will not function. Open and close the catch on the rear aperture only when the switch is in the O/Off position.
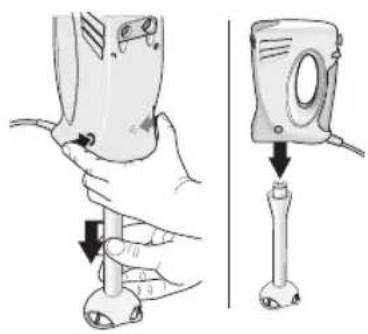
- Push up the catch on the rear aperture until it locks into position.
- Insert the mixer base and lock into position.
- Put ingredients into the blender jug.
- Move the switch to the left to fast and continuous operation and hold in place. After working, remove the mixer base by simultaneously pressing both release buttons.
- Close the catch on the rear aperture.
Note:
- To prevent the food from splashing, first immerse the mixer base into the food, then switch on the appliance.
After using the appliance/cleaning
Attention!
- Never immerse the base unit in water and do not clean in the dishwasher.
– Pull out the main plug.
- Wipe the base unit with a damp cloth and then wipe dry.
- Clean the tools and the mixer base in the dishwasher or with a brush under running water.
Note:
- If processing e.g. red cabbage, the plastic parts will become discoloured by a red film which can be removed with a few drops of cooking oil.
- The power cord can be wound up to facilitate storage of the appliance.





24
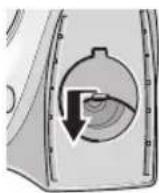
Assistance in case of problems
Switch cannot be moved to settings 1 to 5.
Remedial action: When the rear aperture is open, selector switch 1-5 will not function. The catch must be completely closed.
Application
This appliance is designed for domestic and not industrial use. Use the appliance for processing normal quantities of food for domestic use.
Accessories can be purchased subsequently from customer service. Please retain the operating instructions. If passing on the appliance to a third party, always include the operating instructions.


Disposal
Equipment that has reached the end of its service life can be handed over at a sales outlet, and will be professionally disposed of free of charge.
Equipment that has hazardous defects should be disposed of immediately.
Please ensure that it cannot be used again.
Do not dispose of equipment with household rubbish (for environmental reasons!).

Safety instructions

Risk of electric shock!
Connect and operate the appliance only in accordance with the specifications on the rating plate.
Do not use the appliance if the power cord and/or appliance are damaged. Keep children away from the appliance. After using the appliance, always pull out the main plug, also before cleaning or re-assembling the appliance, before leaving the room or if a fault occurs.
Do not lay the power cord near sharp edges or hot surfaces. To prevent injury, repairs to the appliance, such as replacing a damaged power cord, should be carried out by our customer service only. Do not use the appliance with damp hands and do not operate at no load. Operate the appliance with original accessories only.
Insert tools of one type only (e. g. kneading hook). Never simultaneously use tools and an accessory inserted in the rear aperture. Caution when processing hot liquids. Liquids may splash during processing. Do not immerse the appliance in liquid. If there is a power failure, the appliance remains switched on.
Persons, including children, who in view of the level of their physical, sensory or mental capacities, or their lack of experience or knowledge, are not in a position to use the equipment with safety, may not use the equipment without supervision or instruction from a responsible person.
Risk of in jury!
Before changing tools and the mixer base, wait until the appliance has come to a standstill - when switched off, the appliance continues running briefly. Never grip the blade of the mixer base. Never grip the rotating tools. Never clean the mixer base with bare hands. Use a brush.
Garantie/Garantie/Garanzia/Warranty
DE Garantie
Our TURMIX electrical household appliances carry a warranty of 2 years from the date of purchase. We undertake to replace, free of cost, any parts of the appliance that get damaged as a consequence of material or manufacturing defects during the warranty period. Return shipments should be packed in the original packing or something equivalent. In case of improper handling or in case repairs are attempted by third parties, the warranty is rendered null and void. Damage due to normal wear do not fall under the warranty.
Please preserve your receipt carefully, it serves as the warranty certificate as well.
DKB Household Switzerland AG, Eggbühlstrasse 28, Postfach, CH-8052 Zürich www.turmix.com
Tel. +41 (0)44 306 11 11 / Fax +41 (0)44 306 11 12 Mail: household@dkbrands.com
DKB Household Switzerland AG, Service Center, Grindelstrasse 3-5, CH-8303 Bassersdorf
Tel. +41 (0)43 266 16 00 / Fax +41 (0)43 266 16 10 www.turmix.com
Mail: servicecenter@dkbrands.c
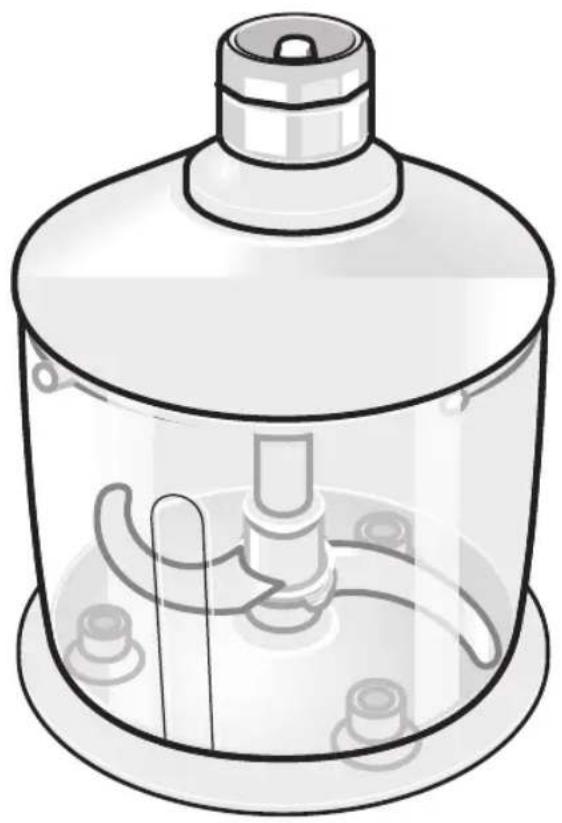
Universal cutter for
hand mixer CX 500
Bedienungsanleitung
Mode d'emploi
Istruzioni d'uso
Operating Manual




28
1. Überblick








7.
10.



This accessory is intended for use with the handmixer CX 500. Follow the operating instructions for the handmixer CX 500. Please retain the operating instructions. If passing on the appliance to a third party, always include the operating instructions.
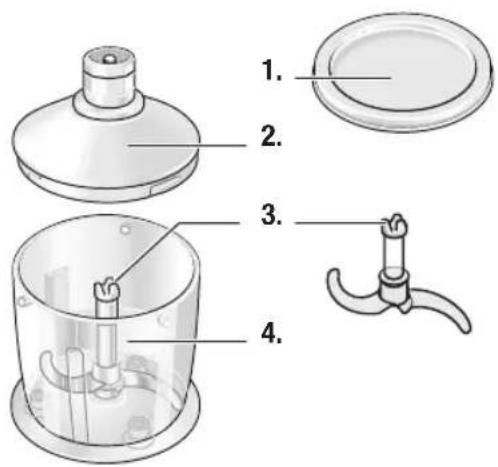
Overview
- Lid
- Attachment
- Blade (attention: sharp!)
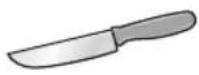
For cutting meat, hard cheese, onions, herbs, garlic, fruit, vegetables, nuts, almonds (see table, at the end of this operating manual).
- Universal cutter jug with non-slip feet
Operating the appliance
- Preparation
– Pull out the main plug.
- Place universal cutter jug on a smooth and clean work surface and depress.
- Insert blade.
- Add food.
Attention! Before cutting meat, remove gristle, bones and sinews. The universal cutter is not suitable for cutting very hard items (coffee beans, radishes, nutmeg) and frozen food (fruit, etc.).
- Place the attachment on the universal cutter jug (1.) and rotate in a clockwise direction until it "clicks" into position (2.).
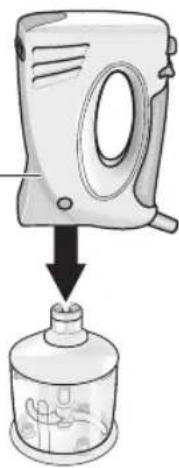
6./7. Attachment of handmixer / Commissioning
- Push up the catch on the rear aperture until it locks into position.
- Place the base unit on the attachment and lock into position.
- Hold the base unit and universal cutter firmly and switch on the appliance at setting "M". The best results are achieved by operating the appliance intermittently (switch on briefly, pause, switch on briefly, ... ). Never lift off the work surface.
Important information
- When the rear aperture is open, the appliance can be operated in fast and continuous operation only "M". Selector switch 1-5 will not function. Open and close the catch on the rear aperture only when the switch is in the O/Off position.
8.-10. After using the appliance / Cleaning
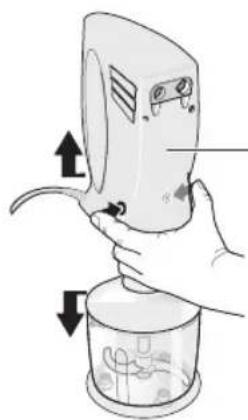
- After working, remove the base unit from the attachment by simultaneously pressing both release buttons (8.).
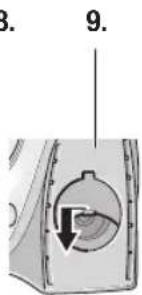
- Close the catch on the rear aperture (9.).
- Rotate attachment in an anti-clockwise direction and remove from the universal cutter-jug.
- Take hold of the blade by the plastic handle and take out.
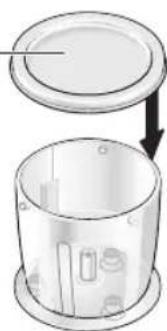
- To store the processed food, place the cover on the universal cutter jug (10.).
– Universal cutter and blade are dishwasher-proof.
Attention!
- Never immerse the attachment for the universal cutter in water and do not clean in the dishwasher.
- Wipe the attachment with a damp cloth only.
Assistance in case of problems
- Switch cannot be moved to settings 1 to 5.
- Remedial action: When the rear aperture is open, selector switch 1-5 will not function. The catch must be completely closed.
Safety instructions
- Risk of injury from sharp blade/rotating drive! Never grip the blade in the universal cutter. Never clean cutting blade with bare hands. Use a brush. Take hold of cutting blade by the plastic handle only.
- Important! Before attaching or removing the universal cutter, wait until the appliance has come to a standstill. Only ever use a completely assembled universal cutter. While working, never lift the universal cutter off the work surface.
 |  |  | ||
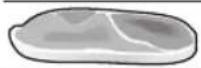 | 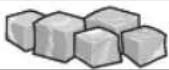 | (1 cm) | 100 g | 10 – 20 s |
 | 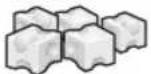 | (1 cm) | 100 g | 30 – 40 s |
 |  | 100 g | 10s | |
 |  | 15 g | 20 – 30 s | |
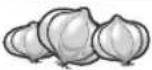 |  | 20 x | 15 s | |
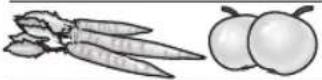 |  | 100 g | 15 s | |
 |  | 150 g | 20 s | |
 |  | 150 g | 30 – 40 s | |
 | 100g + 100g + 100g | 5 s | ||


37




38


39





D3340.90020 / 2. Version
Änderungen vorbehalten / Sous réserve de modifications / Con riserva di modifiche / Alterations reserved
www.turmix.com


- AUF EINEN BLICK
- AUSWURFTASTE
- WICHTIGER HINWEIS
- REMARQUE IMPORTANTE
- ELIMINATION (RECYCLAGE)
- GUIDA RAPIDA
- 5-STEP SWITCH + FAST AND CONTINUOUS OPERATION
- APERTURES FOR INSERTING THE TOOLS
- CABLE REWIND
- REAR APERTURE WITH CATCH FOR INSERTING ACCESSORIES, E.G. MIXER BASE OR UNIVERSAL CUTTER
- RELEASE BUTTONS
- TOOLS
- ACCESSORIES
- OPERATING THE APPLIANCE
- BASE UNIT WITH TOOLS
- STIRRERS FOR
- KNEADING HOOKS FOR
- IMPORTANT INFORMATION
- ATTENTION
- NOTE
- MIXER BASE (ACCESSORIES)
- AFTER USING THE APPLIANCE/CLEANING
- ASSISTANCE IN CASE OF PROBLEMS
- APPLICATION
- DISPOSAL
- SAFETY INSTRUCTIONS
- RISK OF ELECTRIC SHOCK
- RISK OF IN JURY
- GARANTIE/GARANTIE/GARANZIA/WARRANTY
- DE GARANTIE
- ÜBERBLICK
- OVERVIEW
Brand : Turmix
Model : CX 500
Category : Hand blender