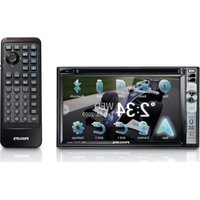
CID2680 - Car radio PHILIPS - Free user manual and instructions
Find the device manual for free CID2680 PHILIPS in PDF.


| Product Type | Car Stereo |
| Brand | Philips |
| Model | CID2680 |
| Dimensions (approx.) | 180 x 50 x 160 mm (DIN standard) |
| Weight (approx.) | 0.5 kg |
| Power Supply | 12V DC (negative ground) |
| Radio Bands | AM/FM |
| Disc Playback | CD, CD-R, CD-RW |
| Audio Inputs | Front USB, Auxiliary (3.5mm) |
| Output Power | 4 x 20W RMS (max 4 x 45W) |
| Preset Memory | Up to 30 stations (18 FM, 12 AM) |
| Display | LCD with backlight |
| Remote Control | Included (wireless) |
| Mounting Type | Single DIN, front-loading |
| Maintenance | Clean with soft dry cloth; avoid liquids |
| Safety | Disconnect battery before installation; use correct fuses |
| Spare Parts & Repairability | Contact Philips authorized service centers |
| General Information | User manual available in PDF at notice-facile.com |
Frequently Asked Questions - CID2680 PHILIPS
User questions about CID2680 PHILIPS
0 question about this device. Answer the ones you know or ask your own.
Ask a new question about this device
Download the instructions for your Car radio in PDF format for free! Find your manual CID2680 - PHILIPS and take your electronic device back in hand. On this page are published all the documents necessary for the use of your device. CID2680 by PHILIPS.
USER MANUAL CID2680 PHILIPS
2 Your in-car entertainment system 6
Introduction 6
What's in the box 6
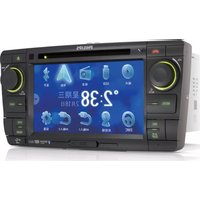
Overview of the main unit 7
Overview of the remote control 8
3 Get started 9
Install the car audio 9
Install remote control battery 14
Turn on 14
Set date and time 14
4 Use map 16
Upgrade the map 16
5 Listen to radio 17
Tune to a radio station 17
Store radio stations in memory 17
Tune to a preset station 18
Play with RDS (Optional) 18
6 Play 21
Load discs 21
Connect USB device 21
Insert USB or SD/MMC card 22
Play/Pause 22
Search for a folder 22
Search within a title/folder 23
Repeat 23
Repeat a section 24
Random play 24
Select audio language 24
Select audio mode 24
Select subtitle language 24
Change view angle 25
Rotate pictures 25
Zoom 25
Select slide show duration 25
7 Play with Bluetooth device 26
Pair the Bluetooth-enabled devices 26
Make a call 26
Receive call 27
Listen to music from Bluetooth device 27
Adjust Bluetooth settings 27
8 Adjust sound 28
Adjust volume 28
Mute 28
Select preset equalizer 28
Adjut fader/balance 29
Set Dynamic Bass Boost (DBB) 29
9 Adjust settings 30
Display system setup menu 30
Adjust general settings 30
Adjust sound settings 31
Adjust video settings 31
Adjust Bluetooth settings 32
Adjust language settings 32
Adjust volume settings 33
Adjust DVD rating 33
10 Others 34
Listen to other devices 34
Reset 35
Remove the unit 35
Replace fuse 35
11 Product information 36
12 Troubleshooting 37
About Bluetooth device 38
13 Glossary 39
1 Important
Safety
Read and understand all instructions • before you use the apparatus. If damage is caused by failure to follow instructions, the warranty does not apply.
Use of controls or adjustments or performance of procedures other than herein may result in hazardous radiation exposure or other unsafe operation.
This unit is designed for negative ground • (earth) 12 V DC operation only.
To reduce the risk of traffic accident, do • no watch video during driving.
To ensure safe driving, adjust the volume • to a safe and comfortable level.
Improper fuses can cause damage or fire. When you need to change the fuse, consult a professional.
Use only the supplied mounting hardware • for a safe and secure installation.
To avoid short circuit, do not expose the • apparatus, remote control or remote control batteries to rain or water.
Never insert objects into the ventilation • slots or other openings on the apparatus.
Never place any objects other than discs • into the disc tray/slot.
• Visible and invisible laser radiation when open. Avoid exposure to beam.
Risk of damage to the screen! Never • touch, push, rub or strike the screen with any object.
Never use solvents such as benzene, • thinner, cleaners available commercially, or anti-static sprays intended for discs.
Clean the apparatus with soft, damp • cloth. Never use substances such as alcohol, chemicals or household cleaners on the apparatus.
The apparatus shall not be exposed to • dripping or splashing.
Do not place any sources of danger on • the apparatus (e.g. liquid filled objects, lighted candles).
Notice

Be responsible Respect copyrights
The making of unauthorized copies of copy-protected material, including computer programs, files, broadcasts and sound recordings, may be an infringement of copyrights and constitute a criminal offence. This equipment should not be used for such purposes.

"DivX, DivX" Certified, and associated logos are trademarks of DivX, Inc. and are used under license.
Official DivX® Certified product. Plays all versions of DivX® video (including DivX® 6) with standard playback of DivX® media files.
The Bluetooth® word mark and logos are registered trademarks owned by Bluetooth SIG, Inc. and any use of such marks by Philips is under license.
DOLBY. DIGITAL
Manufactured under license from Dolby Laboratories.
"Dolby" and the double-D symbol are trademarks of Dolby Laboratories.
Other trademarks and trade names are those of their respective owners.
This apparatus includes this label:

Environmental information
All unnecessary packaging has been omitted. We have tried to make the packaging easy to separate into three materials: cardboard (box), polystyrene foam (buffer) and polyethylene (bags, protective foam sheet.)
Your system consists of materials which can be recycled and reused if disassembled by a specialized company. Please observe the local regulations regarding the disposal of packaging materials, exhausted batteries and old equipment.
Recycling

Your product is designed and manufactured with high quality materials and components, which can be recycled and reused.
When you see the crossed-out wheel bin symbol attached to a product, it means the product is covered by the European Directive 2002/96/EC:

Never dispose of your product with other household waste. Please inform yourself about the local rules on the separate collection of electrical and electronic products. The correct disposal of your old product helps prevent potentially negative consequences on the environment and human health.
Your product contains batteries covered by the European Directive 2006/66/EC, which cannot be disposed of with normal household waste.
Please inform yourself about the local rules on separate collection of batteries. The correct disposal of batteries helps prevent potentially negative consequences on the environment and human health.

This product complies with the radio interference requirements of the European Community.
Any changes or modifications made to this device that are not expressly approved by Philips Consumer Lifestyle may void the user's authority to operate the equipment.
2010 © Koninklijke Philips Electronics N.V. All rights reserved.
Specifications are subject to change without notice. Trademarks are the property of Koninklijke Philips Electronics N.V. or their respective owners. Philips reserves the right to change products at any time without being obliged to adjust earlier supplies accordingly.
2 Your in-car entertainment system
Congratulations on your purchase, and welcome to Philips! To fully benefit from the support that Philips offers, register your product at www.philips.com/welcome.
Introduction
With the car entertainment system, you can
Quickly found routine through the •
navigation system
And you can also enjoy:
Audio/video/JPEG pictures from •
DVD, VCD or CD•
USB devices•
SD/SDHC/MMC cards •
External devices•
FM or AM (MW) radio•
• Audio from Bluetooth-enabled devices
Besides, you can make/receive phone calls with
Bluetooth-enabled devices.
What's in the box
Check and identify the contents of your package:

① Main unit
② Trim plate
③ Remote control
④ AV out cable
⑤ Control/Camera wire
⑥ USB cable
⑦ AV in cable
⑧ MZ-TFT/Video out 2 cable
⑨ GPS antenna
⑩ ISO connectors (x2)
⑪ Screws
- M5×6mm × 8 pcs
- M5×7mm × 8 pcs
- M5×15 × 1pc
Screw nut (4×25.4) × 1 pc
⑫ Remote control battery
⑬ Screen cleaning cloth
⑭ Printing material (include User manual, Quick start guide)
Overview of the main unit

①
Eject disc.
② Remote control sensor
Detects signals from the remote control. When using the remote control, point it directly at the IR sensor.
③ NAVI
Enter the GPS navigation system or • exit.
④ ①/MUTE/VOL -/+
Turn the unit on or off. Turn mute on or off.
- Adjust volume.
⑤ SOURCE
- Select source.
⑥ AV IN
External equipment audio/video in • socket.
⑦
USB socket•
⑧ RESET
Reset the unit when it hangs up.
⑨ SD/SDHC/MMC card slot
⑩ Disc slot
⑪ MAP
Open the cover and insert/remove • the GPS map card.
Overview of the remote control
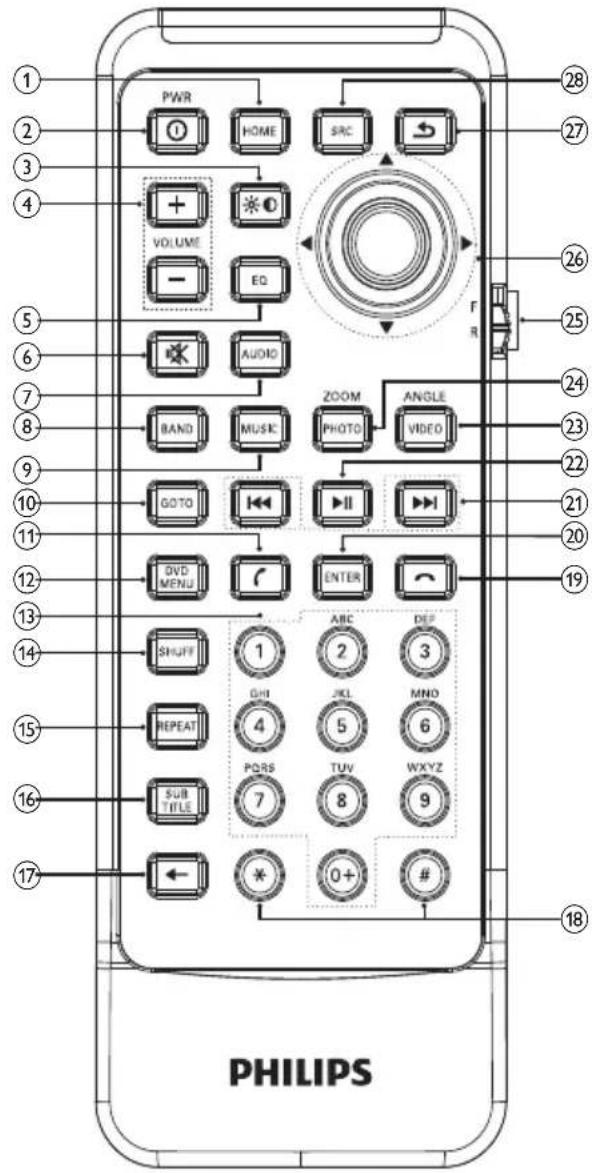
① HOME
• Toggles the home menu on or off.
② ①PWR
• Turn the unit on or off.
③
• Adjust screen brightness/contrast.
④ VOLUME +/-
- Adjust volume.
⑤ EQ
• Access audio setting menu.
⑥ 咪
Mute or unmute audio.
⑦ AUDIO
Select audio language or audio • channel.
⑧ BAND
Select AM or FM band.
⑨ MUSIC
Switch to music playing mode.
⑩ GOTO
Select track/chapter.
⑪ (green)
Answer phone.
Dial number.
⑫ DVD MENU
Return to DVD main menu.
⑬ Numeric keypad
⑭ SHUFF
Turn random play on or off.
⑮ REPEAT
Select repeat play mode.
⑯ SUBTITLE
- Select DVD or DivX subtitle language.
⑰ ←
• Delete entered numbers/characters.
⑱ #/ *
• Symbols for making phone call.
⑲ (red)
- Terminate call.
⑳ ENTER
- Confirm the character/number inputs.
21
- Skip to previous/next track/chapter.
- Tune for radio station.
22 ▶ II
Start play or pause.
Confirm selection.
②3 VIDEOANGLE
Select a difference angle/version of the current DVD scene.
⑳ PHOTOZOOM
Zoom in or out a picture/video image.
② 5 F/R
Switch to front/rear control mode.
⑳ Navigation buttons
• ▲▽
Skip to the previous/next preset station.
Skip to the previous/next folder.
Search backward/forward for DVD video.
Move cursor up/down.
•
Skip to the previous/next track.
Move cursor to left/right.
Press the navigation button down•
Start play or pause.
Confirm selection.
⑳
• Return to previous menu or exit.
⑳ SOURCE
- Select source.
3 Get started

Caution
Use of controls or adjustments or performance of procedures other than herein may result in hazardous radiation exposure or other unsafe operation.
Always follow the instructions in this chapter in sequence.
Install the car audio
These instructions are for a typical installation. However, if your car has different requirements, make the corresponding adjustment. If you have any questions regarding installation kits, consult your Philips car audio dealer.

Caution
This unit is designed for negative ground (earth) 12 V DC operation only.
- Always install this unit in the car dashboard. Other locations can be dangerous as the rear of the unit heats up during use.
• To avoid short-circuit: before you connect, ensure that the ignition is off.
- Ensure that you connect the yellow and red power supply leads after all other leads are connected.
- Ensure that all loose leads are insulated with electrical tape.
- Ensure that the leads do not get caught under screws orin parts that will move (e.g. seat rail).
- Ensure that all ground (earth) leads are run to a common ground (earth) point.
- Use only the supplied mounting hardware for a safe and secure installation.
- Improper fuses can cause damage or fire. When you need to change the fuse, consult a professional.
Note on the power supply lead (yellow)
- When you connect other devices to this system, ensure that the rating of the car circuit is higher than the total fuse value of all the connected devices.
Notes on speaker connection
• Never connect speaker wires to the metal body or chassis of the car.
- Never connect speaker wires with stripes to one another.
Connect wires

Caution
- Ensure that all loose leads are insulated with electrical tape.
1 Check the car's wiring carefully, then connect them to the two supplied ISO wires.
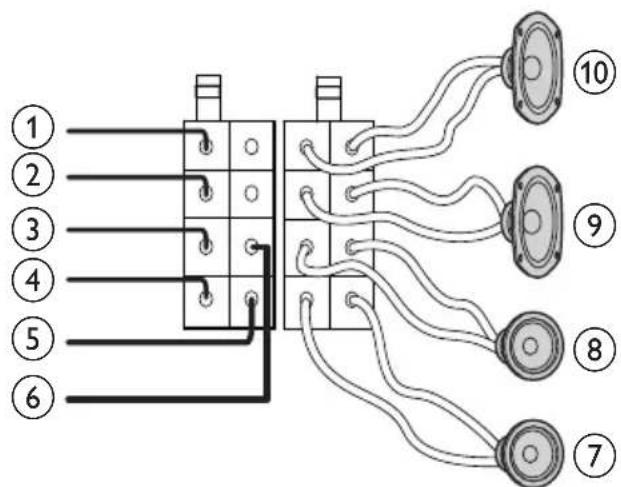
| Connector Connect to | |
| 1 Brown wire Telephone mute | |
| 2 Red wire The +12V power ter which is live in the accessory (ACC) position of the ignition switchIf there is no accessory position, connect to the +12V car battery terminal that is always live. Be sure to connect the black ground (earth) lead to a metal surface of the car first. | |
| 3 Orange wire Illumination switch | |
| 4 Black wire A metal surfaFirst connect the black ground (earth) lead, then connect the yellow and red power supply leads. | |
| 5 Yellow wire The +12V which is live at all times. | |
| 6 Blue wire The electric ante control lead or power supply lead of the antenna boosterIf there is no electric antenna or antenna booster, or it is manually operated telescopic antenna, it is not necessary to connect this lead. | |
| 7 Green and green/black wires | Left speaker (Rear) |
| 8 White and white/black wires | Left speaker (Front) |
| 9 Gray and gray/black wires | Right speaker (Front) |
| 10 Purple and purple/black wires | Right speaker (Rear) |
2 Connect the other end of the two ISO connectors to the car audio system.

3 If necessary, do the other connections:

flowchart
graph TD
    A["摄像头"] --> B["摄像头"]
    B --> C["摄像机"]
    C --> D["UV系统"]
    D --> E["显示器"]
    E --> F["黑白"]
    E --> G["White"]
    E --> H["Red"]
    E --> I["Yellow"]
    E --> J["Black"]
    E --> K["Blue"]
    E --> L["Red screen"]
    E --> M["Wireless headphone"]
    E --> N["Yellow screen"]
    E --> O["White screen"]
    E --> P["Black screen"]
    E --> Q["Touch controller"]
    E --> R["Amplifier"]
    B --> S["摄像头 Green Blue"]
    B --> T["摄像机 RGB"]
    B --> U["UV System AUX"]
    B --> V["显示器 RGB"]
    B --> W["黑白 RGB"]
    B --> X["Red RGB"]
    B --> Y["White RGB"]
    B --> Z["Blue RGB"]
    style A fill:#f9f,stroke:#333
    style B fill:#ccf,stroke:#333
    style E fill:#cfc,stroke:#333
    style F fill:#fcc,stroke:#333
    style G fill:#fcc,stroke:#333
    style H fill:#fcc,stroke:#333
    style I fill:#fcc,stroke:#333
    style J fill:#fcc,stroke:#333
    style K fill:#fcc,stroke:#333
    style L fill:#fcc,stroke:#333
    style M fill:#fcc,stroke:#333
    style N fill:#fcc,stroke:#333
    style O fill:#fcc,stroke:#333
    style P fill:#fcc,stroke:#333
    style Q fill:#fcc,stroke:#333
    style R fill:#fcc,stroke:#333
    style S fill:#cff,stroke:#333
    style T fill:#cff,stroke:#333
    style U fill:#cff,stroke:#333
    style V fill:#cff,stroke:#333
    style W fill:#cff,stroke:#333
Connect GPS antenna
To receive signal from satellites, connect the supplied GPS antenna to your car and the system.
1 Connect the supplier GPS antenna to the system first.
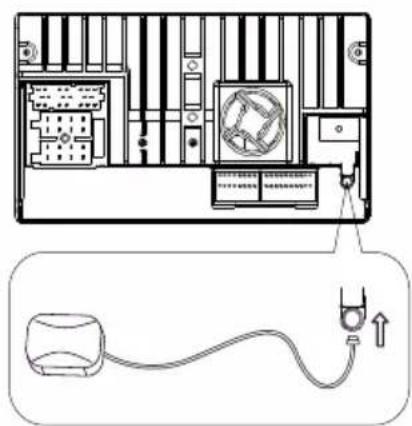
natural_image
Diagram of an electronic device showing internal components and a connected cable with a plug (no text or symbols)2 Stick the other end of the GPS antenna to a metal surface of the car.
Connect Radio antenna
If your car has built-in radio antenna, connect it to the radio antenna of the system for better radio signal.
1 Connect the radio antenna to the car antenna.

Mount in the dashboard

Note
Check wire connection before you mount the unit into a car.
- If preset radio stations are lost when the ignition key is turned OFF and then back ON, reconnect the red leads crosswise to the yellow ones.
1 If the car does not have an on-board drive or navigation computer, disconnect the negative terminal of the car battery.
If you disconnect the car battery in • a car that has an on-board drive or navigation computer, the computer may lost its memory.
If the car battery is not disconnected, to avoid short-circuit, ensure that bare wires do not touch each other.
2 Ensure that car dashboard opening is within these measurements:

Since the unit cannot be used if the dashboard opening's slant angle is above 20 degrees; Ensure that the horizontal slant of the car dashboard opening is between 0 and 20 degrees.
3 Slide the unit into the dashboard until a click sound is heard.

natural_image
Line drawing of an electronic device with a screen and antenna, no text or symbols present4 Attach the trim plate.

natural_image
Technical line drawing of an electronic device with a panel open, showing internal components and a directional arrow (no text or symbols)5 Reconnect the negative terminal of the car battery.
Install remote control battery

Caution
Risk of explosion! Keep batteries away from heat, sunshine or fire. Never discard batteries in fire.

Note
- Remove batteries if they are exhausted or if the remote control is not to be used for a long time.
- Batteries contain chemical substances, they should be disposed of properly.
- Perchlorate Material - special handling may apply. See www.dtsc.ca.gov/hazardouswaste/perchlorate.
1 Open the battery compartment.
2 Insert one CR2025 battery with correct polarity (+/-) as indicated.
3 Close the battery compartment.

Turn on

Caution
Risk of road accidents! Never watch video or adjust settings while you drive.
1 Press Ⓓ to turn on the unit. The available OSD (On-Screen Display) languages are displayed.
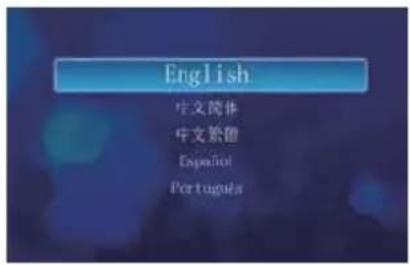
2 Touch a language to select. The OSD language is changed to the → selected language immediately. To adjust screen brightness/contrast, • press ⚙/○ on the remote control, then press ◀, ▶, ▶ or . ▼ To turn off the unit, press ⏱ for 3 seconds.
Set date and time
1 Touch the upper left corner to display main menu.

2 Touch in the middle right side of the screen. The second main menu is displayed.
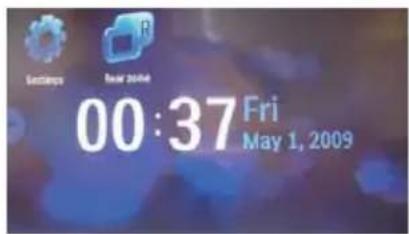
3 Touch [Settings].
4 Touch [Time]. The date/time setup menu is displayed.

Set date
1 Touch [Date]. 2 Touch on the displayed date information. A submenu is displayed.

3 Touch ♠ or ♦ to set year, month and day.
Set clock mode
1 Touch [Clock mode].

2 Touch on [12Hr] or [24Hr] to select clock mode.
Set time
1 Touch [Time].
2 Touch on the displayed time. A submenu is displayed.
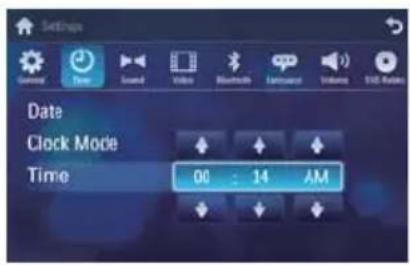
3 Touch ♠ or ♦ to set hour and minute.

4 Use map

Note
You may need to upgrade the map (sold separately) before using it (see "Upgrade the map" section)
1 Touch the upper left corner to display home menu.
2 Touch [Navigation].
The navigation menu is displayed in a few seconds.
3 Refer to the map manual to operate the navigation tool.

Tip
- You can press NAVI to enter/exit the navigation system.
Upgrade the map
1 Turn off the car audio system.
2 Press the map card (sold separately) until you hear a click sound.
3 Take out the card and bring it to the authorized service center for upgrade.

4 Insert the upgraded map card back into the map card slot.
5 Turn on the car audio.
The map upgrades in a few minutes.
5 Listen to radio
Tune to a radio station
1 Touch the upper left corner to display home menu.
2 Touch [Radio]. Band and frequency information is ↩ displayed.

3 Touch on FM or AM to select band:
• FM band options: FM1, FM2, FM3
• AM band options: AM1, AM2
4 Briefly touch ◀ or ▶ to tune to a radio station by step.
Touch ◀ or ▶ for over 1 seconds to tune to a radio station automatically.

Note
- If simplified Chinese is selected as OSD (on-screen-display) language, the RDS functions (see 'Play with RDS (Optional)') are not available. The tuner screen displays as below:

Tune by frequency
1 Touch FM or AM to select band.
2 Touch
3 Touch [Goto].
4 Touch the numbers to enter frequency.

Touch •← to clear the last entered number.
Touch • ✗ to clear all the entered numbers.
5 Touch √to confirm.
The radio station is broadcast.
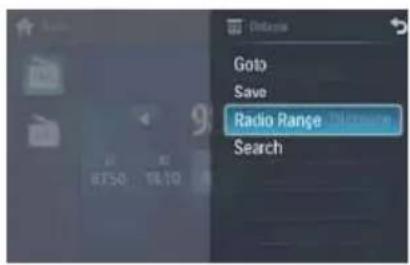
Select radio range
Before you start to search for radio stations, you can select radio range.
1 Touch 目
2 Touch [Radio range] to toggle tuner sensitivity from normal to high sensitivity.
• [Distance]: Only stations with strong signals can be broadcast.
- [Local]: Stations with strong and weak signals can be broadcast.
Store radio stations in memory
You can store up to 6 stations in each band.
Store stations manually
1 Tune to the station.
2 Touch 目
3 Touch [Save].
4 Touch one of the channels 01 to 06 to save the select band.

Store stations automatically
You can search for a station with intro search, which broadcasts a 10-second preview of each detected radio station.
1 Select band.
2 Touch 百
3 Touch [Search].
Auto search starts. The six strongest stations of the selected band are saved in preset channels 1-6 automatically.
Tune to a preset station
1 Touch [Radio].
2 Select band.
3 Touch one of the preset channels (01 to 06) to select a preset station.

Play with RDS (Optional)
The RDS (Radio Data System) function operates only in areas with FM stations broadcasting RDS signals. If you tune to an RDS station, an RDS icon and information about the presenter, station or program is displayed.
Select program type
Before tuning to RDS stations, you can select program type and let the unit search only for programs of the selected category.
1 Touch on FM band to select FM1, FM2, or FM3.
2 Touch [PTY]. List of available program type is ↩ displayed.

3 Touch ▲ or ▼ to display the next/previous screen.
4 Touch on the selected program and then touch √ to activate searching.
| Item Program type | Description |
| 1 None No program type or undefined | |
| 2 News News services | |
| 3 Affairs Politics and current affairs | |
| 4 Info | Special information programs |
| 5 Sport | Sports |
| 6 Educate | Education and advanced training |
| 7 Drama | Radio plays and literature |
| 8 Culture | Culture, religion and society |
| Item Program type | Description | |
| 9 Science Science | ||
| 10 Varied Entertainment programs | ||
| 11 Pop M Pop music | ||
| 12 Rock M Rock music | ||
| 13 Easy M Light music | ||
| 14 | Light M | Light classical music |
| 15 | Classics | Classical music |
| 16 | Other M | Special music programs |
| 17 | Weather | Weather |
| 18 Finance Finance | ||
| 19 | Children | Children's programs |
| 20 | Social | Social Affairs |
| 21 | Religion | Religion |
| 22 | Phone In | Phone In |
| 23 | Travel | Travel |
| 24 Leisure | Leisure | |
| 25 | Jazz | Jazz Music |
| 26 | Country | Country Music |
| 27 | Nation M | National Music |
| 28 | Oldies | Oldies Music |
| 29 | Folk M | Folk Music |
| 30 | Document | Documentary |
| 31 | Test | Alarm Test |
| 32 | Alarm | Alarm |
Select alternate frequencies
You can turn on or off below RDS functions:
| [AF] (Alternate Frequency) | If the radio signal come from the current station is poor, you can turn on the [AF] function to let the unit searches for another station with stronger signal but with the same program identification. |
| [TA] (Traffic Announcement) | If you do not want to miss traffic announcement during enjoying music, you can turn on the [TA] function. When there is traffic announcement, the unit switches to tuner mode (regardless of the current mode) and begins to broadcast the announcement on traffic conditions. When the traffic announcement is over, it returns to the previous mode. |
| [REG] (Regional radio) | When [REG] is turned on, only stations in the current region can be tuned to. |
| [EON](Enhanced Other Networks) | When [EON] is turned on, local stations ‘break into’ a national station’s broadcast for the duration of a Traffic Announcement. |

1 Touch on [AF], [TA], [REG], or [EON] to turn it on or off.
When the icon is highlighted with → blue background color, the function is turned on.
Turn on RDS
You can select below RDS functions:
| [RDS] [On] Turn on RDS functions. | |
| [Off] When RDS is turned off, all the RDS related icons (e.g. PTY, TA) disappear. | |
| [TA VOL](Traffic announcement Volume) | 0 to 10 When TA signal is cut in, the volume can be increased for a certain level: 0 to 10. |
| [CT] (clock time) | [On] Turn on the RDS clock. Time shown on the unit synchronize with that on the RDS station.Note: The accuracy of the transmitted time depends on the RDS station that transmits the time signal. |
| [Off] Turn off the RDS clock | |
| [PS] (Program Service) | [On] Displays information such as RDS station identity name etc. |
| [Off] Turn off the PS function. | |
1 Touch 百
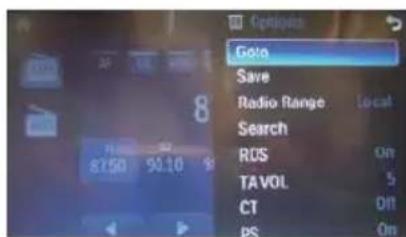
2 Touch on [RDS], [TA VOL], [CT] or [PS].
3 Touch on it again to select on or off. For • [TA VOL], touchor to select volume.
6 Play
Load discs
You can play video, audio or images stored on the following discs:
DVD video, DVD-R, DVD-RW•
VCD•
Audio CD, CD-R, CD-RW•

Note
Ensure that the disc contains playable content.
1 Insert the disc into the disc slot with label side facing up.
Play starts automatically.
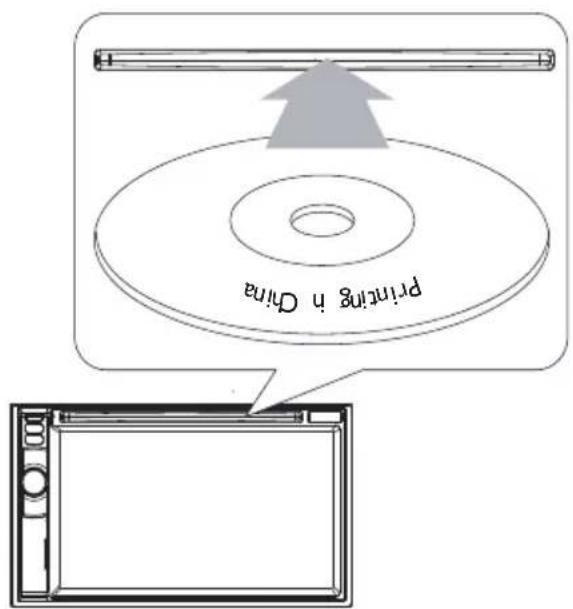
To remove the disc, press the▲ button.
When the disc is ejected, the unit switches to the previous source, if connected. Otherwise, the unit switches to [Radio] mode automatically.

Note
Depends on where you bought the unit, you can play DVD discs with one of the following region codes:
| Countries where you bought the unit | Supported DVD region code |
| China |  |
| Asia Pacific, Taiwan, Korea |  |
| Latin America |  |
| Russia, India |  |
Connect USB device

Note
Ensure that the device contains playable content.
1 Open the USB door.
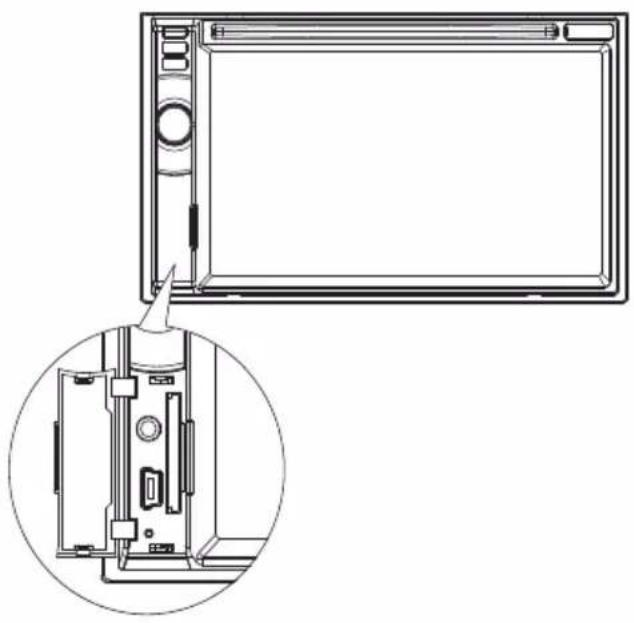
natural_image
Technical line drawing of a device with an inset close-up showing internal components (no text or symbols)2 Insert the small end of the supplied USB cable to the USB socket, then connect the other end of the USB cable to your USB device.
Play starts automatically.

natural_image
Diagram showing cable connection between a monitor and a USB device (no text or symbols present)Remove the USB device
1 Press SOURCE to switch to another source.
2 Remove the USB device.
Insert USB or SD/MMC card

Note
- Ensure that the device contains playable content.
• The unit supports SDHC card.
1 Open the USB/SD/MMC card cover.
2 Insert the SD/MMC card into the SD/MMC card slot.
Play starts automatically.

natural_image
Diagram of a computer monitor with an open screen and a magnified view showing the internal structure (no text or symbols)Remove the SD/MMC card
1 Press SOURCE to switch to another source.
2 Press the card until you hear a click sound. The card is now disengaged.
3 Remove the SD or MMC card.
Play/Pause
1 Once a disc, USB or SD/MMC card is inserted, play starts automatically.
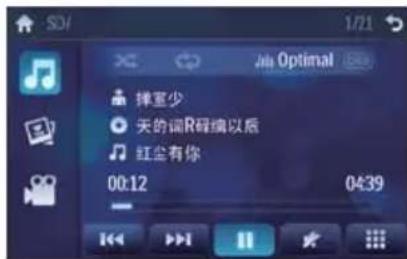
For DVD movie, if a menu appears, press to start play.
2 To pause, touch . "To resume play, touch " again.
Search for a folder
1 Touch ↩ to return to playlist menu.
2 Touch one of below icons to select folder/file:

3 Touch ♦ or ♦ to select a folder/track.
4 Touch ▶ to start play.
Search within a title/folder
1 Touch anywhere except for the upper left corner to display menu on the screen, if necessary.

2 Touch The search screen is displayed.
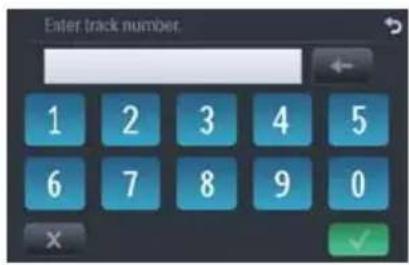
Note: If is not displayed, touch
3 Touch the numbers to enter chapter/file number, then touch√.
To clear the previous input, touch ←. To clear all input, touch ✗.
- Or touch ⋯ first and then touch the numbers to enter time.
Repeat
During play, you can select different repeat play modes.
For DVD/VCD movie disc:
1 Touch anywhere except for the upper left corner to display menu on the screen, if necessary.
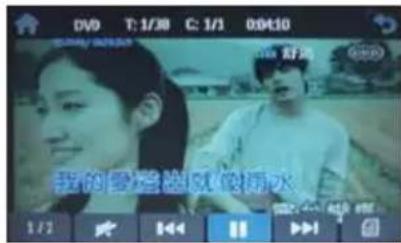
• [Repeat chapter]: play the current chapter repeatedly.
• [Repeat title]: play all chapters in the title repeatedly.
• [Repeat off]: cancel repeat play.
For VCD karaoke:
1 Touch anywhere except for the upper left corner to display menu on the screen, if necessary.
2 Touch ✉to select:
- [Repeat one]: play the current track repeatedly.
• [Repeat off]: cancel repeat play.
For audio files:
1 Touch anywhere except for the upper left corner to display menu on the screen, if necessary.
2 Touch 🔗 to select:
• -1: play the current track repeatedly.
- Folder: play all the tracks in the current folder repeatedly.
• (in grey color): cancel repeat play.

Tip
- You can also press REPEAT on the remote control to select repeated play mode.
Repeat a section
You can repeat a specific section of video file (repeat A-B).
1 During play, touch anywhere except for the upper left corner to display menu on the screen, if necessary.
2 Touch 1/2 to display the 2nd menu, if necessary.
3 Touch A-B repeatedly to mark:
• [Repeat A-]: the start of the section to repeat.
• [Repeat A-B]: the end of the section to repeat.
• The selected section plays repeatedly.
4 To exit A-B repeat mode, touch repeatedly until [Repeat A-B off] is displayed.
Random play
You can play audio tracks/files in random order.
1 During play, touch ✗ repeatedly to turn random play on or off.
• ∞ is highlighted: start random play.
• × turns gray: cancel random play.

Tip
- You can also press SHUFF on the remote control to select random play mode.
Select audio language
For video discs that contain two or more audio channels.
1 During play, touch anywhere except for the upper left corner to display menu on the screen, if necessary.
2 Touch 1/2 to display the 2nd menu.
3 Touch ▶ repeatedly.
The audio channel information is ↗ displayed on the upper line of the screen.
Select audio mode
When you play VCDs, you can select an audio mode (R/L/Stereo).
1 During play, touch anywhere except for the upper left corner to display menu on the screen.
2 Touch ▶ repeatedly until the audio mode is selected.
Select subtitle language
For DVD or DivX discs that contain two or more subtitle languages.
1 During play, touch anywhere except for the upper left corner to display menu on the screen, if necessary.
2 Touch 1/2 to display the 2nd menu
3 Touch 📋 repeatedly to select a language. The selected language is displayed.

Tip
- You may also press SUBTITLE on the remote control repeatedly to select subtitle language.
Change view angle
Some DVDs contain alternate scenes, such as scenes recorded from different camera angles. For such DVDs, you can select from the available alternate scenes.
1 During play, touch anywhere except for the upper left corner to display menu on the screen, if necessary.
2 Press VIDEOANGLE repeatedly on the remote control.
The view angle is changed.
Rotate pictures
1 When you view pictures, touch anywhere except for the upper left corner to display menu on the screen, if necessary.

natural_image
Wooden floating platform on water with blurred background (no visible text or symbols)2 Touch ♦ repeatedly to rotate the picture.
Zoom
You can zoom in pictures for a close view.
1 During view pictures, touch anywhere except for the upper left corner to display menu on the screen, if necessary.
2 Touch ♦ repeatedly to zoom in the picture.

natural_image
Aerial view of a floating pier or floating platform with water and fish visible (no text or symbols)3 Touch ♦, ♦, ◀ or ▶ to pan through the enlarged picture.

Tip
To zoom in/out video image, press • PHOTOZOOM on the remote control.
Select slide show duration
1 Touch anywhere except for the upper left corner to display menu on the screen, if necessary.
2 Touch 🔒 repeatedly to select:
- Fast: 3 seconds
- Normal: 5 seconds
- Slow: 8 seconds
7 Play with Bluetooth device
You can make or receive phone calls with Bluetooth-enabled phones through the unit. You can also listen to music from a Bluetooth-enabled device.
Pair the Bluetooth-enabled devices
To connect your Bluetooth device to the unit, you need to pair the device to the unit. Pairing needs only to be done once. You can pair up to eight devices.

Note
- The operational range between this unit and a Bluetooth device is approximately 10 meters (30 feet).
- Before you connect a Bluetooth device to this unit, familiarize yourself with the Bluetooth capabilities of the device.
- Compatibility with all Bluetooth devices is not guaranteed.
- Any obstacle between this unit and a Bluetooth device can reduce the operational range.
- Keep this unit away from any other electronic device that may cause interference.
1 Turn on the Bluetooth function on the device.
2 Search for Bluetooth device with the device.
3 Select "CID2680" in the pairing list.
4 Enter default password "0000".
4 pairing succeeds, phone call record is displayed.
Disconnect Bluetooth devices
1 To disconnect one device, touch (red).
→ (green) is displayed.

Tip
The device will also be disconnected when the device is moved beyond the operational range.
- If you want to reconnect the device to the unit, place it within the operational range.
- If you do not want to reconnect the device to the unit automatically, touch ☑ [Auto connect], then select [Off]. For details, see the "Adjust Bluetooth settings" section.
Make a call
1 Pair the phone with the unit.
2 Touch the upper left corner to display the home menu.
3 Touch [Bluetooth]. The Bluetooth menu is displayed.

4 Touch ♠ or ♦ to select the paired phone, then touch ⬇.
5 Touch ♦ or ♦ to search for phone number from the following list:

• [Missed calls]
• [Received calls]
• [Dialed calls]
• [Phone book]
• [Sim phone book]
- [Local phone book]
Or touch ⚠ to dial number directly, then touch ⭕ to dial.
Receive call
By default, all incoming calls are received automatically.
1 If there is incoming call, [Incoming call...] flashes on the screen. Speak into the Bluetooth microphone.

2 When conversation ends, touch (nd) to terminate the call.

Tip
- You can select to receive calls manually by set [Auto answer] to [Off] status.
Switch phone call to the mobile
If you do not want your passenger to hear your incoming call, you can switch the call to the mobile.
1 During talking, touch .
The voice is transferred from the unit's loudspeaker to the mobile phone.
Listen to music from Bluetooth device
If the connected Bluetooth device supports Advanced Audio Distribution Profile (A2DP), you can listen to the music stored on the device through the unit. If the device also supports Audio Video Remote Control Profile (AVRCP) profile, you can use the control on the unit or its remote control to play music stored on the device.
1 Pair the phone with the unit.
2 Touch the upper left corner to return to home menu.
3 Touch [Bluetooth]. The Bluetooth menu is displayed.
4 Start play music via device. If your device support AVRCP.
1 Touch ♩.

2 Touch ▶ to start play.
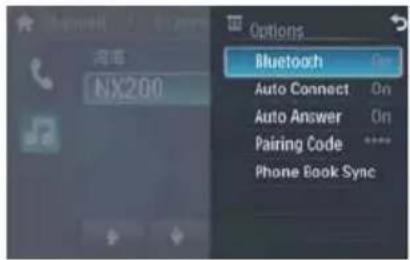
Adjust Bluetooth settings
You can change below Bluetooth settings:
- [Bluetooth]: to turn on or off "Bluetooth" function
-
[Auto connect]: to turn on or off "Auto connect" function
-
[Auto answer]: to turn on or off "Auto answer" function
• [Pairing code]: to set paring code
• [Phone Book Sync]: to synchronize phone book
1 In Bluetooth menu, touch .☐ The option menu is displayed.

2 Touch on the selected option to change the setting.

Tip
- You can also adjust Bluetooth settings in the "Settings" menu.
8 Adjust sound
Adjust volume
1 Tum ① clockwise to increase volume. Tum • anti-clockwise to reduce volume.
Mute
1 During play, press . ① To turn the sound back on, press ① again.

Tip
You can also turn off sound by touching 📀 on the screen.
Select preset equalizer
You can select preset equalizer:
- [User]
• [Techno]
• [Rock]
• [Classic]
• [Jazz]
• [Optimal]
• [Flat]
• [Pop]
1 Touch anywhere except for the upper left corner to display menu on the screen, if necessary.
2 Touch .J The current Equalizer setting is displayed.
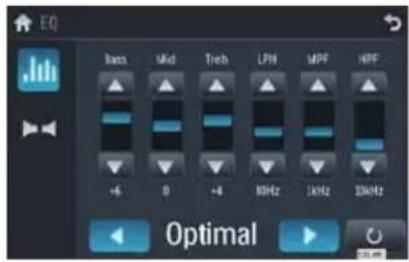
3 Touch ◀ or ▶ to select an EQ.
4 Touch ▲ or ▼ to adjust below settings:
• [Bass] bass range: -14 to +14.
• [Mid] middle range: -14 to +14.
• [Treb] treble range: -14 to +14.
• [LPH] low pass filter range: 60, 80, 100, 200.
• [MPF] middle pass filter range: 500, 1K, 1.5K, 2.5K.
• [HPF] high pass filter range: 10K, 12.5K, 15K, 17.5K.
5 Touch o to restore the above settings into default settings.
6 Press → to exit.
Adjut fader/balance
You can also adjust the front and rear speaker balance, the left and right speaker balance, and subwoofer settings.
Touch anywhere except for the upper left corner to display menu on the screen, if necessary.
1 Touch .
2 Touch
Below options are displayed: ↗
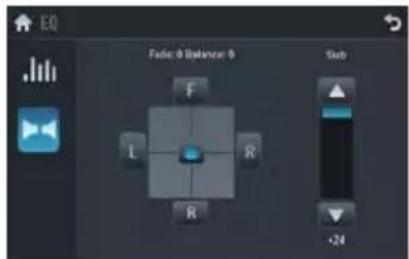
3 Touch ▲ or ▼ to select subwoofer volume.
• [Sub] subwoofer volume: 0 to 24.
4 Touch F, R, L, or R to adjust fader/balance value.
- [Fade] fader range: +24 to -24. (F = front speaker, R = rear speaker)
• [Balance] balance range: -24 to +24. (L = left speaker, R = right speaker)
5 Touch to exit.
Set Dynamic Bass Boost (DBB)
1 Touch DBB to toggle between the settings.
• [DBB] on: The DBB icon is illuminated.
- [DBB] off (default): The DBB icon is gray.
9 Adjust settings
Display system setup menu
1 Touch the upper left corner to display main menu.

2 Touch in the middle right side of the screen. → The second main menu is displayed.

3 Touch [Settings]. → The settings menu is displayed.

Tip
- When the setup adjustment is completed, touch ➕ first and then touch ➕ to return to main menu.
Adjust general settings
1 Touch [General], if necessary.
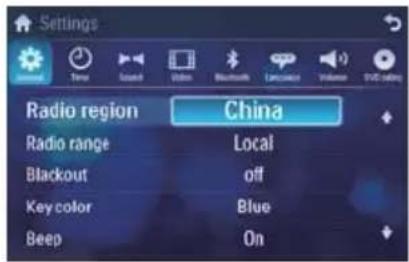
2 Touch ♠ or ♥ to highlight a setting.
3 Touch on the option to display/select an option.
| General settings | Options Description | |
| [Radio region] | [USA], [S.Amer-1], [Arabia], [China], [S.Amer-2], [Europe], [Korea], [OIRT] | Select one that matches your location. |
| [Radio range] | [Local] Only stations with strong signals can be broadcast. | |
| [Distance] Stations with strong and weak signals can be broadcast. | ||
| [Blackout] [off] | Never turn on the screen saver. | |
| [10s] Turn on the screen saver automatically 10 seconds after last operation. | ||
| [20s] Turn on the screen saver automatically 20 seconds after last operation. | ||
| [Auto dimmer] | [On] Turn on the screen dim automatically 5 seconds after last operation. | |
| [Off] Never turn the screen dim. | ||
| [Key color] | [Red] | Button backlight turns red. |
| [Blue] | Button backlight turns blue. | |
| General settings | Options | Description |
| [Beep] | [On] | Turn on the beep sound. Each time you press a button, the unit beeps. |
| [Off] | Turn off the beep sound. | |
| [Calibration] | Calibrate the touch screen. | |
4 Press → to exit.
Adjust sound settings
1 Touch [Sound].

2 Touch an option repeatedly to select:
| Sound settings | Options Description | |
| [Sub woofer] | [On] | Turn on the subwoofer. |
| [Off] | Turn off the subwoofer. | |
| [Sub woofer filter] | [80Hz] | Select subwoofer filter criteria. |
| [120Hz] | ||
| [160Hz] | ||
| [DBB] [On] | The Dynamic Bass Boost (DBB) function is on. | |
| [Off] | The DBB function is off. | |
| Sound Settings | Options Description |
| [DRC] [On] Makes loud sound level softer and soft sound level louder so that you can watch the DVD movies at a low volume, without disturbing others | |
| [Off] The DRC function is off. | |
3 Press → to exit.
Adjust video settings
1 Touch [Video].

2 Touch an option repeatedly to select:
| Video settings | Options Description | |
| [Aspect ratio] | [Full] For widescreen display. | |
| [Normal] For normal display. | ||
| [Video input] | [Auto] The correct format is set automatically. Select this option if you are not sure which format should be selected. | |
| [NTSC] Used in the United States, Canada, Japan, Mexico, the Philippines, South Korea, Taiwan, and some other countries. | ||
| [PAL] Used in China, India, Singapore, the western European countries (except France), Australia, and some other countries. | ||
| [Secam] Used in France, Russia and other countries. | ||
| [Rear camera] | [Normal] When you drive in reverse, the rear view is displayed normally. | |
| [Mirror] When you drive in reverse, the rear view is displayed in mirror. | ||
| [Parking] [On] | Disable video view during drive. | |
| [Off] | Enable video view during drive. | |
| [DivX registration code] | View code for DivX registration. | |
3 Press to exit.
Adjust Bluetooth settings
1 Touch [Bluetooth].

2 Touch an option repeatedly to select:
| Bluetooth settings | Options Description |
| [Bluetooth] | [On] Turn on the Bluetooth function. |
| [Off] Turn off the Bluetooth function. | |
| [Auto connect] | [On] If the pre-paired device is within the effective range, the unit re-connects to pre-paired device automatically. |
| [Off] Need to re-connect manually. | |
| [Auto answer] | [On] Answer paired phone call automatically. |
| [Off] Answer phone call manually. | |
| [Pairing code] | View code for pairing the unit with other Bluetooth devices. |
3 Press to exit.
Adjust language settings
1 Touch [Language].

2 Touch an option repeatedly to select:
| Language settings | Options Description | |
| [OSD] | [English] | Select on-screen-display language. |
| [简体中文] | ||
| [繁体中文] | ||
| Español | ||
| Português | ||
| [DVD audio] | [English] | Select DVD audio language. Options available are depends on DVD disc. |
| [简体中文] | ||
| [繁体中文] | ||
| Español | ||
| Português | ||
| [DVD subtitle] | [English] | Select DVD subtitle language. Options available are depends on DVD disc. |
| [简体中文] | ||
| [繁体中文] | ||
| Español | ||
| Português | ||
| [Off] | Turn off subtitle language display. | |
| [Disc menu] | [English] | Select DVD menu language. Options available are depends on DVD disc. |
| [简体中文] | ||
| [繁体中文] | ||
| Español | ||
| Português | ||
3 Press to exit.
Adjust volume settings
You can set different volume for different modes.
1 Touch [Volume].
The volume setting sub-menu is ↩ displayed.

2 Touch on a source.
• [DVD]
• [USB]
• [SDHC]
• [Radio]
- [Bluetooth]
• [AV-IN1]
• [AV-IN2]
• [CDC]
• [TV]
- [Navigation]
3 Touch ♦ or ♦ to assign value: 0 to 12.
When switches to the source, the volume increases automatically.

4 Press → to exit.
Adjust DVD rating
1 Touch [DVD rating].

2 Touch an option repeatedly to select:
| DVD rating Options Description | ||
| [Set password] | Set password to restrict the play of discs. The default password is 0000. | |
| [Rating level] | [Kid safe] | Acceptable for children. |
| [G] Acceptable for general viewers. | ||
| [PG] Parental guidance suggested. | ||
| [PG-13] Unsuitable for children under age 13. | ||
| [PG-R] Recommend parents to restrict children under 17 to view. | ||
| [R] Restricted. Recommend parent to guide children under 17 to view. | ||
| [NC-17] Unsuitable for children under age 17. | ||
| [Adult] Acceptable for adults only. | ||
| [Load factory] | Restore to default settings. | |
3 Press to exit.
10 Others
Listen to other devices
You can connect an external audio/video device to the unit.
1 Connect the car audio to the device with the supplied AV cable.

2 Touch the upper left corner to display the main menu.
3 Touch [AV-IN1].
4 Operated the connected the device (see the instructions manual of the device).

Tip
If you connected the system to other audio device through the REAR OUT L/R connector (see "Connect wires" section), touch [AV-IN2] to listen to that device.
Reset
When the unit hangs up, you can reset it.
1 Press RESET with a ball-point pen or similar tool.


Tip
When the unit is reset, all the settings remain unchanged.
Remove the unit
To repair, replace fuse, or replace the unit with another car audio, remove it from the dashboard.
1 Take off the trim plate.
2 Screw off the four (4) screws on the left/right side of the unit.
3 Pull the unit out from the dashboard.

natural_image
Technical line drawing of a device chassis with an inset showing a component detail (no text or symbols present)English
Replace fuse
If there is no power, the fuse may be damaged and need to be replaced.
1 Take out the unit from dashboard.
2 Check the electric connection.
3 Buy a fuse that matches the voltage of the damaged fuse (15A)
4 Replace the fuse.

flowchart
graph TD
    A["Device 1"] --> B["Component 1"]
    B --> C["Component 2"]
    C --> D["Output"]
    style A fill:#f9f,stroke:#333
    style B fill:#ccf,stroke:#333
    style C fill:#cfc,stroke:#333
    style D fill:#fcc,stroke:#333
If the fuse gets damaged immediately after it has been replaced, there may be an internal malfunction. In such case, consult your Philips dealer.
11 Product information

Note
- Product information is subject to change without prior notice.
General
| Power supply | 12 V DC (11 V - 16 V), negative ground |
| Fuse | 15 A |
| Suitable speaker impedance | 4 - 8 Ω |
| Maximum power output | 50 W × 4 channels |
| Continuous power output | 24 W × 4 channels (4Ω 10% T.H.D.) |
| Pre-Amp output voltage | 2.0 V (CD play mode; 1 kHz, 0 dB, 10 kΩ load) |
| Subwoofer output voltage | 2.0 V (CD play mode, 61 Hz, 0 dB, 10 kΩ load) |
| Aux-in level | ≥500 mV |
| Dimensions (W × H × D) | 178 × 101 × 160 mm |
| Weight (main unit) | 2.5 kg |
Disc player
| System | DVD / CD audio / MP3 system |
| Frequency response | 20 Hz - 20k Hz |
| Signal/noise ratio | >75dB |
| Total harmonic distortion | Less than 1% |
| Channel separation | >55dB |
| Video signal format NTSC only | |
| Video output | 1 +/- 0.2V |
Tuner
| Frequency range - FM 87.5 - 108.0 MHz (Europe) | |
| Frequency range - AM (MW) | 522 - 1620 KHz (Europe) |
| Usable sensitivity - FM 5 uV | |
| Usable sensitivity - AM (MW) | 50 uV |
LCD
| Screen size 6.5 inches (16:9) |
| Display resolution 800 × 480 dots |
| Contrast ratio 300 |
| Brightness 350 cd/m2 |
Bluetooth
| Communication system | Bluetooth Standard version 2.0 |
| Output Bluetooth Standard Power Class 2 | |
| Maximum communication range | Line of sight approx. 8m |
| Frequency band 2.4 GHz band (2.4000 GHz - 2.4835 GHz) | |
| Compatible Bluetooth profiles | Hands-Free Profile (HFP)Handset Profile (HSP)Advanced Audio Distribution Profile (A2DP)Audio Video Remote Control Profile (AVRCP) |
| Supported codecs | |
| Receive Transmit | SBC (Sub Band Codec)SBC (Sub Band Codec) |
Compatible USB devices:
USB flash memory (USB 2.0 or USB1.1) • USB flash players (USB 2.0 or USB1.1) •
• memory cards (SD / MMC / SDHC)
Supported formats:
• USB or memory file format: FAT16, FAT32
• MP3 bit rate (data rate): 32-320 Kbps and variable bit rate
• WMA v9 or earlier
• Directory nesting up to a maximum of 8 levels
• Number of albums/ folders: maximum 99
• Number of tracks/titles: maximum 999
• ID3 tag v2.0 or later
- File name in Unicode UTF8 (maximum length: 128 bytes)
Supported MP3 disc format:
• ISO9660, Joliet
• Maximum title number: 512 (depending on file name length)
• Maximum album number: 255
• Supported sampling frequencies: 32 kHz, 44.1 kHz, 48 kHz
• Supported Bit-rates: 32-320 Kbps and variable bit rate
Supported video formats:
• DVD
• Divx Home theater
- MP4
• Xvid

Note
• To ensure a better playback, bit rate of 4.5 Mbps is recommended.
12 Troubleshooting

Warning
Never remove the casing of this apparatus.
To keep the warranty valid, never try to repair the system yourself.
If you encounter problems when using this apparatus, check the following points before requesting service. If the problem remains unsolved, go to the Philips web site (www.philips.com/welcome). When you contact Philips, ensure that the apparatus is nearby and the model number and serial number are available.
No power
Car engine has not been started. Start • the car engine.
Connections is incorrect.
- Fuse has been damaged. Replace fuse (see 'Replace fuse').
No sound
Volume is too low. Adjust volume.
• Speaker connections is incorrect.
No response to the remote control
- Ensure that the path between the remote control and the unit is clear from obstacles.
• From a close distance, point the remote control directly at the unit. - Switch F/R to correct position (F for front control and R for rear control).
- The function does not work. Refer to the instructions.
- Replace the remote control battery.
Disc does not play
- Disc is upside down. Ensure the printed side is upwards.
Disc is dirty. Clean the disc with a clean, • soft, lint-free cloth. Wipe the disc outwards from the center.
• Disc is defective. Try another disc.
• incompatible disc is used. Try another disc.
Disc rating exceeds the restrict setting. • Change the rating settings to lower one. Disc region code is not compatible with • the unit. Use disc with proper region code.
No image
Parking brake wire connection is incorrect. Check the parking wiring.
Image flashes or distorted
Video DVD settings do not match with the DVD. Adjust video DVD settings. Video connection is improper. Check the connections.
Noise in broadcasts.
Signals are too weak. Select other stations with stronger signals. Check the connection of the car antenna. Change broadcast from stereo to mono.
Preset stations lost.
- Battery cable is not correctly connected. Connect the battery cable to the terminal that is always live.
Fuse is broken
- The Fuse type is incorrect. Replace it with a 15A fuse. Speaker wire or power wire is grounded. Check the connections.
Display show ERR-12
USB/SD/MMC data error. Check the USB • device or SD/MMC card.
About Bluetooth device
Music playback is unavailable on the system even after successful Bluetooth connection.
- The device cannot be used with the system to play music.
The audio quality is poor after connection with a Bluetooth-enabled device.
- The Bluetooth reception is poor. Move the device closer to the system or remove any obstacle between the device and the system.
Cannot connect with the system.
The device does not support the profiles • required for the system.
The Bluetooth function of the device is • not enabled. Refer to the user manual of the device for how to enable the function. The system is not in the pairing mode. • The system is already connected with • another Bluetooth-enabled device. Disconnect that device or all other connected devices and then try again.
The paired mobile phone connects and disconnects constantly.
The Bluetooth reception is poor. Move the mobile phone closer to the system or remove any obstacle between the mobile phone and the system.
Some mobile phones may connect and disconnect constantly when you make or end calls. This does not indicate any malfunction of the system.
For some mobile phones, the Bluetooth • connection may be deactivated automatically as a power-saving feature.
This does not indicate any malfunction of the system.
13 Glossary
B
Bite rate
The max data transfer through the USB port.
Bluetooth
Bluetooth® is a short-rang wireless protocol that is meant to allow mobile devices to share information and applications without the worry of cables or interface incompatibilities. The name refers to a Viking King who unified Denmark. Operate at 2.4GHz. For more information, see www.bluetooth.com.
M
MMC
MultimediaCard. A type of memory card with a flash memory.
MP3
A file format with a sound data compression system. MP3 is the abbreviation of Motion Picture Experts Group 1 (or MPEG-1) Audio Layer 3. With the MP3 format, one CD-R or CD-RW can contain about 10 times more data than a regular CD.
R
RDS (Radio Data System)
RDS tuners can automatically tune in stations according to the types of music (or talk) they broadcast. RDS also enables a receiver to display text messages and even graphics (usually call letters and format information) that many FM stations include on a sub-carrier signal within their normal broadcast signal. Some RDS equipped tuners can even override with traffic alerts or emergency broadcasts, during playback of other media - CD MD, or cassette. There are other useful features too, many of which are offered by the growing number of RDS stations.
Region code
A system that allows discs to be played only in the region designated. This unit only plays discs that have compatible region codes. You can find the region code of your unit on the product label. Some discs are compatible with more than one region (or ALL regions.)
S
SD
Secure Digital. A type of memory card with a flash memory.
SDHC
Secure Digital High Capacity (SDHC) is a type of flash memory card based on the SDA 2.00 specification. The SDA 2.00 specification enables SD cards to reach higher capacities from 4GB to 32GB, and growing.
W
WMA (Windows Media Audio)
An audio format owned by Microsoft, is a part of Microsoft Windows Media technology. Includes Microsoft Digital Rights Management tools, Windows Media Video encoding technology, and Windows Media Audio encoding technology.
| 部件名称Name of the Parts | 有毒有害物质或元素Hazardous/toxic Substance | |||||
| 铅(Pb, Lead) | 汞(Hg, Mercury) | 镉(Cd, cadmium) | 六价铬(Chromium 6+) | 多溴联苯(PBB) | 多溴二苯醚(PBDE) | |
| Housing外壳 | O | O | O | O | ||
| DVD/CD loader DVD/CD 光盒 | X | O | O | O | ||
| LCD Panel液晶面板 | X | X | O | O | ||
| Loudspeakers喇叭单元 | O | O | O | O | ||
| PWBs电路板组件 | X | O | O | O | ||
| Accessories (Remote control & cables)附件(遥控器,电源线,连接线) | X | O | O | O | ||
O: Indicates that this toxic or hazardous substance contained in all of the homogeneous materials for this part is below the limit requirement in SJ/T11363 - 2006.
X: Indicates that this toxic or hazardous substance contained in at least one of the homogeneous materials used for this part is above the limit requirement in SJ/T11363 – 2006.

环保使用期限 Environmental Protection Use Period
This logo refers to the period (10 years) during which the toxic or hazardous substances or elements contained in electronic information products will not leak or mutate so that the use of these [substances or elements] will not result in any severe environmental pollution, any bodily injury or damage to any assets.
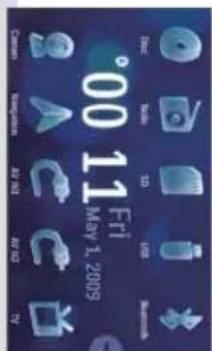
Addendum for Rear Zone operation 後方區域操作附錄 Apéndice para el uso de la zona trasera 后置区域操作附录 Anexo à operação da Zona traseira

| REAR ZONE | ||||||||
| DISC | USB | SDHC | AV-IN(1/2) | RADIO | BT | NAVI | ||
| FRONT ZONE | DISC | Follow front zone / Seguir la zona frontal / Segue a zona frontal / 追蹤前方區域 / 同正面區域 | X | X | X | X | X | X |
| USB | X | Follow front zone / Seguir la zona frontal / Segue a zona frontal / 追蹤前方區域 / 同正面區域 | X | X | X | X | X | |
| SDHC | X | X | Follow front zone / Seguir la zona frontal / Segue a zona frontal / 追蹤前方區域 / 同正面區域 | X | X | X | X | |
| AV-IN (1/2) | X | X | X | Follow front zone * / Seguir la zona frontal * / Segue a zona frontal * / 追蹤前方區域 * / 同正面區域 * | X | X | X | |
| RADIO | √ | √ | √ | X | X | X | X | |
| BT | √ | √ | √ | X | X | X | X | |
| NAVI | √ | √ | √ | X | X | X | X | |
* Rear zone audio output is off. Only the normal speaker/pre-out output is provided. /* La salida de audio de la zona trasera está desactivada. Sólo funciona el parlante normal / la presalida de audio. /* A saída de áudio na zona traseira é desativada. Somente a saída nos alto-falantes normais/pré-amplificador é fornecida. /* 後方區域的音訊輸出已關閉 僅提供正常喇叭/前置輸出。/* 后置区域音频輸出关闭。仅标准扬声器/带预输出功能的輸出提供。
√ - Selectable and works independently / √ - Opción disponible que funciona de forma independiente / √ - Seleccionável e funciona de modo independente / √ - 可選擇並會獨立運作 / √ - 可选择和可单独工作


- Your in-car entertainment system 6
- Get started 9
- Use map 16
- Listen to radio 17
- Play 21
- Play with Bluetooth device 26
- Adjust sound 28
- Adjust settings 30
- Others 34
- Product information 36
- Troubleshooting 37
- Glossary 39
- Important
- Safety
- Notice
- Be responsible Respect copyrights
- DOLBY. DIGITAL
- This apparatus includes this label:
- Environmental information
- Recycling
- Your in-car entertainment system
- Introduction
- What's in the box
- Overview of the remote control
- Get started
- Caution
- Install the car audio
- Note on the power supply lead (yellow)
- Notes on speaker connection
- Connect wires
- If necessary, do the other connections:
- Connect GPS antenna
- Connect Radio antenna
- Mount in the dashboard
- Note
- Attach the trim plate.
- Reconnect the negative terminal of the car battery.
- Install remote control battery
- Turn on
- Press Ⓓ to turn on the unit. The available OSD (On-Screen Display) languages are displayed.
- Touch a language to select. The OSD language is changed to the → selected language immediately. To adjust screen brightness/contrast, • press ⚙/○ on the remote control, then press ◀, ▶, ▶ or . ▼ To turn off the unit, press ⏱ for 3 seconds.
- Set date and time
- Touch the upper left corner to display main menu.
- Set date
- Set clock mode
- Set time
- Use map
- Tip
- Upgrade the map
- Listen to radio
- Tune to a radio station
- Tune by frequency
- Select radio range
- Store radio stations in memory
- Store stations manually
- Store stations automatically
- Tune to a preset station
- Play with RDS (Optional)
- Select program type
- Select alternate frequencies
- Turn on RDS
- Touch 百
- Play
- Load discs
- Connect USB device
- Remove the USB device
- Insert USB or SD/MMC card
- Remove the SD/MMC card
- Play/Pause
- Search for a folder
- Search within a title/folder
- Repeat
- For DVD/VCD movie disc:
- For VCD karaoke:
- For audio files:
- Repeat a section
- Random play
- Select audio language
- Select audio mode
- Select subtitle language
- Change view angle
- Rotate pictures
- Zoom
- Select slide show duration
- Play with Bluetooth device
- Pair the Bluetooth-enabled devices
- Disconnect Bluetooth devices
- Make a call
- Receive call
- Switch phone call to the mobile
- Listen to music from Bluetooth device
- Adjust Bluetooth settings
- Adjust sound
- Adjust volume
- Mute
- Select preset equalizer
- Adjut fader/balance
- Set Dynamic Bass Boost (DBB)
- Adjust settings
- Display system setup menu
- Adjust general settings
- Adjust sound settings
- Adjust video settings
- Adjust language settings
- Adjust volume settings
- Adjust DVD rating
- Press → to exit.
- Others
- Listen to other devices
- Reset
- Remove the unit
- Replace fuse
- Product information
- Compatible USB devices:
- Supported formats:
- Supported MP3 disc format:
- Supported video formats:
- Troubleshooting
- Warning
- No power
- No sound
- No response to the remote control
- Disc does not play
- No image
- Image flashes or distorted
- Noise in broadcasts.
- Preset stations lost.
- Fuse is broken
- Display show ERR-12
- About Bluetooth device
- Music playback is unavailable on the system even after successful Bluetooth connection.
- The audio quality is poor after connection with a Bluetooth-enabled device.
- Cannot connect with the system.
- The paired mobile phone connects and disconnects constantly.
- Glossary
- B
- Bite rate
- Bluetooth
- M
- MMC
- MP3
- R
- RDS (Radio Data System)
- Region code
- S
- SD
- SDHC
- W
- WMA (Windows Media Audio)
Brand : PHILIPS
Model : CID2680
Category : Car radio