
DVD324HBL - DVD player SALORA - Free user manual and instructions
Find the device manual for free DVD324HBL SALORA in PDF.


| Product Type | DVD Player |
| Brand | Salora |
| Model | DVD324HBL |
| Color | Black |
| Dimensions (W x D x H) | 43.5 x 26.5 x 4.2 cm |
| Weight | 1.6 kg |
| Power Supply | 230 V, 50 Hz |
| Power Consumption | 12 W |
| Supported Disc Formats | DVD, DVD±R/RW, CD, CD-R/RW, MP3, JPEG, DivX |
| Video Outputs | HDMI, Composite (CVBS), YUV |
| Audio Outputs | Analog Stereo (RCA), Digital Coaxial |
| USB Input | 1 x USB 2.0 (front) |
| Main Functions | DVD/CD playback, USB, parental control, zoom, repeat, search |
| Display | Front LED (standby, playback) |
| Remote Control | Included (CR2025 battery) |
| Security | Code-based parental lock, auto shut-off |
| Maintenance | Clean with a soft dry cloth; avoid chemical products |
| Spare Parts | Remote control, AV cable, battery (available from customer service) |
| Repairability | Repair by an authorized professional |
| Warranty | 2 years |
| Origin | Made in China |
Frequently Asked Questions - DVD324HBL SALORA
User questions about DVD324HBL SALORA
0 question about this device. Answer the ones you know or ask your own.
Ask a new question about this device
Download the instructions for your DVD player in PDF format for free! Find your manual DVD324HBL - SALORA and take your electronic device back in hand. On this page are published all the documents necessary for the use of your device. DVD324HBL by SALORA.
USER MANUAL DVD324HBL SALORA
WARNING: TO REDUCE THE RISK OF FIRE OR ELECTRIC SHOCK, DO NOT EXPOSE THIS APPLIANCE TO RAIN OR MOISTURE.
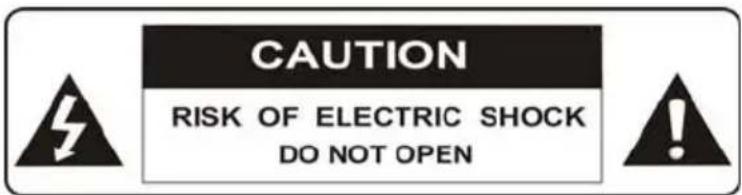
CAUTION: TO REDUCE THE RISK OF ELECTRIC SHOCK, DO NOT REMOVE COVER (OR BACK). NO USER SERVICEABLE PARTS INSIDE. REFER SERVICING TO QUALIFIED SERVICE PERSONNEL.

The lightening flash with arrowhead symbol, within an equilateral triangle, is intended the alert the user to the presence of uninsulated dangerous voltage within the products enclosure that may be of sufficient magnitude to constitute a risk of electric shock to persons.
The exclamation point within an equilateral triangle is intended to alert user to the presence of important operating and maintenance (servicing) instructions in the literature accompanying the appliance.

Laser product symbol: located on the rear panel of the unit, indicate this player is a class laser product, only use weak laser and no hazardous radiation outside of the unit.
- Read through this instruction manual before installation and use.
2.Do not touch the power plug with wet hand. - Switch off the main power when the unit is not in use. (Disconnect the power plug from the power outlet when you do not intend to use the unit for a prolonged period of time.) Before moving the unit, remove the disc from the unit/ tray first.
- Do not open the cover or touch any of the components exposed out of the unit, only for qualified technicians.
- Do not expose the unit under direct sunlight or nearby objects that radiate heat to avoid damage the unit.
- Do not place the unit in moist and humid conditions, which effect the pick-up of the unit lead to out of work.
- Place the unit on a flat surface and ventilative condition. Please ensure the ventilation holes are not covered to avoid overheating and malfunction.
- Clear the panel and case with soft dry cloth only, do not apply any kind of thinner, alcohol or sprays.
- The apparatus shall not be exposed to dripping or splashing and that no objects filled with liquids, such as vases, shall be placed on the apparatus
- unplug the apparatus when not using for a long time oriented to disconnect from the Mains power
- No naked flame sources, such as lighted candles, should not be placed on the apparatus.
- Make sure there is free circulation of air (do not place the device on shelves, on a thick carpet, on a bed, or anywhere that obstructs the ventilation slots, and leave at least 10cm clearance on all sides.
- The apparatus shall not be exposed to dripping or splashing.
- The mains plug is used as the disconnect device, the disconnect device shall remain readily operable.
If the electric cable is damaged, it must be replaced by the manufacturer, or by the qualification persons, in order to avoid a danger.
Macrovision:
This product incorporates copyright protection technology that is protected by method claims of certain U.S. patents and other intellectual property rights owned by Macrovision Corporation, and is intended for home and other limited viewing uses only unless otherwise authorized by Macrovision Corporation. Reverse engineering or disassembly is prohibited.
DOLBY:
Manufactured under license from Dolby Laboratories.
"Dolby" and the double-D symbol are trademarks of Dolby Laboratories.
Contents
- Precautions----4
- Front Panel and Rear Panel Illustration ----5
- Remote Control----6
- Connections----7
- Function Operation----8
- Playing WMA,MP3 and JPEG discs----11
- CD Ripping----12
- System Setup----14
- Specification 18
- Troubleshooting 19
- Recycling----19
1. PRECAUTIONS
Before using this unit, be sure to read the applicable items of the operating instructions and these safety suggestions carefully.
Afterwards keep them handy for future reference.
Take special care to follow the warnings indicated on the unit itself as well as in the operating instructions.
Safety
Power Source-The unit should be connected to power supply only of the type described in the operating instructions or as marked on the unit.
The product's function maybe reset when it is subjected to electrostatic discharge disturbance. Just follow the instruction described in this manual to set the function again for normal operation
Environment
- Water and moisture do not use this unit near water.
For example, near a bathtub, wash bowl, swimming pool, or the like, Damp basements should also be avoided.
- Condensation-moisture may form on the lens in the following conditions.
Immediately after a heater has been turned on.
In a steamy or very humid room.
When the unit is suddenly moved from a cold environment to a warm one, if moisture forms inside this unit, it may not operate properly, to correct this problem wait about one hour for the moisture to evaporate.
- Heat never use or place this unit near a heat source.
Do not leave it in an automobile exposed to direct sun light for a long time with the doors and windows closed as this may deform the cabinet.
2. FRONT PANEL AND REAR PANEL ILLUSTRATION
Front panel

① Standby
② Disc Tray
③ Open/Close
④Display Screen
⑤Remote Sensor
⑥Play
⑦ Pause
⑧ STOP
⑨Card Reader
⑩USB Port
Rear panel

① Main Power
② Downmix Left
③ Downmix Right
④ HDMI Output
⑤ Coaxial Output
⑥ Component Video Output
⑦ Composite Video Output
⑧ S-video Output
⑨ 5.1 Channel Audio Output
⑩ Scart Output
3. REMOTE CONTROL

- STANDBY
- USB/CARD
- AUDIO
- Numeric button
5.CLEAR - SETUP
- UP button
- LEFT button
- DOWN button
10.REV
11.FWD
12.STEP
13.STOP
14.VOLUME +/-
15.L/R
16.N/P
17.SLOW
18.V-MODE - HD/Res. (HD-Mode)
20.PROGRAM - OPEN/CLOSE
22.SEARCH
23.SUB/MP3 - MENU
- TITLE
26.DISPLAY
27.RIGHT button - ENTER button
29.NEXT
30.PREV
31.PLAY/PAUSE
32.A-B
33.REPEAT
34.MUTE
35.ANGLE
36.PBC
37.RETURN
38.ZOOM
Using the Remote Control
Unless stated other wise, the remote control can operate all the features of the DVD Player, Always point the remote control directly at the remote sensor on the front of the DVD Player, not the TV.
Battery Installation
Remove the battery compartment lid on the rear of the remote control by sliding the lid down, then off. Place two AAA batteries inside the battery compartment with their + and ends aligned as indicated.
Do not mix old and new batteries or different types of batteries
Replace the battery compartment lid. Slide the lid until you hear it click into place.
Important:
When replacing batteries, please take care to waste them in accordance with current regulation. For this matter please put them in the right assigned place, in order to ensure they are surely recycled while respecting environment. Do not burn them or burry them.
4. CONNECTIONS
- Turn off the power before connection.
- Turn on the power after finishing connection.
Wires must be firmly connected; especially the plug shall be fully inserted.
DVD+TV
Notes :
There are the following ways of connecting the player AV output to the TV set:
• S-video cable and left/right audio cable (set the video type to component)
• Composite video cable and left/right audio cable
- Component video cable and left/right audio cable (set the video type to component, if you connecting a progressive scan TV set, please set the video type to P-Scan)
- Scart cable (press V-MODE button to switch the video mode to RGB and set the video type to RGB)
- HDMI cable(press V-MODE button to switch the video mode to HD and set the video type to HD)
DVD+ AV Amplifier:
Notes :
There are the following ways of connecting the player with amplifier:
• left/right audio output
• 5.1 channel audio output
- coaxial audio output
Warning:
Do not connect any amplifier with coaxial connector that does not contain Dolby digital AC 3 or DTS decoder. Any attempt to do so and play of DVD disc will result in damaging your speakers and causing possible hearing injury. Other than DVD disc, VCD and CD can be operated normally without conforming to the above restriction.
Setting of TV system
If you find the image like non-fully zoomed picture, brim picture covered or black & white picture etc, please select PAL or NTSC by systems setting or press N/P button to switch the TV system on the remote control. This DVD disc is capable of supporting different scales picture, as a result, non-full zoomed picture could appear or picture be partially covered on user's TV set.
5.1 Function Buttons On the Front Panel
These button's function is the same as the corresponding buttons on the remote control. For the detail information, please see the following texts.
5.2 Function Buttons On the Remote Control
Menu Play (compatible with DVD, SVCD, VCD2.0 discs)
Press Menu Button to display the DVD Root Menu or SVCD or VCD 2.0 menu.
When menu display, you can press Arrow buttons to highlight the menu item you want to choose.
Press Enter, you can begin to play with the highlighted item.
Title Play (compatible with DVD discs only)
During DVD playback, press Title button to display the DVD title content.
Sequence Play (compatible with DVD, SVCD, VCD, WMA, MP3/JPEG discs)
When a SVCD or VCD disc is loaded and MENU is on, once MENU button pressed, MENU switches off. Then the player can play in sequence playback mode; when MENU button pressed twice, MENU switches on.
Except for SVCD or VCD discs, in the stop state, when press Playpause button, the player then enters sequence playback mode. This feature is effective to all the compatible discs.
Program Play (compatible with DVD, SVCD, VCD, CD, WMA, MP3/JPEG discs)
The Program Playback option allows you to enter the order in which you want chapters or tracks to play, maximum to 16.
Program Menu:
Press PROGRAM button to enter program playing state.
Using ARROW key to highlight the item.
Using numeric key to enter chapter/track.
Using Play/Pause to start play.
Notes: To clear the programmed order, use Arrow buttons to highlight the "CLEAR" item,
then press Enter.
To modify the programmed order, use Arrow buttons to highlight the modifying item and enter the new chapter / track you want to program directly.
Advanced operation(some function are invalid for some discs)
Selecting Tracks (compatible with DVD, SVCD, VCD, CD, WMA, MP3/JPEG discs)
Press Numeric buttons to select desired title/ tracks.
Notes: To select tracks from 1 to 9, press corresponding Numeric buttons (1-9, 10).
When selecting track of 10 above, CONTINUOUS Press Numeric buttons(0-9).
Skipping Tracks (compatible with DVD, SVCD, VCD, CD, WMA, MP3/JPEG discs)
To skip forward to the beginning of the next title / chapter / track on a disc, press Next
To skip backward to the beginning of the preceding title / chapter / track on a disc, press
Prev.
Multispeed Fast Motion Playback (compatible with DVD, SVCD, VCD, CD, WMA, MP3/JPEG discs)
Press the F.F button to fast forward play.
Fast Forward Playback has four speeds: × 2, × 4, × 8, × 20.
Press the F.R button to fast reverse play. Fast Reverse Playback has four speeds: × 2, × 4, × 8, × 20.
Note :Press Playpause button to resume normal playback.
Multispeed Slow Motion Playback (compatible with DVD, SVCD, VCD, CD, WMA, MP3/JPEG discs)
Press Slow button to enter Slow Motion Playback mode.
Slow Motion Playback has six speeds: 1/2, 1/3, 1/4, 1/5, 1/6, 1/7.
Press Playpause button to resume normal playback.
Freeze Frame and Frame Advance (compatible with DVD, SVCD, VCD, CD, HD-CD, WMA, MP3/JPEG discs)
During CD, HD-CD, WMA or MP3 / JPEG playback, press Playpause once to freeze playback; Press the Playpause button again or Playpause button to resume normal playback.
During DVD, SVCD or VCD playback, press Playpause once to freeze playback; Press of the Playpause button again to advance the picture one frame at a time; Press Playpause to resume normal playback.
Using the Repeat Feature (compatible with DVD, SVCD, VCD, CD, WMA, MP3/JPEG discs)
While a disc is playing, press Repeat button to switch repeat mode.
DVD playback: Off, Chapter Repeat, and Title Repeat.
VCD playback: Off, chapter Repeat, and Disc Repeat.
Using the Display Feature (compatible with DVD, SVCD, VCD, CD, WMA, MP3/JPEG discs)
Press Display to show playing information.
Changing the Audio Language (compatible with DVD, SVCD discs)
Press Language to change the audio language.
Subtitles (compatible with DVD, SVCD discs)
Press the Subtitle button to switch subtitle language or subtitle off.
Changing the Camera Angle (compatible with DVD discs)
Press Angle to switch camera angle.
Changing the TV System (compatible with DVD, SVCD, VCD, CD, WMA, MP3/JPEG discs)
Press N/P button to change TV system: NTSC, PAL, and AUTO.
Zoom In the Video Image (compatible with DVD, SVCD, VCD, JPEG discs)
The Zoom Function allows you to enlarge or zoom out the video image .zoom factor: Zoom 2, Zoom 3, Zoom 4, Zoom 1/2, Zoom 1/3, Zoom 1/4, Zoom Off.
Use the Arrow buttons to pan across the screen when the zoom factor is 1, 2 or 3.
Repeat a Specific Segment on the Disc that You Define (compatible with DVD, SVCD, VCD, CD, WMA, MP3 discs)
During the normal or fast motion playback, press the A-B button once, and "REPEAT A-" will appear on the screen. This indicates the start of the loop to be repeated.
During the normal of fast motion playback, press A-B again, and “REPEAT A-B” will appear on the screen. It indicates the end of the loop.
Volume control (compatible with DVD, SVCD, VCD, CD, WMA, MP3/JPEG discs)
You can press the Volume button on the remote controller or the TV set or the amplifier to control the sound level.
Note: During DVD PCM output playback, this feature does not work.
USBCARD (Disc/USB playback selection)
Press USB/CARD button, to switch among Disc/USB/CARD playback, please see the following interface:

If you want to select disc playing, move the cursor to the DISC and press Enter button, DISC MODE will be displayed on the top left corner on your TV.
If you want to select USB playing, move the cursor to the USB and press Enter button, USB MODE will be displayed on the top left corner on your TV.
If you want to select CARD playing, move the cursor to the CARD and press Enter button, CARD MODE will be displayed on the top left corner on your TV.
HD/Res.(HD-Mode)
Press the button to switch HD video output resolution
Note:
Under HD mode, this button is used to select the output resolution.
Your DVD player can generate some resolutions that may not be supported by your TV set. If this happen, your TV screen will probably turn black. To solve the problem, please repeatedly press "HD/Res." button until you select a resolution that can be well supported
by your TV set.
Mute the Audio Output (compatible with DVD, SVCD, VCD, CD, WMA, MP3/JPEG discs) Pressing the Mute button allows you to reduce sound to an inaudible level. Press the button again to normal condition.
6. Playing WMA, MP3 and JPEG discs
![The file you choose File Window [ ] 01----. MP3 01. \ 02. F4 03. ---- 20 04. F4---- 05. F4---- 01..001---- 01..02BEAUTY 03..00 04..04---- 05..05 06..06 07..07 08..08 09..09 10..10 Directory Window Music Mode Picture Mode Video Mode](/content/2026/06/1252856/images/6a71b9891053b4c6104b1b05b64a1ebc9535bb46bb8beb65fb2822657d017e54.jpg)
Place a MP3 / JPEG disc into the tray, and the player will auto search the directories saved MP3 / JPEG files. After searching, it will auto go to the first directory saved MP3 files (to the disc containing both mp3 and jpeg files; To the disc containing single type of files, it will auto go to the first directory) and play the first song in the directory ("01:" is highlighted). The screen displays as the picture below:
Use the Arrow buttons to enter the Directory Region and highlight the desired directory, then the first track under it starts playback; Also you can use the Arrow buttons to enter the File Region and select the file you want to play.
I. Press the Left and Right arrow buttons, you can activate Directory Region, File Region and File Switch Region separately.
II. The highlight in Directory Region and File Region is shown as the picture above; While it appears a transparent rectangle in File Switch Region.
III. In File Switch Region, you can press the Left and Right arrow buttons to switch the highlight, then press PLAY; the "M", "P", and "V" button is illustrated in the above picture. For example, if a disc with MP3 and JPEG files but without any NES files is loaded, the color of the letter "M" and "P" will appear to white and "V" black. If a MP3 file playing, "M" turns darker.
IV. To the disc with WMA, MP3 and JPEG files, when playing a JPEG picture, press the Return button to return to JPEG list.
V. When a picture playing or pausing, press the Arrow buttons to change the display angle:
Up: flip vertical
Down: flip horizontal
Left: rotate 90^ counter-clockwise
Right: rotate 90^ clockwise
VI. When a picture stop, press the Menu button, the screen displays small pictures. Up to 6 small pictures are displayed per screen. To view the next 6 pictures, press the Next button or the RIHGT button to go forward and the Prev button or the LEFT button to go to the previous page.
VII. You can press the Numeric buttons to select the file you want to play. For example, if you desire the 15th track in current list, press the "10+" button once, then press "5", the 15th starts playback. Notes: When playing a disc with MP3 files, video cannot be output while only digital audio can.
VIII. When playing JPEG pictures, press the Program button to choose the pictures switched mode.
There are 17 switch modes; Press Program repeatedly to activate the function and choose the required switch mode: Spread from Up to Down, Spread from Down to Left, Spread from Left to Right, Spread from Right to Left, Spread from Left Up to Right Down, Spread from Right Up to Left Down, Spread Left Down to Right Up, Spread from Right Down to Left Up, Spread from Center to Up / Down, Fold from Up / Down to Center, Fold from Left / Right to Center, Horizontal Shutter, Vertical Shutter, Fold from the Corners to the Center, Random Play, Off.
7. CD-RIPPING
Press the SUB/MP3 button on the remote control, the following interface will be display.
Use the direction button(UP, DOWN, LEFT, RIGHT), you can select your desired options displayed in the interface
| RIP CD-UNKNOWN ALBUM | |
| ▶ OPTIONS TRACKS START QUIT | ENCODER OPTIONS |
| SPEED 1X BITRATE 128KBPS | |
| FILE OPTIONS | |
| CREATE ID3 TAG ✓ CREATE PLAYLIST ✓ | |
| STORAGE OPTIONS | |
| STORAGE USB ✓ | |
Press the ENTER button repeatedly, you can select different speed, different bitrate, and create or cancel ID3 tag, create or cancel palylist.
Use the DOWN direction button, you can select TRACKS option, the following interface will be displayed.
| RIP CD-UNKNOWN ALBUM | |||
| OPTIONS ▶ TRACKS START QUIT | ☑ TRK | TITLE | LENGTH |
| ☑ 1 | TRACK 1 | 3:10 | |
| ☑ 2 | TRACK 2 | 2:49 | |
| ☑ 3 | TRACK 3 | 4:06 | |
| ☑ 4 | TRACK 4 | 2:59 | |
| ☑ 5 | TRACK 5 | 3:40 | |
| ☑ 6 | TRACK 6 | 2:55 | |
On the top of the picture, press the ENTER button repeatedly, you can select all the tracks, and press again, you can unselect all the tracks.
Use the DOWN and UP direction button, and press ENTER button, you can select or unselect your desired tracks.
Use the DOWN direction button, you can select START option, the following interface will be displayed.
| RIP CD-UNKNOWN ALBUM | |
| SUMMARY | |
| OPTIONS | TOTAL TRACKS 16 |
| TRACKS | TOTAL TIME 56:16 |
| START | TOTAL SIZE 128.7MB |
| QUIT | |
| PRESS ENTER TO BEGIN | |
Press the ENTER button, the CD-RIPPING will begin. In the CD-RIPPING progress, you can change the speed by pressing ENTER button and also you can cancel the current operation.

Use the DOWN direction button, you can select QUIT option, the following interface will be displayed.
| RIP CD-UNKNOWN ALBUM | |
| OPTIONS TRACKS START ► QUIT | PRESS ENTER TO QUIT |
Press ENTER button, you can exit the CD-RIPPING interface.
8. System Setup
General Steps of Setup Menu
Press the Setup button, the main setup menu appears.
When the main menu displayed, the DVD system will auto pause.
Press the Left and Right arrow buttons to highlight the icon of the desired page, then press the Down or Right arrow button to activate that page;
Press the SETUP button again, you can exit Setup Menu.
Notes: When setup, the pressing of the following buttons will turn off the setup menu, while the choices that have been changed will be saved: N / P, Subtitle, F.F, F.R, MENU, Play, Stop, Pause / Step, Next, Prev, Zoom, PREV, Repeat, Angle, language, Display, Setup.
8.1 SYSTEM SETUP
The system setup options are illustrated below:
8.1.1 TV SYSTEM
According to the Color System of the TV, you can choose the TV System.
AUTO: Choose this settings if your DVD player is connected to a multi-system TV.
NTSC: Choose this settings if your DVD player is connected to a NTSC TV.
PAL: Choose this settings if your DVD player is connected to a PAL TV.
8.1.2 SCREEN SAVER
If the screen saver is on, when your DVD player is in Stop, Open, or No Disc state, or there is a frame frozen for more than 3 minutes, the screen saver will be displayed. This feature can protect the screen from damage.
ON: Choose this setting to activate the screen saver.
OFF: Choose this setting to cancel the screen saver
8.1.3 HD OUTPUT
In this option, you can select different resolution. Under this condition, the VIDEO and TV TYPE are both invalid. The default set is HD OFF.
When you change to the HDMI output with different resolution from the normal video output, a interface will be displayed. Select “yes” to confirm change, select “no” to exit.
8.1.4 VIDEO
TV-RGB: Choose this setting if your DVD player is connected to a TV with an RGB cable.
VIDEO: Choose this setting if your DVD player is connected to TV with Video cable.
Notes:
When your DVD player output composite video, you can choose the setting randomly.
Choose TV-RGB if your DVD player is connected to a RGB TV.
8.1.5 TV TYPE
16:9 (Wide Screen): Choose this setting if your DVD player is connected to a wide screen TV. If you choose this setting and you don't have a wide screen TV, the images on the
screen may appear distorted due to vertical compression.
4 : 3 LB (Letter Box): Choosing this setting if your DVD player is connected to a normal ratio TV. connector You'll see the movies in their original aspect ratio (height-to-width ratio). You'll see the entire frame of the movie, but it will take up a smaller portion of the screen vertically. The movie might appear with black bars at the top and bottom of the screen.
4 : 3 PS (Pan & Scan): Choosing this setting if your DVD player is connected to a normal ratio TV. You can fill the movie to the entire screen of your TV. This might mean that parts of the picture (the left and right edges) won't be seen.
Notes: The image display ratio is related to the recorded disc format. Some disc can not display images in the aspect ratio you choose.
If you play a disc recorded in 4:3 format on a wide screen TV, black bars will appear on the left and right side of the screen.
You must adjust the screen setting depending on the type of the television you have.
8.1.6 PASSWORD
The password option is initialized locked, and you cannot set the ratings limit or change the password. In order for the Ratings feature work, the password mode must be turned on. If you want to set the ratings limit, you will need to enter the default password, which is 0000(press the ANGLE button four times), then press Enter button to confirm.
8.1.7 RATING
The Rating feature is a rating limit system, like movie ratings. It works with DVD discs that have been assigned a rating. This helps you control the types of DVDs that your family watches.
There are these rating options: 1 KID SAFE,2 G,3 PG,4 PG13,5 PG-R,6 R,7 NC-17,8 ADULT.
Notes: If the password option is locked, you cannot set the ratings limit; the rating limit does not work when the password option unlocked.
8.1.8 DEFAULT
Choose this option to resume all the setup options to default settings.
8.2 LANGUAGE SETUP
The language setup options are illustrated below:
8.2.1 Highlight the OSD LANGUAGE option, and press the Arrow buttons to choose the OSD language you prefer. Press ENTER button to confirm, and it will display OSD in that language.
8.2.2 Highlight the AUDIO LANG option, and press the Arrow buttons to choose the audio language you prefer. Press ENTER button to confirm. If the disc you are playing has that language available, it will output audio in that language.
8.2.3 Highlight the SUBTITLE LANG option, and press the Arrow buttons to choose the subtitle language you prefer. Press ENTER button to confirm. If the disc you are playing has that language available, it will displays subtitles in that language.
8.2.4 Highlight the MENU LANG option, and press the Arrow buttons to choose the menu language you prefer. Press ENTER button to confirm. If the disc you are playing has that language available, it will displays menu in that language
Notes: If your preferred language isn't available, the disc's default language will be played.
8.2.5 Highlight the MPEG4 SUBTITLE option, and press the Arrow buttons to choose the Subtitle you prefer. Press ENTER button to confirm.
Notes: If your preferred language isn't available, the disc's default language will be played.
8.3 AUDIO SETUP
The audio setup options are illustrated below:
8.3.1 Highlight the AUDIO OUT option, and press the Arrow buttons to choose the audio output mode you prefer. Press ENTER button to confirm; There are 3 optional audio output modes: SPDIF/OFF, SPDIF / RAW, and SPDIF/ PCM.
SPDIF/OFF : From the Coaxial Output, no signal is output. If you select this option, the HDMI has not audio output.
SPDIF/ RAW: Choose this setting if your DVD player is connected to a power amplifier with a coaxial cable or an optical cable; When playing a disc recorded with Dolby Digital, DTS and MPEG audio formats, the corresponding digital signals will be output from the Coaxial Output jack or Optical Output jack. This player's digital output jacks are designed for a connection to a Dolby Digital, DTS, or MPEG receiver or decoder.
SPDIF / PCM: Choose this setting if your DVD player is connected to a 2-channel digital stereo amplifier; When playing a disc recorded with Dolby Digital and MPEG audio formats, audio signals will be modulated into a 2-channel PCM signal, and it will be output from the Coaxial Output jack or Optical Output jack. (The default set is SPDIF/PCM for the HDMI audio output)
8.3.2 KEY
Use the Up and Down arrow button to move the scroll and adjust the key.
8.3.3 GM5
1) GM5 audio effect function could process 2CH audio source into 5CH sound. The different modes are achieved by different DSP operating method, and the effects will be different, too.
2) GM5 can support CDDA/MP3/VCD/AC3 2CH audio source.
a. There are extended items of GM5 function: SONG/CINEMA/OFF
b. GM5 will be unable when it is set to OFF.
C. When it is set to SONG or CINEMA, the corresponding audio effect will be achieved by GM5 function.
8.4 VIDEO SETUP
The video setup options are illustrated below:
8.4.1 BRIGHTNESS
Use the Up and Down arrow button to move the scroll and adjust the brightness.
8.4.2 CONTRAST
Use the Up and Down arrow button to move the scroll and adjust the contrast.
8.4.3 HUE
Use the Up and Down arrow button to move the scroll and adjust the hue.
8.4.4 SATURATION
Use the Up and Down arrow button to move the scroll and adjust the saturation.
8.4.5 SHARPNESS
Use the Up and Down arrow button to move the scroll and adjust the sharpness.
8.5 SPEAKER SETUP
The speaker setup options are illustrated below:
8.5.1 DOWNMIX
Use the Up and Down arrow button to move the scroll and adjust the saturation.
LT / RT: Choose this setting, it will be sound like in a movie theatre if the original movie the disc was recorded from was encoded in the Pro Logic Dolby Digital format.
STEREO: when 2-channel sound playing, stereo signal will be output.
VSS: Choose this setting, when a disc recorded with 5.1-channel sound format playing, the fictitious surround soundtracks effect will be heard from the main soundtrack.
5.1CH: Choose this setting to output the 5.1-channel sound.
8.5.2 SUBWOOFER
There are two settings in this option: OFF / ON. When ON is chosen, the player will auto detect the subwoofer input then output it. When OFF is chosen and the subwoofer input will not be output
8.5.3 CENTER DELAY
You can adjust center delay in this option
8.5.4 REAR DELAY
You can adjust rear delay in this option.
8.5.5 FRONT
Settings of the front audio channels.
8.5.6 CENTER
Settings of the center audio channel.
8.5.7 REAR
Settings of the rear audio channels.
8.6 DIGITAL SETUP
The video setup options are illustrated below:
8.6.1 OP MODE
LINE OUT: Choose this setting to line out the input signal. It will be more suitable for playing in the night time, for the output volume is low.
RF REMOD: It will be more suitable to choose this setting for playing in the day time, for the output volume is high.
8.6.2 DYNAMIC RANGE: When "LINE OUT" is selected, choose this setting to adjust the line out ratio and get different effect. If adjusting to FULL, the audio signal peak value will be the minimum; while adjusting to OFF, maximum.
NOTE: This option will be validated when the DOWNMIX OFF.
8.6.3 DUAL MONO (LEFT + RIGHT)
Choose this option to setup the L and R mono output mode; There are four modes in this option: STEREO, MONO L, MONO R, and MIX MONO.
- Specification
| Signal system PAL/AUTO/NTSC | |
| Frequency Response 20HZ-20KHZ( at 1KHz 0 dB) | |
| Signal-to-Noisy Ratio ≥90 dB( at 1KHz 0 dB) | |
| Audio Distortion+Noise ≤-60dB ( at 1KHz0dB) | |
| Audio Output(Analog audio) 2.0 | ^+0_-1..0 Vrms |
| Video Output Composite:1.0±0.2Vp-pLoad impedance: 75Ω, imbalance, negative polarity | |
| MAX Resolution >500 lines | |
| Power Supply ~110-240V AC 50/60Hz | |
| Dimensions | 430(mm)X260(mm)X38(mm) |
| Supported Disc MPEG-4/Xvid/D | VD/SVCD/VCD/CD/MP3/KodakPicture/Photo CD |
| USB 2.0 | |
REFERENCE:
To protect your DVD player, the interval between two consecutive Power button operations must be above 30 seconds.
No using for a period of time, please pull out the plug from the electronic outlet.
The player should be operated only on condition that the type of power supply corresponds to the marking label. Otherwise, it doesn't work or even be damaged.
The player may not be compatible with some encrypted discs.
If the player stops playback by accident, please power it on again.
10. Troubleshooting
No picture:
Ensure that the equipment is connected properly.
Connect the video cable securely into the appropriate jacks.
Select the appropriate video input mode on the TV
Picture Distorted
The disc is dirty and needs to be cleaned.
It is normal for some distortion to appear while Fast Motion Playback.
No Sound
Check the connections
Check the volume on the equipment you have connected.
Connect the audio cable securely into the appropriate jacks.
Ensure that the input settings for the television and stereo system are correct.
If the player is in mute mode, please press Mute button again to turn on sound.
No Stereo Sound Effect when playing video CD or CD
Check the connections
The Remote Control does not work properly
Remove the obstacle existing between the DVD player and the remote control.
The remote control is too far from the DVD video player. Operate the remote control within operating distance.
Point the remote control at the remote sensor of the DVD video player.
If the batteries in the remote control are exhausted, please replace batteries with new ones.
The DVD player does not start playback
No disc is inserted.(no disc symbol appears on the screen). Please insert disc.
The disc is place upside down. Place the disc with the playback side down.
The disc is dirty. Please clean the disc.
11. Recycling
This product bears the selective sorting symbol for waste electrical and electronic equipment (WEEE).
This means that this product must be handled pursuant to European Directive 2002/96/EC in order to be recycled or dismantled to minimize its impact on the environment.
For further information, please contact your local or regional authorities.

natural_image
Symbol of a trash bin crossed with no visible text or labelsElectronic products not included in the selective sorting process are potentially dangerous for the environment and human heath due to the presence of hazardous substances.
SALORA
MANUEL D'UTILISATION
DVD324HBL

LECTEUR DVD
AVERTISSEMENT: AFIN D'EVITER LES RISQUES DE FEU ET DES CHOCS ELECTRIQUES, IL NE FAUT PAS EXPOSER CET APPAREIL A LA PLUIE ET A L'HUMIDIT

ATTENTION : AFIN D'EVITER LE RISQUE D'UN CHOC ELECTRIQUE, NE PAS ENLEVER LE PANNEAU ARRIERE. IL N'EXISTE PAS DES FONCTIONS A L'INTERIEUR. CONSULTEZ UN SPECIALISTE POUR LE SERVICE.

CLASS 1 LASER PRODUCT
natural_image
Symbol of a recycling bin with crossed lines and a blank rectangular base (no text or labels)natural_image
Symbol of a trash bin with crossed lines and a horizontal bar, no text or labels present.


- Macrovision:
- DOLBY:
- Contents
- PRECAUTIONS
- Safety
- Environment
- FRONT PANEL AND REAR PANEL ILLUSTRATION
- REMOTE CONTROL
- Using the Remote Control
- Battery Installation
- Important:
- CONNECTIONS
- DVD+TV
- Notes :
- DVD+ AV Amplifier:
- Warning:
- Setting of TV system
- Function Buttons On the Front Panel
- Function Buttons On the Remote Control
- Title Play (compatible with DVD discs only)
- Sequence Play (compatible with DVD, SVCD, VCD, WMA, MP3/JPEG discs)
- Program Play (compatible with DVD, SVCD, VCD, CD, WMA, MP3/JPEG discs)
- Prev.
- HD/Res.(HD-Mode)
- Playing WMA, MP3 and JPEG discs
- CD-RIPPING
- System Setup
- General Steps of Setup Menu
- SYSTEM SETUP
- TV SYSTEM
- SCREEN SAVER
- HD OUTPUT
- VIDEO
- TV TYPE
- PASSWORD
- RATING
- DEFAULT
- LANGUAGE SETUP
- AUDIO SETUP
- KEY
- GM5
- VIDEO SETUP
- BRIGHTNESS
- CONTRAST
- HUE
- SATURATION
- SHARPNESS
- SPEAKER SETUP
- DOWNMIX
- SUBWOOFER
- CENTER DELAY
- REAR DELAY
- FRONT
- CENTER
- REAR
- DIGITAL SETUP
- OP MODE
- DUAL MONO (LEFT + RIGHT)
- REFERENCE:
- Troubleshooting
- No picture:
- Picture Distorted
- No Sound
- No Stereo Sound Effect when playing video CD or CD
- The Remote Control does not work properly
- The DVD player does not start playback
- Recycling
- SALORA
- MANUEL D'UTILISATION
- CLASS 1 LASER PRODUCT
Brand : SALORA
Model : DVD324HBL
Category : DVD player