
HC6000 - Thermostat DANFOSS - Free user manual and instructions
Find the device manual for free HC6000 DANFOSS in PDF.


| Product Type | Thermostat |
| Brand | Danfoss |
| Model | HC6000 |
| Dimensions (W x H x D) | 86 x 86 x 30 mm |
| Weight | 200 g |
| Power Supply | 230 V AC or 2 AA batteries (depending on version) |
| Display Type | Backlit LCD screen |
| Programming | Weekly, up to 4 periods per day |
| Regulation | PID (Proportional, Integral, Derivative) |
| Setpoint Temperature | 5 °C to 35 °C |
| Holiday Function | Yes, adjustable away mode |
| Child Lock | Yes, protection against tampering |
| Open Window Detection | Yes, temporary heating stop |
| Relay Output | Potential-free contact, 230 V / 10 A max |
| Temperature Sensor | Built-in, accuracy ±0.5 °C |
| Maintenance and Cleaning | Clean with a soft, dry cloth. Do not use abrasive products. |
| Safety | Safety shutdown in case of overheating, short-circuit protection |
| Spare Parts and Repairability | Batteries, wall bracket, mounting screws. Repair possible by an approved professional. |
| General Information | 2-year warranty. CE approval. Made in Denmark. |
Frequently Asked Questions - HC6000 DANFOSS
User questions about HC6000 DANFOSS
0 question about this device. Answer the ones you know or ask your own.
Ask a new question about this device
Download the instructions for your Thermostat in PDF format for free! Find your manual HC6000 - DANFOSS and take your electronic device back in hand. On this page are published all the documents necessary for the use of your device. HC6000 by DANFOSS.
USER MANUAL HC6000 DANFOSS
User Instructions 3-11

Your HC6000 electronic programmable room thermostat provides two or four time and temperature events each day. You can programme one set of times and temperatures for weekdays and another set for weekends.
It features a factory pre-set programme, which can be edited by the user, and several user overrides.

LCD Display
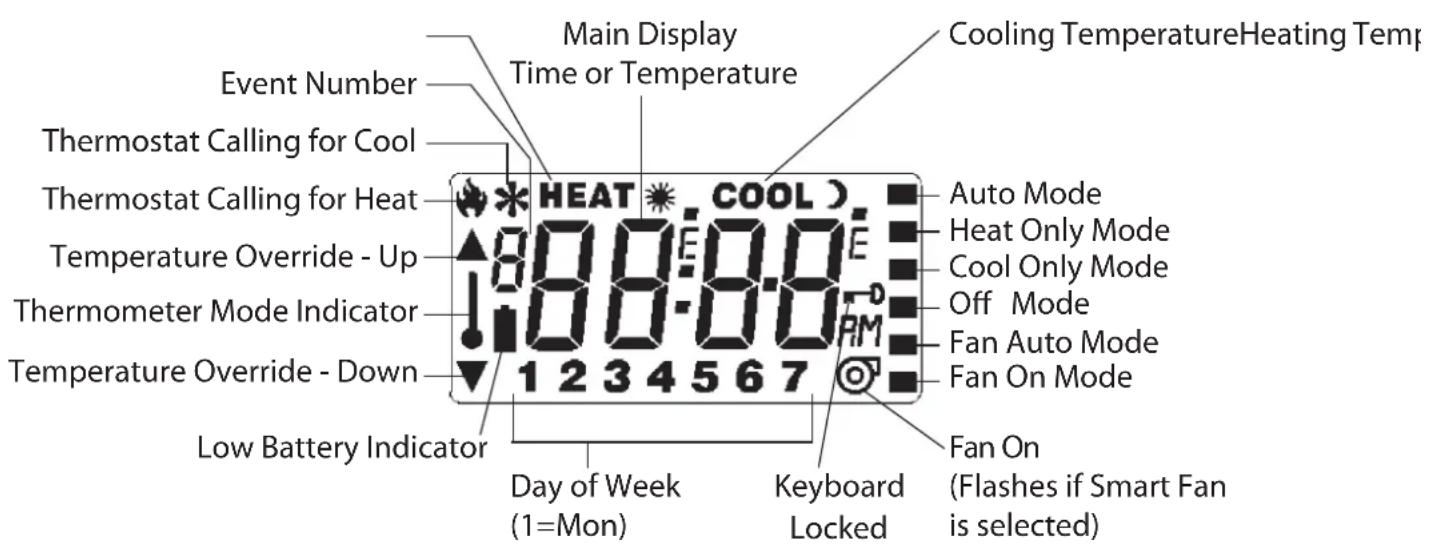
Before beginning the programming of the unit please press the reset button using a non-metallic object (e.g. pencil/matchstick). During programming if no buttons are pressed for two minutes the unit will automatically go back to run mode. All changes made will be saved.
User Preferences
Before programming the thermostat it is recommended that the user preferences as regards clock display and temperature scale are set.
Clock Display
Press both SELECT and ▲ buttons and hold for 2 seconds to change display between AM/PM and 24 hour clock. Repeat to return to original setting.
Temperature Scale
To select between Centigrade and Fahrenheit temperature displays please follow the following steps:
- Press SELECT and ▼ buttons for 2 seconds to enter temperature display mode.
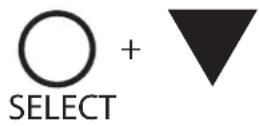
- Press SELECT and FAN buttons for 2 seconds to change between Centigrade and Fahrenheit display.

- Press SELECT and ▼ buttons for 2 seconds to change display back to time display mode prior to programming.
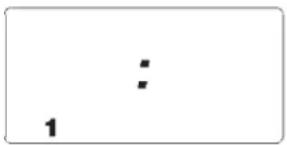
- Press the PROG button to enter programming mode. The LCD will flash 12:00.

- Press the + or - button to adjust the time of day, if in AM/PM mode remember to ensure that AM/PM setting is correct.

- Press PROG to move on to select the current day of the week.
- Press the + or - button repeatedly until the correct day of the week is displayed. Day 7 is Sunday.

- Press PROG button repeatedly to advance to 'Programming event times and temperatures'.
Programming event times and temperatures
The thermostat can be set by the installer to provide 2 or 4 programme events per day. The thermostat provides 5-day/2-day programming with one set of programmes for days 1-5, (Monday to Friday), and another set of programmes for days 6-7, (Saturday and Sunday).
If thermostat has been set by building owner or installer for 2 events per day, only 2 events can be programmed.
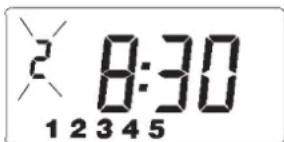
Setting the time and temperatures events for Days 1-5.
- Press + or – buttons to adjust event time for event 1.
- Press PROG to advance to temperature setting.
- Press ▲ or ▼ buttons to adjust heating temperature.
- Press + or - button to select required cooling temperature.
OPTIONAL: If heating is not required, "Off" can be selected below 5°C. If cooling is not required, "Off" can be selected above 37°C.
Press PROG button to move onto event 2 programming and repeat the steps above:
- Press + or – buttons to adjust event time for event 2.
- Press PROG to advance to temperature setting.
- Press ▲ or ▼ buttons to adjust heating temperature.
- Press + or - button to select required cooling temperature.
OPTIONAL: If heating is not required, "Off" can be selected below 5°C. If cooling is not required, "Off" can be selected above 37°C.
Press PROG button to move onto event 3 and repeat steps 1 - 4 for events 3 and 4.



Setting the time and temperatures events for Days 6-7.
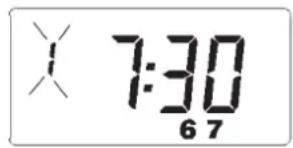
- Press PROG repeatedly until 67 appears at the bottom of the display.
- Press + or - buttons to adjust event time.
- Press PROG to advance to temperature setting.
- Press ▲ or ▼ buttons to adjust heating temperature.
- Press + or – button to select required cooling temperature.


OPTIONAL: If heating is not required, "Off" can be selected below 5°C. If cooling is not required, "Off" can be selected above 37°C.
Press PROG button to move onto event 2 programming and follow the steps above to programme event 2, 3 and 4.
Daily Use instructions
The operating mode of the thermostat can be changed by pressing the SELECT button. These thermostats are used in 4-pipe system which allow heating or cooling to operate all year round. The available modes are as follows:
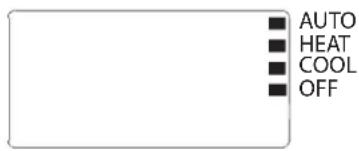
Auto: The thermostat switches automatically between heating and cooling to maintain the programmed temperatures.
Heat: Thermostat operates as heating thermostat only, starting the heating when the room temperature falls to below the wanted temperature.
Cool: Thermostat operates as cooling thermostat only, starting the cooling when the room temperature rises to above the wanted temperature.
Off: Both heating and cooling are turned off. (There is no frost protection in "Off" mode.)
Selecting the thermostat fan operating mode using the FAN button
The operating mode of the thermostat fan output can be changed by pressing the FAN button. The available modes are as follows:
Auto: The fan runs whenever there is a demand for either heating or cooling. A solid bar will show in the display adjacent to the label FAN AUTO and a fan symbol will be shown when the fan is running.
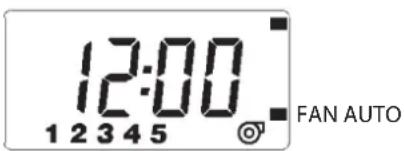
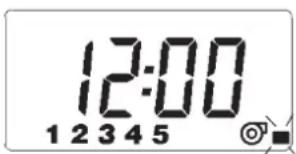
On: The fan runs continuously. A solid bar will show in the display adjacent to the label FAN ON, in addition, the fan symbol will also be shown to indicate that the fan is running.

Smart-fan: The fan runs continuously during events 1-4 but reverts to Auto during event 4-1. A flashing solid bar will be shown adjacent to the label FAN ON and the fan symbol will also be shown.
Temp. changes to programmed temperatures
Press either ▲ or ▼ to view programmed temperatures. If Off is selected this option does not operate.

Then use ▲ button to temporarily raise temperature, a ▲ symbol will appear in the LCD display.

Or use ▼ button to temporarily lower temperature, a ▼ symbol will appear in the LCD display.

Limited temperature adjustment: The amount of temperature adjustment may have been limited by the building owner or the installer.
Automatic cancellation of overrides: Any temporary override of temperature is cancelled at the next event.
Selecting Weekend into Weekday override
Week-end into week day override
To temporarily copy weekend programmes into weekdays press both ▲ and ▼ buttons together and hold down for 2 seconds.
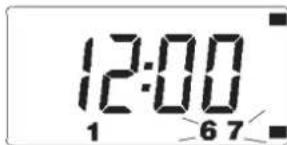
To cancel the weekend into weekday override press both ▲ and ▼ buttons twice. During weekdays, this allows weekend programmes to be temporarily copied into the current day. The programme reverts to normal operation at the end of the day.
Selecting Thermostat mode
Programmes can be permanently overridden by selecting THERMOSTAT mode, this feature is used if fixed temperatures are required for extended periods of operation.
- To enter THERMOSTAT mode press both ▲ and ▼ buttons together and hold down for 2 seconds to enter WEEKEND into WEEKDAY override.

- Press both ▲ and ▼ buttons together for a second time and hold down for 2 seconds to enter THERMOSTAT mode. The default setting is heat only.

-
Once in THERMOSTAT mode it is possible to select the required heating and cooling temperatures and the thermostat operating mode, see below for setting details.
-
Use ▲ or ▼ buttons to select required heating temperature.
-
Press SELECT button to select COOL mode then use ▲ or ▼ buttons to select required cooling temperature.

- Press SELECT button twice again to return to AUTO mode. The thermostat will now operate heating and cooling to maintain the selected temperatures.

-
Should Heat only or Cool only be required, use SELECT button to select required service.
-
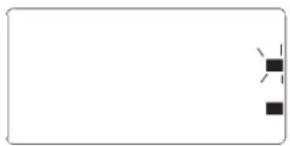
Should system OFF be required, use SELECT button to select "Off".
natural_image
Blank white rectangle with two small black squares at the bottom (no text or symbols)Please note: Frost protection is not provided in OFF mode.
THERMOSTAT mode can be cancelled at any time by pressing both ▲ and ▼ buttons together and holding down for 2 seconds. This will return the unit to normal running mode.
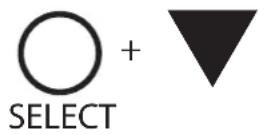
To enter thermometer mode to display current room temperature press both SELECT and ▼ buttons and hold for 2 seconds. To return to time display repeat press and hold operation.
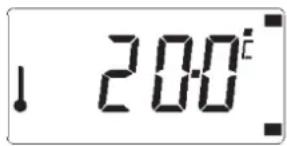
The unit will revert to time display after Programming or Advanced Programming Mode has been entered.
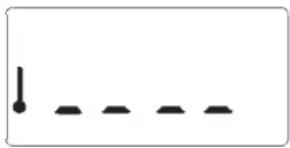
Whilst in thermometer mode if the display flashes a row of bars the measured temperature exceeds the display limit.
natural_image
Simple diagram with a plus sign and four dashed lines, no text or symbols presentSelecting fan speed setting
Use slider switch to select required fan speed.
Resetting the thermostat memory
Return the thermostat to factory settings
This should only be carried out should the performance of the thermostat become erratic, this is only likely to happen as a result of severe electro-magnetic interference such as a lightening storm.
To reset clock and re-start the thermostats micro-processor press the RESET button. After doing this the thermostat must be re-programmed.
natural_image
Blank white rectangle with two small black squares in the bottom-right corner (no text or symbols)natural_image
Blank white rectangle with a small black square symbol in the top-right corner (no text or labels)natural_image
Simple diagram with a vertical line and a horizontal line, no text or symbols presentnatural_image
Blank white rectangle with two small black squares in the bottom-right corner (no text or symbols)natural_image
Blank white rectangle with a small black square symbol in the top-right corner (no text or labels)natural_image
Simple diagram with a downward arrow and five horizontal dashed lines, no text or symbols present.natural_image
Blank white rectangle with a small black square symbol in the bottom-right corner (no text or labels)natural_image
Simple diagram with a downward arrow and five horizontal lines, no text or symbols presentToerental ventilator selecteren
natural_image
Blank white rectangle with a small black square symbol in the bottom-right corner (no text or labels)natural_image
Simple diagram with a vertical line and a series of dashed lines, no text or symbols present.www.danfoss.com/BusinessAreas/Heating
This product complies with the following EC Directives:
Electro-Magnetic Compatibility Directive.
(EMC) (89\336\EEC), (92\31\EEC)
Low Voltage Directive.
(LVD) (73\23\EEC), (93\68\EEC)
CE


- LCD Display
- User Preferences
- Clock Display
- Temperature Scale
- Programming event times and temperatures
- Setting the time and temperatures events for Days 1-5.
- Setting the time and temperatures events for Days 6-7.
- Daily Use instructions
- Selecting the thermostat fan operating mode using the FAN button
- Temp. changes to programmed temperatures
- Selecting Weekend into Weekday override
- Week-end into week day override
- Selecting Thermostat mode
- Selecting fan speed setting
- Resetting the thermostat memory
- Return the thermostat to factory settings
- Toerental ventilator selecteren
Brand : DANFOSS
Model : HC6000
Category : Thermostat