
iMac 27" Core i5-3.2 - Desktop computer APPLE - Free user manual and instructions
Find the device manual for free iMac 27" Core i5-3.2 APPLE in PDF.


| Product Type | All-in-One Desktop Computer |
| Brand | Apple |
| Model | iMac 27" Core i5-3.2 |
| Display Size | 27 inches (diagonal) |
| Display Type | LED-backlit glossy widescreen |
| Processor | Intel Core i5 3.2 GHz (Turbo Boost up to 3.6 GHz) |
| Memory (RAM) | 8 GB (expandable to 32 GB) |
| Storage | 1 TB Hard Drive (optional Fusion Drive or SSD) |
| Graphics | Intel HD Graphics 4000 (or dedicated NVIDIA GeForce GT 640M on some models) |
| Dimensions (Height) | 20.3 inches (51.6 cm) |
| Dimensions (Width) | 25.6 inches (65.0 cm) |
| Dimensions (Depth) | 8.0 inches (20.3 cm) |
| Weight | 21 pounds (9.5 kg) |
| Power Supply | 250W internal power supply |
| Operating System | macOS (compatible with up to macOS Catalina) |
| Connectivity | Thunderbolt, USB 3.0, Ethernet, Wi-Fi 802.11n, Bluetooth 4.0 |
| Main Functions | Computing, web browsing, multimedia editing, gaming, office tasks |
| Maintenance & Cleaning | Use a soft, lint-free cloth; avoid liquids; do not spray directly on screen |
| Safety Precautions | Keep vents clear; do not block airflow; use only Apple-approved accessories |
| Spare Parts & Repairability | RAM and hard drive are user-replaceable; other components require authorized service |
| General Information | Released in 2012; originally shipped with OS X Mountain Lion |
Frequently Asked Questions - iMac 27" Core i5-3.2 APPLE
User questions about iMac 27" Core i5-3.2 APPLE
0 question about this device. Answer the ones you know or ask your own.
Ask a new question about this device
Download the instructions for your Desktop computer in PDF format for free! Find your manual iMac 27" Core i5-3.2 - APPLE and take your electronic device back in hand. On this page are published all the documents necessary for the use of your device. iMac 27" Core i5-3.2 by APPLE.
USER MANUAL iMac 27" Core i5-3.2 APPLE
Apple Technician Guide

iMac (27-inch, Mid 2010)
2010-09-09
Apple Inc.
© 2010 Apple Inc. All rights reserved.
Under the copyright laws, this document may not be copied, in whole or in part, without the written consent of Apple.
Every effort has been made to ensure that the information in this document is accurate. Apple is not responsible for printing or clerical errors.
Apple
1 Infinite Loop
Cupertino, CA 95014-2084
USA
+ 1 408 996 1010
www.apple.com
Apple, the Apple logo, Mac, and Macintosh are trademarks of Apple Inc., registered in the U.S. and other countries.
iMac (27-inch, Mid 2010)
Contents
About This Guide
Updates 10
Updated 9 September 2010 10
Updated 9 August 2010 10
Apple Technician Guide introduced 27 July 2010 10
Feedback 10
Basics
Overview 12
Identifying Features 13
Product Configurations 13
Safety Precautions 14
Serial Number Location 15
New Accessories 16
Magic Trackpad 16
Apple Battery Charger 18
Troubleshooting
General Troubleshooting 20
Wireless Troubleshooting 20
Update System Software & Firmware 20
Troubleshooting Theory 20
Hardware vs. Software 21
Common Reset Procedures 21
Power On Self Test (POST) 21
Resetting the System Management Controller (SMC) 22
Resetting Parameter RAM (PRAM) 22
Starting Up in Safe Mode 23
Removing the Battery, Measuring DC Voltage 24
Diagnostics 25
Sensors Errors 25
Sensor Locations 27
Diagnostic LEDs 29
Location of Diagnostic LEDs 29
LED Functions 30
LED Startup Sequence 31
Logic Board Test Points 32
Functional Overview 33
Block Diagram 34
Symptom Charts 35
Startup and Power 35
No Power, Dead Unit 35
Won't Start Up 37
Intermittent Shutdown 39
Kernel Panic, System Crashes 44
No Video 46
Corrupted Video 48
Burnt Smell/Odor 51
Uncategorized Symptoms 52
Display 53
Backlight Issue/No Backlight 53
Noise / Unstable Flickering 55
LCD Image Issues 58
Incorrect/Missing Colors 60
Distorted/Blurred Image 62
Pixel Anomalies 64
Vertical/Horizontal Lines 66
Non-Uniform Brightness / Color 68
Cosmetic Defects 69
Uncategorized Symptoms 69
Mass Storage 70
Hard Drive Not Recognized 70
Optical Drive Not Recognized 76
Optical Drive Won't Accept/Eject Media 77
Optical Drive Read/Write Error 78
Optical Drive Not Performing to Specifications 80
Optical Drive Noisy 82
SD Card Will Not Insert Into Slot 83
SD Card Not Recognized 84
Uncategorized Symptoms 85
Communications 86
AirPort/Bluetooth Issues 86
AirPort Card Kernel Panic 89
Ethernet Port/Device Issue 90
Wireless Input Device Does Not Pair 91
Uncategorized Symptoms 93
Input/Output Devices 94
Apple Remote Inoperable 94
Audio: Microphone 96
Audio: Built-in Speakers Have Distorted Sound 97
Audio: No Audio from Built-in Speakers 98
Camera Issues 101
FireWire Device Not Recognized 102
USB Device Not Recognized 104
Wired Keyboard Does Not Function Properly 106
Keyboard: Specific Keys Do Not Respond 108
Wired Keyboard/Mouse Not Recognized 108
Wireless Input Device Does Not Pair 110
Apple Wireless Mouse/Magic Trackpad Erratic Tracking 113
Wireless Input Device Loses Connection 114
Apple Battery Charger Does Not Charge Batteries 116
Mechanical 118
Noise/Hum/Vibration 118
Fan Failures / Thermal Issues 121
Stand/Hinge Issues 122
Physical Damage 123
Uncategorized Symptoms 123
Take Apart
General Information 125
Opening the Unit 125
Required Tools 125
Required Special Tools for Glass Panel 126
Cleaning Tools Starter Kit 126
Cleaning & Handling the Glass Panel 127
Do's and Don'ts 127
Handling a Broken Glass Panel 128
How to Remove a Broken Glass Panel 128
Safety 133
Logic Board Handling 134
Reassembly Steps 134
Note About Images in This Manual 134
Screw Sizes 134
Access Door 135
Memory 137
Removal 138
Reassembly 138
Glass Panel 139
Removal 140
Reassembly 141
Camera 144
Removal 145
Reassembly 146
LCD Panel 147
Removal 148
Handling the Panel 153
Reassembly 154
Vertical Sync Cable (Vsync) 157
LED Temp Sensor Cable 158
DisplayPort Cable 159
Audio Ports and Cable 161
AirPort Antenna 163
AirPort Card 165
AirPort Carrier Board 167
AirPort Cable 169
Bluetooth Antenna 171
Bluetooth Board 173
LED Backlight Board 175
Power Supply 177
Removal 178
Reassembly 179
Backlight Pressure Wall 180
Power Supply/Hard drive Pressure Wall 182
Removal 183
Reassembly 183
Hard Drive 185
Removal 186
Reassembly 187
Hard Drive Sensor Cable 188
Removal 189
Reassembly 189
Optical Drive 190
Removal 191
Reassembly 193
Optical Sensor Cable 195
Optical Drive Fan 197
SD Card Reader 199
Removal 200
Reassembly 201
SD Card Reader Cable 202
IR Board and Cable 204
Logic Board 206
Removal 207
Handling the Logic Board 209
Reassembly 210
Video Card 216
Solid State Drive (SSD) 219
Removal 220
Reassembly 222
SSD Data Cable 223
Optical/MXM Pressure Wall 225
Hard Drive Data Cable 227
Optical Drive Data Cable 230
Battery 232
Removal 233
Reassembly 233
Right Speaker 234
CPU Fan 236
Removal 237
Reassembly 238
Ambient Temp Sensor 239
Removal 240
Reassembly 240
Left Speaker 241
Removal 242
Reassembly 242
Hard Drive Fan 244
Mechanism Cover 246
Stand 248
Removal 249
Reassembly 250
Mechanism 252
Bluetooth Cable 254
Camera Cable 257
Cable, AC/DC Power/Backlight/SATA 260
Cable, AC/DC Power/Backlight/SATA, SSD 262
Microphone Cable 265
Rear Housing 266
Reassembly 267
Additional Procedures
Retrieving Mechanism 272
Views
Exploded Views 277
Exploded View #1 277
Exploded View #2 278
Exploded View #3 279
External Views 280
Rear View 280
Ports 281
Internal Views 282
Photo of Components below LCD 282
Photo of Components in the Rear Housing 283
Logic Board, Front Side 284
Logic Board, Back Side 285
Screw Chart 286
About This Guide
iMac (27-inch, Mid 2010)
Updates
Updated 9 September 2010
Troubleshooting:
- Display: several symptoms: Modified steps to allow unit to warm up for about a minute (instead of 15 minutes) before evaluating front-of-screen performance.
Take Apart:
- LCD Panel: Added note that overtightening screws could lead to issue of light leakage after unit is reassembled.
- Camera and Rear Housing: Added note that white thermal paste intended for camera should not be used for any other purpose (such as portable computer heatsinks).
Updated 9 August 2010
- Basics: Overview: New Accessories: Magic Trackpad and Apple Battery Charger: Added links to the User Guides:
Apple Technician Guide introduced 27 July 2010
Feedback
We want your feedback to help improve this and future Technician Guides! Please email any comments to smfeedback2@apple.com
Basics
iMac (27-inch, Mid 2010)
Overview

Introducing the iMac (27-inch, Mid 2010) with the latest Intel Core i3, Core i5 and Core i7 processors and powerful new graphics. The new iMac line is the fastest ever with dual-core processor speeds up to 3.6 GHz, quad-core speeds up to 2.93 GHz and discrete graphics including the powerful ATI Radeon HD 5750.
The processors feature an integrated memory controller to access the system memory directly, allowing the new iMac to take full advantage of its faster 1333 MHz memory. New discrete ATI Radeon HD processors deliver incredibly smooth, crisp graphics for the most demanding 3D games, creative software and technical applications. Refer to the next page for more features.
Identifying Features
The iMac (27-inch, Late 2010) computer features include:
• 27-inch display 2560 x 1440 LED-backlit display - Increased processor speeds:
• 3.20 GHz Intel Core i3 with 4MB shared L3 cache • 2.80 GHz Intel Core i5 (CTO) • 3.60 GHz Quad-Core Intel Core i5 with 8MB shared L3 cache • 2.93 GHz Quad-Core Intel Core i7 (CTO)
• 4 GB 1333 MHz DDR3 SDRAM expandable up to 16GB
- Main memory PC3-10600, DDR3 (1333), 204-pin, ships with 2x1333 MHz SO-DIMMs
- SD card reader slot with SDXC (Secure Digital Extended Capacity) supports 32GB - 2TB
- Mini DisplayPort output (DVI, VGA, and dual-link DVI) and supports input from external DisplayPort sources (adapters sold separately) • Graphics and video support:
• AMD Radeon HD 5670 graphics processor with 512MB GDDR3
• AMD Radeon HD 5750 graphics processor with 1 GB GDDR5
- Hard drive: 1TB, 2TB • Solid State Drive options:
• 256GB SSD (SSD only, without a hard drive) • 256GB SSD + 1TB Serial ATA Hard Drive (CTO) • 256GB SSD + 2TB Serial ATA Hard Drive (CTO)
- Magic Mouse (Mid 2010) and Apple Wireless Keyboard (2009), standard with all configurations
• Ships with and requires at least Mac OS 10.6.3 - Magic Trackpad (CTO) • Apple Battery Charger (CTO)
Product Configurations
For product configurations, refer to Apple Support Tech Specs: http://support.apple.com/specs/
Safety Precautions

WARNING: HIGH VOLTAGE: The AC/DC power supply PCB remains powered up whenever the system is plugged in, whether or not the system has been turned on. Use extreme caution when troubleshooting the system with the front bezel removed.
Important: If the computer is shut down by removing the power cord, allow the power supply a good 2-3 minutes to discharge the capacitors before handling it. However, if you select "Shut Down" via the Apple menu, the computer will discharge the power supply capacitor almost immediately.

Serial Number Location
The iMac (27-inch, Mid 2010) serial number is located on the base of the stand. When replacing a stand, transfer the serial number to the new stand.

New Accessories
Magic Trackpad
The wireless Magic Trackpad uses Bluetooth® technology to connect to the Mac and comes with two AA batteries installed. To use the Magic Trackpad and its full features, update your Mac to Mac OS X version 10.6.4 or later, and then install the latest trackpad software using Software Update, if needed. Refer to the Magic Trackpad Quick Start Guide for more information.
Note: If for some reason the iMac (27-inch, Mid 2010) needs the system software reinstalled, pair the Magic Trackpad and then run Software Update. If for some reason you notice that only basic functionality is present on the Magic Trackpad, ensure that it's paired correctly before launching Software Update. Refer to the following Kbase articles for more information.
• HT4273 About Magic Trackpad Update 1.0 for Windows - HT4254 About Magic Trackpad and Multi-Touch Trackpad Update 1.0
About the Indicator Light
The indicator light displays the status of your Magic Trackpad and the batteries.
- When you first turn your trackpad on, the indicator light glows steadily for 2 to 3 seconds, indicating the batteries are good.
- If your trackpad isn't paired with a Mac, the light blinks, indicating your trackpad is in discovery mode and ready to pair (pairing means connecting your trackpad and Mac to each other wirelessly).
- If you don't pair your trackpad with your Mac within 3 minutes, the light and trackpad turn off to conserve battery life. Press the On/off button on your trackpad to turn it on again, allowing you to pair it with your Mac.
- When your trackpad is on and connected, the indicator light turns off.
Turn on the Trackpad
- To turn the trackpad on, press firmly and release the on/off button.
- To turn on the trackpad and make it stay in discovery mode (prevent auto-pairing to previous known host), press and hold the on/off button.

Pairing the Magic Trackpad
To pair your trackpad:
- Choose Apple ( Apple ) > System Preferences, and then click Trackpad.
- Click "Set Up Bluetooth Trackpad ..." in the lower-right corner.
- Press the On/off button on your trackpad to turn it on.
- Click Continue when your trackpad is detected.
Once your trackpad is paired with your Mac, use Software Update again to make sure you have the latest software installed.
Note: If the iMac (27-inch, Mid 2010) needs to have system software reinstalled for some reason, pair the Magic Trackpad and then run Software Update. If for some reason you notice that only basic functionality is present on the Magic Trackpad, ensure that it's paired correctly before launching Software Update.
Installing Batteries
- Use a coin to remove the battery compartment cover on the left side.
- Insert batteries into the battery compartment as shown.
Warning: Replace or recharge batteries at the same time. Don't mix old batteries with new batteries and don't mix battery types (for example, alkaline and lithium batteries). Don't open or puncture the batteries, install them backwards, or expose them to fire, high temperatures, or water. Don't charge nonrechargeable AA batteries. Keep batteries out of the reach of children.

Apple Battery Charger
Use the Apple Battery Charger to charge rechargeable NiMH batteries for your Apple products that use AA batteries. Each Apple Battery Charger comes with six high-performance AA NiMH batteries: two for your keyboard, two for your mouse or trackpad, and two for charging. You can use the Apple Battery Charger to charge either one or two NiMH rechargeable batteries. To charge batteries fully, allow at least five hours of charging time. For more information, refer to the Battery Charger Quick Start and/or Kbase article HT 4275 About Apple Battery Charger.
Batteries
Use only NiMH rechargeable batteries in the Apple Battery Charger. Don't try to charge nonrechargeable AA batteries (lithium or alkaline) in the charger.
Caution: Risk of explosion if battery is replaced by an incorrect type. Dispose of used batteries according to the instructions. Don't open or puncture the batteries, install them backwards, short circuit, or expose them to fire, high temperatures, or water. Keep batteries out of the reach of children.
Status Lights
The indicator light on top of the Apple Battery Charger displays the charging status of the batteries.
- Amber: The batteries are charging.
- Green: The batteries are charged and ready to use—the green indicator light shuts off after six hours.
No light: May indicate any of the following conditions:
The batteries are charged and ready to use. The inserted batteries are too deeply discharged to register immediately.
Flashing Amber: May indicate any of the following conditions:
The batteries haven't been properly installed in the charger.
An unsupported type of battery is in the charger.
The batteries may be faulty or damaged and should be replaced.


Troubleshooting
General Troubleshooting
Wireless Troubleshooting
If you're having issues with Bluetooth and wireless connectivity issues, refer to the following:
TS3048 Troubleshooting wireless mouse and keyboard issues. HT3887 Wireless input devices: Bluetooth frequently asked questions. HT1365 AirPort and Bluetooth: Potential sources of interference for wireless devices and networks. HT3903 Apple Wireless Keyboard and Mouse: How to install batteries. HT4273 About Apple Magic Trackpad Update 1.0 for Windows. HT4254 About: Magic Trackpad and Multi-Touch Trackpad Update 1.0. HT 4275 About Apple Battery Charger. Bluetooth Service Diagnostic (BSD) self-paced training. Bluetooth Troubleshooting Course.
Update System Software & Firmware
Important: Ensure the correct version of Mac OS X and the latest software and firmware updates have been applied before you begin troubleshooting. Computers sometimes exhibit symptoms that indicate the wrong Mac OS X system software is installed.
Firmware is the name given to software that is written into memory circuits such as flash memory, which will hold the software code indefinitely, even when power is removed from the hardware. Firmware on Intel Mac computers is designed to be updated if necessary by running the Mac OS X Software Update check (available in the Apple menu) while the computer is connected to the Internet. For more information about firmware updates, refer to:
kBase # HT1557: About firmware updates for Intel-based Macs
Troubleshooting Theory
For general information on troubleshooting theory, go to GSX and find the Service Training course menu link. From there you can access the Troubleshooting Theory self-paced course.
Hardware vs. Software
For information on how to isolate a hardware issue from a software issue, refer to:
kBase #TS1388: Isolating issues in Mac OS X
For information on how to troubleshoot a software issue, refer to:
kBase #HT1199: Mac OS X: How to troubleshoot a software issue
kBase #TS1394: Mac OS X: Troubleshooting installation and software updates
kBase #HT2956: Troubleshooting Mac OS X installation from CD or DVD
Common Reset Procedures
Power On Self Test (POST)
Intel-based Mac computers such as the iMac rely on a combination of tones and blinking LEDs to display Power On Self Test (POST) error codes.
- If the computer detects out-of-specification or no SDRAM, the screen will remain black but the computer will beep. This error condition may be due to physically damaged RAM, installing the incorrect type of RAM, poor connection, or not having RAM installed.
- Some RAM may appear to pass the Power-On-Self-Test (POST) but still cannot be used by the operating system. In this case, the computer will display a gray screen, sound three tones and repeat the tones until the computer is turned off.
- The solution to both of these situations is to first re-seat the memory and test the computer again. If the memory fails the POST test again, remove all installed memory and test by installing one by one each memory that has been verified to work correctly on another system (i.e., "known-good") or order new memory.
- A sequence of tones heard at startup or a no video symptom may also be fixed by temporarily removing/replacing the backup battery.
Resetting the System Management Controller (SMC)
The System Management Controller (SMC) is a chip on logic board that controls all power functions. If computer is experiencing any power issue, such as not starting up, not displaying video, sleep issues, battery management, or fan noise issues, resetting SMC may resolve it. To reset SMC on an iMac:
- Shut down the computer.
- Unplug all cables from computer, including power cord.
- Press and hold the power button for 5 seconds.
- Release the power button.
- Attach the computer's power cable. Note: If you press the power button while inserting the power cord, the iMac will enter a mode in which the fans run at full speed. For more information, refer to kbase article TS1433: iMac: Fans run at full speed after computer turns on
- Press the power button to turn on the computer.
For more information, refer to:
kBase #HT3964: Intel-based iMac: How to reset the System Management Controller
Resetting Parameter RAM (PRAM)
PRAM stores certain system and device settings in a location that Mac OS X can access quickly. Exactly which settings are stored in the computer's PRAM varies depending on the type of computer as well as the types of devices and drives connected. To reset PRAM:
- Shut down the computer.
- Locate the following keys on keyboard: Command, Option, P, and R. You will need to hold these keys down simultaneously in Step 4. Note: If the keyboard does not have an Option key, use the Alt key instead.
- Press power button.
- Immediately press and hold Command-Option-P-R keys. Important: You must press this key combination before the gray screen appears.
- Hold down keys until the computer restarts, and you hear the startup chime a second time.
- Release keys.
For more information, refer to:
kBase #HT1242: Mac OS X: What's stored in PRAM
kBase #HT1379: Resetting your Mac's PRAM and NVRAM
Starting Up in Safe Mode
A Safe Boot is a special way to start Mac OS X when troubleshooting. To start up in Safe Mode:
- Make sure computer is shut down.
- Press power button.
- Immediately after you hear the startup tone, press and hold the Shift key. Note: The Shift key should be held as soon as possible after the startup tone, but not before.
- Release the Shift key when you see the screen with the gray Apple and progress indicator (looks like a spinning gear). During startup, "Safe Boot" appears on the Mac OS X startup screen and a gray progress bar is displayed at the bottom of the window (since Mac OS X 10.6).
- To leave Safe Mode, restart the computer normally, without holding down any keys during startup.
For more information, refer to: kBase #HT1564: Mac OS X: What is Safe Boot, Safe Mode? kBase #TS1884: Safe Boot takes longer than normal startup.
Removing the Battery, Measuring DC Voltage
- Unplug the computer. Allow several minutes for the power supply to discharge.
- Remove the logic board.
- Remove the coin battery for 1-2 minutes. The coin battery is located on the back side of the logic board (see graphic below).

- Measure DC voltage on the battery by touching the battery with the red probe and grounding with the black probe. If the voltage is 2.7V or less, replace the battery.
- Reinstall the battery and logic board. This will reset the logic board.
- Power on computer.
- If computer boots, check for and install all software and firmware updates.
Diagnostics
The following diagnostics are required for this product:
• Apple Service Diagnostic (ASD), version 3S140 - For iMac (27-inch, Mid 2010): Apple Hardware Test (AHT), version 3A202 - Bluetooth Service Diagnostic (BSD) 1.1
Sensors Errors
Run latest available service utilities to determine if any thermal sensors or blowers are malfunctioning. When a test reports an error, reseat appropriate connections and check that all air flows are free from obstruction. If issue persists, replace the corresponding part (sensor, blower, logic board, video card, or power supply). See chart below for correlation between affected sensor, sensor location, and additional checks to perform.
Note: AHT can be run by pressing the D key on startup (if hard drive was not reformatted, or if adequate system specific restore DVD is inserted). If a sensor error is detected, AHT will report an error code containing the affected sensor name (ex: "4SNS/1/40000000 TC0H" error code reports to sensor TC0H).
| Sensor Suspected part and Location Suggested Action Notes | |||
| TA0P Excessive incoming Ambient air temperature, or Ambient temp sensor damaged/disconnected from logic board. | Verify that incoming/outgoing air vents are free from obstruction, that sensor cable is securely connected to the top edge of the logic board and attached to the left speaker housing. Replace sensor cable if damaged. | All fans ramp at full speed if sensor is disconnected. | |
| T00p Excessive Optical Drive area temperature, or ODD temp sensor damaged/ disconnected from logic board. | Verify sensor cable is securely connected to the logic board and the sensor is properly attached to the ODD mechanism. Replace sensor cable if damaged. | The ODD fan will run at full speed if sensor is disconnected. | |
| TH00 Excessive Hard Drive area temperature, or HDD temp sensor damaged/disconnected from logic board. Use the correct sensor cable, each drive vendor has a unique sensor cable model. | Verify sensor cable is securely connected to top left side of logic board and it's connected to hard drive. Check for damaged cable on logic board. | The HD fan may run at full speed if the sensor is disconnected. | |
| Tm0p Excessive logic board temperature (this sensor is part of logic board) | Test with known-good logic board | ||
| TL0p Excessive LCD panel area temperature, or LCD temp sensor damaged/disconnected from top of logic board | Verify that the LCD sensor cable is securely connected to the logic board and the sensor is attached to the LCD. Replace the sensor cable if damaged | The CPU fan will run at full speed if the sensor is disconnected. | |
| TS2P Excessive upper internal enclosure temperature, or Skin temp sensor damaged/disconnected from top of logic board. | Verify that the skin temp sensor cable is securely connected to the top of the logic board and sensor is attached to rear housing (near the camera). Replace the sensor cable if damaged. | ||
| TC0H Excessive processor heatsink temperature, or CPU temp sensor damaged/disconnected from back side of logic board (this sensor is part of logic board) | Check CPU sensor cable connection to logic board. It requires removal of the logic board. | If the sensor is disconnected, the CPU fan will run at full speed. | |
| TG0D Excessive graphics processor die temperature (this sensor is part of graphics processor chip) | Test with known-good video card | ||
| TG0H Excessive graphics processor heatsink temperature, or GPU temp sensor damaged/disconnected from back side of logic board (this sensor is part of video card assembly) | Check GPU sensor cable connection to logic board. It requires removal of the logic board. | If sensor is disconnected the CPU fan will run at full speed. | |
| Tp1P, Tp2H, Tp3H | Excessive power supply temperature (these sensors are part of the power supply board) | Test with known-good power cable harness, or known-good power supply board. | |
| ODD fan Optical fan/blower located next to right speaker | Verify that the ODD blower/fan cable is securely connected to the right side of the logic board and that there are no obstructions that would prevent the blower/fan from rotating. Replace fan if the error continues. | Normal fan operation, except the ODD blower | |
| HDD fan Hard drive fan/blower, located below logic board, near hard drive | Verify that the HDD blower/fan cable is securely connected to the top of the logic board and that there are no obstructions that would prevent the blower/fan from rotating. Replace fan if the error continues. | Normal fan operation, except the HDD blower | |
| CPU fan CPU fan/blower, located next to left speaker (logic board has to be removed to replace CPU blower) | Verify that the CPU blower/fan cable is securely connected to the left side of the logic board and that there are no obstructions that would prevent the blower/fan from rotating. Replace fan if the error continues. | Normal fan operation, except the CPU blower | |
Sensor Locations
Temp sensors and fan connector locations are shown in the next two graphics. Ensure cables are correctly routed and the sensors and fans are properly connected. If a sensor or fan is faulty or not connected, Apple Hardware Test will generate an error code.
Sensor Connector Locations: Top Side of Logic Board
Sensor Connector Location: Back Side of Logic Board
Diagnostic LEDs
The iMac (27-inch, Mid 2010) computer has four built-in diagnostic LEDs on the main logic board that can help you troubleshoot the computer. The LEDs are located on the bottom left edge of the logic board (under a piece of black mylar tape) and can only be seen when looking through the lower vents of the enclosure. Refer to the next page for a close-up graphic of the troubleshooting LEDs.
Location of Diagnostic LEDs
The LEDs are located under the mylar tape, on the bottom left corner of the logic board. They can only be seen when looking through the lower vents of the rear housing.

LED Functions

LED #1
Indicates that trickle voltage from the power supply has been detected by the logic board. This LED will remain ON whenever the iMac is connected to a working AC power source. The LED will remain ON even when the computer has been shut down or put to sleep. The LED will remain OFF only if the AC power source is missing or disconnected, if the logic board is disconnected from the power supply, or if the power supply board is faulty.
LED #2
Indicates that the main logic board has detected proper power from the power supply when the computer is turned on and that logic board voltage regulators are functioning properly. This LED will be ON when the computer is turned on and the power supply should be working correctly.
LED #3
Indicates that the computer and the video card are communicating. This LED will be ON when the computer is communicating properly with the video card. If LEDs 1 and 2 are ON and you heard the startup sound, but LED 3 is OFF, then the video card might be installed incorrectly or need replacement.
LED #4
Indicates that the computer and the LCD panel are communicating. This LED will be ON when the computer is turned on and video signal is being generated. If the LED is ON and there is no image on the display, then the LCD panel, the LED backlight board, or the cables between them might be installed incorrectly or need replacement.
LED Startup Sequence
LED #1 = Power available.
If no LED is visible:
- Verify AC power source
- Verify known-good AC cable is connected
- Verify cable connection between AC inlet and power supply
- Verify cable connection between power supply and logic board
- Verify power supply
LED #1 + LED #2 = Power available, and system is powered on.
If second LED is not visible when power button is pressed:
- Verify power button connection to logic board
- Verify power button functionality
- Verify cable connection between power supply and logic board
- Verify power supply
- Verify logic board
LED #1 + LED #2 + LED #3 = Power available, system is powered on, and video card found.
If third LED is not visible after power on:
- Verify that the MXM video card is seated properly
- Verify if boot chime is present and fans are running when powered ON (reset SMC and PRAM, check backup battery if necessary for proper boot up):
- If POST boot chime is not heard, go to Won't Start Up symptom flow.
- If POST boot chime is heard, go to No Video symptom flow.
LED #1 + LED #2 + LED #3 + LED #4 = Power available, system is powered on, video card found, and internal LCD found.
If fourth LED is not visible after power on:
- Verify cable connections between LCD panel and logic board.
- Inspect LCD display cables for cable damage.
- Verify external video functionality, and according to result check the following items: - If external display works then verify/replace the LED backlight board. - If external display works then verify/replace the LCD panel. - If external display does not work verify/replace the logic board.
Logic Board Test Points
Some test points are accessible on the logic board when the LCD panel is removed. The test points are defined below.

| Logic Board Test Point | Function |
| Pin 1 Ground | |
| Pin 3 5V power for Hard | Drive(s). Note: If present, the 12V power will come directly from the Power Supply to the Hard Drive thru the power harness cable. |
| Pin 4 Standby 12V power | (permanent power coming from power supply and present as long as AC cable is connected, even if computer is off); corresponds to LED #1 |
| Pin 6 Backlight Control | pulse width modulated signal (from logic board to LED backlight board, to adjust the backlight level setting according to user setup) |
| Pin 11 12V Run-Mode power | power to logic board (coming from power supply, present as long as system is on or asleep); corresponds to LED #2 |
| Pin12 Power On Request | signal (from logic board to power supply when power button is pressed) |
| Pin 13 Backlight Enable | signal from logic board to Backlight Controller board, to enable backlight |
Functional Overview
Refer to this diagram for symptoms related to logic board connectors. To rotate this page in Preview for easier viewing, go to Tools menu and choose "Rotate Left".

Block Diagram
Refer to this diagram to see how modules are interrelated.
![graph TD A["MLB"] --> B["Optical Drive"] A --> C["Backlight Controller"] A --> D["Hard Drive"] A --> E["AC/DC"] A --> F["Microphone"] A --> G["Display"] A --> H["MXM"] A --> I["Temp Sensor"] A --> J["Camera"] A --> K["SO-DIMM"] A --> L["Fan"] A --> M["Fan"] A --> N["Fan"] A --> O["Power Button"] A -…](/content/2026/06/1251651/images/cf17745ff4a534324c28ea98b7746819ef59f5196e5883fb66db75c48f621fe2.jpg)
Symptom Charts
Follow the steps in the order indicated below. If an action resolves the issue, retest the system to verify.
Startup and Power
No Power, Dead Unit
Unlikely cause: speakers
Quick Check
| Symptoms Quick Check | |
| No Power, Dead UnitNo powerNo fan spinNo startup chimeNo image on external displayNo hard drive or optical drive activityCaps Lock LED on wired keyboard doesn’t light when pressed. | 1. Verify power source.2. Verify power cable.3. Listen closely for signs of activity from system including: rotating fans, hard drive or optical drive activity, startup chime, etc. |
Deep Dive
| Check Result Action Code | |||
| 1. Power ON system. Verify if there is any indication that the system has powered up (fan rotation, hard drive or optical drive noise, backlight turns on). | Yes The symptom is powering up. Go to Won't Start Up symptom flow. | ||
| No Go to step 2. | |||
| 2. Locate the diagnostic LEDs in bottom case vents. Plug AC cord into system. Verify if diagnostic LED #1 turns ON. You may alternately check for presence of a 12V DC signal between pin 4 and pin 1 of the logic board. | Yes Standby power voltage being supplied by power supply. Go to step 3. | ||
| No Go to step 4 | |||
| 3. Press power button while monitoring diagnostic LEDs. Verify if LED #2 turns ON and remains ON after pressing the power button. You may alternately check for a power request signal between pin 12 and pin 1 of logic board. | Yes Power supply functioning and logic board detects supply voltages. Go to Won't Start Up symptom flow. | ||
| No Go to step 5. | |||
| 4. Disconnect AC cable. Remove glass and LCD panel, and carefully inspect the connectors between AC inlet and power supply, then DC connectors and cables between power supply and logic board, for damage or poor connections. | Yes Reseat misconnected cable(s), or replace damaged one(s). | P16 | |
| No Replace DC power cable harness.. Go to step 8. | X03 | ||
| 5. Inspect power button and verify if it is properly connected to the logic board. | Yes Go to step 6. | ||
| No Reconnect power button. | |||
| 6. Disconnect power button from logic board. Inspect cable and connector for damage. Using a multimeter (set as ohmmeter), verify continuity between the two pins of the power button when it is pressed. | Yes Power button is functioning correctly. Reconnect power button to logic board and go to step 7. | ||
| No Power button faulty. Replace rear housing (which includes power button). | X14 | ||
| 7. Press power button and Verify if system turns ON. You may alternately check for presence of a 12V DC signal between pin 11 and pin 1 of logic board when power button is pressed. | Yes Power supply functioning. If system still won't boot, go to Won't Start Up symptom flow. | ||
| No Replace DC power cable harness. Go to step 8. | X03 | ||
| 8. Press power button and verify if system turns ON. | Yes Issue solved with replaced DC power cable harness. | ||
| No Replace power supply. Go to step 9. | P01 | ||
| 9. Press power button and verify if system turns ON. | Yes Issue solved with replaced power supply. | ||
| No Reinstall power supply and replace logic board. | M01 | ||
Note: If the No Power symptom persists after all steps have been followed, use minimum configuration troubleshooting to proceed. Try disconnecting hard drive(s), optical drive, AirPort, Bluetooth, and SD card modules to determine if one of them is preventing the power supply from functioning.
Won't Start Up
Quick Check
| Symptoms Quick Check | |
| Won’t Start UpNo startup chime.Error tones during startup.Grey screen with fan noise, or other noise.Will not progress beyond Apple logo or spinning gear. | 1. Isolate OS by starting up from original install media for this computer, from a same-model computer in Target Disk Mode, or from a compatible known-good OS on an external drive. Both AirPort and Bluetooth services are available when booted from the Install disk.2. Reset SMC and PRAM to clear any stored, corrupted information.3. Start up in Safe Mode by holding shift key down during startup to load only required kernel extensions and disable all startup and login items. See kBase #HT1564: Mac OS X: What is Safe Boot, Safe Mode?4. If system generates error tones there may be an issue with the SDRAM. See kBase #HT2341: Intel-based Mac: Power On Self Test RAM error codes5. Identifying when in the startup process the computer hangs can help isolate the issue. See kBase #HT2674: Intel-based Mac: Startup sequence and error codes, symbols for information on the Macintosh startup sequence, and error codes and symbols used.6. Run latest available service utilities. |
Deep Dive
| Check Result Action Code | |||
| 1. Boot computer to Apple Hardware Test on the internal hard drive or an inserted Install DVD by holding down the D key at startup. Verify if system boots up from any of these volumes. | Yes Run | the extended tests and proceed with results. If AHT passes or boots with a memory error, go to step 2. | |
| No Go | to step 2. | ||
| 2. Remove installed SDRAM, and test with known-good SDRAM. Verify if computer starts up properly now. | Yes SDRAM issue. Reinstall one of user's SDRAM modules and retest. Proceed one by one to find the faulty SDRAM module, and replace it. | X02 | |
| No Go | to step 3. | ||
| 3. Wait 15 seconds after computer was powered down then disconnect AirPort cable from logic board. Verify if computer starts up properly now. | Yes Go to AirPort Card Kernel Panic symptom flow. | ||
| No Go to step 4. | |||
| 4. Startup with Alt key to select and start from the Install DVD inserted in the optical drive, or from an external bootable volume connected. Verify if computer starts up properly from alternate bootable volume. | Yes Go to Hard Drive Not Recognized symptom flow. | ||
| No Go to step 5. | |||
| 5. Disconnect optical drive cable and retest. Verify if computer starts up properly now. | Yes Reconnect optical drive and go to Optical Drive Not Recognized symptom flow. | ||
| No Go to step 6. | |||
| 6. Remove coin battery on back of logic board (you will need to completely remove logic board to do this), and leave out for approximately 1-2 minutes. Then reinstall battery. This will reset logic board. Verify if computer starts up properly now. | Yes Issue resolved by logic board reset. Measure DC voltage on battery touching battery with red probe, and grounding with black probe. If voltage is 2.7v or less, replace battery.For multimeter help, see kBase #HT3250: Diagnostics: Using a digital multimeter. | ||
| No Replace logic board. M02 | |||
Intermittent Shutdown
Troubleshooting Shutdown Causes
Always run the latest available Apple service utilities to check for any abnormal value reading from a thermal, a voltage, or a current sensor, or from a fan speed meter. The log files may also report the cause of a previous shutdown(s).
Collect all available info from the user on shutdown occurrence details: periodicity, power state when the issue happens, running applications, running time before shutdown.
Shutdown events can be categorized into four different areas.
1) User-related shut downs:
A computer shut-down event may be caused by user operation. The following shut down methods should not be considered as a failure, unless the power button is found to be defective.
- Selecting Shut Down by choosing the Apple (✗) menu from the upper-left menu bar and then choosing Shut Down.
- Pressing and holding the power button for 10 seconds
- Programming a timed shutdown in the Energy Saver preferences: refer to 📄 menu>System Preferences>Energy Saver
Suggested troubleshooting steps are:
- Reset the SMC: Refer to: kBase #HT3964: Intel-based iMac: How to reset the System Management Controller
- Check Energy Saver preferences settings: choosing the Apple (✗) menu>System Preferences>Energy Saver
- Test the Power On button for an intermittent short that would force computer to shutdown.
2) Activity-related system shut downs:
- System could not succeed the standard shutdown process and had to force shutdown
- An installed watchdog detected that an application did not respond within specified time (this watchdog can be enabled on Mac O X Server Energy Saver preferences)
These shut downs may be linked to system settings, devices drivers, applications, or operating system freezes.
Suggested troubleshooting steps are:
- Check the system logs and activity monitor utility for clues on the freezing process,
- Check for available software and firmware updates for installed device drivers, applications, or operating system.
- Start the system from a known-good / up-to-date bootable drive for issue reproduction.
3) Power-related system shut downs:
• External power source was removed.
Power-related shut downs are due to power management, poor connections, or defective power sources.
Suggested steps for troubleshooting are:
- Reset the SMC: Refer to: kBase #HT3964: Intel-based iMac: How to reset the System Management Controller
- Verify the following cables are securely connected: AC power cable, AC inlet, and DC power supply cable connections to logic board.
4) Hardware-related system shut downs:
• One of the temperature sensors reached a specified temperature limit • One of the voltage sensors reached a specified voltage limit • One of the current sensors reached a specified current limit
These shut downs are due to temperature, voltage, current, fan speed or other hardware related sensor values getting out of range.
Suggested steps for troubleshooting are:
- Check for all sensors connections and values using the latest available Apple service utilities and locate sensors using table in the General Troubleshooting chapter.
- Check /listen for fan(s) operation.
- Check cleanliness of the heatsink fins and the air flow.
- Check for correct seating of the heatsink on logic board and presence of thermal material.
For additional information refer to the Intermittent Shutdown table on the next page.
Quick Check
| Symptoms Quick Check | |
| Intermittent ShutdownPowers off during startup.Powers off during desktop use.Computer restarts spontaneously.Powers off when waking from sleep. | Make sure that power cord is securely attached to the back of computer, and is not hindered by a desk or other furniture.Plug computer directly into an AC outlet to test if a surge protector or UPS is causing issue.Open System Preferences > Energy Saver > Schedule and make sure that a “Shut Down” event is not scheduled.Isolate OS by starting up from original install media for this computer, from a same-model computer in Target Disk Mode, or from a compatible known-good OS on an external drive. Both AirPort and Bluetooth services are available when booted from the Install disk.Reset SMC and PRAM to clear any stored, corrupted information.Start up in Safe Mode by holding shift key down during startup to load only required kernel extensions and disable all startup and login items. SeekBase #HT1564: Mac OS X: What is Safe Boot, Safe Mode? |
Deep Dive
| Check Result Action Code | |||
| 1. Activity related shutdowns: Reset SMC and PRAM and verify that shutdown issue still happens. | Yes Check with known-good bootable drive: go to step 2 | ||
| No Shutdown cause was related to SMC or PRAM programmed shutdown settings or corruption, and was resolved by reverting them to default settings. | |||
| 2. Booting from known-good bootable drive, verify that shutdown issue still happens. | Yes Go to Power related shutdowns on step 3 | ||
| No Shutdown events do not happen on known-good OS. Reinstall Mac OS on customer hard drive, update OS with latest version and check if any firmware update is available. | |||
| 3. Power related shutdowns: With known-good AC power cord and AC outlet, Verify if system continues to restart or shutdown | Yes Go to step 4. | ||
| No AC power cord / outlet issue. Issue resolved. | X03 | ||
| 4. Disconnect hard drive power cable from hard drive and startup the computer from other bootable media (like Install DVD, a same model computer in Target Disk Mode, or a compatible known-good OS on an external drive). Verify if system continues to restart or shutdown. | Yes Go to step 5 | ||
| No Possible bad software or hard drive. Go to Hard Drive Not Recognized symptom flow. | |||
| 5. Inspect and reseat AC inlet connection to power supply (the smaller of the 2 cables connected to power supply), and DC power cable from power supply to logic board. Verify if damage is observed on the cables or connectors. | Yes Replace damaged cable. Retest. Return to step 1 if problem continues. | X03 | |
| No Go to step 6. | |||
| 6. Install known-good power supply. Verify if system continues to restart or shutdown. | Yes Reinstall original power supply. Go to step 7. | ||
| No Issue resolved with power supply replacement. | P02 | ||
| 7. Replace DC power cable, which supplies power to logic board, hard drive, and LED backlight board. Verify if system continues to restart or shutdown. | Yes Go to | step 8 | |
| No Issue | resolved with DC power cable replacement. | X03 | |
| 8. Hardware-related shutdowns: Run latest available Apple service diagnostics and verify if a sensor failure is reported. | Yes -If a temperature or a fan sensor failure is reported, go to step 9-If a voltage or a current sensor failure is reported test with known-good power supply board. If issue persists, replace logic board. | M23 | |
| No Setup | ASD to loop test suite for burn in tests and go to step 9. If no failure is found after burn in tests, return unit to customer for no failure found. | ||
| 9. Verify if a thermal sensor or fan failure is reported by diagnostics. | Yes -If fan | not running failure, check for fan cable seating and retest. If same failure after retest replace fan with known-good fan and retest. If issue does not happen with known-good fan, replace user's fan.-If an over temp failure reported, check for cause of over temp, like obstructed vent, dust in heatsink fin, clogged fan and retest. If still failing replace part where sensor is located (logic board, power supply, hard drive or sensor cable) according to the sensor location table in General Troubleshooting chapter . Go to step 10 | X22M23P17X03 |
| No Go to | step 10 | ||
| 10. Isolate if issue solved Verify if shutdown/issue does is fixed.. | Yes Issue | fixed | |
| No Replace | logic board with corresponding symptom:-if for thermal error cause-if for other cause | M18M08 | |
Kernel Panic, System Crashes
Quick Check
| Symptoms Quick Check | |
| Kernel Panic, System Crashes• Kernel Panic on startup or desktop use.• System freeze during use.• System freeze upon wake from sleep. | 1. Isolate OS by starting up from original install media for this computer, from a same model computer in Target Disk Mode, or from a compatible known-good OS on an external drive. Both AirPort and Bluetooth services are available when booted from the Install disk.2. Ensure that all software and firmware updates for this model have been installed to take advantage of any available bug fixes.3. Reset SMC and PRAM to clear any stored, corrupted information.4. Start up in Safe Mode by holding shift key down during startup to load only required kernel extensions and disable all startup and login items. See kBase #HT1564: Mac OS X: What is Safe Boot, Safe Mode?5. Check the panic.log, located /Library/Logs/Panicreporter, for information in the back trace that may give clues about the kernel panic.6. For more information, see kBase #HT1392: About “You need to restart your computer” (kernel panic) messages. |
Deep Dive
| Check Result Action Code | |||
| 1. Boot the computer to Apple Hardware Test on internal hard drive or an inserted Install DVD by holding down the D key at startup. Verify if system boots up from any of these volumes. | Yes Run extended tests and proceed with results. If AHT passes or boots with a kernel panic, go to step 2. | ||
| No Go to step 2. | |||
| 2. Remove all peripheral devices including keyboard and mouse. Verify if system starts without kernel panic. | Yes Add peripheral devices one at a time until kernel panic repeats. Replace device causing issue. | ||
| No Go to step 3. | |||
| 3. Use known-good SDRAM in the system. Verify if system start without kernel panic now. | Yes Install | user's SDRAM one by one and retest. If kernel panic repeats, replace affected SDRAM. Verify if correct SDRAM specification is being used. | X01 |
| No Go to | step 4. | ||
| 4. Wait for 20 seconds after shutdown and disconnect AirPort cable on logic board. Verify if system starts without kernel panic now. | Yes Go to | AirPort Card Kernel Panic symptom flow. | |
| No Go to | step 5. | ||
| 5. Disconnect SATA cable from hard drive and startup to the Install DVD in the optical drive or from an external volume. Verify if system starts without kernel panic now. | Yes Go to | Hard Drive Not Recognized symptom flow. | |
| No Go to | step 6. | ||
| 6. Disconnect camera and microphone cables from logic board. Verify if system starts without kernel panic now. | Yes Go to | Camera Issues or Audio: Microphone symptom flow as appropriate. | |
| No Go to | step 7. | ||
| 7. Disconnect Bluetooth cable on logic board. Verify if system starts without kernel panic now. | Yes Go to | AirPort/Bluetooth Issues symptom flow. | |
| No Go to | step 8. | ||
| 8. Disconnect SD board on logic board. Verify if system starts without kernel panic now. | Yes Go to | SD Card Not Recognized symptom flow. | |
| No Go to | step 9. | ||
| 9. Disconnect optical drive and test. Verify if system starts without kernel panic now. | Yes Go to | Optical Drive Not Recognized symptom flow. | |
| No Replace | logic board. M06 | ||
No Video
Unlikely cause: hard drive, optical drive, speakers, camera, microphone
Quick Check
| Symptoms Quick Check | |
| No Video• No image.• Backlight failure. | 1. Check brightness setting.2. For no-video issues, connect an external display to Verify if iMac video circuitry is functioning. If image appears on external display go to Backlight Issue/No Backlight symptom flow.3. Reset SMC. |
Deep Dive
| Check Result Action Code | |||
| 1. Verify boot chime present and fans running when system powered ON. (Reset SMC, clear PRAM or reseat Backup Battery if necessary for proper boot up.) | Yes Power | ON self test OK. Boot sequence started.Go to step 2. | |
| No Go to | Won't Start Up symptom flow. | ||
| 2. Verify if image is visible on built-in LCD panel. | Yes Video | present. Verify system functionality and return to user or jump to appropriate troubleshooting flow. | |
| No Go to | step 3. | ||
| 3. Connect supported external display. Verify if image appears on external display when system is booted. | Yes External display detected by system. Video circuitry on logic board functional.Inspect DisplayPort cable to back of panel connection. Reseat and test again. If you continue to have problems go toBacklight Issue/No Backlightsymptom flow. | ||
| No Go to | step 4. | ||
| 4. Pivot enclosure to access lower intake vent, and locate diagnostic LEDs on edge of logic board. Verify if LED #3 turns on shortly after system powers on. | Yes Logic | board communicating with video card. Go to step 5. | |
| No If LED | #3 does not turn ON reseat video card and retest, then replace video card and repeat step 4. If issue persists, replace logic board. | M03M03 | |
| 5. Locate diagnostic LEDs on logic board. Verify if LED #4 turns on shortly after system powers on. | Yes Logic | board communicating with LCD panel. Go to Backlight Issue/No Backlight symptom flow. | |
| No Replace DisplayPort cable. Go to step 6. | X03 | ||
| 6. Locate diagnostic LEDs on the logic board. Verify if LED #4 turns on shortly after system powers on. | Yes Video | controller functional and communicating with LCD panel. Go to Backlight Issue/No Backlight symptom flow. | |
| No Video | controller unable to communicate with LCD panel. Reseat cables first. If issue persists, replace LCD panel. Retest. | L03 | |
Corrupted Video
Unlikely cause: power supply, hard drive, optical drive, fans, speakers, camera, microphone
Quick Check
| Symptoms Quick Check | |
| Corrupted Video• Text and graphics appear fuzzy• Image corrupted | 1. Using the KBase article http://support.apple.com/kb/HT1159, verify Mac OS X version installed is the build number supported on the hardware. Make sure customer didn't migrate over their old version of Mac OS.2. Set System Preferences > Displays to native resolution of LCD. Non-native resolutions are unable to produce optimal clarity.3. Clean outside surface of glass panel..4. Make sure all relevant firmware and software updates have been applied. Graphics driver updates may be included with software updates.5. Boot from install DVD or another known-good volume to determine whether a potential software/driver issue exists.6. When issue occurs, take a screenshot of the display (Command-Shift-3). View screenshot file on a known-good computer. If image corruption can be seen in the screenshot then issue is with the video drivers, software, or video/logic board. If issue cannot be seen in the screenshot then LCD panel and DisplayPort cable should be tested further. |
Deep Dive
| Check Result Action Code | |||
| 1. Boot from Install DVD and Verify if issue is still visible. | Yes Go | to step 2. | |
| No Issue likely caused by software or driver issue. Troubleshoot for software issues. Make sure all software and firmware updates have been installed. | |||
| 2. Verify if issue is visible on an external display. | Yes Issue is NOT caused by internal LCD display. Go to step 3. | ||
| No Go to step 6. | |||
| 3. Remove video card, inspect connector for damage or corrosion. Reinstall video card and retest. Verify if issue still occurs. | Yes Replace video card. Go to step 4. | M04 | |
| No Issue resolved by reseating video card. | |||
| 4. Verify if video corruption issue is still present. | Yes Replace logic board. If a video card was replaced, reinstall the user's original video card. Go to step 5. | M04 | |
| No Issue resolved with replacement video card. | |||
| 5. Verify if video corruption issue is still present with replacement logic board installed. | Yes Return to step 1 and retest. | ||
| No Issue resolved with replacement logic board. | |||
| 6. Inspect glass panel. Verify if issue is caused by condensation or contaminants on inside/outside surface of glass panel, or on surface of LCD panel. | Yes Clean glass and/or LCD using procedures in Glass Panel take-apart chapter. Identify possible sources of contamination (nearby cigarette/cooking smoke, heavy airborne dust, etc.) to prevent recurrence. Condensation should dissipate after computer has been running a few hours. | ||
| No Go to step 7. | |||
| 7. Disconnect DisplayPort cable between LCD display and logic board, and verify if there is damage to cable or connectors. Repeat with vertical sync cable connected between LCD panel and LED backlight board. | Yes Replace DisplayPort cable or any other damaged part/ module. | X03 | |
| No Reinstall DisplayPort cable and vertical sync cable. Go to step 8. | |||
| 8. Verify if issue is still visible after reinstalling/replacing DisplayPort cable and vertical sync cable. | Yes If video corruption symptom appears to be like a rolling image (bad location of the top of image), replace VSync cable and go to step 9. Else replace DisplayPort cable and go to step 9 | X03 X03 | |
| No Issue resolved with reseating/ replacing damaged cable(s). | |||
| 9. Verify if issue is still visible after replacing DisplayPort cable or/ and vertical sync cable. | Yes Replace LCD panel. L04 | ||
| No Issue resolved with replacing the cable(s). | |||
| 10. Verify if issue is still present with replacement LCD panel installed. | Yes Contact Apple Technical Support. | ||
| No Run | Apple Service Display Utility Diagnostic and enter the receipt code in the “Repair Notes” section of GSX. Issue resolved with replacement of LCD panel. | L04 | |
Burnt Smell/Odor
Unlikely cause: speakers, microphone, rear housing
Quick Check
| Symptoms Quick Check | |
| Burnt Smell/OdorBurning smellUnusual odor | 1. Verify that computer is the source of the odor.2. If system is new, see kBase #TA22044: New Equipment: Odors May Be Present Short-Term.3. Disconnect all third-party devices and check to see if any external device is the source of odor.4. Inspect air intake and air outlets for obstructions. To prevent overheating make sure there is sufficient clearance to allow air to flow unobstructed into and out of the system.5. Verify if system is functional. |
Deep Dive
| Check Result Action Code | |||
| 1. Verify if source of the odor can be identified by visually inspecting each module and its associated cables for signs of burned or damaged components, smoke residue, burned traces, or melted or damaged wiring, | Yes Replace affected module(s). Go to step 2 | P08 | |
| No Unable to locate source of odor. Go to step 3. | |||
| 2. Disconnect all third-party devices and cables. Power ON system and verify if smoke or strong odor returns. | Yes Power down system immediately. Go to step 3. | ||
| No System functions correctly. Verify system functionality with third-party devices and cables and return system to user if problem has been resolved. Consult third-party companies as needed for issues with those products. | |||
| 3. Verify if source of odor can be located using your nose. | Yes Check all AC and DC power cables for pinch or damage. Replace affected module(s) and retest system. | P08 | |
| No Contact Apple for assistance if you feel that there is a possible safety issue with computer that has not been resolved in previous steps. | |||
Uncategorized Symptoms
Quick Check
| Symptoms Quick Check | |
| Uncategorized Symptoms• Unable to locate appropriate symptom code. | 1.Make sure system is plugged into a known-good outlet.2.Listen for boot chime, fan, optical drive, or hard drive noise which indicates system is powering up. If noise is heard, go to Won't Start Up symptom flow. If no noise is heard go to No Power, Dead Unit symptom flow.3.Attempt to boot from Install DVD to isolate possible software issues. |
Deep Dive
| Check Result Action Code | |||
| 1. Verify if existing symptom code applies to issue reported by user. | Yes Jump to appropriate symptom code flow. | ||
| No Document reported failure and send feedback to smfeedback2@apple.com stating that a suitable symptom code wasn't found. Provide as much detail as possible. | N99 | ||
Display
Backlight Issue/No Backlight
Unlikely cause: hard drive, optical drive, speakers, camera, microphone
Quick Check
| Symptoms Quick Check | |
| Backlight Issue/No BacklightNo imagePartial backlight failureBacklight flickersDisplay dim | 1. Check for Software Update.2. Verify that System Preferences > Displays > Brightness control setting is above minimum.3. If no image on built-in display, connect external display to verify if iMac video circuitry is functioning. If no image visible on external display, go toNo Videosymptom flow under Startup and Power troubleshooting. |
Deep Dive
| Check Result Action Code | |||
| 1. Verify boot chime present and fans running when computer powered ON. (Reset SMC, clear PRAM or reseat Backup Battery if necessary for proper boot up.) | Yes Power on self test OK.Go to step 2. | ||
| No Go to Won't Start Up symptom flow. | |||
| 2. Verify if image is visible on built-in LCD panel, with adjustable backlight level. | Yes Video is present. Verify system functionality and return to user, or go to appropriate troubleshooting flow. | ||
| No Go to step 3. | |||
| 3. Connect supported external display to rear Mini DisplayPort video port (Use known-good MiniDisplay to VGA or DVI adapters if needed). Verify if image appears on external display when system is booted. | Yes External display detected by system. Video circuitry on logic board appears functional. Go to step 4. | ||
| No Go to No Video symptom flow. | |||
| 4. Verify if LCD backlight is ON by looking for faint glow from display when viewed in darkened room with brightness set at maximum. | Yes LED backlight is functioning.Go to step 7. | ||
| No Go to step 5. | |||
| 5. Shine bright (low heat) flashlight onto front of LCD. With computer powered ON verify if a faint image is visible. | Yes LCD panel functional but backlight is missing or dim. Remove LCD panel and inspect and reseat the following cable connections:-Backlight power cable between backlight board and LCD panel.-Vertical sync cable between backlight board and LCD panel.-DC power cable to backlight board and power supply.Replace any damaged cable. Reinstall LCD panel and go to step 6. | X03 | |
| No No image nor backlight.Go to step 7. | |||
| 6. Power ON system. Verify if image is now visible on LCD panel with correct backlight level. | Yes Issue resolved. | ||
| No Replace LED backlight board. Retest. If issue persists, go to step 7. | M04 | ||
| 7. Inspect and reseat internal DisplayPort cable (between logic board and LCD panel). Power ON system. Verify if image is visible on built-in LCD display. | Yes Issue resolved. | ||
| No Replace internal DisplayPort cable.If issue persists, replace LCD panel. RunApple Service Display Utilityto verify the resolution of issue.Enter the resulting verification code into the “Notes” field of GSX and return system to customer if repair is complete | X03L03 | ||
Noise / Unstable Flickering
Unlikely cause: camera, microphone
Quick Check
| Symptoms Quick Check | |
| Noise / Unstable FlickeringFlickering imageHorizontal bands of static intermittently appearDock and / or menu bar shift positionsDisplay intermittently flashes on / offUnstable imageHumming noise from displayHigh frequency noise from display | If display flicker only occurs when the brightness level is set below maximum, then jump to topic, "Display: Backlight Issue / No Backlight."Run Automatic Software Update to verify that all available firmware and software updates have been applied.Verify Mac OS X version installed is the build version supported on the hardware. Make sure customer didn't migrate over old version of Mac OS X.Verify that intake vents on bottom of computer are not obstructed.Inspect system for third party software that is being used to set fan speeds to a higher than normal RPM. Some users may install this software to monitor and control internal temperatures, potentially causing higher fan speeds to generate higher than expected noise levels. |
Deep Dive
| Check Result Action Code | |||
| 1. Verify if user issue is due to flickering, or to an unstable video image on the LCD. | Yes Suspected flickering issue, go to step 2 | ||
| No For audible noise issues go to step 8. For all other issues go to appropriate symptoms flow. | |||
| 2. Connect a supported display on rear Mini Display port video port (Use known-good MiniDisplay to VGA or DVI adapters if needed). Verify if issue occurs on both the internal and the external display. | Yes Suspect issue with video circuitry. Go toCorrupted Video symptom flow. | ||
| No Video circuitry appears OK. Go to step 3. | |||
| 3. When display flicker, verify whether one of the following symptoms occurred:• Flickering image• Horizontal bands of static intermittently appear• Dock and / or menu bar shift positions• Display intermittently flashes on / off | Yes Remove glass and LCD panel.Check , reseat, and secure the DisplayPort LCD cable to both ends. Check and reseat the VSync cable to both ends.Go to step 4. | ||
| No LCD panel OK.Go to step 4. | |||
| 4. Power ON computer and verify if issue still occurs. | Yes If connections are secure and display is still flickering, go to step 5. | ||
| No Issue resolved. | |||
| 5. Carefully disconnect and verify if any of the four cables on back of LCD panel show signs of damage, corrosion, or pinched wires. | Yes Replace and damaged cable(s) and retest. | X03 | |
| No Go to step 6. | |||
| 6. Verify whether flickering occurs when brightness level is set below max. | Yes Image present but backlight is flickering. Replace Vertical sync cable (between LCD panel and LED Backlight board) and retest. Replace backlight board if problem persist. | X03 | |
| No Replace internal DisplayPort cable (between Logic Board and LCD panel), retest and go to step 7. | X03 | ||
| 7. Verify if flickering issue is still present. | Yes Replace LCD panel.RunApple Service Display Utilityto verify the resolution of issue.Enter the resulting verification code into the “Notes” field of GSX and return system to customer if repair is complete | L06 | |
| No Issue resolved. | |||
| 8. Verify if high pitch noise varies when adjusting brightness level up and down. | Yes Noise seems to be generated by vertical sync cable. Inspect and replace cable. Replace the LED Backlight board if problem persists. | X03 | |
| No Noise is from another source.Go to step 8. | |||
| 9. Verify if noise can be heard when computer is set up with user seated in normal user position. Adjusting brightness level up and down may be necessary to recreate issue. | Yes Replace LED backlight board.Go to step 9. | M04 | |
| No Noises that are not audible from the normal user position are considered acceptable. | |||
| 10. Verify if noise is still present. Yes if noise still present, go to Noise/Hum/Vibration symptom flow. | |||
| No Issue resolved. | |||
LCD Image Issues
Unlikely cause: power supply, hard drive, optical drive, fans, speakers, camera, microphone
Quick Check
| Symptom Quick Check | |
| LCD IssuesIncorrect/missing colorsDistorted/blurred imagePixel anomaliesVertical/horizontal linesNon-uniform brightnessFlickering | If display flicker only occurs when the brightness level is set below maximum, then jump to topic, "Display: Backlight Issue / No Backlight."Run Automatic Software Update to verify that all available firmware and software updates have been applied.Verify Mac OS X version installed is the build version supported on the hardware. Make sure customer didn't migrate over old version of Mac OS X.Allow display to reach normal operating temperature for about 15 minutes before evaluating front-of-screen performance.Check display preferences for use of custom display profile.Check brightness setting.Clean glass panel while checking for dust/debris. |
Deep Dive:
| Check Result Action Code | |||
| 1. Verify if user issue is due to flickering, or to an unstable video image on the LCD. | Yes Flickering issue, go to Noise/ Unstable Flickering Symptom table: | ||
| No Go to step 2. | |||
| 2. Verify if issue is incorrect/ missing colors. | Yes Go to incorrect/missing colors. | ||
| No Go to step 3. | |||
| 3. Verify if issue is distorted/ blurred image. | Yes Go to distorted/blurred image. | ||
| No Go to step 4. | |||
| 4. Verify if issue is bright or dark pixel anomalies. | Yes Go topixelanomalies. | ||
| No Go to step 5. | |||
| 5. Verify if issue is vertical or horizontal lines. | Yes Goto vertical/horizontallines. | ||
| No Go to step 6. | |||
| 6. Verify if issue is non-uniform brightness. | Yes Goto non-uniformbrightness. | ||
| No LCD functioning OK. Return to appropriate symptom flow if issue is still present. | |||
Incorrect/Missing Colors
Unlikely cause: power supply, hard drive, optical drive, fans, speakers, camera, microphone
Quick Check
| Symptoms Quick Check | |
| Incorrect/Missing ColorsWrong color displayColor/contrast issues | 1. Allow display to reach normal operating temperature for about a minute before evaluating front-of-screen performance.2. Verify if System Preferences > Display settings are configured to use default display profile.3. Verify System Preferences > Universal Access > Display “Enhance contrast”, “Use grayscale”, and “Black on White/White on Black” settings are set to defaults. |
Deep Dive
| Check Result Action Code | |||
| 1. Verify computer has been warmed up for about a minute to stabilize backlight before continuing. | Yes Go | to step 2. | |
| No | Warm up computer for about a minute. Go to step 2. | ||
| 2. Verify if all four cables on back of LCD panel are secure at both ends. | Yes Go | to step 3. | |
| No | Reseat connections, replace damaged cable(s) if needed. Retest. | L14 | |
| 3. Go to System Preferences > Desktop & Screen Saver > Desktop and set color to Solid Gray Light. Verify if incorrect/ missing color issue affects entire display. | Yes Suspect poor video connection. Replace internal DisplayPort cable between logic board and LCD panel. | L14 | |
| No | Go to step 4. | ||
| 4. Set up computer side-by-side with a known-good, same-model computer showing same image. Verify if issue is noticeably worse on display being tested. | Yes Replace LCD panel. RunApple Service Display Utilityto verify the resolution of issue.Enter the resulting verification code into the “Notes” field of GSX and return system to customer if repair is complete | L02 | |
| No Small variations in color uniformity across display are normal and do not warrant replacement of LCD. | |||
Distorted/Blurred Image
Unlikely cause: power supply, hard drive, optical drive, fans, speakers, camera, microphone
Quick Check
| Symptoms Quick Check | |
| Distorted/Blurred Image• Text and graphics appear fuzzy• Image corrupted | 1. If display flicker only occurs when the brightness level is set below maximum, then jump to topic, "Display: Backlight Issue / No Backlight."2. Run Automatic Software Update to verify that all available firmware and software updates have been applied.3. Verify Mac OS X version installed is the build version supported on the hardware. Make sure customer didn't migrate over old version of Mac OS X.4. Set System Preferences > Displays to native resolution of LCD. Non-native resolutions are unable to produce optimal clarity.5. Clean outside of glass panel.6. Boot from install DVD to determine if a potential software issue exists. |
Deep Dive
| Check Result Action Code | |||
| 1. Verify if user issue is due to flickering, or to an unstable video image on the LCD. | Yes Flickering issue, go to Noise / Unstable Flickering. | ||
| No Go to step 2. All other issues go to appropriate symptom flow. | |||
| 2. Boot from Install DVD and verify if issue is still visible. | Yes Go to step 3. | ||
| No Verify Mac OS X version installed is the build version supported on the hardware. Make sure customer didn't migrate over old version of Mac OS X. Make sure all software and firmware updates have been installed. | |||
| 3. Verify if issue is visible on an external display attached to mini DisplayPort. | Yes Issue NOT caused by internal LCD panel. Go to step 7. | ||
| No Go to step 4. | |||
| 4. Inspect glass panel. Verify if issue is caused by condensation or contaminants on inside surface of glass panel. | Yes Clean glass and/or LCD using procedures in Glass Panel take-apart chapter.Identify possible sources of contamination (nearby cigarette/cooking smoke, heavy airborne dust, etc.) to prevent recurrence.Condensation should dissipate after computer has been running a few hours. | ||
| No Go to step 5. | |||
| 5. Remove glass and LCD panel.Disconnect DisplayPort cable between LCD display and logic board, and verify if there is damage to cable or connectors.Repeat with vertical sync cable connected between LCD panel and LED backlight board. | Yes Replace DisplayPort cable, vertical sync cable or any other damaged part/module. | X03 | |
| No Reinstall DisplayPort cable and vertical sync cable.Go to step 6. | |||
| 6. Verify if issue is still visible after reinstalling internal DisplayPort cable and vertical sync cable. | Yes Replace LCD panel.RunApple Service Display Utilityto verify the resolution of issue.Enter the resulting verification code into the “Notes” field of GSX and return system to customer if repair is complete | L04 | |
| No Issue resolved. | |||
| 7. Remove video card, inspect connector for damage or corrosion then reinstall. Verify if issue still occurs. | Yes Replace video card. Go to step 8. | ||
| No Issue likely caused by poor video card connection. | |||
| 8. Verify if distorted/blurred image issue is still present. | Yes Replace logic board. Go to step 9 | M04 | |
| No Issue resolved. | |||
| 9. Verify if issue is still present with replacement logic board installed. | Yes Return to step 1 and retest. | ||
| No Issue resolved. | |||
Pixel Anomalies
Unlikely cause: logic board, power supply, hard drive, optical drive, fans, speakers, camera, microphone
Quick Check

| Symptoms Quick Check | |
| Pixel AnomaliesDark dot anomaliesBright dot anomaliesDebris on inside surface of glass panelDebris on surface of LCD panel | 1. Clean outside surface of glass panel.2. See kBase #HT1721: About LCD display pixel anomalies. |
Deep Dive
| Check Result Action Code | |||
| 1. Determine if “defects” are dust/debris on surface of glass panel or LCD. | Yes Clean glass and/or LCD using procedures in Glass Panel take-apart chapter. | ||
| No Go to step 2. | |||
| 2. Determine if bright pixel defects exceed acceptable number. See kBase #HT1721: About LCD display pixel anomalies. | Yes Replace LCD panel.RunApple Service Display Utilityto verify the resolution of issue.Enter the resulting verification code into the “Notes” field of GSX and return system to customer if repair is complete | L08 | |
| No LCD panel meets bright pixel defect specifications.Go to step 3. | |||
| 3. Determine if dark pixel defects exceed acceptable number. See kBase #HT1721: About LCD display pixel anomalies. | Yes Replace LCD panel.RunApple Service Display Utilityto verify the resolution of issue.Enter the resulting verification code into the “Notes” field of GSX and return system to customer if repair is complete | L08 | |
| No LCD panel meets dark pixel defect specifications.Go to step 4. | |||
| 4. Determine if combination of bright/dark pixel defects exceed acceptable number. SeekBase #HT1721: About LCD display pixel anomalies. | Yes Replace LCD panel.RunApple Service Display Utilityto verify the resolution of issue.Enter the resulting verification code into the “Notes” field of GSX and return system to customer if repair is complete | L08 | |
| No Explain to user that LCD panel is operating within specifications for pixel defects.Do NOT replace LCD panel. | |||
Vertical/Horizontal Lines
Unlikely cause: power supply, hard drive, optical drive, fans, speakers, camera, microphone
Quick Check
Symptoms Quick Check
Vertical/Horizontal Lines
- Vertical lines
- Horizontal lines
- Boot from install DVD to determine if potential software issue exists.
- Verify if issue is visible on an external display.

Deep Dive


| Check Result Action Code | |||||
| 1. Boot from Install DVD and verify if issue is still visible:• Flickering image• Horizontal bands of static intermittently appear• Dock and / or menu bar shift positions• Display intermittently flashes on / off | Yes Go | to Flickering issue, go to Noise / Unstable Flickering. | |||
| No Issue | likely caused by software or driver issue. Troubleshoot for software issues. Make sure all firmware and software updates have been installed. | ||||
| 2. Verify if issue is visible on an external display attached to mini DisplayPort. | Yes Issue | NOT caused by internal LCD. Go to step 3. | |||
| No Go | to step 4. | ||||
| 3. Remove video card and inspect connector for damage or corrosion then reinstall. Verify if issue still occurs. | Yes Replace video card.Go to step 5. | M24 | |||
| No Issue likely caused by poor video card connection. | |||||
| 4. Disconnect DisplayPort cable between LCD display and logic board, and verify if there is damage to cable or connectors.Repeat with vertical sync cable connected between LCD panel and LED backlight board. | Yes Replace DisplayPort cable and vertical sync cable or any other damaged part/module.Go to step 5. | X04 | |||
| No Reinstall DisplayPort cable and vertical sync cable.Go to step 9. | |||||
| 5. Verify if issue is still present. Yes Replace logic board. If video card was present, reinstall original video card.Go to step 6. | M04 | ||||
| No Issue resolved. | |||||
| 6. Verify if issue is still present with replacement logic board installed. | Yes Go to step 7 | ||||
| No Issue resolved. | |||||
| 7. Reinstall original logic board and verify if issue is still present with original logic board reinstalled. | Yes Replace LCD panel. Run Apple Service Display Utility to verify the resolution of issue. Enter the resulting verification code into the “Notes” field of GSX and return system to customer if repair is complete. | L04 | |||
| No Issue resolved. If video card was replaced, reinstall original video card. | |||||
Non-Uniform Brightness / Color
Unlikely cause: power supply, hard drive, optical drive, fans, speakers, camera, microphone
Quick Check

| Symptoms Quick Check | |
| Non-Uniform Brightness/Color• Brightness not uniform• Color not uniform• Yellow tint | 1. Verify System Preferences > Displays > Brightness slider is set above minimum.2. Allow a minute for backlight to reach normal operating temperature and output before evaluating display.3. Visually inspect glass panel for presence of dust, cigarette smoke, or other contaminants. Clean glass panel if needed. |
Deep Dive
| Check Result Action Code | |||
| 1. Determine if color/brightness uniformity issue is visible after display has warmed up for about a minute. | Yes Go to step 2. | ||
| No Display backlight can take a minute to stabilize. Retest. If issue still not visible return computer to user. | |||
| 2. Look at user-provided examples showing brightness uniformity issue. Determine if variation in uniformity appears excessive when compared to another same-model computer. | Yes Go to step 3. | ||
| No Demonstrate to user that LCD performs similarly to another computer of the same model. | |||
| 3. Remove glass panel and loosen screws securing LCD panel. Determine if brightness uniformity improves. | Yes Inspect for mechanical interference with screws or cables making contact with back of LCD. Reseat components & cables, retest. | ||
| No Go to step 4. | |||
| 4. Remove LCD panel, then inspect and reseat backlight cables. Determine if brightness uniformity improves. | Yes One or more backlight cables were loose. | ||
| No Replace LCD panel. Run Apple Service Display Utility. To verify the resolution of issue. Enter the resulting verification code into the "Notes" field of GSX and return system to customer if repair is complete | L07 | ||
Cosmetic Defects
| Symptoms Quick Check | |
| Cosmetic Defects to LCDCracked glass panelCracked LCDScratched LCD polarizerScorched or melted LCDLCD impact damageForeign material on LCD or back side of glass panel. | 1. Replace glass panel. Refer to Take Apart/General Information/How to Remove a Broken Glass Panel2. Determine if damage was caused by user environment, accidental damage, or abuse. If applicable, inform user that Apple does not warrant damage caused by accident, abuse, misuse, flood, fire, earthquake, or other external causes. For more information refer to: http://www.apple.com/legal/warranty3. For dark and bright pixel anomalies seePixel Anomaliessymptom flow. |
Uncategorized Symptoms
Quick Check
| Symptoms Quick Check | |
| Uncategorized Symptoms• Unable to locate appropriate symptom code. | 1. Make sure brightness level is set above minimum.2. Clean glass panel to make sure external contaminants are removed prior to evaluating display performance.3. Allow LCD display to warm up approximately a minute before evaluating display color and brightness uniformity performance. |
Deep Dive
| Check Result Action Code | |||
| 1. Verify if existing symptom code applies to issue reported by user. | Yes Jump to appropriate symptom code flow. | ||
| No Document reported failure and send feedback to smfeedback2@apple.com stating that a suitable symptom code wasn't found. Provide as much detail as possible. | N99 | ||
Mass Storage
Hard Drive Not Recognized
Unlikely cause: LCD panel, power supply, fans, speakers, camera, microphone
Quick Check
| Symptoms Quick Check | |
| Drive Not Recognized Drive No BootFlashing Question MarkBoots to Grey ScreenBoots to Blue ScreenBoots to Prohibitory Symbol(Review kBase #HT2674: Intel-based Mac: Startup sequence and error codes, symbols) | Use a known-good mouse. A stuck mouse button will not allow boot.Bot from Install DVD. Use Disk Utility to verify S.M.A.R.T. status of internal drive(s).Use Disk Utility to repair Mac OS X on disk.Verify that user's data is backed up and that user authorizes erasing disk and reinstalling software.Use Target Disk Mode to mount user's drive on a known-good computer. Use Disk Utility on host computer for Quick Checks 2 through 4.Identify if system is shipped with one hard drive, or with a second SSD drive option (Mac OS X boot volume setup may differ in that case) |
Deep Dive
| Check Result Action Code | |||
| 1. Boot from Install DVD and run Disk Utility. Verify if user's drive is available for Disk Utility to repair. | Yes Go to step 2. | ||
| No Go to step 5. | |||
| 2. Run Disk Utility's "Repair Disk" function and verify if it completes successfully. | Yes Go to step 3. | ||
| No Go to step 4. | |||
| 3. Reboot computer. Verify if system boots successfully and that Disk Utility "Verify" function reports no errors. | Yes Data error. Issue resolved. | ||
| No Go to step 4. | |||
| 4. With user's permission, erase internal drive and reinstall Mac OS. Verify if installation process completes. | Yes Go to step 8. | ||
| No Go to step 5. | |||
| 5. Check that the 4 wire SATA power cable (carrying 12v and 5v DC) is correctly connected to the Hard Drive (other SATA power connector has less wires and is reserved for 5v DC only, optional SSD drive). Inspect internal drive(s) SATA and power cables and connectors for bent pins, or other damage to the cable(s). | Yes Replace any damaged SATA Bus or SATA Power cable. For the internal SATA drive(s), the DC power comes from the main DC power cable harness. Go to step 8. | X03 | |
| No Go to step 6. | |||
| 6. Reseat internal drive(s) SATA data cable(s) at logic board and drive ends, and verify if computer boots up successfully. | Yes Go to step 8. | ||
| No Replace boot drive SATA cable. Go to step 8. | X03 | ||
| 7. Test with a known-good bootable drive. Verify if system boots successfully and that Disk Utility "Verify" function reports no errors. | Yes Reinstall user's drive. Go to step 9. | ||
| No SATA data cable was verified or replaced, and known-good drive is installed: -If hard drive does not spin up when system is powered on, replace DC power harness; if the no spinning issue persists after DC cable was replaced, replace Power Supply. -If hard drive spin up sound can be heard when system is powered on, but system cannot boot from it , replace logic board. | X03P99M19 | ||
| 8. Reboot computer. Verify if system boots successfully and that Disk Utility "Verify" function reports no errors. | Yes Issue resolved. Return system to user. | ||
| No Go to step 7. | |||
| 9. Reboot computer. Verify if system boots successfully and that Disk Utility "Verify" function reports no errors. | Yes Issue resolved. | ||
| No User's hard drive appears to be defective. Go to step 10. | |||
| 10. Replace affected internal drive. Boot from system-specific Install DVD and reinstall Mac OS X with drive format option. Verify if drive is formatted correctly (GUID partition table) and that software restore was successful. | Yes Issue resolved by replacing affected internal drive. | H01 | |
| No SATA data cable verified/ replaced and new drive installed, Check with known- good restore DVD. If restore failure still happens, go to step 11. | |||
| 11. If restore from Install DVD is unsuccessful, startup a known-good Intel Mac system with T key pressed (to enter Target Disk Mode), insert the iMac Install DVD in its optical drive and connect it to the user's system via a FireWire cable. Startup user's system while holding Option key, then select and boot from the Install Disc DVD and restore system software. Verify if software restore was successful. | Yes Restore failure seems to be due to customer's internal optical drive or media issue. Go to Optical Drive Read/Write Error symptom flow. | ||
| No Restore failure seems to be due to internal SATA bus issue. Replace logic board. | M19 | ||
Hard Drive Read/Write Errors
Unlikely cause: LCD panel, power supply, fans, speakers, camera, microphone
Quick Check
| Symptoms Quick Check | |
| Drive Read/Write ErrorDrive Bad Sector/DefectiveDrive Formatting IssuesCannot save documentsRead/write error messageHang when accessing or saving data | 1. Boot from Install DVD. Use Disk Utility to verify S.M.A.R.T. status of internal drive(s).2. Use Disk Utility to repair disk.(s)3. Verify that user's data is backed up and that user authorizes erasing disk and reinstalling software.4. Use Target Disk Mode to mount user's drive(s) on a known-good computer. Use Disk Utility on host computer for Quick Checks 2 through 3. |
Deep Dive
| Check Result Action Code | |||
| 1. Run Disk Utility 'Repair Disk' function, and verify if it completes successfully. | Yes Go to step 2. | ||
| No Go to step 3. | |||
| 2. Reboot computer. Verify if system boots successfully and that Disk Utility "Verify" function reports no errors. | Yes Data error. Issue resolved. H07 | ||
| No Go to step 3. | |||
| 3. With user's permission, erase internal drive(s) containing Mac OS X, and reinstall it. Verify if installation process completes. | Yes Go to step 6. | ||
| No Go to step 4. | |||
| 4. Inspect internal drive(s) SATA power and data cables and connectors for bent pins, or other damage to the cable. | Yes Replace damaged cable.Go to step 6. | H04 | |
| No Go to step 5. | |||
| 5. Reseat SATA cable on internal drive(s) and logic board. Verify if computer starts up. | Yes Go to step 6. | ||
| No Replace internal drive(s) SATA data cable. Go to step 6. | H04 | ||
| 6. Reboot computer. Verify if system boots successfully and Disk Utility "Verify" function reports no errors. | Yes Issue resolved. | ||
| No Go to step 7. | |||
| 7. Test with known-good bootable drive. Verify if system boots successfully and Disk Utility "Verify" function reports no errors. | Yes Reinstall user's drive, go to step 8. | ||
| No SATA data cables verified or replaced and known-good drive installed used without success. Replace logic board. | M19 | ||
| 8. Reboot computer. Verify if system boots successfully and that Disk Utility "Verify" function reports no errors. | Yes Issue resolved. | ||
| No User's drive appears to be defective. Go to step 9. | |||
| 9. Replace user's drive. Verify if drive formats correctly with a GUID partition map and installs Mac OS without errors. | Yes Issue resolved by replacing user's drive. | H03 | |
| No SATA data cable verified or replaced and new drive did not resolve issue. Replace logic board. | M19 | ||
Hard Drive Noisy
Unlikely cause: LCD panel, logic board, power supply, speakers, camera, microphone
Quick Check
| Symptoms Quick Check | |
| Hard Drive NoisyNoise during start upNoise during operationNoise when drive is copying or saving data | 1. Boot from Install DVD. Use Disk Utility to verify S.M.A.R.T. status of hard drive.2. Use Disk Utility to repair disk.3. Determine if noise is comparable to another machine of the same model.4. Refer toKbase article TS3204: Evaluating normal noise. |
Deep Dive
| Check Result Action Code | |||
| 1. Boot from the Install DVD and run Disk Utility. Verify if user hard drive is available for Disk Utility to repair. | Yes Go | to step 2. | |
| No Go | to Hard Drive Not Recognized symptom flow. | ||
| 2. Run Disk Utility 'Repair Disk' function and verify if it completes successfully. | Yes Go | to step 3. | |
| No Go | to step 4. | ||
| 3. Restart the computer. Verify if the noise is still present. | Yes Go | to step 4. | |
| No Issue resolved. Return system to user. | |||
| 4. Remove glass and LCD panel, check that internal hard drive thermal sensor cable is present, is the correct type for the installed drive model, is well connected and retest (with an external display connected). Verify if the noise comes from the center fan. | Yes Replace thermal sensor cable with correct part number (see Illustrated Views chapter to identify the part number, and Take Apart chapter for correct installation) | ||
| No Go to step 5. | |||
| 5. Disconnect internal hard drive Sata cable and retest (with an external display connected). Verify if the noise is still present. | Yes Noise issue still present, but does not appear to be caused by hard drive. Go to Noise/ Hum/Vibration symptom flow. | ||
| No Go to step 6. | |||
| 6. Remove hard drive and verify if rubber vibration isolation grommets are properly installed in hard drive bracket (attached to hard drive) and to mechanism in rear housing (where hard drive pins insert). | Yes Go to step 7 | ||
| No If grommets are missing or damaged, replace hard drive bracket or mechanism as appropriate. Go to step 7 | |||
| 7. Restart system and verify if the noise is still present. | Yes Go to step 8 | ||
| No Reseating or replacing the drive rubber grommets / bracket solved noise issue. | |||
| 8. Reconnect user's drive and, with user's permission, erase hard drive and reinstall Mac OS. Verify if installation process completes. | Yes Go to step 9. | ||
| No Replace hard drive. Go to step 10. | |||
| 9. Restart system and verify if the noise is still present. | Yes Replace hard drive. Go to step 10. | ||
| No Software related issue. | |||
| 10. With replacement hard drive installed, reboot computer. Verify if noise is still present. | Yes Replacement hard drive did not resolve issue. Go to step 11 to check for other source of noise. | ||
| No Issue resolved by replacing hard drive. | H06 | ||
| 11. Disconnect hard drive SATA and power connections then boot from the Install DVD. Verify if noise is caused by fans. | Yes Go to Fan Failures/Thermal Issues symptom flow. | ||
| No Go to step 12. | |||
| 12. Disconnect hard drive and optical drive then boot from an external volume. Verify if noise disappears when optical drive has been disconnected. | Yes Possible optical drive or media issue. Go to Optical Drive Noisy symptom flow. | ||
| No Noise issue still present, but does not appear to be caused by hard drive. Go to Noise/ Hum/Vibration symptom flow. | |||
Optical Drive Not Recognized
Unlikely cause: LCD panel, power supply, fans, speakers, camera, microphone
Quick Check
| Symptoms Quick Check | |
| Drive Not Recognized/MountDiscs inject and eject, but do not appear in FinderVerify that optical media is not physically damaged | Use System Profiler Serial-ATA section to see if optical drive appears.System Profiler Serial-ATA section will show any media inserted.Check Finder Preferences and make sure “CD’s, DVD’s and iPods” is checked under “Show these items on the desktop” in the General section. |
Deep Dive
| Check Result Action Code | |||
| 1. Verify if optical drive is listed in Serial-ATA section of System Profiler. | Yes Go to step 2. | ||
| No Go to step 3. | |||
| 2. Test both CD and DVD media. Verify if optical drive can read both CD and DVD media. | Yes No issue, or possible intermittent issue. Gather more information from user. | ||
| No If both types of media fail, check that Finder Preferences are set to "show CD's and DVD's", then go to step 3. If only one type of media fails, drive has a laser pickup issue. Replace optical drive. | J03 | ||
| 3. Connect known-good optical drive to SATA cable. Verify if both CD and DVD media are read reliably. | Yes SATA cable and port on logic board good. Go to step 5. | ||
| No Go to step 4. | |||
| 4. Reseat SATA cable connections at optical drive and logic board (cable connects to back of logic board). Verify if both CD and DVD media are read reliably. | Yes Go to step 6. | ||
| No Replace SATA cable and test. If issue persists, replace logic board. Go to step 6. | X03 M19 | ||
| 5. Connect original optical drive to known-good SATA cable. Verify if both CD and DVD media are read reliably. | Yes SATA cable issue. Replace SATA cable. Go to step 6. | X03 | |
| No Replace optical drive. J03 | |||
| 6. Test read compatible known-good CD and DVD media (Install DVD). Verify if media is recognized and reads reliably. | Yes Issue resolved. | ||
| No Replace optical drive. J03 | |||
Optical Drive Won't Accept/Eject Media
Unlikely cause: LCD panel, power supply, fans, speakers, camera, microphone
Quick Check
| Symptoms Quick Check | |
| Drive Won’t Accept MediaDrive Won’t Eject MediaCannot insert a disc into driveCannot eject a disc from drive | Use System Profiler Serial-ATA section to see if optical drive appears. If not, go toOptical Drive Not Recognizedsymptom flow.Restart computer and hold down mouse button or keyboard eject key to cycle optical drive.Inspect optical drive slot for obstructions |
Deep Dive
| Check Result Action Code | |||
| 1. Verify if optical drive is listed in System Profiler device tree for Serial-ATA devices. | Yes Optical drive communicating with logic board. Go to step 5. | ||
| No Go to step 2. | |||
| 2. Verify SATA cable connections between optical drive and logic board. Visually inspect cables and connectors for any debris, damage or bent pins. Verify if optical drive is listed in System Profiler device tree. | Yes Optical drive communicating with logic board. Go to step 5. | ||
| No Replace damaged cables and retest. If connections are good and no visible cable damage, go to step 3. | X03 | ||
| 3. Connect known-good optical drive to SATA cable. Verify if known-good optical drive is listed in the System Profiler device tree. | Yes Go to step 4. | ||
| No Suspect bad SATA cable. Go to step 7. | |||
| 4. With known-good optical drive installed, test for media inject/eject. Verify if drive accepts and ejects known-good media. | Yes Known | no good optical drive resolved inject/eject issue. Replace optical drive. | J03 |
| No Go to step 7. | |||
| 5. Inspect optical drive slot during disc insert/eject. Verify if discs can be inserted easily. | Yes Go to step 6. | ||
| No Verify correct optical drive bezel alignment with enclosure. Reseat optical drive then retest. If issue persists, replace optical drive. | J03 | ||
| 6. With known-good optical media (Install DVD), test for media inject/eject. Verify if drive accepts and ejects known-good media. | Yes Media issue. No repair necessary. Suggest user investigate use of different media. | ||
| No Go to step 3. | |||
| 7. Replace SATA cable then test for media inject/eject. Verify if drive injects and ejects known-good media. | Yes SATA cable resolved issue. Return system to user. | X03 | |
| No SATA cable verified or replaced, and optical drive verified or replaced. Replace logic board and retest. | M19 | ||
Optical Drive Read/Write Error
Unlikely cause: LCD panel, power supply, fans, speakers, camera, microphone
Quick Check
| Symptoms Quick Check | |
| Drive Read/Write Data ErrorErrors when writing optical media.Errors when reading optical media.Hang when accessing or preparing to write data. | Test optical media in a known-good optical drive in the same type of computer to rule out media issue.Check with known-good discs like the Install DVD that came with the computer.For write issues, check with known-good media that performs well in a known-good optical drive in the same type of computer. |
Deep Dive
| Check Result Action Code | |||
| 1. Verify if media is free to spin without optical drive scraping edge or surface of media. | Yes Go to step 3. | ||
| No Go to step 2 | |||
| 2. Reseat optical drive in enclosure and verify that a media can be inserted without being scratched | Yes Go to step 3 | ||
| No Replace optical drive and retest. | J05 | ||
| 3. Test both CD and DVD media. Verify if drive can read both CD and DVD media. | Yes Go to step 7. | ||
| No If both types of media fail, check that Finder Preferences are set to "show CD's and DVD's", then go to step 4.If only one type of media fails, drive has a laser pickup issue. Replace optical drive. | J03 | ||
| 4. Install known-good optical drive and verify if both CD and DVD media are read reliably. | Yes Both SATA cable and port on logic board appear good. Go to step 6. | ||
| No Go to step 5. | |||
| 5. Continue to use known-good optical drive. Reseat optical drive SATA+Power cable connection at logic board ends (cable connects to back of logic board). Verify if both CD and DVD media are read reliably. | Yes Go to step 6. | ||
| No Replace SATA cable and retest.If issue persists, replace logic board.Go to step 7. | X03M19 | ||
| 6. Reinstall user's optical drive and verify if both CD and DVD media are read reliably. | Yes Go to step 7. | ||
| No Replace user's optical drive. J03 | |||
| 7. Test write data to compatible CD and DVD media. Verify if burned media is recognized and read reliably. | Yes Issue resolved. | ||
| No Run ODD sensor and ODD fan tests in ASD:If errors found check ODD sensor and ODD fan connections to logic board (read/write errors may be due to drive getting too hot).If no errors are found while running latest Apple diagnostics, replace optical drive. | J03 | ||
Optical Drive Not Performing to Specifications
Unlikely cause: LCD panel, power supply, fans, speakers, camera, microphone
Quick Check
| Symptoms Quick Check | |
| Optical Drive Not Performing to Specifications• Read or write speeds slower than expected | 1. Test optical media in another computer of the same type to rule out media issue.2. For write issues, check with known-good media that performs well in another computer and drive of the same type. |
Deep Dive
| Check Result Action Code | |||
| 1. Test both CD and DVD media.Verify if optical drive can readboth CD and DVD media. | Yes Go | to step 5. | |
| No If both types of media fail,check that Finder Preferencesare set to “show CD’s andDVD’s”, then go to step 2.If only one type of media fails,drive has a laser pickup issue.Replace optical drive. | J03 | ||
| 2. Connect known-good opticaldrive to SATA cable. Verify ifboth CD and DVD media areread reliably. | Yes SATA | cable and port on logicboard good. Go to step 4. | |
| No Go to step 3. | |||
| 3. Reseat SATA cable connectionsat optical drive and logic board(cable connects to back of logicboard). Verify if both CD andDVD media are read reliably. | Yes Go | to step 5. | |
| No Replace SATA cable and test.If issue persists, replace logicboard.Go to step 5. | X03M19 | ||
| 4. Connect original optical driveto known-good SATA cable.Verify if both CD and DVDmedia are read reliably. | Yes SATA | cable issue. ReplaceSATA cable. Go to step 5. | X03 |
| No Replace optical drive. | J03 | ||
| 5. Test write data to compatibleCD and DVD media. Verify ifburned media is recognizedand read reliably. | Yes Issue resolved. | ||
| No Go to step 6. | |||
| 6. Media that is out of balance may not perform well at higher speeds even though higher speeds may be supported by the optical drive. Verify if slowing requested burn speed allows discs to be written reliably. | Yes Media issue. No repair necessary. | ||
| No Go to step 7. | |||
| 7. Test write data to compatible CD and DVD media. Verify burned media is recognized and reads reliably. | Yes Issue resolved. | ||
| No Run ODD sensor and ODD fan tests in ASD:If errors found check ODD sensor and ODD fan connections to logic board (read/write errors may be due to drive being too hot).If no errors are found while running diagnostics, replace optical drive. | J03 | ||
Optical Drive Noisy
Unlikely cause: LCD panel, power supply, fans, speakers, camera, microphone
Quick Check
| Symptoms Quick Check | |
| Optical Drive Noisy (J04)Noise during bootNoise during operationNoise when drive is copying or writing data | 1. Test optical media in another computer of the same type to rule out media issue.2. Check with known-good discs like the Install DVD that came with the computer.3. Verify if noise occurs without media in optical drive. If so, verify if noise made by hard drive or fans.4. Refer toKbase article TS3204: Evaluating normal noise |
Deep Dive
| Check Result Action Code | |||
| 1. Test optical drive with different source of media. Does the noise issue remain? | Yes Go | to step 2. | |
| No Issue | due to unbalanced media. Recommend using different media. | ||
| 2. Reseat optical drive in enclosure. Does noise issue remain? | Yes Go | to step 3. | |
| No Issue | resolved by reseating drive in enclosure. | ||
| 3. Install known-good optical drive in enclosure. Does noise issue remain? | Yes Go | to step 4. | |
| No Replace optical drive. J04 | |||
| 4. Compare system with similar model for optical drive noise in operation and verify that noise level is similar. | Yes Noise level of optical drive appears to be within specification. Return system to user. | ||
| No Check for other causes of noise in the system. | |||
SD Card Will Not Insert Into Slot
Unlikely cause: LCD panel, logic board, optical drive, hard drive
Quick Check
| Symptom Quick Check | |
| SD Card will not insert into slotSD Memory Card does not fully seat into slotCard slot does not align with enclosure. | 1. The SD card must be a 32 mm by 24 mm by 2.1 mm. You can also use thinner cards, such as Multi Media Cards (MMC).2. Clear any obstruction in SD card slot. |
Deep Dive
| Check Result Action Code | |||
| 1. Verify if known-good SD card fits in slot. | Yes Ask user to replace defective or out-of-spec SD card. | ||
| No Loosen the SD board screws, then insert known-good SD card again. Go to step 2. | |||
| 2. Verify if known-good SD card now fits in slot. | Yes Tighten SD reader board screws. Go to step 3. | ||
| No Replace SD reader and retest. X24 | |||
| 3. Verify if SD card now ejects and inserts without issue. | Yes Issue resolved by SD reader board alignment. | ||
| No Replace SD reader board. X24 | |||
SD Card Not Recognized
Unlikely cause: LCD panel, logic board, optical drive, hard drive
Quick Check
| Symptom Quick Check | |
| SD Card Not Recognized• Card does not show up on desktop or in System Profiler | 1. Insert user's SD card into a known-good system and verify that it functions properly. If card cannot be read, contact card manufacturer for support options.2. Verify SD card slot with known-good SD card.3. Check correct drivers are installed for user's SD card type. Standard SD cards are supported by Mac OS X, but others may require specific driver software to be used. |
Deep Dive
| Check Result Action Code | |||
| 1. Verify if SD card inserts correctly in SD slot. | Yes Go to step 2. | ||
| No Go toSD Card Will Not InsertInto Slotsymptom flow. | |||
| 2. Unlock and insert user's SD card and verify it shows up on desktop or in System Profiler. | Yes Go to step 6. | ||
| No Go to step 3. | |||
| 3. Insert a known-good unlocked SD card and verify if read/write capabilities are working. | Yes User's SD card not functioning properly. Contact card manufacturer for support. | ||
| No Go to step 4. | |||
| 4. Run System Profiler and verify if SD card reader is now listed in USB devices. | Yes Go to step 5. | ||
| No Reseat SD cable at SD board and logic boardIf issue persists, replace SD reader cable.If issue persists after cable was replaced, replace SD reader board.If issue persists after card reader was replaced, replace logic board. | X03X24M17 | ||
| 5. Verify if a known-good unlocked SD card can now be correctly read and written. | Yes Go to step 6. | ||
| No Replace SD reader board. X24 | |||
| 6. Lock the user's SD card and verify if it can't be written. | Yes Issue resolved. | ||
| No Replace SD reader board. M17 | |||
Uncategorized Symptoms
| Check Result Action Code | |||
| 1. Verify if existing symptom code applies to issue reported by user. | Yes Jump to appropriate symptom code flow. | ||
| No Document reported failure and send feedback to smfeedback2@apple.com stating that a suitable symptom code wasn't found. Provide as much detail as possible. | N99 | ||
Communications
AirPort/Bluetooth Issues
Quick Check
| Symptoms Quick Check | |
| AirPort/Bluetooth IssuesUnable to join networks or pair devicesAirPort card not availableIntermittent device or connection dropoutsLimited wireless range | 1. Verify that AirPort or Bluetooth is turned ON, and for AirPort issues make sure that a network is selected.(AirPort) Run the Apple System Profiler and verify that installed AirPort card supports the channel number used by the wireless access point.(AirPort) Check if the wireless access point requires special connection and encryption protocols.(AirPort) Check for nearby sources of interference such as microwave ovens or cordless phones. See kBase #HT1365: AirPort: Potential source of interference.(AirPort) Check the number of users trying to use AirPort in the area for possible network congestion (available bandwidth).(Bluetooth) If customer complaints about a Bluetooth issue with his input device, first use a known-good Bluetooth input device to perform tests with computer. Then test customer's Bluetooth device on known-good computer to define which side is creating the communication issue. See kBase #HT1365: Airport potential source of interference.Isolate potential OS issues by starting up from original Install media for the computer, a same-model computer in Target Disk Mode, or compatible known-good OS on an external drive. Both AirPort and Bluetooth services are available when booted from Install disc. |
Deep Dive
| Check Result Action Code | |||
| 1. Open System Profiler. AirPort is listed under Network, while Bluetooth is listed under USB. Verify if both AirPort and Bluetooth cards are recognized. | Yes Install all available software updates for AirPort/Bluetooth and re-test. If issue persists after software update, go to step 4 for AirPort, or go to step 6 for Bluetooth. | ||
| No Go to step 2 for AirPort. Go to step 6 for Bluetooth. | M11 | ||
| 2. (Airport) Reseat AirPort cable connection on logic board and on AirPort card. Verify if AirPort card is now listed in Apple System Profiler. | Yes Issue resolved by reseating AirPort cable. | ||
| No Replace AirPort cable (between logic board and AirPort card carrier) and re-test. Go to step 3. | |||
| 3. (Airport) After cable has been replaced, verify if AirPort card is now listed in Apple System Profiler. | Yes Issue resolved by replacing AirPort cable. | X03 | |
| No Replace AirPort card carrier board and re-test. If issue persists (card not seen on bus), replace AirPort card. | M11 | ||
| 4. (Airport) Enable AirPort and verify if known local AirPort networks are available, or create a computer-to-computer network with another Macintosh computer using AirPort. See http://docs.info.apple.com/article.html?path=AirPort/5.0/en/ap2110.html. Verify if you connect successfully. | Yes Issue resolved. | ||
| No Go to step 5. | |||
| 5. (Airport) Check and reseat the two antennas to the AirPort card. Verify if you can connect to known AirPort network. | Yes Issue resolved. | ||
| No Replace AirPort card. If issue persists, replace AirPort antenna(s). If the damaged antenna is the one embedded in rear housing behind Apple logo, replace rear housing. | N04 | ||
| 6. (Bluetooth) Verify that computer and known-good Bluetooth device are both in discoverable mode. Verify if you can now successfully and reliably pair the device. | Yes Issue resolved. | ||
| No Replace Bluetooth antenna. Go to step 7. | M11 | ||
| 7. (Bluetooth) Re-test with new Bluetooth antenna and verify if Bluetooth issues are resolved. | Yes Issue resolved. | ||
| No Replace Bluetooth card. M11 | |||
AirPort Card Kernel Panic
Quick Check
| Symptoms Quick Check | |
| AirPort Card Kernel Panic• Kernel Panic on startup• Kernel Panic or freezing while attempting to connect to WiFi networks• Kernel Panic while transferring data on WiFi networks | 1. Isolate OS by starting up from original Install media for this computer, a same-model computer in Target Disk Mode, or compatible known-good OS on an external drive. AirPort and Bluetooth services are available when booted from the Install disk.2. Ensure that all software and firmware updates for the computer and AirPort have been installed. |
Deep Dive
| Check Result Action Code | |||
| 1. Disconnect AirPort card cable end from logic board. Verify if computer now starts without kernel panic. | Yes Reseat AirPort card cable and retest. If problem continues replace cable. Go to step 2. | ||
| No Kernel panic not related to AirPort. Restart from Install DVD or known-good bootable external drive and check Panic.Log file on user's hard drive to find out which is the crashing I/O interface. Also troubleshoot installed Mac OS X software.. | |||
| 2. With replacement AirPort card cable installed, verify if computer starts now without kernel panic. | Yes AirPort cable issue. Issue resolved. | N13 | |
| No Replace AirPort card carrier board and re-test. If issue remains, replace AirPort card. Go to step 3. | |||
| 3. With replacement AirPort carrier or card installed, verify if computer starts now without kernel panic. | Yes AirPort carrier or card issue. Issue resolved. | N13 | |
| No Replace logic board. M11 | |||
Ethernet Port/Device Issue
Unlikely cause: LCD display, power supply, hard drive, optical drive, fans
Quick Check
| Symptoms Quick Check | |
| Ethernet Port/Device IssueNo Ethernet device presentUnable to access network resourcesEthernet device shows no connectionEthernet device unable to an IP addressSlow network performance | 1. Check Ethernet cable for damage. Try a known good Ethernet cable – CAT5 or better recommended for 100Mbps+ connections.2. Check Ethernet ports on the computer and wall/ switch for dust, debris, damage or bent pins.3. Ensure distance from networking infrastructure is less than 300 feet/ 105 meters.4. Verify port, cable and network hardware with a known good system. Isolate firewall, MAC address filtering or hardware access control devices.5. Isolate OS by starting up from original Install media for this computer, a same-model computer in Target Disk Mode, or compatible known-good OS on an external drive. |
Deep Dive
| Check Result Action Code | |||
| 1. Visually inspect Ethernet port of computer and ensure that all pins will make physical contact with the Ethernet cable. | Yes Go to step 2. | ||
| No Pins are damaged, bent flat or missing. Replace logic board. | M24 | ||
| 2. Boot from original Install media. Verify Network Link status is active by using Network Utility under the "Info" tab. Verify if the Link Status is "Active". | Yes Go to step 3. | ||
| No If same Ethernet cable gives an "Active" link status on a known-good, same-model computer, replace logic board. | M10 | ||
| 3. Connect computer to another Mac using CAT5 Ethernet cable. See article http://docs.info.apple.com/article.html?path=Mac/10.6/en/8429.html. Verify if you connect successfully. | Yes Ethernet communication good. Go to step 4. | ||
| No If same Ethernet cable and computer connects to a known-good, same-model computer, replace logic board. | M10 | ||
| 4. Check for speed and duplex issues on network. Open System Preference > Network; click the Advanced button, then the Ethernet tab. Verify if the speed and duplex reported are what is expected. | Yes Go to step 5. | ||
| No Change speed and duplex settings. See article http://docs.info.apple.com/article.html?path=Mac/10.6/en/8711.html. Go to step 6. | |||
| 5. Check for MTU (Maximum Transmission Unit) issues. See kBase #HT2532: Mac OS X: How to change the MTU for troubleshooting purposes. Verify if changing MTU settings on computer resolves issue. | Yes Go to step 6. | ||
| No Ethernet controller damaged. Replace logic board. | M10 | ||
| 6. If changing speed, duplex or MTU settings allows connectivity, check with a known-good, same-model computer. Verify if known-good computer produces the same results. | Yes Check with ISP or Network Administrator concerning speed, duplex & MTU settings. | ||
| No Verify with known good OS. If issue persists, replace logic board. | M10 | ||
Wireless Input Device Does Not Pair
Quick Check
| Symptoms Quick Check | |
| Wireless Input Device Does Not Pair• Can’t get system to recognize a Bluetooth keyboard, mouse or trackpad | 1. Check computer with a known-good Bluetooth input device to test computer side.2. Test Bluetooth device side with a known-good computer, with up-to-date Mac OS 10.6.x with installed Bluetooth device driver.3. Ensure that device is being used within 30-foot range for Bluetooth devices.4. See kBase #HT1365 AirPort potential source of interference. |
Deep Dive
| Check Result Action Code | |||
| 1. Without any wired input devices connected, and with a known-good wireless mouse or trackapd in discoverable mode, startup the computer. Verify if computer shows the Bluetooth Mouse Setup Assistant. | Yes Bluetooth hardware is active.Go to step 6. | ||
| No Go to step 2. | |||
| 2. Connect a wired mouse and run Apple System Profiler. Verify if Bluetooth interface is listed under USB in System Profiler. | Yes Bluetooth hardware is present. Go to step 6. | ||
| No Remove glass and LCD panel, reseat both ends of cable between Bluetooth board and logic board. Go to step 3. | |||
| 3. Using an externally connected display, run Apple System Profiler and verify if Bluetooth interface is listed under USB in System Profiler. | Yes Bluetooth hardware is now present. Go to step 6. | ||
| No Replace Bluetooth cable.Go to step 4. | X03 | ||
| 4. Run Apple System Profiler. Verify if Bluetooth interface is listed under USB in System Profiler. | Yes Bluetooth hardware is now present. Go to step 6. | ||
| No Replace Bluetooth board.Go to step 5. | N15 | ||
| 5. Run Apple System Profiler. Verify if Bluetooth interface is listed under USB in System Profiler. | Yes Bluetooth hardware is now present. Go to step 6. | ||
| No Replace logic board. M11 | |||
| 6. Run Software Update and apply any available Bluetooth updates. Activate Bluetooth in System Preferences (or Apple menu icon) then select "Configure a new Bluetooth device" (or run Bluetooth Mouse Setup Assistant). Verify if a known-good Bluetooth mouse/trackpad is seen. | Yes Bluetooth discovery is now active. Go to step 7. | ||
| No Replace Bluetooth antenna. X03 | |||
| 7. With a known-good Bluetooth mouse/trackpad on and in discoverable mode, verify if you can successfully pair the device with the assistant. | Yes Check for stability.Go to step 8. | ||
| No Go to Wireless Input DeviceLoses Connection symptom flow. | |||
| 8. With known-good Bluetooth mouse/trackpad paired, verify if the device stays connected. | Yes Issue resolved. | ||
| No Inspect and reseat Bluetooth antenna cable. Replace a damaged antenna cable, or Bluetooth board if its antenna connector is damaged.Go to step 9. | X03 | ||
| 9. With customer's mouse/ trackpad paired, verify if the mouse stays connected. | Yes Antenna issue. Issue resolved.Resassemble system. | ||
| No Go to Wireless Input DeviceLoses Connection symptom flow. | |||
Uncategorized Symptoms
Quick Check
| Symptoms Quick Check | |
| Uncategorized Symptoms• Unable to locate appropriate symptom code. | 1. Verify System Preferences/Network settings are configured appropriately to support communication method.2. For Ethernet connection issues verify that cable being used functions when used with another known-good system.3. For wireless connection issues review user environment to determine whether possible interference from other 2.4GHz communications devices might be contributing to issue. SeekBase #HT1365: AirPort: Potential sources of interference |
Deep Dive
| Check Result Action Code | |||
| 1. Verify if existing symptom code applies to issue reported by user. | Yes Jump to appropriate symptom code flow. | ||
| No Document reported failure and send feedback to smfeedback2@apple.com stating that a suitable symptom code wasn't found. Provide as much detail as possible. | N99 | ||
Input/Output Devices
Apple Remote Inoperable
Unlikely cause: LCD display, power supply, hard drive, optical drive, fans
Quick Check
| Symptoms Quick Check | |
| Apple Remote Inoperable• Apple Remote doesn’t bring up Front Row• Apple Remote doesn’t control iTunes• Apple Remote doesn’t control computer volume | 1. Make sure Apple Remote is within 30 ft. of computer, and has an unobstructed line-of-sight to computer.2. Make sure lens end of Apple Remote is pointing directly at front of computer.3. Make sure “Disable remote control infrared receiver” checkbox in System Preferences > Security is not checked.4. Ensure that all software and firmware updates for this model have been installed to take advantage of any available bug fixes. |
Deep Dive
| Check Result Action Code | |||
| 1. Open Photo Booth or iChat's video preview window. Point Apple Remote at built-in camera and press any button on Apple Remote. Verify if a white, flashing light is visible in video preview. | Yes Apple Remote is functioning.Go to step 2. | ||
| No Replace Apple Remote battery.Go to step 3. | |||
| 2. Open System Preferences > Security. Verify if "Unpair" setting is available in this preference panel. | Yes Click "Unpair" button to disable possible pairing with another Apple Remote.Go to step 4. | ||
| No Possible IR board issue.Go to step 5. | |||
| 3. With replacement battery, verify if white flashing light is visible coming from Apple Remote in video preview window. | Yes Battery issue. Issue resolved. X05 | ||
| No Apple Remote defective.Replace Apple Remote. | X04 | ||
| 4. After clicking “Unpair”, verify if the computer now responds to the Apple Remote. | Yes Pairing issue. Issue resolved. | ||
| No Possible IR board issue.Go to step 5. | |||
| 5. Open Apple System Profiler.Verify if “IR Receiver” is listed in USB list of devices. | Yes IR board reporting on USB bus. Check for lens block.Go to step 6. | ||
| No Inspect and reseat IR cable connection to logic board.Go to step 7. | |||
| 6. Check that IR board is correctly fitted and aligned with Apple window and that lens is not blocked by any foreign material and re-test. Verify if computer responds to Apple Remote. | Yes Lens blocked or sensor not aligned with window. Issue resolved. | X03 | |
| No Lens damaged or inoperable.Replace IR board. Go to step 7. | |||
| 7. After reseating or replacing IR board, verify if “IR Receiver” is listed under USB in Apple System Profiler, and that computer now responds to Apple Remote. | Yes IR module reseated/replaced. Issue resolved. | X03 | |
| No If IR board was only reseated, replace IR cable. Go to step 8. | |||
| 8. After replacing IR cable, verify if “IR Receiver” is listed under USB in Apple System Profiler, and that computer now responds to Apple Remote. | Yes IR cable replaced. Issue resolved. | X03 | |
| No Replace IR board. Go to step 9. | |||
| 9. After replacing IR board, verify if “IR Receiver” is listed under USB in Apple System Profiler, and that computer now responds to Apple Remote. | Yes IR board replaced. Issue resolved. | X03 | |
| No Replace logic board.M23 | |||
Audio: Microphone
Unlikely cause: LCD display, power supply, hard drive, optical drive, fans
Quick Check
| Symptoms Quick Check | |
| Audio: Microphone• Microphone not working• Microphone audio garbled• No sound | 1. Verify that no tape, sticky notes, or other objects are blocking microphone located on top of computer near camera. Microscopic perforations on top of computer must be free of obstructions in order for microphone to function.2. Go to System Preferences > Sound > Input. Verify that sound input device is set to internal microphone.3. Go to System Preferences > Sound > Input. Verify that “Input volume” setting is set above minimum level.4. Go to System Preferences > Sound > Input. Verify that “Input level” indicator moves when speaking into microphone. |
Deep Dive
| Check Result Action Code | |||
| 1. Verify if boot chime is present when system is powered ON. Make sure audio output preferences are not set to mute. | Yes Go | to step 2. | |
| No Reset PRAM and retest. | |||
| 2. Make sure no cables are connected to external sound input/output ports. Go to System Preferences > Sound > Input and verify that “Internal microphone” is an available option. | Yes Go | to step 3. | |
| No Replace audio cable. M09 | |||
| 3. Go to System Preferences > Sound > Input and verify if “Input volume” is set above minimum sensitivity. | Yes Go | to step 4. | |
| No Set “Input volume” slider to middle position. Retest. | |||
| 4. Go to System Preferences > Sound > Input and verify if “Input level” indicator moves when speaking into microphone. | Yes Microphone and audio input functioning. Go to step 6. | ||
| No Suspect bad microphone connection. Reseat microphone connector on logic board. Go to step 5. | |||
| 5. Inspect microphone cable routing and verify if cable is pinched or damaged. | Yes Replace rear housing (microphone cable not available separately). | L14 | |
| No Go to step 6. | |||
| 6. Record sound sample using GarageBand or iMovie. Verify if sound quality of sound sample is normal during playback. | Yes Microphone circuitry OK. Return system to user. | ||
| No Replace logic board. M09 | |||
Audio: Built-in Speakers Have Distorted Sound
Unlikely cause: LCD display, power supply, hard drive, optical drive, fans
Quick Check
| Symptoms Quick Check | |
| Audio: Built-in Speakers Have Distorted SoundNo audio from one or both speakers.Audio from speakers distorted | 1. Go to System Preferences > Sound > Output.Verify that sound output device is set to internal speakers and that balance control is set to the center position.2. Obtain known-good high-quality sound file or use iTunes Store sound samples to evaluate sound quality. Verify suspect sound files on another system to determine if distortion is caused by computer or sound file.3. Set volume control to mid-range. Overdriving built-in speakers can cause distortion. |
Deep Dive
| Check Result Action Code | |||
| 1. Go to System Preferences >Sound > Output. Set speaker balance 100% to LEFT speaker and play a known-good sound file. Verify if sound is generated by LEFT speaker and that sound quality is acceptable. | Yes LEFT speaker and amplifier circuitry OK. Go to step 2. | ||
| No Distortion detected in LEFT speaker. Set Balance slider to middle position. Go to step 3. | |||
| 2. Set speaker balance 100% to RIGHT speaker and play a known-good sound file. Verify if sound is generated by RIGHT speaker and that sound quality is acceptable. | Yes RIGHT speaker and amplifier circuitry OK. Set Balance slider to middle. Go to step 3. | ||
| No Distortion detected in RIGHT speaker. Go to step 4. | |||
| 3. Connect external speakers or headphones to audio-out port and play a known-good sound file. Verify if sound quality is acceptable. | Yes Suspect bad speaker.Go to step 4. | ||
| No Audio CODEC or amplifier issue suspected. Replace logic board and retest. | M09 | ||
| 4. Inspect LEFT and RIGHT speaker cones and speaker connection cable for damage. Verify if speakers have visible damage. | Yes Replace damaged speaker.Retest. | L11 | |
| No Go to step 5. | |||
| 5. Install known-good speaker into location where distorted sound was heard. Verify if sound quality improves. | Yes Replace speaker. L11 | ||
| No Speaker amplifier issue suspected. Replace logic board. | M09 | ||
Audio: No Audio from Built-in Speakers
Unlikely cause: LCD display, power supply, hard drive, optical drive, fans
Quick Check
| Symptoms Quick Check | |
| Audio: Built-in Speakers Have No AudioNo audio from one or both speakers.Audio from speakers distorted | 1. Confirm correct version of Mac OS X is installed.See kBase #TS1574: Troubleshooting issues with bi audio from built-in speakers on Macs2. Go to System Preferences > Sound > Output.Verify that sound output device is set to internal speakers.3. Go to System Preferences > Sound > Output.Verify that “Output volume” setting is set above the minimum level and that “Mute” checkbox is not selected.4. Go to System Preferences > Sound > Output.Verify that “Balance” slider is set to middle position so left and right speakers are both used. |
Deep Dive
| Check Result Action Code | |||
| 1. Verify if boot chime is present when system is powered ON. Make sure audio output preferences are not set to mute and volume is set to mid-range. | Yes Go | to step 2. | |
| No Reset | PRAM and retest. | ||
| 2. Make sure no cables are connected to external sound input/output ports. Go to System Preferences > Sound > Output and verify that “Internal speakers” is an available option. | Yes Go | to step 3. | |
| No If “Headphones” is the only available sound output device, replace audio cable.If “Digital output” is the only available sound output device, reseat audio cable to logic board. If issue persists, replace audio cable.If issue persists, replace logic board. | L11L11M09 | ||
| 3. Go to System Preferences > Sound > Output. Set speaker balance 100% to LEFT speaker and play a known-good sound file. Verify if sound is generated by LEFT speaker and that sound quality is acceptable. | Yes LEFT speaker and amplifier circuitry OK. Go to step 4. | ||
| No No audio in LEFT speaker.Go to step 7. | |||
| 4. Set speaker balance 100% to RIGHT speaker and play a known-good sound file. Verify if sound is generated by RIGHT speaker and that sound quality is acceptable. | Yes RIGHT speaker and amplifier circuitry OK. Set Balance slider to middle. Go to step 5. | ||
| No No audio in RIGHT speaker.Go to step 7. | |||
| 5. Verify if user-reported audio issue has been resolved. | Yes Issue no longer present.Return system to user. | ||
| No Go to step 6. | |||
| 6. Boot system from Install DVD or another known-good bootable volume. Verify if issue still occurs. | Yes Go to step 7. | ||
| No Known-good boot volume works OK. Troubleshoot for software issue. Isolate if issue is application-specific or a possible OS conflict. | |||
| 7. Connect external speakers or headphones to audio-out port and play a known-good sound file. Verify if sound quality is acceptable. | Yes Logic board, internal speakers, and audio-out port functioning correctly. Return system to user. | ||
| No Go to step 8. | |||
| 8. Disconnect and carefully inspect audio connectors assembly and its connection to logic board for damage such as bent pins or pinched/cut wires. | Yes Replace damaged audio connectors assembly. If issue persists, verify if symptom has changed. | L14 | |
| No Replace logic board.M09 | |||
Camera Issues
Unlikely cause: LCD display, power supply, hard drive, optical drive, fans, speakers, microphone
Quick Check
| Symptoms Quick Check | |
| Camera Issues• Camera not detected• No green LED for camera• Excessive blooming• Poor White Balance• Poor Focus• Green image• Image distortion | 1. Launch Apple System Profiler and confirm that system's USB hub and built-in camera are visible.2. Verify camera lens and glass panel are clean and free of contaminants. Clean glass panel if needed.3. Launch Photo Booth to verify that green indicator LED near camera lens turns on and image quality is acceptable. |
Deep Dive
| Check Result Action Code | |||
| 1. Launch Apple System Profiler and verify built-in camera is visible in USB list of devices. | Yes Camera recognized.Go to step 2 | ||
| No Inspect and reseat camercable connection on logic board. Go to step 2. | |||
| 2. Launch Photo Booth. Verify if green LED near camera lens turns ON and image appears normal. | Yes Camera functioning. Return system to user. | ||
| No Remove glass and clean both sides. Clean camera lens.If issue persists, replace camera cable.If issue persists, replace camera.If issue persists, replace logic board. | X07X07M13 | ||
FireWire Device Not Recognized
Unlikely cause: LCD display, power supply, hard drive, optical drive, fans
Quick Check
| Symptoms Quick Check | |
| FireWire Device Not Recognized• FireWire hard drive not recognized• FireWire optical drive not recognized• FireWire camera not recognized• FireWire printer not recognized | 1. For external FireWire drives, make sure any external power source is plugged in and operating to isolate a power issue with the device.2. Test a known-good FireWire device to isolate a failed peripheral issue.3. Test a known-good FireWire cable to isolate a FireWire cable issue.4. Ensure that all software and firmware updates for this model have been installed to take advantage of any available bug fixes.5. Launch Apple System Profiler and verify if the affected FireWire device is visible on FireWire bus. If yes, then FireWire port and cable are functioning properly. Contact FireWire device manufacturer to verify that device is supported. |
Deep Dive
| Check Result Action Code | |||
| 1. Unplug all FireWire devices from computer. Reset PRAM. Reconnect FireWire device in question. Verify if FireWire device is recognized. | Yes Issue resolved. | ||
| No Possible logic board failure. Go to step 2. | |||
| 2. Use a known-good FireWire cable with a known-good FireWire device (such as another Mac in Target Disk Mode). Verify if FireWire device is recognized. | Yes Try FireWire device in question with a known-good computer of same model. Go to step 3. | ||
| No FireWire not recognized. Replace logic board. | M12 | ||
| 3. Verify if FireWire device is recognized on a known-good same model computer. | Yes Go to step 4. | ||
| No Device may need additional power. Use a powered FireWire hub. Go to step 5. | |||
| 4. Verify if FireWire device is recognized with a known-good FireWire cable on user's computer. | Yes FireWire cable issue. Issue resolved. | ||
| No FireWire device may need additional power. Go to step 5. | |||
| 5. Using a powered FireWire hub, and having installed any software or firmware updates for the device, verify if FireWire device is now recognized. | Yes Device recognized. Required additional power from hub or update. Issue resolved. | ||
| No Device may require additional software, or there may be a conflict in the Mac OS. Go to step 6. | |||
| 6. Create a new user in System Preferences > Accounts and log out current user. Log in on new user account and verify if FireWire device is now recognized. | Yes Software Issue. Troubleshoot software on User account. Issue resolved. | ||
| No Apply all Mac OS and FireWire specific updates. If issue persists, contact device manufacturer for support. FireWire port and cable have been verified. | |||
USB Device Not Recognized
Unlikely cause: LCD display, power supply, hard drive, optical drive, fans
Quick Check
| Symptoms Quick Check | |
| USB Device Not Recognized• USB wired keyboard/mouse not recognized• USB external drive not recognized• USB camera not recognized• USB printer not recognized | 1. Reset SMC.2. For printers and external USB drives, make sure any external power source is plugged in and operating to isolate a power issue with device.3. The iMac has 4 USB ports on rear of computer. Try each port to isolate a particular port malfunction.4. Test with a known-good wired keyboard or mouse to isolate a failed peripheral issue.5. Test with a known-good USB cable when dealing with a printer or external USB drive, to isolate a USB cable issue.6. Ensure that all software and firmware updates for this model have been installed to take advantage of any available bug fixes.7. Launch Apple System Profiler and verify if device is visible on USB bus. If yes, then the USB port and cable are functioning properly. Contact device manufacturer to verify that device is supported. |
Deep Dive
| Check Result Action Code | |||
| 1. Unplug all USB devices from the computer except for USB keyboard and mouse. Start computer and reset PRAM. Verify if USB keyboard and mouse are recognized. | Yes Test with all USB ports to ensure all USB ports working as expected. Replace logic board for any port failures. | ||
| No Reset SMC. Go to step 2. | |||
| 2. Verify if Bluetooth Mouse Setup assistant launches after startup. | Yes Bluetooth detected, but external USB devices not recognized. Go to step 3. | ||
| No Disconnect USB keyboard and mouse. Go to step 4. | |||
| 3. Verify if a known-good USB keyboard and mouse are recognized. | Yes Test | original USB mouse and keyboard. Replace if still not recognized. Go to step 5. | |
| No External USB ports not functioning. Replace logic board. | M15 | ||
| 4. With no USB devices connected, restart computer. Verify if Bluetooth Mouse Setup assistant launches after startup. | Yes Bluetooth detected. Go to step 3. | ||
| No Bluetooth not recognized. Internal and external USB not functioning. Replace logic board. | M15 | ||
| 5. With known-good USB keyboard and mouse working, test USB peripheral in question (USB hard drive or printer, etc.) Verify if device is recognized in Apple System Profiler under USB. | Yes Device recognized. Test in all USB ports to ensure all USB ports working as expected. Replace logic board for any port failures. | M15 | |
| No Device may require more power than supplied by USB ports. Test with a powered USB hub. Go to step 6. | |||
| 6. Verify if using a powered USB hub resolves the issue. | Yes Test | device on the same USB port of a same-model computer without any other USB port populated. If other computer does not require a powered USB hub to allow the device functionality, replace logic board. | M15 |
| No The | computer's USB ports and cable have been verified. Ensure all software and firmware updates have been applied for computer and device. If issue persists, contact device manufacturer for support. . | ||
Wired Keyboard Does Not Function Properly
Quick Check
| Symptoms Quick Check | |
| Wired Keyboard Does Not Function ProperlySome or all keys on the keyboard don’t workEject key or Caps Lock key doesn’t seem to workSome keys don’t work as expected | 1. Reset SMC2. Open System Preferences > Universal Access > Mouse & Trackpad and verify that Mouse Keys is turned OFF. When enabled, Mouse Keys can disable functionality of some or most keys, depending on keyboard used.3. The iMac has 4 USB ports on rear of computer. Make sure to try each port to isolate a particular port malfunction.4. Test with a known-good wired keyboard to isolate a failed peripheral issue.5. Test wired keyboard on a known-good, same-model computer. If it works on the other computer, this may indicate a bad USB port if keyboard doesn’t work at all on user’s computer, or a software issue if keyboard is working but not as expected on user’s computer.6. Ensure that all software and firmware updates for this model have been installed to take advantage of any available bug fixes. |
Deep Dive
| Check Result Action Code | |||
| 1. Verify if all keys on keyboard work. | Yes Go to step 2. | ||
| No Go to Keyboard: SpecificKeys Do Not Respondsymptom flow. | |||
| 2. Verify if Caps Lock is working as expected. | Yes Go to step 3. | ||
| No Go to Keyboard: SpecificKeys Do Not Respondsymptom flow | |||
| 3. Verify if media Eject key is working as expected. Note that to prevent accidentally ejecting media, Mac OS X adds a slight delay to the media Eject key before it takes effect. | Yes Go to step 4. | ||
| No Go to step 5. | |||
| 4. Open System Preferences > Speech. Verify if the "Speak selected text when the key is pressed" checkbox is selected. | Yes The key combination to speak text cannot be used for any other purpose. Either disable, or change to a more rare key combination (including Shift, Command, Option and Control). | ||
| No Go to step 6. M15 | |||
| 5. With optical media in the drive, hold the media Eject key. Verify if the eject symbol appears on screen and that optical media is ejected if present. | Yes Normal media eject key delay. No repair necessary. | ||
| No Go to Optical Drive Won't Accept/Eject Media symptom flow. | |||
| 6. Open System Preferences > Language and Text > Input Menu. Check "Keyboard Viewer". From the Input Menu (flag) in the Menu Bar, choose "Show Keyboard Viewer". Verify if keys pressed appear in Keyboard Viewer. | Yes Keys recognized. Go to step 9. | ||
| No Keys not recognized. Replace keyboard. | K01 | ||
| 7. Open TextEdit or another text application and try typing something using the non-responding keys. Verify if they are typed in this other application. | Yes Application-specific issue. Troubleshoot application. | ||
| No Create a new user account in System Preferences > Accounts, log out from current user and log in with new user to isolate a User account related issue. If issue persists, reinstall Mac OS X from Install DVD. | |||
Keyboard: Specific Keys Do Not Respond
Quick Check
| Symptoms Quick Check | |
| Keyboard: Specific Keys Do Not RespondOne or more keys do not respond when pressedKey sticksKeycap missing | 1. If wireless keyboard is being used verify that it is properly paired with computer. Go toWireless Input Device Doesn’t Pairsymptom flow to resolve pairing issues.2. The caps lock key has a built-in delay to reduce accidental activation and must be held for approximately 1⁄2 second for it to be activated. SeekBase #TS1578: Apple Keyboard (2007): Caps Lock modified to reduce accidental activation.3. Inspect keyboard for signs of liquid spills or other contamination. Apple’s warranty does not cover accidental damage.4. If keycap is loose attempt to reattach it.5. Use the Keyboard Viewer menu to check every key.6. Recheck keyboard with a known-good computer with an up-to-date Mac OS X 10.6.x7. Replace keyboard if issue is confirmed (K01 for inoperative keys, K17 for wrong/falling keycaps). |
Wired Keyboard/Mouse Not Recognized
Quick Check
| Symptoms Quick Check | |
| Wired Keyboard/Mouse Not RecognizedUSB wired keyboard/mouse not recognized when plugged in.Mouse scroll ball not working or not working as expected.Mouse buttons not working or not working as expected. | 1. Reset SMC.2. The iMac has 4 USB ports on rear of computer.Make sure to try each port to isolate a particular port malfunction.3. Test with a known-good wired keyboard or mouse to isolate a failed peripheral issue.4. Test a mouse when connected directly to ports on the back of iMac to isolate a keyboard USB port issue.5. Ensure that all software and firmware updates for this model have been installed to take advantage of any available bug fixes. |
Deep Dive
| Check Result Action Code | |||
| 1. Verify if computer recognizes keyboard or mouse when plugged into rear USB ports on back of iMac. | Yes Test device in all USB ports to ensure all other USB ports are working as expected.Replace logic board if any USB port on rear fails.Replace keyboard if any USB port on keyboard fails.Go to step 2. | M15K11 | |
| No Go toUSB Device Not Recognizedsymptom flow. | |||
| 2. Verify if keyboard is working as expected. | Yes Go to step 3. | ||
| No Go toWired Keyboard Does Not Function Properly symptom flow. | |||
| 3. Verify if Mighty Mouse has an issue with scroll ball. | Yes See kBase #HT1537: How to clean your Mighty Mouse. | ||
| No Go to step 4. | |||
| 4. Verify if mouse has an issue with buttons. | Yes Go to step 7. | ||
| No Go to step 5. | |||
| 5. Verify if mouse has an issue with tracking. | Yes Go to step 6. | ||
| No Go to step 7. | |||
| 6. Try using mouse on another surface. Non-reflective, opaque surfaces without repetitive patterns work best. The surface should be clean but not shiny. Verify if mouse tracks correctly when used on another surface. | Yes Surface issue. Issue resolved. | ||
| No Go to step 7 | |||
| 7. See kBase #HT1581: Troubleshooting Mighty Mouse and determining expected behavior. Verify if this article resolves issue. | Yes Issue resolved. | ||
| No Replace wired Mighty Mouse. K99 | |||
Wireless Input Device Does Not Pair
Quick Check
| Symptoms Quick Check | |
| Wireless Input Device Does Not Pair with computer• Apple Wireless Keyboard/Magic Mouse/Magic Trackpad not recognized when powered on.• Unable to pair Bluetooth input device with computer.• Bluetooth Magic Mouse buttons not working.• Apple Magic Trackpad clicking/tracking/tapping actions not working properly | 1. Remove/ reinstall batteries into device to check they were not reversely inserted.2. Ensure that all software and firmware updates have been installed.3. Ensure that the Bluetooth device software has been installed on test computer.4. Install known-good charged batteries in Bluetooth device, and press the power button to check that green led stays on for at least 3 seconds”5. Review the “Troubleshooting wireless mouse and keyboard issues” kBase article http://support.apple.com/kb/TS3048.6. Use a known-good Macintosh with up-to-date Mac OS 10.6.x, with Bluetooth enabled in Bluetooth Preferences, where a known-good similar Bluetooth device could be previously paired, and where a wired mouse is connected.7. Try to pair the affected Bluetooth device using the Bluetooth Setup Assistant Utility.8. (Apple Wireless Keyboard, Magic Mouse or Magic Trackpad) Download and run the Bluetooth Service Diagnostic utility (available in the Disk Images page of GSX/Service Source).9. (Apple Wireless Keyboard, Magic Mouse or Magic Trackpad) After Bluetooth Service Diagnostic utility passes, pair the device again, using the Bluetooth Setup Assistant. |
Deep Dive
| Check Result Action Code | |||
| 1. (Apple Wireless Keyboard, Magic Mouse, Magic Trackpad) With known-good charged batteries and known-good up to date Mac OS X computer with the Bluetooth device software installed, run the Bluetooth Service Diagnostic utility (available in the Disk Images page of GSX/Service Source) and verify that all tests pass. | Yes Go to step 2. | ||
| No Replace defective Bluetooth device specifying the code provided by Bluetooth Service Diagnostic or corresponding symptom code:-does not connect-no LED when turned on-click does not work-cursor jumpy, jittery-intermittent stopsresponding-gestures do not work-battery life too short-physically damaged | K15K09K13K12K08K02K16K16 | ||
| 2. Try to pair Bluetooth device using the Bluetooth Setup Assistant, and verify that device can be recognized and used. | Yes Issue does not happen with known-good batteries. If device was using standard batteries, go to step 5 to retest with customer batteries.If had fully charged Apple rechargeable batteries, go toApple Battery Charger does not charge batteries. | ||
| No Go to step 3. | |||
| 3. (Apple Wireless Keyboard, Magic Mouse, Magic Trackpad) Run the Bluetooth Diagnostic Utility again and check the "Restore Factory settings" option at final window, and verify that test passes. | Yes Go to step 4. | ||
| No Replace defective Bluetooth device specifying the code provided by Bluetooth Service Diagnostic or corresponding symptom code:-intermittent stopsresponding-gestures do not work-battery life too short | K08K02K16 | ||
| 4. Try to pair Bluetooth device using the Bluetooth Setup Assistant. Verify device can be recognized and used. | Yes Issue solved. | ||
| No Go toWireless Input DeviceLoses Connectionsymptom flow. | |||
| 5. Reinstall customer's batteries in device and try to pair Bluetooth device using the Bluetooth Setup Assistant. Verify that device can be recognized and used. | Yes Issue solved. | ||
| No Recommend that customer replace batteries. If device had fully charged Apple Rechargeable Batteries, go toApple Battery Charger does not charge batteries. | |||
Apple Wireless Mouse/Magic Trackpad Erratic Tracking
Quick Check
| Symptoms Quick Check | |
| Apple Wireless Mouse/Magic Trackpad erratic tracking.• Cursor tracking is jumpy.• Tracking /Clicking/Tapping actions not working• Unresponsive tracking and wrong gesture triggers | 1. Verify all software and firmware updates have been installed.2. Verify the Bluetooth device software has been installed.3. Verify that customer is not using more than three Dual Link Bluetooth input devices at the same time on same computer.4. Cover the entire pad surface for some seconds to reset it.5. Clean mouse sensor/trackpad surface.6. Review the “Troubleshooting wireless mouse and keyboard issues,”http://support.apple.com/kb/TS3048.7. Use a known-good Mac OS X up to date computer with Bluetooth enabled in Bluetooth Preferences, where a known-good similar Bluetooth device could be previously paired, and where a wired mouse is connected.8. (Apple Wireless Keyboard, Magic Mouse or Magic Trackpad) Download and run the Bluetooth Service Diagnostic utility (available in the Disk Images page of GSX/Service Source), checking the Restore Defaults Settings option.9. (Apple Wireless Keyboard, Magic Mouse or Magic Trackpad) If Bluetooth Service Diagnostic utility passes, try to pair again the device using the Bluetooth Setup Assistant.10. Replace defective Bluetooth device specifying the code provided by Bluetooth Service Diagnostic |
Wireless Input Device Loses Connection
Quick Check
| Symptoms Quick Check | |
| Wireless Input Device Loses Connection• Apple Wireless keyboard, Magic Mouse, Magic Trackpad or other Bluetooth input device loses connection | 1. Check orientation of wireless device to computer. Test Magic Trackpad or Magic Mouse with it positioned on either side of computer.2. Verify that user is first clicking/pressing a key to wake input device (refer to kBase article: "HT3081: Click the mouse button to re-establish a connection to your Apple wireless mouse or trackpad.3. Verify if device has been paired to computer previously.4. Remove and reinstall batteries for device.5. Press the power button and check that green LED stays on for around 3 seconds.6. Test with known-good batteries.7. Ensure that customer is not using more than three Dual Link Bluetooth devices, at same time on same computer.8. Ensure other devices pair and keep connection without issue on the computer. If not, jump to AirPort/Bluetooth Issues.9. Ensure that device is being used within 30-foot range for Bluetooth devices.10. Ensure that the latest Mac OS X 10.6.x Software and Firmware updates have been applied.11. See kBase #TS3048: Troubleshooting Wireless Mouse an Keyboard Issues. |
Deep Dive
| Check Result Action Code | |||
| 1. Open System Preferences > Bluetooth. Paired items and their connection status are shown. Verify if device is listed. | Yes Device has been paired.Go to step 2. | ||
| No Device is not paired. Make device discoverable and open Bluetooth Setup Assistant.Go to step 3. | |||
| 2. Make sure device is on.In System Preferences >Bluetooth, select device and from the Action menu (gear) choose "Connect". Verify if device connects successfully. | Yes Go to step 7. | ||
| No Delete pairing in System Preferences. Go to step 3. | |||
| 3. With the device on, run Bluetooth Setup Assistant.Verify if you can successfully pair the device. | Yes Go to step 7. | ||
| No Restart computer.Go to step 4. | |||
| 4. With device on, run Bluetooth Setup Assistant. Verify if you can successfully pair device. | Yes Go to step 7. | ||
| No Create a new Admin User.Go to step 5. | |||
| 5. Log into new Admin User account. With device on, run Bluetooth Setup Assistant. Verify if you can successfully pair device with new user account. | Yes User account issue.Troubleshoot software on User account. No hardware repair needed. | ||
| No Remove the following file: /Library/Preferences/com.apple.Bluetooth.plistGo to step 6. | |||
| 6. Restart computer, With device on, run Bluetooth Setup Assistant. Verify if you can successfully pair device. | Yes Go to step 7. | ||
| No Go to AirPort/BluetoothIssues symptom flow. | |||
| 7. With device paired and connected, verify if device connection is stable if used normally. | Yes Issue resolved. | ||
| No Check wireless device manual to verify if device is being used in accordance with manufacturer's specifications (range, OS support, battery types). Go to step 8. | |||
| 8. Verify if Apple wireless input device is performing to stated specifications. | Yes Educate user. Issue resolved. | ||
| No Replace defective Apple wireless input device according to symptom:-intermittent stops responding-gestures do not work-battery life too short | K08K02K16 | ||
Apple Battery Charger Does Not Charge Batteries
Quick Check
| Symptoms Quick Check | |
| Apple Battery Charger Does Not Charge BatteriesNo Amber/Green status LED visible on charger when batteries are installed and charger is connected to AC.Amber status LED is flashingWhen installed in the input device, the batteries don't power it.Batteries only provide limited run time when used.Batteries show leak/inflation signs | 1. Ensure that only NiMH AA rechargeable batteries are used with the Apple Battery Charger, that they are correctly installed, with correct polarity orientation. If Amber status LED still flashes when these batteries are installed, they are likely to be defective.2. Ensure that only NiMH AA rechargeable batteries are used with the Apple Battery Charger and were left charging for at least 5 hours. (LED will go green when a full charge has been reached, then will turn off to conserve energy).3. Test with known-good AC duck head plug.4. Quickly test customer's Apple Battery Charger for charge of a known-good set of NiMH AA rechargeable batteries. If no Amber or Green status LED is seen, replace battery charger (P01).5. Quick check customer's NiMH AA rechargeable batteries for charge status when installed in a known-good Apple Battery Charger. If no Amber/ Green status LED is seen, replace Apple battery set (P01).6. Go to deep dive. |
Deep Dive
| Check Result Action Code | |||
| 1. Verify if the charger LED goes ON (Green or Amber) when a known-good set of NiMH AA batteries is installed and charger is connected to AC outlet. | Yes Go | to step 2 | |
| No Check batteries fit and are correctly seated in case. If issue persist, replace defective Apple Battery Charger | P01 | ||
| 2. Verify if the charger LED goes Amber when a set of known-good discharged or only partly-charged NiMH AA batteries is installed. | Yes Go | to step 3 | |
| No LED | remains Green while known-good inserted batteries are still not fully charged (charger never initiates a charge): Replace defective Apple Battery Charger. | P10 | |
| 3. Verify if the charger LED will go green when a known-good set of partly charged NiMH AA batteries was installed and had been left for some hours (up to 5 hours if a fully discharged set was installed in charger).Note: Status LED may turn OFF after charge has been completed more than an hour. | Yes When charge of the known-good batteries set has ended (status LED turned to green), insert them in a known-good input device and go to step 4. | ||
| No LED remains amber (never ends charging): Replace defective Apple Battery Charger. | P10 | ||
| 4. Check Battery Level in System Preferences>Trackpad or Mouse Depending on device type, battery type, and time since last full charge, the battery level displayed should vary from 80% to almost full. Verify that battery level shows at least 80% charge. | Yes Charge functionality confirmed. Return Apple Battery Charger to customer and recommend customer to check rechargeable batteries. | ||
| No Charger does not correctly charge batteries Replace defective Apple Battery Charger. | P10 | ||
Uncategorized Symptoms
Quick Check
| Symptoms Quick Check | |
| Uncategorized Symptoms• Unable to locate appropriate symptom code. | 1. Reset SMC.2. Verify that external I/O device (where applicable) works on a known-good, same-model computer.3. For third party I/O devices, make sure necessary software is installed and up-to-date, and that device is supported with user's system. |
Deep Dive
| Check Result Action Code | |||
| 1. Verify if existing symptom code applies to issue reported by user. | Yes Jump to appropriate symptom code flow. | ||
| No Document reported failure and send feedback to smfeedback2@apple.com stating that a suitable symptom code wasn't found. Provide as much detail as possible. | N99 | ||
Mechanical
Noise/Hum/Vibration
Unlikely cause: LCD panel, glass panel, enclosure, cables
Quick Check
| Symptoms Quick Check | |
| Noise/Hum/VibrationBuzzing noiseRattling noiseTicking noiseSqueaking noise | 1. Verify that the vents on the bottom and back of the system are free of dust and other obstructions that might inhibit proper airflow through the system.2. Launch Applications/Utilities/Activity Monitor. Determine whether an application or process is consuming a high percentage of CPU bandwidth. CPU-intensive applications can cause the fans to run fast in order to maintain the proper internal system temperatures. If needed, quit the application or restart the system to resolve the issue.3. Eject optical media from optical drive. Out-of-balance optical media can generate audible noise. To resolve try a different brand of media. For additional information, go toOptical Drive Noisysymptom flow.4. Tilt display to hinge limits to determine if mechanical noise is generated by the hinge mechanism. For additional information, go toStand/Hinge Issuessymptom flow.5. Play sound sample at loud and soft volume levels to determine if the noise is caused by the left/right speakers or the amplifier circuit. Plug external headphones to identify whether the noise comes from audio out or from other source. For additional information, go toAudio: Built-inSpeakers Have Distorted Soundsymptom flow.6. Adjust the display brightness to determine whether the noise is related to the brightness level. For additional information, go toNoise/Unstable Flickeringsymptom flow.7. Run latest available Apple service utilities. |
Deep Dive
| Check Result Action Code | |||
| 1. Verify if any tape, gasket, cable label, or cable is touching the fan blades and causing a ticking noise. | Yes Secure the material so it doesn't touch fan blades. If tape adhesive has lost its stickiness, replace that section of tape. | ||
| No Go to step 2. | |||
| 2. Run latest available Apple service utilities and verify if it reports one or more errors. | Yes Locate affected part and check for correct cable seating. Use ASD Error Codes table and sensors location table (in General Troubleshooting) to decode error. Follow instructions in table for resolving error, then retest. | ||
| No Go to step 3. | |||
| 3. Verify if noise sounds like one or more fans are spinning faster than expected. | Yes Reset SMC by disconnecting power cord for ~15 seconds then retest. If issue continues go to step 3. | ||
| No Go to step 6. | |||
| 4. Verify if noise changes when optical drive is being accessed or media is inserted or ejected. | Yes Suspect issue with optical drive or media used. Go to Optical Drive Noisy symptom flow. | ||
| No Go to step 5. | |||
| 5. Mute the system volume. Verify if issue still occurs. | Yes Go to step 6. | ||
| No Suspect issue with speakers or audio amplifier circuitry. Go to Audio: Built-in Speakers Have Distorted Sound symptom flow. | |||
| 6. Adjust brightness on display between maximum and minimum settings. Verify if issue changes depending on brightness level. | Yes Suspect issue with LCD display or backlight controller board. Go to Noise/Unstable Flickering symptom flow. | ||
| No Go to step 7. | |||
| 7. Remove fans and rotate blades. Verify if fan blades spin smoothly without interference from fan housing. | Yes Go to step 8 | ||
| No Replace affected fan. P04 | |||
| 8. Reinstall fans while carefully ensuring that there are no cables routed under or near fan assembly that might cause interference with fan blades. After reassembling system verify if noise issue is resolved. | Yes Noise issue resolved. Suspect issue caused by interference from wiring or possible distortion or fan housing when installed in system. | P04 | |
| No Go to step 9. | |||
| 9. Temporarily remove LCD display then power ON system. Verify if source of noise can be located. Caution: The exposed power supply poses a serious shock hazard. Take proper precautions when working around an energized system. | Yes Identify, inspect, and if necessary replace part that caused noise issue. | P04 | |
| No Go to step 10. | |||
| 10. Disconnect these major modules/parts (hard drive, optical drive, fans, LCD display) one at a time then power ON the system. Determine if noise issue goes away when one of the modules is disconnected. Caution: The exposed power supply poses a serious shock hazard. Take proper precautions when working around an energized system. | Yes Identify, inspect, and if necessary replace part that caused noise to disappear when it was disconnected from the system. | P04 | |
| No All parts verified. Verify that correct symptom flow is being used. | |||
Fan Failures / Thermal Issues
Unlikely cause: speakers
Quick Check
| Symptoms Quick Check | |
| Fan Failures / Thermal IssuesSystem feels very hotFan(s) not operatingFan(s) running fastSystem is noisy | 1. Verify that vents on bottom and back of system are free of dust and other obstructions that might inhibit proper airflow through the system.2. Verify that computer is not exposed to direct sunlight which may heat up enclosure, making it feel hot to the touch.3. Verify computer is not running hotter than expected for normal operation. If possible, compare to a similarly configured system. Note: Power supply is located in upper left corner where highest temperatures can usually be felt.4. Launch Applications/Utilities/Activity Monitor. Verify if an application or process is consuming a high percentage of CPU bandwidth. CPU-intensive applications can cause fans to run fast in order to maintain proper internal system temperatures. If needed, quit the application or restart the system to resolve issue.5. Reset SMC by unplugging power cord for ~15 seconds.6. Run latest available Apple service utilities. |
Deep Dive
| Check Result Action Code | |||
| 1. Run latest available Apple service utilities and. Verify if one or more errors are reported. | Yes Suspect possible fan or sensor error. Go to ASD Error Codes table and sensors location table (in General Troubleshooting) to decode error. Follow instructions in table for resolving error, then retest. | ||
| No Go to step 2. | |||
| 2. Verify if noise sounds like one or more fans running faster than expected. | Yes Fans running fast. Reset SMC by disconnecting power cord for ~15 seconds then retest. If issue continues go to step 3. | ||
| No Go to step 3. | |||
| 3. Verify if any tape, gasket, cable label, or cable is touching the fan blades and causing a ticking noise | Yes Secure the material so it doesn't touch fan blades. If tape adhesive has lost its stickiness, replace that section of tape | ||
| No Go to step 4. | |||
| 4. Remove fans and rotate blades. Check for any dust that could be clogging the fans. Verify if fan blades spin smoothly without interference from fan housing and fan blades are all intact. | Yes Go to step 5. | ||
| No Replace affected fan(s). X23 | |||
| 5. Run latest available Apple service utilities then ASD in stand-alone tests looping mode, to verify if all sensor or fans related tests pass. | Yes Noise issue resolved. | ||
| No Check for correct sensors/fans connections on logic board. Check for pinched cables. Compare with known-good similar system, and check for unlisted sensors. Replace affected sensor/fan. | X22 | ||
Stand/Hinge Issues
| Symptoms Quick Check | |
| Stand/Hinge IssuesBent standBroken hingeStripped screw/headStripped screw bossUnable to install VESA mount (if supported on this model) | 1. Determine whether damage caused by user / technician environment, accidental damage, or abuse. If so, inform user/technician the failures are not covered by Apple warranties. Refer to http://www.apple.com/legal/warranty2. For hinge noise issues replace hinge mechanism.3. For information on selecting the adequate iMac VESA Mount Adapter and which computer models are supported, refer to installation manuals available at http://support.apple.com/manuals/#desktopcomputers |
Physical Damage
| Symptoms Quick Check | |
| Physical DamageBroken glassBent standBroken hingeStripped screw/headStripped screw bossDent or scratch to chassis | 1. Verify if damage caused by user environment, accidental damage, or abuse. If applicable inform the user that Apple does not warrant damage caused by accident, abuse, misuse, flood, fire, earthquake, or other external causes. For more information refer to:http://www.apple.com/legal/warranty |
Uncategorized Symptoms
| Check Result Action Code | |||
| 1. Verify if existing symptom code applies to issue reported by user. | Yes Jump to appropriate symptom code flow. | ||
| No Document reported failure and send feedback to smfeedback2@apple.com stating that a suitable symptom code wasn't found. Provide as much detail as possible. | N99 | ||
Take Apart
iMac (27-inch, Mid 2010)
General Information
Opening the Unit
- The iMac (27-inch, Mid 2010) has a glass panel that attaches to the front, which must be removed prior to replacing any module on the unit.
- Important: The glass panel should only be removed by Apple-authorized technicians. Read and follow all of the cleaning and handling recommendations to prevent damaging the glass and LCD panel.
- Follow ESD precautions when the front bezel and the LCD display are removed.
Required Tools
Special tools are required to remove, handle and clean the glass panel, such as the following.
- ESD-safe workstation, including an ESD mat and wrist or heel strap
- ESD bags (for storing ESD-sensitive parts while removed from unit) • Magnetized Torx T10 screwdriver • Magnetized Torx T8 screwdriver • Magnetized Torx T6 screwdriver • Phillips #2 screwdriver
- Black stick (nylon probe, Apple part #922-5065) or other non-conductive nylon or plastic flat-blade tool
- Kapton tape
- Magnifying glass, for reading serial number etched on bottom of stand • Digital volt meter (for troubleshooting)
- Soft, clean towel or cloth (to protect display and removed parts from scratches)
For more information about tools, refer to:
kBase #HT3452: Hand Tools for Desktop and Portable Repairs
In addition, the following software programs are required for troubleshooting:
• Apple Service Diagnostic (ASD), version 3S140 or later • Apple Hardware Test (AHT), version 3A202 or later - Bluetooth Service Diagnostic (BSD)
Required Special Tools for Glass Panel
Special tools are required to remove, handle and clean glass panel.
• 922-8252 – Suction cups, Pkg of 2 • 922-8253 – Gloves, lint-free, anti-static, Pkg of 2 • 922-8258 – ESD bags, 24"x20", Pkg of 5. To prevent buildup of static charges which may attract dust particles, store LCD panel in an ESD bag when it is removed from unit. • 922-8259 – Microfoam bag to store glass panel, Pkg of 5 • 922-8261 – Sticky silicone roller (6-inch) to clean glass panel • 922-8262 – Sticky sheet pads to clean silicone roller • 922-8263 – Polishing cloths, anti-static, optical-grade micro-terry, Pkg of 5
Cleaning Tools Starter Kit
The following tools are offered separately or in the starter kit (076-1277):
• Suction cups, 922-8252, 1 pair • Gloves, lint-free, anti-static, 922-8253, Pkg of 2 • Sticky silicone roller (6-inch) to clean the glass panel, 922-8261 • Sticky sheets to clean the silicone roller, 922-8262, Pkg of 2 • Polishing cloths, clean, anti-static, optical-grade micro-fiber, 922-8263 • Microfoam bag to store the glass panel, 922-8259, Pkg of 5 • ESD bag for LCD panel storage, 922-8258, Pkg of 5
Cleaning & Handling the Glass Panel
Follow the cleaning procedures in this manual to ensure the glass panel is free of dust and other particles before returning the computer to the customer.
- The glass panel is not tempered and will break into sharp pieces if mishandled. A scratched or broken glass panel is not covered under warranty.
- Removing the glass panel requires special tools such as lint-free gloves, rubber suction cups, and microfoam storage bags.
- To prevent contamination, wear lint-free gloves and handle the glass only by the edges.
Do's and Don'ts
DO
- Handle glass panel using lint-free gloves.
- Use only a sticky silicone roller to clean the inside surface of the glass and the LCD panel.
- Place the glass panel into a clean protective microfoam bag when removed from the unit.
- Store the glass panel in a safe area where it will not be broken or damaged.
- Store the LCD panel in an anti-static bag to prevent the buildup of static charges which may attract dust particles to the display's surface.
- Store the silicone roller and sticky paper within a temperature range of 39-104 F (5-40 C).
- If the silicone roller is no longer tacky, wash it in warm soapy water or wipe with isopropyl alcohol. If the tackiness does not return, replace the silicone roller.
DON'T
- Touch the inside of the glass with bare hands or dirty gloves. Fingerprints will be difficult to remove.
- Place the glass panel onto a work surface where it may collect dust and other contaminants unless it has first been placed into a protective microfoam bag.
Handling a Broken Glass Panel
The glass panel is not tempered and will break into sharp pieces if mishandled. If the glass is broken it must be carefully removed from the unit to prevent irreparable damage to the front surface of the LCD. If the front surface of the LCD is scratched by broken glass, the LCD may need to be replaced.
How to Remove a Broken Glass Panel
A shattered panel can be removed using safety glasses, packing tape, and leather gloves.
- Put on safety glasses and leather gloves.
- Lay the computer on a smooth, clean work surface.

- Peel protective covering off the front of the glass. Remove and discard any large pieces of broken glass.

- Apply a strip of packing tape horizontally across the top and bottom of the glass panel. Next, apply the tape diagonally, across the broken glass panel, forming an "X."

- Continue applying tape horizontally, thoroughly covering the broken glass. Most of the glass will still be attached to the steel ring that runs around the perimeter of the glass panel.

- Use a black stick to pry the glass panel off the magnets on the rear housing.

- Lift the entire glass panel off the housing.

- Place the broken glass inside a large box, label the box, and dispose of it properly.

- Using a whisk broom, clean the work surface of tiny glass particles.
- Stand the iMac up and use a lint free cloth to carefully brush any of the particles off of the iMac onto the table. Clean the work surface again.
- When the repair is finished the cloth should be disposed of immediately.
- Use a broom and dustpan to sweep up as much of the broken glass as possible. Glass fragments may have traveled several feet from the location of the glass panel, so be sure to thoroughly clean the entire area. Use a vacuum to remove the smaller fragments not picked up by the broom.
- Note: A broken glass panel may leave one or more scratches on the LCD display depending on the severity of the glass breakage. As long as the LCD itself has not been fractured the LCD does not require replacement, but be sure to let the customer know that the scratches are there and were caused by the broken glass panel.

Safety
Warning: HIGH VOLTAGE: The AC/DC power supply PCB remains powered up whenever the system is plugged in, whether or not the system has been turned on. Use extreme caution when troubleshooting the system with the front bezel removed.
- Don't work alone. In the event of an electrical shock it is important to have another individual present who can provide assistance.
- Keep one hand in your pocket when working on any iMac system that is plugged in. This will help ensure that your body does not provide a path to ground in the event that you accidentally make contact with the line voltage.
- Don't wear jewelry, watches, necklaces, or other metallic articles that could present a risk if they accidentally make contact with the power supply circuitry.
Use extreme caution when working around the power supply. The power supply contains a high voltage capacitor that may remain charged for several minutes even when the computer is unplugged. Never touch the leads on the top side of the power supply, especially the capacitor leads located near the warning sign.
Important: If the computer is shut down by removing the power cord, allow the power supply a good 2-3 minutes to discharge the capacitors before handling it. However, if you select "Shut Down" via the Apple menu, the computer will discharge the power supply capacitor almost immediately.

Logic Board Handling
IMPORTANT: Always use two hands to support the logic board, video card and heatsinks. Handling the board incorrectly could flex the board and damage the chips and circuitry. Never handle the board by the heatsink or video card.

Reassembly Steps
When there are no replacement steps listed, replace parts in the exact reverse order of the Removal procedure.
Note About Images in This Manual
Because a pre-production or very similar model was used for most of the images shown in this manual, you may notice small differences in appearance between the image pictured and the computer you are servicing. However, although the appearance may differ, the steps and sequence are the same unless noted.
Screw Sizes
All screw sizes shown are approximate and represent the total length of the screw.
Access Door
First Steps
- Shut down the computer
- Place the computer on a clean, flat surface

Tools
• ESD mat and wrist strap • Phillips #2 screwdriver

Removal
1 Raise the stand and loosen 3 captive screws.
2 Remove the access door.
Important: To ensure proper cooling, the iMac should not be operated without access door installed.

Memory
First Steps
Remove
- Access door
Note: This computer uses PC3-10600, (1333) DDR3, 204-pin, SO-DIMMs.

Tools
• ESD mat and wrist strap

Removal
1 Untuck tabs in the memory compartment. 2 Pull tab to eject the installed memory module.

Reassembly
1 Orient notch on memory with notch in the memory compartment. 2 Press memory firmly into slot until you hear a click. 3 Tuck black plastic tabs into memory compartment. 4 Replace access door and tighten 3 screws.
Important: To ensure proper cooling, the iMac should not be operated without access door installed.

Note: i5 and i7 Quad Core iMac computers come with both top memory slots populated. These computers will not start up if only a single DIMM is installed in any bottom slot; these computers should operate normally with a single DIMM installed in any top slot. Core Duo iMac computers should operate normally with a single DIMM installed in any slot, top or bottom. ("Top" and "bottom" slots refer to the orientation of the slots in the pictures above. "Top" refers to the slots closest to the display; "bottom" refers to the slots closest to the stand).
Glass Panel
First Steps
- Shut down unit.
- Unplug all cables.
- Put on ESD strap.
Caution: The glass panel is not tempered and will break into sharp pieces if mishandled. A scratched or broken glass panel is not covered by warranty.
Important:
This procedure requires special tools, which are offered individually or as part of a cleaning kit. See General Take Apart section for more information.

Tools
- ESD wrist strap
- lint-free gloves
- suction cups
- sticky silicone roller
- sticky sheets to clean the silicone roller
- microfoam bag

Removal
Note: Glass panel is held in place by magnets.
Caution: Unlike previous model iMacs, the glass panel has tabs along bottom that align with rear housing. Be careful not to damage tabs when removing glass panel.
Apple strongly recommends wearing clean, lint-free gloves whenever handling the glass panel, to reduce cleaning required on reassembly.

1 The glass panel can be removed in various ways:
- Lay computer on its back and press clean suction cups in opposite corners on glass panel, or...
- Lay computer on its back and press clean suction cups in top right and left corners on glass panel, or...
- Stand computer upright and use your finger nails to pull glass forward along top edge
2 Lift glass panel off the magnets.

3 Remove suction cups and slide glass into protective microfoam bag.

Reassembly
1 Remove protective covering from silicone roller and sticky sheet.
2 Clean silicone roller by rolling it back and forth a few times on sticky sheet.
If sticky sheet looks dirty, use a new one. If roller is no longer tacky, wash it in warm soapy water. If tackiness does not return, replace silicone roller.

3 Set unit in upright position to minimize settling of dust. 4 Roll silicone roller over LCD panel to remove any particles.

5 Remove glass panel from microfoam bag. 6 Clean INSIDE of glass panel with the silicone roller to remove dust.
Note: If fingerprints or oils are on inside of glass, clean first with isopropyl alcohol.

7 Wearing clean gloves, place glass directly onto unit, aligning tabs along the bottom with notches in rear housing. Magnets will catch it and hold it in place.
Make sure the glass is flush with the rear housing after it is reinstalled.

8 Clean outside of glass panel with a clean, damp microfiber cloth. Wipe glass until there is no longer any residue or haze.
9 Inspect glass for any remaining dust, fingerprints, or a hazy residue. If there are contaminants trapped between LCD panel and glass panel, repeat cleaning procedure.

Camera
First Steps
Remove
- Glass panel

Tools
- Magnetized Torx T10 screwdriver
- Black stick • ESD-wrist strap and mat

Removal
1 Remove 2 T10 screws:
• 922-9239


2 Lift camera bracket out of rear housing. 3 Disconnect camera cable from camera board.

Reassembly
1 Thermal paste is required between the camera and rear housing. Reuse the thermal paste.
2 Use a black stick to remove and reapply paste to camera (areas circled in graphic).
Note: A syringe of thermal paste is available as needed, part number 922-9625, good for 5 applications.
Important: The white thermal paste used on camera should NOT be used for any other purpose (such as portable computer heatsinks).

LCD Panel
First Steps
- Glass panel

Caution: Do not press on front surface of LCD panel when handling.

Tools
• Magnetized T10 screwdriver • ESD-wrist strap and mat • ESD bag to store LCD panel

Removal
1 Remove 8 T10 screws: 922-9246

Reassembly Note:
Do not overtighten LCD screws, which could cause light leakage after unit is reassembled.

2 With computer standing up and facing you, pull the LCD forward slightly from the top edge to access 4 cables inside.

CAUTION: Tilt display out no more than 4 inches (10 cm).
Pulling display too far could damage panel cables or connectors.

3 Looking down into the computer, on the left side, disconnect the vertical sync cable from the top of the backlight board. Pull straight up.
WARNING: HIGH VOLTAGE

Use extreme caution when working around the power supply, which contains a high-voltage capacitor that may remain charged for several minutes even when the computer is unplugged.

4 Pull display forward slightly to disconnect:
- 1: backlight power cable at bottom of backlight board. Pinch and pull cable down from connector
- 2: display temp sensor cable next to the AirPort cable. Pull straight up

5 To the right of the display temp sensor, carefully peel DisplayPort cable (attached with double-sided tape) away from the video card bracket.

6 Gently remove the DisplayPort cable.
- Squeeze side metal tabs (#1) to release and pull cable (#2) up from connector.

7 Lift the LCD panel off rear housing.
Important: Panel Handling information:
• handle the panel by the edges only • use two hands to lift and move the panel • never hold the panel with one hand - don't touch the panel surface

8 Without touching the panel surface, carefully store the LCD panel in an antistatic bag.

Note: If replacing the panel:
- remove aluminum tape securing DisplayPort cable • transfer the DisplayPort cable to the new panel
- secure DisplayPort cable to the panel connector with aluminum tape
- Place mylar tape over aluminum tape & cable (see next graphic)
A replacement LCD panel includes:
- vsync cable • display temp sensor cable and clip
- mylar tape
- aluminum tape

Handling the Panel
1 Important: Handle LCD panel by the edges only.
Use two hands to carry the panel.

2 Never touch LCD surface or hold LCD panel with one hand. It could damage the panel.


Reassembly
1 The panel is heavy! Lift panel and rest it on the "chin" of the rear housing. 2 Lean panel toward the rear housing.

3 Connect the DisplayPort cable.
- Squeeze side metal tabs (#1) to insert cable into connector (#2). Push cable firmly into connector. Verify cable is connected.

4 In the following order, connect:
• #1: display temp sensor - #2: backlight power

5 Press sticky DisplayPort cable onto the video card bracket.

6 Connect the vertical sync cable to the backlight board. 7 Replace 8 panel screws.

Vertical Sync Cable (Vsync)
First Steps
Remove
- Glass panel
- LCD panel
Tools
- Black stick

Removal
1 With a black stick, peel back mylar tape to expose cable. 2 Pull cable straight out of connector.
Replacement Note:
Insert Vysnc securely into panel connector, replace mylar tape.

LED Temp Sensor Cable
First Steps
Remove
- Glass panel
- LCD panel
Tools
- Black stick

Removal
1. Peel black insulator to access cable. 2. Disconnect sensor from bracket.
Replacement Note:
Insert sensor securely into bracket. Replace foam over sensor to isolate the sensor from the internal air temperature.

DisplayPort Cable
First Steps
Remove
- Glass panel
- LCD panel
Tools
No tools are required for this procedure.

Removal
1. Peel back mylar tape securing cable to LCD panel.

2. Peel back aluminum tape securing DisplayPort cable to panel connector.
Replacement Note: A replacement DisplayPort cable will come with:
• a piece of black mylar tape • a piece of aluminum tape
3. Press in on metal side release clips and then gently pull down to disconnect DisplayPort cable.

Audio Ports and Cable
First Steps
Remove
- Glass panel
- LCD panel

Tools
- Torx T10 screwdriver • ESD mat and wrist strap

Removal
1 Disconnect audio cable from logic board and remove 2 T10 screws.
• 922-9245

2 Remove cable from rear housing.

Reassembly Note:
• A black stick can be helpful for guiding and aligning audio ports with rear housing.
- Plugging in the earbuds or headphones can also help keep audio cable aligned while tightening screws.

AirPort Antenna
First Steps
Remove
- Glass panel
- LCD panel

Tools
- Magnetized Torx T8 screwdriver • ESD-wrist strap and mat

Removal

1 Disconnect antenna cable from AirPort card.
WARNING: Be careful not to damage AirPort antenna connectors as it may induce antenna or rear housing replacement (lower antenna, near Apple logo, is part of rear housing).
2 Peel up EMI tape securing antenna cable to rear housing.
3 Remove 2 T8 antenna screws:
• 922-4723

4 Remove antenna from housing.

AirPort Card
First Steps
Remove
- Glass panel
- LCD panel

Tools
• Magnetized Torx T6 screwdriver • ESD-wrist strap and mat

Removal
1 Remove 1 T6 screw.
• 922-8579

2 Disconnect 2 AirPort antenna cables.

Important: Antenna cables and connectors are delicate. If the shorter of the two antenna cables is damaged, you will need to replace the rear housing.
3 Hold card by edges and pull it out of the slot.

AirPort Carrier Board
First Steps
Remove - Glass panel - LCD panel • AirPort card

Tools
• Magnetized Torx T10 screwdriver • ESD-wrist strap and mat

Removal
1 Remove Kapton tape securing AirPort data cable to carrier board. 2 Disconnect Airport data cable. 3 Remove 2 T10 screws: • 922-6850

4 Lift AirPort carrier board from rear housing.

Replacement Note: Secure both ends of the AirPort cable with Kapton tape.
AirPort Cable
First Steps
Remove - Glass panel - LCD panel • AirPort carrier board

Tools
• ESD-wrist strap and mat - black stick

Removal
1 With a black stick, remove Kapton tape (wrapped around carrier board) securing the AirPort cable to the carrier board.
2 Lift AirPort cable off carrier board.
3 Remove Kapton tape securing AirPort cable to logic board. Lift cable straight up from board.
Replacement Note:
Secure both ends of the AirPort cable with Kapton tape.


Bluetooth Antenna
First Steps
Remove
- Glass panel
- LCD panel

Tools
• Magnetized Torx T8 screwdriver - ESD-wrist strap and mat

Removal
1 Remove 2 T8 screws on antenna board:
· 922-4723


2 Disconnect Bluetooth antenna from the Bluetooth card.
3 Remove antenna from housing.

Bluetooth Board
First Steps
Remove
- Glass panel
- LCD panel

Tools
• Magnetized Torx T8 screwdriver - ESD-wrist strap and mat

Removal
1 Disconnect 2 cables:
- Bluetooth antenna
- Bluetooth data cable
2 Remove 1 T8 screw:
• 922-9247


LED Backlight Board
First Steps
Remove
- Glass panel
- LCD panel
Warning: HIGH VOLTAGE

Use extreme caution when working around the capacitors in the top right corner of the backlight board, which contain high-voltage that may remain charged for several minutes even when computer is unplugged. Never touch the leads on the top side of the backlight board.

Tools
- Torx T10 screwdriver • ESD mat and wrist strap

Removal
Warning: HIGH VOLTAGE
If the computer is shut down by removing the power cord, allow the backlight board a good 2-3 minutes to discharge the capacitors before handling it. However, if you select "Shut Down" via the Apple menu, the computer will discharge the capacitors almost immediately.
1 Remove 4 T10 screws. • 922-6850


2 Lift up board, flip over, and disconnect power connector.

Power Supply
First Steps
Remove
- Glass panel
- LCD panel
WARNING: HIGH VOLTAGE

Use extreme caution when working around the power supply, which contains a high-voltage capacitor that may remain charged for several minutes even when the computer is unplugged. Never touch the leads on the top side of the power supply, especially those near the warning sign.

Tools
• Magnetized Torx T10 screwdriver • ESD-wrist strap and mat

Removal
WARNING: HIGH VOLTAGE
If the computer is shut down by removing the power cord, allow the power supply a good 2-3 minutes to discharge the capacitors before handling it. However, if you select "Shut Down" via the Apple menu, the computer will discharge the power supply capacitor almost immediately.
1 Remove 4 T10 screws.
• 1 self-tapping, 922-6850, short (S)

• 2 machine, 922-9244, medium, (M)

• 1 longer self-tapping, 922-9593, long (L)


2 Disconnect 2 cables:
- DC power (top cable) • AC power inlet (taped to pressure wall)

Reassembly
1 Route AC power inlet cable over power supply pressure wall. 2 Connect AC power cable and tuck edge of connector under logic board. 3 Press cable into notches on pressure wall. 4 Replace tape over AC power cable and pressure wall. 5 Replace 4 screws.

Backlight Pressure Wall
First Steps
Remove
- Glass panel
- LCD panel • Power supply

Tools
• ESD mat and wrist strap

Removal
1 Lift pressure wall off posts in the rear housing.

Power Supply/Hard drive Pressure Wall
First Steps
Remove - Glass panel - LCD panel • Power supply

Tools
• ESD mat and wrist strap

Removal
Lift pressure wall off posts in the rear housing.

Reassembly
1 Note: Make sure the camera and AC inlet cables are routed correctly around the pressure wall. 2 The camera cable runs along the right side of the pressure wall, next to hard drive, and through bottom notch in pressure wall.

3 Connect AC inlet cable and then press cable into notches on top of the pressure wall.
4 Replace Kapton tape securing AC inlet cable to pressure wall.

Hard Drive
First Steps
Remove
- Glass panel
- LCD panel

Tools
• Magnetized Torx T10 screwdriver • ESD-wrist strap and mat

Removal
1 Remove 2 T10 screws from mounting bracket:
• 922-6850

2 Disconnect 2 cables: - HD power cable - HD data cable 3 Leave small HD temp sensor cable attached to drive. 4 Slide hard drive up slightly to lift pins out of 2 rubber grommets on mounting bracket. 5 Disconnect HD sensor cable from top of logic board. 6 Important: Do not disconnect HD sensor cable from hard drive. Each drive manufacturer has a different type of sensor cable, which is provided with a replacement drive.


Reassembly
1 If installing a replacement hard drive, transfer the following:
- hard drive bracket
• 2 T10 bracket screws 922-9136

• 2 T10 screw pins 922-7001


2 Note: Each hard drive vendor has a unique sensor cable. Do not mix and match temp sensor cables.
3 Important: When installing a Western Digital drive:
- Orient drive with circuit board facing up (as shown)
- Connect temp sensor cable to hard drive pins, leaving 2 left pins unconnected and the gray wire on sensor cable installed in the "up" orientation.
If sensor cable is installed incorrectly the hard drive fan will run at full speed.

Hard Drive Sensor Cable
First Steps
Remove
- Glass panel
- LCD panel
- Hard drive
Note: Each hard drive manufacturer has a different type of sensor cable, which is included with a replacement drive.
If replacing sensor cable only, be sure to order correct cable for drive manufacturer.

Tools
• ESD-wrist strap and mat

Removal
1 Disconnect hard drive sensor cable from hard drive and logic board.
Note: Do not reuse temp sensor cable. A new sensor cable is included with each replacement drive.
Each hard drive manufacturer has a unique sensor cable.

Reassembly
1 Important: When installing a Western Digital drive:
- orient drive with circuit board facing up (as shown)
- connect temp sensor cable to hard drive pins as shown, leaving 2 left pins unconnected
If sensor cable is installed incorrectly, hard drive fan will run at full speed.

Optical Drive
First Steps
Remove
- Glass panel
- LCD panel
Important: When servicing the optical drive, handle it by the edges only. Pressing elsewhere on the drive could damage the internal mechanism.

Tools
- Torx T10 screwdriver • ESD-wrist strap and mat

Removal
1. Remove 4 T10 screws. • 922-6850


2. Lift the optical drive slightly and wiggle the optical drive cable off the optical drive. A black stick may be helpful.
3. Pull the optical drive away from the slot opening in the housing.
Note: A replacement optical drive includes the bezel. Do not remove or transfer the bezel.

4. Disconnect the optical sensor cable from the connector on the logic board.

Reassembly
1. If installing a replacement optical drive, a temp sensor/cable is included with each replacement optical drive.

2. Install the optical drive by aligning the pins on the bezel with the holes on the optical drive.
Check the felt on the optical drive opening. Damaged or wrinkled felt across the opening could impair installation.

3. Replace the screws in the order shown.
Note: Insert a disc into the optical drive to check that the optical drive is correctly aligned with the rear housing.

Optical Sensor Cable
First Steps
Remove
- Glass panel
- LCD panel • Optical drive
Important: When servicing the optical drive, handle it by the edges only. Pressing elsewhere on the drive could damage the internal mechanism.

Tools
• ESD-wrist strap and mat

Removal
1. Disconnect optical sensor cable from logic board.
2. Peel up foam gasket to release sensor end of cable.
Replacement Note:
A replacement optical drive will include a new sensor cable.

Optical Drive Fan
First Steps
Remove - Glass panel - LCD panel • Optical drive

Tools
- Torx T10 screwdriver • ESD-wrist strap and mat

Removal
1. Remove 1 T10 screw. • 922-9236

2. Disconnect fan cable from logic board. 3. Lift fan off 2 guide posts in rear housing.

SD Card Reader
First Steps
Remove
- Glass panel
- LCD panel
Important: The SD card reader must be replaced like-for-like, with an SD card reader with the same EEE code.

Tools
- Torx T8 screwdriver • ESD-wrist strap and mat
- black stick

Removal
1. Remove 1 T8 screw: • 922-9241


2. Disconnect cable and with a black stick, pry SD card reader up and out of rear housing.

Reassembly
The SD card reader must be replaced like-for-like, with an SD card reader that has the same EEE code.
1 Look at the sticker on the underside of old SD card reader. 2 The EEE code will read DDHF or 6DW. 3 Compare old SD card reader to both parts in the kit and use the new SD card reader with the matching EEE code.
SD Card Reader Cable
First Steps
Remove
- Glass panel
- LCD panel • Optical drive • Optical drive fan
Note: The SD card and SD cable are also part of the rear housing assembly.

Tools
- ESD-wrist strap and mat

1 Peel back aluminum tape that covers the exposed portion of the SD cable. 2 Disconnect cable from SD card reader and logic board.

IR Board and Cable
First Steps
Remove
- Glass panel
- LCD panel
Note: A new IR board includes a new cable. The cable is not available as a separate part.

Tools
• ESD-wrist strap and mat - black stick

Removal
1. Remove Kapton tape to access IR cable connector.

2. Disconnect IR cable from logic board. Pull cable straight up to release.
3. With 2 fingers, wiggle IR mounting bracket up and off mounting post.
Replacement Note:
With your finger, pull front housing out slightly to make room for IR mounting bracket to slide onto IR mounting post.

Logic Board
First Steps
Remove
- Glass panel
- LCD panel • Power supply
- Backlight pressure wall • Optical drive • Optical fan
- IR board
- Memory
Note: The SSD-only CTO option will have an HDD temp sensor jumper (922-9628) in the HDD temp sensor connector location on the logic board. It shorts out the HDD temp sensor when there's no HDD in the computer.
Transfer this jumper if replacing the logic board.

Tools
- Torx T10 screwdriver • ESD-wrist strap and mat

Removal
1 Carefully disconnect 14 cables from the logic board.
(1) power button (2) CPU fan (3) skin temp sensor (4) hard drive temp sensor or HD jumper if SSD-only config (5) hard drive fan (6) camera (7) Bluetooth (8) ambient temp sensor (9) AirPort (10) microphone (11) secure digital (SD) (12) audio ports (13) left speaker (14) right speaker
2 Tape cables back so they do not get trapped during reassembly.


3 Remove 8 T10 screws, (in graphic: S=short, M=medium, L=long)
• 922-6800, (2) short

• 922-9237, (2) 20mm, medium

• 922-9243, (4) 24mm, long


4 Gently pull board forward and disconnect 2 or 3 cables (depending on the configuration) on the back side of logic board.
- DC power cable (#1)
- SSD data cable (#2)
- HD data cable (#3)
Note: On the SSD-only config, (no hard drive) the HD data cable (#3) is absent and a jumper will be present at the hard drive temp sensor connector location.

5 Carefully lift board up and out of rear housing.

Handling the Logic Board
Important: Always use 2 hands to support board and heatsink. Handling board incorrectly could flex board and damage chips and circuits.
Never handle board by heatsink or metal frame.

Reassembly
1 Remove HD temp sensor jumper if present (applies to SSD-only configs).
Important: If jumper is not transferred to replacement logic board on SSD-only configs, the fans will run at full speed.

2 Verify that tamper indicator labels on front and back of heatsink assembly are intact. If labels have been removed or tampered with, logic board is not eligible for exchange.

3 Transfer:
- memory (install after logic board is in place)
- video card • optical, HDD, & SSD data cables
4 Apply new Ethernet ID label (included in box with new logic board) to bottom of stand.
5 Use the Blank Board Serializer tool to set computer's serial number on new logic board.
6 Note: You can install the logic board with the computer positioned as shown or with the computer standing upright.
Important: Make sure the memory modules are removed for installation and no cables are trapped between the logic board and rear housing.

7 Lower board into rear housing. Connect 2-3 cables on the back side, depending on the drive configuration:
- DC power cable (#1)
- SSD data cable (#2)
- HD data cable (#3)
Important! Make sure the DC Power cable is securely inserted into connector.

8 Check that the video card cable is connected to the back side of the board

9 Observe how the optical data cable routes over top of DC power cable and extends out to the side.
Keep the optical cable out of the way as the board is lowered into place.

10 As you lower the board, position cables into lowest notch on pressure wall.
Note: Line up board with edge of CPU fan and screw standoffs.

11 Connect 14 cables to the logic board.
(1) power button (2) CPU fan (3) skin temp sensor (4) hard drive temp sensor or HD jumper (if SSD-only config) (5) hard drive fan (6) camera (7) Bluetooth (8) ambient temp sensor (9) AirPort (10) microphone (11) secure digital (SD) (12) audio ports (13) left speaker (14) right speaker

12 Insert cable connectors into the I/O ports to align the board to the ports before replacing the screws.

13 Replace 8 T10 screws S=short (2) M=medium (2) L=long (4)

Video Card
First Steps
Remove
- Glass panel
- LCD panel • Power supply
- Backlight pressure wall • Optical drive • Optical fan
- IR board
- Memory
- Logic board

Tools
- Torx T8 screwdriver
- Torx T10 screwdriver • ESD-wrist strap and mat

Removal
1 Remove 3 screws attaching video card to bracket.
• (1) 922-7971, T10

• (2) 922-4723, T8

2 Disconnect video card temp sensor from logic board.

3 Support video card as you slide card and heatsink out of slot on logic board.
Replacement Note:
If you replace the logic board, transfer video card and video card bracket to replacement logic board.
Refer to the next page if removing video card bracket from logic board.

1 To remove the bracket, remove 3 T8 screws on front side of logic board.
• 922-4723

2 Carefully slide video bracket off logic board. Be careful not to bump DisplayPort connector as you slide the bracket off.

Solid State Drive (SSD)
First Steps
Remove - Glass panel - LCD panel • Power supply - Backlight pressure wall • Optical drive - Optical fan - IR board - Memory - Logic board
Note: The SSD-only option will have an HDD temp sensor jumper (922-9628) in the HDD temp sensor connector location on the logic board. It shorts out the HDD temp sensor when there's no HDD in the system. Transfer this jumper if replacing the logic board.

Tools
- Torx T8 screwdriver
- black stick • ESD-wrist strap and mat

Removal
1 Note: There are two SSD drive configs:
- HDD + SSD or,
- SSD-only
This graphic shows the HDD + SSD configuration.
2 Disconnect 3 cables from the cable bundle:
• HDD data & power cables (A)
- SSD data cable (B)
- SSD power cable (C)
3 Remove 1 T8 screw in bottom left corner of the pressure wall.
• 922-9488


4 Use a black stick to pry pressure wall off rear housing. Dotted lines represent adhesive on under side of pressure wall. Exert some force to release adhesive.
5 Lift pressure wall and SSD drive from rear housing.

6 Turn pressure wall over. Remove 4 screws securing SSD drive to pressure wall.
• 922-9488


Reassembly
1 Make sure the Bluetooth cable routes over the top of the SSD drive and pressure wall.

2 On SSD-only configs (no Hard drive), make sure HDD temp sensor jumper is connected to HD temp sensor connector on logic board.
If jumper is absent, the fans will run at full speed.

SSD Data Cable
First Steps
Remove
- Glass panel
- LCD panel • Power supply
- Backlight pressure wall • Optical drive • Optical fan
- IR board
- Memory
- Logic board

Tools
• ESD-wrist strap and mat

Removal
1 Disconnect SSD data cable from top of SSD drive.
Replacement Note:
The SSD cable connects to the middle connector of three connectors at the top of the SSD drive. The connector on the left (closest to the hard drive) is unused.

Optical/MXM Pressure Wall
First Steps
Remove
- Glass panel
- LCD panel • Power supply
- Backlight pressure wall • Optical drive • Optical fan
- IR board
- Memory
- Logic board

Tools
- Torx T10 screwdriver • ESD-wrist strap and mat

Removal
Note: Observe the Bluetooth and microphone cable routing before removing the pressure wall. The Bluetooth cable routes over the pressure wall and the microphone cable routes under (illustration shows a non-SSD config). On SSD configs the Bluetooth cable routes over the top of the SSD drive.
1 Remove 1 T8 screw on pressure wall.
• 922-9241

2 (Illustration shows SSD drive config) Use a black stick to pry pressure wall off rear housing. Dotted line represents location of adhesive. Exert some force to release pressure wall.
3 If replacing pressure wall and the SSD drive is installed, remove SSD drive from pressure wall and transfer SSD to new pressure wall.


Hard Drive Data Cable
First Steps
Remove - Glass panel - LCD panel • Power supply - Backlight pressure wall • Optical drive • Optical fan - IR board - Memory - Logic board
Note: One end of hard drive data cable attaches to back side of logic board.

Tools
• ESD-wrist strap and mat

Removal
1 Disconnect hard drive data cable from side of hard drive.

2 Disconnect other end from back side of logic board.

Replacement Note:
As you lower logic board, route DC power cable and hard drive cable into notch on pressure wall.

Optical Drive Data Cable
First Steps
Remove
- Glass panel
- LCD panel • Power supply
- Backlight pressure wall • Optical drive • Optical fan
- IR board
- Memory
- Logic board
Note: Optical drive data cable attaches to back side of logic board.

Tools
• ESD-wrist strap and mat

Removal
Disconnect optical data cable from back side of logic board.

Replacement Note:
Hold the optical cable with your thumb as you lower the logic board into rear housing. Make sure optical data cable:
- routes over the top of the DC power cable • extends out to side once the logic board is lowered

Battery
First Steps
Remove - Glass panel - LCD panel • Power supply - Backlight pressure wall • Optical drive • Optical fan - IR board - Memory - Logic board
Note: Battery is located on the back side of logic board.

Tools
- Black stick • ESD mat and wrist strap

Removal
1 Use a black stick to pry battery from battery socket on back side of logic board.

Reassembly
1 Make sure battery socket is open and free of dust. 2 Press battery (922-9626) into socket with engraved markings (+ side) facing up.

Right Speaker
First Steps
Remove
- Glass panel
- LCD panel • Power supply
- Backlight pressure wall • Optical drive • Optical fan • Audio ports
- IR board
- Memory
- Logic board

Tools
- Torx T10 screwdriver • ESD-wrist strap and mat

Removal
1 Remove 1 T10 screw. • 922-9242


2 Rotate speaker to the left and lift out of rear housing.

CPU Fan
First Steps
Remove
- Glass panel
- LCD panel • Power supply
- Backlight pressure wall • Optical drive • Optical fan
- IR board
- Memory
- Logic board

Tools
- Torx T10 screwdriver
- ESD-wrist strap and mat

Removal
1. Remove 2 T10 shoulder screws.
· 922-9236

2. Lift fan up and out of rear housing.
3. Note guidepot on fan that will fit into bottom of rear housing on reassembly.
4. Note routing of ambient temp sensor cable and left speaker cable through clips on fan.
5. Remove ambient temp sensor and left speaker cable from fan.
Replacement Note:
Transfer ambient temp sensor to replacement fan.


Reassembly
1. Route sensor cable through clip on fan.

2. Route ambient sensor cable under fan and along with fan cable, route through clip on the side of fan.

Ambient Temp Sensor
First Steps
Remove
- Glass panel
- LCD panel • Power supply
- Backlight pressure wall • Optical drive • Optical fan
- IR board
- Memory
- Logic board
- CPU fan

Tools
- Black stick • ESD-wrist strap and mat

Removal
1 Note routing of temp sensor cable through clips on fan.
2 Release sensor cable from 2 cable clips on CPU fan.
Replacement Note: If you are replacing CPU fan, transfer sensor cable to replacement CPU fan.

Reassembly
Route the ambient sensor cable under the fan and along with the fan cable, then route them through the clip on the side of the fan.

Left Speaker
First Steps
Remove
- Glass panel
- LCD panel • Power supply
- Backlight pressure wall • Optical drive • Optical fan
- IR board
- Memory
- Logic board • CPU fan

Tools
- Magnetized Torx T10 screwdriver • ESD-wrist strap and mat

Removal
1. Remove 1 T10 screw. • 922-8249

2. Lift speaker out of rear housing.

Reassembly
1. Route speaker cable around bottom of CPU fan and through clip on side of CPU fan.

2. Route speaker cable above AC power inlet and toward right speaker. Tuck speaker cable under cable clips in rear housing.

Hard Drive Fan
First Steps
Remove
- Glass panel
- LCD panel • Power supply
- Backlight pressure wall • Optical drive • Optical fan
- IR board
- Memory
- Logic board

Tools
• Magnetized Torx T10 screwdriver • ESD-wrist strap and mat

Removal
1. Remove 1 T10 screw.
• 922-9236

2. Pull the fan straight up and off the guide posts.

Mechanism Cover
First Steps
Remove
- Glass panel
- LCD panel • Power supply
- Backlight pressure wall • Optical drive • Optical fan
- IR board
- Memory
- Logic board
- Hard drive fan • Optical pressure wall

Tools
• ESD-wrist strap and mat - Magnetized Torx T10 screwdriver

Removal
1. Peel up the aluminum tape.
2. Remove 4 T10 screws: two at the top (larger screws) and two smaller screws at the bottom.
• (2) 922-6800

• (2) 922-9238 (same screws as mechanism)


3. Pry the cover off the mechanism.

Stand
First Steps
No preliminary steps are required to remove the stand.

Tools
- Torx T10 screwdriver
- Access card to lock/unlock the stand • ESD-wrist strap and mat

Removal
1. Place the computer face down on a table so that the base of the stand extends over the table edge. 2. Press the stand down and insert an access card into the slot between the top of the stand and the rear housing.

3. Insert the card as far as it will go, and press the stand down until you hear a click—the audible cue that tells you that the stand is locked into place. 4. Remove the access card.

5 Remove 8 T10 screws.
· 922-8174

6 Separate the stand from the clutch mechanism.

Reassembly
1 Align the pin on the clutch mechanism to the central hole in the stand. 2 Replace 8 T10 screws. 3 Place the computer face down on a table so that the base of the stand extends over the table edge. Press the stand down and insert an access card into the slot between the top of the stand and the rear housing.

4 Insert the access card as far as it will go. Gently lift the stand approximately two inches to unlock the clutch mechanism, and then remove the access card. The clutch mechanism should now be unlocked.
5 Stand the computer upright.

Mechanism
First Steps
Remove
- Glass panel
- LCD panel • Power supply
- Backlight pressure wall • Optical drive • Optical fan
- IR board
- Memory
- Logic board
- Hard drive fan • Optical pressure wall
- Mechanism cover
- Stand

Tools
- Magnetized Torx T10 screwdriver • ESD-wrist strap and mat

Removal
1 Remove 6 T10 screws: • 922-9238

2 Lift mechanism off rear housing.

Bluetooth Cable
First Steps
Remove
- Glass panel
- LCD panel • Power supply
- Backlight pressure wall • Optical drive
- Optical fan
- IR board
- Memory
- Logic board

Tools
• ESD-wrist strap and mat

Removal
1. Disconnect the black Bluetooth cable from the Bluetooth board.

2. Follow the cable along to the right... to the right of the mechanism.

3. Peel back the EMI tape securing the Bluetooth cable to the rear housing. Lift the cable from the rear housing.
Replacement Note:
The cable routes over the notch of the optical pressure wall and connects to the top of the logic board.
Note: In the SSD drive configurations, the Bluetooth cable routes over the top of the SSD drive.

Camera Cable
First Steps
Remove
- Glass panel
- LCD panel
- Camera
- Hard drive • Power supply • Power supply pressure wall

Tools
- ESD-wrist strap and mat

Removal
1 Disconnect camera cable from camera board at top of rear housing.

2 Disconnect camera cable (#5) from the top of logic board.

3 Remove EMI tape at top of camera cable. Lift pressure wall to remove camera cable from rear housing.
Replacement Note:
The camera cable runs along the right side of the pressure wall, next to the hard drive and through the lower notch in the pressure wall.

Cable, AC/DC Power/Backlight/SATA
First Steps
Remove
- Glass panel
- LCD panel • Power supply
- Backlight pressure wall • Optical drive • Optical fan
- IR board
- Memory
- AirPort Carrier
- Logic board

Tools
• ESD-wrist strap and mat

Removal
1. Observe cable routing for reassembly. 2. Release cable from cable clips and lift out of rear housing.

Replacement Note: The bottom section of cable bundle routes through the lower notch on the optical pressure wall.
Cable, AC/DC Power/Backlight/SATA, SSD
First Steps
- Glass panel
- LCD panel • Power supply
- Backlight pressure wall
- Optical drive • Optical fan
- IR board
- Memory
- AirPort card
- AirPort carrier
- Logic board

Tools
• Magnetized Torx T10 screwdriver - Black stick • ESD-wrist strap and mat

Removal
1. Disconnect SSD drive power cable from top of SSD drive.

2. Release cable from black cable clips and lift out of rear housing.

Replacement Note: The bottom section of cable bundle routes through the lower notch on the optical pressure wall.

Microphone Cable
First Steps
The microphone cable is part of the rear housing and is not available as a separate part.
Refer to the rear housing procedure.

Rear Housing
First Steps
Remove
- Glass panel
- LCD panel
- Camera
- Bluetooth board
- AirPort cable • AirPort carrier board
- Backlight board • Power supply
- Hard drive
- SSD drive (CTO option)
- Bluetooth cable
- Camera cable
- Camera • Optical drive • Optical drive fan
- SD Card Reader
- SD cable
- Audio cable
- IR board & cable
- Logic board • DC/SATA/SSD/backlight power cable
- CPU fan
- Ambient temp sensor
- Left speaker
- Right speaker
- Hard drive fan
- Mechanism cover
- Stand
- Mechanism
- Pressure walls (3)

With all other modules removed, the rear housing is the remaining assembly.
A new rear housing includes the following parts:
• SD card reader and SD cable (also available separately) • optical drive bezel kit (see reassembly, step 2) • AirPort antenna in silver circle behind Apple logo on back of computer • microphone and cable • skin temp sensor and cable • power button and cable • AC inlet • Aluminum tape • Foam gaskets
Reassembly
When replacing the rear housing, follow these important steps:
1. Handling: Handling the rear housing incorrectly could flex the aluminum and cause alignment issues.
Always handle the rear housing with two hands, holding the lower left and right corners.
Never carry the rear housing with a single hand, or by the aluminum "chin" near the Apple logo.

2. Optical Drive Bezel
When replacing the rear housing, if the unit has a Sony optical drive mechanism, it may need a different optical drive bezel. A new bezel kit is included with a new rear housing.
Check the EEE code in the serial number of the bezel. The EEE code is located at the end of the serial number, starting with the 4th digit from the end. If the EEE code is A2W, continue with the procedure.

3. Remove foil tape and gaskets. Examine plastic tabs under foil tape. Notice that some tabs go on the outside surface and some on the inside surface of the drive. 4. Remove 4 bezel screws, 2 on each side. 5. Remove old bezel and install new bezel, taking care that tabs are properly aligned. 6. Reinstall 4 screws. 7. Apply new foil tape and 2 gaskets (included with new bezel kit) as shown. 8. Once computer is fully reassembled, test optical drive (inject, read, eject) before returning to customer.

9 Transfer Camera and Reuse Thermal Paste:
Transfer camera from old rear housing to new rear housing and reuse thermal paste from old rear housing.
Use a black stick to remove and reapply thermal paste to camera (circled).
Note: A syringe of thermal paste is available as needed, part number 922-9625, good for 5 applications.
Important: This white thermal paste should NOT be used for any other purpose (such as portable computer heatsinks).

10 Apply aluminum tape and foam gasket:
Install aluminum tape (#1) and foam gasket (#2) as shown.
Aluminum tape placement continued on next page.

11 Place the two new pieces of aluminum tape over the right and left sides of the mechanism cover
12 Transfer:
- Bluetooth and AirPort antennas
- Bluetooth cable
- camera cable
- 3 pressure walls
13 Replace the remaining modules.

Additional Procedures
iMac (27-inch, Mid 2010)
Retrieving Mechanism
Overview
Without a stand or VESA mount installed, the mechanism can retract inside the computer if an access card trips the latch that locks the mechanism.
In the rare event that retrieving the mechanism is necessary, follow this procedure.
Note: You may notice small differences in appearance between the images in this procedure and the computer you are servicing. Although the appearance may differ, the steps and sequence are the same unless noted.

Tools
- Access card (Apple part #922-7172) • Retrieval tool (Apple part #922-7849) • Scissors to cut access card in half

Removal
1. Place computer face down on a clean, soft surface. 2. Peer into stand slot to see recessed latch. Latch is a shiny metal spring clip located above mechanism that is almost as wide as stand slot.

3. Cut access card in half vertically, into two equal halves.
4. Insert half of access card into one end of stand slot and push latch away to get a sense of how latch moves.

5. Notice shape of retrieval tool. When inserting retrieval tool, make sure curved end of tool is down, as shown. 6. The small hole on end of retrieval tool will hook onto pin on recessed mechanism.

7. Hold access card so latch is pushed as far as possible. 8. Align retrieval tool over pin on mechanism. 9. Have an assistant hold computer down firmly as you simultaneously push latch away and pull mechanism towards you.
Note: There is a lot of tension on the mechanism and it will take a lot of force to pull it up.

10 When you can pull up the mechanism and see it emerge through the slot, maintain pull force on the retrieval tool, but remove the access card. 11 Pull up the mechanism until it clicks or locks into place.

12 The mechanism is now ready to accept installation of the stand or VESA mount.

Views
iMac (27-inch, Mid 2010)
Exploded Views
Exploded View #1
Exploded View #2
Exploded View #3

External Views
Rear View

Ports
![graph TD 1["1"] --> A["Switch"] 2["2"] --> B["Switch"] 3["3"] --> C["Switch"] 4["4"] --> D["Switch"] 5["5"] --> E["Switch"] 6["6"] --> F["Switch"] style 1 fill:#FFD700,stroke:#333 style 2 fill:#FFD700,stroke:#333 style 3 fill:#FFD700,stroke:#333 style 4 fill:#FFD700,stroke:#333 style 5 fill:#FFD700,…](/content/2026/06/1251651/images/4b309dea5a50e594c2403b19d203efc0f28762220f47034ae6a97edd9a4c98b6.jpg)
1 - Headphone out/optical digital audio out port 2 - Audio in/optical digital audio in port 3 - USB 2.0 ports (4) 4 - FW 800 port 5 - Mini DisplayPort 6 - Ethernet port (10/100/1000 Base-T)
Internal Views
Photo of Components below LCD

Photo of Components in the Rear Housing
Logic Board, Front Side

Logic Board, Back Side
Screw Chart
Note: Screws are not to scale.
922-9246T10 LCD panel (8) LCD panel (8) | 922-9239T10 Camera (2) Camera (2) | 922-4723T8 Bluetooth antenna (2), AirPort antenna (2), video card (2), video card bracket (3) Bluetooth antenna (2), AirPort antenna (2), video card (2), video card bracket (3) |
922-9247T8 Bluetooth board (1) Bluetooth board (1) | 922-8579T6 AirPort card (1) AirPort card (1) | 922-6850T10 AirPort carrier board (2), LED backlight board (4), Power supply (1), Hard drive (2), Optical drive (4), AC inlet (3) AirPort carrier board (2), LED backlight board (4), Power supply (1), Hard drive (2), Optical drive (4), AC inlet (3) |
922-9244T10 Power supply, machine (2) Power supply, machine (2) | 922-9593T10 Power supply, long (1), Logic board, long 24mm (4) Power supply, long (1), Logic board, long 24mm (4) | 922-9241T8 SD card reader (1) SD card reader (1) |
922-9136T10 Hard drive bracket to HDD (2) Hard drive bracket to HDD (2) | 922-7001T10 Hard drive pins (2) Hard drive pins (2) | 922-9245T10 Audio cable (2) Audio cable (2) |
922-9236T10 Optical fan (1), CPU fan (2), Hard drive fan (1) Optical fan (1), CPU fan (2), Hard drive fan (1) | 922-6800T10 Logic board, short (2), Mechanism cover, small (2) Logic board, short (2), Mechanism cover, small (2) | 922-9237T10 Logic board, medium 20mm (2) Logic board, medium 20mm (2) |
922-9243T10 Logic board, long, 24mm (4) Logic board, long, 24mm (4) | 922-9242T10 Right speaker (1), Left speaker (1) Right speaker (1), Left speaker (1) | 922-9238T10 Mechanism cover (2), Mechanism (6) Mechanism cover (2), Mechanism (6) |
922-8174T10 Stand (8) Stand (8) | 922-9488T8[8x28]SDD bracket to SSD drive (1) | 922-7018T10Optical drive bezel to ODD (4) |
922-7971T10 Video card bracket (1) Video card bracket (1) |
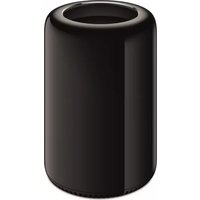


- APPLE TECHNICIAN GUIDE
- IMAC (27-INCH, MID 2010)
- CONTENTS
- ABOUT THIS GUIDE
- UPDATES
- FEEDBACK
- BASICS
- OVERVIEW
- TROUBLESHOOTING
- GENERAL TROUBLESHOOTING
- SYMPTOM CHARTS
- TAKE APART
- GENERAL INFORMATION
- ACCESS DOOR
- MEMORY
- GLASS PANEL
- CAMERA
- LCD PANEL
- VERTICAL SYNC CABLE (VSYNC)
- LED TEMP SENSOR CABLE
- DISPLAYPORT CABLE
- AUDIO PORTS AND CABLE
- AIRPORT ANTENNA
- AIRPORT CARD
- AIRPORT CARRIER BOARD
- AIRPORT CABLE
- BLUETOOTH ANTENNA
- BLUETOOTH BOARD
- LED BACKLIGHT BOARD
- POWER SUPPLY
- BACKLIGHT PRESSURE WALL
- POWER SUPPLY/HARD DRIVE PRESSURE WALL
- HARD DRIVE
- HARD DRIVE SENSOR CABLE
- OPTICAL DRIVE
- STAND
- MECHANISM
- BLUETOOTH CABLE
- CAMERA CABLE
- MICROPHONE CABLE
- REAR HOUSING
- ADDITIONAL PROCEDURES
- RETRIEVING MECHANISM
- VIEWS
- EXPLODED VIEWS
- EXTERNAL VIEWS
- INTERNAL VIEWS
- SCREW CHART
- UPDATED 9 SEPTEMBER
- UPDATED 9 AUGUST
- APPLE TECHNICIAN GUIDE INTRODUCED 27 JULY
- IDENTIFYING FEATURES
- PRODUCT CONFIGURATIONS
- SAFETY PRECAUTIONS
- SERIAL NUMBER LOCATION
- NEW ACCESSORIES
- MAGIC TRACKPAD
- ABOUT THE INDICATOR LIGHT
- TURN ON THE TRACKPAD
- PAIRING THE MAGIC TRACKPAD
- INSTALLING BATTERIES
- APPLE BATTERY CHARGER
- BATTERIES
- STATUS LIGHTS
- WIRELESS TROUBLESHOOTING
- UPDATE SYSTEM SOFTWARE & FIRMWARE
- TROUBLESHOOTING THEORY
- HARDWARE VS. SOFTWARE
- COMMON RESET PROCEDURES
- POWER ON SELF TEST (POST)
- RESETTING THE SYSTEM MANAGEMENT CONTROLLER (SMC)
- RESETTING PARAMETER RAM (PRAM)
- STARTING UP IN SAFE MODE
- REMOVING THE BATTERY, MEASURING DC VOLTAGE
- DIAGNOSTICS
- SENSORS ERRORS
- SENSOR LOCATIONS
- DIAGNOSTIC LEDS
- LOCATION OF DIAGNOSTIC LEDS
- LED FUNCTIONS
- LED
- LED STARTUP SEQUENCE
- LOGIC BOARD TEST POINTS
- FUNCTIONAL OVERVIEW
- BLOCK DIAGRAM
- STARTUP AND POWER
- NO POWER, DEAD UNIT
- WON'T START UP
- INTERMITTENT SHUTDOWN
- TROUBLESHOOTING SHUTDOWN CAUSES
- SHUTDOWN EVENTS CAN BE CATEGORIZED INTO FOUR DIFFERENT AREAS
- USER-RELATED SHUT DOWNS
- ACTIVITY-RELATED SYSTEM SHUT DOWNS
- POWER-RELATED SYSTEM SHUT DOWNS
- HARDWARE-RELATED SYSTEM SHUT DOWNS
- KERNEL PANIC, SYSTEM CRASHES
- NO VIDEO
- CORRUPTED VIDEO
- BURNT SMELL/ODOR
- UNCATEGORIZED SYMPTOMS
- QUICK CHECK
- DEEP DIVE
- DISPLAY
- BACKLIGHT ISSUE/NO BACKLIGHT
- NOISE / UNSTABLE FLICKERING
- LCD IMAGE ISSUES
- INCORRECT/MISSING COLORS
- DISTORTED/BLURRED IMAGE
- PIXEL ANOMALIES
- VERTICAL/HORIZONTAL LINES
- SYMPTOMS QUICK CHECK
- NON-UNIFORM BRIGHTNESS / COLOR
- COSMETIC DEFECTS
- MASS STORAGE
- HARD DRIVE NOT RECOGNIZED
- HARD DRIVE READ/WRITE ERRORS
- HARD DRIVE NOISY
- OPTICAL DRIVE NOT RECOGNIZED
- OPTICAL DRIVE WON'T ACCEPT/EJECT MEDIA
- OPTICAL DRIVE READ/WRITE ERROR
- OPTICAL DRIVE NOT PERFORMING TO SPECIFICATIONS
- OPTICAL DRIVE NOISY
- SD CARD WILL NOT INSERT INTO SLOT
- SD CARD NOT RECOGNIZED
- COMMUNICATIONS
- AIRPORT/BLUETOOTH ISSUES
- AIRPORT CARD KERNEL PANIC
- ETHERNET PORT/DEVICE ISSUE
- WIRELESS INPUT DEVICE DOES NOT PAIR
- INPUT/OUTPUT DEVICES
- APPLE REMOTE INOPERABLE
- AUDIO: MICROPHONE
- AUDIO: BUILT-IN SPEAKERS HAVE DISTORTED SOUND
- AUDIO: NO AUDIO FROM BUILT-IN SPEAKERS
- CAMERA ISSUES
- FIREWIRE DEVICE NOT RECOGNIZED
- USB DEVICE NOT RECOGNIZED
- WIRED KEYBOARD DOES NOT FUNCTION PROPERLY
- KEYBOARD: SPECIFIC KEYS DO NOT RESPOND
- WIRED KEYBOARD/MOUSE NOT RECOGNIZED
- APPLE WIRELESS MOUSE/MAGIC TRACKPAD ERRATIC TRACKING
- WIRELESS INPUT DEVICE LOSES CONNECTION
- APPLE BATTERY CHARGER DOES NOT CHARGE BATTERIES
- MECHANICAL
- NOISE/HUM/VIBRATION
- FAN FAILURES / THERMAL ISSUES
- STAND/HINGE ISSUES
- PHYSICAL DAMAGE
- OPENING THE UNIT
- REQUIRED TOOLS
- REQUIRED SPECIAL TOOLS FOR GLASS PANEL
- CLEANING TOOLS STARTER KIT
- CLEANING & HANDLING THE GLASS PANEL
- DO'S AND DON'TS
- DO
- DON'T
- HANDLING A BROKEN GLASS PANEL
- HOW TO REMOVE A BROKEN GLASS PANEL
- SAFETY
- LOGIC BOARD HANDLING
- REASSEMBLY STEPS
- NOTE ABOUT IMAGES IN THIS MANUAL
- SCREW SIZES
- FIRST STEPS
- TOOLS
- REMOVAL
- REASSEMBLY
- IMPORTANT
- REASSEMBLY NOTE
- PULL DISPLAY FORWARD SLIGHTLY TO DISCONNECT
- GENTLY REMOVE THE DISPLAYPORT CABLE
- LIFT THE LCD PANEL OFF REAR HOUSING
- HANDLING THE PANEL
- IN THE FOLLOWING ORDER, CONNECT
- PRESS STICKY DISPLAYPORT CABLE ONTO THE VIDEO CARD BRACKET
- REPLACEMENT NOTE
- WARNING: HIGH VOLTAGE
- OPTICAL SENSOR CABLE
- OPTICAL DRIVE FAN
- SD CARD READER
- SD CARD READER CABLE
- IR BOARD AND CABLE
- LOGIC BOARD
- HANDLING THE LOGIC BOARD
- TRANSFER
- VIDEO CARD
- SOLID STATE DRIVE (SSD)
- SSD DATA CABLE
- OPTICAL/MXM PRESSURE WALL
- HARD DRIVE DATA CABLE
- OPTICAL DRIVE DATA CABLE
- BATTERY
- RIGHT SPEAKER
- CPU FAN
- AMBIENT TEMP SENSOR
- LEFT SPEAKER
- HARD DRIVE FAN
- MECHANISM COVER
- CABLE, AC/DC POWER/BACKLIGHT/SATA
- CABLE, AC/DC POWER/BACKLIGHT/SATA, SSD
- TRANSFER CAMERA AND REUSE THERMAL PASTE
- APPLY ALUMINUM TAPE AND FOAM GASKET
- EXPLODED VIEW
- PORTS
- LOGIC BOARD, FRONT SIDE
Brand : APPLE
Model : iMac 27" Core i5-3.2
Category : Desktop computer