
KAMN44DQUCLA - Tracking Kogan - Free user manual and instructions
Find the device manual for free KAMN44DQUCLA Kogan in PDF.


| Brand | Kogan |
| Model | KAMN44DQUCLA |
| Product Type | Curved Dual QHD USB-C Monitor |
| Screen Size | 44.5 inches |
| Resolution | 5120 x 1440 (Dual QHD) |
| Aspect Ratio | 32:9 |
| Refresh Rate | 120 Hz |
| Contrast Ratio | 3000:1 (TYP) |
| Viewing Angle | 178° (H) / 178° (V) |
| Color Depth | 16.7 million colors |
| Power Input | 100-240V~ 50/60Hz 3.5A |
| Power Output (USB-C PD) | 90W (20V 4.5A) |
| Dimensions (with stand) | 1083.4 x 554.5 x 316.2 mm |
| Dimensions (without stand) | 1083.4 x 372.0 x 193.3 mm |
| Tilt Angle | -5° to +13° (±2°) |
| Height Adjustment | 95 mm (±5 mm) |
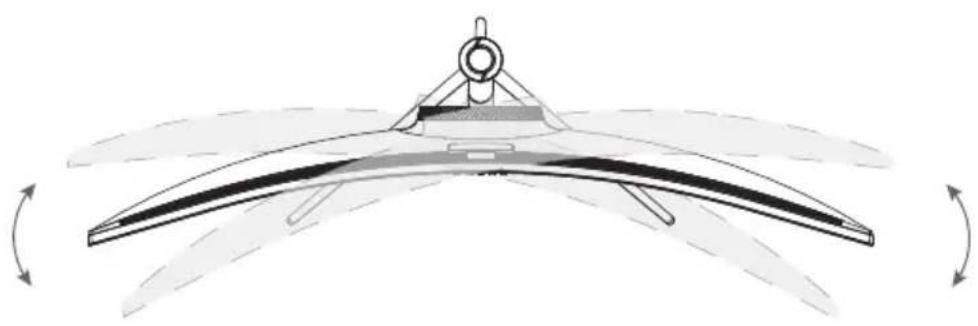
| Rotation Angle | ±13° (±2°) |
| Connectivity | 2x HDMI, 1x DP, 1x USB-C (with PD 90W), 1x USB-B, 2x USB-A, RJ45, Audio Out |
| Built-in Features | Pop-up camera, microphone, speakers, OSD controls, PIP/PBP |
| HDR Support | HDR 400 |
| Mount Pattern (VESA) | 100 x 100 mm |
Frequently Asked Questions - KAMN44DQUCLA Kogan
User questions about KAMN44DQUCLA Kogan
0 question about this device. Answer the ones you know or ask your own.
Ask a new question about this device
Download the instructions for your Tracking in PDF format for free! Find your manual KAMN44DQUCLA - Kogan and take your electronic device back in hand. On this page are published all the documents necessary for the use of your device. KAMN44DQUCLA by Kogan.
USER MANUAL KAMN44DQUCLA Kogan
natural_image
Exterior view of a modern curved monitor with three legs and a small screen on top (no visible text or symbols)44.5" Curved Dual QHD USB-C Monitor
5120*1440, HDR 400, 120Hz
KAMN44DQUCLA
SAFETY & WARNINGS
- Read all instructions before using the appliance and retain for reference.
- This monitor is designed with ventilation holes on the back of the casing. Do not cover or block them.
- Do not insert any object or spray any liquid into the vents.
- Avoid placing the monitor near heaters, stoves, fireplaces or other sources of heat, as well as in rooms lacking adequate ventilation.
- Do not position the monitor in unsafe locations. If the monitor falls, it may be damaged and may injure nearby people.
- Unplug the monitor if it is not going to be used for an extended period.
- Do not place heavy objects on the monitor, its power cord or any connected cable.
- Do not open the back panel of the monitor, as it contains a high-voltage current even when not plugged in.
- There is a polarizer layer (not a protective film) on the surface of the screen. Do not peel it off, or the product may be damaged and the warranty will be invalid.

HIGH-DEFINITION MULTIMEDIA INTERFACE
The terms HDMI and HDMI High-Definition Multimedia Interface, and the HDMI Logo are trademarks or registered trademarks of HDMI Licensing Administrator, Inc. in the United States and other countries.
COMPONENTS
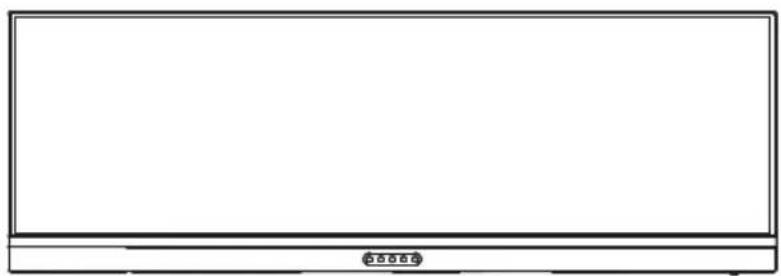
natural_image
Front view of a blank rectangular monitor with a small logo at the bottom (no text or symbols on the screen)Monitor


natural_image
Simple line drawing of a three-leaf tripod stand with a central circular element (no text or symbols)

Base Screws x4Stand Mount studs x4

natural_image
Line drawing of a U-shaped cable with two USB connectors (no text or symbols)
natural_image
Line drawing of a cable with a plug and connector (no text or symbols)
User guideDP signal cable Pc
OVERVIEW
Description of buttons
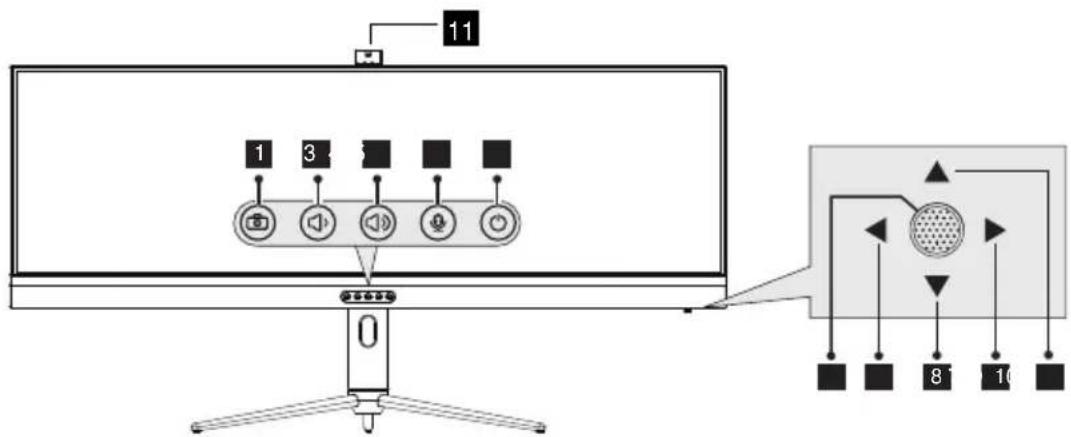
| Button | Function |
| 1 | Camera: Press to turn on/off. |
| 2 | Volume Down. |
| 3 | Volume Up. |
| 4 | Microphone: Press to turn on/off. |
| 5 | Power: Press to turn monitor on/off. |
| 6 | Confirm button: Enter the currently selected menu. |
| 7 | Rocker Switch Left: Press to return to the previous menu / exit menu. |
| 8 | Rocker Switch Down: Scroll menu down. |
| 9 | Rocker Switch Right: Scroll menu right. |
| 10 | Rocker Switch up: Scroll menu up. |
| 11 | Camera: Press to pop up to use the camera. |
*Please press to pop-up the camera first before use it to avoid the black screen.
*Can enter to OSD menu when press any rocker button.
Explanation of indicator light

Indicator light: Solid blue light indicates power is on and the monitor is operating normally. Flashing blue light indicates no video source, no horizontal or vertical signal has been detectable or voltage is low. Please ensure your computer is on and all video cables are fully inserted and/or connected.
ASSEMBLY
Installation of base
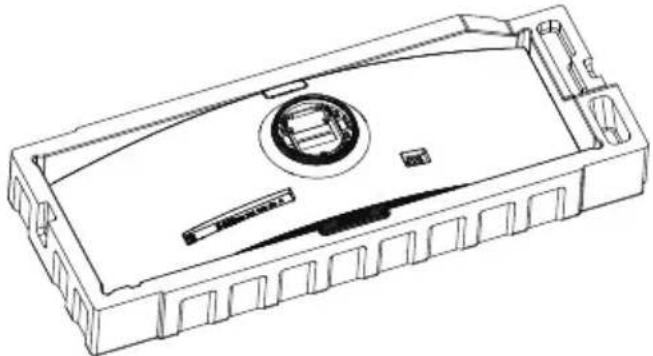
- Open the package and take out the product with the foam still attached. Gently place it on a desktop or table.
natural_image
Technical line drawing of a rectangular electronic device casing with internal components (no text or symbols)- Tighten the bracket and base together with the three screws as shown in the picture.

- Put the assembled base into the corresponding slot of the back shell, gently press the bracket to lock it into the lock, please make sure it can be locked.

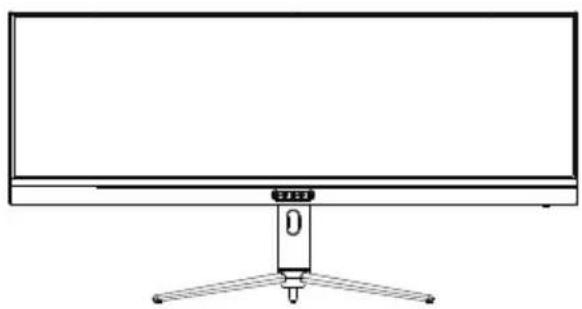
- Stand the monitor up on the assembled base. ((Note: Do not squeeze the screen directly with your hands during the process of standing up the monitor to prevent it from breaking)
natural_image
Line drawing of a flat-screen monitor with a stand and a small labeled component (no text or symbols)
natural_image
Line drawing of a monitor with a circular dial and stand, no text or symbols presentInstallation of mount
- Open the package to take out foams and put them on a flat tabletop.

natural_image
Technical line drawing of a mechanical housing or enclosure with internal components and mounting holes (no text or symbols)- Press the button to remove the stand plate, then tighten the included four mount studs onto the mounting holes on back of monitor.

- Install the monitor on the wall, mount, or fixture as desire. During hanging of the product, do not pinch the screen with hand to avoid damage to the screen.
Tips: The mounting hole distance of the mount for the product is 100x100mm.

Notes: To prevent the monitor on the mount from failing, please install it firmly and protect it fully. Do not place or hang any object on the mount, and the using height of the mount should be less than 2 meters.
ADJUSTMENT

Tilting angle -5.0^(±2.0^) - +13^(±2.0^)

Height adjustment 95mm(±5.0mm)
natural_image
Technical line drawing of a mechanical component with curved surfaces and directional arrows indicating rotation (no text or symbols)Rotation angle ±13°(±2.0°)
CONNECTIVITY
Cable connection

natural_image
Line drawing of a monitor with a central vertical stand and ports, no text or symbols presentHDMI Interface
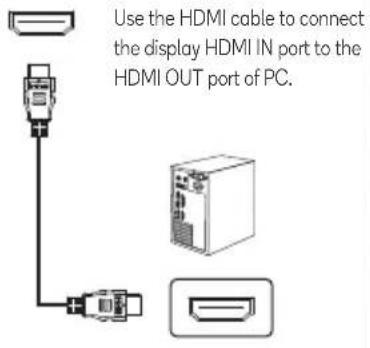
DP Port USB B Inter
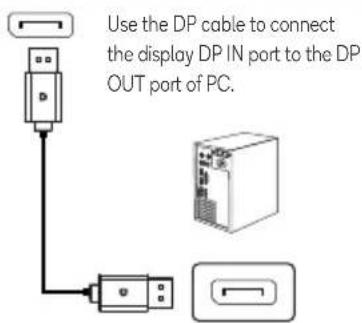
ace
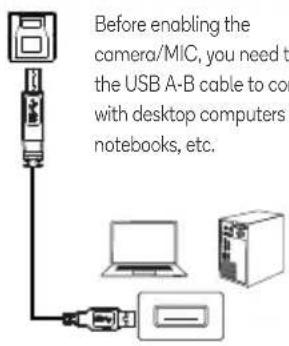
Type-C Interface USB A

interfaceAUDIO OUT

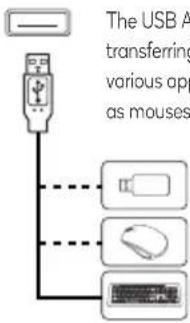
flowchart
graph TD
    A["USB"] --> B["Application"]
    B --> C["Application"]
    B --> D["Application"]
    B --> E["Application"]
RJ45 Interface

AC IN Interface
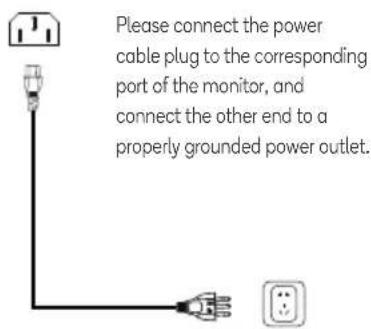
OPERATION
- The color and shape of the OSD menu may be slightly different of shown.
- OSD menu may changed by function improvements.
The On-Screen Display (OSD) menu allows you to adjust the monitor settings, turn on the monitor, and press any of the rocker buttons to display the navigation interface.
- Press any rocker button to enter the OSD main menu or enter sub-menus.

-
Push the rocker buttons ▲ or ▼ or ▶ to scroll through the functions.
-
Select the desired function, then push the rocker buttons center to enter the submenu.
- Push the rocker buttons ▲ or ▼ or ▶ to scroll through sub-menus, and push the rocker buttons center ○ to select and confirm the desired function.
-
Push the rocker buttons ▲ or ▼ or ▶ to select one option, and push the rocker buttons center ○ to confirm settings and exit from the current menu.
-
Push the rocker buttons ◀ to exit from the menu screen.
- Functions of the monitor vary with models, and the functions in this manual are for reference only.
| Main Menu Sub | Menu Option | |
| Game Settings | Standard Mode | Off/On |
| RTS/RPG Mode | Off/On | |
| FPS Arena Mode | Off/On | |
| MOBA Arena Mode | Off/On | |
| Adaptive-Sync | Off/On | |
| Shadow Balance | 0-100 | |
| Response Time | Off/Normal/Fast/Ultrafast | |
| Refresh Rate | Off/On/Position (Top Right/Top Left/Bottom Right/Bottom Left) | |
| Game Crosshair | Off/On (Crosshair1/Crosshair2/Crosshair3/Crosshair4/Crosshair5/Crosshair6) | |
| Game Time | Off/On (15:00/30:00/45:00/60:00) | |
| Dynamic Brightness | Off/Standard/Expert/Elaboration | |
| Off/HDR StandardHDR | ||
| MPRT | Off/On | |
| Picture Settings | 0-100Brightness | |
| Contrast | 0-100 | |
| DCR | Off/On | |
| Contextual Model | Off/On (Movie Mode/Reading Mode/Night mode/sRGB Mode) | |
| Low Blue Light | 0-100 | |
| Sharpness | 0-5 | |
| Gamma | 1.8/2.0/2.2/2.4/2.6/S.curve | |
| Aspect Ratio | Wide Screen/4:3/1:1/Auto | |
| Color Settings | Warm | Off/On |
| Natural | Off/On | |
| Cool | Off/On | |
| User1 | Off/On:0-100(R/G/B) | |
| User2 | Off/On:0-100(R/G/B) | |
| User3 | Off/On:0-100(R/G/B) | |
| Hue | 0-100(R/G/B/C/M/Y) | |
| Saturation | 0-100(R/G/B/C/M/Y) |
- Functions of the monitor vary with models, and the functions in this manual are for reference only.
| Main Menu Sub | Menu Option | |
| PIP/PBP | PIP/PBP Mode | Off/PIP Mode/PBP 2Win 1:1/PBP 2Win2:1/PBP 2Win1:2 |
| Sub-Signal Source | Type-C/DP/HDMI1/HDMI2 | |
| Audio Source | Auto/Type-C/DP/HDMI1/HDMI2 | |
| PIP Position | Top Right/Top Left/Bottom Right/Bottom Left | |
| PIP Size | Small/Medium/Large | |
| Window Swap | Off/On | |
| OSD Settings | Language | 简体中文/English/한국어/ Portuguese do Brasilazil/Deutsch/Nederland/Suomi/Français/Ελληνικά/Indonesia/Italiano/日本語/Malaysia/Polskie/Português/Русский/Espanol/ไทย/Українська/Tiếng Việt/繁体中文/Türkçe |
| 5-60OSD Time Out | ||
| 0-100OSD H-Position | ||
| 0-100OSD V-Position | ||
| 0-5OSD Transparency | ||
| OSD Lock | Off/On | |
| Other Settings | Input Signal | Auto/Type-C/DP/HDMI1/HDMI2 |
| Volume | 0-100 | |
| Sound effect | Standard/Game/Meeting | |
| Mute | Off/On | |
| HDMI Version | HDMI 5K/HDMI 4K | |
| DP Mode | DP 5K/DP 4K | |
| Eyeshield Remind | Off/On | |
| USB Switch | Type-B/Type-C | |
| USB Power(Sleep) | Off/On | |
| USB Upgrade | No/Yes | |
| Reset | No/Yes | |
| Input Source: /Resolution: /Mode: /HDR Ver:Information | ||
| Product model | KAMN44DQUCLA | |
| Product name | Liquid Crystal Display | |
| Screen size | 44.5inch | |
| Aspect ratio | 32:9 | |
| Viewing angle | 178°(H) / 178°(V) | |
| Contrast ratio | 3000:1(TYP) | |
| Color | 16.7M | |
| Resolution | 5120 x 1440 | |
| Refresh rate | 120Hz | |
| Power input | 100-240V~ 50/60Hz 3.5AThe standard voltage and power supply may vary with countries, please refer to the label at the back of the product. | |
| Power Output | PD 90W (20V 4.5A, 15V 3.0A, 12V 3.0A, 9V 3.0A, 5V 3.0A) | |
| Product dimensions | Without stand | 1083.4x372.0x193.3mm |
| With stand | 1083.4x554.5x316.2mm | |
| Tilting angle | Forward tilting-5°±2.0°; Backward tilting13°±2.0° | |
| Height range | 95±5mm | |
| Rotation angle | ±13°(±2.0°) | |
| Environmental conditions | Action | Temperature: 0°C~ 40°C (32°F ~ 104°F)Humidity: 10%~90% RH (non-condensing) |
| Storage | Temperature: -20°~ 60° (-4°F ~ 140°F)Humidity: 5%-95% RH (non-condensing) | |
NOTES
Need more information?
We hope that this user guide has given you the assistance needed for a simple set-up.
For the most up-to-date guide for your product, as well as any additional assistance you may require, head online to help.kogan.com
kogan.com


Brand : Kogan
Model : KAMN44DQUCLA
Category : Tracking