CX4492T - Microwave Oven Atag - Free user manual and instructions
Find the device manual for free CX4492T Atag in PDF.

User questions about CX4492T Atag
0 question about this device. Answer the ones you know or ask your own.
Ask a new question about this device
Download the instructions for your Microwave Oven in PDF format for free! Find your manual CX4492T - Atag and take your electronic device back in hand. On this page are published all the documents necessary for the use of your device. CX4492T by Atag.
USER MANUAL CX4492T Atag
When contacting the service department, have the complete type number to hand.
Sørg for at have hele typenummeret klar, när serviceafdelingen kontaktes.
Ha hele typenummeret for hånden när du kontakter serviceavdelingen.
You will find the addresses and phone numbers of the service organisation on the guarantee card.
Instructions for use
Microwave oven
Brugsvejledning
Mikrobølgeovn
Bruksanvisning
Mikrobølgeovn
Bruksanvisning
Mikrovågsugn
ATAG
700005131100

natural_image
Exterior view of a stainless steel oven with control panel and display (no visible text or symbols)CX4411T
CX4492T
NL

text_image
Two UI icons: a circular dial with rotational arrow and 'START' button, and a hand cursor clicking a circle.text_image
Digital display showing a rotary knob with bidirectional arrows and a digital clock reading '09:00' and '1:00'.text_image
Two UI icons: a circular dial with rotation arrows and a hand pressing a button labeled 'START'.natural_image
Circular device knob with diagonal stripes and control buttons (no visible text or symbols)natural_image
Hand cursor clicking a circular button with an eye symbol (no text or numbers present)
text_image
kg-Wnatural_image
Circular dial indicator with pointer and measurement markings (no text or symbols)natural_image
Hand cursor clicking a circular button with an eye symbol (no text or numbers present)
text_image
kg-Wnatural_image
Circular button with segmented design and bidirectional arrow, no text or symbols presentnatural_image
Hand holding a circular button with '°C' and letter 'c' inside, no text or symbols present
natural_image
Circular mechanical component with rotational arrows, no text or symbols presentnatural_image
Hand cursor clicking a circular button with an eye symbol (no text or numbers present)
natural_image
Circular mechanical component with curved arrows indicating rotation or cycle (no text or symbols)natural_image
Technical line drawing of an oven with two circular fans inside, no text or symbols presentnatural_image
Top-down technical diagram of an oven with two fans and cooling fans, labeled with numbers 2 and 3 (no text or symbols on the diagram itself)natural_image
Top-down schematic of an oven with two circular fans inside, showing internal structure and ventilation ducts (no text or symbols)text_image
Technical diagram of an oven with labeled parts, showing internal structure and numbered annotations.natural_image
Technical line drawing of an oven with internal compartments and ventilation ducts (no text or symbols)natural_image
Technical line drawing of an oven with two circular fans inside, no text or symbols presentnatural_image
Top-down schematic of a double boiler interior showing fan and vent (no text or labels)text_image
Technical diagram of an oven with labeled components, showing internal structure and numbered parts.natural_image
Top-down schematic of an oven with two circular vented chambers and internal structure (no text or symbols)natural_image
Circular button with gradient shading and diagonal stripes, no visible text or symbolsnatural_image
Hand holding a circular button with an eye symbol (no text or numbers present)
text_image
kg-Wnatural_image
Hand holding a circular button with '°C' and letter 'c' inside, no text or symbols presentnatural_image
Top-down schematic of an oven with two circular fans inside, showing internal structure and ventilation ducts (no text or labels)natural_image
Circular mechanical component with concentric rings and a central shaft (no visible text or symbols)natural_image
Hand cursor clicking a circular button with an eye symbol (no text or numbers present)
text_image
kg-Wnatural_image
Hand holding a circular button with '°C' and letter 'c' inside, no text or symbols presentnatural_image
Top-down schematic of an oven with two circular vented chambers and a central tray (no text or labels)natural_image
Simple circular diagram with diagonal lines inside, no text or symbols present
natural_image
Hand icon pointing at a circular button with an eye symbol (no text or numbers)natural_image
Circular button with directional arrows indicating rotation or refresh (no text or symbols)
natural_image
Hand icon pointing at a circular button with an 'O' symbol (no text or numbers present)
text_image
STARTnatural_image
Simple diagram of a circular object with diagonal stripes and a central circle, no text or symbols present.
natural_image
Hand icon pointing at a circular button with an eye symbol (no text or numbers)natural_image
Circular mechanical component with rotational arrows indicating motion (no text or symbols)
natural_image
Hand cursor clicking a circular button with an eye symbol (no text or numbers present)natural_image
Circular button with arrow indicating clockwise rotation (no text or symbols)
natural_image
Hand cursor clicking a button with a play button (no text or symbols)natural_image
Circular mechanical component with rotational arrows, no text or symbols presentnatural_image
Circular mechanical component with rotational arrows, no visible text or symbolsnatural_image
Hand holding a circular button with a play triangle icon (no text or symbols)
natural_image
Circular button with directional arrows indicating refresh or move (no text or symbols)natural_image
Hand icon pointing at a button with a play button (no text or symbols)
natural_image
Circular mechanical component with rotational arrows indicating motion (no text or symbols)
natural_image
Circular mechanical component with rotational arrows indicating motion (no text or symbols)
natural_image
Hand holding a button with a play button icon (no text or symbols)natural_image
Hand holding a circular button with an eye symbol (no text or labels)5
natural_image
Hand holding a circular button with '°C' and letter 'c' inside, no text or symbols present6

text_image
STARTnatural_image
Circular mechanical component with rotational arrows, no visible text or symbols
natural_image
Hand icon pointing at a button with a play button (no text or symbols)natural_image
Circular button with directional arrows indicating rotation or refresh (no text or symbols)3
natural_image
Circular mechanical component with rotational arrows, no text or symbols presentnatural_image
Hand holding a button with a play button icon (no text or symbols)
natural_image
Circular button with arrow indicating refresh or move (no text or symbols)natural_image
Hand icon pointing at a circular button with a play symbol (no text or numbers)
natural_image
Circular button with directional arrows indicating rotation or refresh (no text or symbols)natural_image
Hand holding a button with a play button icon (no text or symbols)
natural_image
Circular mechanical component with rotational arrows, no visible text or symbolsnatural_image
Simple circular diagram with diagonal lines and a marked point (no text or symbols)natural_image
Circular mechanical component with rotational arrows, no visible text or symbolsnatural_image
Circular button with directional arrows indicating rotation or refresh (no text or symbols)
text_image
STARTnatural_image
Illustration showing a washing machine with a circular vent and a hand pouring liquid into a microwave oven (no text or symbols)natural_image
Hand icon pointing at a button with a play button (no text or symbols)natural_image
Illustration of a hand cleaning a kitchen oven with a cloth (no text or symbols)flowchart
graph TD
    A["Receiving Oven with lid"] --> B["Heating Box with fabric"]
    B --> C["Ordering Window with fabric"]
    C --> D["Box with fabric inside oven"]
    D --> E["Screen with fabric inside oven"]
    E --> F["Box with fabric inside oven"]
    F --> G["Box with fabric inside oven"]
text_image
Control panel interface with digital display and navigation buttons labeled 'MENU' and directional arrowstext_image
Control panel interface with multiple display screens and function buttons, including 'OK', 'Cancel', 'OK', 'Cancel', and 'OK' icons.text_image
Control panel interface with digital display and navigation buttons labeled 'MENU' and directional arrowtext_image
Front panel of a digital appliance control interface with labeled buttons and display screen showing temperature readings.natural_image
Symbol of a trash bin crossed with diagonal lines, representing waste sorting or disposal (no text or labels)natural_image
Simple line drawing of a rectangular tray or container with no text or symbolsnatural_image
Isometric line drawing of two rectangular trays with dashed edges, no text or symbols presenttext_image
Grillegrinator Keramikback- blechnatural_image
Isometric view of a rectangular metal grate or rack structure (no text or symbols)text_image
Two UI icons: a circular dial with rotation arrows and a hand pressing a button labeled 'START'.natural_image
Two grayscale icons: a rotary knob with circular arrows and a digital display showing 100 o'clock (no text or symbols on the knob itself)text_image
Two UI icons: a circular dial with rotational arrows and a hand pressing a button labeled 'START'.text_image
Diagram of a kitchen oven with a dog inside, showing airflow direction and control buttonsnatural_image
Circular dial indicator with pointer and measurement markings (no text or symbols)natural_image
Hand cursor clicking a circular button with an eye symbol (no text or numbers present)
text_image
kg-Wnatural_image
Circular button with diagonal stripes and an arrow, no visible text or symbolsnatural_image
Circular button with segmented design and bidirectional arrow, no text or symbols presentnatural_image
Two grayscale icons showing a hand pressing a circular button labeled '°C' and a rotary knob with curved arrows indicating rotation (no text or symbols)natural_image
Two grayscale icons showing a hand cursor clicking a circular button and a circular dial with bidirectional arrows (no text or symbols)natural_image
Top-down technical diagram of an oven with two circular fans and a labeled component (no text or symbols)natural_image
Technical line drawing of an oven with two fans and a cooling rack (no text or symbols)natural_image
Top-down schematic of an oven with two circular fans inside, showing internal structure and ventilation duct (no text or symbols)text_image
Technical diagram of an oven with labeled components and numbered parts (2 and 5)natural_image
Technical line drawing of an oven with internal compartments and ventilation ducts (no text or symbols)natural_image
Top-down schematic of a double boiler interior showing fan and vent (no text or symbols)natural_image
Top-down technical diagram of an oven with two circular fans inside, showing structural panels and ventilation ducts (no text or symbols)text_image
Technical diagram of an oven with labeled components and numbered partsnatural_image
Top-down schematic of an oven with two circular fans inside, enclosed in a rectangular frame (no text or symbols)natural_image
Circular button with diagonal stripes, no visible text or symbolsnatural_image
Hand holding a circular button with an eye symbol (no text or numbers present)
text_image
kg-Wnatural_image
Hand holding a circular button with '°C' and letter 'c' inside, no text or symbols presentnatural_image
Top-down schematic of an oven with two circular vent vats inside, showing internal structure and ventilation duct (no text or symbols)natural_image
Circular mechanical component with concentric rings and horizontal lines, no visible text or symbolsnatural_image
Hand holding a circular button with an eye symbol, no text or labels present
text_image
kg-Wnatural_image
Hand holding a circular button with '°C' and letter 'c' inside, no text or symbols presentnatural_image
Top-down schematic of an oven with two circular vented chambers and a double-bonded top panel (no text or labels)natural_image
Circular mechanical component with diagonal stripes, no visible text or symbols
natural_image
Hand holding a circular button with an eye symbol (no text or labels)natural_image
Circular button with arrow indicating refresh or move (no text or symbols)
natural_image
Hand cursor clicking a circular button with a circular icon on the top (no text or symbols)natural_image
Simple diagram of a circular object with diagonal lines inside, no text or symbols present.
natural_image
Hand icon pointing at a circular button with an eye symbol (no text or numbers)natural_image
Circular mechanical component with rotational arrows indicating motion (no text or symbols)
natural_image
Hand icon pointing at a circular button with an eye symbol (no text or labels)text_image
8:00' 8:00' 8:00' 8:00' 8:00'natural_image
Circular button with arrow indicating refresh or move (no text or symbols)
natural_image
Hand icon pointing at a button with a play button (no text or symbols)natural_image
Circular mechanical component with rotational arrows, no visible text or symbolsnatural_image
Circular mechanical component with rotational arrows, no visible text or symbolsnatural_image
Hand icon pointing at a button with a play button (no text or symbols)
natural_image
Circular button with arrow indicating refresh or move (no text or symbols)natural_image
Hand icon pointing at a button with a play button (no text or symbols)
natural_image
Circular mechanical component with rotational arrows indicating motion (no text or symbols)
natural_image
Circular mechanical component with rotational arrows indicating motion (no text or symbols)
natural_image
Hand icon pointing at a button with a play button (no text or symbols)text_image
Two-step diagram showing a hand pressing a circular button labeled with 'O' and '°C', likely illustrating a process or control.natural_image
Two icons: a circular dial with rotational arrows and a hand pressing a button (no text or symbols)text_image
Two UI icons: a circular dial with rotation arrows and a hand holding a 'START' button.natural_image
Circular mechanical component with rotational arrows, no text or symbols presentnatural_image
Hand holding a button with a play button icon (no text or symbols)
natural_image
Circular button with arrow indicating rotation or refresh (no text or symbols)natural_image
Hand icon pointing at a button with a play button (no text or symbols)
natural_image
Circular button with directional arrows indicating rotation or refresh (no text or symbols)natural_image
Hand cursor clicking a button with a play button (no text or symbols)
natural_image
Circular button with arrow indicating refresh or move (no text or symbols)natural_image
Circular object with diagonal lines and a small asterisk symbol at the top (no readable text or symbols)natural_image
Circular mechanical component with rotational arrows, no visible text or symbolsnatural_image
Circular mechanical component with rotational arrows indicating motion (no text or symbols)
text_image
STARTnatural_image
Illustration showing a washing machine with a circular vent and a kitchen appliance inside (no text or symbols)natural_image
Hand cursor clicking a button with a play button (no text or symbols)natural_image
Illustration of a hand cleaning a kitchen oven with a cloth (no text or symbols)flowchart
graph TD
    A["Receiving Oven"] --> B["Heating Room"]
    B --> C["Receiving Window with Air"]
    C --> D["Receiving Window with Air"]
    D --> E["Receiving Window with Air"]
    E --> F["Receiving Window with Air"]
    F --> G["Receiving Window with Air"]
text_image
Control panel of a refrigerator with digital display and navigation buttons labeled 'MENU'text_image
Control panel display with digital interface buttons and status indicatorstext_image
Control panel interface with digital display and navigation buttons labeled 'MENU' and directional arrowstext_image
Digital appliance control panel with temperature and display settings, including buttons for navigation and audio controlsnatural_image
Symbol of a trash bin crossed with diagonal lines, no text or numbers presentUsing this manual....8
SAFETY 8
Before you begin....14
Setting the language and the clock 14
Automatic shutoff (clock) 14
Types of heating 15
Explanation of knobs and buttons 17
The menu button....17
Symbols in the textdisplay 21
How a microwave oven works 22
Using the microwave mode 23
Microwave mode setting....23
Guide to microwave power levels 24
Microwave cookware guide 25
Microwave cooking guide 27
Using the oven mode 33
Oven mode setting 33
Hot air setting 35
Cooking guide. 35
Hot air + Top heat setting 36
Cooking guide....36
Top heat + Bottom heat setting 37
Cooking guide....37
Grill setting 38
Cooking guide....38
Top heat + fan setting....39
Cooking guide....39
Hot air + Bottom heat setting 40
Cooking guide....40
Intensive setting 41
Cooking guide....41
Multi level cook setting 42
Cooking guide....42
Eco Hot air setting 43
Cooking guide. 43
CONTENTS
Using the Microwave + Hot air mode 44
Select Microwave + Hot air mode 44
Cooking guide....45
Using the Microwave + Grill mode 46
Select Microwave + Grill mode 46
Cooking guide....47
Setting the cook time 48
Setting the delayed start....49
Using the auto MENU mode....50
Auto menu mode setting....50
Guide to auto menu programmes 51
Using the defrost mode 64
Guide to defrost settings. 65
Test dishes 66
Using the aqua clean feature 67
Child safety lock....69
Cleaning your microwave oven....70
Storing and repairing your microwave oven....70
Troubleshooting 71
Error codes....72
Technical specifications 73

text_image
3 4 1 5 6 AUTO 2 8 7 9 10 11 12 13 14 15 16 17 START STOP- OFF
- AUTO MENU
- OVEN
- DEFROST
- MICROWAVE MODE
- MICROWAVE + HOT AIR
- MICROWAVE + GRILL
- MODE SELECTOR
- DISPLAY
-
BACK
-
MENU SETTINGS
- COOK TIME
- TEMP SETTINGS
- WEIGHT SETTINGS
- NEXT
- MULTI-FUNCTION SELECTOR
- START
- STOP/CANCEL
10+11. CHILD LOCK

text_image
Control Panel Top Heating Elements Level 5 Level 4 Oven Levels Level 3 Level 2 Microwave Level 1 Safety Door Lock Door Door HandleNote
- Shelf levels are numbered from the bottom up.
- The levels 4 and 5 are mainly used for grill function.
- The level 1 is mainly used for microwave function with the ceramic tray.
- Please refer to Cooking Guides in this manual to determine the appropriate shelf level for your dishes.
Oven light
In order to save energy the oven light will turn off after a while. Press the MENU button to turn the light on again.
The following accessories are provided with your microwave oven:

natural_image
Simple line drawing of a rectangular tray or container with no text or symbols1 Ceramic Tray (Useful for Microwave Mode)

natural_image
Isometric line drawing of a rectangular tray or tray with dashed outlines and a central square (no text or symbols)2 Baking Trays (DO NOT use for Microwave Mode.)

text_image
Grill insert Ceramic Tray3 Grill Insert for Ceramic Tray (Useful for Speed Menu and Grill Mode)

natural_image
Isometric view of a rectangular metal grate or filter structure (no text or symbols)4 Oven Rack (DO NOT use for Microwave Mode.)
Note
Please refer to Cooking Guides in this manual to determine the appropriate accessory for your dishes.
Thank you for purchasing a ATAG Microwave oven.
Your Owner's Manual contains essential information on using and caring for your new Microwave oven. The installation instructions are included separate.
Before using your microwave oven, please read the safety instructions and all the information in this manual fi rst and keep it for future reference.
SAFETY
Safe use

- WARNING: this appliance and the accessible parts become hot during use. Do not touch the hot components. Keep children younger than 8 away from the appliance unless you can watch them continuously.
- This equipment may be used by children older than 8, as well as by people with physical, sensory or learning difficulties or with a lack of experience and knowledge, provided they are supervised and instructed in the safe use of the appliance and understand the associated dangers. Do not allow children to play with the appliance. Do not allow children to clean or maintain the appliance unless supervised.
- This appliance is only designed for household use. Use it only for food preparation.
- Keep the cable away from hot surfaces.
- Never cover the ventilation openings.
- The appliance is not intended to be operated by means of an external timer or separate remote control system.
- In connection with electrical safety, the appliance may not be cleaned with high-pressure cleaners or steam cleaners.
- WARNING: never heat sealed tins. Pressure develops in the tin which can make it explode.
- In preparing meals containing alcohol, high temperatures may cause the alcohol to evaporate. The vapour can catch fi re if it comes into contact with hot parts.
- Do not use the appliance for storing fl ammable materials or materials that warp easily.


- Ensure that food is always heated thoroughly. The time required for this depends on many factors including the quantity and type of food. Any bacteria present in the food are only destroyed if the food is heated at a temperature higher than 70 °C for more than 10 minutes. Allow the food to cook for longer if you are not sure if the food has been heated through.
- Do not use any abrasive cleaners or metal scrapers to clean the glass door. This will scratch the surface which may cause the glass to break.
- Use oven gloves or a pot-holder to remove dishes and accessories from the appliance.
- If smoke is emitted, switch off or unplug the appliance and keep the door closed in order to stifl e any fl ames.
- Only use the temperature probe recommended for this oven (for appliances having a facility to use a temperature-sensing probe).
- Remove all excess spillage and utensils before cleaning with pyrolytic self cleaning function.
- If, for cleaning, the controls have to be set to a position higher than for normal cooking purposes (pyrolytic), the surfaces may get hotter than usual and children should be kept away.
- WARNING: Ensure that the appliance is switched off before replacing the lamp to avoid the possibility of electric shock.
- WARNING: If the (glass) control panel is cracked, switch off the appliance to avoid the possibility of electric shock.
- WARNING: Unattended cooking with fat or oil can be dangerous and may result in fire.
- NEVER try to extinguish a fire with water, but switch off the appliance and keep the door closed.
- WARNING: Danger of fi re: do not store items in the oven.
Children
- Do not allow children to play with the appliance. Do not allow children to clean or maintain the appliance unless supervised.
- Do not store anything of interest to children in cabinets above or behind the appliance.
Safe use of microwave/Combi-microwave

- WARNING: it is dangerous for unqualified people to carry out repairs involving opening the appliance casing. The casing protects against the release of micro-energy.
- WARNING: if the door or the seal is damaged, do not use the microwave until it has been repaired by a qualified person.
- WARNING: the contents of baby's bottles and jars of baby food should be shaken and stirred. Check the temperature prior to consumption to prevent scalding.
- WARNING: do not try to use the microwave with the door open. Microwave radiation can be dangerous.
- Only use the appliance inside the home.
- Do not use the appliance in damp areas or near taps.
- The microwave is insulated. Nevertheless, heat transfer always occurs, with the outer casing of the appliance heating up. This heating up falls well within the norm.
- Use only cutlery and tableware suitable for microwave use (take care with gold or silver-coloured edging).
- Place a plastic spoon in a cup if you want to boil a liquid (for example water). It is possible for a liquid to boil without bubbling. As soon as you take the cup out of the microwave, the liquid can suddenly start to boil furiously and spit out of the cup, which may scald you.
- A microwave is only safe if the door closes properly! Never place an object between the door of the microwave and ensure that the door and the door seal are always clean.
- Only use the microwave for defrosting, preparing and heating food and not, for example, for drying clothes or paper. These can catch fire.
- Self-combustion is possible if you heat small quantities of dry or powdery products in the microwave (such as when drying herbs).
Switch off and disconnect the appliance if something in the microwave catches fi re or if smoke is observed (take the plug out of the plug socket/switch off the automatic fuse(s) or set the switch in the fuse box to zero). Keep the door closed to smother any fl ames.
- Never switch the microwave on if it is empty as this may damage the microwave.
- Remove metal strips from plastic bags and use bowls and dishes that are microwave safe.
- Always first check on the packaging how food should be placed in the microwave. In general, liquids or foodstuffs in air-tight packaging may only be heated after pricking a few holes in the packaging. This is because pressure builds up during heating.
- Liquids and other foodstuffs may not be heated in airtight packaging as they can explode.
- Keep an eye on the microwave when heating foodstuff s in plastic or paper packaging, in connection with the possibility of combustion.
- Never heat longer than necessary, and remember that food continues to cook after it is removed from heat.
- Prick the skin of meat, chicken or fish with a fork or other pointed object. This prevents spitting.
- The microwave should be cleaned regularly and all food remains should be removed. Remnants of crumbs and moisture absorb microwaves and increase cooking time. Food remnants can also damage the interior which may result in hazardous situations.
A microwave is not suitable for:
• preserving foods;
- cooking eggs in the shell or warming up hard-boiled eggs, as they shatter through pressure build-up;
- heating of frying oil.
Safe use of oven/Steam oven
- Keep children at a safe distance from the oven during baking or roasting. The oven becomes hot during use. Do not touch the elements and the interior until the oven has cooled completely.
- The outside of the oven may become hot if it is used for a long period of time at high temperatures. If the oven is used at the maximum temperature for a long time (when grilling, for example), the glass panel in the oven door may become hot. Please be careful if children are around
- The oven is fully insulated. Despite this, there is always some transfer of heat, as a result of which the outside of the oven heats up. This heating up falls well within the norm.
- The oven has a fan that cools the oven casing. The fan may run for some time after the oven is switched off.
- Make sure the appliance is turned off before replacing the bulb to avoid risk of electric shock.
- Do not place accessories on the open oven door.
- Close the oven door during cooking.
- Open the oven door carefully; hot steam will escape.
- Do not store fl ammable materials in the oven.
- Frozen products such as pizzas should be cooked on the grid shelf. If the baking tray is used, it may become deformed due to the large differences in temperature.
- Never cover the bottom of the oven with aluminium foil. The foil blocks heat flow, which may result in inferior cooking results. This can also damage the enamel of the bottom of the oven.
- Smaller quantities require a shorter cooking time. When the cooking times given in recipes are used, you might burn them.
- Never pour cold water on the hot oven floor. This can damage the enamel.
- Fruit juices can result in stains on the oven floor that are difficult to remove. When cooking moist pastries (such as apple pie), use a baking tin/griddle/roasting tin as a drip tray.
- Spilled food containing sugar or fruit juices, such as prune juice or rhubarb, can damage the colour of the enamel. It is advisable to clean the oven immediately after it has cooled down.
Note: the water in the steam oven insert pan is still hot!
- Heat and steam resistant baking tins should be used in the steam oven. Silicone baking tins are not suitable when combining hot air circulation and steam.
- Do not use baking tins that have areas of rust. Even tiny patches can lead to rust in the oven interior.
Installation
- Check the appliance for transport damage. Do not connect a damaged appliance.
- This appliance should only be connected by a registered installer!
- Faulty parts may only be replaced by original parts. The manufacturer can only guarantee that original parts meet safety requirements.
- To avoid dangerous situations, a damaged connecting cable should only be replaced by the manufacturer, the manufacturer's service organisation or suitably qualified persons.
- The electrical connection must comply with national and local regulations.
- The wall plug socket and plug should always be accessible.
- If you want to make a fixed connection, make sure that a omnipolar switch with a contact separation of at least 3 mm is fitted in the supply cable.
- The equipment should not be connected to the network via a multi-plug socket or extension lead, as the safe use of the equipment can then not be guaranteed.
- WARNING: Never open the appliance casing. The casing may only be opened by a service technician.
- Disconnect the appliance from the mains supply before starting any repair work.
- Freestanding micro wave ovens shall not be placed in a cabinet.
If the safety instructions and warnings are not followed, the manufacturer cannot be held responsible for any resulting damage.

If you decide to discontinue using the appliance because of a fault, we recommend you cut off the cable after removing the plug from the plug socket. Take the appliance to your municipality's waste disposal site.

Setting the language and the clock
When the power is first supplied to the oven, you must set the language and the time.

natural_image
Circular mechanical component with rotational arrows indicating motion (no text or symbols)
text_image
START1 Turn the MULTI-FUNCTION SELECTOR to set the language. Press Start to confirm.

text_image
-12.002 Now you have to set the right time. The '12' will blink.

natural_image
Circular mechanical component with rotational arrows, no visible text or symbols
text_image
8:00:00 8:00:003 Example: to set 1:30. Turn the MULTI-FUNCTION SELECTOR to set the hour.

text_image
100 MENU C C Ag-W4 Press Next to confirm. The '00' will blink.

natural_image
Circular mechanical component with rotational arrows, no visible text or symbols
text_image
START
text_image
1:305 Turn the MULTI-FUNCTION SELECTOR to set the minutes. Press Start to fi nish setting the clock. '30' will stop blinking.
6 The display shows the time of day. The appliance is now ready to use. If you want to change the time later on, you can do this by pressing the Menu and choose 'Time' by turning the MULTI-FUNCTION SELECTOR and press the Next. Then follow step 2-6 as described on this page.
Automatic shutoff (clock)
If the knobs of the oven are not operated for more than 30 minutes, the display will turn off automatically for energy saving reasons. By operating any key, the display is switched on again. If desired, this function can be turned off (see page 17; 'Auto shutoff').
The following chart summarizes the various heating modes and settings available on your oven. Use the Cooking Guides in the pages that follow to determine the appropriate mode and setting for all your recipes.
MICROWAVE MODE
 | Microwave energy is used to cook and defrost foods. It provides fast effi cient cooking without changing the colour or form of food. Power level and cooking time are manually set to suit various dishes. |
| OVEN MODE | |
 | Hot air settingFood is heated by hot air from the back of the oven. This setting provides uniform heating and is ideal for baking.Suggested temperature: 180 °C |
 | Hot air + Top heat settingHot air and top heating element combine, making this setting ideal for crisping and browning. Especially recommended for meats.Suggested temperature: 180 °C |
 | Top heat + Bottom heat settingHeat comes from top and bottom heating elements. This setting is suitable for baking and roasting.Suggested temperature: 200 °C |
 | Grill settingFood is heated by the top heating element.Suggested temperature: 220 °C |
 | Top heat + fan settingThe heat generated by the top heating elements is distributed by the fan. This mode can be used for grilling meat and fi sh.Suggested temperature: 220 °C |
 | Hot air + Bottom heat settingHot air and the bottom heating element combine so food can be crisped and browned.Suggested temperature: 180 °C |
 | Intensive settingThis mode activates all heating elements such as top, bottom and convection fan alternately. The heat is distributed evenly in the oven.This mode is suitable for big quantities of food, which need heat supply, such as large gratins and pies.Suggested temperature: 180 °C |
  | Multi level cook settingMulti level cook is available for when you wish to cook a larger quantity of food on two levels. The entire oven cavity may then be utilized.For example, cooking two trays of biscuits.Keeping warm settingThe food will be kept warm by help of the heat, provided by the bottom heating element. (Do not keep food warm for longer than 2 hours. Warm food spoils more quickly.)Temperature: 70 °C |
 | Eco Hot air settingThis mode uses the optimized heating system so that you save the energy during cooking your dishes. The cooking time will be increased a little but you can achieve the even baking results without the burning on your dishes.Suggested temperature: 180 °CNoteThe ECO Hot air mode of heating is used to determine the energy efficiency class in accordance with EN50304. |
| COMBI-FUNCTIONS | |
| Microwave + Hot air settingThis function is suitable for all kind of meat and poultry as well as casseroles and gratin dishes, sponge cakes and light fruit cakes, pies and crumbles, roast beef and chicken. | |
| Microwave + Grill settingThis function is suitable for all kind of cooked food which need reheating and browning (e.g. baked pasta), as well as foods which required a short cooking time to brown the top of the food.Also, this mode can be used for thick food portions that benefit from a browned and crispy top (e.g. chicken pieces). | |
| AUTO MENU MODE | |
| AUTO | 65 pre-programmed auto menu settings can be selected for your convenience. Time and temperature will be set automatically.You simply select the programme and the weight of your dish and start the auto cooking process. |
| DEFROST MODE | |
 | Choose from 5 pre-programmed defrost settings for defrosting.Defrosting time and power level are automatically set. Simply select the programme and weight to start defrosting. |
| COMBI-FUNCTIONS | |
 | Microwave + Hot air settingThis function is suitable for all kind of meat and poultry as well as casseroles and gratin dishes, sponge cakes and light fruit cakes, pies and crumbles, roast beef and chicken. |
 | Microwave + Grill settingThis function is suitable for all kind of cooked food which need reheating and browning (e.g. baked pasta), as well as foods which required a short cooking time to brown the top of the food.Also, this mode can be used for thick food portions that benefit from a browned and crispy top (e.g. chicken pieces). |
| AUTO MENU MODE | |
 | 65 pre-programmed auto menu settings can be selected for your convenience. Time and temperature will be set automatically.You simply select the programme and the weight of your dish and start the auto cooking process. |
The menu button
After you have pressed Menu, you can choose several settings by turning the MULTI-FUNCTION SELECTOR. Choose a setting, press Next to confirm and again you can choose several settings by turning the MULTI-FUNCTION SELECTOR. In the table below you can see the settings you can choose.
MENU:
 |  | START | |
| Time | Hours/Minutes(see page 14) | Time is adjusted | |
| MENU | Language | Nederlands | Language is adjusted |
| English | |||
| Deutsch | |||
| Français | |||
| Dansk | |||
| Sueco | |||
| Norsk | |||
| Spansk | |||
| Key sound | On | Key sound is adjusted | |
| Off | |||
| Contrast | 1 | Contrast is adjusted2 | |
| 3 | |||
| Cleaning Aqua clean Aqua clean | |||
| Dishes | Add (see pages 61 - 62) | - | |
| Delete (see page 61) | |||
| Auto shutoff (clock) | Yes | Auto shutoff is turned on(see page 14) | |
| No | Auto shutoff is turned off(see page 14) | ||
CHILD LOCK:
 |  |  | |
| Press at the same time | Child lock is set (lock symbol light is on) | Press at the same time again | Child lock is released (lock symbol light is off ) |
COOK TIME:
 | |||
| Cook time is blinking | Set the cooking time | Confir rm. The cooking time stops blinking | If the ‘Temperature’ or ‘Weight’ is pressed, these functions will start blinking and can be adjusted (if available) |
DELAYED START:
| Press for three seconds |  | ||
| Delayed start is blinking | Set the delayed start | Confirm. The delayed start stops blinking | If the ‘Cook Time’, ‘Temperature’ or ‘Weight’ is pressed, these functions will start blinking and can be adjusted (if available) |
TEMPERATURE:
 | |||
| Temperature is blinking | Change the temperature | Confirm. The temperature stops blinking | If the ‘Cook Time’, ‘Delayed start’ or ‘Weight’ is pressed, these functions will start blinking and can be adjusted (if available) |
WEIGHT/WATTS:
 |  | ||
| Weight/Watts is blinking | Change the weight/watts | Confi rm. The weight/watts stop blinking | If the ‘Cook Time’ or ‘Temperature’ is pressed, these functions will start blinking and can be adjusted (if available) |
AUTO MENU MODE:
If you have chosen a mode with the Mode selector, you can choose and change several settings by turning the MULTI-FUNCTION SELECTOR.
 |  |  | ||
| AUTO | Auto Menu Mode | Select a category and press ‘Next’ to confi rm | Select a food item | See pages 50 - 63 for further information |
OVEN MODE:
 |  |  |  |  | |
| = | Oven | Hot air setting | Press (and hold) to adjust or add the:• Cooking Time• Temperature• Delayed start | Turn to change | Press to confi rm |
| Hot air + Top heat setting | |||||
| Top heat + Bottom heat setting | |||||
| Grill setting | |||||
| Top heat + Fan setting | |||||
| Hot air + Bottom heat setting | |||||
| Intensive setting | |||||
| Multi level cook setting | |||||
| Keeping warm setting | |||||
| ECO Hot air setting |
DEFROST MODE:
 |  |  |  |  | |
 | Defrost | Meat | Press to adjust or add the:• Weight | Turn to change | Press to confi rm |
| Poultry | |||||
| Fish | |||||
| Bread/cake | |||||
| Fruit |
MICROWAVE MODE:
 | [80WT] [2KYA] |  |  | |
 | Microwave | Press to adjust or add the:• Cooking Time• Delayed start• Watts | Turn to change | Press to confi rm |
MICROWAVE + HOT AIR MODE:
 |  [CS88] [CS88]  |  |  | |
 | Microwave + Hot air | Press to adjust or add the:• Cooking Time• Delayed start• Temperature• Watts | Turn to change | Press to confi rm |
MICROWAVE + GRILL MODE:
 |    |  |  | |
 | Microwave + Grill | Press to adjust or add the:• Cooking Time• Delayed start• Temperature• Watts | Turn to change | Press to confi rm |
Symbols in the textdisplay
When you choose Auto Menu Mode by turning the Mode selector or press Menu for setting, text and symbols will appear in the display. The table below gives an explanation of symbols.
| Symbols in the textdisplay Buttons/knobs Explanation | ||
 | Turn to choose ('scroll' through the menu) | |
| ▶ | Confi rm | |
 | Turn to choose ('scroll' through the menu) | |
| ▶ | Confi rm | |
| ◀ | Go back one step | |
| ◀ | Go back one step | |
| START | Start (no more 'scrolling') | |
Microwaves are high - frequency electromagnetic waves; the energy released enables food to be cooked or reheated without changing either the form or the colour.
You can use your microwave to:
• Microwave mode
• Combi-functions
Cooking Principle

text_image
Diagram of a microwave oven with a bag inside, showing airflow direction and control buttons- The microwaves generated by the microwave are distributed uniformly by using a stirrer distribution system. The food is thus cooked evenly.
- The microwaves are absorbed by the food up to a depth of about 1 inch (2.5 cm). Cooking then continues as the heat is dissipated within the food.
- Cooking times vary according to the container used and the properties of the food:
• Quantity and density
- Water content
- Initial temperature (Refrigerated or not)
Important
As the centre of the food is cooked by heat dissipation, cooking continues even when you have taken the food out of the oven.
Standing times specified in recipes and in this booklet must therefore be respected to ensure
• Even cooking of the food right to the centre;
- The same temperature throughout the food.
Microwaves are high frequency electromagnetic waves. In microwave cooking, microwave energy penetrates food, attracted and absorbed by its water, fat and sugar content. The microwaves cause the molecules in the food to move rapidly. The rapid movement of these molecules creates friction and the resulting heat cooks the food. IMPORTANT: use the ceramic tray on level 1.
Microwave mode setting

natural_image
Circular dial indicator with diagonal stripes and 'AIR' label, no readable text or symbols beyond the dial pattern1 Turn the Mode selector to Microwave mode.

natural_image
Hand cursor clicking a circular button with an eye symbol (no text or numbers present)
text_image
kg-W2 If desired, adjust the cook time and/or power level. See pages 18 - 19.

text_image
START3 Press Start. The combi microwave oven will start.
Guide to microwave power levels
| POWER LEVEL | PERCENTAGE(%) | OUTPUT POWER (W) | REMARK |
| HIGH 100 900 For | heating up liquids. | ||
| HIGH LOW 83 750 | For heating up and cooking food. | ||
| MEDIUM HIGH 67 | 600 For heating up and cooking food. | ||
| MEDIUM 50 450 | For cooking meat and heating up delicate foods. | ||
| MEDIUM LOW 33 | 300 | ||
| DEFROST 20 180 | For defrosting and continued cooking. | ||
| LOW 11 100 For | defrosting delicate foods. |
Microwave cookware guide
Cookware used for Microwave Mode must allow microwaves to pass through and penetrate food. Metals such as stainless steel, aluminum and copper reflect microwaves. Therefore, do not use cookware made of metallic materials. Cookware marked microwave - safe is always safe for use. For additional information on appropriate cookware refer to the following guide and always use the ceramic tray on shelf Level 1 when using microwave mode.
| COOKWARE | MICROWAVE-SAFE | COMMENTS |
| Aluminium Foil | √X | Can be used in small quantities to protect areas against overcooking.Arcing can occur if the foil is too close to the oven wall or if too much foil is used. |
| China and Earthenware | √ | Porcelain, pottery, glazed earthenware and bone china are usually suitable, unless decorated with a metal trim. |
| Disposable Polyester Cardboard Dishes | √ | Some frozen foods are packaged in these dishes. |
| Fast - Food PackagingPolystyrene cups containersPaper bags or newspaperRecycled paper or metal trims | √XX | Can be used to warm food. Overheating may cause the polystyrene to melt.May catch fi re.May cause arcing. |
| GlasswareOven-to-table wareFine glasswareGlass jars | √√√ | Can be used, unless decorated with a metal trim. Can be used to warm foods or liquids. Delicate glass may break or crack if heated suddenly.Must remove the lid. Suitable for warming only. |
| MetalDishesFreezer bag twist ties | XX | May cause arcing or fi re. |
| PaperPlates, cups, napkins and Kitchen paperRecycled paper | √X | For short cooking times and warming.Also to absorb excess moisture.May cause arcing. |
| Plastic | ||
| • Containers | √ | Particularly if heat-resistant thermoplastic. Some other plastics may warp or discolour at high temperatures. Do not use Melamine plastic. Can be used to retain moisture. Should not touch the food. Take care when removing the fi lm as hot steam will escape. Only if boilable or oven-proof. Should not be airtight. Prick with a fork, if necessary. |
| • Cling fi lm | √ | |
| Freezer bags | √× | |
| Wax or Grease-proof Paper | √ | Can be used to retain moisture and prevent spattering. |
Note
“Arcing” is the microwave term for sparks in the oven.
√ : Recommended
√X : Use Caution
X : Unsafe
Microwave cooking guide
GENERAL GUIDELINES
Food Suitable for Microwave Cooking
Many kinds of food are suitable for microwave cooking, including fresh or frozen vegetables, fruit, pasta, rice, grains, beans, fi sh, and meat. Sauces, custard, soups, steamed puddings, preserves, and chutneys can also be cooked in a microwave oven.
Covering During Cooking
Food should be covered during cooking, as the evaporated water rises as steam and contributes to the cooking process. Food can be covered in different ways such as with a ceramic plate, plastic cover or microwave suitable cling fi lm.
Standing Times
After cooking, it is important to let food stand for the recommended standing time to allow the temperature to even out within the food.
COOKING GUIDE FOR FROZEN VEGETABLES
Use a suitable glass Pyrex bowl with lid. Cook covered for the minimum time (See table). Continue cooking to get the result you prefer. Stir twice during cooking and once after cooking. Add salt, herbs or butter after cooking. Keep covered during standing time.
| Food | Portion (g) | Power (W) | Time (Min) | Standing Time (Min) | Instructions |
| Spinach 150 600 5 - 6 2 | -3 Add 1 | 5 ml (1 tbsp) | cold water. | ||
| Broccoli 300 600 8 - 9 2 | -3 Add 3 | 0 ml (2 tbsp) | cold water. | ||
| Peas 300 600 7 - 8 2 - 3 | Add 15 ml (1 tbsp) | cold water. | |||
| Green Beans 300 600 7 12 - 8 12 2 - 3 Add 30 ml (2 tbsp) | cold water. | ||||
| Mixed Vegetables (Carrots/Peas/Corn) | 300 600 7 - 8 2 | -3 Add 15 ml (1 tbsp) | cold water. | ||
| Mixed Vegetables (Chinese Style) | 300 600 7 12 - 8 12 2 - 3 Add 15 ml (1 tbsp) | cold water. | |||
COOKING GUIDE FOR FRESH VEGETABLES
Use a suitable glass Pyrex bowl with lid. Add 30 - 45 ml cold water (2 - 3 tbsp) for every 250 g unless another water quantity is recommended (see table). Cook covered for the minimum time (see table). Continue cooking to get the result you prefer. Stir once during and after cooking. Add salt, herbs or butter after cooking. Cover during the 3 minute standing time.
Hint : Cut fresh vegetables into even sized pieces. The smaller they are cut the quicker they are cooked.
Note : All fresh vegetables should be cooked using full microwave power (900 W).
| Food Portion (g) | Time(Min.) | Standing Time (Min.) | Instructions | |
| Broccoli 250 | 4 - 5 | 3 Prepare | even sized fl orets. Arrange stems to the centre. | |
| 500 | 5 - 6 | |||
| Brussels Sprouts | 250 5 - 6 | 3 Add 60 | -75 ml (5 - 6 tbsp) water. | |
| Carrots 250 5 - 6 | 3 Cut carrots | into even | sized slices. | |
| Caulifl ower 250 | 5 - 6 | 3 Prepare | even sized fl orets. Cut big fl orets into halves. Arrange stems to the centre. | |
| 500 | 7 - 8 | |||
| Courgettes 250 3 | -4 3 Cut courgettes into slices. Add | 30 ml (2 tbsp) water or a knob of butter. Cook until just tender. | ||
| Egg Plants 250 3 | -4 3 Cut egg plants into small slices | and sprinkle with 1 tablespoon lemon juice. | ||
| Leeks 250 3 - 4 3 | Cut leeks into thick slices. | |||
| Mushrooms 125 | 1 - 2 | 3 Prepare | small whole or sliced mushrooms. Do not add any water. Sprinkle with lemon juice. Spice with salt and pepper. Drain before serving. | |
| 250 | 2 - 3 | |||
| Onions | 250 4 - 5 | 3 Cut onions into slices | or halves.Add only 15 ml (1 tbsp) water. | |
| Pepper | 250 4 - 5 | 3 Cut pepper into small slices | ||
| Potatoes | 250 | 4 - 5 | 3 Weigh | the peeled potatoes and cut them into similar sized halves or quarters. |
| 500 | 7 - 8 | |||
| Turnip Cabbage | 250 5 - 6 | 3 Cut turnip cabbage into small cubes. | ||
COOKING GUIDE FOR RICE AND PASTA
Rice
Use a large glass Pyrex bowl with lid. (Note that rice doubles in volume during cooking.) Cook covered. After cooking time is over, stir before letting stand. Add salt or herbs and butter. Note that rice may not have absorbed all water after the cooking time is finished.
Pasta
Use a large glass Pyrex bowl. Add boiling water, a pinch of salt and stir well. Cook uncovered. Stir occasionally during and after cooking. Cover during standing time and drain thoroughly afterwards.
| Food | Portion (g) | Power (W) | Time (Min) | Standing Time (Min) | Instructions |
| White Rice (Parboiled) | 250375 | 900 | 16 - 1818 - 20 | 5 | Add 500 ml cold water.Add 750 ml cold water |
| Brown Rice (Parboiled) | 250375 | 900 | 20 - 2222 - 24 | 5 | Add 500 ml cold water.Add 750 ml cold water |
| Mixed Rice (Nice + Wild Rice) | 250 900 | 17 - 19 | 5 Add 500 ml | cold water. | |
| Mixed Corn (Rice + Grain) | 250 900 | 18 - 20 | 5 Add 400 ml | cold water. | |
| Pasta 250 900 10 - | 11 5 Add | 1000 ml | hot water. |
REHEATING
Your microwave oven will reheat food in a fraction of the time a conventional oven takes.
Arranging and Covering
Avoid reheating large items such as joints of meat since they tend to overcook and dry out before the centre is piping hot. You will have more success reheating smaller pieces. Keeping food covered while heating will also help prevent drying.
Power Levels
Different power levels can be used for reheating foods.
In general, for large quantities of delicate food or foods that heat up quickly, such as mince pies, it is better to use a lower power level.
Stirring
Stir well or turn food over during reheating for best results. When possible, stir again before serving. Stirring is especially important when heating liquids.
Heating and Standing Times
When reheating food for the first time, it is helpful to make a note of the time taken for future reference. Avoid overheating. If uncertain, it is preferable to underestimate cooking time. Then extra heating time can be added, if necessary. Always make sure that reheated food is piping hot throughout. Allow food to stand for a short time after reheating to let the temperature even out. The recommended standing time after reheating is 2 - 4 minutes.
Reheating Liquids and Food
Take special care when heating liquids. To prevent eruptive boiling and possible scalding, place a spoon or glass stick in the beverage. Stir during heating and always stir after heating. Allow a standing time of at least 20 seconds after the oven has been switched off to allow the temperature to even out.
| Food | Portion (g,ml) | Power (W) | Time (Min,Sec) | Standing Time (Min) | Instructions |
| Drink | 250ml (1 mug) | 900 | 112 - 2 | 1 - 2 | Pour into a ceramic cup and reheat uncovered. Place cup in the center of ceramic tray. Stir carefully before and after standing time. |
| 500ml (2 mugs) | 2 - 3 | ||||
| Soup (Chilled) | 250 g 90 | 0 3 - 4 2 | - 3 | Pour into a deep ceramic plate. Cover with plastic lid. Stir well after reheating. Stir again before serving. | |
| Stew (Chilled) | 350 g 60 | 0 5 - 6 2 | - 3 | Pour into a deep ceramic plate. Cover with plastic lid. Stir well after reheating. Stir again before serving. | |
| Pasta with sauce (Chilled) | 350 g 60 | 0 5 - 6 2 | - 3 | Pour into a deep ceramic plate. Cover with plastic lid. Stir well after reheating. Stir again before serving. | |
| Plated meal (Chilled) | 350 g 450 g | 600 | 5 - 66 - 7 | 3 | Plate a meal of 2-3 chilled components on a ceramic dish. Cover with microwave cling fi lm. |
REHEATING BABY FOOD
Baby Food
Extra caution should also be exercised when reheating baby foods. Put food into a deep ceramic plate. Cover with plastic lid. Stir well after reheating. Let stand for 2 - 3 minutes before serving. Stir again and check temperature. Recommended serving temperature is between 30 - 40 °C.
Baby Milk
Pour milk into a sterilised glass bottle. Reheat uncovered. Never heat a baby's bottle with the nipple on, as the bottle may explode if overheated. Shake well before standing time and again before serving. Always carefully check the temperature of baby milk or food before serving. Recommended serving temperature is 37^ .
Reheating baby food and milk.
Use the power levels and times in this table as guide lines for reheating.
| Food | Portion (g,ml) | Power (W) | Time (Min,Sec) | Standing Time (Min) | Instructions |
| Baby food (vegetable+meat) | 190 g 6 | 00 30-40 | sec 2 - 3 | Empty into ceramic deep plate. Cook covered. Stir after cooking time. Stand for 2-3 minutes. Before serving, stir well and check the temperature carefully. | |
| Baby porridge (grain+milk+fruit) | 190 g 6 | 00 20-30 | sec 2 - 3 | Empty into ceramic deep plate. Cook covered. Stir after cooking time. Stand for 2-3 minutes. Before serving, stir well and check the temperature carefully. | |
| Baby milk | 100 ml 200 ml | 300 | 30-40 sec 50 sec to 1 min | 2 - 3 | Stir or Shake well and pour into a sterilized glass bottle. Place into the centre of ceramic tray. Cook uncovered. Shake well and stand for at least 3 minutes. Before serving, Shake well and check the temperature carefully. |
DEFROSTING
Microwaves are an excellent way of defrosting frozen food. Microwaves gently defrost frozen food in a short period of time. This can be a great advantage, if unexpected guests suddenly show up.
Frozen poultry must be thoroughly thawed before cooking. Remove any metal ties and take it out of any wrapping to allow thawed liquid to drain away.
Put the frozen food on a dish without a cover. Turn over half way, drain off any liquid and remove any giblets as soon as possible.
Check the food occasionally to make sure that it does not feel warm.
If smaller and thinner parts of the frozen food start to warm up, they can be shield by wrapping very small strips of aluminium foil around them during defrosting.
Should poultry start to warm up on the outer surface, press STOP/CANCEL and allow it to stand for 20 minutes before continuing.
Leave the fi sh, meat and poultry to stand in order to complete defrosting.
The standing time for complete defrosting will vary depending on the quantity defrosted.
Please refer to the table on the next page.
Hint: Flat food is defrosted better than thicker items, and smaller quantities need less time than bigger ones. Remember this hint while freezing and defrosting food.
For defrosting of frozen food with a temperature of about - 18 to - 20 °C, use the following table as a guide.
Frozen foods should be defrosted using defrosting power level (180 W).
| Food | Portion (g) | Time (Min) | Standing Time (Min) | Instructions |
| Meat | ||||
| Minced Beef | 250 | 6 - 7 | 15 - 30 Place | the meat on the ceramic plate. |
| 500 | 8 - 12 | Shield thinner edges with aluminium foil. | ||
| Pork Steaks | 250 | 7 - 8 | Turn over after half of defrosting time. | |
| Poultry | ||||
| Chicken | 500 | 12 - 14 | 15 - 60 First, put chicken pieces | |
| Pieces | (2 pcs) | skin - side down, whole chicken breast - side - down on ceramic plate. | ||
| Whole Chicken | 1200 | 28 - 32 | Shield the thinner parts like wings and ends with aluminium foil. Turn over after half of defrosting time. | |
| Fish | ||||
| Fish Fillets | 200 | 6 - 7 | 10 - 25 Put | frozen fi sh in the middle of ceramic plate. Arrange the thinner parts under the thicker parts. Shield narrow ends of fi llets and tail of whole fi sh with aluminium foil. Turn over after half of defrosting time. |
| Whole Fish | 400 | 11 - 13 | ||
| Fruit | ||||
| Berries 300 6 - 7 | 5 - 10 Spread fruit on a fl at, round glass dish | |||
| Bread | ||||
| Bread Rolls | 2 pcs | 1 - 112 | 5 - 20 Arrange rolls in a circle or bread | |
| (Each ca. 50 g) | 4 pcs | 212 - 3 | ||
| Toast/ | 250 | 4 - 412 | ||
| Sandwich | 500 | 7 - 9 | ||
10 settings are available under this mode. Check Cooking Guides on pages 35 - 43 to determine appropriate setting.
Oven mode setting

text_image
= AUD1 Turn the Mode selector to OVEN mode position.

natural_image
Circular button with directional arrows indicating rotation or refresh (no text or symbols)2 Turn the MULTI-FUNCTION SELECTOR to desired oven mode. The oven mode and recommended temperature will be displayed (Default: Hot air mode).
 | Hot air | 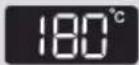 |
 | Hot air + Top heat |  |
 | Top heat + Bottom heat | 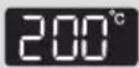 |
 | Grill |  |
 | Top heat + fan | 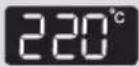 |
 | Hot air + Bottom heat |  |
 | Intensive |  |
 | Multi level cook |  |
 | Keeping warm |  |
 | Eco Hot air |  |

natural_image
Two grayscale icons showing a hand pressing a circular button labeled '°C' and a rotary knob with curved arrows indicating rotation (no text or symbols)3 To change the temperature, press TEMP SETTING and turn the MULTI-FUNCTION SELECTOR to set the desired temperature.

natural_image
Two grayscale icons showing a hand cursor clicking a circular button and a circular dial with bidirectional arrows (no text or symbols)4 To set the cooking time, press COOK TIME and turn the MULTI-FUNCTION SELECTOR to set the desired cooking time.

text_image
START5 Press START.
Note
1) During cooking, cook time and temperature are available to change the setting.
2) In Oven Mode settings, the convection heater and top and bottom heating elements switch off and on throughout cooking to regulate the temperature.
Hot air setting
Food is heated by hot air from the two fans and heating element, which are located in the rear back side of the oven. This setting provides uniform heating and is ideal for baking.

natural_image
Top-down schematic of an oven with two circular vented chambers and a labeled component (no text or symbols)Place the trays on Level 2 or 3.
* Temperatures Setting: 40 - 250 °C
* Please ensure that glass baking dishes are suitable for 40 - 250 °C cooking temperatures.
Cooking guide
Use temperatures and times in this table as guidelines for baking. We recommend to preheat the oven with Hot air mode.
| Food Item Shelf Level Temperature (°C) Time (h) Accessory | |||
| Hazelnut Cake Square Mould | 2 160 - | 170 1:00 - 1:10 Oven rack | |
| Lemon Cake Ring-Shaped or Bowl Mould | 2 150 - | 160 0:50 - 1:00 Oven rack | |
| Sponge Cake 2 150 - | 160 0:25 - 0:35 | Oven rack | |
| Fruit Flan Base 2 150 - | 170 0:25 - 0:35 | Oven rack | |
| Flat Streusel Fruit Cake (Yeast Dough) | 3 150 - | 170 0:30 - 0:40 Baking tray | |
| Croissants 2 170 - 180 | 0:10 - 0:20 | Baking tray | |
| Bread Rolls 2 180 - 190 | 0:10 - 0:15 | Baking tray | |
| Cookies 3 160 - 180 | 0:10 - 0:20 | Baking tray | |
| Frozen Oven Chips | 3 200 - | 220 0:15 - 0:20 Baking tray | |
Note
Preheating is recommended.
Hot air + Top heat setting
Hot air and top heating element combine, making this setting ideal for crisping and browning. This setting is especially recommended for cooking meats.

natural_image
Top-down technical diagram of an oven with two fans and cooling fans inside (no text or symbols)When cooking meat, place on rack on Level 3 and set baking tray on Level 2 to catch drippings.
* Temperatures Setting: 40 - 250 °C
* Please ensure that glass baking dishes are suitable for 40 - 250 °C cooking temperatures.
Cooking guide
Use temperatures and times in this table as guidelines for roasting.
We recommend to preheat the oven using Hot air + Top heat mode.
Put meat on oven rack, follow shelf level advice in the table and use baking tray as oil pan on level 2.
| Food Item Shelf Level Temperature (°C) Time (h) Accessory | ||||
| Beef Roast Beef/1 kg Medium | 3 + 2 170 | - 190 1:00 - 1:30 | Oven rack + Baking tray | |
| Pork Shoulder Joint/Roll 1 kg | 3 + 2 180 | - 200 1:30 - 2:00 | Oven rack + Baking tray | |
| Lamb Roast Lamb/ Leg of Lamb 0.8 kg | 3 + 2 190 | - 210 0:50 - 1:20 | Oven rack + Baking tray | |
| Chicken Whole Chicken 1.2 kg | 3 + 2 200 | - 220 0:50 - 1:10 | Oven rack + Baking tray | |
| Fish Whole Trouts 2 pcs/0.5 kg | 3 + 2 180 | - 200 0:30 - 0:40 | Oven rack + Baking tray | |
| Duck Breast 0.3 kg 3 | + 2 180 - 200 | 0:25 - 0:35 | Oven rack + Baking tray | |
Note
Preheating is recommended.
Top heat + Bottom heat setting
Heat comes from top and bottom heating elements. This setting is suitable for traditional baking and roasting.

natural_image
Top-down schematic of an oven with two circular fans inside, showing internal structure and ventilation duct (no text or symbols)Baking tray or oven rack is usually placed on Level 2 or 3.
* Temperatures Setting: 40 - 250 °C
* Please ensure that glass baking dishes are suitable for 40 - 250 °C cooking temperatures.
Cooking guide
Use temperatures and times in this table as guidelines for baking. We recommend to preheat the oven with Top heat + Bottom heat mode.
| Food Item Shelf | Level Temperature (°C) Time (h) Accessory | |
| Lasagne 3 200 - 220 | 0:20 - 0:25 Oven rack | |
| Vegetables Gratin 3 | 180 - 200 0:20 - 0:30 Oven rack | |
| Potato Gratin 3 180 | - 200 0:40 - 1:00 Oven rack | |
| Frozen Pizza Baguettes | 3 160 - 180 0:10 - 0:15 Baking tray | |
| Marble Cake 2 160 | - 180 0:50 - 1:10 Oven rack | |
| Loaf Cake 2 150 - 170 | 0:50 - 1:00 Oven rack | |
| Muffi ns 2 180 - 200 | 0:20 - 0:30 Oven rack | |
| Cookies | 3 180 - 200 0:10 - 0:20 Baking tray |
Note
Preheating is recommended.
Grill setting
Food is heated by the top heating elements.

text_image
Technical diagram of an oven with labeled parts, showing internal components and numbered annotations.For grilling, Oven rack is usually placed on Level 5 or Oven rack with baking tray on Level 5 and Level 2.
* Temperatures Setting: 150 - 250 °C
* Please ensure that glass baking dishes are suitable for 40 - 250 °C cooking temperatures.
Cooking guide
Use temperatures and times in this table as guidelines for grilling. Set 220 °C grill temperature, preheat for 5 minutes.
| Food Item Shelf Level | Time (h) 1 ^st side | Time (h) 2 ^nd side | Accessory |
| Kebab Spits 5 + 2 0:08 - 0:10 0:06 - | 0:08 | Oven rack + baking tray | |
| Pork Steaks 5 + 2 0:07 - 0:09 0:05 - | 0:07 | Oven rack + baking tray | |
| Sausages 5 + 2 0:06 - 0:08 0:05 - 0:07 | Oven rack | ||
| Chicken Pieces 5 + 2 0:20 - 0:25 0:15 - 0:20 | Oven rack + baking tray | ||
| Salmon Steaks 5 + 2 0:08 - 0:12 0:06 - 0:10 | Oven rack + baking tray | ||
| Sliced Vegetables 5 0:15 - 0:20 - Baking tray | |||
| Toast 5 0:02 - 0:03 0:01 - 0:02 Oven rack | |||
| Cheese Toasts 5 0:03 - 0:05 - | Oven rack |
Note
Preheating is recommended.
The heat generated by the top heating element is distributed by the fan. This mode can be used for grilling meat, fi sh, poultry and vegetables. It is not necessary to turn over food and it will get the crispy texture.

natural_image
Technical line drawing of an oven with internal compartments and ventilation ducts (no text or symbols)For grilling, oven rack or baking tray are usually placed on Level 4.
* Temperatures Setting: 40 - 250 °C
* Please ensure that glass baking dishes are suitable for 40 - 250 °C cooking temperatures.
Cooking guide
Use temperatures and times in this table as guidelines for grilling. Set 220 °C grill temperature, preheat for 5 minutes.
| Food Item Shelf | Level Time (h) | Accessory | |
| Sausages 4 0:08 - 0:10 Oven rack | |||
| Potato wedges 4 0:20 - 0:25 Oven rack | |||
| Frozen oven chips 4 0:15 - 0:20 Baking tray | |||
| Frozen Croquettes 4 0:20 - 0:25 Baking tray | |||
| Frozen Nuggets 4 0:15 - 0:20 Baking tray | |||
| Salmon Steak 4 + 2 0:15 - 0:20 | Oven rack + baking tray | ||
| Fish fi llet | 4 + 2 0:12 - 0:17 | Oven rack + baking tray | |
| Whole fi sh | 4 + 2 0:15 - 0:20 | Oven rack + baking tray | |
| Chicken pieces | 4 + 2 0:30 - 0:40 | Oven rack + baking tray | |
Note
Preheating is recommended.
Hot air + Bottom heat setting
Hot air and the bottom heating element combine to heat food. This is a useful setting for crisping and browning.

natural_image
Top-down schematic of a traditional oven or stove interior with two circular fans and ventilation grilles (no text or symbols)Baking tray or oven rack is often used on Level 2.
* Temperatures Setting: 40 - 250 °C
* Please ensure that glass baking dishes are suitable for 40 - 250 °C cooking temperatures.
Cooking guide
Use temperatures and times in this table as guidelines for baking. We recommend to preheat the oven with Hot air + Bottom heat mode.
| Food Item Shelf | Level Temperature (°C) Time (h) Accessory | |||
| Homemade Pizza 2 | 200 - 220 0:20 | - 0:25 Baking tray | ||
| Chilled Pre-baked Quiche/Pie | 2 180 - 200 0:10 - 0:15 Oven rack | |||
| Frozen Self Rising Pizza | 2 180 - 200 0:15 - 0:20 Baking tray | |||
| Frozen Pizza 2 200 | - 220 0:15 - 0:20 Oven rack | |||
| Chilled Pizza 2 180 | - 200 0:08 - 0:15 Baking tray | |||
| Apple pie 2 160 - 180 | 0:70 - 0:80 Oven rack | |||
| Puff Pastry, apple fl lling | 2 180 - 200 0:10 - 0:15 Baking tray | |||
Note
Preheating is recommended.
Intensive setting
This mode activates all heating elements such as upper, lower and convection fan alternately. The heat is distributed evenly in the oven. This mode is suitable for big quantities of food, which need heat supply, such as large gratins and pies.

natural_image
Top-down schematic of a double boiler or oven with two circular fans inside, enclosed in a rectangular frame (no text or symbols)Baking tray or oven rack is often used on Level 2.
* Temperatures Setting: 40 - 250 °C
* Please ensure that glass baking dishes are suitable for 40 - 250 °C cooking temperatures.
Cooking guide
Use temperatures and times in this table as guidelines for baking. We recommend to preheat the oven with Intensive mode.
| Food item Shelf level | Temperature (°C) | Time (h) | Accessory | |
| Lasagne 2 kg 2 180 - 200 | 0:20 - 0:30 | Oven rack | ||
| Vegetables Gratin 2 kg | 2 160 - | 180 0:40 - 0:60 | Oven rack | |
| Potato Gratin 2 kg 2 160 | - 180 1:00 - | 1:30 | Oven rack | |
| Beef Roast Beef/2 kg Medium | 3 + 2 160 | - 180 1:00 - 1:30 | Oven rack +Baking tray | |
| Duck Whole/2 kg 3 + 2 | 180 - 200 1:00 | - 1:30 | Oven rack +Baking tray | |
| 2 Chickens Whole/1.2 kg each | 3 + 2 200 | - 220 1:00 - 1:30 | Oven rack +Baking tray |
Note
Preheating is recommended. Turnover is not necessary but you can get the better results if you turnover at half time.
Multi level cook setting
This mode is suitable for cooking with two different levels at the same time. This mode works by the circulation of heated air. The entire oven cavity may then be utilized. For example, cooking two trays of biscuits.
The cooking time will be increased compared with 1 level cooking but you can get the twice dishes at the same time.

text_image
Technical diagram of an oven with labeled components, showing internal structure and numbered parts.For Multi-Level Cook, 2 Baking trays or 1 baking tray and oven rack are usually placed on Level 2 and 5.
* Temperatures Setting: 40 - 250 °C
* Please ensure that glass baking dishes are suitable for 40 - 250 °C cooking temperatures.
Cooking guide
Use temperatures and times in this table as guidelines for baking. We recommend to preheat the oven with Multi-level cook mode.
| Food Item Shelf | Level Temperature (°C) | Time (h) | Accessory | |
| Small cakes 2 + 5 150 | - 160 0:20 - 0:30 | 2 baking trays | ||
| Mini pies 2 + 5 160 | - 180 0:20 - 0:30 | 2 baking trays | ||
| Croissants 2 + 5 160 | - 180 0:20 - 0:30 | 2 baking trays | ||
| Puff pastry 2 + 5 180 | - 200 0:30 - 0:40 | 2 baking trays | ||
| Cookies 2 + 5 | 170 - 190 0:15 | - 0:20 2 baking trays | ||
| Lasagne | 2 + 5 160 | - 180 0:30 - 0:40 | Oven rack +Baking Tray | |
| Frozen oven chips | 2 + 5 180 | - 200 0:30 - 0:40 2 baking trays | ||
| Frozen Nuggets | 2 + 5 | 180 - 200 0:20 | - 0:30 2 baking trays | |
| Frozen pizza | 2 + 5 200 | - 220 0:20 - 0:30 | Oven rack +Baking Tray |
Note
Preheating is recommended.
Eco Hot air setting
This mode uses the optimized heating system so that you save energy during cooking your dishes.
The cooking time will be increased a little but you can achieve even baking results on your dishes.

natural_image
Top-down schematic of an oven with two circular fans inside, enclosed in a rectangular frame (no text or symbols)Baking tray or oven rack is often used on Level 3.
* Temperatures Setting: 40 - 250 °C
* Please ensure that glass baking dishes are suitable for 40 - 250 °C cooking temperatures.
Cooking guide
Use temperatures and times in this table as guidelines for baking. We recommend to preheat the oven with ECO Hot air mode.
| Food Item Shelf | Level Temperature (°C) Time (h) Accessory | |||
| Sponge cake 2 150 - Small cake 3 150 - 170 | 160 0:30 - 0:40 | Oven rack | ||
| 0:20 - 0:30 Baking tray | ||||
| Muffi n 3 160 - 180 0:30 - 0:40 Oven rack | ||||
| Beef Roast Beef/1 kg Medium | 3 + 2 170 - 190 1:00 - 1:30 | Oven rack +Baking tray | ||
| Potato Gratin 3 160 - 180 1:00 - 1:30 | Oven rack | |||
Note
Preheating is recommended.
Energy saving tip
- If cooking time is more than 30 minutes, you can switch off the oven 5 - 10 minutes before the end of the cooking time to save energy. The residual heat will complete the cooking process.
- Please do not open the door frequently during cooking to keep the temperature in the cavity and to save energy and time.
Microwave + Hot air
This mode combines hot air and microwave and is therefore reducing the cooking time while giving the food a brown and crispy surface. Suitable food for combination mode include all kinds of meats and poultry as well as casseroles and gratin dishes, sponge cake and light fruit cakes, pies and crumbles, roast vegetables, scones and breads.
Select Microwave + Hot air mode

natural_image
Circular button with diagonal stripes, no visible text or symbols1 Turn the Mode selector to Microwave + Hot air mode.

natural_image
Hand holding a circular button with an eye symbol (no text or numbers present)
text_image
kg-W2 If desired, adjust the cook time and/or power level. See pages 18 - 19.

natural_image
Hand holding a circular button with '°C' and letter 'c' inside, no text or symbols present3 If desired, adjust the temperature. See page 18.

text_image
START4 Press Start. The combi microwave oven will start.

natural_image
Top-down schematic of an oven with two circular fans inside, showing internal structure and ventilation duct (no text or symbols)For Microwave + Hot air, ceramic tray with grill insert is usually placed on Level 3.
* Microwave Power Setting: 100 - 600 W
* Temperatures Setting: 40 - 230 °C
* Please ensure that glass baking dishes are suitable for 40 - 250 °C cooking temperatures.
Cooking guide
Use power level with temperatures and times in this table as guidelines for cooking.
Preheating is not needed.
| Food Item | Shelf Level | Power level (W) | Temperature (°C) | Time 1 ^st (min) | Time 2 ^nd (min) | Accessory |
| Whole chicken 1.2 kg | 3 450 | 180 - 200 | 25 - 30 15 - 25 | Ceramic tray + grill insert | ||
| Roast Beef/ Lamb(medium) | 3 300 | 180 - 200 | 15 - 20 15 - 20 | Ceramic tray + grill insert | ||
| Frozen Lasagne/ Pasta gratin | 3 450 | 180 - 200 | 20 - 25 - | Ceramic tray + grill insert | ||
| Potato gratin 3 45 | 180 - 200 | 10 - 15 - | Ceramic tray + grill insert | |||
| Fresh fruit fl an 3 | 100 160 | - 180 40 - 50 | Ceramic tray |
Microwave + Grill
This mode combines radiant heat coming from the grill with the speed of microwave cooking. The cooking time will be decreased and the results will have a browned and crispy top.
This function is suitable for all kind of cooked food which need reheating and browning (e.g. baked pasta), as well as foods which required a short cooking time to brown the top of the food. Also, this mode can be used for thick food portions that benefit from a browned and crispy top (e.g. chicken pieces).
To brown both sides of the food, turn it over half way through cooking.
Select Microwave + Grill mode

natural_image
Circular mechanical component with concentric rings and horizontal lines, no visible text or symbols1 Turn the Mode selector to Microwave + Grill mode.

natural_image
Hand holding a circular button with an eye symbol (no text or numbers present)
text_image
kg-W2 If desired, adjust the cook time and/or power level. See pages 18 - 19.

natural_image
Hand holding a circular button with '°C' and letter 'c' inside, no text or symbols present3 If desired, adjust the temperature. See pages 18.

text_image
START4 Press Start. The combi microwave oven will start.

natural_image
Top-down schematic of an oven with two circular vented chambers and a double-bonded top panel (no text or labels)For Grill + Microwave, ceramic tray with grill insert is usually placed on Level 4.
* Microwave Power Setting: 100 - 600 W
* Temperatures Setting: 40 - 200 °C
* Please ensure that glass baking dishes are suitable for 40 - 250 °C cooking temperatures.
Cooking guide
Use power level with temperatures and times in this table as guidelines for cooking.
Preheating is not needed.
| Food Item | Shelf Level | Power level (W) | Temperature (°C) | Time 1 ^st (min) | Time 2 ^nd (min) | Accessory |
| Baked Potatoes | 4 600 180 | - 200 10 - | 15 - | Ceramic tray + grill insert | ||
| Grilled Tomatoes | 4 300 | 160 - 180 | 05 - 10 - | Ceramic tray + grill insert | ||
| Vegetable Gratin | 4 450 | 180 - 200 | 10 - 20 - | Ceramic tray + grill insert | ||
| Roast Fish 4 300 | 180 - 200 | 04 - 08 04 - 06 | Ceramic tray + grill insert | |||
| Chicken Pieces 4 | 300 180 | - 200 10 - | 15 10 - 15 | Ceramic tray + grill insert |

text_image
=
natural_image
Hand holding a circular button with an eye symbol (no text or labels)1 Choose the desired mode and function (and set the temperature if preferred). Press Cook Time.

text_image
20:00m2 The default cook time and the 'cook time symbol' will blink.

natural_image
Circular mechanical component with rotational arrows indicating motion (no text or symbols)
natural_image
Hand icon pointing at a circular button with an 'O' symbol (no text or numbers present)
text_image
START3 Turn the MULTI-FUNCTION SELECTOR to set the desired Cook Time and press Cook Time to end the setting of the cook time.
4 Press Start. The oven will start promptly.
Example: Setting the Delayed Start Time (2 hours) in Oven Mode

natural_image
Simple diagram of a circular object with diagonal stripes and a horizontal line, no text or symbols present.
natural_image
Hand icon pointing at a circular button with an eye symbol (no text or numbers)1 Turn the Mode selector to Oven mode. Press and hold Cook Time for 3 seconds.

text_image
8:00:00 8:00:00 8:00:00 12:30m2 The current time and the ‘delayed start time symbol’ will blink.

natural_image
Circular mechanical component with rotational arrows, no visible text or symbols
natural_image
Hand icon pointing at a circular button with an eye symbol (no text or numbers)3 Turn the MULTI-FUNCTION SELECTOR to set the desired delayed start time (in this example 2 hours) and press Cook Time to confirm.

text_image
88:00 88:00 8:00 2:004 In the display you will see the delayed start time that counts down. You can also read 'Programme will start in' in the display. The combi microwave oven will start automatically after two hours.
Auto Menu Mode allows you to choose from 65 pre-programmed settings to conveniently cook, roast, bake or defrost your favorite foods. Cooking time and power level are automatically set. Simply select one of the 65 settings and choose the weight to start cooking.
Auto menu mode setting

text_image
AVTO1 Turn the MODE SELECTOR to AUTO MENU position.

natural_image
Circular mechanical component with rotational arrows, no text or symbols present
natural_image
Hand cursor clicking a button with a play button (no text or symbols)2 Turn the MULTI-FUNCTION SELECTOR to choose an auto menu feature. Press Next to confirm the setting.
• Refer to the table on pages 51 - 60 for a description of the 65 Auto Menu settings.

natural_image
Circular mechanical component with rotational arrows indicating motion (no text or symbols)3 Turn the MULTI-FUNCTION SELECTOR to choose a food item.

text_image
START4 Press the Start to confirm the setting and to start the auto menu program.
Note
- Some of the auto menus are continuous. Others require the food to be turned over. The oven will beep to prompt you.
- The oven temperature set during the operation of the auto menu is displayed.
• Temperatures and times cannot be changed during cooking.
Guide to auto menu programmes
The following table presents 65 Auto Programmes for Cooking, Roasting and Baking. It contains its quantities, weight ranges and appropriate recommendations. Cooking Modes and times have been pre-programmed for your convenience. You can refer to these guidelines for cooking. Always insert food in cold oven. Always use oven gloves while taking out food.
The Auto Menu Programmes are divided into 10 categories:
- Reheat
- Frozen
- Bakery
- Dishes
- Fish
- Meat
- Poultry
- Side dishes
- Speed cook
- User dishes
The categories 1-9 are pre-programmed, category 10 contains your own programmed dishes (see page 51 - 63).
Important
Most of Auto Menu settings use microwave energy to heat food. Therefore guidelines for cookware and other microwave safety precautions must be strictly observed when using this mode.
- Reheat
| No | Food Item Weight | Accessory | Shelf level | Recommendation | |
| 1 Drink | 0.250.5 | Ceramic tray 1 | Pour the liquid into ceramic mugs and reheat uncovered. Place one mug in the centre, place 2 mugs side by side on ceramic tray. Leave them to stand in the microwave oven. Stir well after 1-2 min standing. Be careful while taking the cups out. (see safety instruction for reheating liquids.) | ||
| 2 | Plated meal | 0.3-0.40.4-0.5 | Ceramic tray 1 | Put on a ceramic plate and cover with microwave cling fi lm. This programme is suitable for meals consisting of 3 components (e.g. meat with sauce, vegetables and a side dish like potatoes, rice or pasta). After cooking stand for 3 min. | |
| 3 | Frozen Plated meal | 0.3-0.40.4-0.5 | Ceramic tray 1 | Take frozen ready meal and check if dish is suitable for microwave. Pierce fi lm of ready meal. Put the frozen ready meal in the centre. This programme is suitable for frozen ready meals consisting of 3 components (e.g. meat with sauce, vegetables and a side dish like potatoes, rice or pasta). After cooking stand for 3 min. | |
| 4 | Soup | 0.2-0.30.4-0.5 | Ceramic tray 1 | Pour into a deep ceramic plate or bowl and cover with plastic lid during heating. Put soup in the centre. Stir carefully before and after 2-3 min standing. | |
| 5 | S t e | 0.2-0.3w0.4-0.5 | Ceramic tray 1 | Pour into a deep ceramic plate or bowl and cover with plastic lid during heating.Put soup in the centre.Stir carefully before and after 2-3 min standing. | |
- Frozen
| No | Food Item Weight | Accessory | Shelf level | Recommendation | |
| 1 | Frozen fi sh fi ngers | 0.3-0.5 Baking tray 3 | Put frozen fi sh fi ngers evenly on baking tray. If turnover when beeps, you can get the better results. | ||
| 2 | Frozen fi sh gratin | 0.4-0.6 | Grill + Ceramic tray | 3 | Put frozen fi sh gratin in a suitable glass pyrex or ceramic dish on the ceramic tray.After reheating let stand for 2-3 minutes. This programme is suitable for frozen fi sh gratin such as lasagna, cannelloni or macaroni. |
| 3 | Frozen lasagne | 0.4-0.6 | Grill + Ceramic tray | 3 | Put frozen lasagne in a suitable glass pyrex or ceramic dish.After reheating let stand for 2-3 minutes. |
| 4 | Frozen oven chips | 0.4-0.5 Baking tray 3 | Distribute frozen oven chips on baking tray. | ||
| 5 | Frozen pizza | 0.3-0.40.4-0.5 | Baking tray 3 | Put frozen pizza in the middle of oven rack. | |
| 6 | Frozen Potato Wedge | 0.4-0.6 Baking tray 3 | Put frozen potato wedge evenly on metal baking tray. | ||
| 7 | Frozen Croquettes | 0.4-0.6 Baking tray 3 | Put frozen potato croquettes evenly on metal baking tray. | ||
| 8 | Frozen vegetables | 0.3-0.40.4-0.5 | Ceramic tray 1 | Put frozen vegetables, such as broccoli, carrot slices, caulifl ower fl orets and peas into a glass bowl with lid. Add 1-2 tbsp. water. Put bowl in the centre. Cook covered. Stand 2-3 minutes and stir after cooking. | |
| 9 | Frozen Potato Roesti | 0.2-0.4 Baking tray 3 | Put frozen potato roesti evenly on metal baking tray. | ||
| 10 | Frozen pasta gratin | 0.2-0.5 | Grill + Ceramic tray | 3 | Put frozen pasta gratin in a suitable glass pyrex or ceramic dish on the ceramic tray. After reheating let stand for 2-3 minutes. This programme is suitable for frozen pasta gratin such as lasagna, cannelloni or macaroni. |
| 11 | Frozen Pizza Snack | 0.2-0.3 | Grill + Ceramic tray | 5 | Put frozen pizza snacks on grill insert rack with ceramic tray and cook. |
| 12 | Frozen Mini Spring rolls | 0.2-0.4 Baking tray 3 | Put frozen mini spring rolls evenly on metal baking tray. |
- Bakery
| No | Food Item Weight | Accessory | Shelf level | Recommendation | |
| 1 | Apple pie 1.2-1.4 | Oven rack 2 | Put apple pie into a round metal dish. Put on the oven rack. The weight ranges include apple and so on. | ||
| 2 | Base for fruit pie | 0.3-0.5 Oven rack 3 | Put batter into metal base dish on the oven rack. | ||
| 3 | Brownies 0.5-0.7 | Oven rack 3 | Put batter into a round glass pyrex and ceramic dish on the oven rack. | ||
| 4 | Croissants 0.2-0.4 | Baking tray 3 | Use baking paper. Put croissants side by side on the baking tray. | ||
| 5 | Dutch butter pie | 0.5-0.7 Oven rack 2 | Put fresh batter into a round metal baking dish. Put on the rack. | ||
| 6 | Dutch loaf Cake | 0.7-0.8 Oven rack 3 | Put fresh batter into suitable sized rectangular metal baking dish(length 25 cm). Put dish lengthway to the door on oven rack. | ||
| 7 | Muffi ns 0.5-0.6 | Oven rack 3 | Put muffi n batter into metal muffi n dish, suitable for 12 muffi ns. Set dish in the middle of oven rack. | ||
| 8 | Rising yeast dough | 0.3-0.6 Oven rack 3 | Prepare yeast dough for pizza, cake or bread. Put into a large round heat-resistant dish and cover with cling fi lm. | ||
| 9 | Sponge cake | 0.3-0.6 Oven rack 2 | Put 300 g batter into 18 cm, 400 g into 24 cm and 500 g into 26 cm diameter round black metal baking dish. Set dish in the middle of oven rack. | ||
| 10 | White bread 0.7-0.8 | Oven rack 3 | Put fresh batter into suitable sized rectangular metal baking dish(length 25 cm). Put dish lengthway to the door on oven rack. |
- Dishes
| No | Food Item Weight | Accessory | Shelf level | Recommendation | |
| 1 | Homemade pizza | 0.6-1.0 Baking tray 2 | Put pizza on the tray. The weight ranges include topping such as sauce, vegetables, ham and cheese. | ||
| 2 | Lasagne 0.8-1.1 | Oven rack 3 | Prepare fresh lasagne or use ready prepared product and put into a suitable sized ovenproof dish. Put dish in the centre of oven. | ||
| 3 | Potato gratin | 0.7-1.0 | Oven rack 3 | Put the fresh potato gratin into a glass pyrex dish. Put the dish on the rack. After cooking stand for 2-3 minutes. | |
| 4 | Vegetable Gratin | 0.4-0.8 | Oven rack 3 | Prepare vegetable gratin using an ovenproof round dish. Put dish in the centre of oven. After cooking stand for 2-3 minutes. | |
| 5 | Puff pastry, fi lled apple | 0.3-0.5 | Baking tray 2 | Use baking paper. Put 4 pcs side by side on the baking tray. | |
| 6 | Puff pastry, fi lled fi sh | 0.2-0.6 | Baking tray 2 | Use baking paper. Put 4 pcs side by side on the baking tray. | |
| 7 | Puff pastry, fi lled minced meat | 0.2-0.6 | Baking tray 2 | Use baking paper. Put 4 pcs side by side on the baking tray. | |
| 8 | Quiche 0.7-0.9 | Oven rack 2 | We recommend to preheat the oven to 190 °C with Bottom + convection mode until beep sounds. Use the metal baking tin. After preheating put in the centre of oven rack. |
- Fish
| No | Food Item Weight | Accessory | Shelf level | Recommendation | |
| 1 | Fish fi llet, thin | 0.3-0.6 | Oven rack + Baking tray | 5+2 | Marinate fi sh fi llet (thin, 1 cm) and put side by side on grill rack. Turnover, as soon as the oven beeps. Push start button to continue process. |
| 2 F | sh fi llet 0.3-0.6 | Oven rack + Baking tray | 5+2 | Marinate fi sh fi llet(2 cm) and put side by side on grill rack. Turnover, as soon as the oven beeps. Push start button to continue process. | |
| 3 | Salmon steak, 3cm | 0.3-0.6 | Oven rack + Baking tray | 5+2 | Marinate salmon steaks and put side by side on grill rack. Turnover, as soon as the oven beeps. Push start button to continue process. |
| 4 | Prawns 0.2-0.5 | Oven rack + Baking tray | 5+2 | Put the raw prawns on the baking tray evenly. | |
| 5 | Whole fi sh 0.4-0.8 | Oven rack + Baking tray | 3+2 | Brush skin of whole fi sh with oil and herbs and spices. Put fi sh side by side, head to tail on the wire rack. Turnover, as soon as the beep sounds. Push start button to continue process. The programme is suitable for whole fi shes, like trout, pikeperch or gilthead. |
- Meat
| No | Food Item Weight | Accessory | Shelf level | Recommendation | |
| 1 | Beef steak, thin | 0.3-0.6 | Oven rack + Baking tray | 5+2 | We recommend to preheat the oven to 250 °C with grill mode for 5 min. Put beef steaks side by side in the middle of oven rack. Turn over as soon as the oven beeps. Push start button to continue process. |
| 2 | Beef steak, thick | 0.6-0.8 | Oven rack + Baking tray | 5+2 | We recommend to preheat the oven to 250 °C with grill mode for 5 min. Put beef steaks side by side in the middle of oven rack. Turn over as soon as the oven beeps. Push start button to continue process. |
| 3 | Lamb chops | 0.3-0.6 | Oven rack + Baking tray | 5+2 | Marinate lamb chops. Put lamp chops on oven rack. Turnover, as soon as the oven beeps and push the start button to continue process. |
| 4 | Leg of lamb, rare-medium | 1.0-1.2 | Oven rack + Baking tray | 3+2 | Put leg of lamb, brushed with oil and spices, with the fat-side down on the oven rack and baking tray. Turnover, as soon as the beep sounds. Press start to continue cooking process. |
| 5 | Roast beef, rare-medium | 1.1-1.3 | Oven rack + Baking tray | 3+2 | Brush the beef with oil and spices(pepper only, salt should be added after roasting). Put it on the oven rack. Turnover, as soon as the oven beeps and press start to continue cooking process. After roasting and during standing time of 5-10 minutes it should be wrapped in aluminium foil. |
| 6 | Roast beef, medium-welldone | 1.1-1.3 | Oven rack + Baking tray | 3+2 | Brush the beef with oil and spices(pepper only, salt should be added after roasting). Put it on the oven rack. Turnover, as soon as the oven beeps and press start to continue cooking process. After roasting and during standing time of 5-10 minutes it should be wrapped in aluminium foil. |
| 7 | Roast beef, slowly cooked | 1.1-1.3 | Oven rack + Baking tray | 3+2 | Brush the beef with oil and spices(pepper only, salt should be added after roasting). Put it on the oven rack. Turnover, as soon as the oven beeps and press start to continue cooking process. After roasting and during standing time of 5-10 minutes it should be wrapped in aluminium foil. |
| 8 | Roast pork 0.7-0.9 | Oven rack + Baking tray | 3+2 | Put pork roast, brushed with oil and spices, with the fat-side down on the oven rack. Turnover, as soon as the beep sounds. Press start to continue cooking process. |
- Poultry
| No | Food Item Weight | Accessory | Shelf level | Recommendation | |
| 1 | Chicken pieces | 0.5-0.71.0-1.2 | Oven rack + Baking tray | 5+2 | Brush chilled chicken pieces with oil and spices. Put skin-side down on oven rack. Turnover, as soon as the oven beeps. Push start button to continue process. |
| 2 | Chicken spits | 0.6-0.8 | Oven rack + Baking tray | 5+2 | Brush the Chicken spits with oil and spices(max. size of chicken cubes 3X3 cm). Put in the middle of oven rack. Turnover as soon as the oven beeps. Push start button to continue process. |
| 3 | Chicken, drumsticks | 0.5-0.7 | Oven rack+Baking tray | 5+2 | Put the marinated Chicken drumsticks side by side, with skin-side down on the oven rack. Turnover as soon as the oven beeps. Push start button to continue process. |
| 4 | Chicken breasts | 0.4-0.60.6-0.8 | Oven rack + Baking tray | 5+2 | Put the marinated Chicken breast side by side on the oven rack. Turnover as soon as the oven beeps. Push start button to continue process. |
| 5 | Duck breasts | 0.3-0.5 | Oven rack + Baking tray | 5+2 | Brush duck breast with oil and spices. Put on the oven rack with skin-side down. Turnover, as soon as the oven beeps. Push start button to continue process |
| 6 | Turkey legs 0.8-0.9 | Oven rack + Baking tray | 3+2 | Put turkey legs, brushed with oil and spices on the oven rack. Turnover, as soon as the beep sounds. Press start to continue cooking process. | |
| 7 | Whole chicken | 1.0-1.11.2-1.3 | Oven rack + Baking tray | 3+2 | Brush chicken with oil and spices and put breast side-down on the grill rack. Turnover, as soon as the oven beeps and push start button to continue process. After cooking let stand for 5 minutes. |
- Side dishes
| No | Food Item Weight | Accessory | Shelf level | Recommendation | |
| 1 | Fresh vegetables | 0.3-0.40.5-0.6 | Ceramic tray 1 | Weigh the vegetables after washing, cleaning and cutting into similar size. Put them into a glass bowl with lid. Add 45 ml water (3 tablespoons). Put bowl in the centre. Cook covered. Stand 2-3 minutes and stir after cooking. | |
| 2 | Peeled Potato | 0.5-0.60.7-0.8 | Ceramic tray 1 | Weigh the potatoes after peeling, washing and cutting into a similar size. Put them into a glass bowl with lid. Add 45-60 ml (3-4 tablespoons) water. Put bowl in the centre. Stand 2-3 minutes and stir after cooking. | |
| 3 | Baked Potato | 0.4-0.8 Baking tray 3 | Use middle sized potatoes. Rinse and clean potatoes. Brush skin with a mixture of olive oil, salt pepper and herbs. Put potatoes side by side on baking tray. | ||
| 4 | Wedge Potato | 0.4-0.6 Baking tray 3 | Rinse and clean potatoes. Cut them into wedge or cut small potatoes into halves. Brush with olive and spice. Put them on the baking tray evenly and start to cook. | ||
| 5 | Roasted Vegetable | 0.2-0.5 Baking tray 5 | Put vegetables, such as sliced courgette, pieces of pepper, sliced aubergine, mushrooms and cherry tomatoes into baking tray. Brush with a mixture of olive oil, herbs and spices. | ||
| 6 | White rice 0.3-0.4 | Ceramic tray 1 | Weigh parboiled white rice and add double quantity of cold water. For example: when cooking 0.3 kg rice, add 600ml cold water. Use glass pyrex bowl with lid. Put bowl in the centre. Cook covered. Stand 5 minutes and stir after cooking. |
- Speed cook
| No | Food Item Weight | Accessory | Shelf level | Recommendation | |
| 1 | BakedPotato halves | 0.4-0.60.6-0.8 | Ceramic tray + insert rack | 4 | Cut potatoes into halves. Put them in a circle on the rack with the cut side to the grill. After cooking let stand for 2-3 minutes. |
| 2 | Roast pork 0.8-1.0 | Ceramic tray +i nsertrack | 3 | Put marinated roast pork on grill insert rack with ceramic tray. When beeps, turnover and start again. | |
| 3 | Chicken pieces | 0.5-0.71.0-1.2 | Grill + Ceramic tray | 5 | Brush chilled chicken pieces with oil and spices. Put on grill insert with ceramic tray with the skin-side down. Turnover, as soon as the oven beeps. After cooking let stand for 2-3 minutes. |
| 4 | Whole chicken | 1.0-1.11.2-1.3 | Grill + Ceramic tray | 3 | Brush chilled chicken with oil and spices. Put breast-side-down, in the middle of grill insert rack with ceramic tray in shelf level 2. Turnover, as soon as the oven beeps. Put start button to continue process. After cooking let stand for 5 minutes. |
Add your own dishes
You can program 10 of your own dishes and save it as a 'user dishes'.

text_image
MENU
natural_image
Circular mechanical component with rotational arrows, no visible text or symbols1 Press Menu and turn the MULTI-FUNCTION SELECTOR to choose 'Dishes'.

natural_image
Hand holding a circular button with a play triangle icon (no text or symbols)
natural_image
Circular button with directional arrows indicating refresh or move (no text or symbols)2 Press Next to confirm. Turn the MULTI-FUNCTION SELECTOR to choose 'Add'.

natural_image
Hand icon pointing at a button with a play button (no text or symbols)
natural_image
Circular mechanical component with rotational arrows, no visible text or symbols3 Press Next to confirm. In the display you will see 'Choose Name'. Enter the first character of the name of your dish by turning the MULTI-FUNCTION SELECTOR. Press Next and enter the second character, etc. If you have entered the name completely; wait for 'two arrows' to appear after the name and press Next to confirm the setting.

natural_image
Circular mechanical component with rotational arrows indicating motion (no text or symbols)
natural_image
Hand holding a button with a play button icon (no text or symbols)4 In the display you will see 'Choose function' and then the several oven modes. Turn the MULTI-FUNCTION SELECTOR to choose the preferred oven mode.

text_image
Two-step diagram showing a hand pressing a circular button labeled with 'G' and '°C', likely illustrating a process or control.5 If desired, adjust the cook time, and/or the temperature (if available). See pages 18.

text_image
START6 If all the settings are done display; press Start to confirm. In the display you will see 'Saved'
- During programming your own dishes, you can go back by pressing Back.
- It is not possible to change the settings of the added dishes after you have pressed Start. You have to delete your own dishes (see page 63) and add it again with the new settings.
Choose your own programmed dishes

text_image
AUTO1 Turn the Mode selector to "AUTO" position.

natural_image
Two icons: a circular dial with rotation arrows and a hand pressing a button (no text or symbols)2 Turn the MULTI-FUNCTION SELECTOR to choose 'User Dishes'. Press Next to confirm the setting.

text_image
Two UI icons: a circular dial with rotation arrows and a hand pressing a button labeled 'START'.3 Turn the MULTI-FUNCTION SELECTOR to choose your own programmed dish. Press Start to start the cooking of your dishes.
Delete your own programmed dishes

text_image
MENU
natural_image
Circular mechanical component with rotational arrows, no text or symbols present1 Press Menu and turn the MULTI-FUNCTION SELECTOR to choose 'Dishes'.

natural_image
Hand holding a button with a play button icon (no text or symbols)
natural_image
Circular button with arrow indicating refresh or move (no text or symbols)2 Press Next to confirm. Turn the MULTI-FUNCTION SELECTOR to choose 'Delete'.

natural_image
Hand holding a circular button with a play triangle icon (no text or symbols)
natural_image
Circular button with directional arrows indicating rotation or refresh (no text or symbols)3 Press Next to confirm. Turn the MULTI-FUNCTION SELECTOR to choose your own programmed dishes.

natural_image
Hand holding a button with a play button icon (no text or symbols)
natural_image
Circular button with arrow indicating refresh or move (no text or symbols)4 Press Next to confirm. Turn the MULTI-FUNCTION SELECTOR to choose 'Delete'.

text_image
START5 Press Start to delete your own programmed dishes.
Setting Defrost Mode
Choose from fi ve pre - programmed microwave settings for defrosting. Defrosting time and power level are automatically set.
Open the door. Place the frozen food in the centre of the ceramic tray. Position is level 1. Close the door.

natural_image
Circular mechanical component with internal striped pattern and dimension lines (no text or symbols)1 Turn the Mode selector to Defrost mode.

natural_image
Circular mechanical knob with rotational arrow indicating clockwise motion (no text or symbols)2 Turn MULTI-FUNCTION SELECTOR to the desired defrost item (refer to the table on page 65 for a description of the 5 defrost settings).

text_image
kg-W3 If desired, adjust the weight. See page 19.

text_image
START4 Press Start. The combi microwave oven will start.
Note
- The oven beeps half way through defrosting to remind you to turn the food over.
Important
- Only use containers that are microwave - safe.
- You can also defrost food manually. To do so, select the microwave function with a power level of 180 W (see pages 31 - 32).
Guide to defrost settings
The following table presents the various Defrost programmes, quantities, standing times and appropriate recommendations. These programmes use microwave energy only. Remove all packaging material before defrosting. Place meat, poultry and fish on the ceramic tray.
Important
The Defrost uses microwave energy to heat food. Therefore guidelines for cookware and other microwave safety precautions must be strictly observed when using this mode.
| NO | Food Item | Serving size (kg) | Accessory | Standing time (min) | Recommendation |
| 1 | Meat 0.2-2.0 | Ceramic tray | 20 - 120 | Always shield the edges with aluminium foil.Turn the meat over, as soon as the oven beeps. This programme is suitable for beef, lamb, pork, steaks, chops, minced meat. | |
| 2 | Poultry 0.2-2.0 | Ceramic tray | 20 - 120 | Always shield the leg and wing tips with aluminium foil. Turn the poultry over, as soon as the oven beeps. This programme is suitable for whole chicken as well as for chicken portions. | |
| 3 | Fish 0.2-2.0 | Ceramic tray | 20 - 110 | Always shield the tail of a whole fi sh with aluminium foil. Turn the fi sh over, as soon as the oven beeps. This programme is suitable for whole fi shes as well as for fi sh fi llets. | |
| 4 | Bread/ cake | 0.1-1.0 | Ceramic tray | 10 - 60 | Put bread horizontally, lengthways to the door, on a piece of kitchen paper on ceramic tray.Turn over, as soon as the oven beeps. Place cake on ceramic tray and if possible, turn over, as soon as the oven beeps. (Oven keeps operating and is stopped, when you open the door.) This programme is suitable for all kinds of bread, sliced or whole, as well as for bread rolls and baguettes. Arrange bread rolls side by side.This programme is suitable for all kinds of yeast cake, biscuit, cheese cake and puff pastry. It is not for all kinds of yeast cake, biscuit, cheese cake and puff pastry. It is not with chocolate topping. |
| 5 | Fruit 0.1-0.8 | Ceramic tray | 5 - 30 | Spread fruits evenly on the ceramic tray. This programme is suitable for all kind of fruits. |
According to standard EN 60350
1. Baking
The recommendations for baking refer to preheated oven. Insert baking tray with slanted side towards the door front.
| Type of Food | Dish & Notes Shelf level | Cooking Mode Temp. °C | Cooking time min | ||
| Small Cakes | Baking tray | 3 | Top Heat + Bottom | 150 - 170 20 | -30 |
| 3 Hot Air 150 - 170 20-25 | |||||
| Baking tray + Baking tray ** | 2 + 5 | Multi-Level Cook | 150 - 160 20 | -30 | |
| Fatless Sponge Cake | Springform cake tin on Big grid (Dark coated, ø 26 cm) | 2 | Top Heat + Bottom | 160 - 180 20 | -30 |
| 2 Hot Air 150 - 160 30 - 35 | |||||
| Shortbread Baking tray | 3 | Top Heat + Bottom | 150 - 160 | 20 - 30 | |
| 3 Hot Air 150 - 160 | 20 - 30 | ||||
| Apple Yeast Tray Cake | Baking tray | 3 | Top Heat + Bottom | 150 - 160 40 | -50 |
| 2 Hot Air 150 - 160 45 - 55 | |||||
| Apple Pie | Big grid + 2 Springform cake tins * (Dark coated, ø 20 cm) | 2 Placed diagonally | Hot Air + Bottom Heat | 170 - 190 70 | -90 |
* Two springform cake tins are arranged on the grid at the back left and at the front right.
** Two cakes are arranged in the center on top of each other.
2. Grilling
Preheat the empty oven for 5 minutes using Grill function.
| Type of Food | Dish & Notes Shelf level | Cooking Mode Temp. °C | Cooking time min | |
| White Bread Toasts | Oven rack 5 Grill 270 | 1^st 1 - 2 2^nd 1 - 2 | ||
| Beef Burgers (12 ea) | Oven rack +Baking tray (to catch drippings) | 5 Grill 270 | 1^st 10 - 15 2^nd 10 - 15 |
The Aqua Clean feature allows you to sanitize your oven in just 15 minutes.

natural_image
Circular dial indicator with measurement markings (no text or symbols)
natural_image
Illustration of a hand pouring liquid into a microwave oven (no text or symbols)1 Turn Mode selector to "Off" position. Pour about 100 ml water onto the floor of the empty oven.

text_image
MENU
natural_image
Circular mechanical component with rotational arrows, no visible text or symbols2 Press Menu and turn the MULTI-FUNCTION SELECTOR to choose 'Cleaning'.

natural_image
Hand holding a circular button with a play triangle icon (no text or symbols)3 Press Next to choose 'Aqua clean'.

text_image
START4 Press Start. The combi microwave oven will start automatically.

natural_image
Illustration of a hand cleaning a kitchen oven with a cloth (no text or symbols)5 When the process is finished: open the door and wipe inside the cooking cavity with a dry cloth.
Important
- Use this feature only when the microwave oven has cooled down completely to room temperature.
• DO NOT use distilled water.
• DO NOT use high-pressure water cleaners or steam jet cleaners to clean the microwave oven.

flowchart
graph TD
    A["Receiving Oven"] --> B["Lighting Lamp"]
    B --> C["Lighting Toilet"]
    C --> D["Lighting Toilet with Air Filter"]
    D --> E["Lighting Toilet with Air Filter"]
    E --> F["Lighting Toilet with Air Filter"]
    F --> G["Lighting Toilet with Air Filter"]
After deactivating the Aqua Cleaning
Tips
• Take care when opening the door before the end of the aqua cleaning procedure; the water on the bottom is hot.
- Never leave the residual water in the oven for any length of time, for example, overnight.
- Open the oven door and remove the remaining water with a sponge.
- Using a detergent - soaked sponge, a soft brush or a nylon scrubber, wipe the oven interior. Stubborn soil can be removed with a nylon scourer.
- Lime deposits may be removed with a cloth soaked in vinegar.
- Wipe clean with clear water and dry with a soft cloth (do not forget to wipe under the oven door seal).
- If the oven is heavily soiled, the procedure may be repeated after the oven has cooled.
- If the oven is heavily soiled with grease, for example, after roasting or grilling, it is recommend that you rub detergent into the stubborn soil before activating the oven cleaning function.
• After cleaning, leave the oven door ajar at a 15^ angle to allow the interior enamel surface to dry thoroughly.
The oven's Child Safety Lock allows you to lock the control panel to protect the oven against unintended use.
To Lock the Oven

text_image
Control panel interface with digital display and navigation buttons labeled 'MENU' and directional arrows1 Press BACK and MENU at the same time and hold for 3 seconds.

text_image
Control panel interface with multiple display screens and function buttons, including 'OK', 'Cancel', and 'Log 50' options.2 A lock symbol appears in the display, indicating that all functions are locked.
To Unlock the Oven

text_image
Control panel interface with digital display and navigation buttons labeled 'MENU' and directional arrow1 Press BACK and MENU at the same time and hold for 3 seconds.

text_image
Front panel of a digital appliance control interface with labeled buttons and display screen showing temperature readings.2 The lock symbol disappears in the display, indicating that all functions are unlocked.
Clean your oven regularly to prevent grease and food particles from building up, especially on inside and outside surfaces, door and door seals.
- Clean outside surfaces with a soft cloth and warm soapy water. Rinse and dry.
- Remove any splashes or stains on inside surfaces with a soapy cloth. Rinse and dry.
- To loosen hardened food particles and remove smells, place a cup of diluted lemon juice on the floor of the empty oven and heat for ten minutes at maximum power.
- Wash the inside.
Important
• Take special care NOT to spill water in the vents.
- NEVER use abrasive products or chemical solvents.
- ALWAYS ensure that door seals are clean to prevent particles from building up so that the door can close properly.
STORING AND REPAIRING YOUR MICROWAVE OVEN
Repairs should only be made by a qualified service technician.
If oven requires servicing, unplug the oven and contact ATAG Customer Service.
When calling, please have the following information ready:
• The model number and serial number (can be found inside the oven door)
- Warranty details
• Clear description of the problem
If oven must be temporarily stored, choose a clean dry place as dust and dampness can cause damage.
If you have problems with your oven, try the solutions suggested below. They may save you the time and inconvenience of an unnecessary service call.
▶ Food remains uncooked.
- Ensure timer has been set correctly and START pressed.
- Firmly close door.
- Make sure you have not blown a fuse or triggered a circuit breaker.
▶ Food is either overcooked or undercooked.
• Make sure appropriate cook time was used.
- Make sure appropriate power level was used.
▶ Sparking and cracking (arcing) occur inside the oven.
- Make sure you are using proper cookware without metal trimmings.
- Make sure no forks or other metal utensils have been left inside the oven.
- If using aluminum foil, make sure it is not too close to inside walls.
▶ The oven causes interference with radios or televisions.
- Slight interference on televisions or radios may occur when the oven is operating. To minimize this effect, try to install oven away from televisions, radios and aerials.
Electronic interference causes DISPLAY to be reset.
- Disconnect the power plug and reconnect it. Reset the time.
▶ Condensation appears inside the oven.
- This is a normal occurrence. Simply wipe away after cooking.
The fan continues to operate after the oven has been turned off.
- This is a normal occurrence. Cooling fan may continue to operate for up to three minutes after oven has been turned off.
▶ Air flow is detected around the door and outer casing.
• This is a normal occurrence.
▶ Light reflection around the door and outer casing.
• This is a normal occurrence.
▶ Steam escapes from around the door or vents.
• This is a normal occurrence.
▶ A clicking sound occurs while the oven is operating, especially in defrosting mode.
• This is a normal occurrence.
| Error Code General Functions | |
 | TEMP SENSOR OPEN ERRORIt occurs due to a defective sensor, misplaced wires, a defective PCB and when A/D value that MICOM senses falls under 10. |
 | TEMP SENSOR SHORT ERRORIt occurs due to a defective sensor, misplaced wires, a defective PCB and when A/D value that MICOM senses rises over 252. |
 | TEMP SENSOR TARGET TEMPlt occurs when the preheating is not completed in 30 minutes. |
 | ABNORMAL TEMP SENSING ERRORIt occurs when the temperature of cavity inside is over 250 °C for 10 minutes. |
 | MICROWAVE ABNORMAL TEMP SENSING ERRORIt occurs when the temperature of cavity inside is over 210 °C in the Microwave Mode. |
 | KEY SHORT ERRORThis error occurs when a button is pressed and held for over 10 seconds.It may occur when water soaks through the inside of the control panel or dust particles are stuck to TOUCH PAD. |
 | NAK SIGNAL ERRORNak signal occurs if initial power-up for more than 10 seconds. |
 | COMMUNICATION ERRORIt occurs when not communicating between main and sub PCB for more than 10 seconds. |
 | EEPROM OPEN ERRORIt occurs when EEPROM communication is error during initial power setting. |
 | EEPROM READ & WRITE ERROREeprom use does not occur. |
If any of these errors occur, please contact ATAG Customer Service.
| Model CX4411T | CX4492T |
| Power Source 230 V ~ 50 Hz | |
| Power ConsumptionMaximum powerMicrowave ModeGrill ModeHot air Mode | 3200 W1650 W2500 W2400 W |
| Output Power 100 W/900 W (IEC - 705) | |
| Operating Frequency 2450 MHz | |
| Magnetron OM75P (21) | |
| Cooling Method Cooling fan motor | |
| DimensionsSet size:Built in size: | W 595 x H 454 x D 569.4W 555 x H 445 x D 548.8 |
| Volume 50 L | |
| WeightNetShipping | 42.0 kg46.5 kg |
The packaging of this appliance is recyclable and may have been made of:
- cardboard
- paper
- polythene foil (PE)
• CFC-free polystyrene (PS hard foam)
• polypropylene tape (PP).
Dispose of these materials in a responsible manner and in accordance with government regulations.

natural_image
Symbol of a trash bin with crossed lines indicating no waste or discharge (no text or labels)The appliance carries the symbol of a crossed-out dustbin to state that segregated processing is compulsory to avoid any negative effects on the environment and public health. This means that at the end of its working life, you must hand it in at a special refuse collection centre run by your local authority or dealer.
Segregated processing enables the recovery of the materials used in the production of this appliance, thus saving considerably in terms of raw materials and energy.
CE
Declaration of conformity
We declare that our products meet the applicable European Directives, Decisions and Regulations and the requirements listed in the standards referenced.
©
©
©
©
©
©
©
©
©
©
©
©
©
©
©
©
©
©
©
©
©
©
©
©
©
©
©
©
©
©
©
©
©
©
©
©
©
©
©
©
©
©
©
©
©
©
©
©
©
©
©
©
©
©
©
©
©
©
©
©
©
©
©
©
©
©
©
©
©
©
©
©
©
©
©
©
©
©
©
©
©
©
©
©
©

©
©
©
©
©
©
©
©
©
©
©
©
©
©
©
©
©
©
©
©
©
©
©
©

©
©
©
©
©
©
©
©
©
©
©
©
©
©
©
©
©
©
©
©
©
©
©
©
©
©
©
©
©
©
©
©
©
natural_image
Symbol of a trash bin crossed with diagonal lines, no text or numbers presentnatural_image
Simple line drawing of a rectangular tray or container with no text or symbolsnatural_image
Isometric line drawing of two rectangular electronic components with dashed outlines (no text or symbols)natural_image
Isometric view of a metal grid structure with no text or symbolsnatural_image
Circular mechanical component with rotational arrows, no text or symbols present
text_image
STARTnatural_image
Circular mechanical component with rotational arrows, no text or symbols present
text_image
89:56.18 89:100text_image
1:00 MENU C C Top-W ▶natural_image
Circular mechanical component with rotational arrows, no text or symbols present
text_image
START
text_image
1:30 88:88:8text_image
Diagram of a kitchen oven with a chicken inside, showing airflow direction and control buttonsnatural_image
Circular dial indicator with diagonal lines, no visible text or symbolsnatural_image
Hand holding a circular button with an eye symbol (no text or labels)
text_image
kg-Wnatural_image
Circular button with diagonal stripes and an arrow, no text or symbols presentnatural_image
Circular button with directional arrows indicating rotation or refresh (no text or symbols)2 Vrid Vrid MULTI-FUNKTIONSVÄLJAREN till
natural_image
Two icons: a hand pointing at a circular button labeled '°C' and a rotary knob with curved arrows indicating rotation (no text or symbols)natural_image
Two grayscale icons: one showing a hand button with an eye symbol, the other showing a circular dial with bidirectional arrows (no text or symbols)natural_image
Top-down schematic of an oven with two circular fans inside, showing internal structure and ventilation ducts (no text or symbols)natural_image
Technical line drawing of an oven with two fans and a cooling rack (no text or symbols)natural_image
Top-down schematic of a double boiler with two circular fans inside, showing internal structure and mounting brackets (no text or symbols)text_image
Technical diagram of an oven with labeled components, showing internal structure and numbered parts.natural_image
Technical line drawing of an oven with internal compartments and ventilation ducts (no text or symbols)natural_image
Top-down schematic of a double boiler interior showing front panel, side panels, and fan-like components (no text or labels)natural_image
Top-down schematic of a microwave oven with two circular fans and ventilation ducts (no text or symbols)text_image
Technical diagram of an oven with labeled components, showing internal chambers and structural elements.natural_image
Top-down schematic of a double boiler with two circular fans inside, showing internal structure and mounting brackets (no text or symbols)natural_image
Circular button with gradient shading and diagonal stripes, no visible text or symbolsnatural_image
Hand icon pointing at a circular button with an arrow symbol (no text or labels)
text_image
kg-Wnatural_image
Hand holding a circular button with '°C' and letter 'c' inside, no text or symbols present3 Justera temperaturen om du vill. Se sidan 18.

text_image
START4 Tryck Start. Kombi mikrovågsugnen startar.

natural_image
Top-down schematic of an oven with two circular fans inside, showing internal structure and ventilation duct (no text or symbols)natural_image
Circular mechanical component with concentric rings and horizontal lines, no visible text or symbolsnatural_image
Hand icon pointing at a circular button with an eye symbol (no text or numbers)
text_image
kg-Wnatural_image
Hand holding a circular button with '°C' and letter 'c' inside, no text or symbols present3 Justera temperaturen om du vill. Se sidan 18.

text_image
START4 Tryck Start. Kombi mikrovågsugnen startar.

natural_image
Technical line drawing of an oven with internal compartments and ventilation ducts (no text or symbols)natural_image
Hand icon pointing at a circular button with an eye symbol (no text or numbers)natural_image
Circular mechanical component with rotational arrows indicating motion (no text or symbols)
natural_image
Hand cursor clicking a circular button with an eye symbol (no text or numbers present)
text_image
STARTnatural_image
Hand icon pointing at a circular button with an eye symbol (no text or numbers)natural_image
Circular mechanical knob with rotational arrows indicating clockwise motion (no text or symbols)
natural_image
Hand cursor clicking a circular button with an eye symbol (no text or numbers present)natural_image
Circular mechanical component with rotational arrows, no text or symbols present
natural_image
Hand icon pointing at a button with a play button (no text or symbols)natural_image
Circular mechanical component with rotational arrows, no visible text or symbolsnatural_image
Circular mechanical component with rotational arrows indicating motion (no text or symbols)natural_image
Hand icon pointing at a button with a play button (no text or symbols)
natural_image
Circular mechanical component with rotational arrows, no text or symbols presentnatural_image
Hand cursor clicking a button with a play button (no text or symbols)
natural_image
Circular mechanical component with rotational arrows indicating motion (no text or symbols)
natural_image
Circular mechanical component with rotational arrows, no text or symbols present
natural_image
Hand cursor clicking a button with a play triangle icon (no text or symbols)text_image
Two-step diagram showing a hand pressing a circular button labeled with 'C' and a circular symbol, likely illustrating a process or control.natural_image
Two icons: a circular dial with rotation arrows and a hand pressing a button (no text or symbols)text_image
Two UI icons: a circular dial with rotation arrows and a hand holding a 'START' button.natural_image
Circular button with arrow indicating refresh or move (no text or symbols)natural_image
Hand cursor clicking a button with a play button (no text or symbols)
natural_image
Circular button with directional arrows indicating rotation or refresh (no text or symbols)natural_image
Hand icon pointing at a button with a play button (no text or symbols)
natural_image
Circular mechanical component with curved arrows indicating rotation or motion (no text or symbols)natural_image
Hand holding a button with a play button icon (no text or symbols)
natural_image
Circular mechanical component with rotational arrows, no visible text or symbols
text_image
STARTnatural_image
Circular mechanical component with internal striped pattern and dimension lines (no text or symbols)
natural_image
Circular mechanical component with rotational arrows indicating motion (no text or symbols)natural_image
Circular mechanical component with rotational arrows, no visible text or symbols
text_image
START3 Justera temperaturen om du vill. Se sidan 19.
4 Tryck Start. Kombi mikrovågsugnen startar.
Obs
natural_image
Illustration showing a washing machine with a door and a kitchen appliance inside (no text or symbols)natural_image
Hand icon pointing at a button with a play button (no text or symbols)
text_image
STARTnatural_image
Illustration of a hand cleaning or cleaning a kitchen oven with a cloth (no text or symbols visible)flowchart
graph TD
    A["Receiving Oven with lid"] --> B["Receiving Washing Machine"]
    B --> C["Receiving Refrigerator with circular buttons"]
    C --> D["Receiving Dish with cloth and glass"]
    D --> E["Receiving Oven with cloth and circular buttons"]
    E --> F["Receiving Refrigerator with circular buttons and cloth inside the oven"]
    F --> G["Receiving Dish with cloth and glass inside the oven"]