SA9Z-K01 - Sensor Idec - Free user manual and instructions
Find the device manual for free SA9Z-K01 Idec in PDF.

User questions about SA9Z-K01 Idec
0 question about this device. Answer the ones you know or ask your own.
Ask a new question about this device
Download the instructions for your Sensor in PDF format for free! Find your manual SA9Z-K01 - Idec and take your electronic device back in hand. On this page are published all the documents necessary for the use of your device. SA9Z-K01 by Idec.
USER MANUAL SA9Z-K01 Idec
text_image
Visible red laser beam and fast response speed. High precision sensing. Polarized Retroreflective Background Suppression (BGS) Through-beam groundVisible red laser, easy-to-align optical axis,

text_image
Easy InstallationPositioning made easy
Because the optical axis can be positioned quickly, the photoelectric switch can be installed on a machine or system easily, even in applications requiring a long sensing range or detection of small objects.
IDEC's Unique Optical Lens Mechanism
Parallel beam to the housing axis makes installation of the photoelectric switch easy.
Laser Diode
(fixed in the housing)

Optical Lens (positioned to make the beam parallel to the housing axis)


Optical Lens (fixed in the housing)

Top View
Detectable object size: 0.2 mm (Background Suppression)
Light ON/Dark ON
Selectable modes.


natural_image
Close-up of a black rectangular electronic component with a red accent and two small pins, no visible text or symbols.APPLICATION EXAMPLES
Narrow space for the beams to pass through

natural_image
Diagram of three black cylindrical batteries connected to a multi-layered green circuit board (no text or symbols visible)Closely-spaced objects on a fast-moving conveyor

text_image
placed objects -moving rLong sensing distance

text_image
Long sensing distance 30 m max.(12/04/19)
fast response speed, and high precision sensing.

text_image
Through-beam Polarized RetroreflectiveBackground Suppression (BGS)
Fast
250 μs
Detects fast-moving objects
The 250 s response speed is the fastest in its class. Closely-spaced objects on a fast-moving conveyor can be detected reliably.
Red Laser
Small red laser beam
Because the visible red laser is easy to see in both short (20 mm) and long (30 m) distances, the detecting position and optical axis can be found quickly. The small beam can detect small objects, and it also enables easy positioning of the sensor in applications where the beam has to pass through narrow spaces.
All models are Class 1 laser compliant (JIS, IEC, FDA).

Dust and water resistant
IP67 structure can be used in environments exposed to dust or water vapor.
Exposure to dust or water vapor

text_image
sure to dust or water vapor(12/04/19)

text_image
Small objectsSA1E-L
Miniature Laser Photoelectric Switches (Built-in Amplifier)
Class 1 laser.
Fastest response in its class. Reliably detects fast-moving objects.
Light source is a red laser (Class 1 by IEC60825-1, 2007).
Laser beams with high degree of straightness achieve a long sensing range (30 m maximum).
Response speed of 250 μs is the fastest in its class. Reliably detects fast-moving small objects.
The visible beam ensures easy and reliable positioning.
IP67 structure can be used in environments exposed to dust or water. Operating temperature: 55°C maximum.
Aligning the optical axis is easy because the lens unit is fixed on the housing (through-beam/polarized retroreflective).
Light ON/Dark ON mode is selectable.
Cable (1m, 2m, 5m cable) or M8 connector.
CE marked.
Compliant with Class 1 of FDA regulations • (according to Laser Notice No. 50).


text_image
Through-beam Background Suppression (BGS) Polarized Retroreflective With right-angle connector cablePackage Quantity: 1
| Sensing Method Sensing Range Connection | Cable Length | Part No. | ||||
| NPN Output PNP | Output | |||||
| Through-beam |  | 30mSee the characteristics on page 11. | Cable | 1 m | SA1E-LTN3 SA1E-LTP3 | |
| 2 m | SA1E-LTN3-2M SA1E-LTP3-2M | |||||
| 5 m | SA1E-LTN3-5M SA1E-LTP3-5M | |||||
| Connector | — | SA1E-LTN3C SA1E-LTP3C | ||||
| Polarized Retroreflective |  ...... ...... | 10m (300 mm)When using IAC-R5/R810m (300 mm)When using IAC-R9See the characteristics on page 11. | Cable | 1 m | SA1E-LPN3 | SA1E-LPP3 |
| 2 m | SA1E-LPN3-2M | SA1E-LPP3-2M | ||||
| 5 m | SA1E-LPN3-5M | SA1E-LPP3-5M | ||||
| Connector | — | SA1E-LPN3C | SA1E-LPP3C | |||
| Background Suppression |  | 20 to 300 mmAdjustable Sensing Range40 to 300 mmSee the characteristics on page 12. | Cable | 1 m | SA1E-LBN3 | SA1E-LBP3 |
| 2 m | SA1E-LBN3-2M | SA1E-LBP3-2M | ||||
| 5 m | SA1E-LBN3-5M | SA1E-LBP3-5M | ||||
| Connector | — | SA1E-LBN3C | SA1E-LBP3C | |||
Note: Maintain at least the distance shown in the ( ) between the SA1E-L photoelectric switch and reflector. Reflectors are not supplied and must be ordered separately. See page 5.
SA1E-L Miniature Laser Photoelectric Switches (Built-in Amplifier)
Accessories (optional)
Sensor Mounting Brackets
| Item Part No. | Package Quantity | ||
| Sensor Mounting Brackets | Vertical Mounting | SA9Z-K01 | 1 |
| Horizontal Mounting | SA9Z-K02 | ||
| Cover Type | SA9Z-K03 | ||
| Back Mounting | SA9Z-K04 | ||
See page 8 for dimensions. •
Two mounting screws (M3 × 12 mm sems screws) are supplied with the SA9Z-K01 and SA9Z-K02.
Two mounting screws (M3 × 14 mm sems screws) are supplied • with the SA9Z-K03.
The through-beam type requires two mounting brackets, one • each for the projector and the receiver.
The SA9Z-K02 cannot be used for the connector models.
Contact IDEC about mounting brackets for the connector models.
Sensitivity Control Screwdriver
| Item | Part No. | Package Quantity |
| Sensitivity Control Screwdriver | SA9Z-AD01 | 1 |
Slits (for through-beam)
| Item Slit | Size Part No. | Ordering No. | Package Quantity | |
| Round Slit | ø0.5 mm | SA9Z-S12 SA9Z-S12PN02 | 2ø1.0 mm | |
| SA9Z-S13 SA9Z-S13PN02 | ||||
| ø2.0 mm | SA9Z-S14 SA9Z-S14PN02 | |||
See page 6 for dimensions. •
Reflectors
| Item Part No. | Package Quantity | |
| Reflector | IAC-R5 | 1 |
| IAC-R8 | ||
| IAC-R9 |
See page 9 for dimensions. •
Reflector Mounting Brackets
| Item Part No. | Package Quantity | ||
| Reflector Mounting Bracket | For IAC-R5 | IAC-L2 (Note 1) | 1For IAC-R9 |
| IAC-L3 (Note 2) | |||
| For IAC-R8 | IAC-L5 (Note 3) | ||
See page 10 for dimensions.
Note 1: The IAC-L2 is not supplied with M4 mounting screws and nuts.
Note 2: The IAC-L3 is supplied with two M3 mounting screws (M3 × 8 mm sems screws).
Note 3: The IAC-L5 is supplied with two M4 mounting screws (M4 × 10 mm sems screws).
Connector Cable (for connector models)
| Number of Core Wires | Style & Length | Part No. | Package Quantity |
| 4 | Straight, 2m | SA9Z-CM8K-4S2 | 1 |
| Straight, 5m | SA9Z-CM8K-4S5 | ||
| Right angle, 2m | SA9Z-CM8K-4L2 | ||
| Right angle, 5m | SA9Z-CM8K-4L5 |
See page 10 for dimensions.
- Contact IDEC for UL approved cables.
Air Blower Mounting Block
| Item | Part No. | Package Quantity |
| Air Blower Mounting Block | SA9Z-A02 | 1 |
See page 10 for dimensions.
Two mounting screws (M3 × 20 mm sems screws), one M5 × 6 mm screw for plugging the air supply port, and one gasket (0.5 mm thick) are supplied.
The air tube fitting and mounting bracket are not supplied and must be ordered separately (recommended mounting bracket: SA9Z-K01).
Material: Anodized aluminum surface
SA1E-L Miniature Laser Photoelectric Switches (Built-in Amplifier)
Specifications
| Through-beam Polarized Retroreflective Background Suppression (BGS) | ||||
| Part No. | SA1E-LT SA1E-LP SA1 | E-LB | ||
| Power Voltage | 12 to 24V DC (Operating range: 10 to 30V DC)Equipped with reverse-polarity protection | |||
| Current Draw | Projector: 15 mA maximumReceiver: 30 mA maximum | 35 mA maximum | ||
| Sensing Range 30m 0.3 to 10m | (IAC-R5/R8/R9) | 20 to 300 mm(using 100 × 100 mm white matte paper) | ||
| Adjustable Sensing Range — 40 | to 300 mm | |||
| Detectable Object Size (typical) of | 6 mm minimum (opaque, at 3 m) | ø0.2 mm minimum (copper wire)(at 170 mm) | ||
| Detectable Object Opaque | ||||
| Hysteresis — 10% maximum | ||||
| Response Time 250 μs maximum | ||||
| Sensitivity Adjustment Adjustable | using a potentiometer | — | ||
| Sensing Range Adjustment — 6 | turn control knob | |||
| Light Source Element | Red laser diode (emission wavelength: 650 nm) (IEC/JIS/FDA Class 1) (Note) | |||
| Operation Mode | Light ON/Dark ON (selectable) | |||
| Control Output | NPN open collector or PNP open collector(30V DC, 100 mA maximum, short-circuit protection)Voltage drop: 1.5V maximum | |||
| LED Indicators | Operation LED: YellowStable LED: GreenPower LED: Green (Through-beam type projector) | |||
| Interference Prevention | — | Two units can be mounted in close proximity. | ||
| Degree of Protection | IP67 (IEC 60529) | |||
| Extraneous Light Immunity | Sunlight: 10,000 lux maximum, Incandescent lamp: 5,000 lux maximum (at receiver) | |||
| Operating Temperature | -10 to +55°C (no freezing) | |||
| Operating Humidity | 35 to 85% RH (no condensation) | |||
| Storage Temperature | -25 to +70°C (no freezing) | |||
| Storage Humidity | 35 to 85% RH (no condensation) | |||
| Insulation Resistance | Between live part and mounting bracket: 20 MΩ minimum (500V DC megger) | |||
| Dielectric Strength | Cable models: 1,000V AC, 50/60 Hz, 1 minute (between live part and mounting bracket)Connector models when connected with connector cable: 500V AC, 50/60 Hz, 1 minute (between live part and clamp ring) | |||
| Vibration Resistance | 10 to 55 Hz, amplitude 1.5 mm, 20 cycles in each of 3 axes | |||
| Shock Resistance | 500 m/s2, 3 shocks in each of 3 axes | |||
| Material | Housing: PBT, Lens: PMMA, Indicator cover: PC, knob; POM | |||
| Weight(approx.) | Cable Model | 35g (1 m cable), 55g (2 m cable), 120g (5 m cable) | ||
| Connector Model | 20g | |||
| ConnectionMethod | Cable Model | ø3.5 mm, 3-core, 0.2 mm2, vinyl cabtyre cable | ||
| Connector Model | M8 connector (4-pin) | |||
Note: Compliant with Class 1 of FDA regulations (21 CFR 1040.10 and 21 CFR 1040.11 according to Laser Notice No. 50).
Slit and Sensing Range (typical) [Through-beam SA1E-LT□]
| Slit | Sensing Range (m) | Minimum Detectable Object Width (mm) | |
| Part No. | Slit Width: A | Used on receiver | |
| SA9Z-S12 | 0.5 mm | 6 | 1.1 |
| SA9Z-S13 | 1.0 mm | 10 | 1.6 |
| SA9Z-S14 | 2.0 mm | 22 | 2.5 |
- Minimum detectable object width (mm): when the object is at the intermediate point between the projector and receiver.
The slit can be pressed to snap onto the front easily.

text_image
Slit (stainless steel) The slits Make sur is on topThe slits have an orientation. Make sure that the TOP marking is on top of the sensor (LED side).
Dimensions

text_image
8.2 6.1 4.4 ØA 32.1 0.3Material: Stainless Steel All dimensions in mm.
SA1E-L Miniature Laser Photoelectric Switches (Built-in Amplifier)


natural_image
Close-up of a black mechanical component with a lever and handle (no visible text or symbols)Note 1: No stable LED, sensitivity control, and operation mode switch are attached on the through-beam projector.
Note 2: Power ON LED (green) for through-beam projector.
Note 3: Cable length depends on models.
Note 4: The connector length is 18 mm when a right-angle connector cable (SA9Z-CM8K-4L*) is attached.
In the photo, the right-angle connector cable is attached.
Output Circuit & Wiring Diagram
NPN Output PNP Output Through-beam Type Projector

text_image
Brown (1) +V Load Black (4) OUT Blue (3) 0V 12 to 24V DC(Connector Pin Assignment)


text_image
Main Circuit Brown (1) Black (4) OUT Blue (3) 0V 12 to 24V DC Load(Connector Pin Assignment)


text_image
Main Circuit Brown (1) +V 12 to 24V DC Blue (3) 0V(Connector Pin Assignment)

SA1E-L Miniature Laser Photoelectric Switches (Built-in Amplifier)
Dimensions
Mounting Brackets
SA9Z-K01

text_image
8.0 9.04.5 3.0 14° 3.4 21.5 3.4 14.0With Mounting Bracket


text_image
13.7 7° 25.4 12.3 3.2Material: Stainless Steel

text_image
(Note 3) 8.0 25.0 10.8 (3.2) (Note 1) (Note 2) 7.2 17.1 25.4 42.5 12.3
Note 1: Projector (through-beam)
Receiver (through-beam)
Note 2: Projector (polarized retroreflective, background suppression)
Note 3: Receiver (polarized retroreflective)
SA9Z-K02


text_image
55.0 34.8 10.6 1.2 14.6
text_image
21.5 12.7 Ø3.4 25.48,4 4.5 15.3 14° 4.5 12.0 5.0Material: Stainless Steel

text_image
(Note 3) (Note 1) 55.0 34.8 8.0 (Note 2) 7.2 17.1 10.6 28.0 1.2 8.0 14.6 (3.2)
text_image
1.0 19.5 21.5 12.7 1.2 25.4 31.5 15.3 12.3Note 1: Projector (through-beam)
Receiver (through-beam)
Note 2: Projector (polarized retroreflective, background suppression)
Note 3: Receiver (polarized retroreflective)
SA9Z-K03

text_image
ø55 ø39 6 40° 20° 7 5.5 19 29 5.5With Mounting Bracket

text_image
Ø39.0 Ø55.0 0.6 19.5 29.0
text_image
19 4 14° 17° 3.2 Ø25 2-R25 25 2.5 18 46 13 5.5 6.2 R9.5Material: Stainless Steel

text_image
(Note 3) 8.0 (3.2) (Note 1) (Note 2) 7.2 17.1 25.4 12.3 10.8 13.0 (18.0) (55.0)
text_image
15.0 1.2 (5.3) 31.5 9.3Note 1: Projector (through-beam)
Receiver (through-beam)
Note 2: Projector (polarized retroreflective, background suppression)
Note 3: Receiver (polarized retroreflective)
All dimensions in mm.
SA1E-L Miniature Laser Photoelectric Switches (Built-in Amplifier)
SA9Z-K04

Reflector

text_image
2-Ø4.3 72 60 51 (Reflecting surface: 47.2 × 47.2) 3 9IAC-R8IAC-R5

text_image
51.2 51.2 30.4 30 40 2-ø4.5 (Reflecting surface: 47 x 47)
text_image
61 8IAC-R9

text_image
61.6 51 4.4 5 2-R 2.2 20 40 51.6 (Reflecting surface 47 × 47.6) 2-R 2.2 3.5 6.1All dimensions in mm.
SA1E-L Miniature Laser Photoelectric Switches (Built-in Amplifier)
Dimensions
Reflector Mounting Brackets
IAC-L2 (for IAC-R5) IAC-L3 (for IAC-R9) IAC-L5 (for IAC-R8)

Connector Cable (connector on one end)
Straight (SA9Z-CM8K-4S□)

text_image
④ Black White ③ Blue Brown Cable length: 2 or 5m ø9.6 32 ø5.2Right-angle (SA9Z-CM8K-4L□)

text_image
④ Black ② White ③ Blue Brown ø9.6 16.5 28 Cable length: 2 or 5m ø5.2• Dielectric strength when installed on the SA1E-L: 1000V AC (between live part and mounting bracket, except between live part and tightening ring)
Air Blower Mounting Block
SA9Z-A02

text_image
With Mounting Bracket 14.0 8.0 M5 P0.6 37.0 25.4 5.8 2.032 6.9 25.0 M5 P0.6 Recommended mounting bracket (SA9Z-K01) (3.2) 42.5 (3.8) 31.5 3.4 14.0 8.0 10.9 3.5 19.5 2.0 (3.2) Plugging screws for air supply port (M5), Gasket (using on one side only) SA1E-**** Air Blower Mounting Block 6.5The SA9Z-A02 air blower mounting block is supplied with two mounting screws (M3 × 20 mm sems screws), one screw for plugging the air supply port (M5 × 6 mm), and one gasket (1 mm thick) for plugging the air supply port.
An air tube fitting can be installed to either the top or side. Tighten the fitting to a torque of 0.5 N·m maxi mum.
The air tube fitting and mounting bracket are not supplied and must be ordered separately (recommended mounting bracket: SA9Z-K01).
All dimensions in mm.
(Material: Anodized aluminum surface)
SA1E-L Miniature Laser Photoelectric Switches (Built-in Amplifier)
Characteristics (Typical)
1. Through-beam SA1E-LT
Excess Gain (without slit) Excess Gain (with round slit) Lateral Displacement (without slit)

line
| Sensing Distance (m) | Excess Gain | | -------------------- | ----------- | | 0 | 1 | | 50 | 10 |
line
| Operation Level | Excess Gain | | --------------- | ----------- | | ε0.5 mm Silt on receiver | ~10 | | ε1.0 mm Silt on receiver | ~10 | | ε2.0 mm Silt on receiver | ~10 |
line
| Sensing Distance (m) | Lateral Displacement Y (mm) | | --------------------- | --------------------------- | | 0 | 0 | | 1 | -5 | | 2 | -10 | | 3 | -15 | | 4 | -20 | | 5 | -25 | | 6 | -30 | | 7 | -25 | | 8 | -20 | | 9 | -15 | | 10 | -10 | | 11 | -5 | | 12 | 0 | | 13 | 5 | | 14 | 10 | | 15 | 15 | | 16 | 20 | | 17 | 25 | | 18 | 20 | | 19 | 15 | | 20 | 10 | | 21 | 5 | | 22 | 0 | | 23 | -5 | | 24 | -10 | | 25 | -15 | | 26 | -20 | | 27 | -25 | | 28 | -30 | | 29 | -25 | | 30 | -20 | | 31 | -15 | | 32 | -10 | | 33 | -5 | | 34 | 0 | | 35 | 5 | | 36 | 10 | | 37 | 15 | | 38 | 20 | | 39 | 25 | | 40 | 20 | | 41 | 15 | | 42 | 10 | | 43 | 5 | | 44 | 0 | | 45 | -5 | | 46 | -10 | | 47 | -15 | | 48 | -20 | | 49 | -25 | | 50 | -30 |Angle (without slit)

line
| Sensing Distance X (m) | Receiver Angle 0 (°) | | ---------------------- | -------------------- | | 0 | 15 | | 5 | 15 | | 10 | 15 | | 15 | 15 | | 20 | 15 | | 25 | 15 | | 30 | 10 | | 35 | 10 | | 40 | 5 | | 45 | 5 | | 50 | 5 | | 55 | 5 | | 60 | 5 | | 65 | 5 | | 70 | 5 | | 75 | 5 | | 80 | 5 | | 85 | 5 | | 90 | 5 | | 95 | 5 | | 100 | 5 | | 105 | 5 | | 110 | 5 | | 115 | 5 | | 120 | 5 | | 125 | 5 | | 130 | 5 | | 135 | 5 | | 140 | 5 | | 145 | 5 | | 150 | 5 | | 155 | 5 | | 160 | 5 | | 165 | 5 | | 170 | 5 | | 175 | 5 | | 180 | 5 | | 185 | 5 | | 190 | 5 | | 195 | 5 | | 200 | 5 | | 205 | 5 | | 210 | 5 | | 215 | 5 | | 220 | 5 | | 225 | 5 | | 230 | 5 | | 235 | 5 | | 240 | 5 | | 245 | 5 | | 250 | 5 | | 255 | 5 | | 260 | 5 | | 265 | 5 | | 270 | 5 | | 275 | 5 | | 280 | 5 | | 285 | 5 | | 290 | 5 | | 295 | 5 | | 300 | 5 | | 305 | 5 | | 310 | 5 | | 315 | 5 | | 320 | 5 | | 325 | 5 | | 330 | 5 | | 335 | 5 | | 340 | 5 | | 345 | 5 | | 350 | 5 | | 355 | 5 | | 360 | 5 | | 365 | 5 | | 370 | 5 | | 375 | 5 | | 380 | 5 | | 385 | 5 | | 390 | 5 | | 395 | 5 | | 400 | 5 | | 405 | -10 | | 410 | -10 | | 415 | -10 | | 420 | -10 | | 425 | -10 | | 430 | -10 | | 435 | -10 | | 440 | -10 | | 445 | -10 | | 450 | -10 | | 455 | -10 | | 460 | -10 | | 465 | -10 | | 470 | -10 | | 475 | -10 | | 480 | -10 | | 485 | -10 | | 490 | -10 | | 495 | -10 | | 500 | -10 | | Note: The angle θ is marked as 'θ' between two points on the curve. The x-axis represents distance in meters.Light Beam Diameter

line
| Sensing Distance (mm) | Light Beam Diameter (mm) - Curve A | Light Beam Diameter (mm) - Curve B | | --------------------- | ---------------------------------- | ---------------------------------- | | 0 | 0 | 0 | | 5 | ~5 | ~10 | | 10 | ~10 | ~15 | | 15 | ~15 | ~20 | | 20 | ~20 | ~25 | | 25 | ~25 | ~30 | | 30 | ~30 | ~35 | | 35 | ~35 | ~40 | | 40 | ~40 | ~45 | | 45 | ~45 | ~50 | | 50 | ~50 | ~50 |(Light beam diameter)
Sensing distance below 3 m:
Defined as 1/e ^2 (13.5%) of the center intensity
Sensing distance over 3 m:
Reference value (visual inspection)
- Polarized Retroreflective SA1E-LP
Excess Gain

line
| Operation Level | Excess Gain | | --------------- | ----------- | | 0 | 1 | | 5 | 10 | | 10 | 10 | | 15 | 10 | | 20 | 10 |Lateral Displacement

line
| Sensing Distance X (m) | Lateral Displacement Y (mm) | | ---------------------- | --------------------------- | | 0 | 0 | | 1 | 0 | | 2 | -5 | | 3 | -10 | | 4 | -10 | | 5 | -10 | | 6 | -10 | | 7 | -10 | | 8 | -10 | | 9 | -10 | | 1 | -10 |Angle

line
| Sensing Distance X (m) | IAC-R5/R8 | IAC-R9 | | ---------------------- | --------- | ------ | | 0 | -20 | -20 | | 1 | 40 | -40 | | 2 | 40 | -40 | | 3 | 40 | -40 | | 4 | 40 | -40 | | 5 | 40 | -40 | | 6 | 40 | -40 | | 7 | 40 | -40 | | 8 | 40 | -40 | | 9 | 40 | -40 | | 10 | 40 | -40 |Light Beam Diameter

line
| Sensing Distance (mm) | Light Beam Diameter (mm) - Curve A | Light Beam Diameter (mm) - Curve B | | --------------------- | ---------------------------------- | ---------------------------------- | | 0 | 0 | 0 | | 5 | ~5 | ~5 | | 10 | ~10 | ~10 | | 15 | ~15 | ~15 | | 20 | ~20 | ~20 | | 25 | ~25 | ~25 | | 30 | ~30 | ~30 | | 35 | ~35 | ~35 | | 40 | ~40 | ~40 | | 45 | ~45 | ~45 | | 50 | ~50 | ~50 |(Light beam diameter)
Sensing distance below 3 m:
Defined as 1/e ^2 (13.5%) of the center intensity
Sensing distance over 3 m:
Reference value (visual inspection)
SA1E-L Miniature Laser Photoelectric Switches (Built-in Amplifier)
Characteristics (Typical)
3. Background Suppression (BGS) SA1E-LB
Lateral Displacement (Preset 150 mm) Lateral Displacement (Preset 300 mm) Light Beam Diameter

line
| Sensing Distance X (mm) | Lateral Displacement Y (mm) - Black Paper | Lateral Displacement Y (mm) - White Paper | | ----------------------- | ---------------------------------------- | ---------------------------------------- | | 0 | 2.0 | 0.0 | | 200 | -2.0 | 0.0 |
line
| Sensing Distance X (mm) | Lateral Displacement Y (mm) - White Paper | Lateral Displacement Y (mm) - White Paper | | ----------------------- | ------------------------------------------ | ----------------------------------------- | | 0 | 1.5 | -1.5 | | 200 | 1.0 | -1.0 | | 400 | 0.5 | -0.5 |
line
| Sensing Distance (mm) | Light Beam Diameter (mm) | | --------------------- | ------------------------ | | 0 | 1.8 | | 50 | 1.6 | | 100 | 1.4 | | 150 | 1.2 | | 200 | 1.0 | | 250 | 0.8 | | 300 | 0.6 | | 350 | 0.8 | | 400 | 1.0 | | 450 | 1.4 | | 500 | 1.6 |Light beam diameter: Defined as 1 / e^2 (13.5%) of the center intensity
Color Matte Paper and Other Materials (Preset 150 mm)

bar
| Material | Sensing Distance (mm) | |---|---| | White | 150 | | Black | 150 | | Steel | 150 | | Green | 150 | | Blue | 150 | | Grey | 150 | | Black | 140 | | Cardboard | 150 | | Aluminum | 120 | | Stainless Steel | 180 | | Eraser | 150 | | Black Rubber | 150 |Comparison of sensing distance when set to detect white matte paper (100 × 100 mm) at 150 mm
Color Matte Paper and Other Materials (Preset 300 mm)

bar
| Material | Sensing Distance (mm) | |---|---| | White | 295 | | Red | 295 | | Green | 270 | | Blue | 240 | | Grey | 280 | | Black | 185 | | Cardboard | 290 | | Aluminum | 265 | | Stainless Steel | 340 | | Steev | 300 | | Black Rubber | 190 |Comparison of sensing distance when set to detect white matte paper (100 × 100 mm) at 300 mm
Control Knob vs. Sensing Distance

line
| Control Knob (turns) | Sensing Distance (mm) | | ------------------- | --------------------- | | 0 | 0 | | 1 | 20 | | 2 | 40 | | 3 | 80 | | 4 | 160 | | 5 | 600 | | 6 | 600 | | 7 | 600 |Instructions
Indicator and Output Operation (Through-beam/Polarized Retroreflective)

text_image
Operation LED (yellow) Operation Mode Switch Sensitivity Control Stable LED (green)The operation LED turns on (yellow) when the control output is • on.
The stable LED turns on (green) either at stable incident or stable interruption. Make sure to use the photoelectric switch after the stable operation is ensured.
In the light ON operation, the output turns on when the receiving light intensity level is 1.0 or over as shown below.
In the dark-ON operation, the output turns on when the receiving light intensity level is 1.0 or less as shown below.
| Receiving Light Intensity Level | Light Receiving Status | Stable LED (green) | Operation LED (yellow)/ Control Output | ||
| Light ON Dark ON | |||||
| Operation Level | 1.3 and over | Stable Incident | ON | ON OFF | |
| 1.0 | Unstable Incident | OFF | |||
| Unstable Interruption | OFF ON | ||||
| 0.7 and below | Stable Interruption | ON | |||
Optical Axis Alignment (Light ON)
Through-beam
Fasten the receiver temporarily. Place the projector to face the receiver. Move the projector up, down, right and left to find the range where the operation LED turns on. Fasten the projector in the middle of the range. Next, move the receiver up, down, right and left in the same manner and fasten in the middle of the range where the operation LED turns on. Make sure that stable LED turns on at stable incident and stable interruption.
Polarized Retroreflective
Install the reflector perpendicularly to the optical axis. Move the SA1E-L photoelectric switch up, down, right and left to find the range where the operation LED turns on. Fasten the switch in the middle of the range. Make sure that stable LED turns on at stable incident and stable interruption. When installing the reflector near the photoelectric switch, adjust the angle and positions of photoelectric switch and reflector so that sensing objects can be detected reliably.
Background Suppression (BGS)
Place the SA1E-L photoelectric switch where the switch can detect the object. Move the switch up, down, right and left to find the range where the operation LED turns on. Fasten the switch in the middle of the range. Make sure that stable LED turns on at stable incident and stable interruption.
Sensitivity Adjustment (Through-beam/Polarized Retroreflective)
Referring to the table below, adjust the sensitivity of the SA1E- L photoelectric switch when necessary, in such cases as the through-beam is used to detect small or translucent objects. The table explains the status of operation LED when the operation mode is set to light ON.
| Step | Photoelectric Switch Status | Sensitivity Control | Adjusting Procedure |
| 1 | Receiving lightThrough-beam, •polarized retroreflective:No object detected |  | Turn the control counter-clockwise to the minimum. Then turn clock wise until the operation LED turns on (turns off with dark ON type) (point A). |
| 2 | Light is interruptedThrough-beam, •polarized retroreflective:Object detected |  | At interruption status, turn the control clock wise from point A, until the operation LED turns on (turns off with dark ON type) (point B).If the operation LED does not turn on (turn off with dark ON type) even though the control has reached the maxi mum, set the maximum position as point B. |
| 3 | — |  | Set the middle point between point A and B as point C. |
After adjusting the sensitivity, make sure that stable LED turns on • at stable incident and stable interruption. For detecting objects too small to turn on the stable LED, use an optional slit. Sensitivity is set to the maximum at the factory before shipment. • When adjusting the sensitivity, use the screwdriver supplied with the SA1E-L photoelectric switch to turn the control as shown below, to a torque of 0.05 N·m maximum.
Adjustment of Sensing Range for Background Sup pression (BGS)
When adjusting the sensing range, follow the instruction below.
| Step | Distance Control | Adjusting Procedure | |
| 1 |  | Install the photoelectric switch and the object firmly. Turn the control counterclockwise until the operation LED turns off (turns on with dark ON type). From this point, turn the con trol clockwise until the operation LED turns on (turns off with dark ON type) (point A). | |
| 2 |  | Remove the object, and confirm that the operation LED turns off (turns on with dark ON type). Turn the control clockwise until the operation LED turns on (detecting the back-ground) (turns off with dark ON type) (point B). (Note 1) | |
| 3 | B |  | Set the middle point between point A and B as point C. (Note 2) |
Note 1: When the background is far off and not detected, turn the control 360°, and set the point as point C.
Note 2: Because the control is multi-turn, it may take more than one turn to move from point A to point B.
Turning the control clockwise lengthens the sensing distance.

text_image
Sensing Range Control (Note 3) Operation LED (yellow) Operation Mode Switch Stable LED (green)SA1E-L Miniature Laser Photoelectric Switches (Built-in Amplifier)
Power Supply and Wiring
Do not use the SA1E-L photoelectric switch in the transient status immediately after turning on the power (approx. 100 ms). When the load and switch use different power supplies, make sure to power up the switch first.
Use a power supply with little noise and inrush current, and use the photoelectric switch within the rated voltage range. Make sure that the ripple is within the allowable limit. Do not apply AC voltage, otherwise the switch may blow out or burn.
When using a switching power supply, make sure to ground the • FG (frame ground) terminal, otherwise high-frequency noise may affect the photoelectric switch.
Turn power off before inserting/removing the connector on photoelectric switch. Make sure that excessive mechanical force is not applied to the connector. Connect the connector cable to a tightening torque of 0.5 N·m maximum.
To ensure the degree of protection, use the applicable connector cable for the connector type. Connector cables are ordered separately (see page 5).
Avoid parallel wiring with high-voltage or power lines in the same - conduit, otherwise noise may cause malfunction and damage. When wiring is long, use a separate conduit for wiring.
Use a cable of 0.3 mm^2 -minimum core wires, then the cable can be extended up to 100 m.
Installation
Installing the Photoelectric Switch
Do not install the S • A1E-L photoelectric switches in an area where the switches are subject to the following conditions, otherwise mal function and damage may be caused.
* Inductive devices or heat source
* Extreme vibration or shock
* Large amount of dust
* Toxic gases
* Water, oil, chemicals
* Outdoors
Make sure to prevent sunlight, fluorescent light, and especially the fluorescent light of inverters from entering the receiver of the pho toelectric switch directly. Keep the through-beam type receiver away from intense extraneous light.
Interference prevention allows two SA1E-L switches to be mounted in close proximity. However, the through-beam model is not equipped with interference prevention. Maintain appropriate distance between the switches referring to the lateral displacement characteristics.
Because the SA1E-L photoelectric switches are IP67 waterproof, the SA1E-L can be exposed to water. However, wipe water drops and smears from the lens and slit using a soft cloth to make sure of the best detecting performance.
Acrylic resin is used for optical elements. Do not use ammonia or caustic soda for cleaning, otherwise optical elements will be dissolved. To remove dust and moisture build-up, use soft dry cloth.
Tighten the mounting screws (M3) to a torque of 0.4 to 0.5 N·m. Do not tighten the mounting screws excessively or hit the switch with a hammer, otherwise the protection degree cannot be maintained.
Installing the Reflector
Use M4 mounting screws for the IAC-R5 and IAC-R8 reflectors. Tighten the mounting screws to a tightening torque of 0.4 to 0.5 N·m maximum. Do not tighten the mounting screws excessively, otherwise the screw holes of the reflector will be damaged.
While optional reflector mounting bracket IAC-L2 is not supplied with mounting screws or nuts, the IAC-L3 and IAC-L5 are supplied with mounting screws for mounting the reflector on the bracket.
SA1E-L Miniature Laser Photoelectric Switches (Built-in Amplifier)
Installing the air blower mounting block SA9Z-A02
When installing the SA9Z-A02 on the SA1E-L photoelectric switch, use the attached M3 mounting screws and tighten to a torque of 0.4 to 0.5 N·m maximum.
Mounting bracket is not supplied with SA9Z-A02 and must be ordered separately. SA9Z-K01 mounting bracket can be used with SA9Z-A02. When installing the SA9Z-K01 mounting bracket on SA9Z-A02 air blower mounting block, use the M3 × 20 mounting screws supplied with SA9Z-A02. Do not use the mounting screws (M3 × 12) supplied with SA9Z-K01.
The SA9Z-A02 cannot be used with the through-beam slits • (SA9Z-S12, SA9Z-S13, and SA9Z-S14).
The air tube fitting (M5) can be installed to either the top or side. • The air tube is not supplied.
Close the unused port using the supplied air supply port plugging screw (M5 × 6) and gasket to a tightening torque of 1 to 2 N·m maximum. The recommended air pressure is 0.1 to 0.3 MPa.
Installing the background suppression (BGS) type
This sensor can detect objects correctly when the sensor head is • installed perpendicular to the moving object. Install the sensor head as shown below to minimize sensing errors.

text_image
Correct CorrectIncorrectObjectObjectObject
If the SA1E-L is used in a place subject to large variations in the ambient temperature, the characteristics may change depending on the target object. Be sure to check the operation under the actual operating conditions.
Polarized retroreflective: when the sensing objects have mirror surface, the reflected light from the mirror surface might cause false detection. Make sure that the reflected light does not enter the receiver.
Using a laser product
The SA1E-L photoelectric switches radiate a visible laser beam. Do not look directly at laser beam. Also, do not look at the laser beam reflected by a mirror surface.
IEC 60825-1 (Safety of laser products) sets safety standards of laser products. The SA1E-L photoelectric switches are classified as Class 1 product.
The SA1E-L photoelectric switches comply with 21 CFR 1040.10 and 21 CFR 1040.11 according to Laser Notice No. 50, dated June 24, 2007, issued by the CDRH (Center for Devices and Radiological Health) under the FDA (Food and Drug Administration).
Labels •
According to IEC 60825-1 and FDA regulations, the SA1E-L has the warning and certification/identification labels as shown below. When installing the SA1E-L on a system/equipment used in the United States, ensure that the labels are attached to the SA1E-L.

text_image
Warning Label CLASS LABER PRODUCT クラス1 レーザ製品 Certification/Identification Label DEC Configuration ID: 1-20 Information Circuitry+4.5, Dose, SS-680, 300 Risikawa-7, 24CR, 90-51, 80-51 No. No. No. No. No. No. No. No. No. No. No. No. No. No. No. No. No. No. No. No. No. No. No. No. No. No. No. No. No. No. No. No. No. No. No. No. No. No. No. No. No. No. No. No. No. No. No. No. No. No. No. Yes PROFESSIONAL NAME: 1-20 PROFESSIONAL NAME: 1-20 PROFESSIONAL NAME: 1-20 PROFESSIONAL NAME: 1-20 PROFESSIONAL NAME: 1-20 PROFESSIONAL NAME: 1-20 PROFESSIONAL NAME: 1-20 PROFESSIONAL NAME: 1-20 PROFESSIONAL NAME: 1-20 PROFEPTIONS PROFEPTIONS PROFEPTIONS PROFEPTIONS PROFEPTIONS PROFEPTIONS PROFEPTIONS PROFEPTIONS PROFEPTIONS PROFEPTIONS PROFEPTIONS PROFEPTIONS PROFEPTIONS PROFEPTIONS PROFEPTIONS PROFEPTIONS PROFEPTIONS PROFEPTIONS PROFEPTIONS PROFEPTIONS PROFEPTION S PROFEPTION S PROFEPTION S PROFEPTION S PROFEPTION S PROFEPTION S PROFEPTION S PROFEPTION S PROFEPTION S PROFEPTION S PROFEPTION S PROFEPTION S PROFEPTION S PROFEPTION S PROFEPTION S PROFEPTION S PROFEPTION S PROFEPTION S PROFEPTION S PROFEPTION S PROFEPTIONS PROFEPTIONS PROFEPTIONS PROFEPTIONS PROFEPTIONS PROFEPTIONS PROFEPTIONS PROFEPTIONS PROFEPTIONS PROFEPTIONS PROFEPTIONS PROFEPTIONS PROFEPTIONS PROFEPTIONS PROFEPTIONS PROFEPTIONS PROFEPTIONS PROFEPTIONS PROFEPTIONS PROFEPTIONSTSA1E-L Miniature Laser Photoelectric Switches (Built-in Amplifier)
SA1E Miniature LED Photoelectric Switches (Built-in Amplifier)

Seven sensing methods available.
Cable Model

text_image
19.5 10.8 31.5 Photo: Polarized retroreflectiveConnector Model

text_image
19.5 10.8 31.5 10.8 P TReflectors

natural_image
Collection of black mesh-based electronic components and a grid-patterned surface (no text or symbols visible)
natural_image
Three electronic components with mounting holes, labeled as 'For detecting transparent objects' (no other text or symbols visible)All dimensions in mm.
Part No. Development
SA1E -T □ □ -NA -□M
12345
| 1 | T Through-beam (Infrared LED) | |
| TA Through-beam (Red LED) | ||
| P Polarized Retroreflective (Red LED) | ||
| D Diffuse-reflective (Infrared LED) | ||
| N Small-beam Reflective (Red LED) | ||
| B | Background Suppression (BGS) (Red LED) | |
| G Convergent Reflective (Infrared LED) | ||
| X | Coaxial Polarized Retroreflective(Transparent Object Sensing) (Red LED) | |
| 2 | N NPN output | |
| P PNP output | ||
| 3 | 1 Light ON | |
| 2 Dark ON | ||
| 4 | Blank | w/ Sensitivity Adjustment |
| -NA | w/o Sensitivity Adjustment | |
| 5 | Blank | 1 m cable |
| -2M 2 | m cable | |
| -5M 5 | m cable | |
| C Connector | ||
| Model | Through-beam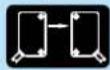 SA1E-T SA1E-T | Polarized Retroreflective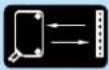 SA1E-P SA1E-P | Diffuse-reflective SA1E-D SA1E-D | Small-beam Reflective SA1E-N SA1E-N |
| Detectable Object | Opaque | Opaque | Opaque/transparent | Opaque/transparent |
| Sensing Range | 10 m | 2.5 m | 700 mm | 50 to 150 mm |
| Current Draw | Projector: 15 mARceiver: 20 mA | 30 mA | 30 mA | 30 mA |
| Response Time | 1 ms | 1 ms | 1 ms | 1 ms |
| Model | Background Suppression (BGS) | Convergent Reflective | Coaxial Polarized Retroreflective |
 |  |  | |
| SA1E-B | SA1E-G | SA1E-X | |
| Detectable Object | Opaque | Opaque/transparent | Opaque/transparent/mirror-like objects |
| Sensing Range | 20 to 200 mm | 5 to 35 mm | 2 m |
| Current Draw | 30 mA | 30 mA | 20 mA |
| Response Time | 1 ms | 1 ms | 0.5 ms |
For details, see Cat No. EP1155-0 and EP1333-0.
Package quantity: 1
Specifications and other descriptions in this catalog are subject to change without notice.

IDEC CORPORATION
7-31, Nishi-Miyahara 1-Chome, Yodogawa-ku, Osaka 532-8550, Japan
Tel: +81-6-6398-2571, Fax: +81-6-6392-9731
E-mail: marketing@idec.co.jp
| www.idec.com | IDEC CORPORATION (USA)Tel: +1-408-747-0550 / (800) 262-IDEC (4332)E-mail: opencontact@idec.com | IDEC ELECTRONICS LIMITEDTel: +44-1256-321000 E-mail: sales@uk.idec.com | IDEC (SHENZHEN) CORPORATIONTel: +86-755-8356-2977 |
| IDEC CANADA LIMITEDTel: +1-905-890-8561, Toll Free: (800) 262-IDEC (4332)E-mail: sales@ca.idec.com | IDEC ELEKTROTECHNIK GmbHTel: +49-40-25 30 54 - 0 E-mail: service@idec.de | IDEC IZUMI (H.K.) CO., LTD.Tel: +852-2803-8989 E-mail: info@hk.idec.com | |
| IDEC AUSTRALIA PTY. LTD.Tel: +61-3-8523-5900, Toll Free: 1800-68-4332E-mail: sales@au.idec.com | IDEC (SHANGHAI) CORPORATIONTel: +86-21-6135-1515 E-mail: idec@cn.idec.com | IDEC TAIWAN CORPORATIONTel: +886-2-2698-3929 E-mail: service@tw.idec.com | |
| IDEC (BEIJING) CORPORATIONTel: +86-10-6581-6131 | IDEC IZUMI ASIA PTE. LTD.Tel: +65-6746-1155 E-mail: info@sg.idec.com(12/04/19) |