amaran SM5c - Lighting Aputure - Free user manual and instructions
Find the device manual for free amaran SM5c Aputure in PDF.

User questions about amaran SM5c Aputure
0 question about this device. Answer the ones you know or ask your own.
Ask a new question about this device
Download the instructions for your Lighting in PDF format for free! Find your manual amaran SM5c - Aputure and take your electronic device back in hand. On this page are published all the documents necessary for the use of your device. amaran SM5c by Aputure.
USER MANUAL amaran SM5c Aputure
natural_image
Illustration of a film reel with concentric circular patterns and a cable extending outward (no text or symbols)amaran SM5c
Product Manual
English
Introduction
Thank you for purchasing the "amaran" SM5c LED strip light.
The amaran SM5c is a Bluetooth and Wifi-connected RGB pixel light strip. Featuring smart-speaker compatibility, Sidus Link app control, and 100 lighting zones across 5 meters for smooth lighting effects, the SM5c easily creates a colorful and creative atmosphere for video production and daily life.
IMPORTANT SAFETY INSTRUCTIONS
When using this unit, basic safety precautions should always be followed, including the following:
- Read and understand all instructions before using.
- Close supervision is necessary when any fixture is used by or near children. Do not leave the fixture unattended while in use.
- Care must be taken as burns can occur from touching hot surfaces.
- Do not operate the fixture if a cord is damaged, or if the fixture has been dropped or damaged, until it has been examined by qualified service personnel.
- Position any power cables such that they will not be tripped over, pulled, or put into contact with hot surfaces.
- If an extension cord is necessary, a cord with an amperage rating at least equal to that of the fixture should be used. Cords rated for less amperage than the fixture may overheat.
- Always unplug the lighting fixture from the electrical outlet before cleaning and servicing, or when not in use. Never yank the cord to remove the plug from the outlet.
- Let the lighting fixture cool completely before storing. Unplug the power cable from lighting fixture before storing and store the cable at assigned space.
-
To reduce the risk of electric shock, do not immerse this fixture in water or any other liquids.
-
To reduce the risk of fire or electric shock, do not disassemble this fixture. Contact cs@aputure.com or take the lighting fixture to qualified service personnel when service or repair is required. Incorrect reassembly may cause electric shock when the lighting fixture is in use.
-
The use of any accessory attachment not recommended by the manufacturer may increase the risk of fire, electric shock, or injury to any persons operating the fixture.
-
Please do not block the ventilation or do not look at the LED light source directly when it is powered on. Please do not touch the LED light source in any condition.
-
Please do not place the LED lighting fixture near any flammable object.
-
Only use a dry microfiber cloth to clean the product.
-
Please do not use the light fixture in wet conditions on account of electric shock may be caused.
-
Please have the product checked by an authorized service personnel agent if the product has a problem. Any malfunctions caused by unauthorized disassembly are not covered by the warranty. The user may pay for maintenance.
-
We recommend only using the original Aputure or amaran cable accessories. Please note that any malfunctions caused by using unauthorized accessories are not covered by the warranty. The user may pay for maintenance.
-
This product is certified by RoHS, CE, KC, PSE, and FCC. Please operate the product in full compliance with relevant country's standards. Any malfunctions caused by incorrect use are not covered by warranty. The user may pay for maintenance.
-
The instructions and information in this manual are based on thorough, controlled company testing procedures. Further notice will not be given if the design or specifications change.
SAVE THESE INSTRUCTIONS
FCC Compliance Statement
This device complies with Part 15 of the FCC Rules. Operation is subject to the following two conditions:
(1) This device may not cause harmful interference.
(2) This device must accept any interference received, including interference that may cause undesired operation.
WARNING
Changes or modifications not expressly approved by the party responsible for compliance could void the user's authority to operate the equipment.
NOTICE
This equipment has been tested and found to comply with the limits for a Class B digital device, pursuant to Part 15 of the FCC Rules. These limits are designed to provide reasonable protection against harmful interference in a residential installation. This equipment generates, uses, and can radiate radio frequency energy and, if not installed and used in accordance with the instructions, may cause harmful interference to radio communications. However, there is no guarantee that interference will not occur in a particular installation.
If this equipment does cause harmful interference to radio or television reception, which can be determined by turning the equipment off and on, the user is encouraged to try reorient or relocate the receiving antenna.
- Increase the separation between the equipment and receiver.
- Connect the equipment to an outlet on a different circuit than the receiver is connected to.
- Consult the dealer or an experienced radio/TV technician for help.
RF Warning Statement:
This device has been evaluated to meet general RF exposure requirements.
Components List
Please make sure all accessories listed below are included before using. If not, please contact your sellers immediately.
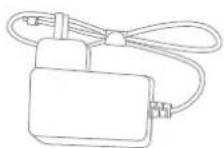
Power adapter (1 pc)
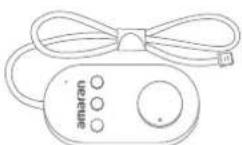
Controller (1 pc)
natural_image
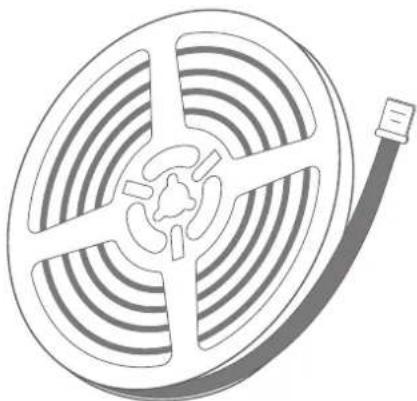
Illustration of a film reel with concentric circular patterns and a cable extending outward (no text or symbols)Strip light (1 pc)
Double-sided tape (1 pc)
Cleaning kit (1 set)
*The illustrations in the manual are only diagrams for reference. Due to the continuous development of new versions of the product, if there are any differences between the product and the user manual diagrams, please refer to the product itself.
Product Details
1. Strip light

text_image
Extension strip light Connecting pin Strip light Connecting pin DC in Power adapter*The amaran SM5c extension is sold separately.
2. Control box
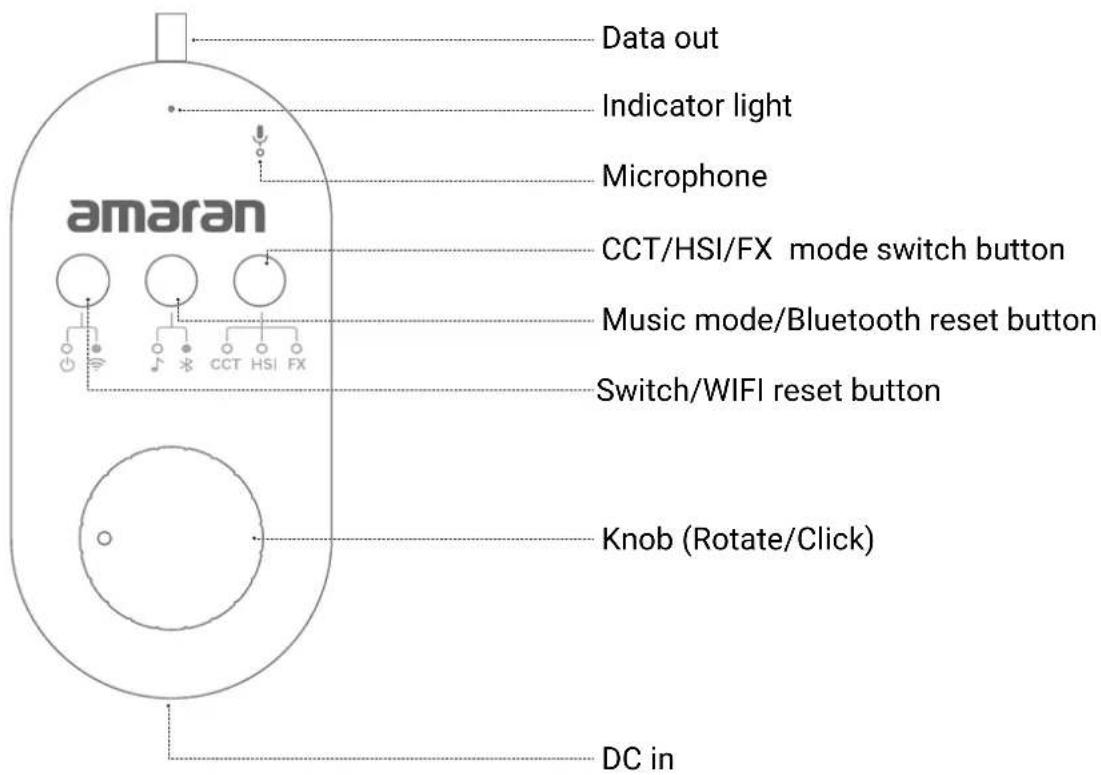
text_image
Data out Indicator light Microphone CCT/HSI/FX mode switch button Music mode/Bluetooth reset button Switch/WIFI reset button Knob (Rotate/Click) DC in amaranSetting Up the Light Installing strip light
- Choose a dry, clean and smooth surface to install the strip light.

natural_image
Close-up of a dark textured fabric with a red X mark at the bottom left (no text or symbols)
natural_image
Close-up of a textured gray surface with a red 'X' mark in the bottom right corner (no text or symbols on the surface)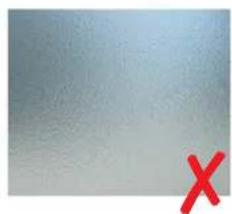
natural_image
Plain gray surface with a red 'X' mark in the bottom right corner (no text or symbols)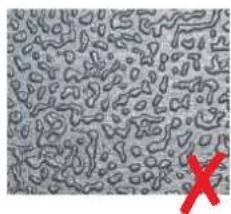
natural_image
Microscopic view of irregularly shaped particles with a red 'X' marking a specific point (no text or symbols present)*Do not install strip light on surfaces such as fabric, dusty walls, rough plastic, and frosted glass.
- Clean the mounting surface with the included cleaning kit.
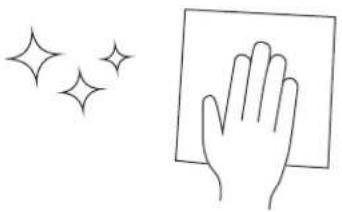
natural_image
Simple line drawing of a hand holding a paper with sparkles above (no text or symbols)- When the ambient temperature is lower than 10^ C/50°F, please use a hair dryer to heat it before installation to achieve the best adhesive effect.
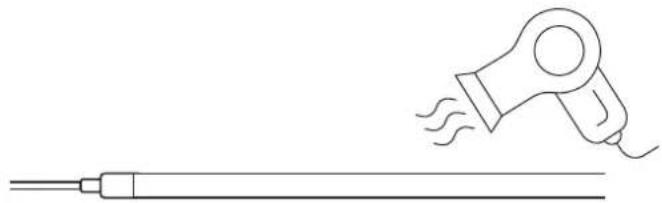
natural_image
Line drawing of a hairdryer emitting steam from a cylindrical tool (no text or symbols)- After confirming the installation position, remove the dustproof paper tape from the double-sided tape on the back of the strip light, and mount the strip light to your chosen surface.

natural_image
Line drawing of two hands holding a tool over a cylindrical object (no text or symbols)- After the strip light is installed, use the included double-sided tape to reinforce any corners or areas where the adhesive is not strong.
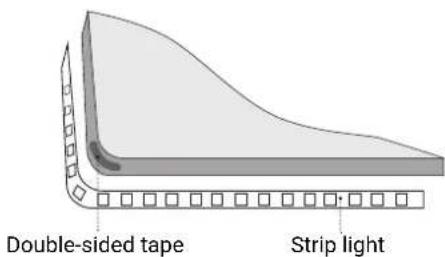
text_image
Double-sided tape Strip light- After arranging the control box and wires to the desired position, fix them with double-sided tape.
Powering up the Light
1. Connect the control box and the strip light.

text_image
Control boxStrip light2. Connect the light strip and the extension light strip.
Light strip and extension light strip are connected via connector

text_image
Extension strip light Strip lightThe triangle mark on the connector must be on the same side, do not insert it backwards.

natural_image
Pure diagram of two mechanical components with directional arrows indicating motion (no text or symbols)*One controller can connect up to a 5m strip light + ONE 5m extension strip light, for a total of 10m length.
*Connect the initial strip light to the controller first, and then add the extension strip light.
*The extension strip light needs to be purchased separately.
*Connecting the extension strip light will reduce the power output of each strip by half to match the power output of the power adapter.
3. Connect the control box and the power adapter.

text_image
Control box DC connector Power adapter4. Plug the Power Adapter into an AC power socket.
WARNING
Trimming of the light strip(s) should be avoided as it will result in a delayed boot-up process and certain Pixel FX will be incomplete, including Snake, Timing, Pinball, Clock, and Fuse.
Operating the Light
1. Manual Control
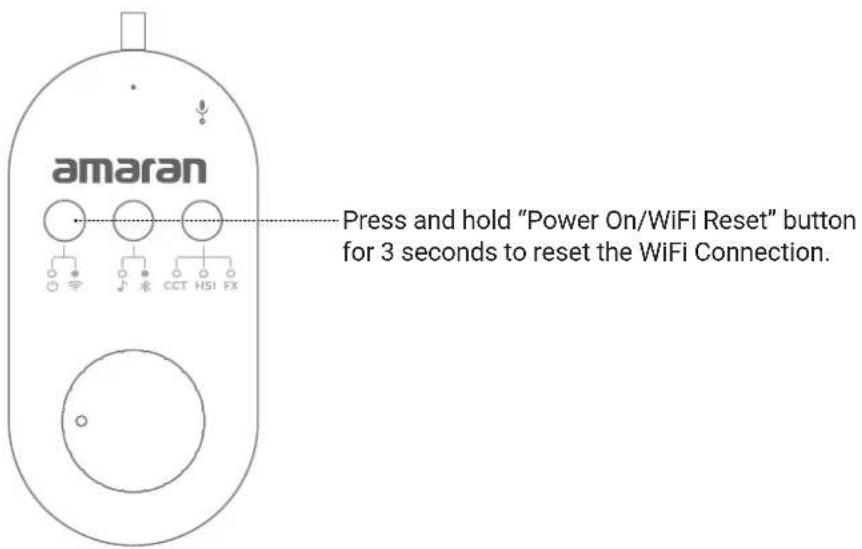
ON-OFF / Wi-Fi reset button:
Short press the button to switch the strip light on and off, press and hold the button for three seconds to reset Wi-Fi connection. After the Wi-Fi reset is successful, the indicator light will flash quickly.
Music Mode/Bluetooth reset button:
Short press the button to activate the Music Sync or Music Mode, press and hold the button for three seconds to reset the Bluetooth connection. After the Bluetooth reset is successful, the indicator light will begin flashing quickly.
CCT/HSI/FX Mode switch button:
Press this button to toggle between the three different lighting modes.
Knob:
In CCT mode, rotate the knob to adjust the brightness/color temperature, click the knob to toggle between brightness & color temperature.
In HSI mode, rotate the knob to adjust the brightness/hue, click the knob to toggle between brightness & hue. In FX mode, rotate the knob to adjust the brightness/effects, click the knob to toggle between brightness & lighting effects.
2. Connect to Sidus Link APP control
2.1. Download the "Sidus Link" APP with a smartphone or tablet and create an account if needed. Then turn on the Bluetooth of your phone or tablet.
2.2. Short press the "Power On/WiFi Reset" button to power on the light, then press and hold the "Music/Bluetooth Reset" button for 3s until the indicator light flashes quickly to indicate a successful Bluetooth Reset
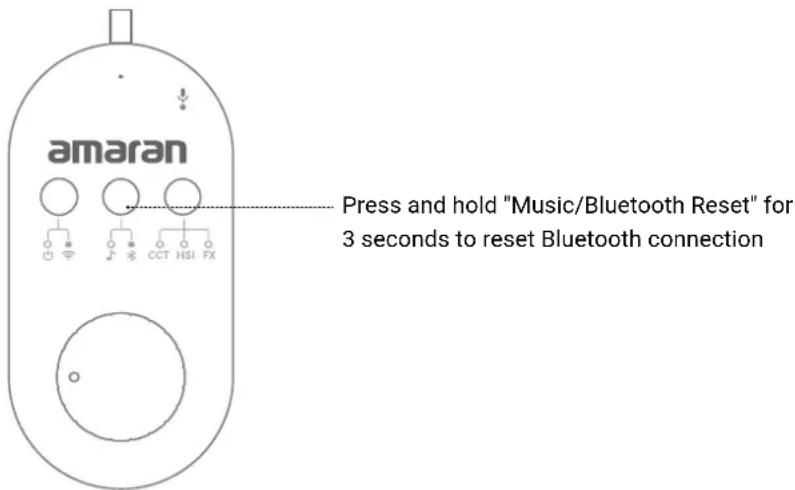
text_image
amaran Press and hold "Music/Bluetooth Reset" for 3 seconds to reset Bluetooth connection2.3. Open the Sidus Link APP to add the light in a scene (create a new scene if needed). After the connection is successful, the strip light can be controlled.
3. Connecting Smart Speaker Control
text_image
amaran Press and hold "Power On/WiFi Reset" button for 3 seconds to reset the WiFi Connection.3.2 Connect your phone or tablet to a stable Wi-Fi wireless network. Download the "Tuya Smart" APP with a smartphone or tablet and register an account.
3.3 Open the "Tuya Smart" APP, and follow the instructions to add the SM5c strip light. After successfully connecting to the SM5c, you can control the strip light through the "Tuya Smart" APP.
4. Binding "Tuya Smart" Account and Smart Speaker Account
The SM5c supports voice control through smart speakers using "Amazon Alexa" and "Google Assistant." Pair smart speakers with strip light using the following instructions:
4.1 Link an "Amazon Alexa" account and "Tuya"
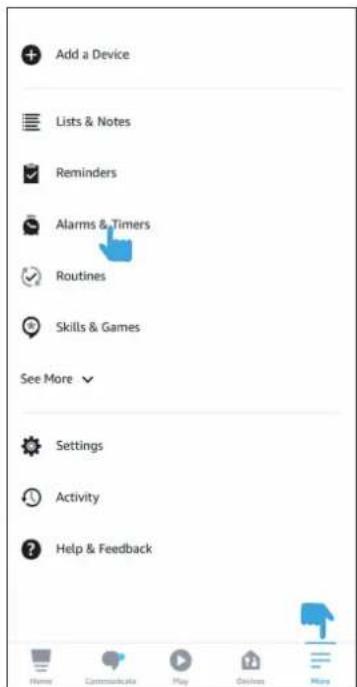
4.1.1. In the Amazon Alexa APP, tap the ≡ in the bottom right corner of the Home page, and select the

Skills & Games tab.
text_image
Add a Device Lists & Notes Reminders Alarms & Timers Routines Skills & Games See More Settings Activity Help & Feedback
in the bottom right corner of the Home page, and select the
text_image
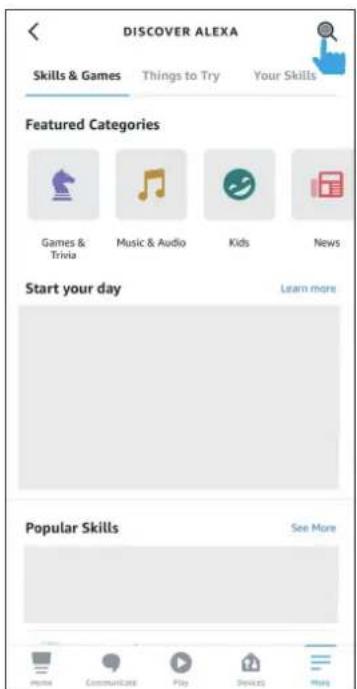
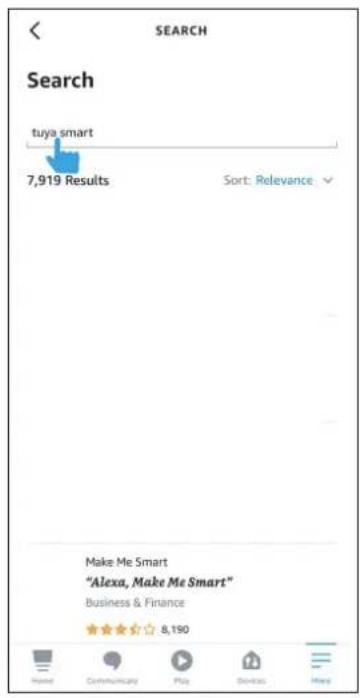
DISCOVER ALEXA Skills & Games Things to Try Your Skills Featured Categories Games & Trivia Music & Audio Kids News Start your day Learn more Popular Skills See More4.1.2. Search for "Tuya Smart" in the search box, and then tap
ENABLE TO USE
text_image
SEARCH Search tuya smart 7,919 Results Sort: Relevance Make Me Smart "Alexa, Make Me Smart" Business & Finance 8,190
text_image
TUYA SMART Tuya Smart Tuya Inc. Rated: Guidance Suggested 960 ENABLE TO USE Account required If you have any problems, please contact us at service@tuya.com Tuya Smart offers the most comprehensive voice- controlled smart home experience with Alexa. Contr... ✓ See More Start By Saying English (US) "Alexa, turn on hallway light" "Alexa, turn off hallway light" "Alexa, set hallway light to 50 percent" About Home Communicate Play Develop More4.1.3. Select the country your account belongs to and enter the account and password of your "Tuya Smart" account, and complete the linking process.
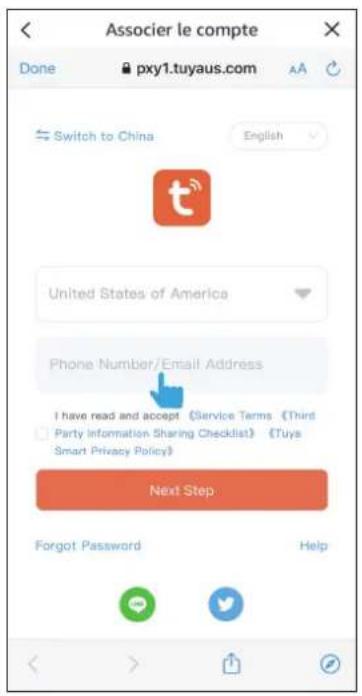
text_image
Associer le compte Done pxy1.tuyaus.com Switch to China English United States of America Phone Number/Email Address I have read and accept (Service Terms (Third Party Information Sharing Checklist) (Tuiys Smart Privacy Policy) Next Step Forgot Password Help
text_image
ACCOUNT LINKING Your Tuya Smart account has been successfully linked. What to do next: Close this window to discover smart-home devices you can control with Alexa. CLOSE4.2 Link a "Google Assistant" account and "Tuya Smart" account
4.2.1. Open the "Google Home" APP, tap the + button in the upper left corner of the home page. Select + Set up device, and select Works with Google under the list.

text_image
My Home Settings Add devices to your home to control everything in one place
text_image
Add and manage Add to home + Set up device + Add person to home + Create speaker group + Create new home Add services Videos Music @ Rebates & rewards Pro services Offers Offers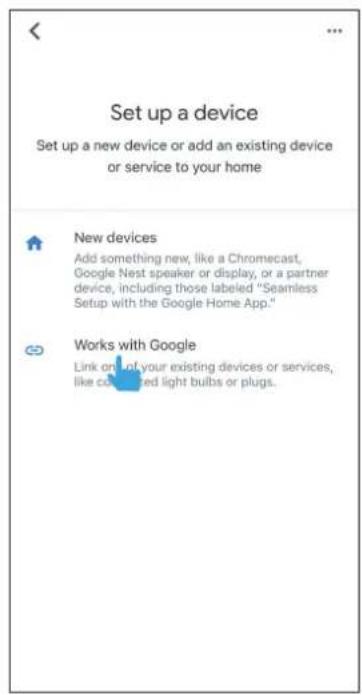
text_image
Set up a device Set up a new device or add an existing device or service to your home New devices Add something new, like a Chromecast, Google Nest speaker or display, or a partner device, including those labeled "Seamless Setup with the Google Home App." Works with Google Link on that of your existing devices or services, like colored light bulbs or plugs.4.2.2. Search for "Tuya Smart" in the list and open it, enter your "Tuya Smart" App account and password, and tap Next Step to to complete the linking process.

text_image
Tuya smart Add new Tuya Smart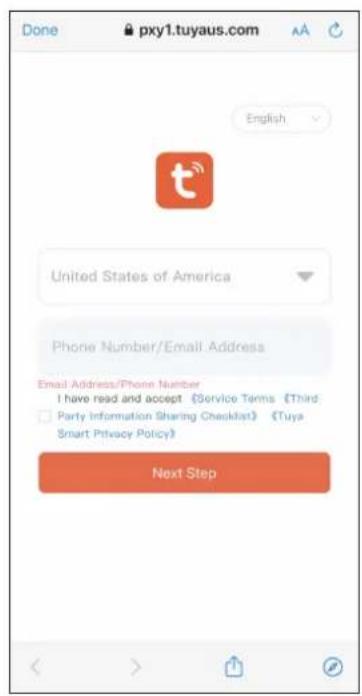
text_image
Done pxy1.tuyaus.com English United States of America Phone Number/Email Address Email Address/Phone Number I have read and accept (Service Terms) (Third Party Information Sharing Checklist) (Tuya Smart Privacy Policy) Next Step*To use smart voice control with the SM5c, customers must connect the fixture to a stable Wi-Fi network and a compatible smart speaker/smart assistant. Smart speakers must be purchased separately by the customer. *If there are any updates to any of the APPs mentioned above, these instructions may differ from the actual operation of the APP. Please follow the operation guidelines in each APP.
5. Precautions
1) Do not use/turn on the strip light in the spool for long periods of time to avoid overheating and damage to the strip light.
2) The minimum bending diameter of the strip light is 5cm. Do not wrap the strip light around objects with a diameter of less than 5cm or fold the strip light in half.
3) We recommended to use transparent double-sided adhesive tape to reinforce the corners where the strip light is installed to avoid the light falling off.
4) The controller can only support up to 10 meters of strip lights (including the strip light and the extension). Do not attempt to connect additional strip lights to this controller.
5) This strip light is not waterproof, please do not immerse the strip light in liquid.
6) For optimal lighting effects in Music Mode, place the audio source 30cm (1ft) from the control box.
7) Trimming of the light strip(s) should be avoided as it will result in a delayed boot-up process and certain Pixel FX will be incomplete, including Snake, Timing, Pinball, Clock, and Fuse.
Using the Sidus Link APP
You can download the Sidus Link app from the iOS App Store or Google Play Store for enhancing the functionality of the light. Please visit sidus.link/app/help for more details regarding how to use the app to control your Aputure lights.

text_image
QR code image containing encoded data, no visible human-readable textGet Sidus Link ^® App

text_image
QR code image containing encoded data, no visible human-readable textSidus.link/app/help
Specification
| Power Input | 20W (Max) |
| Operating Current | 1.7A (Max) |
| Operating Voltage | 12VDC |
| Strip Light Length | 5m |
| Extension Strip Light Length(Purchased Separately) | 5m |
| -10°C - +40°COperating Temperature | |
| Control Methods | Manual, Sidus Link App, SmartHome/Voice Control (Tuya,Google Assistant, Amazon Alexa) |
| Cooling Method | Passive Cooling |
Trademarks
● Amazon Alexa is a trademark registered by Amazon Technologies, Inc. in China and other countries.
● Google Assistant is a trademark registered by Google LLC in China and other countries.
● Tuya is a trademark registered by Tuya Global Inc. in China and other countries.