Nova P300C - Lighting Aputure - Free user manual and instructions
Find the device manual for free Nova P300C Aputure in PDF.


| Product Type | Full-Color RGBWW LED Panel |
| Model | Nova P300C |
| Power Output | 300W |
| Color Temperature Range | 2000K - 10000K |
| Color Gamut | Full RGBWW with Green/Magenta Adjustment |
| CRI / TLCI | Average ≥96 / ≥97 |
| Beam Angle | 120° (without reflector) |
| Dimensions (with yolk) | 368 × 262 × 140 mm |
| Weight | 4.6 kg |
| Power Supply | AC 100-240V, 50/60Hz |
| Power Consumption | ≤350W |
| Control Methods | Onboard, DMX512, Sidus Link App (Bluetooth) |
| Effects | Built-in effects: Lightning, Fire, Party, etc. |
| Cooling | Active fan cooling (silent mode available) |
| Ingress Protection | IP65 (dust and water resistant) |
| Mounting | Universal yoke with 28mm receiver |
| Maintenance | Clean with dry cloth; avoid solvents. Keep vents clear. |
| Safety | Do not cover or block ventilation. Use only approved accessories. |
| Spare Parts & Repairability | Contact Aputure support for replacement parts. Light engine not user-serviceable. |
Frequently Asked Questions - Nova P300C Aputure
User questions about Nova P300C Aputure
0 question about this device. Answer the ones you know or ask your own.
Ask a new question about this device
Download the instructions for your Lighting in PDF format for free! Find your manual Nova P300C - Aputure and take your electronic device back in hand. On this page are published all the documents necessary for the use of your device. Nova P300C by Aputure.
USER MANUAL Nova P300C Aputure
Thank you for purchasing Aputure® NOVA P300c.
The Aputure NOVA P300c is a color panel lamp with wide color gamut.
IMPORTANT SAFETY INSTRUCTIONS
Bsica safety precautions should always be followed while using the unit, as bellowing:
-
Please read and understand these instructions before using it.
-
Close supervision is necessary when the fixture is used or near to children, Please don't put it unattended while normally operating
-
Care must be taken of burning could occur from touching hot surface.
-
Don't operate the fixture if a cord is damaged or the fixture has been dropped or damaged - until it has been examined by qualified service personnel.
-
Position any power cables such that they will not be tripped over, pulled, and don't touch them with hot surfaces.
-
If an extension cord is necessary, a cord with an amperage rating at least equal to that of the fixture should be used. Cords rated for less amperage than the fixture may overheat.
-
Always unplug the lighting fixture from the electrical outlet before cleaning and servicing, or when not in use. Never yank the cord to remove the plug from the outlet.
-
Let the lighting fixture cool completely before storing.
-
To reduce the risk of electric shock, don't immerse this fixture in water or any other liquid.
-
To reduce the risk of electric shock, don't disassemble this fixture. Contact Aputure Customer Service or take it to qualified service personnel when service or repair work is required. Incorrect reassembly may cause electric shock when the lighting fixture is in use.
-
Use an accessory attachment not be recommended by the manufacturer may increase the risk of fire, electric shock, or injury to any person operating the fixture.
-
Power this fixture by connecting it to a grounded outlet.
-
Please don't place the LED lighting fixture near any liquid or other flammable object.
-
Only use a dry microfiber cloth to clean the product.
-
Please don't operate the fixture in damp environment or exist risk of short circuit or electrical shock
-
Please contact authorized service personnel while repair is necessary. The malfunctions caused by unauthorized disassemble are not covered under the warranty but pay for maintenance.
-
We recommend only using the original Aputure cable accessory. Please note that our warranty for this product does not apply to any repair required due to any malfunctions of unauthorized Aputure accessories, although you may request such repairs for a fee.
-
This product is certified by RoHS, CE, KC, PSE, and FCC. Please operate the product in full compliance with the operation standards. Please note that this warranty does not apply to repairs arising from malfunctions, although you may request such repairs on a chargeable basis.
-
The instructions and information in this manual are based on thorough, controlled company testing procedures. Further notice will not be given if the design or specifications change.
SAVE THESE INSTRUCTIONS
FCC Compliance Statement
This device complies with Part 15 of the FCC Rules. Operation is subject to the following two conditions:
(1) This device may not cause harmful interference.
(2) This device must accept any interference received, including interference that may cause undesired operation.
Warning: Changes or modifications not expressly approved by the party responsible for compliance could void the user's authority to operate the equipment.
NOTE: This equipment has been tested and found to comply with the limits for a Class B digital device, pursuant to Part 15 of the FCC Rules. These limits are designed to provide reasonable protection against harmful interference in a residential installation. This equipment generates, uses, and can radiate radio frequency energy and, if not installed and used in accordance with the instructions, may cause harmful interference to radio communications. However, there is no guarantee that interference will not occur in a particular installation. If this equipment does cause harmful interference to radio or television reception, which can be determined by turning the equipment off and on, the user is encouraged to try reorient or relocate the receiving antenna.
- Increase the separation between the equipment and receiver.
- Connect the equipment into an outlet on a circuit different from that to which the receiver is connected.
- Consult the dealer or an experienced radio/TV technician for help.
RF Warning Statement:
This device has been evaluated to meet general RF exposure requirements.
Components List
Please make sure all accessories listed below are completed before using. If not, please contact with your sellers immediately.
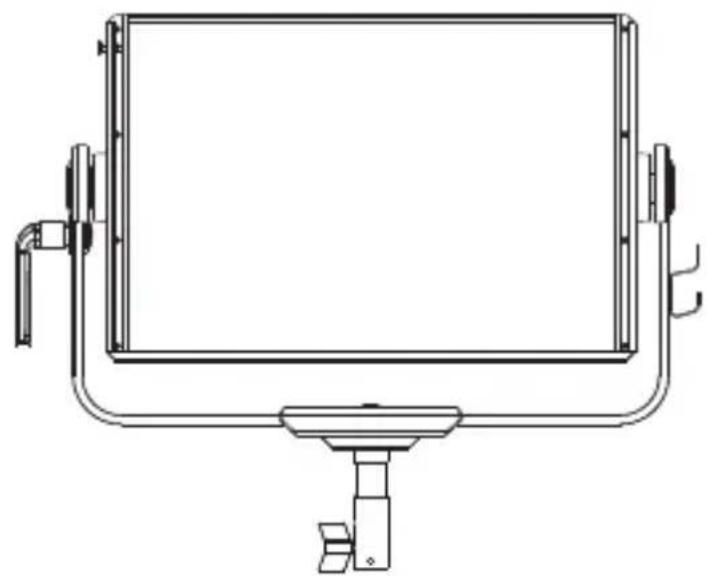
natural_image
Technical line drawing of a rectangular device mounted on a stand, showing mounting brackets and a central base (no text or symbols)Nova P300c Lamp Head (1 pc)
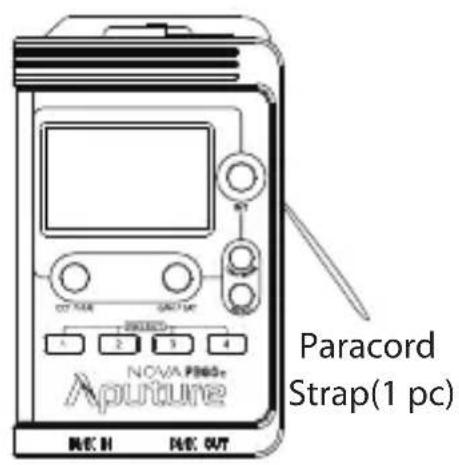
Control Box (1 pc)
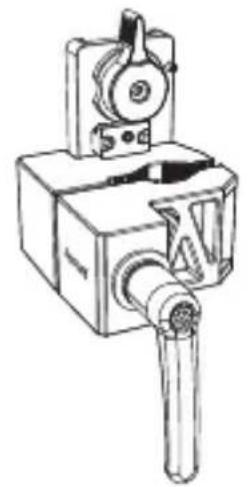
natural_image
Technical line drawing of a mechanical clamp or clamp device (no text or symbols)Lightning Clamp (1 pc)
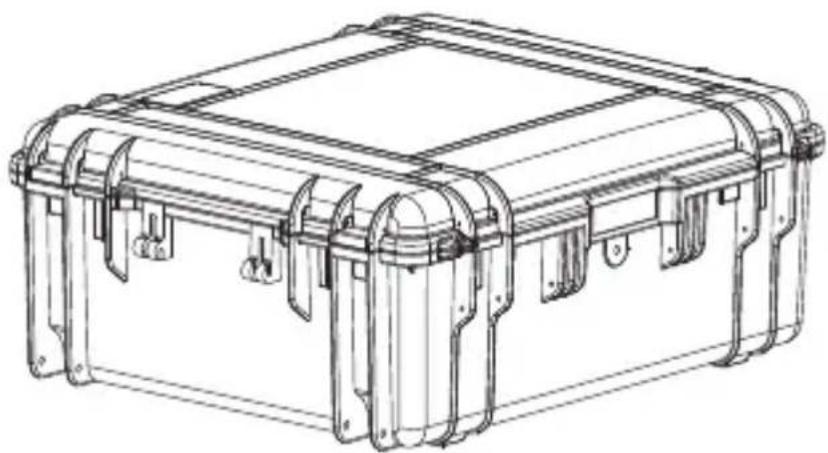
natural_image
Technical line drawing of a rectangular mechanical housing with multiple metal clamps and mounting brackets (no text or symbols)Nova P300c Custom Hard Shell (Available in Kit/Sold Separately) (1pc)
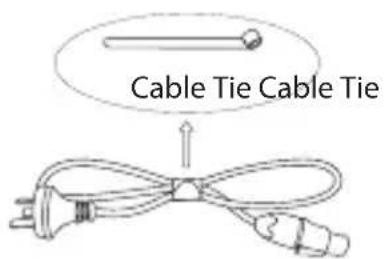
Neutrik® powerCON AC Power Cable (6m) (1 pc)
natural_image
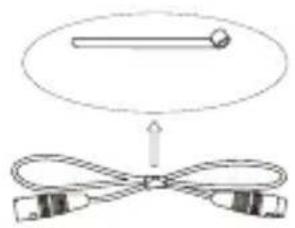
Diagram showing a cable with a pointer and a separate ribbon, no text or symbols present5-Pin Male-to-Female XLR Head Cable (3m) (1 pc)
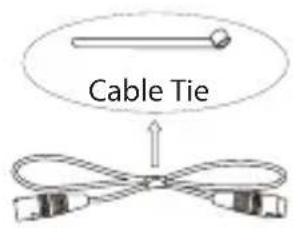
5-Pin Male-to-Female XLR Head Cable (0.6m) (1 pc)
Product Details
1. Light
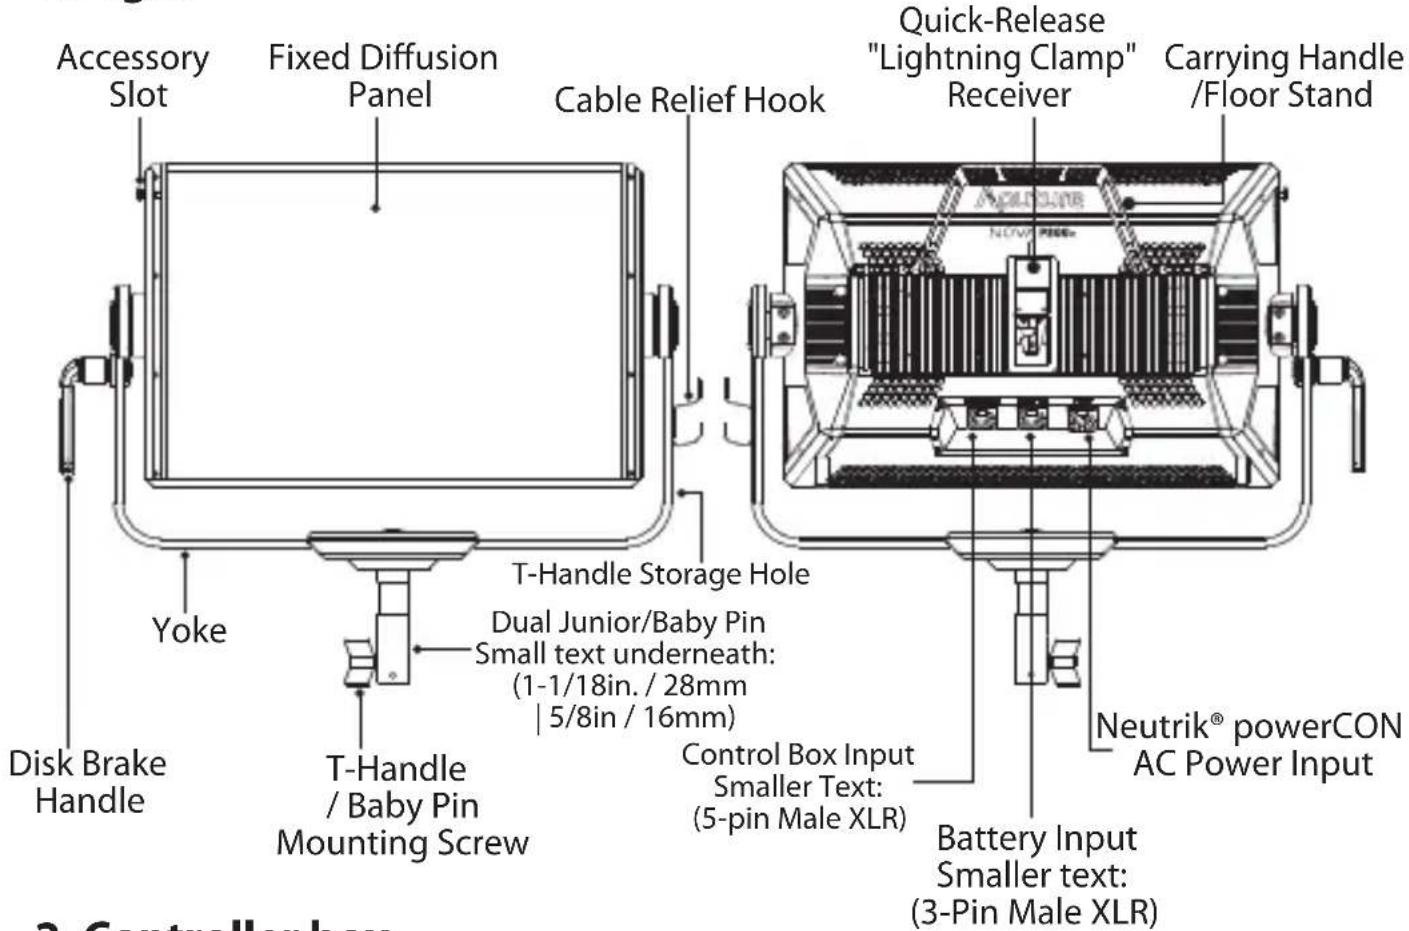
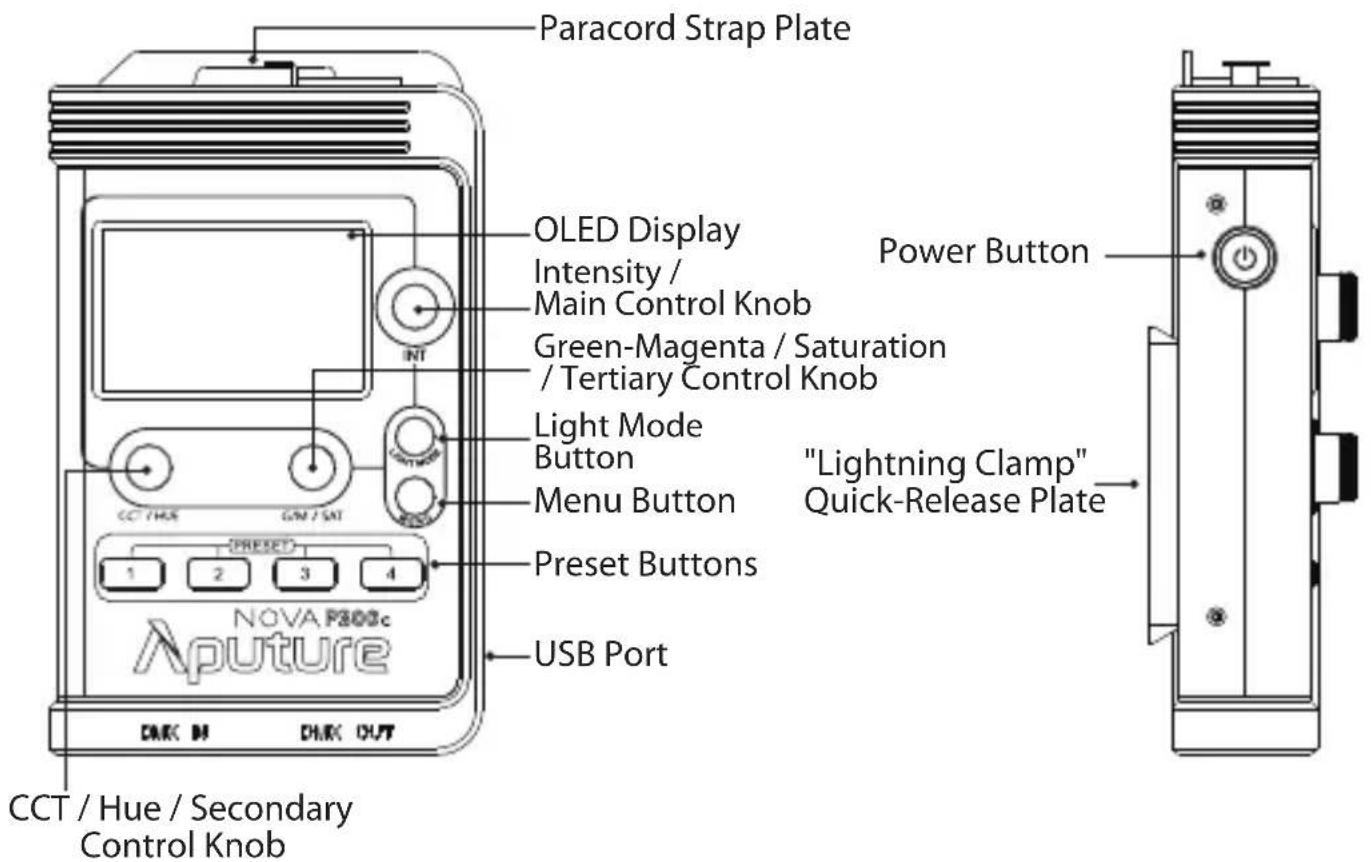
2. Controller box
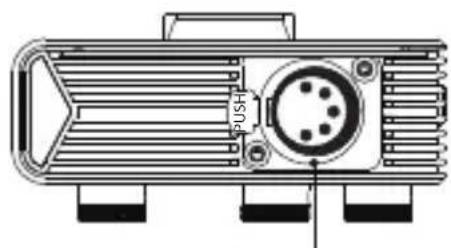
natural_image
Technical line drawing of a mechanical component with no visible text or symbols5-Pin Female XLR Control Box Input
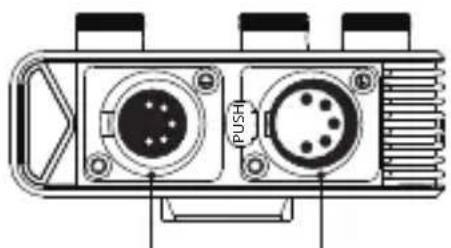
natural_image
Technical line drawing of a dual-port electronic device with two ports and a push button (no text or symbols)DMX IN Port DMX OUT Port
Installations
1. Setting Up Your Light
Baby Pin (5/8in. / 16mm)
Mount the lamp head onto a light stand, then fix it in place by tightening the T-Handle on the mounting column. Then loosen/tighten the handbrake locking mechanism on the yoke to adjust the tilt of the fixture.
Junior Pin
Remove the T-Handle from the Junior Pin and screw it into the T-Handle Storage Hole on the yoke. Place the light into the Junior Pin Receiver on the stand, and tighten down the T-Handle on the receiver.
natural_image
Illustration of a hand pressing down on a piece of paper with an upward arrow indicating motion (no text or symbols)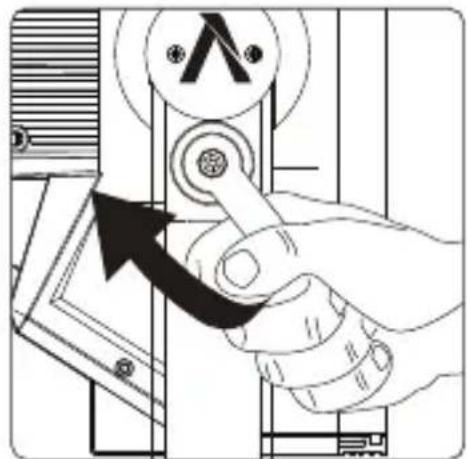
2. Connect the light to the control box
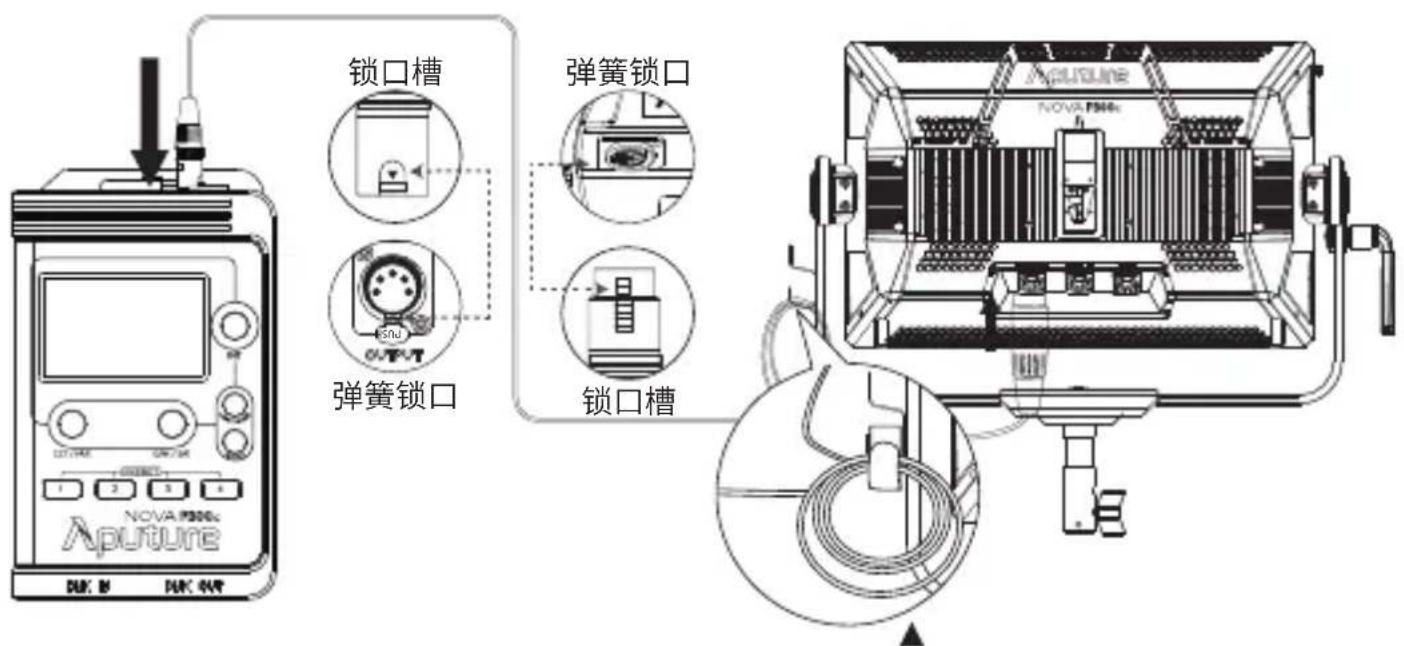
Connect the light to the control box with a 5-Pin Male-to-Female XLR cable (3m or 0.6m) as shown below.
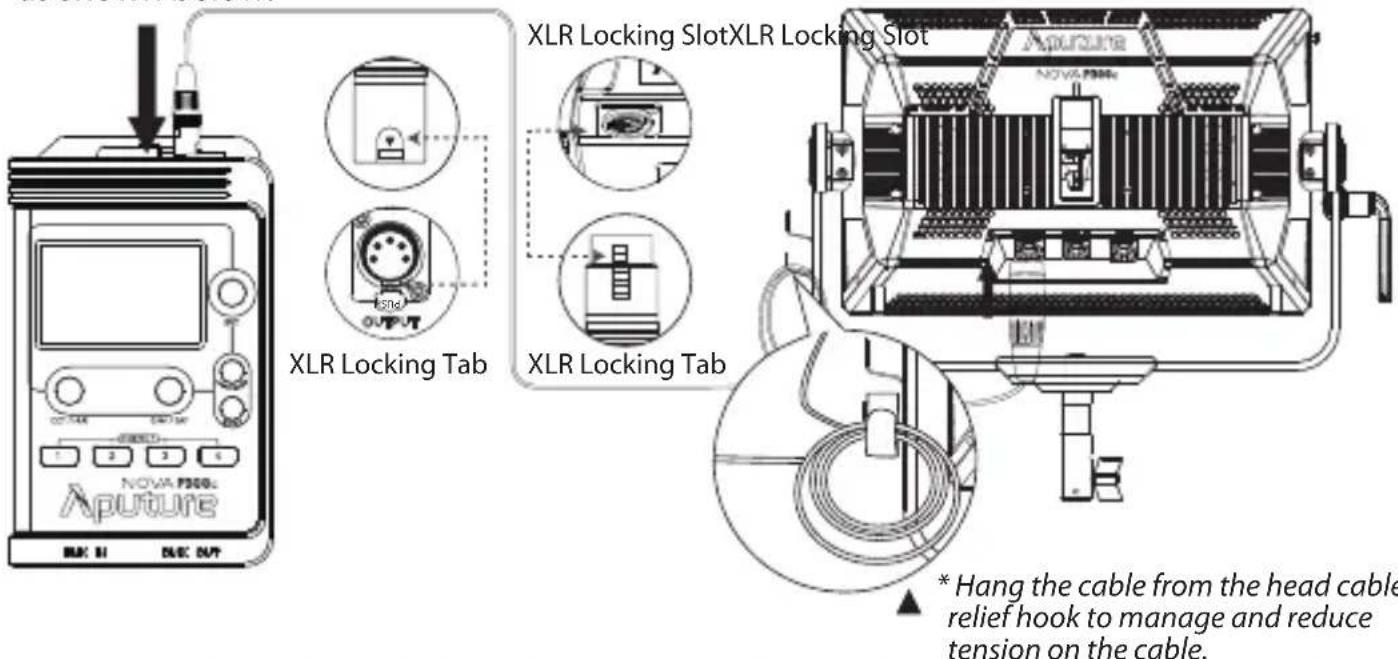
** Disconnect the XLR head cable by pushing down on the locking tabs on the female XLR connectors, then remove the cable.
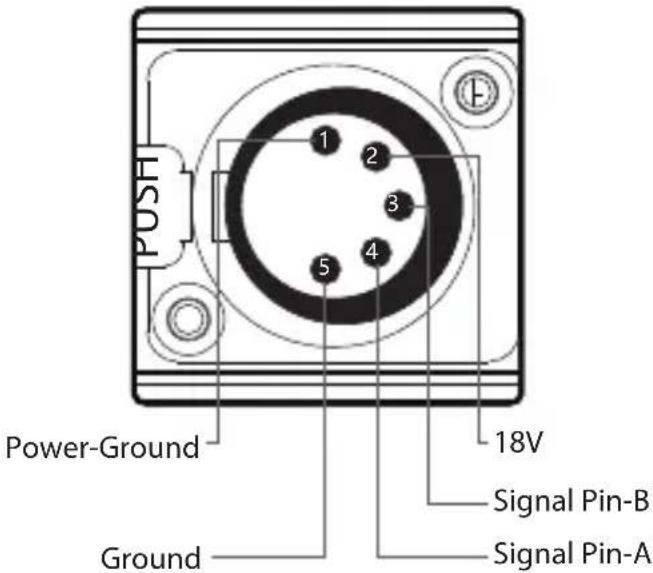
* The lamp controller interface schematic is shown in the pictures below:
3. Instructions for the Lightning Clamp
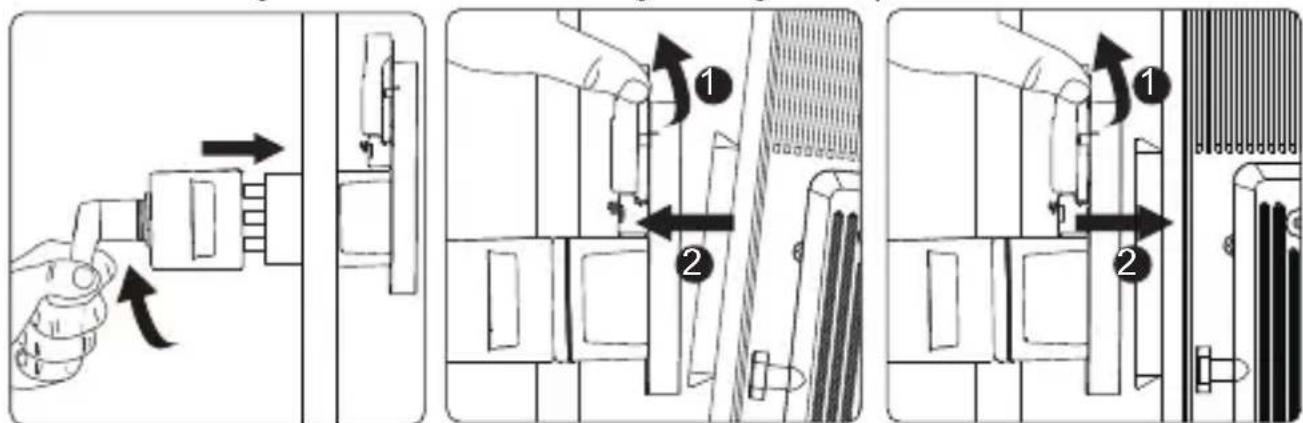
1) Clamp the Lightning Clamp onto a light stand.
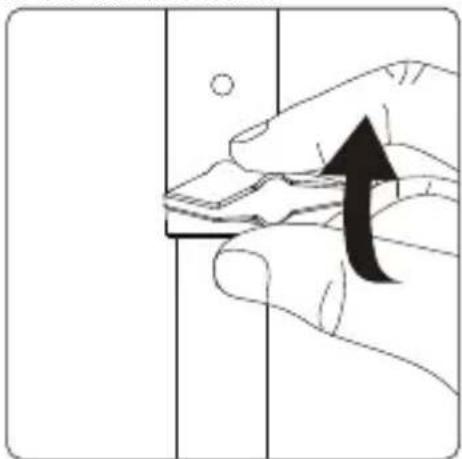
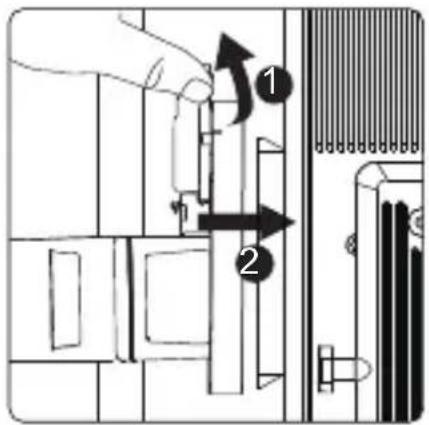
2) To attach the control box, rotate the release lever to unlock the quick-release baseplate, then mount the control box onto the Lightning Clamp (the release lever will automatically spring back).
3) To remove the control box, grasp it firmly, then unlock the quick-release plate by turning the release lever, and detach the control box.
4) For the Lightning Clamp Receiver on the back of the lamp head, the using method of fixing is similar with the Lightning Clamp.
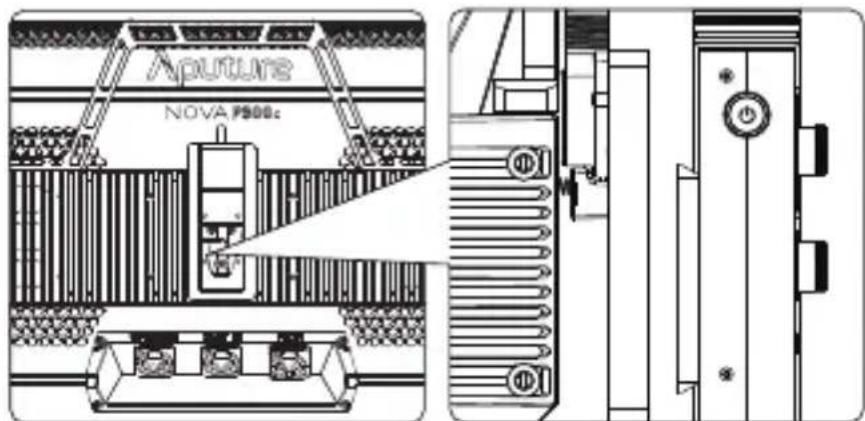
Specifications
| Weight | 670g / 1.48lbs 10.35x8s74x12.5cm / 4.07x3.44x4.92in |
| * The Quick-Release "Lightning Clamp" can clamp onto square or round pipe with a diameter between 2-5cm or 0.79-1.97in. | |
4. Powering up the Light
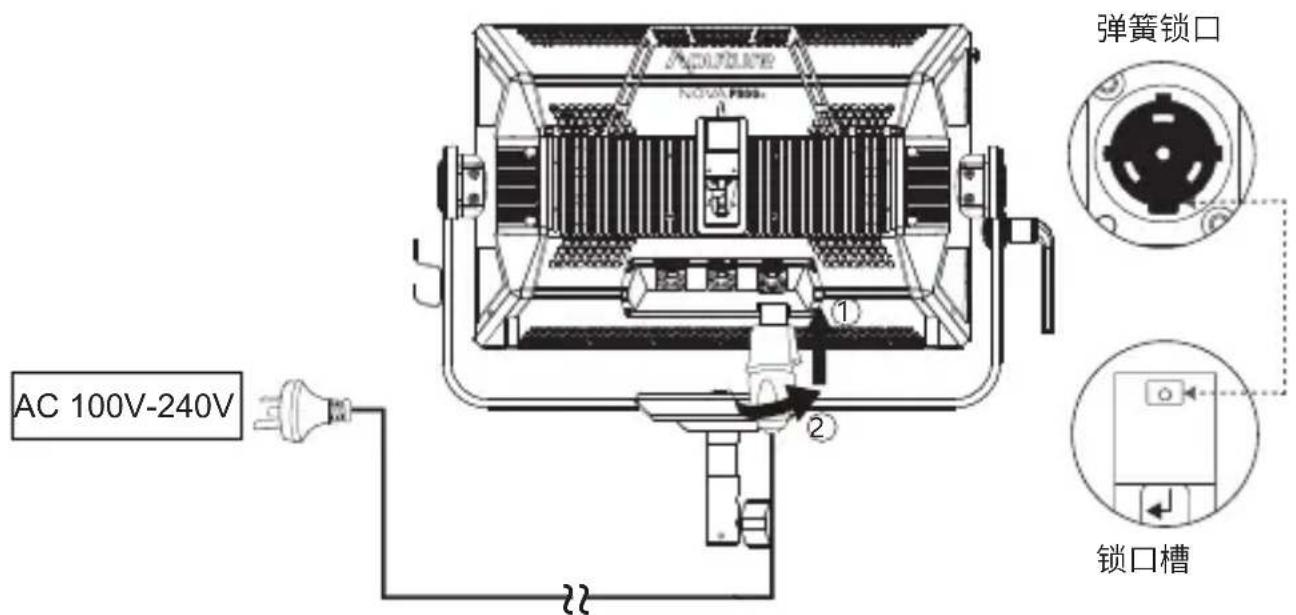
1) Powered by AC
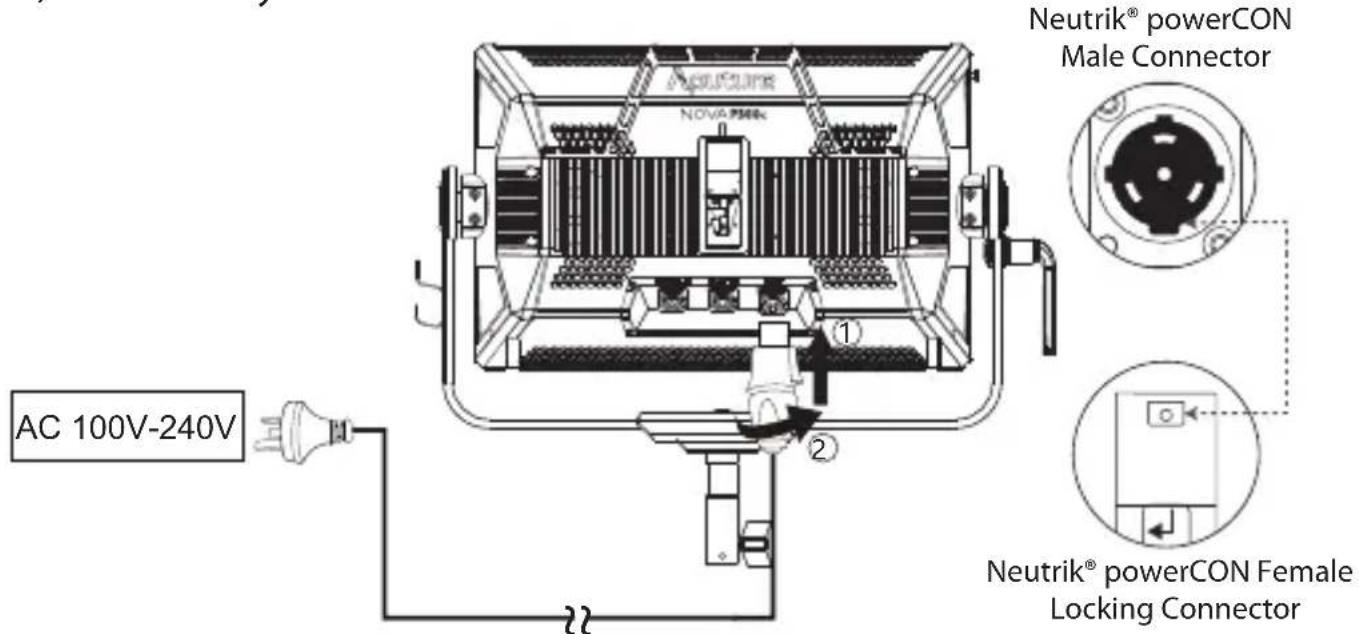
To disconnect the Neutrik® powerCON cable, pull back on the yellow release tab on the cable connector, and rotate the connector counterclockwise.
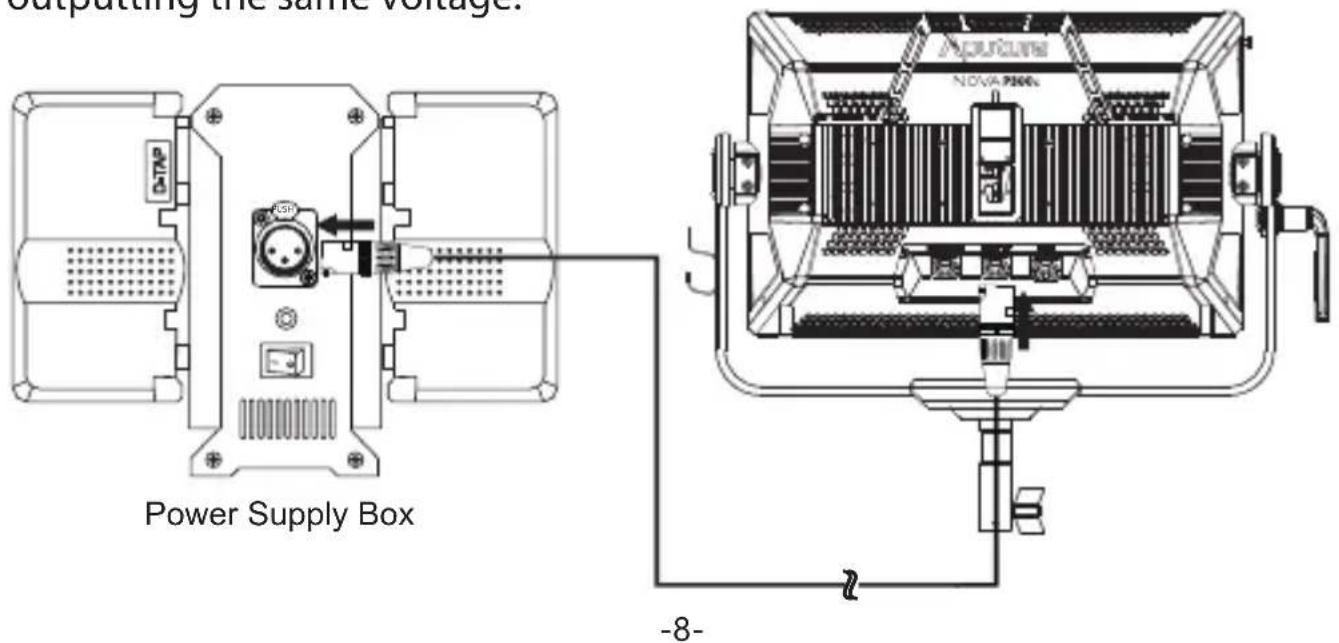
2) Powered by Battery
You can also power this light via DC 24V-48V Power from a 3-pin XLR. This can be done via our an Aputure Battery Power Station that supports 48V output, or other power stations or block batteries that are capable of outputting the same voltage.
Operation Instructions
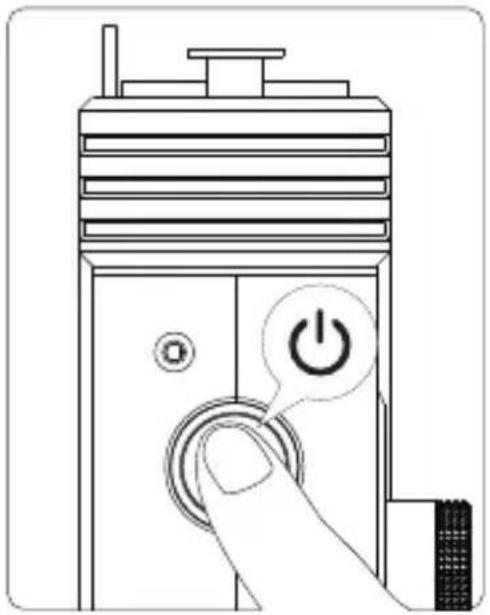
1. Turning on the Light
After connecting the lamp head to an appropriate power source, connect the lamp head and control box with one of the included 5-Pin
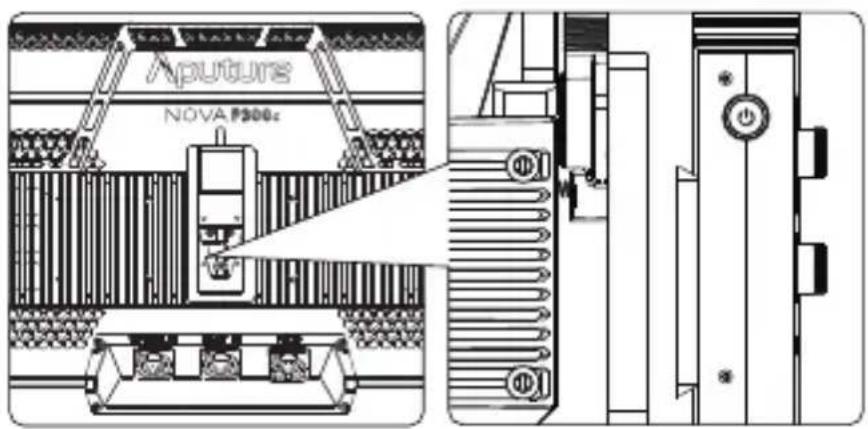
Male-to-Female XLR Head Cables. Press the power button on the side of the control box to turn the light on and off.
natural_image
Line drawing of a door with a hand pressing a button labeled 'Power' (no text or symbols beyond the icon)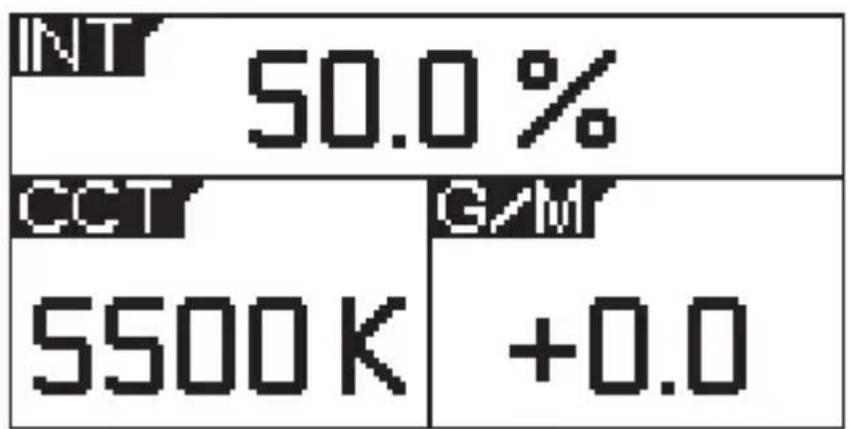
other
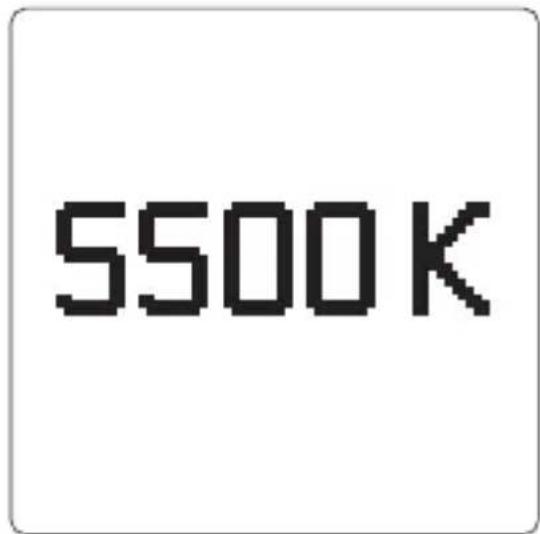
| Category | Value (%) | |---|---| | INT | 50.0 | | CCT | 5500 K | | G/M | +0.0 |2. Manual Control
2.1. Rotate the Intensity (INT) Control Knob to adjust the intensity of the light from 0-100%.
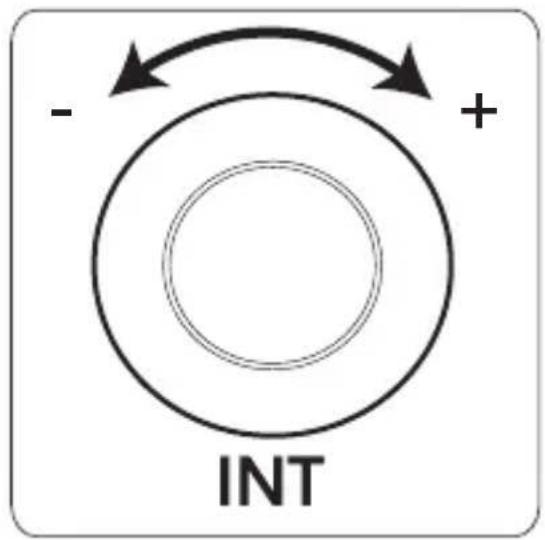
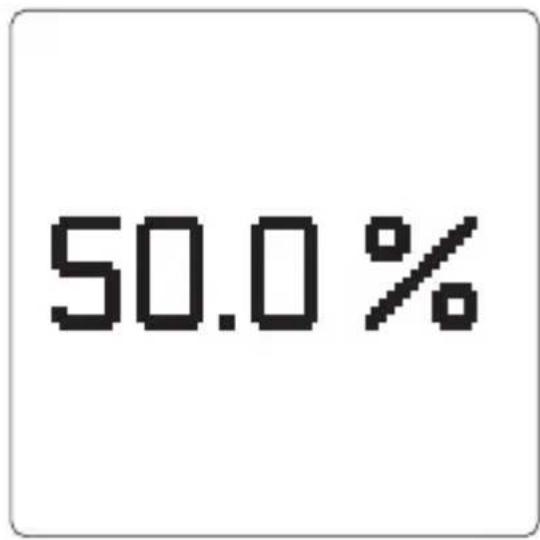
Rotate the CCT / HUE Control Knob to adjust the CCT or HUE Output of the light fixture.
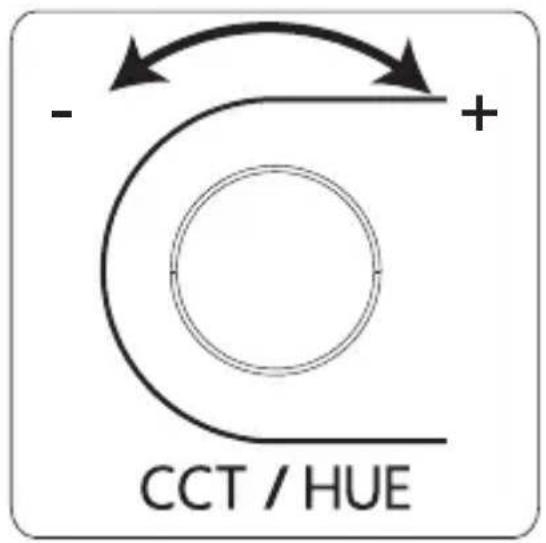
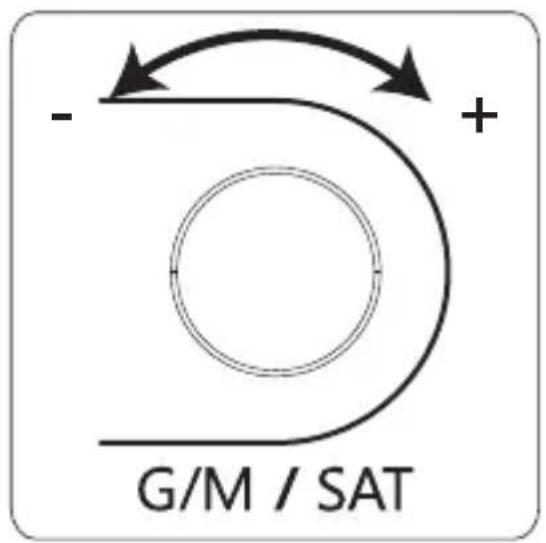
Rotate the Green-Magenta / Saturation (G/M / SAT) Control Knob to adjust the the Green-Magenta Shift or Saturation output of the light fixture.
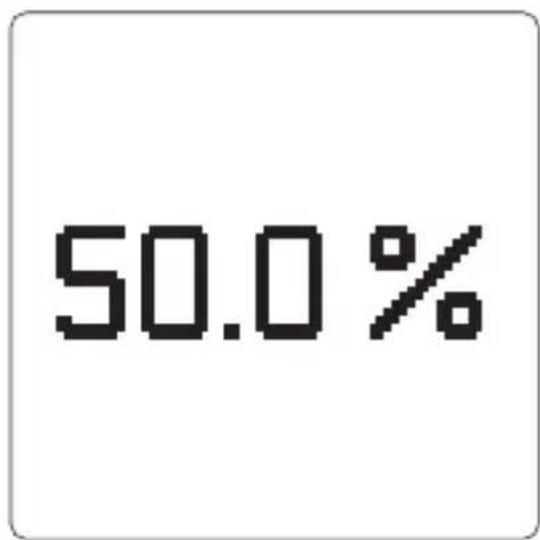
* The speed at which you rotate the knob will result in different rates of change.
2.2. Light Mode Interface
Press the Light Mode button to enter the system.
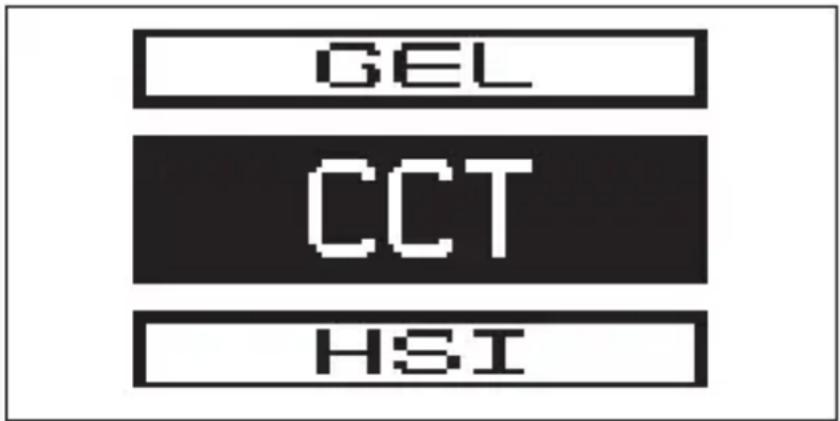
2.2.1 Press the INT button to select CCT mode to adjust the color emperature of the light from 2000K-10000K.
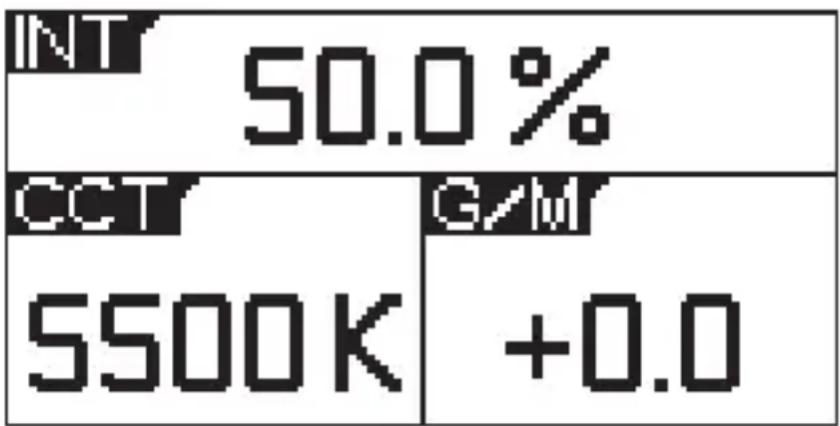
other
| Metric | Value (%) | | :--- | :--- | | INT | 50.0 | | CCT | 5500K | | G/M | +0.0 |2.2.2 Press the INT button to select HSI mode to adjust the change of the HUE from 1°\~360°.
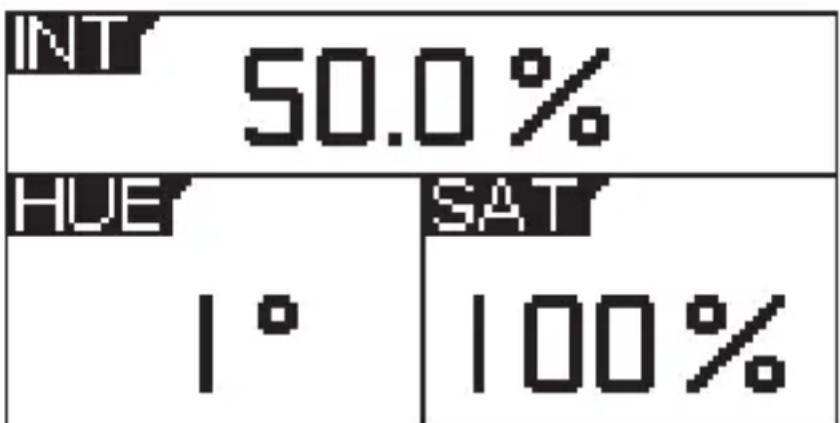
other
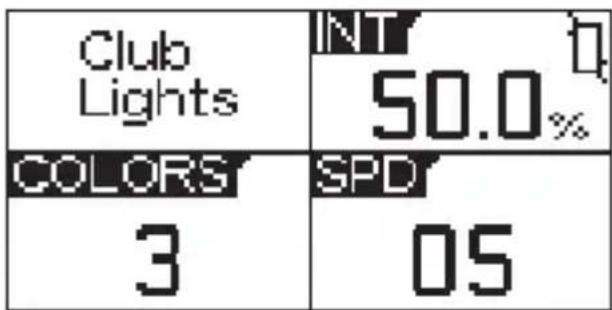
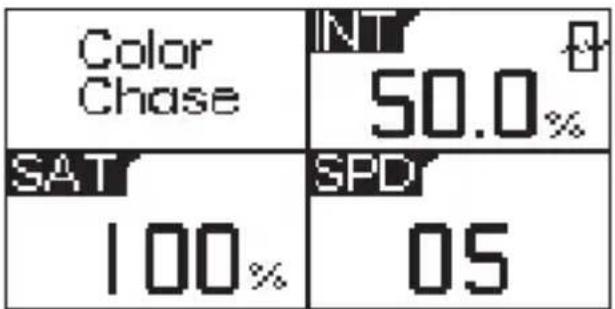
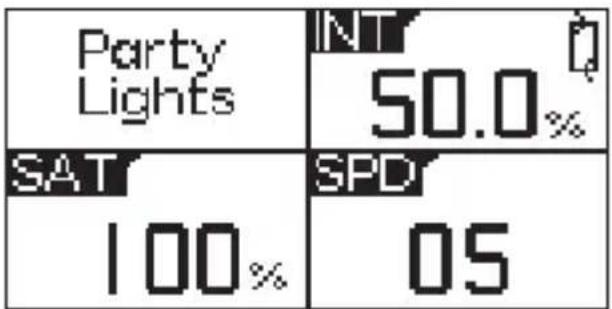
| Category | Value (%) | |---|---| | INT | 50.0 | | HUE | 1° | | SAT | 100% |2.2.3 Press the INT button to select FX mode, then rotate the INT control knob to toggle between Club Lights, Paparazzi, Lightning, TV, Candle, Fire, Strobe, Explosion, Fault Bulb, Pulsing, Welding, Cop Car, Color Chase, Party Lights, Fireworks.
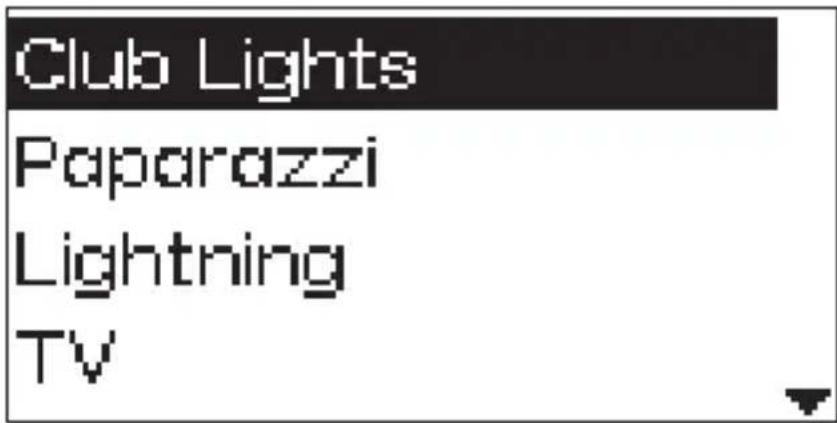
a. Club Lights b. Paparazzi
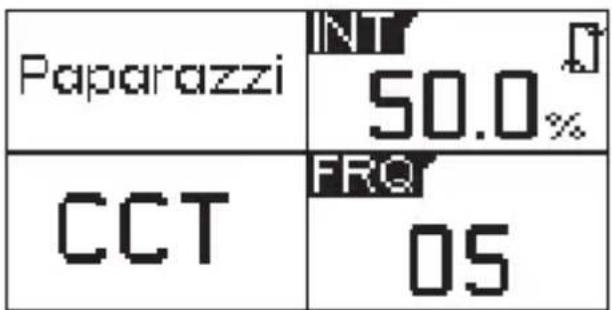
c. Lightning d. TV
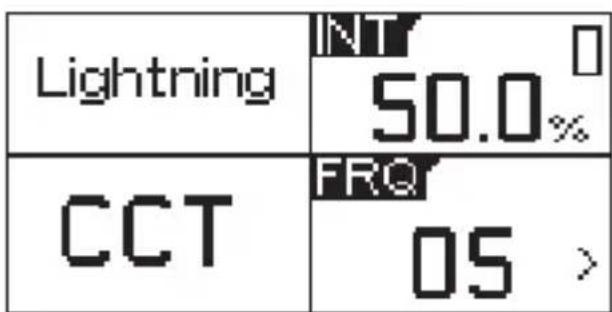
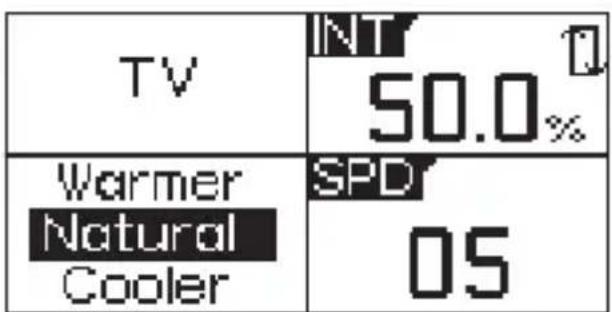
e. Candle f. Fire
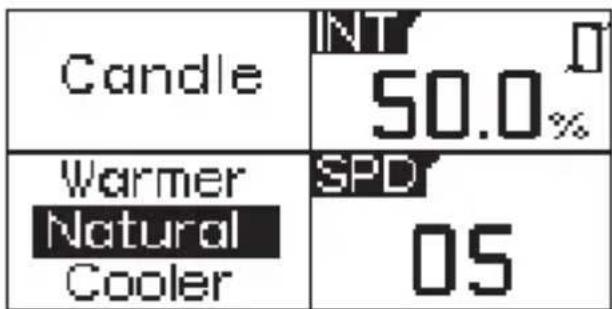
| Fire | INT 50.0% |
| Warmer Natural Cooler | SPD 05 |
g. Strobe h. Explosion
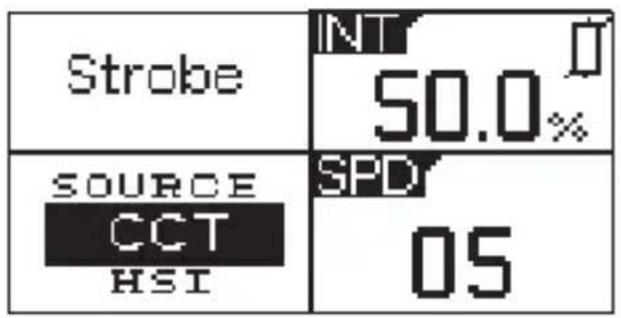
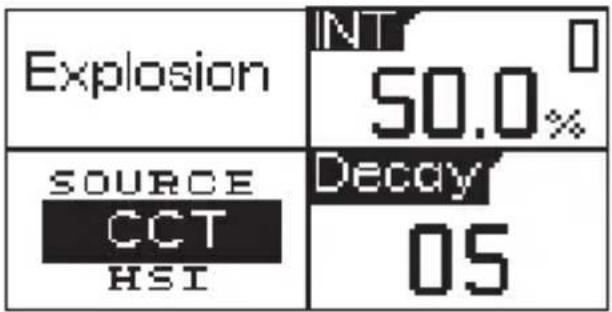
i. Fault Bulb j. Pulsing
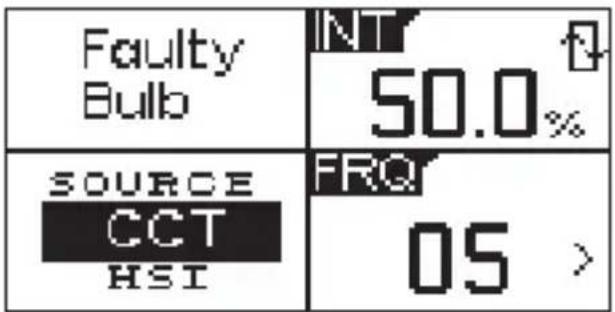
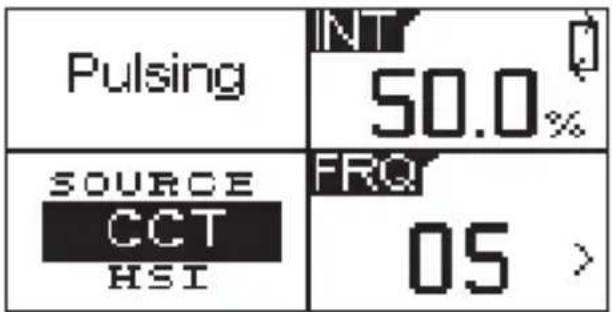
i. Welding j. Cop Car
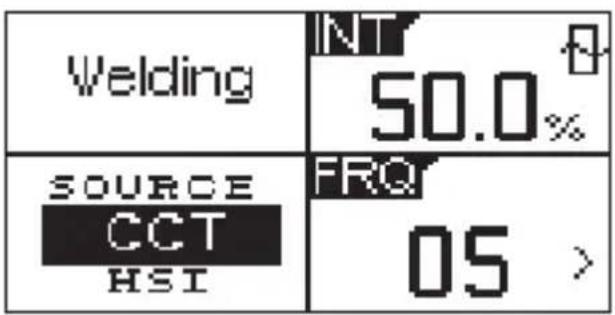
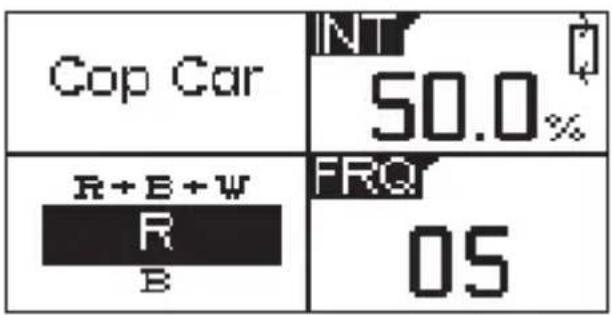
k. Color Chase
I. Party Lights
m. Fireworks
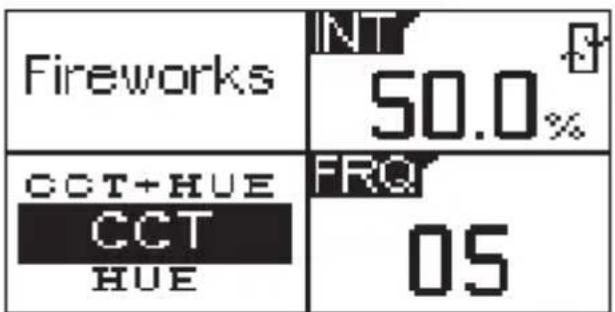
Under anyone FX mode, press the INT control knob to circulate the light effect and press the INT control knob again to pause the light effect. But under Lightning and Explosion, press the INT control knob, it will become trigger.
2.2.4 Press the INT button to select RGB mode to adjust the brightness via change the scale of each of R/G/B.
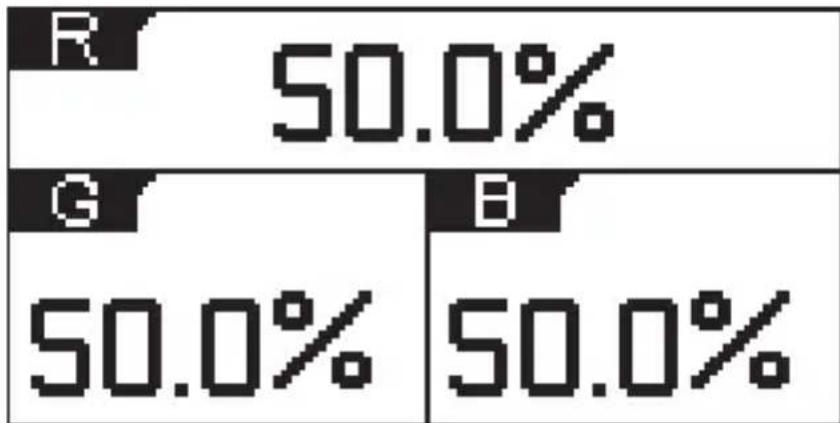
other
| Category | Value (%) | |---|---| | R | 50.0 | | G | 50.0 | | B | 50.0 |2.2.5 Press the INT button to select X, Y color coordinate mode, press or rotate the HUE control knob to change the figure of X and press the SAT control knob to change the figure of Y.
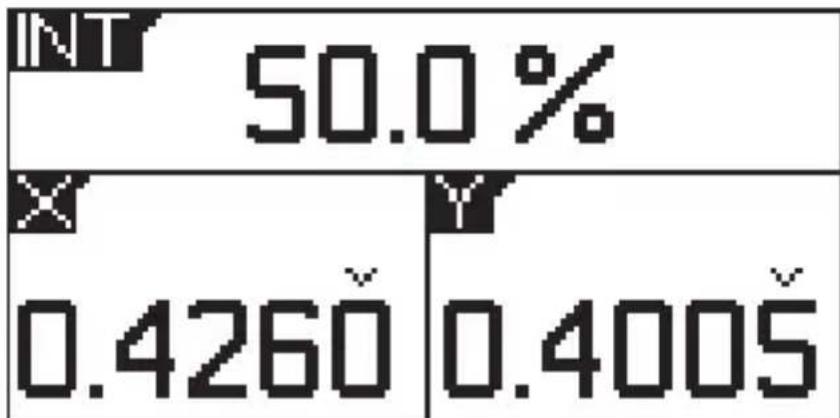
bar
| Value | Label | |---|---| | 50.0% | | | 0.4260 | 0.4005 | | | Y | | | X |2.2.6 Press the INT button to select SOURCE mode, then rotate the INT control knob to select appropriate source.
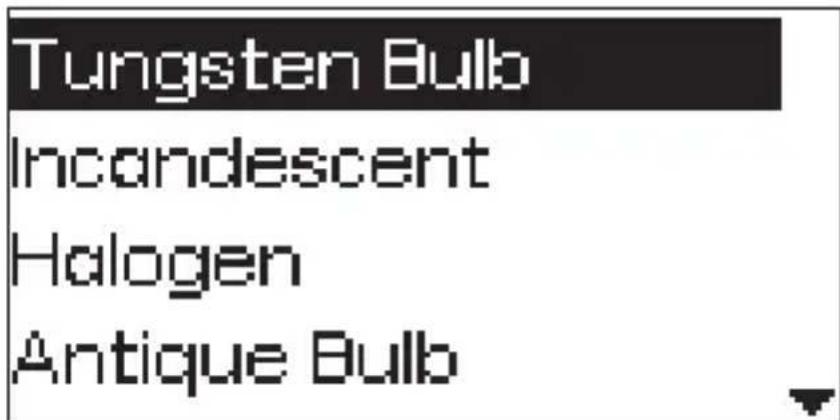
2.2.7 Press the INT button to select GEL mode, then rotate the INT control knob to adjust the brightness, rotate the INT control knob to choose 3200K/5600K and press G/M control knob to enter the interface of GEL.
| 50.0% | |
| 3200K 5600K | 202 Full CT |
2.3 Press the MENU button to enter the system of menu interface, as shown below.
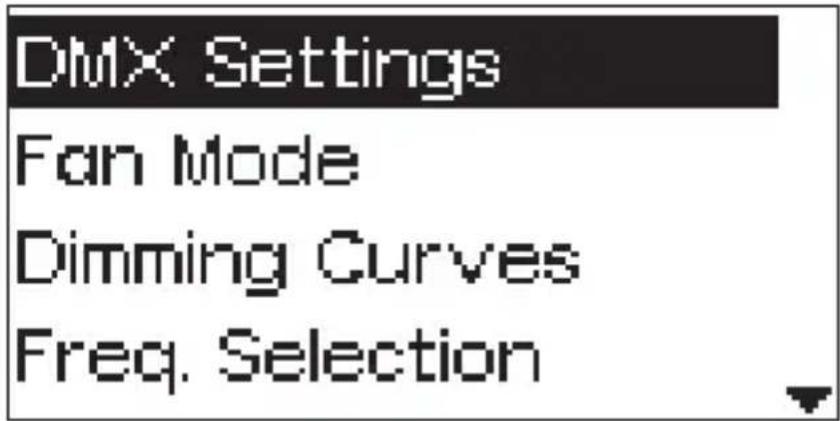
2.3.1 Fan mode
Press the MENU button to enter the system menu, rotate the INT control knob to select Fan Mode, and press the INT knob again to enter Fan Mode. rotate the INT control knob to select between Force and Auto, and press the INT control knob to confirm your selection.
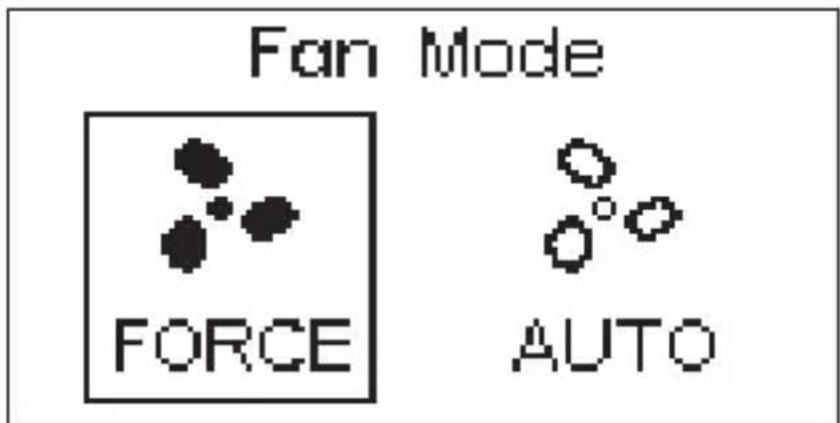
2.3.2 Dimming curve mode
Press the MENU button to enter the system menu, rotate the INT control knob to select Dimming Curve, and press the INT knob again to enter the dimming curve. rotate the INT control knob to choose from exponential (Exp), logarithmic (Log), S-Curve, or linear dimming curves, and press the INT control knob to make your choice.
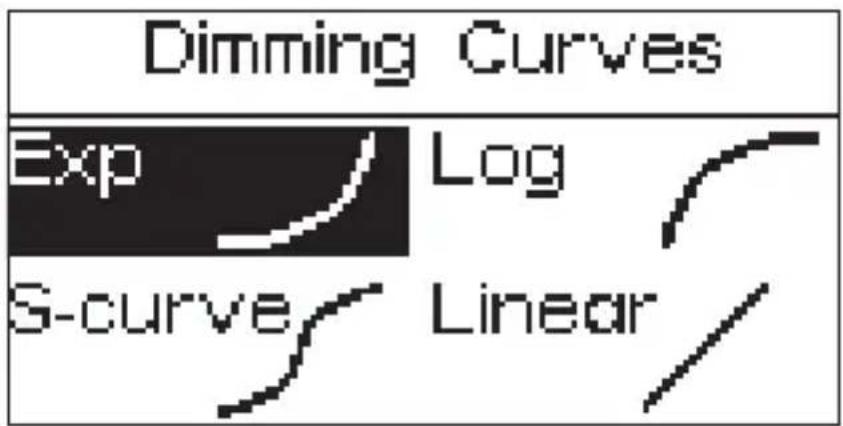
2.3.3 Freq. Selection
Press the MENU button to enter the system menu, rotate the INT control knob to select Freq. Selection, and press the INT knob again to enter the Freq.
Selection, rotate the INT control knob to get frequency between 1 to 10. and press the INT control knob to return the previous menu.
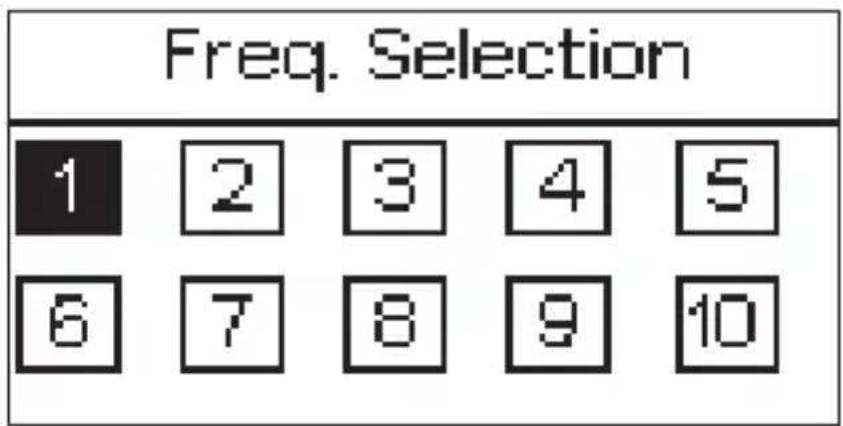
2.3.4 Bluetooth Reset
Press the MENU button to enter the system menu, rotate the INT control knob to select BT Reset. Press the INT control knob again to enter the BT Reset. Use the knob to select "YES" to reset the Bluetooth pairing; If you choose "NO", then it will return to the previous menu.
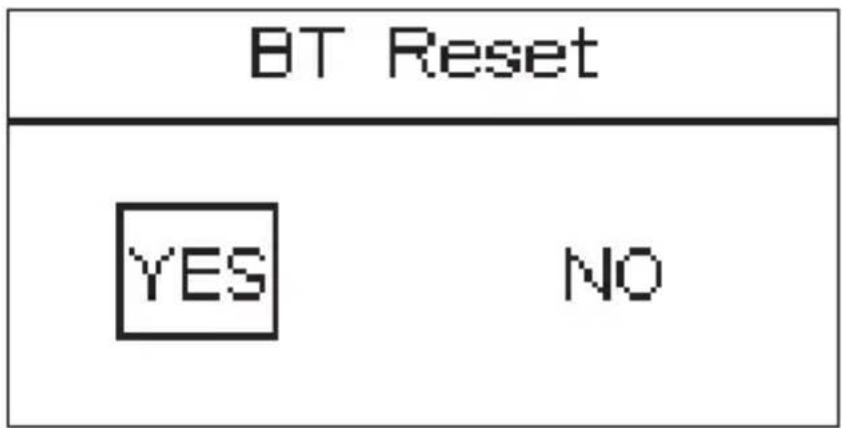
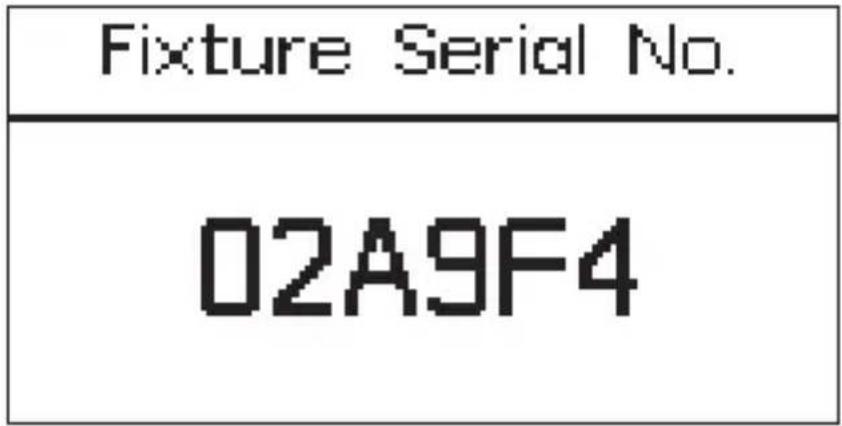
2.3.5 Fixture Serial No.
Press the MENU button to enter the system menu, rotate the INT control knob to select "Fixture Serial No." and you can see that device has a unique serial number.
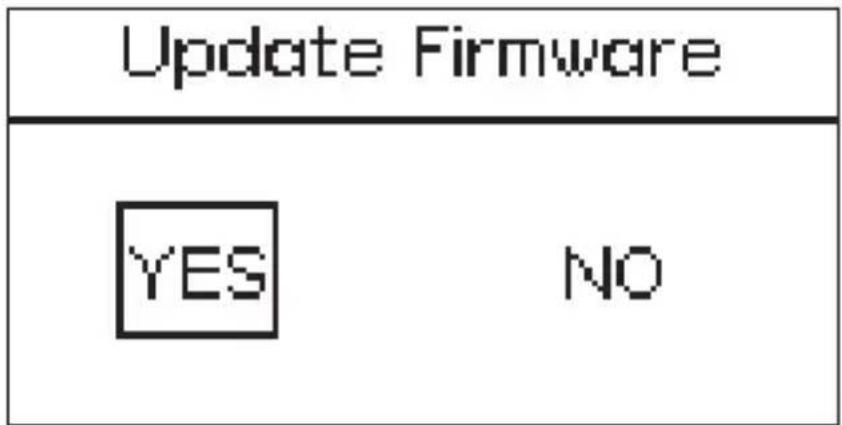
2.3.6 Update Firmware
Press the MENU button to enter the system menu, rotate the INT control knob to select Update Firmware. Press the INT control knob again to enter the Update Firmware. rotate the INT control knob to select "YES" or "NO". If a USB flash drive containing a firmware update is mounted in the USB port, the screen will display an update progress bar; If you choose "NO", then it will return the menu interface.
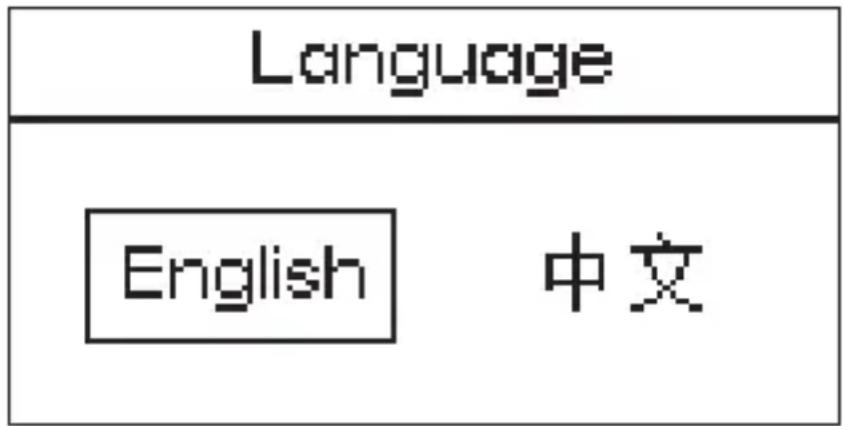
2.3.7 Language
Press the MENU button to enter the system menu, rotate the INT control knob to select Language, and press the INT control knob again to enter the Language interface. rotate the INT control knob to select from the available languages. Initial languages include "English" and "Chinese".
flowchart
graph TD
    A["Language"] --> B["English"]
    A --> C["中文"]
2.3.8 Firmware Version
Press the MENU button to enter the system menu, rotate the INT control knob to select Firmware Version, and press the INT control knob again to enter the Firmware Version interface. Then Lamp Version number and Lamp Version will appear.
| Firmware Version |
| Lamp Head : 1.0 Control Box : 1.0 |
2.4 Fixture Presets
There are 4 preset buttons located on the bottom row of the control box.
Once you have set your light to the desired output, long press and hold one of the four buttons (1, 2, 3, or 4) to start the Save Preset procedure. Use the INT control wheel to select "YES" or "NO".
You can then use those preset buttons in any Lighting Mode and it will activate the mode and settings you previously saved to that preset.
You can save a nearly infinite number of presets using the Sidus Link mobile app.
3. Connecting to DMX
1) Connect a standard DMX controller
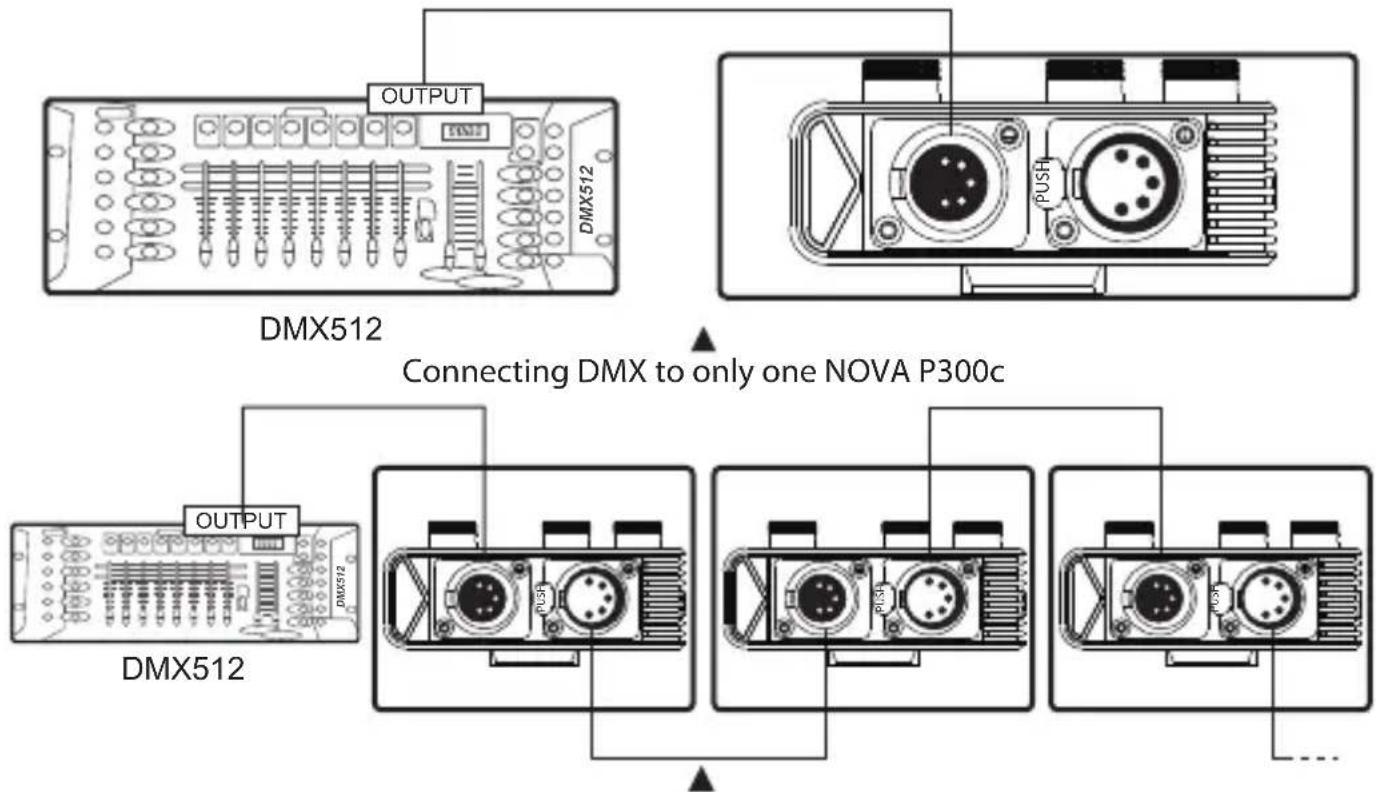
Daisy chaining multiple lights using DMX
* The DMX interface schematic is shown in the pictures below:
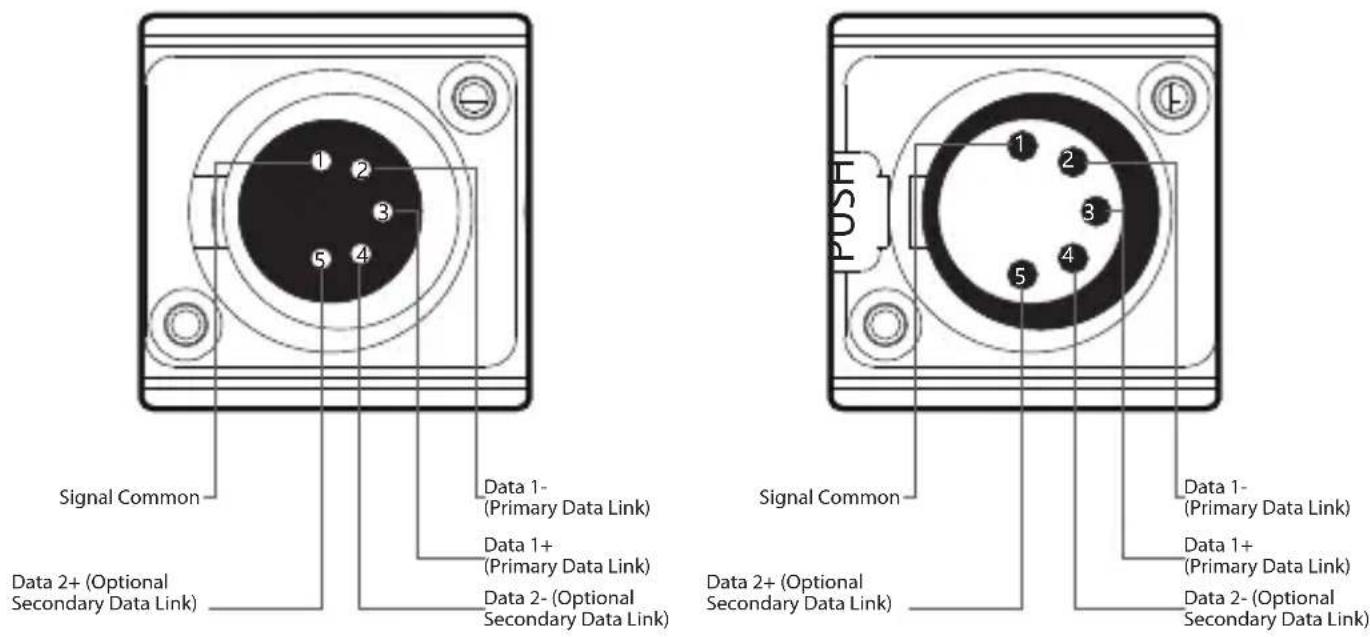
2) Channel Selection
In DMX mode, match the channel of your DMX controller with the light, and then adjust accordingly.
* The default DMX channel is "001".
** The range of DMX channels is 1 to 512.
4. Controlling Device Via DMX
1) Connect the DMX controller's OUTPUT to the Nova P300c controller's DMX INPUT as shown in the figure below.
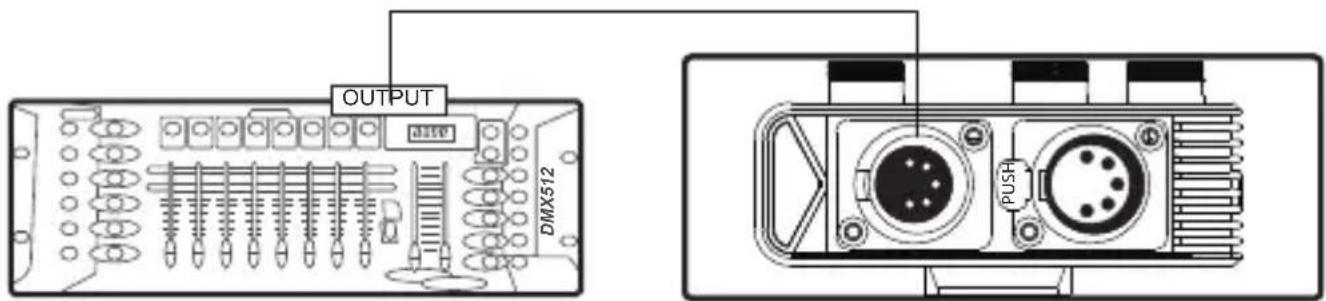
DMX512
2) DMX Chart
| Model | Channel | Function | |
| DMX Profile1: CCT | INT: 0-100%1 | ||
| 2 | Color Temp: 2000-10000K | ||
| 3 | G/M: -1.0~+1.0 | ||
| DMX Profile2: CCT&HSI | 1 | INT: 0-100% | INT: 0-100% |
| 2 | Color Temp: 2000-10000K | HUE: 1°-360° | |
| 3 | VG/M: -1.0~+1.0 | SAT: 0-100% | |
| 4 | CCT->HSI | HSI->CCT | |
| DMX Profile3: CCT&RGB | 1 | INT: 0-100% | R INT: 0-100% |
| 2 | Color Temp: 2000-10000K | G INT: 0-100% | |
| 3 | G/M: -1.0~+1.0 | B INT: 0-100% | |
| 4 | CCT->RGB | RGB->CCT | |
| DMX Profile4: GEL | 1 | INT: 0-100% | |
| 2 | Color Temp: 3200K/5600K | ||
| 3 | GEL Selection: R/L | ||
| 4 | GEL Selection: Series | ||
| 5 | GEL Selection: Model | ||
| DMX Profile5: HSI | 1 | INT: 0-100% | |
| 2 | HUE: 1°-360° | ||
| 3 | SAT: 0-100% | ||
| DMX Profile6: Source | 1 | INT: 0-100% | |
| 2 | Source(contain 46 sources) | ||
| DMX Profile7: RGB | 1 | R INT: 0-100% | |
| 2 | G INT: 0-100% | ||
| 3 | B INT: 0-100% | ||
| DMX Profile8: X,Y | 1 | INT: 0-100% | |
| 2 | X-coordinate: 0.0000-0.8000 | ||
| Y-coordinate: 0.0000-0.80003 | |||
| DMX Profile9: FX | 1 | FX Selection: Club Lights, Paparazzi, Lightning, TV, Candle, Fire, Strobe, Explosion, Fault Bulb, Pulsing, Welding, Cop Car, Color Chase, Party Lights, Fireworks | |
| 2 | INT: 0-100% | ||
| 3 | Club Lights | Colors: 3、6、9、12、15、18、24、36 | |
| 4 | SPD: 1-10 | ||
| 5 | Stop/Loop | ||
| 3 | Paparazzi | CCT: 2000-10000K | |
| 4 | G/M: -1.0~+1.0 | ||
| 5 | FRQ: 1-10 | ||
| 6 | Stop/Loop | ||
| 3 | Lightning | CCT: 2000-10000K | |
| 4 | G/M: -1.0~+1.0 | ||
| 5 | FRQ: 1-10-R | ||
| 6 | SPD: 1-10-R | ||
| 7 | Stop/Loop | ||
| 3 | TV | CCT: Warmer/Natural/Cooler | |
| 4 | SPD: 1-10-R | ||
| 5 | Stop/Loop | ||
| 3 | Candle | CCT: Warmer/Natural/Cooler | |
| 4 | SPD: 1-10 | ||
| 5 | Stop/Loop | ||
| 3 | Fire | CCT: Warmer/Natural/Cooler | |
| 4 | SPD: 1-10 | ||
| 5 | Stop/Loop | ||
| DMX Profile9: FX | 3 | Strobe | CCT | HSI | GEL | X, Y | SOURCE |
| 4 | CCT: 2000-10000K | HUE: 1°-360° | CCT: 3200K/5600K | X-coordinate: 0.0000-0.8000 | Source matching | ||
| 5 | G/M: -1.0~+1.0 | SAT: 0-100% | GEL Selection: R/L | Y-coordinate: 0.0000-0.8000 | SPD: 1-10-R | ||
| 6 | SPD: 1-10-R | SPD: 1-10-R | GEL Selection: series | SPD: 1-10-R | Stop/Loop | ||
| 7 | Stop/Loop | Stop/Loop | GEL Selection: Model | Stop/Loop | / | ||
| 8 | / | / | SPD: 1-10-R | / | / | ||
| 9 | / | / | Stop/Loop | / | / | ||
| 3 | Explosion | CCT | HSI | GEL | X, Y | SOURCE | |
| 4 | CCT: 2000-10000K | HUE: 1°-360° | CCT: 3200K/5600K | X-coordinate: 0.0000-0.8000 | Source matching | ||
| 5 | G/M: -1.5~+1.0 | SAT: 0-100% | GEL Selection: R/L | Y-coordinate: 0.0000-0.8000 | Decay: 1-10 | ||
| 6 | Decay: 1-10 | Decay: 1-10 | GEL Selection: series | Decay: 1-10 | Stop/Loop | ||
| 7 | Stop/Loop | Stop/Loop | GEL Selection: Model | Stop/Loop | / | ||
| 8 | / | / | Decay: 1-10 | / | / | ||
| 9 | / | / | Stop/Loop | / | / | ||
| 3 | Fault Bulb | CCT | HSI | GEL | X, Y | SOURCE | |
| 4 | CCT: 2000-10000K | HUE: 1°-360° | CCT: 3200K/5600K | X-coordinate: 0.0000-0.8000 | Source matching | ||
| 5 | G/M: -1.2~+1.0 | SAT: 0-100% | GEL Selection: R/L | Y-coordinate: 0.0000-0.8000 | FRQ: 1-10-R | ||
| 6 | FRQ: 1-10-R | FRQ: 1-10-R | GEL Selection: series | FRQ: 1-10-R | SPD: 1-10 | ||
| 7 | SPD: 1-10 | SPD: 1-10 | GEL Selection: Model | SPD: 1-10 | Stop/Loop | ||
| 8 | Stop/Loop | Stop/Loop | FRQ: 1-10-R | Stop/Loop | / | ||
| 9 | / | / | SPD: 1-10 | / | / | ||
| 10 | / | / | Stop/Loop | / | / | ||
| DMX Profile9: FX | 3 | Pulsing | CCT | HSI | GEL | X, Y | SOURCE |
| 4 | CCT: 2000-10000K | HUE: 1°-360° | CCT: 3200K/5600K | X-coordinate: 0.0000-0.8000 | Source matching | ||
| 5 | G/M: -1.0~+1.0 | SAT: 0-100% | GEL Selection: R/L | Y-coordinate: 0.0000-0.8000 | SPD: 1-10-R | ||
| 6 | FRQ: 1-10-R | FRQ: 1-10-R | GEL Selection: Series: 1-10-R | -10-R | |||
| 7 | SPD: 1-10-R | SPD: 1-10-R | GEL Selection: Model | SPD: 1-10-R | Stop/Loop | ||
| 8 | Stop/Loop | Stop/Loop | FRQ: 1-10-R | Stop/Loop | / | ||
| 9 | / | / | SPD: 1-10-R | / | / | ||
| 10 | / | / | Stop/Loop | / | / | ||
| 3 | Welding | CCT | HSI | GEL | X, Y | SOURCE | |
| 4 | CCT: 2000-10000K | HUE: 1°-360° | CCT: 3200K/5600K | X-coordinate: 0.0000-0.8000 | Source matching | ||
| 5 | G/M: -10~+1.0 | SAT: 0-100% | GEL Selection: R/L | Y-coordinate: 0.0000-0.8000 | FRQ: 1-10 | ||
| 6 | FRQ: 1-10 | FRQ: 1-10 | GEL Selection: series | FRQ: 1-10 | Min: 0-100% | ||
| 7 | Min: 0-100% | Min: 0-100% | GEL Selection: Model | Min: 0-100% | Stop/Loop | ||
| 8 | Stop/Loop | Stop/Loop | FRQ: 1-10 | Stop/Loop | / | ||
| 9 | / | / | Min: 0-100% | / | / | ||
| 10 | / | / | Stop/Loop | / | / | ||
| 3 | Cop Car | Colors: R/B/R+B/B+W/R+B+W | |||||
| 4 | FRQ: 1-10 | ||||||
| 5 | Stop/Loop | ||||||
| 3 | Color Chase | SAT: 0-100% | |||||
| 4 | SPD: 1-10 | ||||||
| 5 | Stop/Loop | ||||||
| DMX Profile9: FX | 3 | Party Lights | SAT: 0-100% | ||||
| 4 | SPD: 1-10 | ||||||
| 5 | Stop/Loop | ||||||
| 3 | Fireworks | CCT+HUE: CCT/HUE/CCT+HUE | |||||
| 4 | FRQ: 1-10-R | ||||||
| 5 | Stop/Loop | ||||||
* You can get more detail information about DMX by visiting http://aputure.com/wp-content/uploads/2020/03/dmx_chart_of_aputure_nova_p300c.pdf
5. Using the Sidus Link APP
You can download the Sidus Link app from the iOS App Store or Google Play Store for enhancing the functionality of the light. Please visit sidus.link/app/help for more details regarding how to use the app to control your Aputure lights.
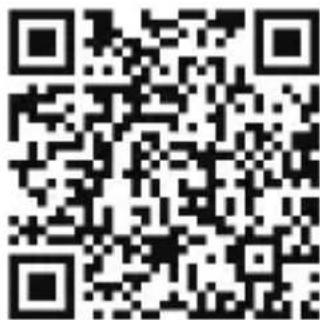
Sidus.link/app/help Get Sidus Link™ App
Specifications
| Operating Temperature | -10~45°C | |
| Power Supply | AC 100~240V 50/60Hz | |
| Operating Current | 4A | |
| Power Input | ≤360W | |
| Power Output | ≤360W | |
| LED Quantity Breakdown | 2500K (Warm White) & 7500K (Cool White): 572 LEDsRGB: 546 LEDs | |
| CRI | ≥95 | |
| TLCI | ≥95 | |
| CCT | 2000K-10000K | |
| CQS | 95 | |
| SST(D55) | 74 | |
| SST(Tungsten) | 85 | |
| App Control Type | Bluetooth 5.0 Mesh | |
| Battery Operating Voltage Range | 24V-48V | |
| Cooling Mode | Active Cooling | |
| Fixture Weight | 16.9kg | |
| Fixture Weight (kit) | 24.4kg | |
| Sizes(L*W*H) | Light | 56.19*45.7*17.2cm / 22.1*18.0*6.77in |
| Controller box | 9.66*15.75*4.63cm / 3.8*6.2*1.82in | |
Photometrics
| CCT | 1m | 3m 5m | |
| 2700K | 7450 lux | 890 lux 350 lux | |
| 3200K | 8200 lux 960 lux 370 lux | ||
| 4300K | 8600 lux 1000 lux 395 lux | ||
| 5500K | 9000 lux 1100 lux 430 lux | ||
| 6500K | 8550 lux 1020 lux 400 lux | ||
* This data is based on average brightness measurements, there will be slight variations between lights.
Aputure®
GUARANTEE CARD
Aputure Imaging Industries Co., Ltd. warrants the original consumer purchaser from defects in material and workmanship for a period of one (1) year after the date of purchase. For more details of warranty visit www.aputure.com
Important:
Keep your original sales receipt. Be sure the dealer has written on it the date, serial No. of the product. This information is required for warranty service.
This warranty does not cover:
● Damage that is the result of misuse, abuse, accident (including but
Damage that is the result of misuse, abuse, accident (including but not limited to damage by water), faulty connection, defective or maladjusted associated equipment, or the use of the product with
equipment for which it was not intended.
● Cosmetic defects that appear more than thirty (30) days after the
Cosmetic defects that appear more than thirty (30) days after the date of purchase. Cosmetic damage caused by improper handling is
also excluded.
● Damage that occurs while the product is being shipped to whoever
will service it.
This warranty is void if:
The product identification or serial No. label is removed or defaced in
any way.
The product is serviced or repaired by any one other than Aputure
or an authorized Aputure dealer or service agency.
Aputure Imaging Industries Co., Ltd.
Add: F/3, Building 21, Longjun industrial estate,
HePing West Road, Shenzhen, Guangdong
E-MAIL: cs@aputure.com
Sales Contact. (86)0755-83285569-615
Add: F/3, Building 21, Longjun Industrial Estate, Heping West Road, Shenzhen, Guangdong
Service Warranty (EN)
NOVA P300c
使用者指南
中文
前言
natural_image
Technical line drawing of a rectangular device mounted on a stand, with no visible text or symbols.灯体 (1 pc)
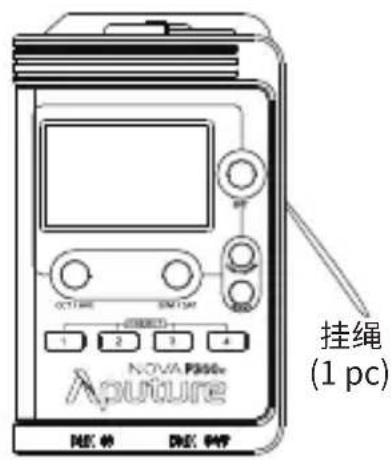
控制盒 (1 pc)
natural_image
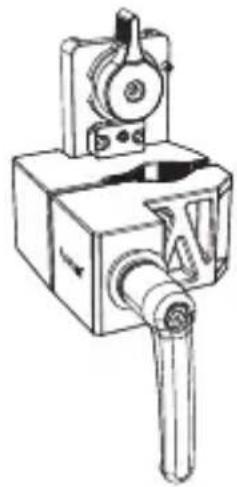
Technical line drawing of a mechanical device with no visible text or symbols快装件 (1 pc)
natural_image
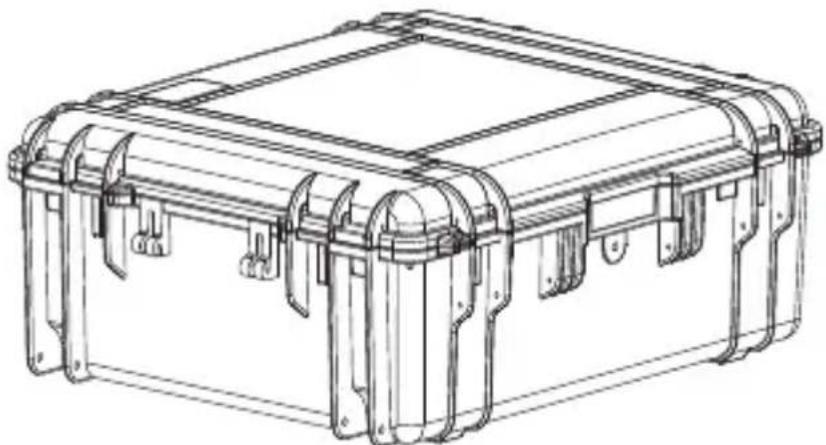
Technical line drawing of a rectangular mechanical housing with multiple metal brackets and mounting feet (no text or symbols)防爆箱 (1 pc) (仅套装版本)
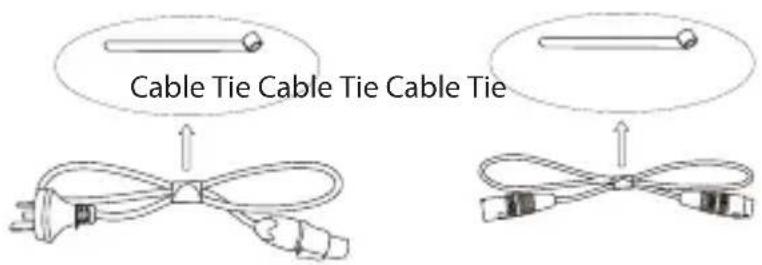
电源线 (1 pc)
natural_image
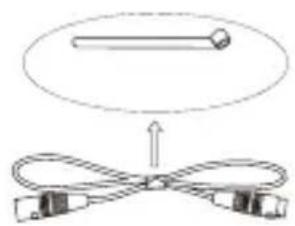
Diagram showing a cable being twisted with a string, no text or symbols present连接线 (1 pc)
产品视图
1. 灯体
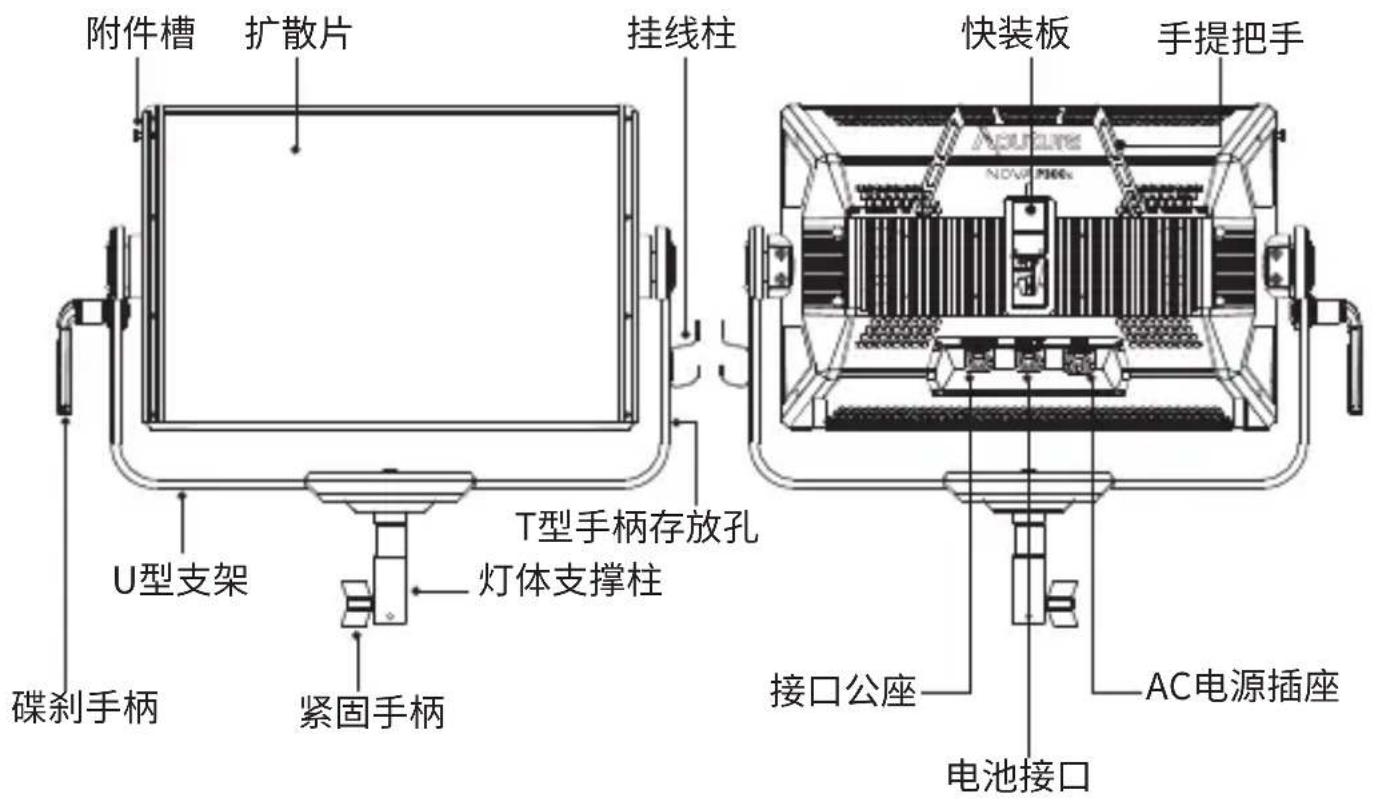
natural_image
Technical line drawing of a mechanical component with no visible text or symbols接口母座
natural_image
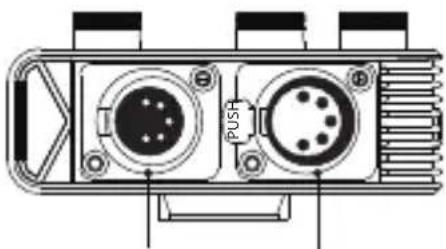
Technical diagram of a dual-port connector with ports and heat sink (no text or symbols)DMX输入插座
DMX输出插座
安装
1. 固定灯体
natural_image
Illustration of a hand holding a small object with an upward arrow, no text or symbols present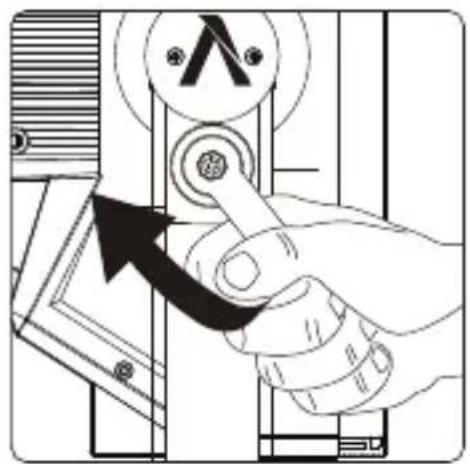
natural_image
Illustration of a hand pressing a button on a device, with an arrow indicating motion (no text or symbols present)2. 连接灯体和控制盒
用连接线连接灯体和控制。
natural_image
Diagram of a hand operating a device with directional arrows indicating movement (no text or symbols)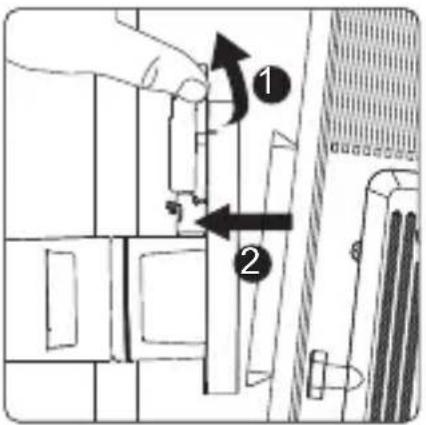
快装件规格
| 重量 | 670g / 1.48lbs 1 | 0.35x8.7(长×宽×高) / 4.07x3.44x4.92in |
| *快装件能夹直径2-5cm / 0.79-1.97in的圆管或方管。 | ||
4. 供电
1) 交流电供电
natural_image
Line drawing of a door with a hand pressing a button labeled 'Power' (no text or symbols beyond the icon)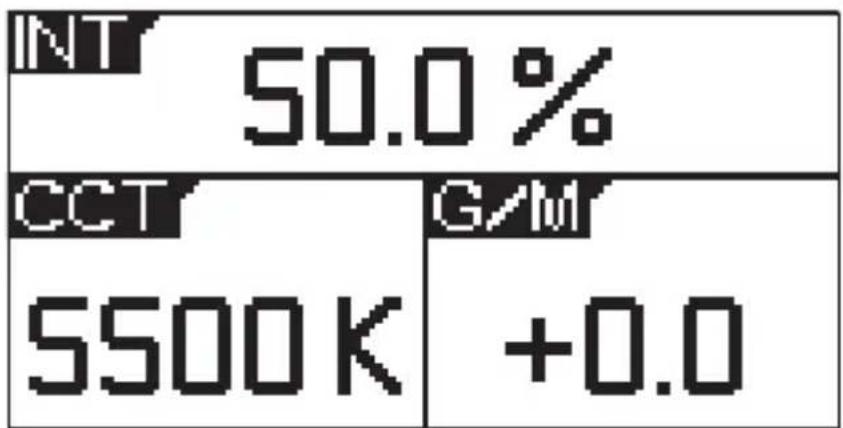
other
| Metric | Value (%) | | :--- | :--- | | INT | 50.0 | | CCT | G/M | | 5500 K | +0.0 |other
| Category | Value (%) | |---|---| | INT | 50.0 | | CCT | G/M | | 5500K | +0.0 |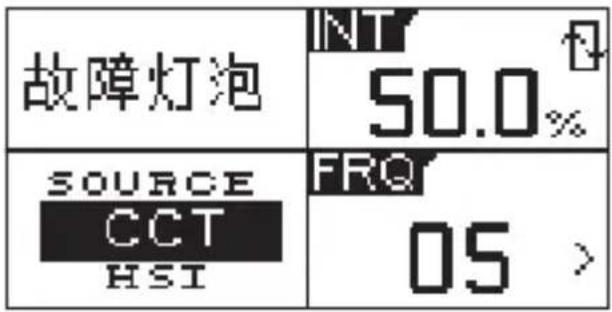
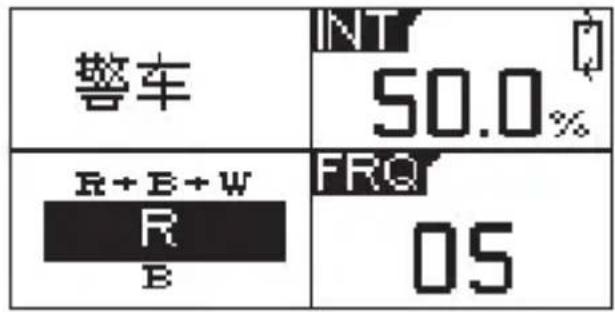
k. 焊接模式 l. 警车模式
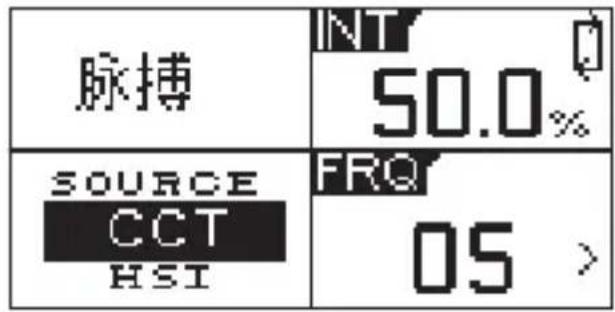
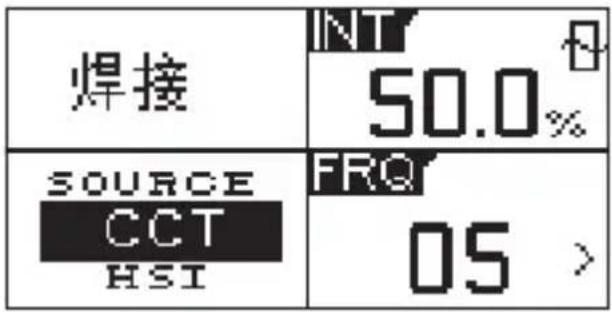
m. 颜色捕捉模式 n. 聚会灯光模式
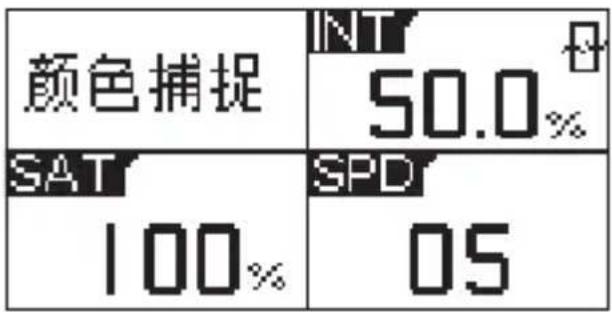
o. 烟花模式
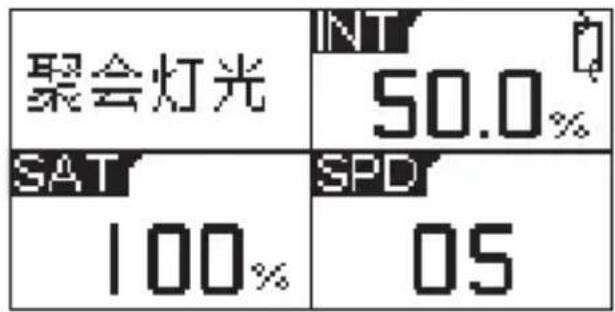
| 烟花 | INT 50.0% |
| CCT+HUE CCT HUE | FRQ 05 |
other
| Category | Value (%) | |---|---| | R | 50.0 | | G | 50.0 | | B | 50.0 |other
| Value | Label | |---|---| | 50.0% | | | 0.4260 | 0.4005 | | X | (unknown label) |DMX512
2) DMX 实用表
| 模式 | 信道功能 | ||
| 模型1:CCT | INT: 0-100%1 | ||
| 2 | 色温: 2000-10000K | ||
| 3 | G/M: -1.0~+1.0 | ||
| 模型2:CCT&HSI | 1 | INT: 0-100% | INT: 0-100% |
| 2 | 色温: 2000-10000K | HUE: 1°-360° | |
| 3 | VG/M: -1.0~+1.0 | SAT: 0-100% | |
| 4 | CCT->HSI | HSI->CCT | |
| 模型3:CCT&RGB | 1 | INT: 0-100% | R INT: 0-100% |
| 2 | 色温: 2000-10000K | G INT: 0-100% | |
| 3 | G/M: -1.0~+1.0 | B INT: 0-100% | |
| 4 | CCT->RGB | RGB->CCT | |
| 模型4:GEL | 1 | INT: 0-100% | |
| 2 | 色温: 3200K/5600K | ||
| 3 | GEL选择: R/L | ||
| 4 | GEL选择: series | ||
| 5 | GEL色温: Model | ||
| 模型5:HSI | 1 | INT: 0-100% | |
| 2 | HUE: 1°-360° | ||
| 3 | SAT: 0-100% | ||
| 模型6:Source | 1 | INT: 0-100% | |
| 2 | 光源(共46种) | ||
| 模型7:RGB | 1 | R INT: 0-100% | |
| 2 | G INT: 0-100% | ||
| 3 | B INT: 0-100% | ||
| 模型8:X,Y | 1 | INT: 0-100% | |
| 2 | X坐标: 0.0000-0.8000 | ||
| Y坐标: 0.0000-0.80003 | |||
| 模型9:FX | 1 | FX选择: 酒吧灯光/狗仔队/闪电/电视/烛光/火光/闪光灯/爆炸/故障灯泡/脉搏/焊接/警车/颜色捕捉/聚会灯光/烟花 | |
| 2 | INT: 0-100% | ||
| 3 | 酒吧灯光 | Colors: 3、6、9、12、15、18、24、36 | |
| 4 | SPD: 1-10 | ||
| 5 | 停止/循环 | ||
| 3 | 狗仔队 | 色温: 2000-10000K | |
| 4 | G/M: -1.0~+1.0 | ||
| 5 | FRQ: 1-10 | ||
| 6 | 停止/循环 | ||
| 3 | 闪电 | 色温: 2000-10000K | |
| 4 | G/M: -1.0~+1.0 | ||
| 5 | FRQ: 1-10-R | ||
| 6 | SPD: 1-10-R | ||
| 7 | 停止/循环 | ||
| 3 | 电视 | 色温: Warmer/Natural/Cooler | |
| 4 | SPD: 1-10-R | ||
| 5 | 停止/循环 | ||
| 3 | 烛光 | 色温: Warmer/Natural/Cooler | |
| 4 | SPD: 1-10 | ||
| 5 | 停止/循环 | ||
| 3 | 火光 | 色温: Warmer/Natural/Cooler | |
| 4 | SPD: 1-10 | ||
| 5 | 停止/循环 | ||
| 模型9:FX | 3 | 闪光灯 | CCT | HSI | GEL | X,Y | SOURCE |
| 4 | 色温:2000-10000K | HUE: 1°-360° | 色温:3200K/5600K | X坐标:0.0000-0.8000 | Source matching | ||
| 5 | G/M:-1.0~+1.0 | SAT: 0-100% | GEL选择:R/L | Y坐标:0.0000-0.8000 | SPD: 1-10-R | ||
| 6 | SPD: 1-10-R | SPD: 1-10-R | GEL选择:系列 | SPD: 1-10-R | 停止/循环 | ||
| 7 | 停止/循环 | 停止/循环 | GEL选择:型号 | 停止/循环 | / | ||
| 8 | / | / | SPD: 1-10-R | / | / | ||
| 9 | / | / | 停止/循环 | / | / | ||
| 3 | 爆炸 | CCT | HSI | GEL | X,Y | SOURCE | |
| 4 | 色温:2000-10000K | HUE: 1°-360° | 色温:3200K/5600K | X坐标:0.0000-0.8000 | Source matching | ||
| 5 | G/M:-1.0~+1. 0 | SAT: 0-100% | GEL选择:R/L | Y坐标:0.0000-0.8000 | Decay: 1-10 | ||
| 6 | Decay: 1-10 | Decay: 1-10 | GEL选择:系列 | Decay: 1-10 | 停止/循环 | ||
| 7 | 停止/循环 | 停止/循环 | GEL选择:型号 | 停止/循环 | / | ||
| 8 | / | / | Decay: 1-10 | / | / | ||
| 9 | / | / | 停止/循环 | / | / | ||
| 3 | 故障灯泡 | CCT | HSI | GEL | X,Y | SOURCE | |
| 4 | 色温:2000-10000K | HUE: 1°-360° | 色温:3200K/5600K | X坐标:0.0000-0.8000 | Source matching | ||
| 5 | G/M:-1.0~+1. .0 | SAT: 0-100% | GEL选择:R/L | Y坐标:0.0000-0.8000 | 频率: 1-10-R | ||
| 6 | 频率: 1-10-R | 频率: 1-10-R | GEL选择:系列 | 频率: 1-10-R | SPD: 1-10 | ||
| 7 | SPD: 1-10 | SPD: 1-10 | GEL选择:型号 | SPD: 1-10 | 停止/循环 | ||
| 8 | 停止/循环 | 停止/循环 | 频率: 1-10-R | 停止/循环 | / | ||
| 9 | / | / | SPD: 1-10 | / | / | ||
| 10 | / | / | 停止/循环 | / | / | ||
| 模型9:FX | 3 | 脉搏 | CCT | HSI | GEL | X,Y | SOURCE |
| 4 | 色温:2000-10000K | HUE: 1°-360° | 色温:3200K/5600K | X坐标:0.0000-0.8000 | Source matching | ||
| 5 | G/M:-1.0~+1.0 | SAT: 0-100% | GEL选择:R/L | Y坐标:0.0000-0.8000 | SPD: 1-10-R | ||
| 6 | 频率: 1-10-R | 频率: 1-10-R | GEL选择:系列 | 频率: 1-10-R | |||
| 7 | SPD: 1-10-R | SPD: 1-10-R | GEL选择:型号 | SPD: 1-10-R | 停止/循环 | ||
| 8 | 停止/循环 | 停止/循环 | 频率: 1-10-R | 停止/循环 | / | ||
| 9 | / | / | SPD: 1-10-R | / | / | ||
| 10 | / | / | 停止/循环 | / | / | ||
| 3 | 焊接 | CCT | HSI | GEL | X,Y | SOURCE | |
| 4 | 色温:2000-10000K | HUE: 1°-360° | 色温:3200K/5600K | X坐标:0.0000-0.8000 | Source matching | ||
| 5 | G/M:-1.0~+1. 0 | SAT: 0-100% | GEL选择:R/L | Y坐标:0.0000-0.8000 | 频率: 1-10 | ||
| 6 | 频率: 1-10 | 频率: 1-10 | GEL选择:系列 | 频率: 1-10 | Min: 0-100% | ||
| 7 | Min: 0-100% | Min: 0-100% | GEL选择:型号 | Min: 0-100% | 停止/循环 | ||
| 8 | 停止/循环 | 停止/循环 | 频率: 1-10 | 停止/循环 | / | ||
| 9 | / | / | Min: 0-100% | / | / | ||
| 10 | / | / | 停止/循环 | / | / | ||
| 3 | 警车 | Colors: R/B/R+B/B+W/R+B+W | |||||
| 4 | 频率: 1-10 | ||||||
| 5 | 停止/循环 | ||||||
| 3 | 颜色捕捉 | SAT: 0-100% | |||||
| 4 | SPD: 1-10 | ||||||
| 5 | 停止/循环 | ||||||
| 模型9:FX | 3 | 聚会灯光 | SAT: 0-100% | ||||
| 4 | SPD: 1-10 | ||||||
| 5 | 停止/循环 | ||||||
| 3 | 烟花 | CCT+HUE: CCT/HUE/CCT+HUE | |||||
| 4 | 频率: 1-10-R | ||||||
| 5 | 停止/循环 | ||||||
Sidus.link/app/help
获取 Sidus Link™ App
规格
- IMPORTANT SAFETY INSTRUCTIONS
- SAVE THESE INSTRUCTIONS
- FCC Compliance Statement
- RF Warning Statement:
- Components List
- Product Details
- Light
- Controller box
- Installations
- Setting Up Your Light
- Connect the light to the control box
- Instructions for the Lightning Clamp
- Specifications
- Powering up the Light
- 1) Powered by AC
- 2) Powered by Battery
- Operation Instructions
- Turning on the Light
- Manual Control
- Light Mode Interface
- Fan mode
- Dimming curve mode
- Freq. Selection
- Bluetooth Reset
- Fixture Serial No.
- Update Firmware
- Language
- Firmware Version
- Fixture Presets
- Connecting to DMX
- 2) Channel Selection
- Controlling Device Via DMX
- Using the Sidus Link APP
- Aputure®
- GUARANTEE CARD
- Important:
- This warranty does not cover:
- This warranty is void if:
- Service Warranty (EN)
- NOVA P300c
- 使用者指南
- 前言
- 产品视图
- 灯体
- 安装
- 固定灯体
- 连接灯体和控制盒
- 快装件规格
- 供电
- 1) 交流电供电
Brand : Aputure
Model : Nova P300C
Category : Lighting