
PCI2S422ISO - Unspecified StarTech.com - Free user manual and instructions
Find the device manual for free PCI2S422ISO StarTech.com in PDF.

| Product Type | Serial Adapter Card |
| Model | PCI2S422ISO |
| Brand | StarTech.com |
| Number of Serial Ports | 2 |
| Connector Type | 9-pin DB9 Male |
| Max Data Transfer Rate | 115.2 Kbits/sec |
| Bus Interface | PCI (32-bit, 5V) |
| Serial Interface | RS-422 and RS-485 |
| Bus Transceivers | Full-Duplex and Half-Duplex |
| FIFO Length | 32 FIFOs |
| I/O Address | Plug & Play |
| Standards | PCI 2.2 |
| Optical Isolation | Yes |
| Supported Operating Systems | Windows 2000/Vista/NT/XP, SCO Unix, Linux, DOS |
| Dimensions (Approx.) | 12.5 x 7.0 x 1.8 cm |
| Weight (Approx.) | 100 g |
| Power Source | PCI Slot Power (3.3V/5V) |
| Warranty | Lifetime |
| Maintenance | Clean with dry cloth; avoid liquids. Handle with anti-static precautions. |
| Spare Parts / Repairability | Not user-serviceable; contact StarTech.com support for replacement. |
Frequently Asked Questions - PCI2S422ISO StarTech.com
User questions about PCI2S422ISO StarTech.com
0 question about this device. Answer the ones you know or ask your own.
Ask a new question about this device
Download the instructions for your Unspecified in PDF format for free! Find your manual PCI2S422ISO - StarTech.com and take your electronic device back in hand. On this page are published all the documents necessary for the use of your device. PCI2S422ISO by StarTech.com.
USER MANUAL PCI2S422ISO StarTech.com
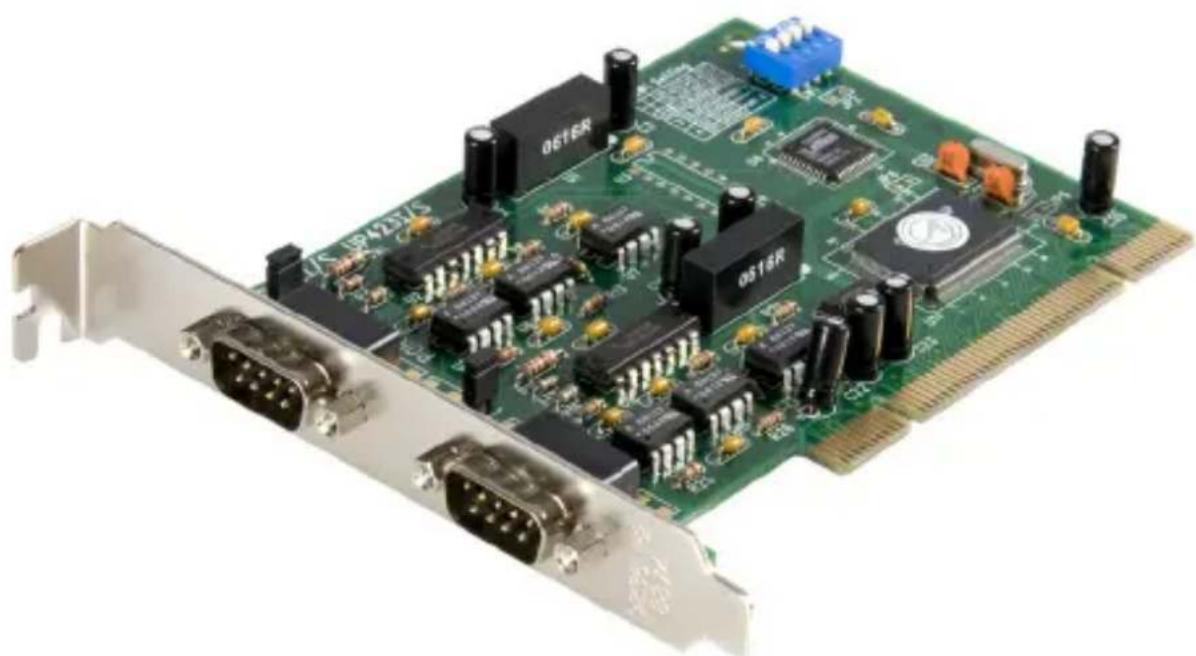
2 Port PCI RS422 RS485 DB9 Serial Adapter Car
PCI2S422ISO
natural_image
Green printed circuit board with multiple electronic components and connectors (no visible text or symbols)*actual product may vary from photos
For the most up-to-date information, please visit: www.startech.com
FCC Compliance Statement
This equipment has been tested and found to comply with the limits for a Class B digital device, pursuant to part 15 of the FCC Rules. These limits are designed to provide reasonable protection against harmful interference in a residential installation. This equipment generates, uses and can radiate radio frequency energy and, if not installed and used in accordance with the instructions, may cause harmful interference to radio communications. However, there is no guarantee that interference will not occur in a particular installation. If this equipment does cause harmful interference to radio or television reception, which can be determined by turning the equipment off and on, the user is encouraged to try to correct the interference by one or more of the following measures:
• Reorient or relocate the receiving antenna.
- Increase the separation between the equipment and receiver.
- Connect the equipment into an outlet on a circuit different from that to which the receiver is connected.
- Consult the dealer or an experienced radio/TV technician for help.
Use of Trademarks, Registered Trademarks, and other Protected Names and Symbols
This manual may make reference to trademarks, registered trademarks, and other protected names and/or symbols of third-party companies not related in any way to StarTech.com. Where they occur these references are for illustrative purposes only and do not represent an endorsement of a product or service by StarTech.com, or an endorsement of the product(s) to which this manual applies by the third-party company in question. Regardless of any direct acknowledgement elsewhere in the body of this document, StarTech.com hereby acknowledges that all trademarks, registered trademarks, service marks, and other protected names and/or symbols contained in this manual and related documents are the property of their respective holders.
Table of Contents
Introduction ....1
Packaging Contents ....1
System Requirements....1
Installation 2
Installing the Card....2
Driver Installation....3
Windows XP/2000....3
Windows NT 4
DOS 5
SCO OpenServer 8
Technical Specifications ....10
Technical Support 11
Warranty Information 11
Introduction
The PCI2S422ISO 2 Port PCI RS422 RS485 DB9 Serial Adapter Card adds two isolated serial (DB9) ports to a PCI-enabled computer, providing a cost-effective way to connect your RS422 or RS485 serial devices to a computer doesn't offer native serial support, or adding more ports to a computer that does.
To ensure effective data transmission over long distances, including electrically noisy environments, the card's ports feature optical isolation.
Ensuring a reliable RS422 or RS485 connection with a broad range of serial devices including printers, touch screen monitors and more, the adapter card is suitable for industrial applications and compatible with a broad range of operating systems including Windows, DOS, Linux and Unix based platforms.
Backed by a StarTech.com lifetime warranty and free lifetime technical support.
Packaging Contents
• 1x PCI Serial Card
- 2x Driver CD
• 1x Instruction Manual
System Requirements
• A computer running Windows XP/Vista/2000/ DOS, Linux or UNIX SCO Open Server
• An open 5V PCI slot
Installation
Note: In one system, you can install two of these serial cards. Follow the instructions below to designate each card as either card number 1 or card number 2. Install the cards one at a time, starting with the card you want to be designated number 1.
Installing the Card
- Make sure that your system is unplugged and you are grounded.
- If you are installing two cards in the same system, you must differentiate between the cards by using the dip switch on the card. You use dip switch 1 and 2 to set the card number. When both dip switch 1 and 2 are in the ON position, the card will be designated card number 1. When dip switch 1 is OFF and dip switch 2 is ON, the card will be designated card number 2.
You use dip switch 3 and 4 to set each port to either RS-422 or RS-485 mode. Dip switch 3 corresponds with Port A (marked on the card), dip switch 4 corresponds with Port B. When the dip switch is in the ON position, the port will operate in RS-422 mode. When the dip switch is in the OFF position, the port will operate in RS-485 mode.
-
Remove the cover of your system (see your computer's user manual for details, if necessary) and gently turn your computer onto its side.
-
Locate an empty PCI slot (usually white in colour) and remove the metal plate that covers the rear bracket. You may need a Phillips screwdriver to perform this step. Hang on to the screw! You will need it to secure the card later.
-
Gently insert the card into the empty slot, making sure it is firmly seated.
-
Secure the card in place using the screw you removed in Step 3 and put your computer case back on.
-
Turn the computer on.
Driver Installation
Note: Depending on your operating system and the configuration of your system, the instructions below may not be identical to what you see on your screen.
Windows XP/2000/Vista
Once you turn your computer on after installing the card, Windows will automatically detect the new hardware. Follow the onscreen prompts and direct Windows to the Win2000 folder on the driver disk (Windows 2000 and Windows XP use the same driver).
Notes:
- To change the COM port number: Windows will automatically assign the card a COM port number. If you need to specify another port number, you can use the setup utility included with the driver. Go to: Control Panel/System/Hardware/Device Manager/Multi-Port Serial Adapter/Setup. From here you will be able to set the target value.
• Each serial card needs an open IRQ for Plug and Play function. - In Windows XP, the driver for each port will be installed and confirmed. In Windows 2000, the driver will be installed automatically.
Windows NT
Before you begin the installation, make sure you are logged in as a user with administrative privileges.
- Start the Control Panel applet by double-clicking on its icon in the Program Managers main group.
- Double-click the Network icon to bring up the Network Control Panel applet.
- Select Add Adapter. A list of possible adapters will be displayed. Select "Other: Requires disk from manufacturer."
- When prompted for the path, specify the location of the driver for the card you installed. Depending on your version of the driver disk, the drivers for the PCI2S422ISO may be found in the P220/NT4 folder. The drivers for the PCI4S422ISO may be found in the P584/NT4 folder.
- Follow the onscreen prompts to complete installation. Make sure that the COM port number does not conflict with any other devices in your system.
- Use the "Binding" function to make more serial ports available. If you do not perform a binding function, you may not have an extra COM port available in your next boot procedure.
Notes:
- When installing two cards in the same system, the card with the jumper ON will be assigned the lower COM port number. The card with the jumper OFF will have the higher COM port number.
DOS
When installing multiple cards in DOS, it is important to install the card designated card Number 1 (with the jumper ON) first.
- Change your active directory to the target directory: ex: c:\RAYON
- Insert the driver disk into the disk drive and copy the DOS files from the driver diskette: ex: xcopy /s/e/v a:\DOS*.*
-
Run the driver installation command: ex: c:\rayon\pciport
-
The cards will now be installed in your system. Each card will show the card number in the system (for the application to specify the target card and target port), the card model, the card jumper setting (for card number 1 or 2), the IRQ assigned, and the COM port number for the card.
You may see the following error messages:
• PCIPORT already installed. This means the driver has already been installed.
- Please check the "JP1". This means that both cards in the system have their jumpers ON or OFF.
• PCIPORT not in system. There is no card in the PCI slot.
Notes:
- The driver function call description can be found on the DOS driver diskette. There is also a DEMO program for the user to modify to meet their target application program.
LINUX
- Login as super-user (SU) or root.
- Change your directory to root and copy the driver diskette to the system:
# cd /
# tar xvf /dev/fd0
- Change the directory to /etc/pciport and run the Install command:
# cd /etc/rayon
# ./Install
-
Follow the prompts to perform the following:
-
Choose your card type
- Choose your Linux kernel version
• Rebuild your system - Exit and reboot with new settings
The device name will be /dev/tty8[1--2] [a--h]
Card Definitions
Card Number Device Name
1 tty81?
2 tty82?
Note: Card 1 is the card with the jumper ON.
I/O Port Number Definitions
Port Number Device Name
A tty8?a
B tty8?b
C tty8?c
D tty8?d
For example, the device named /dev/tty82b is the device plugged into port B on card Number 2.
Notes:
- The above installation procedure installs a module type driver. If you can not install the driver successfully, you may need to use a kernel type driver. With kernel type drivers, you may need to have the full source file for the Linux system and the source file must be located in the /usr/src/linux directory. If your source file is in a different location, you must move it or link it to the usr/src/linux directory.
• Each serial card needs an open IRQ for Plug and Play function.
SCO OpenServer
- Log in as a super-user (SU) or root.
- Extract all the files on the diskette using the tar command
cd /
tar xvf /dev/fd0135ds18
- Change the directory to /etc/pciport and run the Build command:
# cd /etc/pciport
# ./build
- Reboot your system.
The device name will be /dev/tty8[1--2] [a--h]
Card Definitions
Card Number Device Name
1 tty81?
2 tty82?
Note: Card 1 is the card with the jumper ON.
I/O Port Number Definitions
Port Number Device Name
A tty8?a
B tty8?b
C tty8?c
D tty8?d
For example, the device named /dev/tty82b is the device plugged into port B on card Number 2.
Notes:
- The resources for the card are assigned by the PCI BIOS. If your environment has changed, you may need to run the Build command again to remove the old driver and reinstall it again.
• Each serial card needs an open IRQ in order to function properly.
Technical Specifications
Number of Serial Ports 2
Connector Type 9-pin DB Male
Max Data Transfer Rate 115.2 Kbits/sec
Bus Interface PCI
Serial Interface RS-422 & RS-485
Bus Trasceivers Full-Duplex and Half-Duplex
FIFO Length 32 FIFOs
I/O Adress Plug & Play
Standards PCI 2.2
System Requirements Windows 2000/Vista/NT/XP, SCO Unix, Linux & DOS
System 5 volt slot for with 32-bit PCI Bus
Technical Support
StarTech.com's lifetime technical support is an integral part of our commitment to provide industry-leading solutions. If you ever need help with your product, visit www.startech.com/support and access our comprehensive selection of online tools, documentation, and downloads.
For the latest drivers/software, please visit www.startech.com/downloads
Warranty Information
This product is backed by a lifetime warranty.
In addition, StarTech.com warrants its products against defects in materials and workmanship for the periods noted, following the initial date of purchase. During this period, the products may be returned for repair, or replacement with equivalent products at our discretion. The warranty covers parts and labor costs only. StarTech.com does not warrant its products from defects or damages arising from misuse, abuse, alteration, or normal wear and tear.
Limitation of Liability
In no event shall the liability of StarTech.com Ltd. and StarTech.com USA LLP (or their officers, directors, employees or agents) for any damages (whether direct or indirect, special, punitive, incidental, consequential, or otherwise), loss of profits, loss of business, or any pecuniary loss, arising out of or related to the use of the product exceed the actual price paid for the product. Some states do not allow the exclusion or limitation of incidental or consequential damages. If such laws apply, the limitations or exclusions contained in this statement may not apply to you.
Hard-to-find made easy. At StarTech.com, that isn't a slogan. It's a promise.
StarTech.com is your one-stop source for every connectivity part you need. From the latest technology to legacy products — and all the parts that bridge the old and new — we can help you find the parts that connect your solutions.
We make it easy to locate the parts, and we quickly deliver them wherever they need to go. Just talk to one of our tech advisors or visit our website. You'll be connected to the products you need in no time.
Visit www.startech.com for complete information on all StarTech.com products and to access exclusive resources and time-saving tools.
StarTech.com is an ISO 9001 Registered manufacturer of connectivity and technology parts. StarTech.com was founded in 1985 and has operations in the United States, Canada, the United Kingdom and Taiwan servicing a worldwide market.


- Port PCI RS422 RS485 DB9 Serial Adapter Car
- FCC Compliance Statement
- Use of Trademarks, Registered Trademarks, and other Protected Names and Symbols
- Table of Contents
- Introduction ....1
- Installation 2
- Technical Specifications ....10
- Technical Support 11
- Warranty Information 11
- Introduction
- Packaging Contents
- System Requirements
- Installation
- Installing the Card
- Driver Installation
- Windows XP/2000/Vista
- Notes:
- Windows NT
- DOS
- You may see the following error messages:
- LINUX
- Card Definitions
- Card Number Device Name
- I/O Port Number Definitions
- Port Number Device Name
- SCO OpenServer
- cd /
- tar xvf /dev/fd0135ds18
- Technical Specifications
- Technical Support
- Warranty Information
- Limitation of Liability
Brand : StarTech.com
Model : PCI2S422ISO
Category : Unspecified