
BSWM3IWP - Speaker Stand SANUS - Free user manual and instructions
Find the device manual for free BSWM3IWP SANUS in PDF.


| Product Type | In-wall speaker mount with power module |
| Brand | Sanus |
| Model | BSWM3IWP |
| Compatibility | Universal speakers (rear mounting) and Sonos Era 100 |
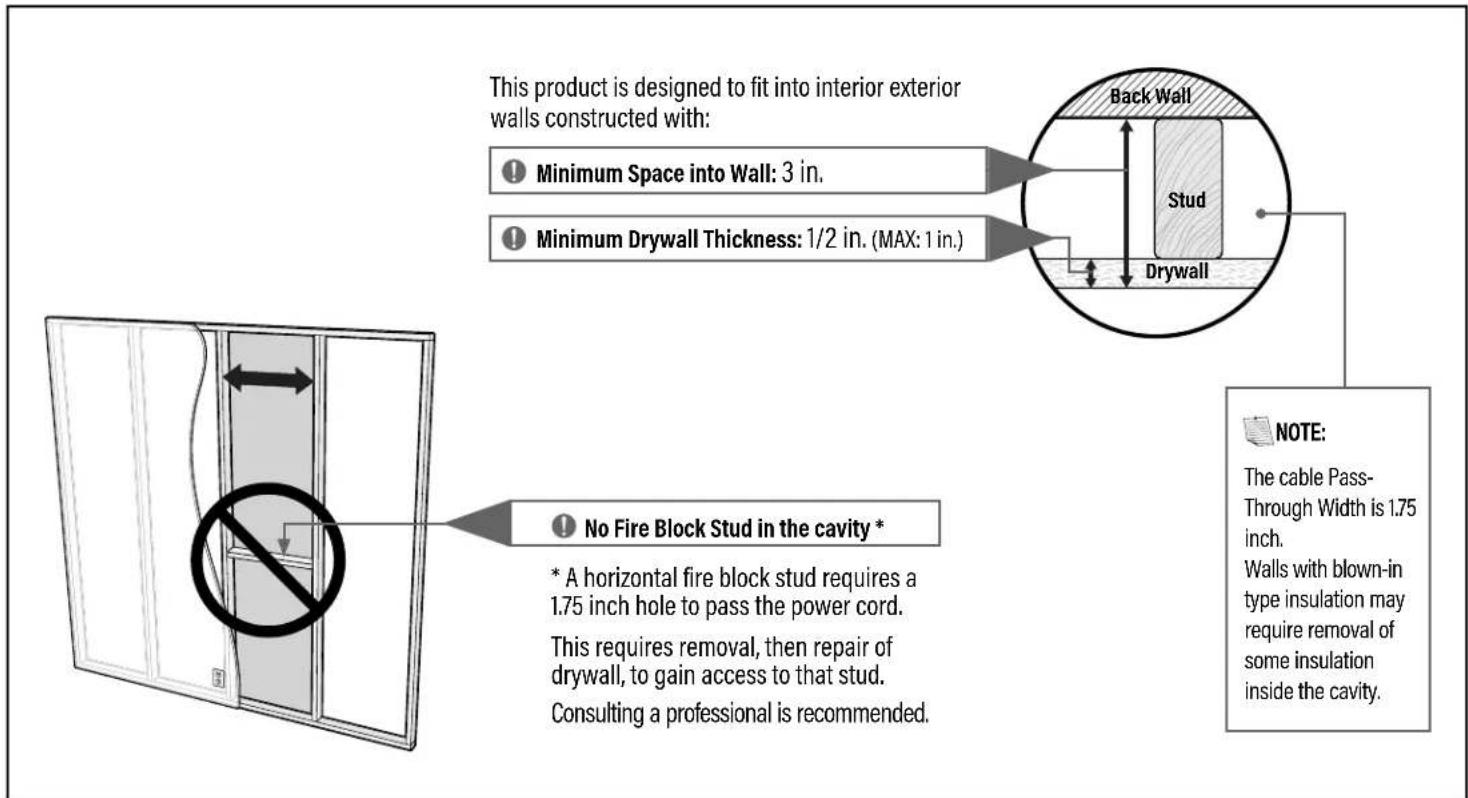
| Installation Location | Indoor, drywall (minimum thickness 1/2 in., maximum 1 in.) |
| Minimum wall depth | 3 inches |
| Cable pass-through width | 1.75 inches |
| Power | In-wall power module, compatible with 15-amp circuits, grounding included |
| Key Features | Speaker mount with in-wall cable management, wall mounting, adjustable orientation (high and low positions) |
| Package Contents | Top module, bottom module, screws, cutting template, grounding power cord, instructions |
| Required Tools | Stud finder, tape measure, level, pencil, drywall saw |
| Safety | For use only on 15 A circuits, mandatory grounding, do not modify plug, risk of fire and shock if installed incorrectly |
| Maintenance and Cleaning | Clean with dry cloth; do not use harsh chemicals |
| Replacement Parts and Repairability | No user-serviceable parts; contact technical support for any issues |
| General Information | Designed for wall installation without fire-block studs; consult a professional if blown insulation is present |
Frequently Asked Questions - BSWM3IWP SANUS
User questions about BSWM3IWP SANUS
0 question about this device. Answer the ones you know or ask your own.
Ask a new question about this device
Download the instructions for your Speaker Stand in PDF format for free! Find your manual BSWM3IWP - SANUS and take your electronic device back in hand. On this page are published all the documents necessary for the use of your device. BSWM3IWP by SANUS.
USER MANUAL BSWM3IWP SANUS
Integrated Wall Mount and Inwall Power for Wireless Speakers
Model BSWM3IWP-B1
INSTRUCTION MANUAL
We'll Make It Stress-Free
If you have any questions along the way, just give us a call.
1-800-359-5520 or, chat at SANUS.com/chatSP
We're ready to help!

natural_image
Technical line drawing of a mechanical device with a vertical arm, coiled cable, and terminal plug (no text or symbols)IMPORTANT SAFETY INSTRUCTIONS
PLEASE READ ENTIRE MANUAL PRIOR TO USE - SAVE THESE INSTRUCTIONS
CAUTION: Avoid potential personal injuries and property damage!
- Please read through these instructions completely to be sure you're comfortable with this easy install process.
- Do not use this product for any purpose not explicitly specified by manufacturer.
● Manufacturer is not responsible for damage or injury caused by incorrect assembly or use.
● This product has no user serviceable parts.
- If you do not understand these instructions or have doubts about the safety of the installation, assembly or use of this product, contact customer service.
WARNING: RISK OF FIRE AND SHOCK.
Do not connect the module 2 to any other circuits or outlets.
CAUTION: RISK OF FIRE AND SHOCK.
ONLY intended for use on 15 ampere branch circuits.
CAUTION: RISK OF FIRE AND SHOCK.
Do not install power supply cord 14 within wall cavity.
This product conforms to and should be properly grounded in compliance with requirements of the current National Electrical Code or codes administered by local authorities.
All electrical products may present a possible shock or fire hazard if improperly installed or used. This product may bear the mark of a Nationally Recognized Testing Laboratory and should be installed in conformance with current local and/or the National Electrical Code.
GROUNDING INSTRUCTIONS: This product must be grounded. If it should malfunction or breakdown, grounding provides a path of least resistance for electric current to reduce the risk of electric shock. This product is equipped with a cord having an equipment-grounding conductor and a grounding plug.
The plug must be plugged into an appropriate outlet that is properly installed and grounded in accordance with all local codes and ordinances.
DANGER - Improper connection of the equipment-grounding conductor can result in a risk of electric shock. Check with a qualified electrician or serviceman if you are in doubt as to whether the product is properly grounded. Do not modify the plug provided with the product - if it will not fit the outlet, have a proper outlet installed by a qualified electrician.
Speaker Weight Limit
DO NOT EXCEED

Tools Required


Phillips Screwdriver
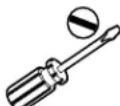
Slotted Screwdriver
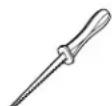
Drywall Saw
Supplied Parts
WARNING: This product contains small items that could be a choking hazard if swallowed. Before starting assembly, verify all parts are included and undamaged. If any parts are missing or damaged, do not return the damaged item to your dealer; contact Customer Service. Never use damaged parts!
NOTE: Not all parts will be used.

Cutting Template
1 x1
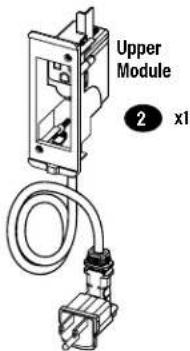

Wall Mount
3 x1
E100 Speaker Bracket
4 x1
Speaker Install Screws
For back-mounted speakers For Sonos
Only one size fits your speaker

x1each
Spacers SONOS E100
If Needed
* Era 100* Speakers

(1) 2017年1月1日

2.5mm


10-24×1/2 in

M5 x 12mm

5mm


2012.17.1
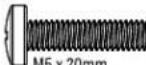
M5 x 20mm

Cover Plate
5 x1

Lower Module
6 x1

Cable Cap
7 x1
In Wall Box Assembly

x2

4-20 x 3/4 in.

9

6-32×5/16 in.


natural_image
Simple line drawing of a power cord with two plug connectors (no text or symbols)14 x1
! Verify Wall Compatibility
Based on your speaker model, follow the correct STEP below
For Universal (back-mounted) Speaker Installation, go to STEP 1 on PAGE 6
natural_image
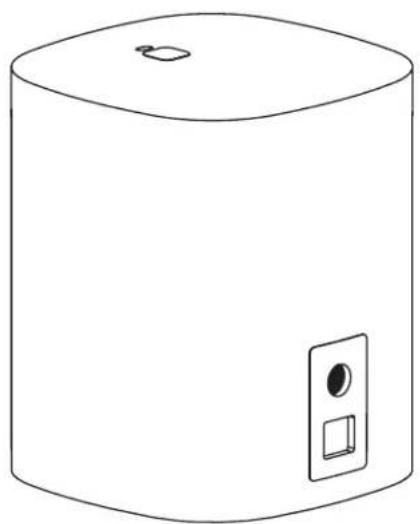
Line drawing of a cylindrical container with a square vent and circular top (no text or symbols)For Sonos® Era 100™ Speaker Installation, go to STEP 2 on PAGE 8

natural_image
Line drawing of a cylindrical container with side markers (no text or symbols)STEP 1
Universal (back-mounted) Speaker Assembly
1a
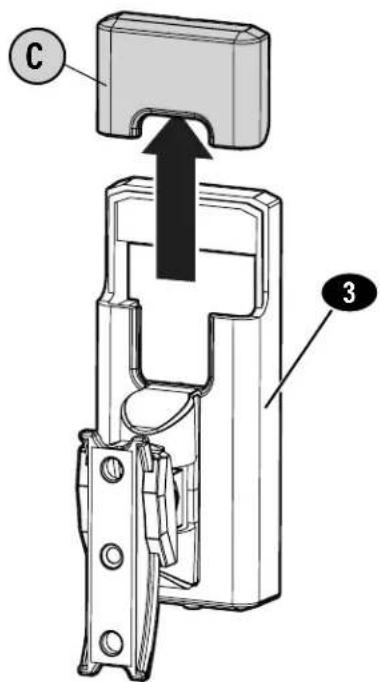
natural_image
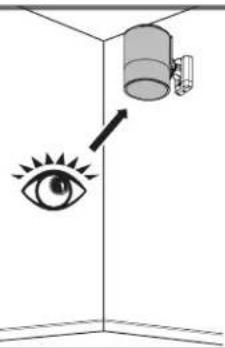
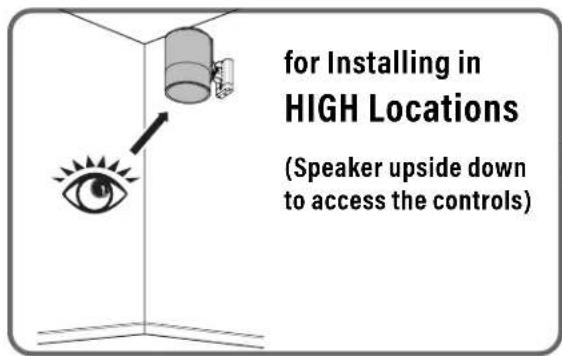
Diagram showing an eye under a ceiling-mounted device with a light source, no text or symbols presentfor Installing in HIGH Locations
(Speaker upside down to access the controls)

natural_image
Simple diagram showing an eye pointing to a cylindrical object with a container, no text or symbols present.for Installing in LOW Locations

flowchart
graph TD
    A["Step 1: User input, switch"] --> B["Step 2: Press"]
    B --> C["Continue with Step 2 on Page 8"]
STEP 2
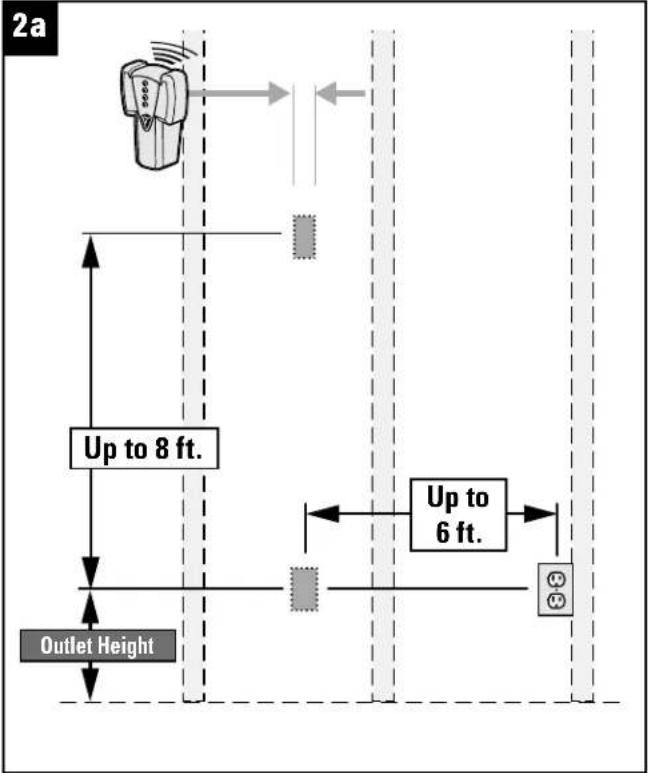
Cut Holes


natural_image
Two identical illustrations of a tool with a pointed tip, placed on a rectangular block (no text or symbols)STEP 3
Install Upper Module


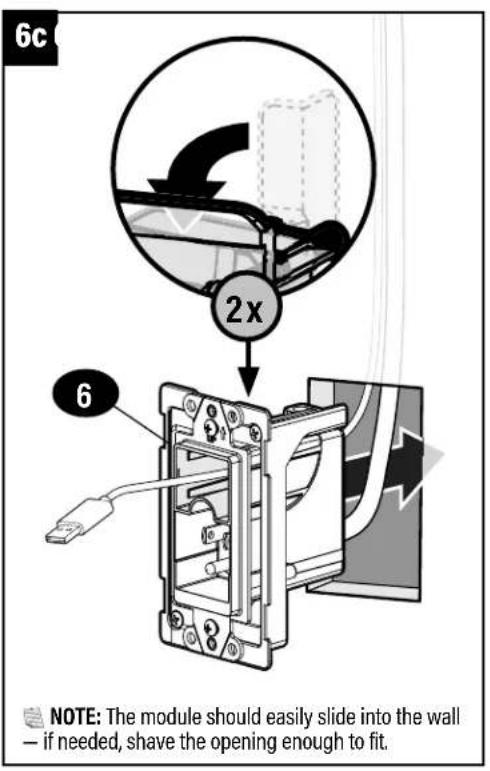
NOTE: The module should easily slide into the wall — if needed, shave the opening enough to fit.

Based on your speaker model, follow the correct STEP below
For Universal (back-mounted) Speaker Installation, go to STEP 4 on PAGE 11

natural_image
Simple line drawing of a cylindrical container with a square slot and a small circular top (no text or symbols)For Sonos® Era 100™ Speaker Installation, go to STEP 5 on PAGE 12

natural_image
Simple line drawing of a cylindrical container with side markers (no text or symbols)STEP 4
Universal Speaker (back-mounted) Installation

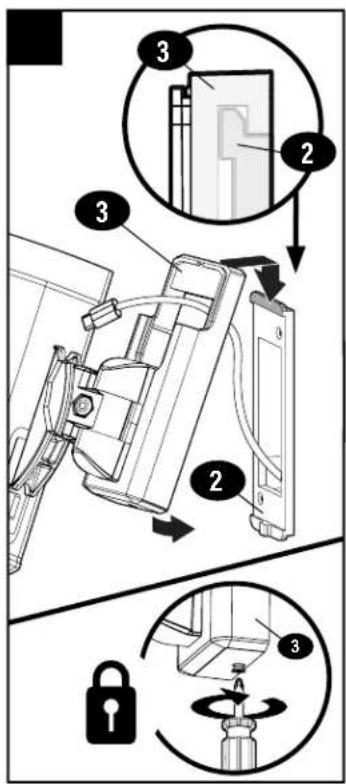


Go to STEP 6 on PAGE 16

STEP 5
Sonos ^® Era 100 ^™ Speaker Installation
5a



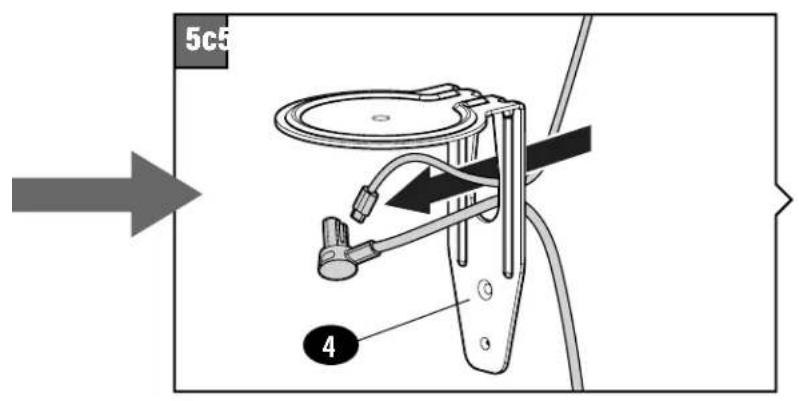

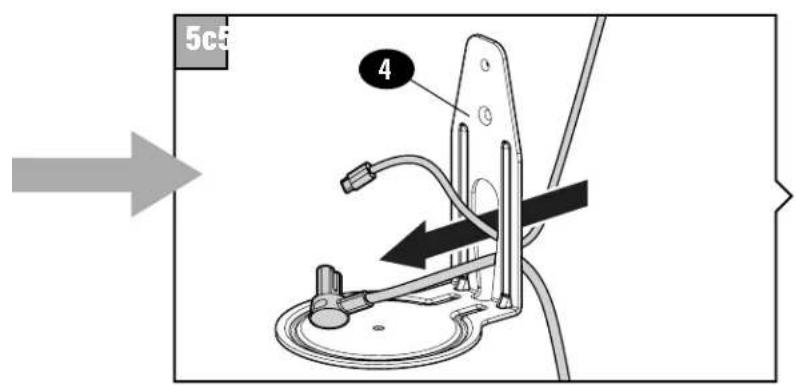
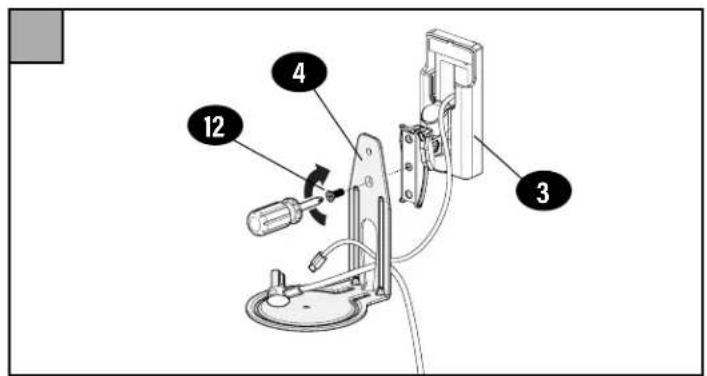

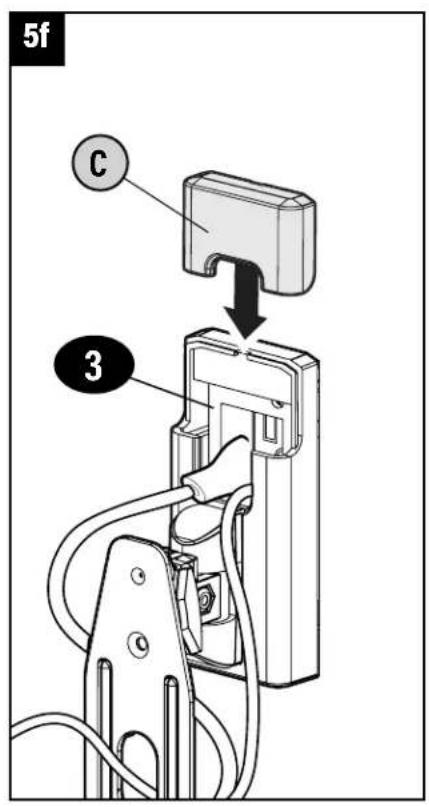

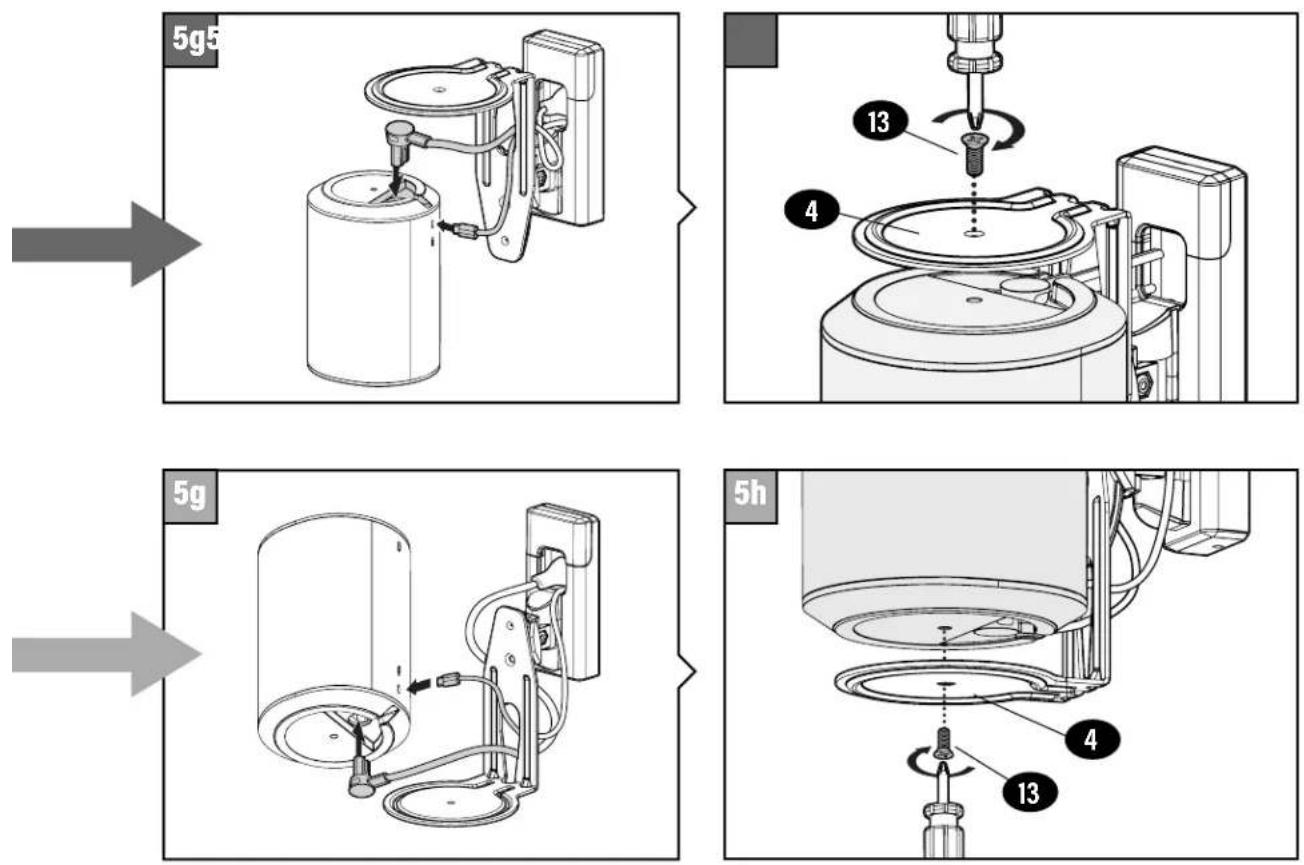
Go to
STEP 6
on
PAGE 16

STEP 6
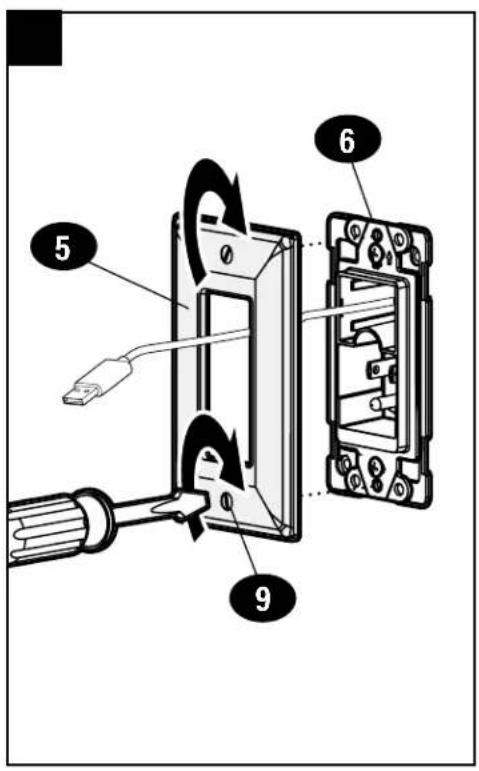
Install Lower Module



STEP 7
Connect Cable

Removal
a
Disconnect the power cable

natural_image
Illustration of a power plug connected to an open electrical outlet with two socket slots (no text or symbols)b
Turn screws to remove modules

Loosen ONLY enough remove module.


ESPAÑOL

PASO 7 Conectar Cables
página 18
Para retirar
página 19
Legrand AV Inc.
6436 City West Parkway;
Eden Prairie, MN 55344 USA
SANUS.com | 800-359-5520
Legrand AV Inc. and its affiliated corporations and subsidiaries (collectively, "Legrand"), intend to make this manual accurate and complete. However, Legrand makes no claim that the information contained herein covers all details, conditions, or variations. Nor does it provide for every possible contingency in connection with the installation or use of this product. The information contained in this document is subject to change without notice or obligation of any kind. Legrand makes no representation of warranty, expressed or implied, regarding the information contained herein. Legrand assumes no responsibility for accuracy, completeness or sufficiency of the information contained in this document.
©2024 Legrand AV Inc. All Rights Reserved. SANUS is a Legrand AV Inc. brand. SANUS and the SANUS logo are trademarks of Legrand.
6901-603274 00


- Integrated Wall Mount and Inwall Power for Wireless Speakers
- We'll Make It Stress-Free
- IMPORTANT SAFETY INSTRUCTIONS
- PLEASE READ ENTIRE MANUAL PRIOR TO USE - SAVE THESE INSTRUCTIONS
- CAUTION: Avoid potential personal injuries and property damage!
- Supplied Parts
- Speaker Install Screws
- Spacers SONOS E100
- In Wall Box Assembly
- 4-20 x 3/4 in.
- ! Verify Wall Compatibility
- Based on your speaker model, follow the correct STEP below
- STEP 1
- Universal (back-mounted) Speaker Assembly
- STEP 2
- Cut Holes
- STEP 3
- Install Upper Module
- STEP 4
- Universal Speaker (back-mounted) Installation
- STEP 5
- Sonos ® Era 100 ™ Speaker Installation
- STEP 6
- Install Lower Module
- STEP 7
- Connect Cable
- Removal
- a
- b
- ESPAÑOL
- PASO 7 Conectar Cables
- Para retirar
- Legrand AV Inc.
Brand : SANUS
Model : BSWM3IWP
Category : Speaker Stand