
SDS 3000 A1 TELESCOPIC CAMERA TRIPOD - Camera tripod SILVERCREST - Free user manual and instructions
Find the device manual for free SDS 3000 A1 TELESCOPIC CAMERA TRIPOD SILVERCREST in PDF.

| Product type | Camera tripod |
| Brand | SILVERCREST |
| Model | SDS 3000 A1 TELESCOPIC CAMERA TRIPOD |
| Maximum load | Approx. 3 kg |
| Folded height | Approx. 55.5 cm |
| Extended height | Approx. 157 cm |
| Thread size | 1/4 inch |
| Head type | Swivel head with quick release plate |
| Panning rotation | 360° horizontal |
| Tilt | Vertically adjustable up to 90° for portrait format |
| Bubble level | Adjustment level and leveling level |
| Stabilization hook | Hook for weights up to 2 kg |
| Locking system | Locking levers for legs, locking screws for height and rotation |
| Intended use | Domestic, for cameras and camcorders with 1/4 inch thread |
| Maintenance | Clean with a slightly damp cloth and mild detergent if necessary |
| Safety | Do not exceed max load; always check stability and fastenings |
| Spare parts | Use only original spare parts |
| Included accessories | Carrying bag and instruction manual |
| After-sales service | See the manual for contact details by country |
Frequently Asked Questions - SDS 3000 A1 TELESCOPIC CAMERA TRIPOD SILVERCREST
User questions about SDS 3000 A1 TELESCOPIC CAMERA TRIPOD SILVERCREST
0 question about this device. Answer the ones you know or ask your own.
Ask a new question about this device
Download the instructions for your Camera tripod in PDF format for free! Find your manual SDS 3000 A1 TELESCOPIC CAMERA TRIPOD - SILVERCREST and take your electronic device back in hand. On this page are published all the documents necessary for the use of your device. SDS 3000 A1 TELESCOPIC CAMERA TRIPOD by SILVERCREST.
USER MANUAL SDS 3000 A1 TELESCOPIC CAMERA TRIPOD SILVERCREST
Telescopic Camera Tripod SDS 3000 A1
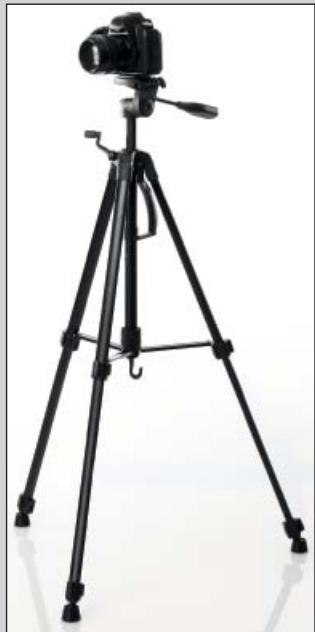
GB Telescopic Camera Tripod
IE Operating instructions
Teleskopfotostativ
Bruksanvisning
Information for these operating instructions 2
Copyright 2
Intended use 2
Safety instructions 3
Items supplied. 4
Operating components 4
Setup 5
Unpacking 5
Disposal of the packaging. 5
Setting the tripod up 5
Securing devices 6
Using the tripod. 6
Transportation and storage. 7
Cleaning and Care 7
Disposal of the device. 7
Technical data 7
Importer. 8
Service 8
Introduction
Information for these operating instructions
These operating instructions are a component of the Telescopic Camera Tripod SEAD 1800 A1 and they provide you with important information about the intended use, the safety and the handling of the appliance.
These operating instructions must be constantly kept available close to the tripod. They are to be read and applied by everyone assigned to operate the tripod.
Retain these operating instructions and pass them on, together with the tripod, to any future owners.
Copyright
This documentation is copyright protected.
Any copying or reproduction, including as extracts, as well as the reproduction of images, also in an altered state, is only permitted with the written authorisation of the manufacturer.
Intended use
This tripod is designed for the secure attachment of photo cameras, video cameras and similar devices with a 1/4 inch thread.
This tripod is intended for domestic use only, it is not suitable for commercial or industrial applications.
Claims of any kind resulting from damage caused by improper use, incompetent repairs, unauthorized modifications or the use of non-approved spare parts will not be acknowledged.
The operator alone bears liability.
Safety instructions
For safe handling of the tripod observe the following safety information:
WARNING - RISK OF INJURY!
This appliance is not intended for use by individuals (including children) with restricted physical, physiological or intellectual abilities or deficiencies in experience and/or knowledge unless they are supervised by a person responsible for their safety or receive from this person instruction in how the appliance is to be used.
Children should be supervised to ensure that they do not play with the appliance.
WARNING - PROPERTY DAMAGE!
Ensure that the tripod stands securely and firmly. If you do not, it may fall over and the tripod as well as the attached device may be damaged.
Ensure that the device is firmly screwed onto the quick release plate. Otherwise, it may fall off and become damaged!
Ensure that the quick release plate is firmly attached to the tripod plate. Otherwise, the affixed device may fall off and be damaged!
- Never burden the tripod with more weight than that indicated in the technical data. If you do, the device and the tripod may be damaged.
Defective components may only be replaced with original replacement parts. Only by using original replacement parts can you guarantee that the safety requirements are complied with.
Items supplied
The device is delivered with the following components as standard:
- Tripod
Transport bag - Operating instructions
NOTICE
- Check the contents to ensure that everything is present and for signs of visible damage.
If the contents are incomplete or have been damaged due to defective packaging or through transportation, contact the Service Hotline (see chapter Service).
Operating components
1 Thread
Quick release plate
3 Tripod plate
4 Adjustment spirit level
Locking screw "360"
6 Levelling spirit level
7 Locking screw "Height"
Locking device
Tripod head screw
10 Grip
11 Crank
12 Locking ring
13 Locking lever
14 Locking lever
15 Accessory hook
16 Transport handle
Setup
Unpacking
■ Remove all parts of the tripod and the operating instructions from the packaging.
Remove all packing material.
Disposal of the packaging
The packaging protects the appliance from transport damage. The packaging materials are selected from the point of view of their environmental friendliness and disposal technology and are therefore recyclable.

The return of packaging into the material circuit saves on raw materials and reduces the amount of generated waste. Dispose of packaging material that is no longer needed according to the regionally established regulations.
Setting the tripod up
1) Open the tripod out completely, so that the locking ring ⑫ touches the column end..
2) Turn the locking ring ⑫ firmly in a clockwise direction so that it can no longer move.
3) Loosen the locking levers 18 + 14 to unlock the legs of the tripod and pull them out to the required lengths.
4) Align the tripod by shifting the legs as required. For this use the levelling spirit level ⑥.
NOTICE
The air bubble must be located in the middle of the circular marking.
5) When you have found the right position, relock the tripod legs with the locking levers 13 + 14 .
6) Now align - if you want to have the tripod plate ③ lined up exactly horizontally - the tripod plate ⑧. For this, turn on the grip ⑩ and move it up or, respectively, down.
NOTICE
The air bubble of the adjustment spirit level ④ must be located between the two markings.
Securing devices
NOTICE
This tripod is equipped with a quick release plate 2. When a device is screwed onto the quick release plate 2 you can, by sliding the locking device 8 on the side of the tripod plate 3, loosen the device together with the quick release plate 2 from the tripod plate 3. Thus, you do not always have to unscrew the device from the thread 1.
1) Remove the quick release plate 2 from the tripod. For this, slide the locking device 3 to the side so that you can lift the quick release plate 2.
2) Screw the required device onto the quick release plate ②. To do this, turn the screw - with the help of the handle on the underside of the quick release plate ② - until the device is firmly seated.
3) To replace the quick release plate 2 complete with the device back on the tripod plate 3, slide the locking device 8 to the side and reposition the quick release plate 2. Then secure the locking device 8, such that the quick release plate 2 is firmly seated.
Using the tripod
When you have set the tripod up and the device is mounted on it, you can then adjust it as follows:
Loosen the locking screw "High" ⑦ to a point where the crank ① can be turned easily. Turn the crank ⑩ to adjust the height. When the desired height has been reached, firmly retighten the locking screw "High" ⑦.
NOTICE
Always hold the grip firmly when you loosen the locking screw "High" 7 and turn the crank 1. Otherwise - if the locking screw "High" 7 is loosened and the crank 1 is not firmly held - the rod with the attached device could fall down to the lowest setting and, through it, the device could be damaged.
To swivel the device horizontally through up to 360^ , loosen the locking screw "360" ⑤. Take hold of the grip ⑩ and swivel the tripod plate ③. When you have reached the desired position, retighten the locking screw "360" ⑤ firmly.
To adjust the tilt angle, rotate the grip 10 and move it either up or down. When the desired tilt angle has been reached, rotate the grip 10 again until it is firm.
Should you wish to bring the tripod plate ③ through up to 90^ , from the vertical to the horizontal position, to take for example photos in portrait format, then loosen the tripod head screw ⑨. Swivel the tripod plate ⑧ into the required position and then retighten the tripod plate screw ⑨ firmly.
NOTICE
You can additionally stabilise the tripod by placing a weight (max. 2 kg) on the accessory hook ⑤.
Transportation and storage
Transport the tripod by using the transport handle 16. This is also possible when it is set up.
If you need to transport the tripod over long distances, then slide it together and place it into the supplied transport bag.
Store the tripod at a clean and dry location. Preferably, in the supplied transport bag.
Cleaning and Care
WARNING - PROPERTY DAMAGE!
- Do not use abrasive or aggressive cleaning materials. These could attack the upper surfaces and irreparably damage the tripod.
Clean the tripod with a lightly moistened cloth.. For stubborn soiling use a mild detergent on the cloth..
Disposal of the device
Dispose of the appliance through an approved disposal centre or at your community waste facility. Observe the currently applicable regulations. In case of doubt, please contact your waste disposal centre.
Technical data
| Max. loading | approx. 3 kg |
| Height when compacted | approx. 55. 5 cm |
| Height when fully extended | approx. 157 cm |
| Thread size | 1/4 inch |
Importer
KOMPERNASS GMBH
BURGSTRASSE 21
44867 BOCHUM, GERMANY
www.kompernass.com
Service
GB DES UK LTD
Tel.: 0871 5000 700 (£ 0.10 / minute)
E-Mail: support.uk@kompernass.com
IE Kompernass Service Ireland
Tel: 1850 930 412 (0,082 EUR/Min.)
Standard call rates apply. Mobile operators may vary.
E-Mail: support.ie@kompernass.com