
KAMN133TFDEA - Tracking Kogan - Free user manual and instructions
Find the device manual for free KAMN133TFDEA Kogan in PDF.

| Product Type | Tri-fold portable monitor |
| Brand | Kogan |
| Model | KAMN133TFDEA |
| Screen Size | 13.3 inches (diagonal) per screen |
| Resolution | 1920 x 1080 (Full HD) |
| Panel Type | IPS LCD |
| Aspect Ratio | 16:9 |
| Number of Screens | 3 (two side screens, one main) |
| Weight | 1.39 kg (3.06 lbs) |
| Dimensions (Width x Height x Depth) | 37.3 cm x 21.9 cm x 2.53 cm (14.69 x 8.62 x 1.0 in) |
| Power Consumption | 5V 2A per screen (10A total) |
| Input Ports (per screen) | USB-C (full function), Mini-HDMI, USB-C (power only) |
| Compatible Laptop Size | Width 308-427 mm, height >218 mm, thickness <8.5 mm |
| Connection Type | USB-C, HDMI, USB-A (with adapter) |
| Supported DisplayPort | Thunderbolt 3/4, USB-C with DP |
| Stand | Adjustable, retractable |
| Accessories Included | Mini HDMI-HDMI cables (x2), USB-C to USB-C (90°) cables (x2), USB-C to USB-A cables (x2), carry bag, velcro fastener, protective caps (x6) |
| OSD Languages | English, French, German, Simplified Chinese, Italian, Spanish, Portuguese, Turkish, Polish, Dutch, Japanese, Korean |
| Safety Warning | Do not exceed turning angles: left screen 0-235°, right screen 0-180° |
| Cleaning | Handle with care; avoid pressing screens |
| Repairability | Not specified; contact Kogan support |
Frequently Asked Questions - KAMN133TFDEA Kogan
User questions about KAMN133TFDEA Kogan
0 question about this device. Answer the ones you know or ask your own.
Ask a new question about this device
Download the instructions for your Tracking in PDF format for free! Find your manual KAMN133TFDEA - Kogan and take your electronic device back in hand. On this page are published all the documents necessary for the use of your device. KAMN133TFDEA by Kogan.
USER MANUAL KAMN133TFDEA Kogan
natural_image
Two large laptops displayed side by side, each with a colorful abstract wallpaper on its screen (no text or symbols visible)FHD PRO DUAL SCREEN TRI- FOLD PORTABLE MONITOR
13.3"
KAMN133TFDEA
SAFETY & WARNINGS
- Handle the tri-screen with care and do not press the screens to avoid damage.
- Do not exceed its maximum turning angle showing as below:
Turning angle of screens

natural_image
Line drawing of a monitor mounted on a stand with an arrow indicating rotation (no text or symbols)Left screen (0° - 235°)

natural_image
Line drawing of a computer monitor with an arrow indicating rotation (no text or symbols)Right screen (0° - 180°)
COMPONENTS

natural_image
Technical line drawing of a symmetrical mechanical or electrical component with two rectangular sections and a central circular hole (no text or symbols)Monitor


Mini HDMI - HDMI Cables (x2)
USB-C - USB-C (90-degree) Cables (x2)
natural_image
Empty rounded rectangle outline with a small arrow pointing to the top-right corner (no text or symbols)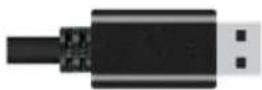
USB-C - USB-A Cables (x2)
Carry Bag
natural_image
Simple line drawing of a ribbon or clip (no text or symbols)
Velcro Fastener
Protective Caps (x6)
OPERATION
Inputs and Buttons

 | Press the Menu to enter the OSD (On-Screen Display) menu |
 | Increase the brightness, enter menu and press it to turn to the next selection, increase the parameter value |
 | Decrease the brightness/decrease the parameter value |
 | x2 USB-C (Type C) Ports: fully functional, power supply, video signal transmission |
| [KW40] | Mini HDMI Port (No Power Supply); video signal transmission |
| [XYZ2] | USB-C Port (power supply only): Power supply, reverse charging, compatible with PD2.0 power supply protocol, Supporting 5-20V voltage input |
Selecting the Right Cables
- To determine which cables you will use, first identify your laptop's ports using the pictures below or reference your laptop's user manual.
- If your laptop has two Thunderbolt3/4 / USB-C with DP ports, the simplest way to use the tri-screen is with the two USB-C to USB-C cables provided.
- If your laptop does not have any Thunderbolt3/4 / USB-C with DP ports, you will need to use one USB-A to USB-C cable and one HDMI to Mini-HDMI cable for each screen.
- If your laptop does not have an HDMI port, then you can use any other video out ports shown below with a HDMI adapter (not supplied).
- Some laptops have USB-C ports that do not support DisplayPort over USB-C. Please reference your laptop's User manual.
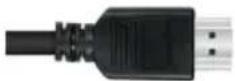
| VIDEO ONLY | |
 |  |
| HDMI | DisplayPort |
 |  |
| Mini-DisplayPort | Mini-DVI |
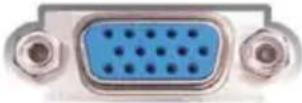 |  |
| VGA USB 3.0 (with HDMI adapter) | |
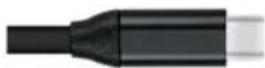
| POWER ONLY | VIDEO & POWER |
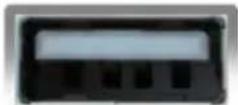 |  |
| USB-A | Thunderbolt 3/4 / USB-C with DP* |
Protective Caps
Using the protective cap if your laptop is an ultra-thin style (laptop screen thickness ≤6mm), this helps keep your laptop in place.

natural_image
Pure technical line drawing of a mechanical assembly with two circular insets showing internal components (no text or symbols)INSTALLATION
- Unpack the monitor.
- Open the two screens in the direction shown.
- Place the bracket at the back of the laptop screen and install it well with the bracket clamping the screen.
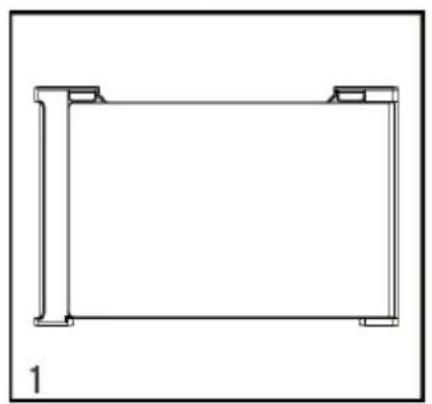
natural_image
Pure technical line drawing of a rectangular frame with corner brackets, no text or symbols present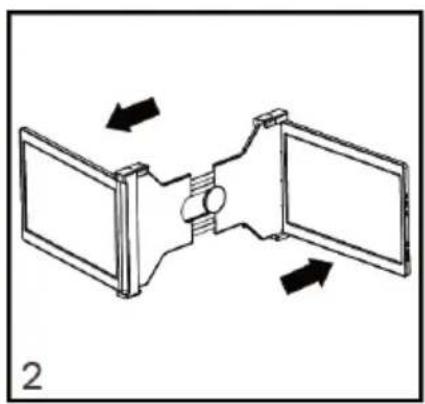
natural_image
Diagram of a mechanical or electrical component with two panels and directional arrows indicating rotation (no text or symbols)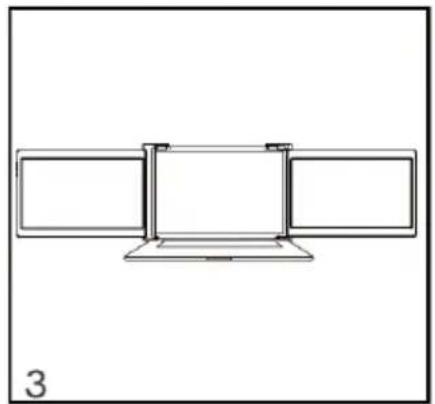
natural_image
Simple line drawing of a three-panel monitor setup with no text or symbols- Lift up the stand and stretch to its end. Press and hold the button to retract the stand. (The stand is embedded in the rear of the triple monitor, which can offer extra support to the monitor.)
- Using the necessary cables, plug one end of the cable into the triple monitor and the other into your laptop.

natural_image
Technical line drawing of a mechanical assembly with a downward arrow indicating motion (no text or symbols)
natural_image
Simple line drawing of a rectangular frame with an arrow pointing to it and a small mark on the left side (no text or symbols)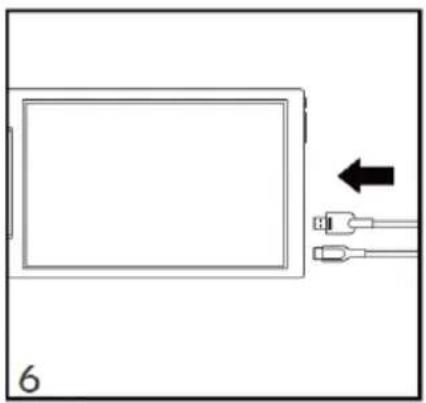
natural_image
Simple line drawing of a device with two USB connectors and an arrow pointing to it (no text or symbols)CONNECTIVITY
Two USB-C or Thunderbolt 3/4 Ports
If there are 2 full-functioned USB-C or 2 Thunderbolt 3/4 ports on the laptop, use the 2 included USB-C cables to connect the laptop to the monitors.

Note:
Ensure that the laptop USB-C ports support power & data transmission and has enough power supply above 5V/2A.
Some USB-C ports may not be able to transmit currents above 5V/2A, connect an external power supply for better results.
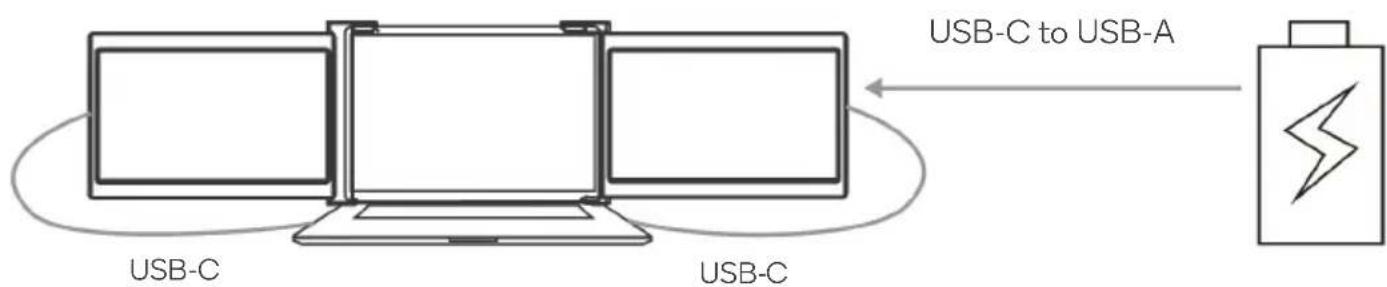
flowchart
graph LR
    A["USB-C"] -->|USB-C to USB-A| B["USB-C"]
    B --> C["USB-C to USB-A"]
    C --> D["USB-C to USB-A"]
Notes:
- Ensure the USB-C port of your laptop is a full-functioned USB-C port (supports both video & data transmission).
- Ensure 5V/2A or above power can be supported through USB-C port. An external power supply of 5V/2A or above is needed for normal use (adjust brightness above 50).
One Full Functioned USB-C and HDMI Port Connection
If there's one full functioned USB-C port and one HDMI port on the laptop:
- Use the included full functioned USB-C cable to connect one side of the monitor and the laptop.
- Meanwhile, use the HDMI cable and an extra power supply (USB-C to USB-A cord) to connect the other side of the monitor and the laptop.
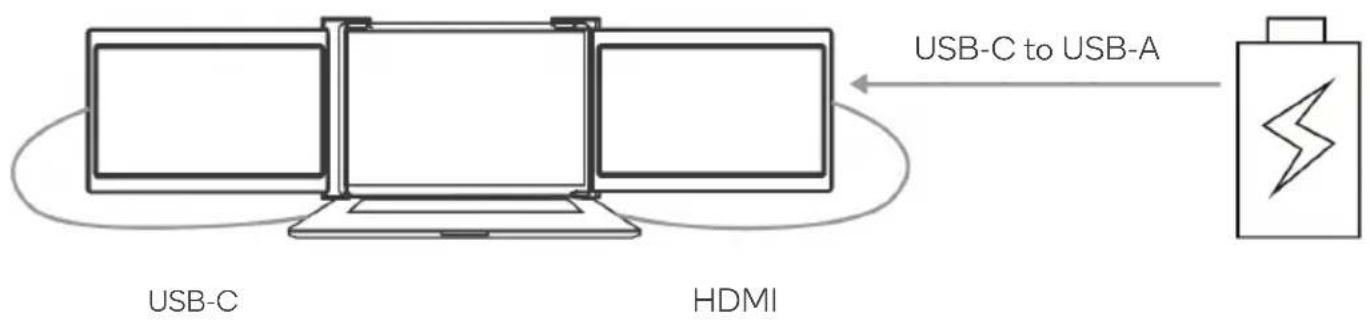
flowchart
graph LR
    A["USB-C"] -->|USB-C to USB-A| B["HDMI"]
    B --> C["USB-C to USB-A"]
Note:
The HDMI port does not provide power, so the monitor must be plugged into a power supply (5V/2A or above).
Laptop Display Configuration
PC / WINDOWS
- Go to your Display Settings (Start > Settings > System > Display)
- Click and drag screens to configuration shown
- If you need to set different display modes for multiple screens, please click 1/2/3 (click the "Identify" button down the screen to find the corresponding screen) and select the one, then enter the "Multiple displays" menu to set
- If any of the screens are upside down, click on the screen in the display menu.
- Then click on the "Orientation" dropdown menu and select "Landscape (flipped)"
- To increase the zoom, click the "Change the size of text, apps and other items" dropdown and select "150%"


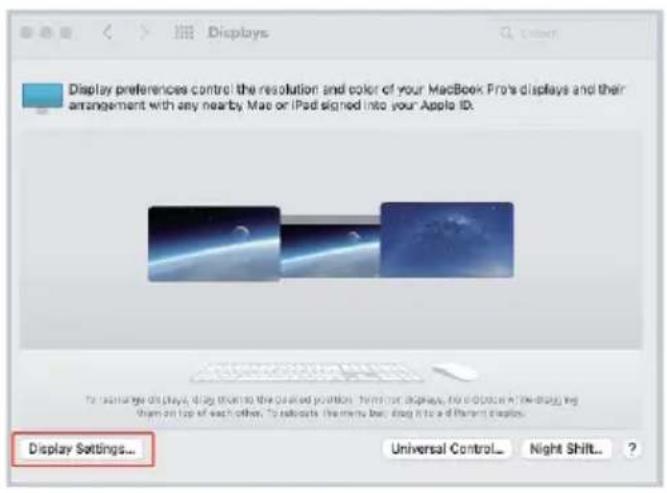
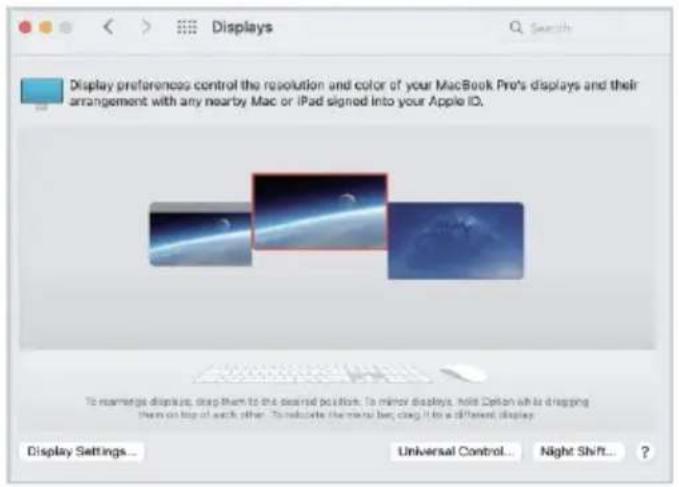
MAC
- Open "System Preferences"
- Select "Displays" from the menu
- Click "Display Settings" from display menu.
- Click monitor name to set Mirror or Extended display.
- Click any display screen in the interface to adjust the screen position.
- To increase the zoom, click the "Scaled" radio button.


OSD (on screen display)
- Press the "≡" Menu button to activate the OSD menu.
- Press "+" button to choose your settings.
- Press Menu "≡" button to confirm.
- Long press the “≡” button to return to previous page.

OSD Settings
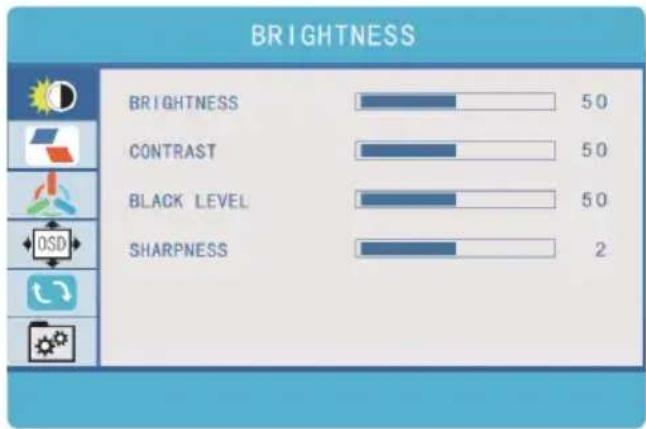
Brightness:
The adjusting range is from 0 to 100.
Contrast:
The adjusting range is from 0 to 100.
Black Level:
The adjusting range is from 0 to 100.
Sharpness:
The adjusting range is from 0 to 100.
Image
ECO: Preset display settings for various modes (Standard/ Game/ Movie/ Text/ FPS/ RTS
Modes)
DCR: Select ON or OFF to enable or disable dynamic contrast ratio function
Aspect: Adjusts the aspect ratio to 4:3/ WIDE
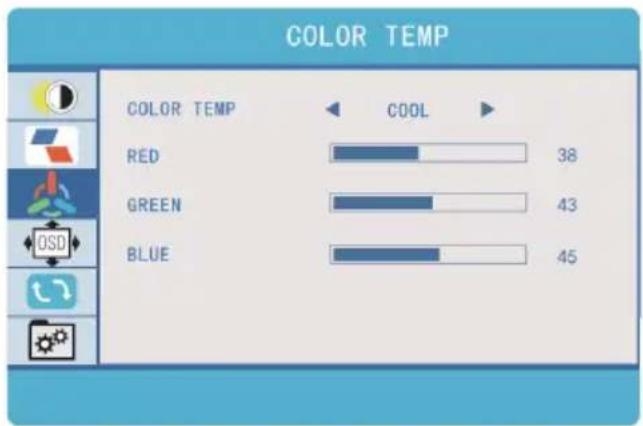
Colour Temp
Colour Temp: Enables the adjustment of each individual RGB colour or select a Warm or
Cool preset level
Red: The adjusting range is from 0 to 100
Green: The adjusting range is from 0 to 100
Blue: The adjusting range is from 0 to 100

OSD Setting
Language: Select OSD language. The selections are: English, French, German, Simplified
Chinese, Italian, Spanish, Portuguese, Turkish, Polish, Netherlands, Japanese, Korean
OSD Timer: Sets time-out for monitor settings menu (10-60 seconds)
Transparency: Sets transparency of monitor settings menus
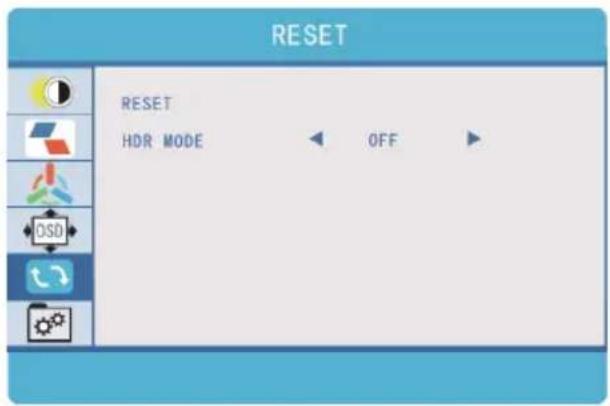
Reset
Selects RESET to revert all settings to the factory default mode
HDR MODE:
Enables HDR (High Dynamic Range) if connected to a compatible device Contains 3 modes (off/auto/2084)
Other
Signal Source:
Contains two signal sources USB-C (Type C) and HDMI
Low Blue Light:
Decreases blue light content in display


SPECIFICATIONS
| Display | Two 13.3inch (diagonal) 1920*1080, Full HD LCD IPS Panels16:9 aspect ratioAdjustable brightnessPower consumption: 5V 2A (Per screen) |
| Inputs and connectivity (per screen) | Thunderbolt 3/4 / USB-C 3.1 inputVideo and PowerThunderbolt 3/4 / USB-C 3.1 inputVideo and PowerMini-HDMI inputVideo Only |
| Size and weight | Weight: 3.06 pounds/ 1.39 kgDepth: 1 inch/ 2.53 cmHeight: 8.62 inch/ 21.9cmWidth: 14.69 inch/ 37.3 cm |
| Adaptive laptop dimensions | Length (left to right) 308-427 mm (12.1 -16.8 inch)Breadth (top to bottom) > 218mm (8.6inch)Thickness (display panel) < 8.5mm (0.34inch) |
Need more information?
We hope that this user guide has given you the assistance needed for a simple set-up.
For the most up-to-date guide for your product, as well as any additional assistance you may require, head online to help.kogan.com
kogan.com


- FHD PRO DUAL SCREEN TRI- FOLD PORTABLE MONITOR
- SAFETY & WARNINGS
- COMPONENTS
- OPERATION
- Inputs and Buttons
- Selecting the Right Cables
- Protective Caps
- INSTALLATION
- CONNECTIVITY
- Two USB-C or Thunderbolt 3/4 Ports
- Note:
- Notes:
- One Full Functioned USB-C and HDMI Port Connection
- Laptop Display Configuration
- PC / WINDOWS
- MAC
- OSD (on screen display)
- OSD Settings
- Image
- Colour Temp
- OSD Setting
- Reset
- Other
- SPECIFICATIONS
- Need more information?
Brand : Kogan
Model : KAMN133TFDEA
Category : Tracking