ADYR22 - Air purifier GE - Free user manual and instructions
Find the device manual for free ADYR22 GE in PDF.

User questions about ADYR22 GE
0 question about this device. Answer the ones you know or ask your own.
Ask a new question about this device
Download the instructions for your Air purifier in PDF format for free! Find your manual ADYR22 - GE and take your electronic device back in hand. On this page are published all the documents necessary for the use of your device. ADYR22 by GE.
USER MANUAL ADYR22 GE
SAFETY INFORMATION......3
OPERATING INSTRUCTIONS
Controls 4
Other Features .... 5
How the Dehumidifier Operates .....5
Choosing a Location 6
Water Level 6
Bucket Operation 6
Removing Collected Water 6
CARE AND CLEANING
Grille and Case 8
Water Bucket 8
Air Filter 8
TROUBLESHOOTING TIPS ..... 9
WIFI SETUP....10
CONSUMER SUPPORT
Limited Warranty 11
Consumer Support 12
Before you begin
Record the GE module number and password for wifi setup. To locate this information, see page 10.
GE Module Number #____
Password #
Write the model and serial numbers here:
Model # ____
Serial # ____
You can find them on a label on the back of the dehumidifier.
OWNER'S MANUAL
ADYR22
ADYR35
ADYR50
APYR50
AWYR50
ENGLISH/ESPAÑOL
THANK YOU FOR MAKING GE APPLIANCES A PART OF YOUR HOME.
Whether you grew up with GE Appliances, or this is your first, we're happy to have you in the family.
We take pride in the craftsmanship, innovation and design that goes into every GE Appliances product, and we think you will too. Among other things, registration of your appliance ensures that we can deliver important product information and warranty details when you need them.
Register your GE appliance now online. Helpful websites and phone numbers are available in the Consumer Support section of this Owner's Manual. You may also mail in the pre-printed registration card included in the packing material.

GE APPLIANCES
IMPORTANT SAFETY INFORMATION READ ALL INSTRUCTIONS BEFORE USING THE APPLIANCE
WARNING
For your safety, the information in this manual must be followed to minimize the risk of fire, electric I injury.
- Use this appliance only for its intended purpose as described in this Owner's Manual.
- This dehumidifier must be properly installed and grounded as described in this manual before it is used.
- Never operate this dehumidifier in an area that is likely to accumulate standing water. If this condition develops, for your safety disconnect the power supply before stepping into the water.
- Never unplug your dehumidifier by pulling on the power cord. Always grip plug firmly and pull straight out from the receptacle.
- Immediately replace all electric service cords that have become frayed or otherwise damaged. A damaged power supply cord must be replaced with a new power supply cord obtained from the manufacturer and not repaired. Do not use a cord that shows cracks or abrasion damage along its length or at either the plug or connector end.
- If the receptacle does not match the plug, the receptacle must be changed out by a qualified electrician
-
If the SUPPLY CORD is damaged, it must be replaced by the manufacturer, its service agent or similarly qualified person in order to avoid a hazard.
-
The appliance shall be installed in accordance with national wiring regulations.
- Turn the dehumidifier OFF and unplug it before cleaning.
- GE Appliances does not support any servicing of the dehumidifier. We strongly recommend that you do not attempt to service the dehumidifier yourself.
- For your safety, do not store or use combustible materials, gasoline or other flammable vapors or liquids in the vicinity of this or any other appliance.
- All dehumidifiers contain refrigerants, which under federal law must be removed prior to product disposal. If you are getting rid of an old product with refrigerants, check with the company handling disposal about what to do.
- Do not use outdoors.
- This dehumidifier is intended for indoor residential applications only. This dehumidifier should not be used for commercial or industrial applications.
- This appliance can be used by persons with reduced physical, sensory or mental capabilities or lack of experience and knowledge if they have been given supervision or instruction concerning use of the appliance in a safe way and understand the hazards involved.
WARNING
USE OF EXTENSION CORDS RISK OF FIRE. Could cause serious injury or death.
■ DO NOT use an extension cord with this Dehumidifier.
■ DO NOT use surge protectors or multi-outlet adaptors with this Dehumidifier.
HOW TO CONNECT ELECTRICITY
Do not, under any circumstances, cut or remove the third (ground) prong from the power cord. For personal safety, this appliance must be properly grounded.
DO NOT use an adapter plug with this appliance.
The power cord of this appliance is equipped with a 3-prong (grounding) plug which mates with a standard 3-prong (grounding) wall outlet to minimize the possibility of electric shock hazard from this appliance.
Have the wall outlet and circuit checked by a qualified electrician to make sure the outlet is properly grounded.
Where a 2-prong wall outlet is encountered, it is your personal responsibility and obligation to have it replaced with a properly grounded 3-prong wall outlet.
The dehumidifier should always be plugged into its own individual electrical outlet, which has a voltage rating matching the rating plate.
This provides the best performance and also prevents overloading house wiring circuits, which could cause a fire hazard from overheated wires.
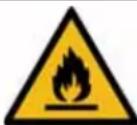
WARNING
Risk of Fire or Explosion. This unit contains flammable refrigerant. Additional safety precautions must be followed.
- Do not use means to accelerate the defrosting process or to clean, other than those recommended by the manufacturer.
- The appliance shall be stored in a room without continuously operating ignition sources (for example: open flames, an operating gas appliance or an operating electric heater.
- Do not pierce or burn refrigerant tubing. Be aware that refrigerants may not contain an odor.
- Keep ventilation openings clear of obstruction.
-
When handling, installing, and operating the appliance, care should be taken to avoid damage to the refrigerant tubing.
-
Do not drill holes in the unit.
- Maintenance, cleaning, and service should only be performed by technicians properly trained and qualified in the use of flammable refrigerants.
- GE Appliances does not support any servicing of the sealed system components (i.e. refrigerant containing parts) in the product.
- Dispose of dehumidifier in accordance with Federal and Local Regulations. Flammable refrigerants require special disposal procedures. Contact your local authorities for the environmentally safe disposal of your dehumidifier.
For appliance recycling information please visit GEAppliances.com/recycling.
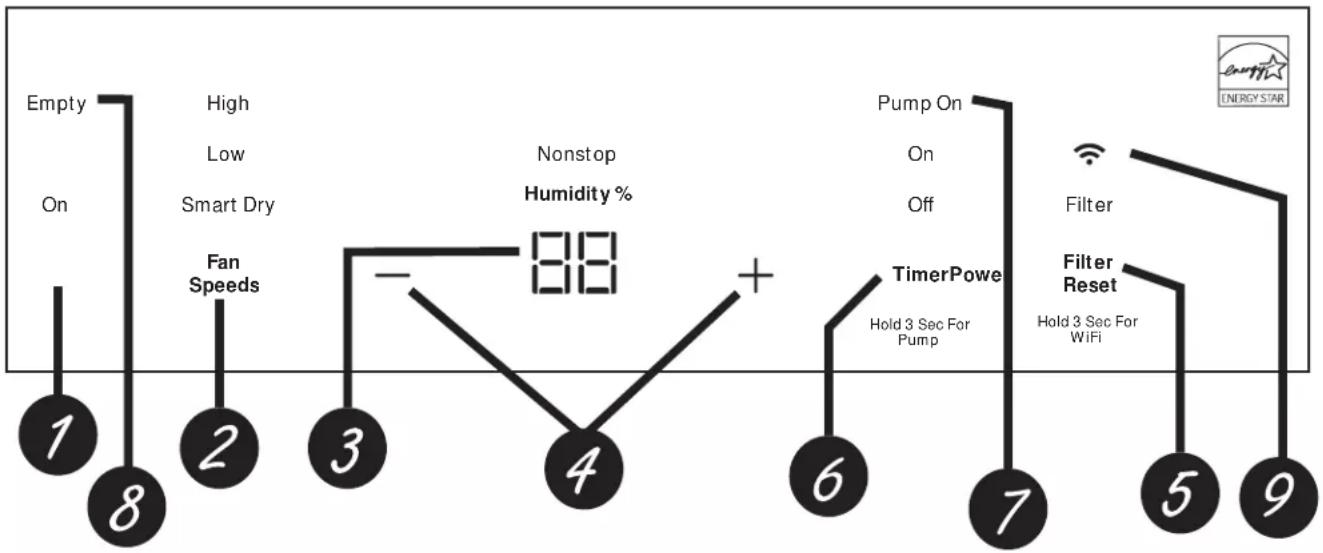
Controls
Appearance may vary by model.
flowchart
graph TD
    A["1: Empty On"] --> B["2: High Low Smart Dry Fan Speeds"]
    B --> C["3: Nonstop Humidity %"]
    C --> D["4: Off"]
    D --> E["5: Pump On"]
    E --> F["6: Timer Power"]
    F --> G["7: Filter"]
    G --> H["8: Filter Reset"]
    H --> I["9: Energy Star"]
Controls
NOTE: When the bucket is full or removed, the controls cannot be set.
1. Power Pad
Press to turn the dehumidifier on and off.
NOTE: Turning off the power by pressing the Power button does NOT disconnect the appliance from power supply.
2. Fan Speed Pad
Controls the fan speed.
Press to select either High, Low, or Smart Dry fan speed. Set the fan control to High for maximum moisture removal. When the humidity has been reduced and quiet operation is preferred, set the fan control to Low. Smart Dry compares the set humidity level with the actual humidity and adjusts the fan speed automatically.
3. Display
Shows the set % humidity level while setting, then shows the actual (+/- 5% accuracy) room % humidity level.
4. Humidity Set Control Pads
The humidity level can be set within a range of 35% RH (Relative Humidity) to 80% RH (Relative Humidity) in 5% increments or in Nonstop mode for continuous operation. To set the unit for continuous operation, press the “-” pad until the “Nonstop” indicator light is illuminated.
NOTE: If Nonstop is selected, the dehumidifier will operate continuously at its maximum dehumidification settings if attached to a hose to drain or until the bucket is full. For drier air, press the “−” pad and set to a lower percent value (%). For damper air, press the “+” pad and set to a higher percent value (%). When you first use the dehumidifier, set the humidity control to 45% or 50%. Allow at least 24 hours for the dehumidifier to achieve the humidity level. If you still have damper air than desired, set the humidity level to a lower setting or select Nonstop for maximum dehumidification.
5. Filter Reset
After 250 hours of operation, the Clean the Filter indicator light will glow to remind you to clean the filter. Remove the filter and clean it.
Press and hold Filter button for 3 seconds to reset the filter reminder. See the Care and Cleaning section.
6. Timer Off
While the dehumidifier is operating, press the Timer button. Press the “+” / “−” buttons to select the number of hours you want the dehumidifier to continue to operate before turning Off.
NOTE: After displaying the time, the Display will revert to showing the current humidity after 5 seconds have passed. Pressing the Timer button will display the number of hours left on the Timer.
Timer On
While the dehumidifier is off, press the Timer button.
Press the “+” / “-” buttons to select the number of hours you want the dehumidifier to remain off before turning On.
NOTE: The display will show the number of hours left until the dehumidifier turns on.
To cancel the Timer:
Press the Timer button once, the hours remaining on the Timer will appear on the display. Press the Timer button against and the Timer will be cancelled.
7. Pump (on some models)
Activates the internal pump. Press Timer for 3 seconds to activate the internal pump for automatic removal of condensate. The Pump On light will remain illuminated after 3 seconds. Press Timer again for 3 seconds to deactivate the pump. Before turning on the pump, ensure the included hose is connected.
8. Empty Indicator
The "Empty" indicator will blink when the bucket is ready to be emptied, or when the bucket is removed and/or not replaced in the proper position.
9. WiFi (on some models)
Hold the Filter Reset button for 3 seconds to enable connection of the dehumidifier to home WiFi.
Download SmartHQ App for details at:
GEAppliances.com/connect.
Other Features
Alarm
If the bucket is full or missing, an alarm will sound for about 10 seconds to remind you to empty and replace the bucket.
Auto Shut Off
The Water Level Control Switch shuts off the dehumidifier when the bucket is full, or when the bucket is removed and/or not replaced in the proper position.
NOTE: The fan and compressor will stop running as soon as the bucket is removed. The alarm will sound if the bucket is not replaced in the proper position after 3 minutes.
Auto Defrost
When frost builds up on the evaporator coils, the compressor will cycle off and the fan will continue to run until the frost disappears. When the coil is defrosted, the compressor or fan will automatically restart and dehumidifying will resume.
Power Outage
In the case of a power outage or interruption, the unit will automatically restart, in the settings last used, after the power is restored.
Using the Dehumidifier
When first using the dehumidifier, operate the unit continuously for 24 hours.
How the Dehumidifier Operates
Moist, humid air is drawn over a cold refrigerated dehumidifying coil. Moisture in the air condenses on this coil and drains into a bucket (or through a hose and drain).
Dry, clean air is drawn through the condenser where it is heated and discharged out the top grille into the room. It is normal for the surrounding air to become slightly warmer as the dehumidifier operates.
Using the Dehumidifier
Choosing a Location
A dehumidifier operating in a basement will have little or no effect in drying an adjacent enclosed storage area, such as a closet, unless there is adequate circulation of air in and out of the area.
- Do not use outdoors.
- This dehumidifier is intended for indoor residential applications only. This dehumidifier should not be used for commercial or industrial applications.
- Place the dehumidifier on a smooth, level floor strong enough to support the unit with a full bucket of water.
- Allow at least 18 inches of air space on all sides of the unit for good air circulation.
- Place the dehumidifier in an area where the temperature will not fall below 41°F (5°C) or above 90°F (32°C). The coils can become covered with frost at temperatures below 41°F, which may reduce performance.
- The suggested range of relative humidity is between 40% and 50%
- Use the dehumidifier in cooking, laundry and dishwashing areas that have excessive moisture.
NOTE: Place the dehumidifier away from the clothes dryer.
- Use the dehumidifier to prevent moisture damage anywhere books or valuables are stored.
-
Use the dehumidifier in a basement to help prevent moisture damage.
-
The dehumidifier must be operated in an enclosed area to be most effective.
- Close all doors, windows and other outside openings to the room.
NOTE: The dehumidifier has casters to aid placement, but it should only be rolled on smooth, flat surfaces. Do not attempt to roll the dehumidifier on carpet or over objects.

text_image
Correct Wrong Above 41 °F (5 °C) Below 41 °F (5 °C) at least 18 inches at least 18 inchesWater Level
The dehumidifier will turn off automatically when the bucket is full, or when the bucket is removed or not replaced in the proper position.
The bucket must be replaced in the proper position for the dehumidifier to work. The empty indiator will blink and the dehumidifier will not run if the bucket is not in the proper position.
Bucket Operation
DO NOT remove the float or magnet in the bucket assembly. If removed the Dehumidifier will not work properly.

natural_image
Technical diagram of a mechanical assembly with an inset showing internal components (no text or labels)Always make sure the water bucket is locked into place on the dehumidifier.
Removing Collected Water
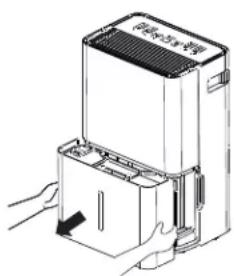
There are 3 ways to remove collected water:
- Use the bucket
- Use a garden hose
– Use the internal pump (on some models)
Use the bucket. When the bucket is removed, the unit will shut off. Empty and replace the bucket.
IMPORTANT: Do not use the hose if using the bucket to collect water. When the hose is connected, water will flow through it onto the floor instead of into the bucket.
Removing Collected Water (cont)
NOTES:
- Do not remove the bucket while the dehumidifier is operating or if it has just stopped operating. This might cause some water to drip from the drain pan.
- The bucket must be in place and securely seated for the dehumidifier to operate.

text_image
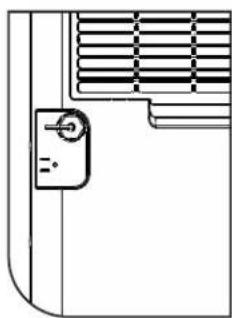
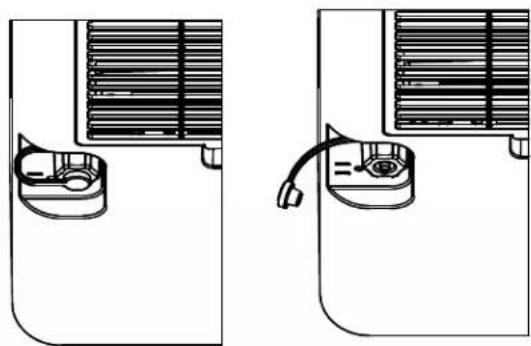
空调+空调+空调Use a garden hose. Water can be automatically emptied into a floor drain by attaching a garden water hose (not included).
- Unscrew the cover to the hose outlet located at the rear of the dehumidifier just under the filter.
natural_image
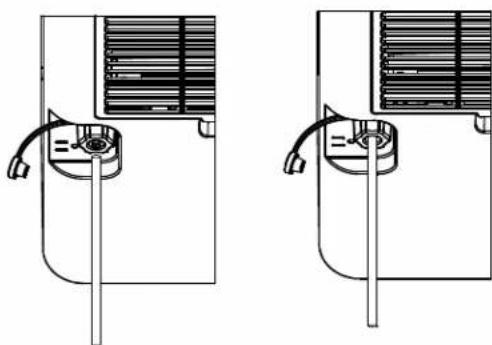
Pure technical line drawing of a door handle and ventilation grille (no text or symbols)- Thread a garden hose (not supplied) onto the nozzle and ensure it is seated securely. Cut to length and lead it to the floor drain.
natural_image
Pure electrical circuit lines without any symbols-
Thread a garden hose (not supplied) onto the nozzle and ensure it is seated securely. Cut to length and lead it to the floor drain.
-
Replace the bucket in the unit.
NOTE: The bucket must be in place and securely seated for the dehumidifier to operate. The garden hose must run down from the dehumidifier to the floor drain.
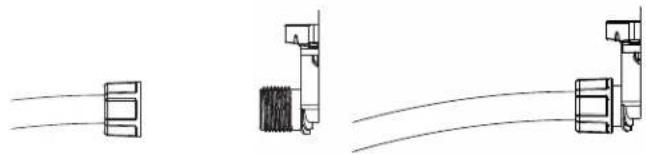
Use the internal pump (on some models)
Water can be automatically emptied into a remote location by attaching the included pump hose.
- Remove the black rubber drain plug from the garden hose attachment exposing the hose bar.
natural_image
Diagram showing two views of a refrigerant air conditioner unit with cooling fans and a valve (no text or labels)- Connect the included hose to the hose barb. Ensuring hose fully covers hose bar to prevent leaks.
natural_image
Technical line drawing of two identical air conditioning unit designs with ventilation ducts and cooling fans (no text or symbols)- Lead the hose discharge to desired drain location.
- Make sure pump is activated. To activate the pump, press and hold the Timer button for 3 seconds. The Pump On indicator will remain illuminated.
IMPORTANT: Make sure the condensate hose is properly connected and is not kinked, bent or cracked as this may cause water to flow onto the floor. Please ensure the bucket is empty before putting the unit into pump mode. The bucket must also be fully seated for the pump to work properly. Do not operate the machine if the room temperature is 41°F or below.
NOTE: Maximum lift height is 16ft.
Care and Cleaning
Turn off the dehumidifier and remove the plug from the wall outlet before cleaning.
Grille and Case
To clean the case:
Use water and a mild detergent. Do not use bleach or abrasives.
To clean the rear grille:
Use a vacuum attachment or brush.
Water Bucket
To clean:
Every few weeks, clean the bucket to prevent growth of mold, mildew and bacteria. Partially fill the bucket with clean water and add a little mild detergent. Swish it around in the bucket, empty and rinse.
NOTE: Do not use a dishwasher to clean the water bucket.
To remove:
Remove the bucket and pour out any water.
To replace:
Slide the bucket into the dehumidifier.
NOTE: The bucket must be in place and securely seated for the dehumidifier to operate.

natural_image
Line drawing of hands holding a medical device (no text or symbols present)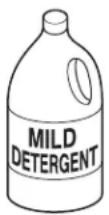
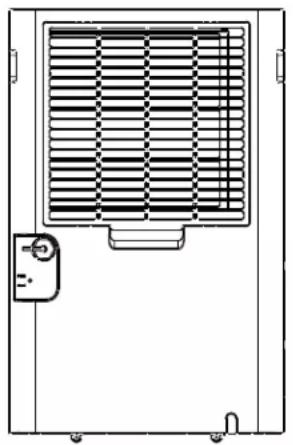
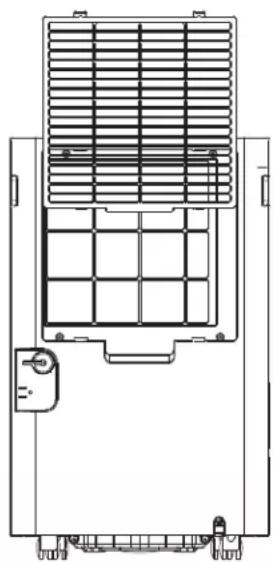
Air Filter
The air filter behind the rear grille should be checked and cleaned at least every 250 hours of operation or more often if necessary.
After 250 hours of operation, the Filter indicator light will glow to remind you to clean the filter. Remove the filter and clean it. Replace the filter and press and hold the filter button for 3 seconds.
To remove:
Remove the rear grille and the filter will be attached.
To clean:
Clean the filter with warm, soapy water. Rinse and let the filter dry before replacing it.
NOTE: DO NOT put the filter in an automatic dishwasher.
CAUTION
DO NOT operate the dehumidifier
without a filter because dirt and lint will clog the unit and reduce performance.
natural_image
Technical line drawing of a mechanical or electrical component with a grid-patterned panel and mounting bracket (no text or symbols)
text_image
Air filterTroubleshooting Tips... Before you call for service
Save time and money! Review the charts on the following pages first and you may not need to call for service.
| Problem Possible Cause What To Do | ||
| Dehumidifier does not start | The dehumidifier is unplugged. | Makes sure the dehumidifier's plug is pushed completely into the outlet. |
| The fuse is blown/circuit breaker is tripped. | Check the house fuse/circuit breaker box and replace the fuse or reset the breaker. | |
| Dehumidifier has reached its set humidity level or bucket is full. | The dehumidifier automatically turns off when either condition occurs. Change to a lower setting or empty the bucket and replace properly. | |
| Bucket is not in the proper position. | The bucket must be in place and securely seated for the dehumidifier to operate. | |
| Power Failure. There is a protective time delay (up to 3 minutes) to prevent tripping of the compressor overload. For this reason, the unit may not start normal dehumidification for 3 minutes after it turned back on. | ||
| Dehumidifier does not dry the air as it should | Did not allow enough time to remove the moisture. | When first installed, allow at least 24 hours to maintain the desired dryness. |
| Airflow is restricted. Make sure there are no curtains, blinds or furniture blocking the top or back of the dehumidifier. See the Choosing a Location section. | ||
| Dirty Filter See the Care and Cleaning section. | ||
| The Humidity Control may not be set low enough. | For drier air, press the ▼ pad and set to a lower percent value (%) or at the Nonstop setting for maximum dehumidification. | |
| Doors and windows may not be closed tightly. | Check that all doors, windows and other openings are securely closed. | |
| Clothes dryer may be blowing moisture-laden air into the room. | Install the dehumidifier away from the dyer. The dryer should be vented to the outside. | |
| Room temperature is too low. | Moisture removal is best at higher room temperatures. Lower room temperatures will reduce the moisture removal rate. Models are designed to be operated at temperatures above 41°F (5°C). | |
| Dehumidifier runs too much | Area to be dehumidified is too large. | The capacity of your dehumidifier may not be adequate |
| Doors and windows are open. Close all doors and windows to the outside. | ||
| Frost appears on the coils | Room temperature is below 41°F (5°C) | Please operate unit at temperatures above 41 F (5 C). Frost will usually disappear within 60 minutes. Under certain conditions, frost may appear on the coils of your dehumidifier at temperatures above 41°F (5°C). This is normal and frost will usually disappear within 60 minutes. See the Automatic Defrost section. |
| Fan noise Air is moving through the dehumidifier. | This is normal. | |
| Water on floor | Hose connection may be loose. | Check the hose connection. See the Removing Collected Water section. |
| Intended to use the bucket to collect water, but a hose was attached | Disconnect the hose if using a bucket to collect water. See the Removing Collected Water section. | |
| Bucket Full LED light flashing and alarm sounds while drain hose is connected | Drain hose not tight on fitting. | Check drain hose connection. |
| Drain hose is kinked. | Ensure the drain hose is pointed straight down to the floor and is not kinked in anyway. | |
| Bucket fills up when using drain pump (on some models) | Unit not in pump mode | Ensure pump is turned on and pump light is illuminated |
| Pump hose not installed | Ensure pump hose is properly installed on back of unit | |
| Water level sensor issue | This may be caused by very humid conditions or error with float sensor. Check unit for a P1 error code on display. If this is present - turn off the unit, unplug unit for a few seconds, plug back in and turn on the unit to reset sensor. If this error continues to occur refer to warranty section for exchange options. | |
GE Appliances SmartHQ (for customers in the United States)
GE Appliances SmartHQ Enabled*. If your Dehumidifier has a Connected Appliance Information label located on the outside as shown below, your dehumidifier is GE Appliances SmartHQ Enabled. A WiFi communication card is built into the product allowing it to communicate with your smart phone for remote monitoring, control and notifications. Please visit www.GEAppliances.com/connect to learn more about connected appliance features, and to learn what connected appliance apps will work with your smart phone.
WiFi Connectivity:
For assistance with the appliance or the ConnectPlus network connectivity (for models that are WiFi enabled or WiFi optional), please call 1-800-220-6899.

natural_image
Technical line drawing of a ventilation grille with a door and bracket (no text or symbols)
UPD ID:XXXXXXXXXXXX MAC:XXXXXXXXXXXX
Contains FCC ID: ZKJ-WCATA008 Contains IC: 10229A- WCATA008

165D1656P001
Getting Started
To connect your dehumidifier, you'll need the GE Appliances App. The app will walk you through the connection process. Download the app from iTunes or Google Play.

natural_image
Icon of a house with Wi-Fi signal symbol (no text or numbers)
All connected appliance data is held in strict accordance with the GE Appliances Connected Data Privacy Policy. Visit geappliances.com/privacy/privacy_policy_connected to view this policy.
Questions about SmartHQ
Get answers you need about setting up WiFi appliances and connecting to your home network in our support articles.
Visit products.geappliances.com/appliance/gea-support-search-content to view wifi connect support articles.
REGULATORY INFORMATION
FCC/IC Compliance Statement:
This device complies with Part 15 of the FCC Rules. Operation is subject to the following two conditions:
- This device may not cause harmful interference.
- This device must accept any interference received, including interference that may cause undesired operation.
This equipment has been tested and found to comply with the limits for a Class B digital device, pursuant to Part 15 of the FCC Rules. These limits are designed to provide reasonable protection against harmful interference in a residential installation. This equipment generates uses and can radiate radio frequency energy and, if not installed and used in accordance with the instructions, may cause harmful interference to radio communications. However, there is no guarantee that interference will not occur in a particular installation. If this equipment does cause harmful interference to radio or television reception, which can be determined by turning the equipment off and on, the user is encouraged to try to correct the interference by one or more of the following measures:
- Reorient or relocate the receiving antenna.
- Increase the separation between the equipment and receiver.
- Connect the equipment into an outlet on a circuit different from that to which the receiver is connected.
- Consult the dealer or an experienced radio/television technician for help.
Labelling: Changes or modifications to this unit not expressly approved by the manufacturer could void the user's authority to operate the equipment.
*Select Models Only
This product has Wi-Fi capability and requires Internet connectivity and a wireless router to enable interconnection with an Energy Management System, and/or with other external devices, systems or applications.
GE Appliances Dehumidifier Limited Warranty
| For The Period Of: | Will Replace: |
| One YearFrom the date of the original purchase | Replacement, repair, or refund of the original retail price for any product which fails due to a defect in materials or workmanship. If the unit is exchanged, the replacement unit is warranted for the remainder of your product's original one-year warranty period. GE Appliances will, at its sole discretion, replace the product with a product of the same or comparable functionality and quality or refund the original retail price. |
In Order to Make a Warranty Claim During Your Retailer's Allowable Return Period:
- Properly pack your unit. We recommend using the original carton and packing materials.
- Return the product to the retail location where it was purchased.
- Include in the package a copy of the sales receipt or other evidence of date of original purchase. Also print your name and address and a description of the defect.
In Order to Make a Warranty Claim During the Remainder of the One-Year Warranty:
- Locate your original sales receipt and make a note of your model and serial number.
- Call 866.907.1655 (in the United States) to initiate a warranty claim.
- You will be asked to provide your name, address, date of purchase, model and serial number.
- Warrant claims may require electronic or mailed-in evidence of purchase.
What Will Not Cover:
- Customer instruction. This owner's manual provides information regarding operating instructions and user controls.
- Improper installation. If you have an installation problem, or if the product is of improper capacity, contact your dealer or installer. You are responsible for providing adequate electrical connecting facilities.
-
Failure of the product resulting from modifications to the product or due to unreasonable use including failure to provide reasonable and necessary maintenance.
-
Replacement of house fuses or resetting of circuit breakers.
- Failure due to corrosion.
- Damage to the product caused by improper power supply voltage, accident, fire, floods or acts of God.
- Incidental or consequential damage caused by possible defects with this product.
• Damage caused after delivery.
EXCLUSION OF IMPLIED WARRANTIES - Your sole and exclusive remedy is product repair as provided in this Limited Warranty. Any implied warranties, including the implied warranties of merchantability or fitness for a particular purpose, are limited to one year or the shortest period allowed by law.
For US Customers: This limited warranty is extended to the original purchaser and any succeeding owner for products purchased for home use within the USA. If the product is located in an area where service by a GE Appliances Authorized Servicer is not available, you may be responsible for a trip charge or you may be required to bring the product to an Authorized GE Appliances Service location for service. In Alaska, the limited warranty excludes the cost of shipping or service calls to your home.
Some states do not allow the exclusion or limitation of incidental or consequential damages. This limited warranty gives you specific legal rights, and you may also have other rights which vary from state to state. To know what your legal rights are, consult your local or state consumer affairs office or your state's Attorney General.
Warrantor US: GE Appliances, a Haier company
Louisville, KY 40225
Consumer Support
GE Appliances Website
Have a question or need assistance with your appliance? Try the GE Appliances Website 24 hours a day, any day of the year! You can also shop for more great GE Appliances products and take advantage of all our on-line support services designed for your convenience. In the US: GEAppliances.com
Register Your Appliance
Register your new appliance on-line at your convenience! Timely product registration will allow for enhanced communication and prompt service under the terms of your warranty, should the need arise. You may also mail in the pre-printed registration card included in the packing material. In the US: GEAppliances.com/register
Extended Warranties
Purchase a GE Appliances extended warranty and learn about special discounts that are available while your warranty is still in effect. You can purchase it on-line anytime. GE Appliances Services will still be there after your warranty expires. In the US: GEAppliances.com/extended-warranty or call 800.626.2224 during normal business hours.
Remote Connectivity
For assistance with wireless network connectivity (for models with remote enable), visit our website at GEAppliances.com/connect or call 800.220.6899 in the US.
Parts and Accessories
Individuals qualified to service their own appliances can have parts or accessories sent directly to their homes (VISA, MasterCard and Discover cards are accepted). Order on-line today 24 hours every day. In the US: GEApplianceparts.com or by phone at 877.959.8688 during normal business hours.
Instructions contained in this manual cover procedures to be performed by any user. Other servicing generally should be referred to qualified service personnel. Caution must be exercised, since improper servicing may cause unsafe operation.
Contact Us
If you are not satisfied with the service you receive from GE Appliances, contact us on our Website with all the details including your phone number, or write to:
In the US: General Manager, Customer Relations | GE Appliances, Appliance Park | Louisville, KY 40225 GEAppliances.com/contact
INFORMACIÓN
DE SEGURIDAD....3
natural_image
Technical line drawing of a mechanical assembly with an inset close-up view (no text or symbols)natural_image
Line drawing of a device with a handle and internal components, no text or symbols presentnatural_image
Pure technical line drawing of a door handle and ventilation grille (no text or symbols)natural_image
Diagram showing two views of a shared air conditioner unit with a hose and vent (no text or labels)natural_image
Technical line drawing of two identical mechanical or electrical components with internal structure and connectors (no text or symbols)natural_image
Line drawing of a hand holding a piece of paper or seal, with no visible text or symbols
Filtro de aire
natural_image
Line drawing of a front-mounted air conditioner unit with ventilation grille and control panel (no text or symbols)Filtro de aire
natural_image
Technical line drawing of a mechanical or electrical component with grid and mounting bracket (no text or symbols)natural_image
Technical line drawing of a ventilation grille with a control panel and indicator button (no text or symbols)
UPD ID:XXXXXXXXXXXX MAC:XXXXXXXXXXXX
Contains FCC ID: ZKJ-WCATA008 Contains IC: 10229A- WCATA008

165D1656P001
Puesta en marcha
natural_image
Icon of a house with Wi-Fi signal symbol (no text or numbers)
GE Appliances, a Haier company
Louisville, KY 40225