
UV36WC - Washing machine LG - Free user manual and instructions
Find the device manual for free UV36WC LG in PDF.

| Product Type | Single Ceiling Suspended Air Conditioner |
| Brand | LG |
| Model | UV36WC |
| Operation Modes | Cooling (Standard, Power, Comfort), Heating, Dehumidification, Fan, Auto, Auto Changeover |
| Remote Controller | Wireless remote control with LCD display |
| Temperature Setting Range | Cooling: 18-30°C (64-86°F); Heating: 16-30°C (60-86°F); Auto Changeover: 18-30°C (64-86°F) |
| Fan Speeds | Super Low, Low, Medium, High, Chaos (Natural Wind) |
| Airflow Direction Control | Up/Down (vertical) louvers, Left/Right (horizontal) optional, Individual vane angle control (optional) |
| Special Functions | Jet Cool, Comfort Cooling, Plasma Purification (optional), Auto Clean, Smart Clean |
| Timer Functions | On Timer, Off Timer, Sleep Timer (max 7 hours) |
| Air Filter | Washable; clean every 2 weeks |
| Indoor Unit Cleaning | Wipe with soft dry cloth; do not use bleach or abrasives |
| Power Supply | Dedicated circuit; must be grounded |
| Refrigerant | Check label on product; specified refrigerant only |
| Safety Features | Overcurrent protection, auto restart after lightning, self-diagnosis error codes |
| Installation | Must be installed by specialist; use provided installation kit |
| Warranty | Refer to dealer; staple receipt to manual |
Frequently Asked Questions - UV36WC LG
User questions about UV36WC LG
0 question about this device. Answer the ones you know or ask your own.
Ask a new question about this device
Download the instructions for your Washing machine in PDF format for free! Find your manual UV36WC - LG and take your electronic device back in hand. On this page are published all the documents necessary for the use of your device. UV36WC by LG.
USER MANUAL UV36WC LG
Please read this manual carefully before operating your set and retain it for future reference.
Single ceiling suspended air conditioner
EAC

TIPS FOR SAVING ENERGY
Here are some tips that will help you minimize the power consumption when you use the air conditioner. You can use your air conditioner more efficiently by referring to the instructions below:
- Do not cool excessively indoors. This may be harmful for your health and may consume more electricity.
- Block sunlight with blinds or curtains while you are operating the air conditioner.
- Keep doors or windows closed tightly while you are operating the air conditioner.
- Adjust the direction of the air flow vertically or horizontally to circulate indoor air.
- Speed up the fan to cool or warm indoor air quickly, in a short period of time.
- Open windows regularly for ventilation as the indoor air quality may deteriorate if the air conditioner is used for many hours.
- Clean the air filter once every 2 weeks. Dust and impurities collected in the air filter may block the air flow or weaken the cooling / dehumidifying functions.
For your records
Staple your receipt to this page in case you need it to prove the date of purchase or for warranty purposes. Write the model number and the serial number here:
Model number :
Serial number :
You can find them on a label on the side of each unit.
Dealer's name :
Date of purchase :
IMPORTANT SAFETY INSTRUCTIONS
READ ALL INSTRUCTIONS BEFORE USING THE APPLIANCE.
Always comply with the following precautions to avoid dangerous situations and ensure peak performance of your product

WARNING
It can result in serious injury or death when the directions are ignored

CAUTION
It can result in minor injury or product damage when the directions are ignored

WARNING
• Always ground the product. There is a risk of electric shock.
- Do not use a defective or underrated circuit breaker. Use the correctly rated breaker and fuse. There is risk of fire or electric shock.
- Do not use a multi consent. Always use this appliance on a dedicated circuit and breaker. Otherwise it can cause electric shock or fire.
- For electrical work, contact the dealer, seller, a qualified electrician, or an Authorized Service Center. Do not disassemble or repair the product by yourself. There is risk of fire or electric shock.
- Always ground the product as per the wiring diagram. Do not connect the ground wire to gas or water pipes lightening rod or telephone ground wire. There is risk of fire or electric shock.
- Install the panel and the cover of control box securely. There is risk of fire or electric shock due to dust, water etc.
- Use the correctly rated breaker or fuse. There is risk of fire or electric shock.
- Do not modify or extend the power cable. If the power cable or cord has scrathes or skin peeled off or deteriorated then it must be replaced. There is risk of fire or electric shock.
- For installation, removal or reinstall, always contact the dealer or an Authorized Service Center. There is risk of fire, electric shock, explosion, or injury.
- Do not install the product on a defective installation stand. Be sure that the installation area does not deteriorate with age. It may cause product to fall.
- Never install the outdoor unit on a moving base or a place from where it can fall down. The falling outdoor unit can cause damage or injury or even death of a person.
- When the product is soaked (flooded or submerged) in water, contact an Authorized Service Center for repair before using it again. There is risk of fire or electric shock.
- Be sure to check the refrigerant to the used. Please read the label on the product. Incorrect refrigerant used can prevent the normal operation of the unit.
- Don't use a power cable, a plug or a loose socket which is damaged. Otherwise it may cause a fire or electrical shock.
- Do not touch, operate, or repair the product with wet hands. Hold the plug by hand when taking out. There is risk of electric shock or fire.
- Do not place a heater or other heating appliances near the power cable. There is risk of fire and electric shock.
- Do not allow water to run into electric parts. Install the unit away from water sources. There is risk of fire, failure of the product, or electric shock.
- Do not store or use or even allow flammable gas or combustibles near the product. There is
risk of fire.
- Indoor/outdoor wiring connections must be secured tightly and the cable should be routed properly so that there is no force pulling the cable from the connection terminals. Improper or loose connections can cause heat generation or fire.
- Safely dispose off the packing materials. Like screws, nails, batteries, broken things etc after installation or svc and then tear away and throw away the plastic packaging bags. Children may play with them and cause injury.
- Make sure to check that the power cable plug is not dirty, loose or broken and then only insert the plug completely. Dirty, loose or broken power plug can cause electric shock or fire.
- In outdoor unit the step-up capacitor supplies high voltage electricity to the electrical components. Be sure to discharge the capacitor completely before conducting the repair work. An charged capacitor can cause electrical shock.
- When installing the unit, use the installation kit provided with the product. Otherwise the unit may fall and cause severe injury.
- Be sure to use only those parts which are listed in the svc parts list. Never attempt to modify the equipment. The use of inappropriate parts can cause an electrical shock, excessive heat generation or fire.
- Do not use the product in a tightly closed space for a long time. Perform ventilation regularly. Oxygen deficiency could occur and hence harm your health.
- Do not open the front grille of the product during operation. (Do not touch the electrostatic filter, if the unit is so equipped.) There is risk of physical injury, electric shock, or product failure.
- If strange sounds, smell or smoke comes from product. Immediately turn the breaker off or disconnect the power supply cable. There is risk of electric shock or fire.
- Ventilate the product room from time to time when operating it together with a stove, or heating element etc. Oxygen deficiency can occur and hence harm your health.
- Turn the main power off and unplug the unit when cleaning or repairing the product. There is risk of electric shock.
- When the product is not to be used for a long time, disconnect the power supply plug or turn off the breaker. There is risk of product damage or failure, or unintended operation.
• Take care to ensure that nobody especially kids could step on or fall onto the outdoor unit. This could result in personal injury and product damage.
• Take care to ensure that power cable could not be pulled out or damaged during operation. There is risk of fire or electric shock.
- Do not place ANYTHING on the power cable. There is risk of fire or electric shock.
- Do not plug or unplug the power supply plug to turn the unit ON/OFF. There is risk of fire or electric shock.
- When flammable gas leaks, turn off the gas and open a window for ventilation before turn the product on. Do not use the telephone or turn switches on or off. There is risk of explosion or fire.
- This appliance is not intended for use by persons (including children) with reduced physical, sensory or mental capabilities, or lack of experience and knowledge, unless they have been given supervision or instruction concerning use of the appliance by a person responsible for their safety. Children should be supervised to ensure that they do not play with the appliance.

CAUTION
- Two or more people must lift and transport the product. Avoid personal injury.
- Do not install the product where it will be exposed to sea wind (salt spray) directly. It may cause corrosion on the product.
• Install the drain hose to ensure that the condensed water is drained away properly. A bad connection may cause water leakage.
- Keep level even when installing the product. To avoid vibration or noise.
- Do not install the product where the noise or hot air from the outdoor unit could damage or disturb the neighborhoods. It may cause a problem for your neighbors and hence dispute.
- Always check for gas (refrigerant) leakage after installation or repair of product. Low refrigerant levels may cause failure of product.
- Do not use the product for special purposes, such as preserving foods, works of art, etc. It is a consumer air conditioner, not a precision refrigeration system. There is risk of damage or loss of property.
- Do not block the inlet or outlet of air flow. It may cause product failure.
- Use a soft cloth to clean. Do not use harsh detergents, solvents or splashing water etc. There is risk of fire, electric shock, or damage to the plastic parts of the product.
- Do not touch the metal parts of the product when removing the air filter. There is risk of personal injury.
- Do not step on or put anything on the product. (outdoor units) There is risk of personal injury and failure of product.
- Always insert the filter securely after cleaning. Clean the filter every two weeks or more often if necessary. A dirty filter reduces the efficiency.
- Do not insert hands or other objects through the air inlet or outlet while the product is operating. There are sharp and moving parts that could cause personal injury.
- Be cautious when unpacking and installing the product. Sharp edges could cause injury.
- If the refrigerant gas leaks during the repair, do not touch the leakaing refrigerant gas. The refrigerat gas can cause frostbite (cold burn)
- Do not tilt the unit when removing or uninstalling it. The condensed water inside can spill.
- Do not mix air or gas other than the specified refrigerant used in the system. If air enters the refrigerant system, an excessively high pressure results, causing equipment damage or injury.
- If the refrigerant gas leaks during the installation, ventilate the area immediately. Otherwise it can be harmful for your health.
- Dismantling the unit, treatment of the refrigerant oil and eventual parts should be done in accordance with local and national standards. Replace the all batteries in the remote control with new ones of the same type. Do not mix old and new batteries or different types of batteries. There is risk of fire or product failure.
- Do not recharge or disassemble the batteries. Do not dispose off batteries in a fire. They may burn or explode.
- If the liquid from the batteries gets onto your skin or clothes, wash it well with clean water. Do not use the remote if the batteries have leaked. The chemicals in batteries could cause burns or other health hazards.
- If you eat the liquid from the batteries, brush your teeth and see doctor. Do not use the remote if the batteries have leaked. The chemicals in batteries could cause burns or other health hazard.
- Do not let the air conditioner run for a long time when the humidity is very high and a door or a window is left open. Moisture may condense and wet or damage furniture.
- Do not expose your skin or kids or plants to the cool or hot air draft. This could harm to your health.
- Do not drink the water drained from the product. It is not sanitary and could cause serious health issues.
- Use a firm stool or ladder when cleaning, maintaining or repairing the product at an height. Be careful and avoid personal injury.
TABLE OF CONTENTS
2 TIPS FOR SAVING EN- ERGY
3 IMPORTANT SAFETY IN-STRUCTIONS
7 BEFORE USE
7 Preparing for operation
7 Usage
7 Cleaning and maintenance
7 Service
8 PRODUCT INTRODUC-TION
8 Name and function of parts
9 Operation Indication Lamps
10 Wireless Remote Controller
11 How to insert the Batteries
11 Wireless Remote Controller Maintenance
11 Operating Method
12 OWNER'S INSTRUCTION
12Cooling Mode - Standard Operation
12Cooling Mode - Power Cooling
13Cooling Mode - Comfort Cooling
14 Heating Mode
15Dehumidification Mode
16Fan Mode
17 Auto Operation Mode
18 Auto Changeover Mode
19 Auto Changeover Mode - Setting the Mode Change Temperature
20 Airflow Setting
22 Auto Clean (Optional)
23 Smart Clean (Optional)
24 Individual vane angle control (Optional)
25 TIMER
25 Setting the Current Time
25 Sleep Timer Setting
25 On Timer Setting
26 Off Timer Setting
26 To cancel the Timer Setting
27 MAINTENANCE AND SERVICE
27 Indoor Unit
28 Operation Tips!
28 When the air conditioner is not going....
29 Troubleshooting Tips! Save time and money!
29 Call the service immediately in the following situations
BEFORE USE
Preparing for operation
- Contact an installation specialist for installation.
- Use a dedicated circuit.
Usage
- Being exposed to direct airflow for an extended period of time could be hazardous to your health. Do not expose occupants, pets, or plants to direct airflow for extended periods of time.
- Due to the possibility of oxygen deficiency, ventilate the room when used together with stoves or other heating devices.
- Do not use this air conditioner for non-specified special purposes (e.g. preserving precision devices, food, pets, plants, and art objects). Such usage could damage the items.
Cleaning and maintenance
- Do not touch the metal parts of the unit when removing the filter. Injuries can occur when handling sharp metal edges.
- Do not use water to clean inside the air conditioner. Exposure to water can destroy the insulation, leading to possible electric shock.
- When cleaning the unit, first make sure that the power and breaker are turned off. The fan rotates at a very high speed during operation. There is a possibility of injury if the unit's power is accidentally triggered on while cleaning inner parts of the unit.
Service
For repair and maintenance, contact your authorized service dealer.
PRODUCT INTRODUCTION
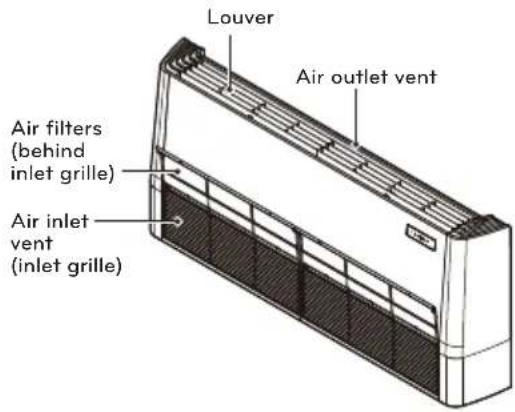
Name and function of parts
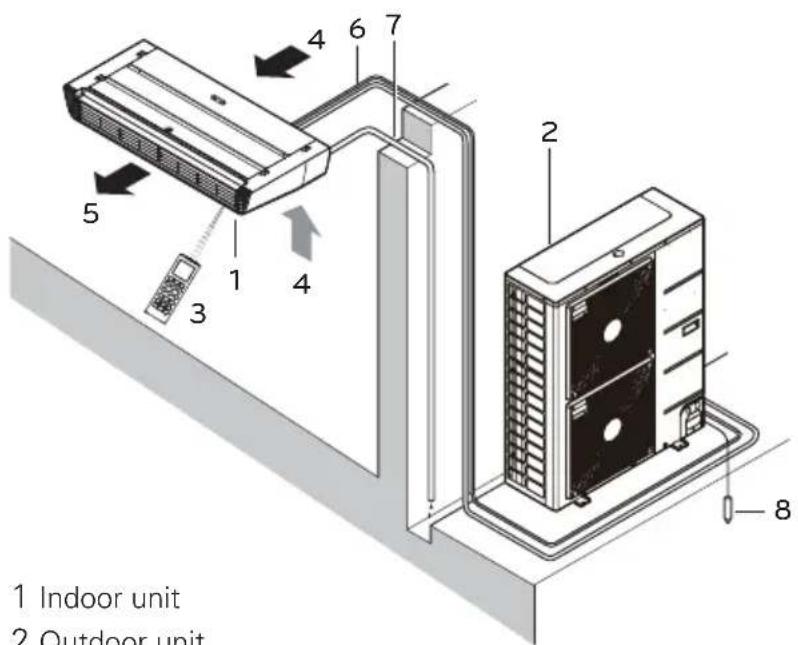
1 Indoor unit
2 Outdoor unit
3 Remote controller
4 Inlet air
5 Discharge air
6 Refrigerant piping, connection electric wire
7 Drain pipe
8 Ground wire
Wire to ground outdoor unit to prevent electrical shocks.
Operation Indication Lamps
① On/Off : Lights up during the system operation.
Filter Sign : Lights up after 2400 hours from the time of first operating unit.
Timer : Lights up during Timer operation.
* Defrost Mode: Lights up during Defrost Mode or Hot Start operation.
(Heat pump model only)
Forced operation : To operate the unit when the remote control can't be used for any reason.
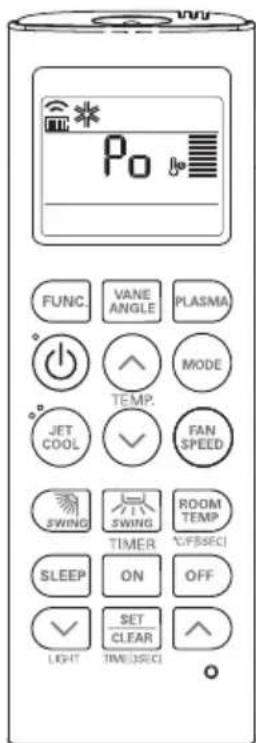
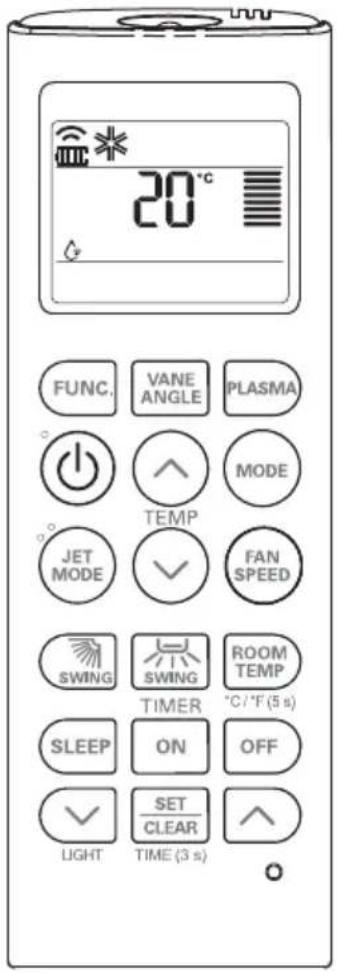
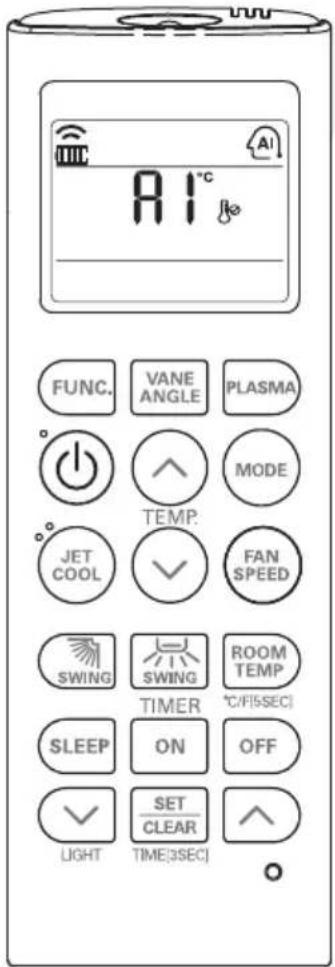
Wireless Remote Controller

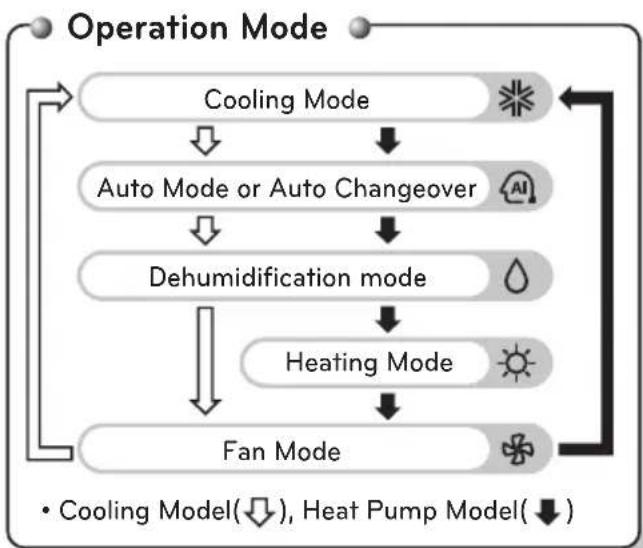
flowchart
graph TD
    A["Operation Mode"] --> B["Cooling Mode"]
    B --> C["Auto Mode or Auto Changeover"]
    C --> D["Dehumidification mode"]
    D --> E["Heating Mode"]
    E --> F["Fan Mode"]
    F --> A
    style A fill:#f9f,stroke:#333
    style B fill:#ccf,stroke:#333
    style C fill:#cfc,stroke:#333
    style D fill:#fcc,stroke:#333
    style E fill:#cff,stroke:#333
    style F fill:#ffc,stroke:#333
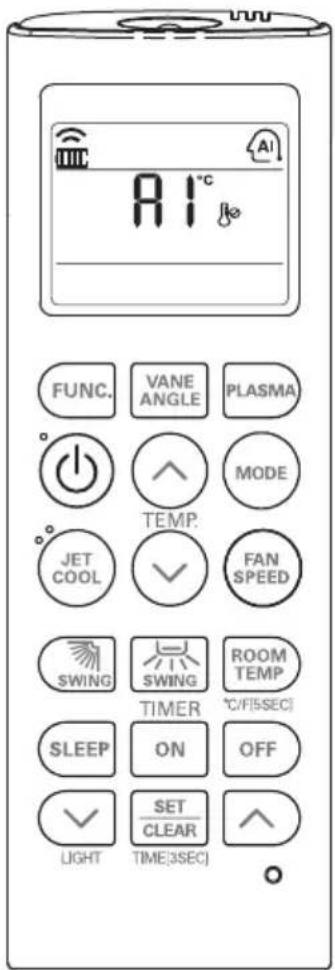
1 VANE ANGLE Button
Used to set each vane angle.
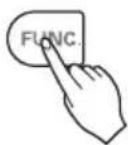
2 FUNCTION SETTING Button
Used to set or clear Auto Clean, Smart Clean, Electric heater or Individual vane angle control.
3 ON/OFF Button
Used to turn on/off the unit.
4 JET COOL Button
Speed cooling operates super high fan speed.
5 LEFT/RIGHT AIRFLOW Button (OPTIONAL) Used to set the desired left/right(horizontal) airflow direction.
6 UP/DOWN AIRFLOW Button
Used to stop or start louver movement and set the desired up/down airflow direction.
7 ON TIMER Button
Used to set the time of starting operation.
8 SLEEP TIMER Button
Used to set the time of sleeping operation.
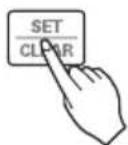
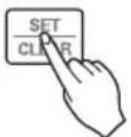
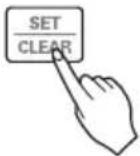
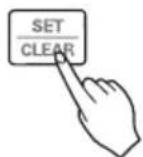
9 SET / CLEAR Button
Used to set/clear the timer.
Used to set the current time(if it input for 3sec.)
10 PLASMA Button (OPTIONAL)
Used to start or stop the plasma-purification function.
11 ROOM TEMPERATURE SETTING Button Used to select the room temperature.
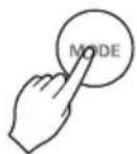
12 OPERATION MODE SELECTION Button
Used to select the operation mode.
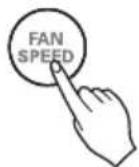
13 INDOOR FAN SPEED SELECTION Button
Used to select fan speed in four steps low,
medium, high and chaos.
14 ROOM TEMPERATURE CHECKING Button
Used to check the room temperature.
15 OFF TIMER Button
Used to set the time of stopping operation.
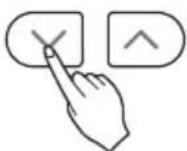
16 TIMER SETTING(Up/Down)/LIGHT Button
Used to set the timer.
Used to adjust the brightness.(if it is not time adjust mode)
17 RESET Button
Used to reset the remote controller.
How to insert the Batteries
1 Remove the battery cover by pulling it according to the arrow direction.
2 Insert new batteries making sure that the (+) and (-) of battery are installed correctly.
3 Reattach the cover by sliding it back into position.


NOTE
• Always use/replace both batteries of same type.
- If the system is not to be used for a long time, remove the batteries to save their working life.
- If the display screen of remote controller starts, fading replace both of the batteries.
Wireless Remote Controller Maintenance
1 Choose a suitable place where its safe & easy to reach.
2 Fix the holder to wall etc with the supplied screws firmly.
3 Slide the remote controller inside the holder.

natural_image
Technical line drawing of a handheld device with a scroll wheel and a separate mobile phone showing keypad (no text or symbols)
NOTE
- Remote controller should never be exposed to direct sunlight.
- Signal transmitter & receiver should always be clean for proper communication. Use a soft cloth to clean them.
- In case some other appliances also get operated with remote control, change their position or consult your serviceman.
Operating Method
1 The signal receiver is inside the unit.
2 Aim the remote controller towards the unit to operate it. There should not be any blockage in between.
OWNER'S INSTRUCTION
Cooling Mode - Standard Operation

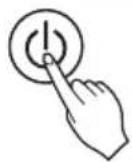
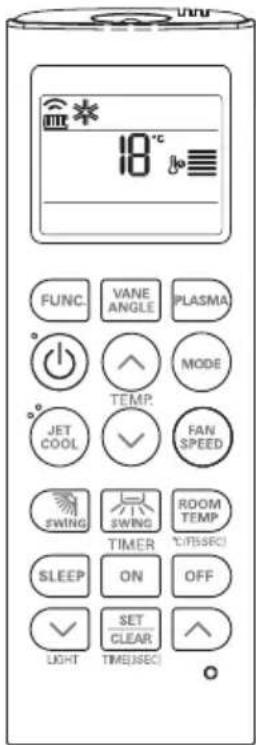
1 Press the ON/OFF button. The unit will respond with beep sound.

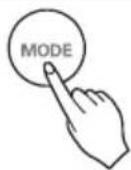
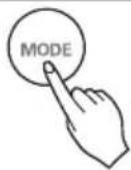
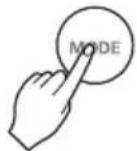
2 Press MODE button to select Cooling Mode.
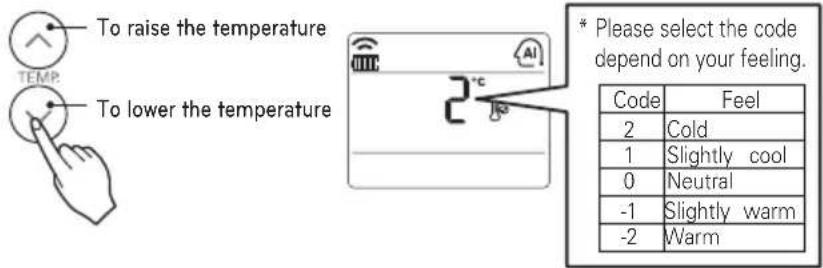
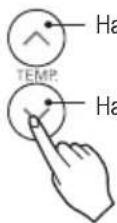
3 Set the desired temperature by pressing TEMP button. Press ROOM TEMPERATURE CHECKING button to check the room temperature. When setting the desired temperature is higher than room temperature, cooling wind isn't blow out.

* Setting Temp. Range : 18\~30 °C(64\~86 °F)
To raise the temperature
To lower the temperature
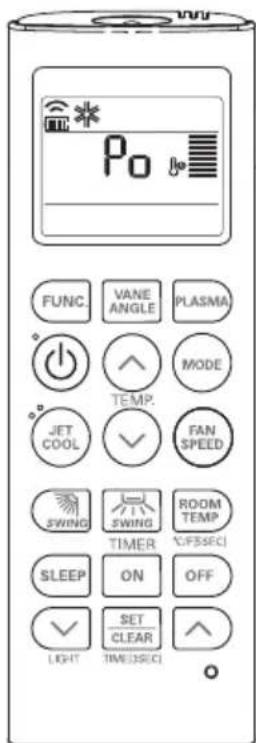
Cooling Mode - Power Cooling
1 Press the ON/OFF button. The unit will respond with beep sound.
2 Press MODE button to select Cooling Mode.
3 Press the JET COOL button. The unit will operate in super high fan speed in cooling mode. * Wall mounted models operate power cooling mode for 30 minutes.

4 To cancel the Power cooling Mode press the Jet Cool button or the fan button or the room temperature setting button again and the unit will operate in high fan speed in cooling mode.
or or

Cooling Mode - Comfort Cooling
This function is automatically control the cooling strength to maintain the pleasant feeling without turning off the product after the indoor temperature reached the desired temperature.
1 Press the ON/OFF button. The unit will respond with beep sound.

2 Press MODE button to select Cooling Mode.
3 Press FUNC. Button repeatedly until comfort cooling icon displayed.

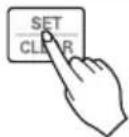
4 Press SET/CLEAR button for setting.
Heating Mode
This Function is only for H/P model.
![30°C FUNC. VANE ANGLE PLASMA TEMP. JET COOL FAN SPEED SWING SWING ROOM TEMP TIMER °C/[5sec] SLEEP ON OFF SET CLEAR LIGHT TIME(3sec)](/content/2026/06/1211694/images/f04ebe282f5de5c685d00d5ef871f0259395d21ec875e0cc542e40595c1b4621.jpg)
1 Press the ON/OFF button. The unit will respond with beep sound.
2 Press MODE button to select Heating Mode.

3 Set the desired temperature by pressing TEMP button. Press ROOM TEMPERATURE CHECKING button to check the room temperature. When setting the desired temperature is lower than room temperature, heating wind isn't blow out.

* Setting Temp. Range in Heating Mode : 16\~30 °C (60 °F\~86 °F)
4 Set the fan speed again. You can select the fan speed in four steps—low, medium, high, or chaos. Each time the button is pressed, the fan speed mode is shifted.
Dehumidification Mode
![FUNC. VANE ANGLE PLASMA TEMP. JET COOL FAN SPEED SWING SWING ROOM TEMP TIMER °C/F[5:SEC] SLEEP ON OFF SET CLEAR LIGHT TIME[3:SEC]](/content/2026/06/1211694/images/eb620dc3eaa3f09f769b0bf480af3a9759054235131616122bd80682fbb35e57.jpg)
1 Press the ON/OFF button. The unit will respond with beep sound.
2 Press MODE button to select Dehumidification Mode.

3 Set the fan speed. You can select the fan speed in five steps - super low,low, medium, high, or chaos. Each time the button is pressed, the fan speed mode is shifted.
Fan Mode
![FUNC. VANE ANGLE PLASMA TEMP. JET COOL ✓ FAN SPEED SWING SWING ROOM TEMP TIMER °C/F[5SEC] SLEEP ON OFF ✓ SET CLEAR LIGHT TIME[3SEC]](/content/2026/06/1211694/images/2d00208cbdd85d79827e87d3bd30a010ce8dbe1289f739f11d4f9d31a2e4f605.jpg)
1 Press the ON/OFF button. The unit will respond with beep sound.

2 Press MODE button to select Fan Mode.

3 Set the fan speed again. You can select the fan speed in five steps—super low,low, medium, high, orchaos. Each time the button is pressed, the fan speed mode is shifted.


NOTE
• NNaattuurraall WWiinndd bbyy tthhee cchhaaooss LLooggiicc
For more fresh feeling than other fan speed, press the Indoor Fan Speed Selector and set to chaos mode. In this mode, the wind blows like natural breeze by automatically changing fan speed according to the chaos logic.
• DDuurriinngg FFaann MMooddee
The outdoor compressor doesn't work.
Have a function to circulate the indoor as it sends out the air that doesn't have much temperature difference with indoor.
Auto Operation Mode
1 Press the ON/OFF button. The unit will respond with beep sound.

2 Press MODE button to select Auto Operation Mode.
3 Set the desired temperature.
The temperature and fan speed are automatically set by the electronic controls based on the actual room temperature. If you feel hot or cold, press TEMPERATURE SETTING buttons for more cooling or heating effect.
You cannot switch the indoor fan speed. It has already been set by the Auto Operation Mode rule.
NOTE
During Auto Operation Mode
- If the system is not operating as desired, manually switch to another mode. The system will not automatically switch from the cooling mode to the heating mode, or from heating to cooling, then you must set the mode and the desired temperature again.
Auto Changeover Mode

1 Press the ON/OFF button. The unit will respond with beep sound.
2 Press MODE button to select Auto Changeover Mode.

3 Set the desired room temperature.
* Setting Temp. Range in Auto Changeover Mode : 18\~30 °C (64\~86 °F)

To raise the temperature
To lower the temperature
4 You can select the fan speed in five steps—super low,low, medium, high, orchaos. Each time the button is pressed,the fan speed mode is shifted.
NOTE
During Auto changeover Mode
The air conditioner changes the operation mode automatically to keep indoor temperature. When room temperature vary over ±2 ^(4 ^) with respect to setting temperature, air conditioner keeps the room temperature within ±2 ^(4 ^) with respect to setting temperature by auto changeover mode.
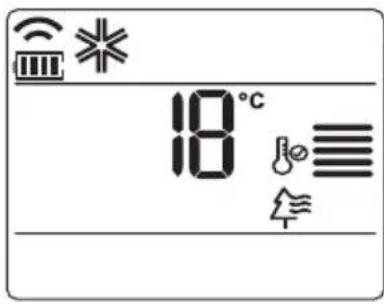
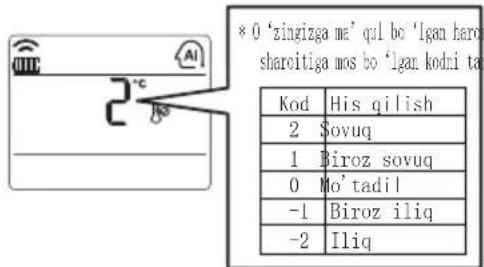
Auto Changeover Mode - Setting the Mode Change Temperature
This Function is to set the operating mode of the Auto Changeover Mode.
1 In Auto Changeover Mode, Press FUNCTION button to select Setting the Mode Change Temperature.
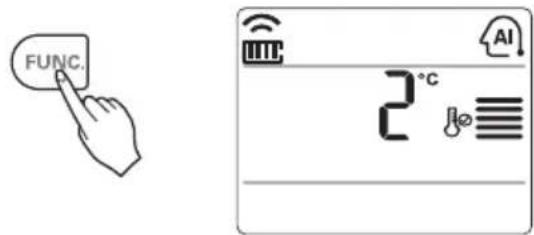
2 Press the TEMPERATURE SETTING button to set desired Mode Change Temperature. (Default value is 2^ C(4°F).)

To raise the temperature

* Mode Change Temp. Range : 1\~7 °C(2\~14 °F)
3 Complete the setting by pressing SET/CLEAR button.

NOTE
The Mode Change Temperature is the difference of temperature when from cooling mode to heating mode or from heating mode to cooling mode.
Ex) When setting temperature is 25 ^(76 ^) and room temperature is 20 ^(68 ^) , then operating mode is heating. If you set the mode change temperature to 2 ^(4 ^) , when the room temperature up to 27 ^(25 ^ + 2 ^)(80 ^(76 ^ + 4 ^)) , the unit start cooling operation.
Airflow Setting
Up/Down Airflow Direction Control (Optional)
The up/down airflow (Vertical Airflow) can be adjusted by using the remote controller.
1 Press the ON/OFF button to start the unit.
2 Press up/down airflow button and the louvers will swing up and down.
Press the up/down airflow button again to set the vertical louver at the desired airflow direction.

NOTE
- If you press the UP/DOWN AIRFLOW button, the horizontal airflow direction is changed automatically based on the Auto Swing algorithm to distribute the air in the room evenly and at the same time to make the human body feel more comfortable, as if enjoying a natural breeze.
- Always use the remote controller to adjust the up/down airflow direction. Manually moving the vertical airflow direction louver by hand, could damage the air conditioner.
- When the unit is shut off, the up/down airflow direction louver will close the air outlet vent of the system.
We can simply adjust the desired temperature
- Press the buttons to adjust the desired temperature

: Increase Temp. per one time pressing

: Decrease Temp. per one time pressing
Room temp: Indicate the current room temperature
Set temp: Indicate the temperature that user want to set
The cooling mode doesn't work if desired temperature is higher than room temperature Please lower the desired temperature
The heating mode doesn't work if desired temperature is lower than room temperature. Please increase the desired temperature
Whenever press ROOM TEMPERATURE button, the room temperature will be displayed within 5 seconds.
After 5 seconds, it turns to display the desired temperature.
Because of location of remote controller, the real room temperature and the this displayed value can be different.
Press ROOM TEMPERATURE button for 5 seconds, temperature unit change Celsius to Fahrenheit or Fahrenheit to Celsius.
SUB FUNCTION
Plasma Purification(Optional)
1 Press the ON/OFF button. The unit will respond with beep sound.

2 Press the PLASMA button. Plasma Purification will start when the button is pressed and stop when the button is pressed again.
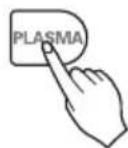
PLASMA Purification only
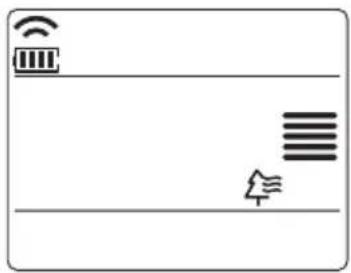
If you press the PLASMA button, Plasma Purification operates.
- Plasma filter is a technology developed by LG to get rid of microscopic contaminants in the intake air generating a plasma of high charge electrons. This plasma kills and destroys the contaminants completely to provide clean and hygienic air.
- This function can be used in any operation mode and any fan speed can be used while plasma filter is functioning.

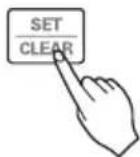
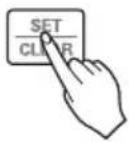
Auto Clean (Optional)
This function operate when the unit is turned off.
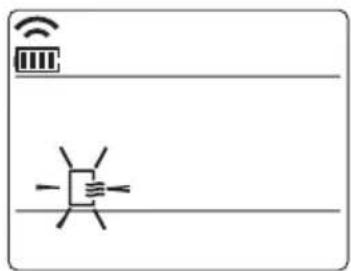
1 Press the FUNCTION SETTING button 1 time. Auto Clean symbol will blink.
2 Press the SET/CLEAR button to reserve or cancel the Auto Clean function.
If the Auto Clean function is reserved, whenever the unit is turned off, the indoor fan is still running for about 30 minutes internally without cooling or dehumidification operation. Also the louver is closed. This dries up any remains of moisture & cleans the unit internally.
Smart Clean (Optional)
The Smart Clean function can be used by setting to manual or automatic.
Auto Smart Clean operation
If the accumulated operation time of the product exceeds 30 hours, the Smart Clean automatically starts when the unit is turned off.
natural_image
Simple line drawing of a hand holding a phone with radiating lines, no text or symbols present1 Press the FUNCTION SETTING button 2 times. Smart Clean symbol will blink.
2 Press the SET/CLEAR button to reserve or cancel the Smart Clean function. You can set/clear with out on or off.

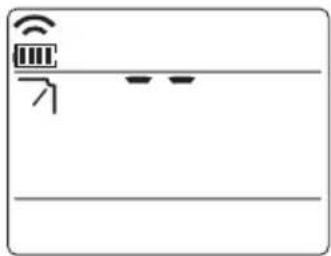
Manual Smart Clean operation

natural_image
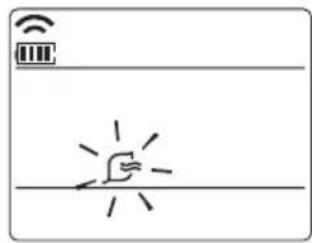
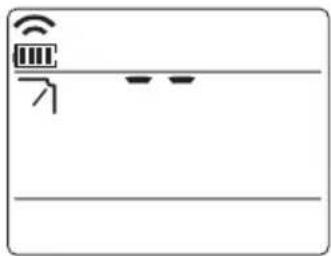
Simple line drawing of a Wi-Fi icon above a horizontal bar with a hand pointing at it (no text or symbols)1 When the unit stop, press the FUNCTION button to select Smart Clean. Smart Clean symbol blinks, then press SET/CLEAR button.
2 To stop Manual Smart Clean operation, press the FUNCTION button to select Smart clean and press SET/CLEAR button.
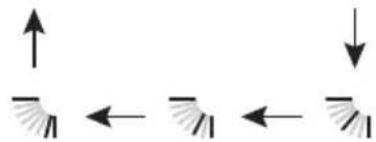
The brush clean a dust from the filter by moving from left to right or from right to left on the filter. The sucked dust is collected into the dust box.
The operating process of Smart Clean is different from the product type.
Individual vane angle control (Optional)
It is the function that can control 4 vane angles individually in the ceiling type 4Way cassette product group.
1 Press the VANE ANGLE button, Individual vane angle control symbol will blink.
When vane angle control button is pressed, it repeats in the order of No.1 vane → No.2 vane → No.3 vane → No.4 vane → vane angle control mode is released.
![[]](/content/2026/06/1211694/images/b07900f23da33adecfcb1fd445da2ce27091fb5a846ec6e0d037977b21f859ca.jpg)


No1. Vane No2. Vane No3. Vane

No4. VaneRelease
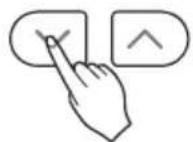
2 Set each vane angle by pressing TEMPERATURE SETTING buttons.
- Every time VANE ANGLE button is pressed, corresponding vane angle and set values are displayed.
- When temperature setting button is pressed, the display window appears as of the figure in the right, and the angle can be set to 1 \~6.


1st stage 2nd stage 3rd stage
natural_image
Pure diagram of two parallel lines with arrows indicating direction, no text or symbols present4th stage5th stage6
natural_image
Pure electrical circuit lines without any symbols3 Complete the setting by pressing SET/CLEAR button. Vane angle control mode is released.

- If you press the VANE ANGLE button 3sec. all vanes are set to standard angle.
- There may be differences between wireless remote controller up/down/left/right buttons and the wind discharge port directions.
- Set desired angle with checking the vane angle movement of the product.
- The individual vane control function is an additional function of a product, and it may not work in some products.
TIMER
Setting the Current Time
1 Press the SET / CLEAN button for 3 seconds.

2 Press TIME SETTING buttons until the desired time is set. (If you press down the button for a long time, it will change quickly in the units of 10 min.)
3 Press the SET / CLEAR button.
NOTE
Check the indicator for A.M. and P.M.
Sleep Timer Setting
1 Press the TIMER button to turn timer on or off.

2 Press TIME SETTING buttons until the desired time is set. (7 hours is the maximum setting)
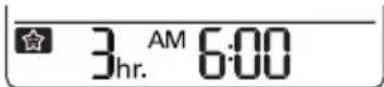
Timer Sleep
3 Press the SET / CLEAR button.

On Timer Setting
1 Press the ON button to turn timer on or off.

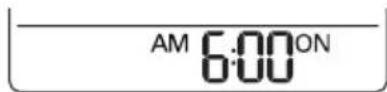
Timer ON
2 Press TIME SETTING buttons until the desired time is set.
3 Press the SET / CLEAR button.
Off Timer Setting
1 Press the OFF button to turn timer on or off.
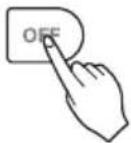
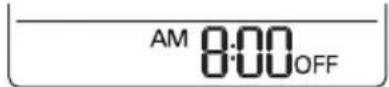
Timer OFF
2 Press TIME SETTING buttons until the desired time is set.

3 Press the SET / CLEAR button.

To cancel the Timer Setting
- If you wish to cancel all timer setting, press the CLEAR ALL button.

- If you wish to cancel each timer setting, press the each timer button to turn timer sleep or on or off as you want.
And then press the SET/CLEAR button aiming the remote controller at the signal receptor.
(The timer lamp on the air conditioner and the display will go off.)
MAINTENANCE AND SERVICE
Indoor Unit
Grille, Case and Remote Control
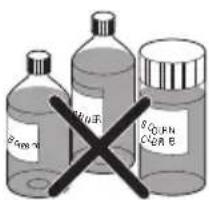
- Turn the system off before cleaning, To clean, wipe with a soft, dry cloth. Do not use bleach or abrasives.

NOTE
Supply power must be disconnected before cleaning the indoor unit.
Air Filters
The air filters behind the front grille should be checked and cleaned once every 2 weeks or more often if necessary.

natural_image
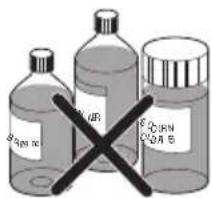
Close-up of a hand pressing down on a white ventilation grille (no text or symbols visible)- Never use any of the followings:
Water hotter than 40 °C.
Could cause deformation and or discoloration.
Volatile substances.
Could damage the surfaces of the air conditioner.
- Remove the Air filters.
Take hold of the tab and pull slightly forward to remove the filter.

CAUTION
When the air filter is to be removed, do not touch the metal parts of the indoor unit.
It may cause an injury.
- Clean dirt from the air filter using a vacuum cleaner or washing with water.
If dirt is conspicuous, wash with a neutral detergent in lukewarm water.
If hot water (40 °C or more) is used, it may be deformed.
- After washing with water, dry well in the shade.
Do not expose the air filter to direct sunlight or heat from a fire when drying it.
- Install the air filter.
Operation Tips!
| Do not overcool the room.This is not good for the health and wastes electricity. | Keep blinds or curtains closed.Do not let direct sunshine enter the room when the air conditioner is in operation. | Keep the room temperature uniform.Adjust the vertical and horizontal airflow direction to ensure a uniform temperature in the room. |
| Make sure that the doors and windows are shuttight.Avoid opening doors and windows as much as possible to keep the cool air in the room. | Clean the air filter regularly.Blockages in the air filter reduce the airflow and lower cooling and dehumidifying effects. Clean at least once every two weeks. | Ventilate the room occasionally.Since windows are kept closed, it is a good idea to open them and ventilate the room now and then. |
When the air conditioner is not going....
When air conditioner is not going to be used for a long time.
- Operate the air conditioner at the following settings for 2 to 3 hours.
Type of operation: Fan operation mode. (Refer to page "Fan Mode".)
This will dry out the internal mechanisms.
- Turn off the breaker.

CAUTION
Turn off the breaker when the air conditioner is not going to be used for a long time.
Dirt may collect and may cause a fire.
- Remove the batteries from the Remote Controller.
Helpful information
The air filters and your electric bill.
If the air filters become clogged with dust, the cooling capacity will drop, and 6% of the electricity used to operate the air conditioner will be wasted.
When the air conditioner is to be used again.
- Clean the air filter and install it in the indoor unit. (Refer to page "MAINTENANCE AND SERVICE".)
- Check that the air inlet and outlet of the indoor/outdoor unit are not blocked.
- Check that the ground wire is connected correctly. It may be connect to the indoor unit side.
Disposal of Waste Batteries/Accumulators
- This symbol may be combined with chemical symbols for mercury (Hg), cadmium (Cd) or lead (Pb) if the battery contains more than 0.0005% of mercury, 0.002% of cadmium or 0.004% of lead.
- All batteries/accumulators should be disposed separately from the municipal waste stream via designated collection facilities appointed by the government or the local authorities.
- The correct disposal of your old batteries/accumulators will help to prevent potential negative consequences for the environment, animal and human health.
- For more detailed information about disposal of your old batteries/accumulators, please contact your city office, waste disposal service or the shop where you purchased the product.
Troubleshooting Tips! Save time and money!
Check the following points before requesting repairs or service.... If the malfunction persist, please contact your dealer.
| The air conditioner does not operate.- Have you made a mistake in timer operation?- Has the fuse blown or has the circuit breaker been tripped? | The room has a peculiar odor.- Check that this is not a damp smell exuded by the walls, carpet, furniture or cloth items in the room. | It seems that condensation is leaking from the air conditioner.- Condensation occurs when the airflow from the air conditioner cools the warm room air. | Air conditioner does not operate for about 3 minutes when restart.- This is the protector of the mechanism.- Wait about three minutes and operation will begin. |
| Does not cool or heat effectively.- Is the air filter dirty? See air filter cleaning instructions.- The room may have been very hot when the room air conditioner was first turned on. Allow time for it to cool down.- Has the temperature been set incorrectly?- Are the indoor unit's air inlet or outlet vents obstructed? | The air conditioner operation is noisy.- For a noise that sounds like water flowing.* This is the sound of freon flowing inside the air conditioner unit.- For a noise that sounds like the compressed air releasing into atmosphere.- This is the sound of the dehumidifying water being processed inside the air conditioning unit. | Crack sound is heard.- This sound is generated by the expansion/ constriction of the front panel, etc. due to changes of temperature. | Remote control display is faint, or no display at all.- Are the batteries depleted?- Are the batteries inserted in the opposite (+) and (-) directions? |
| Filter sign lamp (LED) is ON.- Cleaning the filter, press the Timer button and ◀button of wired remote controller at the same time for 3 sec. | The error code is occurred after lightning struck- This product has been applied to the over current protection circuit.Error can occur, but it is normal behavior. After few minutes, It will operate normally. |
Call the service immediately in the following situations
- Anything abnormal such as burning smell, loud noise etc. happen. Stop the unit and turn the breaker off. Never try to repair by yourself or restart the system in such cases.
- Main power cable is too hot or damaged.
- Error code is generated by self diagnosis.
- Water leaks from indoor unit even if the humidity is low.
- Any switch, breaker (safety, earth) or fuse fails to work properly
User must carry routine checkup & cleaning to avoid unit's poor performance.
In case of special situation, the job must be carried out by service person only.

ПРИМЕЧАНИЕ
natural_image
Technical line drawing of a handheld device with a scroll wheel and a separate mobile phone showing keypad (no text or symbols)
ПРИМЕЧАНИЕ
natural_image
Simple line drawing of a hand holding a device with radiating lines, no text or symbols presentnatural_image
Simple line drawing of a Wi-Fi interface with sensor icon and hand gesture (no text or symbols)natural_image
Pure diagram of two vertical bars with arrows indicating direction, no text or symbols present4-й шаг5-й шаг6-й

natural_image
Simple line drawing of a device interface with icons and lines (no text or symbols)natural_image
Close-up of a hand pressing down on a ventilation grille (no text or symbols visible)- Не используйте:

ПРИМИТКА
natural_image
Technical line drawing of a handheld device with a scroll wheel and a separate mobile phone (no text or symbols)
ПРИМИТКА
natural_image
Simple line drawing of a hand holding a device with radiating lines, no text or symbols presentnatural_image
Simple line drawing of a Wi-Fi icon above a horizontal bar with a hand gesture below (no text or symbols)4-й крок5-й крок6-й

natural_image
Pure electrical circuit lines without any symbolsnatural_image
Close-up of a hand pressing down on a white ventilation grille (no text or symbols visible)
ECKEPTNE
natural_image
Technical line drawing of a handheld device with a screwdriver and a separate mobile phone (no text or symbols)
ECKEPTNE
natural_image
Simple line drawing of a hand holding a device with radiating lines, no text or symbols presentnatural_image
Simple line drawing of a Wi-Fi interface with sensor icon and hand gesture (no text or symbols)Калак №4Жіберу
natural_image
Simple line drawing of a device interface with Wi-Fi symbol and two horizontal lines (no text or labels)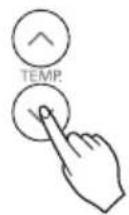
natural_image
Pure diagram of two vertical beams with opposing arrows indicating direction (no text or symbols)4-ші баскыш5-ші бас
natural_image
Close-up of a hand pressing down on an air vent grille (no text or symbols visible)
ЗАЎВАГА
natural_image
Technical line drawing of a handheld device with a scroll wheel and a separate mobile phone showing keypad (no text or symbols)
ЗАЎВАГА
Калі вы націснеце кнопку ПЛАЗМА, запусціцца Плазменная Ачыстка.
natural_image
Simple line drawing of a hand holding a device with radiating lines, no text or symbols presentnatural_image
Simple line drawing of a Wi-Fi interface with sensor icon and hand gesture (no text or symbols)№4 ЛопасцьСкідванне
2 Усталюйце вугал кожнай лопасці, націскаючы кнопку TEMPERATURE SETTING (НАСТРОЙКІ ТЭМПЕРАТУРЫ).
natural_image
Simple line drawing of a device interface with icons and lines (no text or symbols)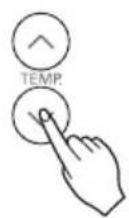
natural_image
Pure diagram of two vertical arrows pointing upward and downward, with no text or symbols4ы узровень5ы узрс
3 Скончыце настройку, націснуўшы кнопку SET/CLEAR (УСТАЛЯВАЦЬ/ВЫДАЛІЦЬ).
natural_image
Close-up of a hand pressing down on a striped air vent (no text or symbols visible)12 Sovitish rejimi–Sovitish quvvati
13 Sovitish rejimi–Qulay sovutish
14 Isitish rejimi
15 Namsizlantirish rejimi
16 Ventilator rejimi
17 Avtomatik ishlatish rejimi
18 Avtomatik tarzda almashadigan rejim
19 Avtomatik tarzda o'zgartirish rejimi – Haroratni o'zgartirish rejimini o'rnatish
20 Havo oqimi yo'nalishini o'rnatish
20 Selsiy/Farengeyt o'tishi
21 Haroratni o'rnatish/Xona haroratini tekshirish
22 SUB-FUNKSIYA

IZOH
- Doim ikkita bir xil turdagi batareyani ishlating/almashtiring.
- Agar tizimdan uzoq vaqt foydalanilmaydigan bo'lsa, batareyalar xizmat muddatini saqlash uchun ularni pultdan olib qo'ying.
- Agar masofa pulti displey ekrani xiralasha boshlasa, har ikki batareyani almashtiring.
Simsiz masofa pultining ishga shayligini ta'minlash
natural_image
Technical line drawing of a handheld device with a scroll wheel and a separate mobile phone showing keypad (no text or symbols)
IZOH
- Masofa pultini aslo bevosita quyosh nuri ta'siri ostida qoldirmang.
- Signal aloqasi ko'ngildagidek ta'minlanishi uchun signal uzatgich va signal qabul qiluvchi datchik doim toza bo'lishi lozim. Ularni tozalash uchun yumshoq matodan foydalaning.
- Agar masofa pulti orqali boshqa uy jihozlari ham ishlab ketsa, masofa pulti joyini o'zgartiring yoki texnik xizmat ko'rsatuvchi ustaga murojaat qiling
Ishlatish usuli
Sovitish rejimi–Standart ishlatish
1 ON/OFF tugmasini bosing. Qurilma ovozli signal beradi.

2 Isitish rejimini tanlash uchun MODE tugmasini bosing.
3 TEMP tugmasini bosib, kerakli haroratni o'rnating. Xona haroratini tekshirish uchun ROOM TEMPERATURE CHECKING tugmasini bosing. Kerakli harorat xona haroratidan pastroq bo'lgan hollarda isituvchi shamol purkalmaydi.
* O'rnatiladigan harorat diapazoni : 18\~30 °C(64\~86 °F)
Haroratni ko'tarish
Sovitish rejimi–Sovitish quvvati
1 ON/OFF tugmasini bosing. Qurilma ovozli signal beradi.
2 Isitish rejimini tanlash uchun MODE tugmasini bosing.

3 JET COOL tugmasini bosing. Blok sovitish rejimida o'ta yuqori ventilyator tezligida ishlay boshlaydi. * Devorga o'rnatiladigan modellar 30 daqiga davomida kuchli sovutish rejimida ishlaydi.
4 Sovitish quvvati rejimini bekor qilish uchun Tez sovitish tugmasini yoki ventilyator tugmasini va yoki xona haroratini o'rnatish tugmasini yana bosing, shunda blok sovitish rejimidagi yuqori ventilyator tezligida ishlaydi.

yoki yoki


Sovitish rejimi-Qulay sovutish
Bu funksiya xona ichidagi harorat kerakli haroratga erishganidan keyin mahsulotni o'chirmagan holda yoqimli hisni ushlab turish uchun sovutish kuchini avtomatik tarzda boshqaradi.

1 YOQ./O'Ch tugmasini bosing. Jihoz tovushli signal bergan holda javob beradi.
2 Isitish rejimini tanlash uchun MODE tugmasini bosing.

3 Qulay sovutish ikonkasi ko'rsatilgunicha FUNC. tugmasini qayta-qayta bosing.

4 O'rnatish uchun SET/CLEAR tugmasini bosing.

Isitish rejimi
Bu funksiya faqat issiqlik nasosi bor modellar uchun.
![30°C FUNC. VANE ANGLE PLASMA ° 功 功 ° MODE TEMP. JET COOL FAN SPEED SWING SWING ROOM TEMP TIMER °C/FI[SEC] SLEEP ON OFF SET CLEAR LIGHT TIME(3SEC)](/content/2026/06/1211694/images/f69c733cf0e58ab721878be050917dff93dfd652afa0396c5fc6eb02c30053f9.jpg)
1 ON/OFF tugmasini bosing. Qurilma ovozli signal beradi.

2 Isitish rejimini tanlash uchun MODE tugmasini bosing.

3 TEMP tugmasini bosib, kerakli haroratni o'rnating. Xona haroratini tekshirish uchun ROOM TEMPERATURE CHECKING tugmasini dosing. Kerakli harorat xona haroratidan pastroq bo'lgan hollarda isituvchi shamol purkalmaydi.
* Issiqlik rejimida o'rnatiladigan harorat diapazoni : 16\~30 °C (60 °F\~86 °F)
4 Yana ventilator tezligini o'rnating. Ventilyator tezligining to'rt darajasidan birini tanlashingiz mumkin - past, o'rtacha, yuqori va xaos. Har safar tugma bosilganda ventilatorning tezlik rejimi o'zgaradi.

Namsizlantirish rejimi
![FUNC. VANE ANGLE PLASMA TEMP. MODE JET COOL FAN SPEED SWING SWING ROOM TEMP TIMER °C/F[5(SEC)] SLEEP ON OFF SET CLEAR LIGHT TIME[3(SEC)]](/content/2026/06/1211694/images/c2f566e72e9ccce436a51eef307cfdbaa683d58ec5200695e8843995b12f2b24.jpg)
1 ON/OFF tugmasini bosing. Qurilma ovozli signal beradi.

2 Namsizlantirish rejimini tanlash uchun MODE tugmasini bosing.
3 Ventilator tezligini o'rnating. Ventilyator tezligining to'rt darajasidan birini tanlashingiz mumkin - past, o'rtacha, yuqori va xaos. Har safar tugma bosilganda ventilatorning tezlik rejimi o'zgaradi.

Ventilator rejimi
![FUNC. VANE ANGLE PLASMA TEMP. JET COOL FAN SPEED SWING SWING ROOM TEMP TIMER °C/F[5sec] SLEEP ON OFF SET CLEAR LIGHT TIME(3sec)](/content/2026/06/1211694/images/9180c99ee23344cc66e0ea1f7f03270156cf5e93b08ddd99ef7037864623d58c.jpg)
1 ON/OFF tugmasini bosing. Qurilma ovozli signal beradi.

2 Ventilyator rejimini tanlash uchun MODE tugmachasini bosing.

3 Yana ventilator tezligini o'rnating. Ventilyator tezligining to'rt darajasidan birini tanlashingiz mumkin - past, o'rtacha, yuqori va xaos. Har safar tugma bosilganda ventilatorning tezlik rejimi o'zgaradi.

IZOH
- Tartibsizlik mantig'i yordamida tabiiy shamol hosil qilish
Ventilyatorning boshqa tezligi beradiganidan ko'ra ko'proq sarinlikni his qilish uchun Ichki ventilyator tezlizini tanlash moslamasini bosing va o'ta shiddatlilik regimini o'rnating. Ushbu rejimda shamol tartibsizlik mantig'iga asoslanib, ventilyator tezligini avtomatik tarzda o'zgartiradi va tabiiy shabadaga o'xshab esa boshlaydi. - Ventilyator rejimida
Tashqi kompressor ishlamaydi. Ihcki havoni aylantiradigan funksiyani ishlating va u ichki havo bilan farqi bo'Imagan havoni tashqariga haydaydi.
Avtomatik ishlatish rejimi
1 ON/OFF tugmasini bosing. Qurilma ovozli signal beradi.
2 Avtomatik ishlatish rejimini tanlash uchun MODE tugmasini bosing.

3 Kerakli haroratni o'rnating.
Harorat va ventilator tezligi amaldagi xona haroratiga asoslangan holda elektronik boshqaruv elementlari yordamida avtomatik ravishda o'rnatiladi. Agar issiq yoki sovuqni sezsangiz, ko'proq sovuq yoki issiq ta'sirini o'rnath uchun TEMPERATURE SETTING tugmasini bosing. Siz ichki blok ventilyatori tezligini o'zgartira olmaysiz. Uni allaqachon Avtomatik ishlatish rejimi qoidasi o'rnatib bo'lgan.

! IZOH
2 Istalgan haroratni o'zgartirish rejimini o'rnatish uchun TEMPERATURE SETTING tugmasini bosing. (Sukut bo'yicha qiymat 2 °C(4 °F).)

Haroratni ko'tarish

* Rejim almashish harorat diapazoni : 1\~7 °C(2\~14 °F)
3 SET/CLEAR tugmasini bosib o'rnatishni yakunlang.

! IZOH
Haroratni o'zgartirish rejimi sovitish rejimidan isitish rejimiga yoki isitish rejimidan sovitish rejimiga o'tish harorati o'rtasidagi farqdir.
Misol) Agar o'rnatilgan harorat 25 °C(76 °F) va xonadagi amaldagi harorat 20 °C(68 °F) bo'lsa, konditsioner isitish rejimida ishlaydi. Xona harorati 27 °C(25 °C + 2 °C)(80 °F(76 °F + 4 °F)) gacha bo'lganda, agar rejim almashish haroratini 2 °C(4 °F) ga sozlasangiz, konditsioner sovutish rejimini ishga tushiradi.
Havo oqimi yo'nalishini o'rnatish
Agar PLAZMA tugmasi bosilsa, plazma tozalash funksiyasi ishlaydi.
natural_image
Simple line drawing of a hand holding a device with radiating lines, no text or symbols present1 FUNKSIYA O'RNATISH tugmasini 2 marta bosing. Aqlli tozalash belgisi yonib o'chadi.
Qo'lda bajariladigan aqli tozalash operatsiyasi

natural_image
Simple line drawing of a Wi-Fi interface with sensor icon and hand gesture (no text or symbols)1 Jihoz to'xtaganda, FUNKSIYA tugmasini bosib Aqlli tozalashni tanlang. Aqlli tozalash belgisi yonib o'chadi, so'ng, O'RNATISH/BEKOR QILISH tugmasini bosing.
2 Qo'lda bajariladigan aqli tozalash operatsiyasini bekor qilish uchun FUNCTION tugmasini bosib Aqli tozalashni tanlang va SET/CLEAR tugmasini dosing.
Cho'tkani chapdan o'ngga yoki o'ngdan chapga yurg'izgan holda filtrdagi changni tozalang.
So'rilgan changlar chang qutiga to'planadi.
4-kurak Chiqish
![[]](/content/2026/06/1211694/images/b5800b45a8f20b94c8de9aa791c1c8eadd76535f04ca488fd416bcbeaee0874c.jpg)
2 HARORATNI SOZLASH tugmalari yordamida kuraklar burchagini sozlang.
- Har gal KURAK BURCHAGI tugmasi bosilganda, tegishli kurak burchagi o'rnatilgan qiymat ko'rsatiladi.
- Haroratni sozlash tugmasi bosilganda, displey oynasida o'ng tomonda berilgan rasm ko'rinadi, burchakni 1\~6 diapazonda sozlash mumkin.
natural_image
Simple line drawing of a device interface with icons and lines (no text or symbols)

flowchart
graph TD
    A["1-bosqich 2-bosqich 3-bosqich"] --> B["←"]
    B --> C["←"]
    C --> D["←"]
    D --> E["←"]
    E --> F["←"]
    F --> G["←"]
    G --> H["←"]
    H --> I["←"]
    I --> J["←"]
    J --> K["←"]
    K --> L["←"]
    L --> M["←"]
    M --> N["←"]
    N --> O["←"]
    O --> P["←"]
    P --> Q["←"]
    Q --> R["←"]
    R --> S["←"]
    S --> T["←"]
    T --> U["←"]
    U --> V["←"]
    V --> W["←"]
    W --> X["←"]
    X --> Y["←"]
    Y --> Z["←"]
4-bosqich5-bosqic
3 SET/CLEAR tugmasini bosib o'rnatishni yakunlang. Kurakni sozlash rejimidan chiqiladi.
- Agar KURAK BURCHAGI tugmasini 3 soniya bosib tursangiz, barcha kuraklar standart burchakka sozlanadi.
- Simsiz masofa pulti tepaga/pastga/o'ngga/chapga tugmalari va havo oqimi chiqarish porti yo'nalishlari o'rtasida farqlar bo'lishi mumkin.
- Jihoz kurak burchagi harakatini tekshirgan holda kerakli burchakni o'rnating.
- Kuraklar burchagini individual sozlash funksiyasi jihozning qo'shimcha funksiyasi bo'lib, bu funksiya ayrim konditsionerlarda ishlamasligi mumkin.
TAYMER
Joriy vaqtni o'rnatish
1 SET / CLEAN tugmasini 3 soniya bosib turing.
2 Kerakli vaqt o'rnatilmaguncha TIME SETTING tugmalarini bosing. (Agar tugmani uzoq vaqt bosib tursangiz, u 10 daqiqa birligida tezda o'zgarib boradi.)
3 SET / CLEAR tugmasini bosing.


! IZOH
Indikatorda A.M. yoki P.M. Aks etayotganligini tekshiring.
O'chirish taymerini sozlash
1 Taymerni yoqish yoki o'chirish uchun TIMER tugmasini bosing.
2 Kerakli vaqt o'rnatilmaguncha TIME SETTING tugmalarini bosing. (eng ko'pi bilan 7 soatgacha tanlashingiz mumkin)
3 SET / CLEAR tugmasini bosing.

3 AM 6:00 3hr.
Uyqu taymeri


Yoqish taymerini sozlash
1 Taymerni yoqish yoki o'chirish uchun ON tugmasini bosing.
AM 6:00 ON
Taymer YOQ.
2 Kerakli vaqt o'rnatilmaguncha TIME SETTING tugmalarini bosing.
3 SET / CLEAR tugmasini bosing.

O'chirish taymerini sozlash
1 Taymerni yoqish yoki o'chirish uchun OFF tugmasini bosing.


Taymer O'Ch.
2 Kerakli vaqt o'rnatilmaguncha TIME SETTING tugmalarini bosing.

3 SET / CLEAR tugmasini bosing.

natural_image
Close-up of a hand pressing down on a striped ventilation grille (no text or symbols visible)- Quyidagilarni hech qachon ishlatmang: Harorati 40°C dan balandroq bo'lgan issiq suv. Bu konditsionerning deformatsiyalanishi va/yoki rangining o'chishiga olib kelishi mumkin. Uchuvchan moddalar. Konditsioner yuzasini shikastlashi mumkin.
- Havo filtrarini yechib oling. Filtrni yechib olish uchun tagligidan ushlagan holda biroz oldinga tortiladi.

DIQQAT
Havo filtrini olish kerak bo'lganda ichki blokning metal qismlariga tegmang. Bu jarohatlanishga olib kelishi mumkin.
- Havo filtridagi kirlarni changyutgich yordamida yoki suvda yuvish orqali ketkazing.
Agar kir ketmasa, mo'tadil kir yuvish vositasi bilan iliq suvda yuving.
Agar tozalashda qaynoq suvdan (40 °C yoki undan ortiq) foydalanilsa, konditsioner deformatsiyaga uchrashi mumkin.
- Suv bilan yuvgandan keyin soya joyda quriting. Havo filtrini quritganda, to'g'ridan-to'g'ri quyosh nurlari yoki olov issiqligi ta'siri ostida bo'lgan yerga qo'ymang.
- Havo filtrini o'rnating.

- TIPS FOR SAVING ENERGY
- For your records
- IMPORTANT SAFETY INSTRUCTIONS
- READ ALL INSTRUCTIONS BEFORE USING THE APPLIANCE.
- WARNING
- CAUTION
- TABLE OF CONTENTS
- TIPS FOR SAVING EN- ERGY
- IMPORTANT SAFETY IN-STRUCTIONS
- BEFORE USE
- PRODUCT INTRODUC-TION
- OWNER'S INSTRUCTION
- TIMER
- MAINTENANCE AND SERVICE
- BEFORE USE
- Preparing for operation
- Usage
- Cleaning and maintenance
- Service
- PRODUCT INTRODUCTION
- Name and function of parts
- Operation Indication Lamps
- Wireless Remote Controller
- How to insert the Batteries
- NOTE
- Wireless Remote Controller Maintenance
- Operating Method
- OWNER'S INSTRUCTION
- Cooling Mode - Standard Operation
- Cooling Mode - Power Cooling
- Cooling Mode - Comfort Cooling
- Heating Mode
- Dehumidification Mode
- Fan Mode
- Auto Operation Mode
- During Auto Operation Mode
- Auto Changeover Mode
- During Auto changeover Mode
- Auto Changeover Mode - Setting the Mode Change Temperature
- Airflow Setting
- Up/Down Airflow Direction Control (Optional)
- SUB FUNCTION
- Plasma Purification(Optional)
- Auto Clean (Optional)
- Smart Clean (Optional)
- Auto Smart Clean operation
- Manual Smart Clean operation
- Individual vane angle control (Optional)
- Press the VANE ANGLE button, Individual vane angle control symbol will blink.
- Set each vane angle by pressing TEMPERATURE SETTING buttons.
- Complete the setting by pressing SET/CLEAR button. Vane angle control mode is released.
- TIMER
- Setting the Current Time
- Sleep Timer Setting
- On Timer Setting
- Off Timer Setting
- To cancel the Timer Setting
- MAINTENANCE AND SERVICE
- Indoor Unit
- Air Filters
- Operation Tips!
- When the air conditioner is not going....
- When air conditioner is not going to be used for a long time.
- Helpful information
- When the air conditioner is to be used again.
- Disposal of Waste Batteries/Accumulators
- Troubleshooting Tips! Save time and money!
- Call the service immediately in the following situations
- ПРИМЕЧАНИЕ
- ПРИМИТКА
- ECKEPTNE
- ЗАЎВАГА
- SUB-FUNKSIYA
- IZOH
- Simsiz masofa pultining ishga shayligini ta'minlash
- Ishlatish usuli
- Sovitish rejimi–Standart ishlatish
- Sovitish rejimi–Sovitish quvvati
- Sovitish rejimi-Qulay sovutish
- Isitish rejimi
- Namsizlantirish rejimi
- Ventilator rejimi
- Avtomatik ishlatish rejimi
- ! IZOH
- Havo oqimi yo'nalishini o'rnatish
- Qo'lda bajariladigan aqli tozalash operatsiyasi
- TAYMER
- Joriy vaqtni o'rnatish
- O'chirish taymerini sozlash
- Yoqish taymerini sozlash
- DIQQAT
Brand : LG
Model : UV36WC
Category : Washing machine