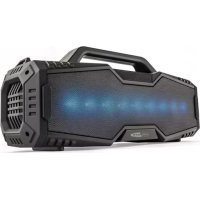
HFG509BTN - Speaker CALIBER - Free user manual and instructions
Find the device manual for free HFG509BTN CALIBER in PDF.

User questions about HFG509BTN CALIBER
0 question about this device. Answer the ones you know or ask your own.
Ask a new question about this device
Download the instructions for your Speaker in PDF format for free! Find your manual HFG509BTN - CALIBER and take your electronic device back in hand. On this page are published all the documents necessary for the use of your device. HFG509BTN by CALIBER.
USER MANUAL HFG509BTN CALIBER
text_image
CALIBER AUDIO TECHNOLOGY
natural_image
Solid dark rectangular object with a white curled corner, no visible text or symbols.HFG 509BTN
Manual
ENGLISH
IMPORTANT SAFETY INSTRUCTIONS
When used in the directed manner, this unit has been designed and manufactured to ensure your personal safety. However, improper use can result in potential electrical shock or fire hazards. Please read all safety and operating instructions carefully before installation and use, and keep these instructions handy for future reference. Take special note of all warnings listed in these instructions and on the unit.
1. Water and Moisture
The unit should not be used near water. For example: near a bathtub, washbowl, kitchen sink, laundry tub, swimming pool or in a set basement.
2. Ventilation
The unit should be situated so that its location or position does not interfere with its proper ventilation. For example, it should not be situated on a bed, sofa, rug or similar surface that may block the ventilation openings. Also, it should not be placed in a built-in installation, such as a bookcase or cabinet, which may impede the flow of air through the ventilation openings.
3. Heat
The unit should be situated away from heat sources such as radiators, heat registers, stoves or other appliances (including amplifiers) that produce heat.
4. Power Source
The unit should be connected to a power supply only of the type described in the operating instructions or as marked on the appliance.
5. Power Cord Protection
Power supply cords should be routed so that they are not likely to be walked on or pinched by items placed upon or against them. It is always best to have a clear area from where the cord exits the unit to where it is plugged into an AC wall outlet.
6. Cleaning
Clean only with dry cloth – The appliance should be cleaned only as recommended by the manufacturer.
7. Object and Liquid Entry
Care should be taken so that objects do not fall and liquids are not spilled into any openings or vents located on the product,
8. Attachments
Do not use attachments not recommended by the product manufacturer
9. Lightning and Power Surge Protection
Unplug the unit from the wall outlet. This will prevent damage to the product due to lightning and power-line surges.
10. Overloading
Do not overload wall outlets, extension cords, or integral convenience receptacles as this can result in a risk of fire of electric shock.
11. Damage Requiring Service
This unit should be serviced by qualified service personnel when;
A. The power supply cord or plug has been damaged.
B. Objects have fallen into or liquid has been spilled into the enclosure.
C. The unit has been exposed to rain.
D. The unit has been dropped or the enclosure damaged,
E. The unit exhibits a marked change in performance or does not operate normally.
12. Periods of Nonuse
If the unit is to be left unused for an extended period of time, such as a month or longer, the power cord should be unplugged from the unit to prevent damage or corrosion.
13. Servicing
The user should not attempt to service the unit beyond those methods described in the user's operating instructions. Service methods not covered in the operating instructions should be referred to qualified service personnel.
14. WARNING :
- To reduce the risk of fire or electric shock, do not expose this apparatus to rain or moisture. The apparatus shall not be exposed to dripping or splashing and that objects filled with liquids, such as vases, shall not be placed on apparatus.
- The mains plug is used as disconnect device, the disconnect device shall remain readily operable.
- Batteries shall not be exposed to excessive heat such as sunshine, fire or the like.
These symbols may be found on the device and shall indicate the following:

The lightning symbol warns the user of dangerously high voltages inside the case.

The exclamation mark symbol points to important instruction or maintenance remarks in the accompanying guidelines.
CAUTION: Changes or modifications not expressly approved by the party responsible for compliance could void the user's authority to operate the equipment.
LOCATION OF CONTROLS
Top View

text_image
op View 1 2 3 4 5 6 7 8Front View

text_image
9 10 21 11 12Back View

natural_image
Technical line drawing of a device with two circular components and a central control panel (no text or symbols)REMOTE CONTROL

text_image
1 15 17 MATS FWR MODE 16 18 8 5 6 4 7 19 20 2 MUSIC MOVE 31. Power On/Standby Button
Press to turn on/off the unit
2. MUSIC Button
Press to choose music mode
3. MOVIE Button
Press to choose movie surround mode
4. Play/Pause ▶ button
Press to play or pause the current track
When there is a phone call, press to answer or end call.
5. Button
Press once to return to the beginning of current track or previous track.
6. ▶▶ Button
Press once to advance to the next track.
7. -/▼ Button
Press to adjust volume level down.
8. +/▲ Button
Press to adjust volume level up.
9. Remote Sensor
-
Microphone
-
Pilot Lamp
-
USB Port
- AUX-IN JACK
- AC Power Cord
- Button
Press to hang up the phone
- PAIR Button
Press and hold for 3 seconds to activate pairing mode.
If the speaker is already connected and you would like to connect to a different device, press and hold for 3 seconds to break the current connection and initiate pairing.
- MUTE Button
Press to mute the sound
- MODE Button
To select different play modes: Bluetooth/USB/Aux
- Button
To search down during play
- ▶▶ Button
To search up during play
- NFC tab area
FIRST USE OF THE DEVICE/INTRODUCTION
Power Supply
This unit is designed to operate on AC 100-240V\~50/60 Hz household mains supply.
Power of Remote Control
To use the remote control, please ensure the remote control battery CR2032 (included) is installed properly and take the insulation clarity paper out.(Once you stop to use the remote control, please Insert in it same as before). Replace the remote control battery when it stops working. It is highly recommended to use a good quality button cell.

BATTERY NOTE AND CARE
- Danger of explosion if the battery is replaced incorrectly. Replace only with the same type battery.
- Only use a good quality known brand battery to ensure the longest life and best performance.
- If the remote is not to be used for an extended period of time, remove the battery. An old or leaking battery can cause damage to the remote and may void the warranty.
- Do not dispose of batteries in fire. Batteries may leak or explode.
- Do not try to recharge batteries that are not intended to be recharged; they can overheat, rupture and leak (Follow battery manufacturer's directions).
GETTING STARTED
WARNING: Do not apply power to the unit until all of your connections are made.
- Plug the AC cord plug into a convenient AC wall outlet.
- The Pilot lamp on the bottom of the unit will lights up in Red color. The unit enters into STANDYBY Mode.
- Press the ⏻ power button turn on/off the unit.
- Remove the AC cord out of the wall outlet if you want to switch off the main voltage completely.
SPECIAL TIPS
Pilot lamp to show different play mode
Press the MODE Button during power on, the play mode will be changed circularly from Bluetooth mode, USB mode, AUX-IN mode, meanwhile, the Pilot lamp on the bottom of the unit will lights with different colors:
Blue for Bluetooth mode
Blue+ Green for USB mode
Green for Aux-in mode
PLAYBACK VIA BLUETOOTH
Bluetooth involves a technology for wireless radio connection of devices over a short distance. Devices with Bluetooth standard are transmitting between 2.402 and 2.480 GHz in the ISM band (Industrial, Scientific and Medical). Interference can be caused for example by WLAN-networks, DAB radios, cordless phones, or microwave ovens which work on the same frequency band.
This device offers you the possibility to use a Bluetooth enabled device. The functional radius is limited to approx.10 metres depending on the surroundings and the unit used.
If your playing device supports the A2DP profile (Advanced Audio Distribution Profile) and has a music-player function, then you can also wirelessly transfer music to the device. The A2DP profile involves a multi-vendor Bluetooth profile. By streaming, stereo-audio signals are wirelessly transferred between the playing device (source) and the receiving device.
Due to the different device manufacturers, models, and software versions, a full functionality cannot be guaranteed.
Pair the Speaker using NFC (Near Field Communication)
With Near Field communication (NFC), you can easily pair and connect this speaker to your compatible devices.
If the compatible device supports NFC, activate its NFC feature, and touch the NFC area of the speaker (make sure that the speaker is in pairing mode) with the NFC area of your device, the speaker connects to the device automatically, the Blue color indicator on the speaker stops flashing once pairing has been carried out successfully,.
For details on NFC, see the user guide of the device.
If the device does not support NFC, pair the speaker manually.
Pair the Speaker manually
Before you listen to music via the unit, you must pair the devices.
-
Ensure, that the Bluetooth function is activated in your player (e.g. mobile phone). For this, refer to the operation manual of your player.
-
Press the MODE button repeatedly until the Pilot lamp changes to blue to access to the Bluetooth mode. The blue color indicator flashes to show that the unit is in pairing mode.
-
Choose the Bluetooth menu in your player and register the device in your player. For this, refer to the operation manual of your player. The device “HFG509BTN” will show in your player as a selection.
NOTE:
Only one playback unit can be connected to the speaker. If the speaker is already connected to another playback unit, the speaker will not appear in the BT selection menu.
- If your device asks for a passkey (depending on the device manufacturers, model, and software version), then enter digits “0000” (four zeros) and press OK.
If pairing has been carried out successfully, the Blue color indicator stops flashing.
For the further procedure, please refer to the user manual of the playback unit. If possible, adjust the volume of the external unit to a comfortable level.
NOTE:
☐ Depending on the device manufacturer, you need to perform the registration (PAIRING) again to connect the devices
The Bluetooth compatibility cannot be ensured for devices (e.g. mobile phones) getting released in the future.
To ensure an optimal connection, make sure that the battery of your player is completely charged.
☐ Some of the mobile phone brands have an energy-saving mode. Deactivate the energy-saving mode as it can otherwise result in problems during the data transfer through Bluetooth.
☐ To be able to transfer audio data, Bluetooth needs to stay activated in your player Observe the operation manual of your player.
☐ If a mobile phone on which you are playing music receives a call, the music will be interrupted. The sound however is not played back via the speaker. After you have ended the call, the devices are connected to each other again and playback continues.
Using The Speaker as a Handfree Bluetooth Speakerphone
- Link your cell phone to the speaker via Bluetooth as described above.
- When receiving an incoming call on your cell phone, tap ▶ button on the main unit or ▶ button on the remote to switch the incoming call from cell phone to the speaker. A short beep sound will be heard confirming the call was answered. Complete your call using the built-in microphone and speaker.
- Adjust the volume control of your cell phone to obtain the desired sound level.
- To end the call, press the ▶ button on the main unit o ▶ button on the remote again, a short beep sound will be heard and the call will end. If you were playing music from your cell phone to the speaker before answering the call, the music will automatically resume playing when you hang up.
- To ignore an incoming call, simply press the ➕ button on the remote.
USB OPERATION
This device has been developed in line with the latest technical advances in the USB filed. The wide range of different USB storage devices of all types which are currently on the market, unfortunately do not allow us to guarantee full compatibility with all USB storage devices. For this reason, in rare cases there may be problems in playing back files from USB storage devices. This is not a malfunction of the device.
- Connect a USB storage device directly into the port to access to USB mode, the Pilot lamp changes to Blue+Green color, The USB will start playing automatically once the contents scanning is finished.
- Press the + / - button on the speaker or on the remote to adjust to the desired volume level.
- To remove your USB device, simply stop the playback and gently unplug it from the connector.
NOTE:
□ Always directly connect a USB storage medium to the USB port to prevent any malfunctions.
☐ The USB port is also designed for charging external devices except for Apple devices.
During USB mode, if you plug an audio cable into the unit, the play mode will automatically change to AUX-IN mode.
OPERATING THE SPEAKER IN AUX-IN MODE
- Press the ⏻ power button to turn on the unit.
- Connect an audio cable to the headphone or line-out jack of an audio device and plug the other end into the Aux-in jack located on back of the main unit, it will access to AUX-IN mode automatically, the Pilot lamp changes to Green color
- Turn audio device on and play this device.
- Press the + / - button on the speaker or on the remote to raise/lower the volume level, When finished, press the ⏻ power button to turn off the main unit. Remember to turn off the speakers and your audio device, too.
Notes:
1). If you're connected to the Line out Jack of your external device, then you only need to adjust the volume control of this speaker. If you're connected to the Headphone Jack of your external device, then you may need to adjust both the volume control of your external device and the volume control of this unit to find the most desirable volume setting.
2). During AUX mode, if you plug a USB device into the unit, the play mode will automatically change to USB mode.
TROUBLESHOOTING GUIDE
Should you experience difficulties in the use of this player, please refer to the following chart.
| Fault Cause Solution | ||
| Unit cannot be operated. | Unit crashes and “hangs” | Disconnect from the mains for around 5 seconds. Then switch the unit on again. |
| No audio signal via the Bluetooth connection | Speaker is not paired to the audio source. | Check whether a connection exists. If necessary, pair the speaker again to the audio source. |
| Volume too low | Increase the volume on the speaker | |
| Increase the volume on the the audio source. | ||
| Speaker cannot be connected | Pairing does not work | Check whether the audio source supports the A2DP protocol |
| Audio source is switched off | Switch on the audio source | |
| Bluetooth is switched off at the audio source. | Switch on the Bluetooth function in the audio source. | |
| Bluetooth version is not supported. | Use a different playback unit. | |
| Poor sound quality from a Bluetooth® device | Bluetooth device is almost out of range of the HFG509BTN | Move your Bluetooth device closer to the HFG509BTN |
| Remote control is not functioning properly. | Low battery. | Replace the battery with correct type CR2032 |
| Remote Control is not pointed to ward the IR window | Point the Remote Control to ward the unit IR window, use with in 10 feet of the unit. |
SPECIFICATIONS
Power Supply
Power Input.... 100-240V\~50/60Hz
Power Consumption: 50 W
Power of Remote control...... 1 xDC 3V CR2032 button cell (included)
Protection class:....II
Net weight:......approx. 3.8kg
Working Temperature 0-45°C
Working Humidity.... 20%\~80%
Bluetooth
Bluetooth support:.....V4.0
Range:....upto 10 metres
Transmission frequency: 2.4 GHz
Protocols:....A2DP 1.2
The right to make technical and design modifications in the course of continuous product development remains reserved.