Series 5000 HC5441 - Lawn mower PHILIPS - Free user manual and instructions
Find the device manual for free Series 5000 HC5441 PHILIPS in PDF.

User questions about Series 5000 HC5441 PHILIPS
0 question about this device. Answer the ones you know or ask your own.
Ask a new question about this device
Download the instructions for your Lawn mower in PDF format for free! Find your manual Series 5000 HC5441 - PHILIPS and take your electronic device back in hand. On this page are published all the documents necessary for the use of your device. Series 5000 HC5441 by PHILIPS.
USER MANUAL Series 5000 HC5441 PHILIPS
natural_image
Illustration of a Philips brand hairpin with a 23-pin button (no text or symbols on the device itself)フィリップ スヘアーカッター
品番
HC5441/15
取扱説明書
保証書付
natural_image
Line drawing of a mechanical device with ribbed top and handle (no text or symbols)コーム
natural_image
Line drawing of a mechanical component with multiple blades and a central pin (no text or symbols)キッズコーム
Guidance in English 20\~30
● 保 証
保証とアフターサービス …… 31
仕様 32
無料修理規定 34
保証書 …… 最終ページ
必ずお守り ください
安全上のご注意
natural_image
Diagram of a medical or surgical tool with a pointed tip and curved tube, no text or symbols presentnatural_image
Simple line drawing of a mechanical component with a circular base and power button (no text or symbols)natural_image
Hand holding a device with an arrow pointing to a button (no text or symbols visible)natural_image
Diagram of a medical or surgical tool with a pointed tip and curved tube, no text or symbols presentnatural_image
Diagram of a robotic arm with motion arrows indicating movement, no text or symbols present2 コームの取り外し
natural_image
Illustration of a hand holding a curved object with arrows indicating motion or force (no text or symbols)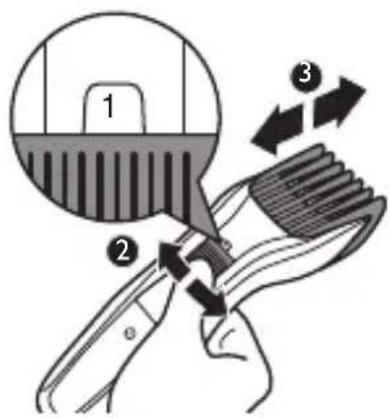
3 電源 スイッチのN/OFF
natural_image
Line drawing of a handheld device with a button and directional arrows indicating movement (no text or symbols)ヘアーカッ 準備
用意するもの
・ヘ ア ー カッタ・くし
・コーム ・髪切り専用のハサミ
・髪を留める大きめのピン
・首に巻くタオル
・肩にかけるケープ
・毛払いブラシ
natural_image
Illustration of a hand using a handheld device to trigger an electric shock, with arrows indicating action direction (no text or symbols)natural_image
Illustration of hands performing a hairpinning technique on a person's head (no text or symbols present)2 サイド
natural_image
Illustration of a person combing their hair with a brush (no text or symbols)3 前髮
natural_image
Illustration of a person using a hairbrush to trim their head (no text or symbols present)natural_image
Illustration of a person styling hair with a comb, showing hand and close-up of motion (no text or symbols)えり足の整え方
natural_image
Illustration of a hand holding a curved object with arrows indicating direction (no text or symbols)コームを外します。
natural_image
Illustration of a hand using a comb to apply a tooth (no text or symbols present)natural_image
Illustration of a hand holding a toothbrush near the ear, with an arrow indicating direction (no text or symbols present)natural_image
Illustration of a hand holding a tooth with a dental tool, showing a finger pressing down on the jaw (no text or symbols present)natural_image
Illustration of a person receiving a medical or therapeutic procedure with an arrow indicating direction (no text or symbols present)natural_image
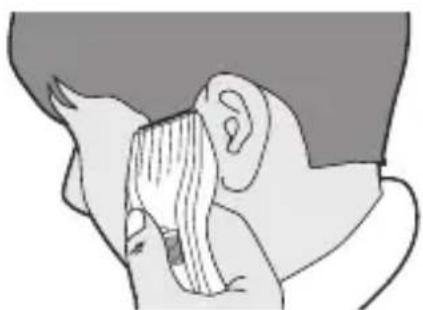
Illustration of a person performing a neck massage or pressure technique with a curved arrow indicating motion (no text or symbols present)前側からもカーブに合わせて動かします。
2 もみあげカット
natural_image
Illustration of a hand pressing down on a curved surface with arrows indicating direction (no text or symbols)コームを外します。
natural_image
Illustration of a person's head and ear with a bandage, no text or symbols presentnatural_image
Illustration of a human ear with a dashed outline indicating the ear area (no text or symbols)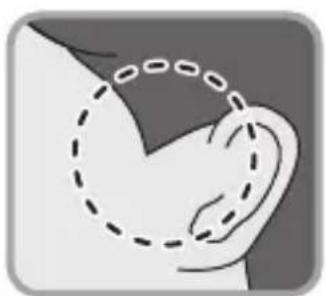
natural_image
Illustration of a human ear with a dashed outline marking the ear area (no text or symbols)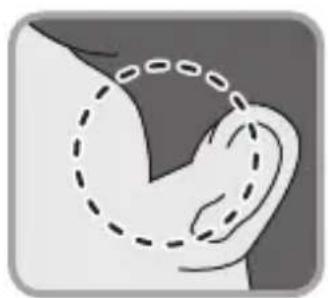
natural_image
Illustration of a human ear with a dashed outline marking the ear area (no text or symbols)刃の交換方法
部品の取り替え
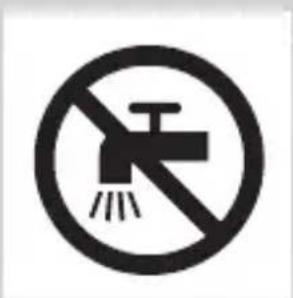
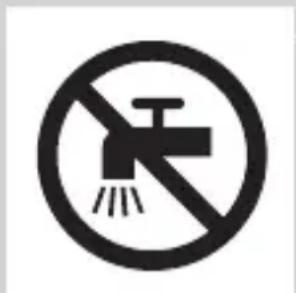
本体は水洗いできません。
(刃とコームは水洗いが可能です)
natural_image
Illustration of a hand pressing down on a curved surface with arrows indicating motion (no text or symbols)natural_image
Illustration of two hand-painted items: one using a tool on a flat stool, the other pouring liquid from a container onto a surface (no text or symbols)natural_image
Diagram showing two mechanical components with arrows indicating movement, no text or symbols presentnatural_image
Illustration of a hand inserting a plug into a device with a no-smoking symbol (no text or labels)ニッケル水素電池のリサイクルについて
natural_image
Illustration of a hand holding a mechanical component with a black arrow indicating direction (no text or symbols)natural_image
Illustration of a hand holding a vehicle with an upward arrow indicating motion (no text or symbols)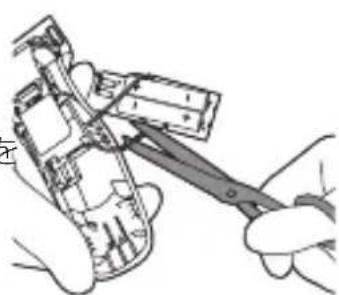
natural_image
Illustration of hands using a tool to adjust or install electronic components (no text or symbols visible)Congratulations on your purchase and welcome to Philips! To fully benefit from the support that Philips offers, register your product at www.philips.com/welcome.
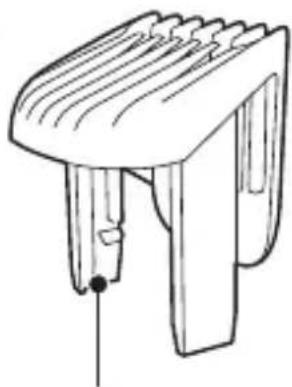
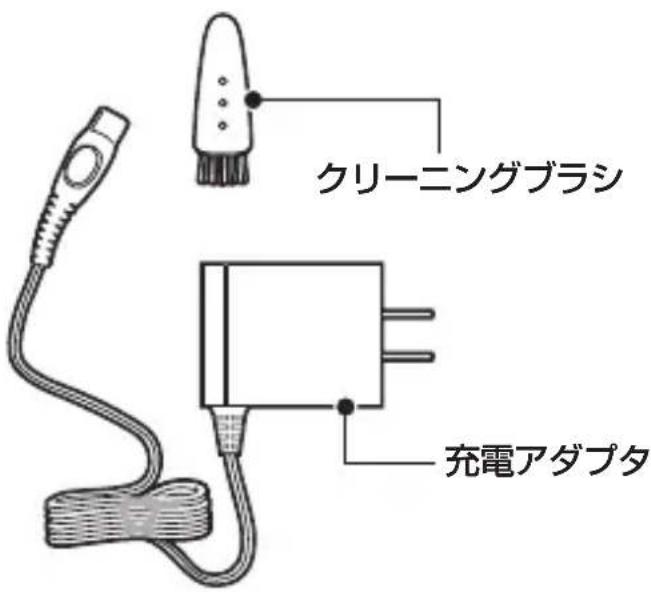
General description (Fig. 1)
1 Cutting element
2 Length setting control
3 On/off slide
4 Charging light
5 Trimming comb
6 Kids comb
7 Cleaning brush
8 Adapter
9 Small plug
Important safety information
Read this important information carefully before you use the appliance and its accessories and save it for future reference. The accessories supplied may vary for different products.
Danger
- Keep the adapter dry.
Warning
- The adapter contains a transformer. Do not cut off the adapter to replace it with another plug, as this causes a hazardous situation.
- This appliance is not intended for use by persons (including children) with reduced physical, sensory or mental capabilities, or lack of experience and knowledge, unless they have been given supervision or instruction concerning use of the appliance by a person responsible for their safety.
natural_image
No smoking sign with faucet symbol (no text or numbers)- Children should be supervised to ensure that they do not play with the appliance.
- Always check the appliance before you use it. Do not use the appliance if it is damaged, as this may cause injury. Always replace a damaged part with one of the original type.
Caution
- This appliance is not washable. Never immerse the appliance in water and do not rinse it under the tap. Only the cutting element can be rinsed under the tap.
- Only use this appliance for its intended purpose as shown in the user manual.
- Do not use the adapter in or near wall sockets that contain or have contained an electric air freshener to prevent irreparable damage to the adapter.
- Never use compressed air, scouring pads, abrasive cleaning agents or aggressive liquids such as petrol or acetone to clean the appliance.
Electromagnetic fields (EMF)
- This Philips appliance complies with all applicable standards and regulations regarding exposure to electromagnetic fields.
General
- The appliance is suitable for mains voltages ranging from 100 to 240 volts.
- The adapter transforms 100-240 volts to a safe low voltage of less than 24 volts.
Charging
Charge the appliance fully before you use it for the first time or after a long period of disuse.
ENGLISH
It takes approximately 8 hours to fully charge the appliance.
When it is fully charged, the appliance has a cordless operating time of up to 75 minutes.
Note: After charging the appliance once fully for the first time, you can also use the appliance directly from the mains. Simply connect the appliance to the mains.
Charging with the adapter
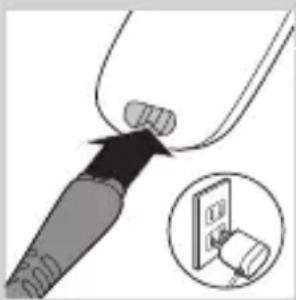
1 Make sure the appliance is switched off.
natural_image
Diagram of a plug inserted into a socket with an arrow indicating the insertion direction (no text or symbols present)2 Insert the appliance plug into the appliance and put the adapter in the wall socket.
3 After charging, remove the adapter from the wall socket and pull the appliance plug out of the appliance.
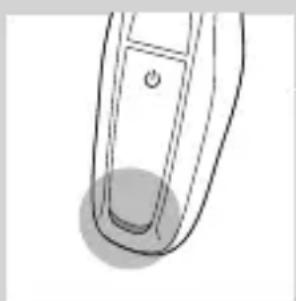
Charging indication
natural_image
Simple line drawing of a remote control device with a circular button at the bottom (no text or symbols)Charging
- When the appliance is charging, the charging light lights up green continuously.
Optimising the lifetime of the rechargeable battery
When you have charged the appliance for the first time, we advise you to use it until the battery is completely empty. Continue to use the appliance
until the motor almost stops operating during a session. Then recharge the battery. Follow this procedure at least twice a year.
Using the appliance
The hair length settings are indicated in millimeters, the combs cut the hair to a length of 1mm to 23mm with steps of 1mm. The settings correspond to the remaining hair length after cutting.
When you trim for the first time, be careful. Do not move the trimmer too fast. Make smooth and gentle movements.
Tip: Start trimming at a high length setting and reduce the length setting gradually until you have reached the desired hair length.
Note: You can also use this appliance directly from the mains.
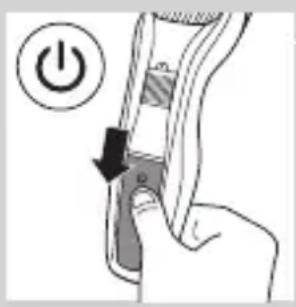
Switching the appliance on and off
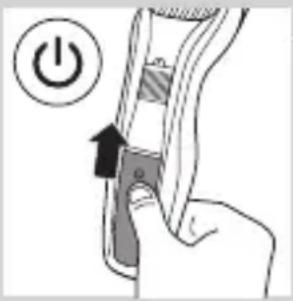
1 To switch on the appliance, slide the on/off button upwards.
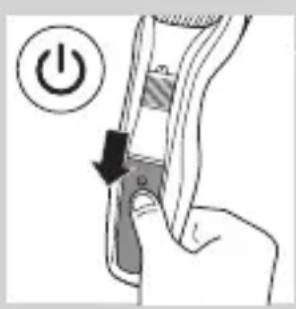
2 To switch off the appliance, slide the on/off button downwards.
Trimming with comb

natural_image
Illustration of a hand holding a device with arrows indicating motion or force (no text or symbols)Note: The kids comb is especially for trimming children's hairs.
1 Attach the comb onto the appliance.
natural_image
Illustration of a hand using a comb to lift a tooth (no text or symbols)2 Turn the length setting control to the desired length setting.
Note: When you trim for the first time, start at the highest length setting to familiarise yourself with the appliance.
natural_image
Illustration of a person using a comb with an inset showing a geological cross-section (no text or symbols)3 Switch on the appliance.
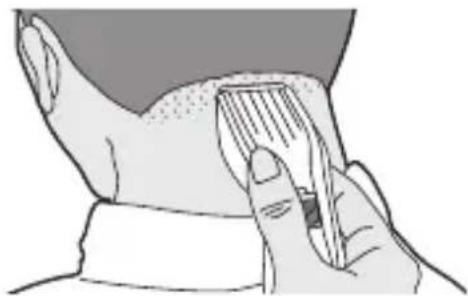
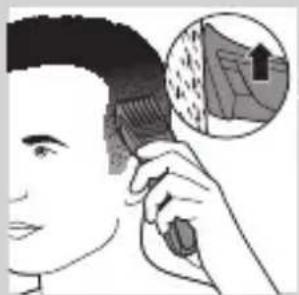
4 To trim most effectively, move the trimmer against the hair growth direction. Make sure the surface of the comb always stays in contact with the skin.
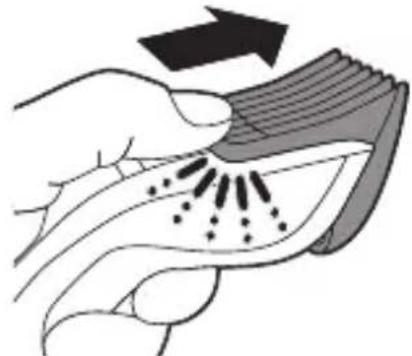
Trimming without comb
natural_image
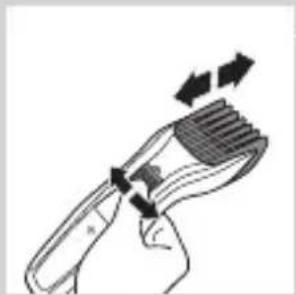
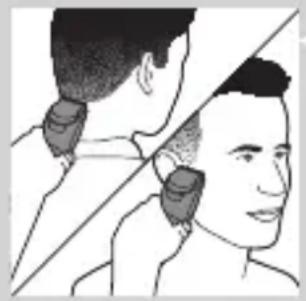
Illustration of a hand holding a textured object with arrows indicating direction (no text or symbols)You can use the trimmer without the comb to contour your beard, moustache, sideburns or neckline to a length of 0.5mm.
Be careful when you trim without comb because the cutting element removes every hair it touches.
1 Push the comb off the appliance.
2 Switch on the appliance.
natural_image
Illustration of a person receiving earbuds from another person (no text or symbols present)3 Make well-controlled movements. Touch the hair lightly with the trimmer.
Cleaning
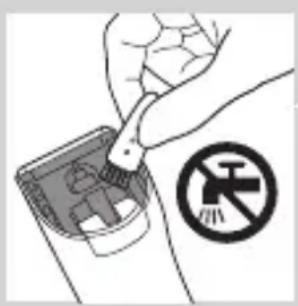
Never use scouring pads, abrasive cleaning agents or aggressive liquids such as alcohol, petrol or acetone to clean the appliance.
Never immerse the appliance in water or rinse it under the tap.
Note: Only the cutting element and the comb can be cleaned with water.
natural_image
Two diagrams showing a hand holding a small object above a base, connected to a vertical rod with a force arrow (no text or symbols present)1 Make sure the appliance is switched off and disconnected from the mains.
2 Wipe the housing of the appliance with a dry cloth.
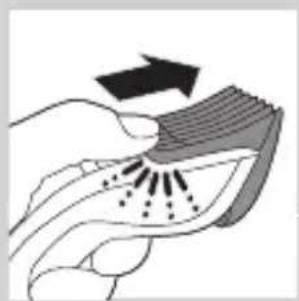
3 Push the comb off the appliance and clean it with the brush or rinse it under the tap.
Caution: Make sure that the comb is dry before you reattach it to the appliance.
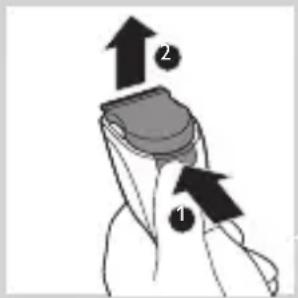
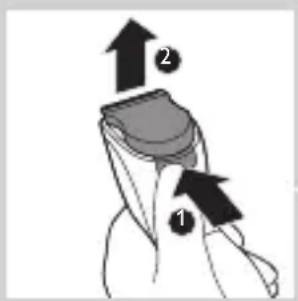
4 Press the release button (1). The cutting element comes off the appliance (2).
ENGLISH
natural_image
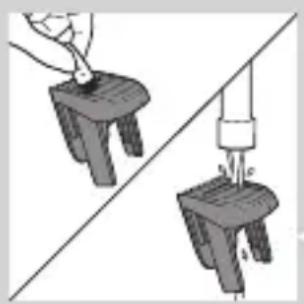
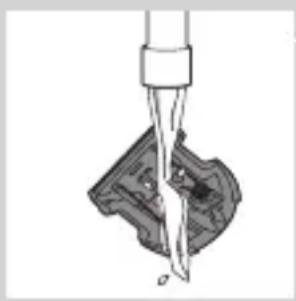
Diagram of a mechanical component being inserted into a housing (no text or symbols)5 Clean the cutting element with the brush or rinse it under the tap. Shake off excess water and leave to dry.
Caution: Do not dry the cutting element with a towel, as this may damage the cutting element
natural_image
Illustration of a hand using a tool to clean a device with a no-smoking symbol (no text or labels)Caution: Make sure that the cutting element is dry before you reattach it to the appliance.
6 Clean the inside of the appliance with the brush.
Never immerse the appliance in water or rinse it under the tap.

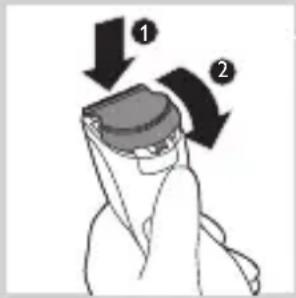
7 To reattach the cutting element, insert the lug of the cutting element into the guiding slot.
8 Insert the lug of the cutting element into the guiding slot (1) and push the cutting element back onto the appliance (2).
Replacement
Only replace a worn or damaged cutting element with an original Philips cutting element, available from authorised Philips service centres.
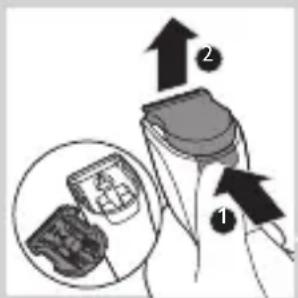
1 Press the release button (1). The cutting element comes off the appliance (2).
2 Insert the lug of the new cutting element into the guiding slot (1) and push the cutting element back onto the appliance (2).
Ordering accessories
To buy accessories or spare parts, visit www.shop.philips.com/service or go to your Philips dealer. You can also contact the Philips Consumer Care Centre in your country (see the worldwide guarantee leaflet for contact details).
Recycling
Do not throw away the appliance with the normal household waste at the end of its life, but hand it in at an official collection point for recycling. By doing this, you help to preserve the environment.
Removing the rechargeable battery
Only remove the rechargeable battery if it is completely empty.
1 Disconnect the appliance from the mains and let the appliance operate until the motor stops.
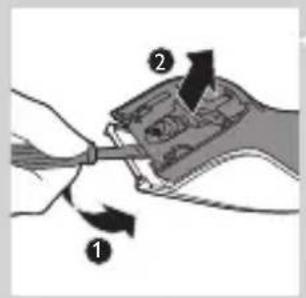
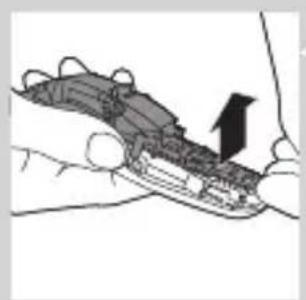
2 Press the release button (1) and remove the cutting element (2).
3 Insert the screwdriver between the motor unit and the back panel of the appliance. Press down the screwdriver as far as it will go

natural_image
Illustration of a hand holding a car tire with a black arrow indicating motion (no text or symbols)ENGLISH
4 Tilt the handle of the screwdriver downwards (1) and separate the back panel from the appliance (2).
natural_image
Illustration of a hand holding a device with an arrow pointing to it (no text or symbols present)5 Remove the side panels. Pull the bottom part of the printed circuit board with the rechargeable batteries attached from the appliance.
natural_image
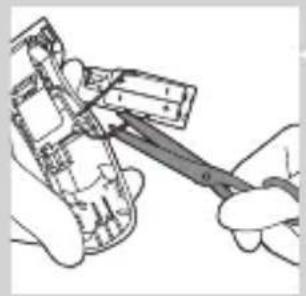
Illustration of hands using a power tool to adjust or install electronic components (no text or symbols visible)6 Cut the wires to separate the rechargeable batteries from the appliance.
Do not connect the appliance to the mains again after you have opened it.
Guarantee and support
If you need information or support, please visit www.philips.com/support or read the separate worldwide guarantee leaflet.
Troubleshooting
This chapter summarises the most common problems you could encounter with the appliance. If you are unable to solve the problem with the information below, visit www.philips.com/support for a list of frequently asked questions or contact the Consumer Care Centre in your country.
Problem Possible cause Solution
| The appliance produces an uneven cutting result. | The comb does not touch the skin when you move the appliance through the hair. | Make sure the comb is always fully in contact with the skin when you move the appliance through the hair. |
| You only move the appliance in one direction. | Because not all hairs grow in the same direction, move the appliance in different directions (upwards, downwards and across). | |
| The setting of the comb has changed during trimming. | Check the setting of the comb. If you push the appliance too hard onto the scalp, you may accidentally change the setting of the comb. | |
| The attachment is not assembled correctly. | Detach the attachment and reattach it. | |
| The cutting performance decreases when the cutting element and the comb are dirty. | Clean the cutting element and the comb (see chapter ‘Cleaning and maintenance’). | |
| The appliance does not work when I switch it on. | The appliance has an empty battery. | Charge the appliance (see chapter ‘Charging’). Make sure that the appliance plug is inserted properly into the appliance and the adapter is connected properly to the wall socket. |