
DF1015W3VV - Freezer Profilo - Free user manual and instructions
Find the device manual for free DF1015W3VV Profilo in PDF.

| Product Type | Freezer |
| Brand | Profilo |
| Model | DF1015W3VV |
| Freezer Type | Free-standing |
| Climate Class | SN, N, ST, T |
| Ambient Temperature Range | +10°C to +43°C (depending on class) |
| Voltage | 220-240 V, 50 Hz |
| Protection Class | I |
| Recommended Fuse | 10 A to 16 A |
| Refrigerant | R600a (flammable) |
| Temperature Control | Thermostat dial, adjustable from -12°C to -20°C |
| Freezer Drawers | Yes (small and big) |
| Freezer Calendar | Yes |
| Door Hinge | Reversible |
| Defrosting | Manual (scrape frost, use warm water pans) |
| Cleaning | Soft cloth, lukewarm water, pH-neutral detergent; no steam cleaner |
| Ventilation Clearances | Sides 25 mm, rear 50 mm, top 30 mm |
| Levelling Feet | Yes, adjustable |
| Installation | Free-standing, 2 persons required for transport |
| Noise Level | Normal operating noises: humming, bubbling, clicking |
| Safety Features | Child safety warnings, flammable refrigerant precautions |
| Maximum Altitude | Up to 2000 m |
| Net Weight | Not specified |
| Dimensions (H x W x D) | Not specified |
Frequently Asked Questions - DF1015W3VV Profilo
User questions about DF1015W3VV Profilo
0 question about this device. Answer the ones you know or ask your own.
Ask a new question about this device
Download the instructions for your Freezer in PDF format for free! Find your manual DF1015W3VV - Profilo and take your electronic device back in hand. On this page are published all the documents necessary for the use of your device. DF1015W3VV by Profilo.
USER MANUAL DF1015W3VV Profilo
en Instructions for use and installation
natural_image
Line drawing of a single refrigerator with lid and front panel (no text or symbols)en Table of contents
Safety and warning information ...... 3
Directions for disposal 5
Scope of delivery 6
Installing the appliance 6
Changing over the door hinges 7
Observe the room temperature and ventilation requirements .... 7
Connecting the appliance 7
Getting to know the appliance 8
Control panel 8
Switching on the appliance 9
Setting the temperature 9
Usable capacity 9
Freezer compartment 9
Max. freezing capacity 10
Freezing and storing 10
Freezing fresh food 10
Defrosting frozen food 11
Switching the appliance off and putting it out of operation 12
Defrosting 12
Cleaning the appliance 12
Saving energy 13
Operating noises 13
Rectifying minor faults yourself ..... 14
After-sales service 15
tr İçindekiler
Safety and warning information
Before you put the appliance into operation
Carefully read through the instructions for use and assembly instructions. They contain important information on setting up, using and maintaining the appliance.
The manufacturer is not liable for any damage caused by failure to follow the guidance and warnings contained in the instructions for use. Retain all documents for later use or for subsequent owners.
Technical safety

Risk of fire
The tubes of the refrigeration circuit convey a small quantity of an environmentally friendly but flammable refrigerant (R600a). It does not damage the ozone layer and does not increase the greenhouse effect. If refrigerant escapes, it may injure your eyes or ignite.
If damage has occurred
- Keep naked flames and/or ignition sources away from the appliance,
■ thoroughly ventilate the room for several minutes,
■ switch off the appliance and pull out the mains plug,
■ inform customer service.
The more refrigerant an appliance contains, the larger the room must be in which the appliance is situated. Leaking refrigerant can form a flammable gas-air mixture in rooms which are too small.
The room must be at least 1 m ^3 per 8 g of refrigerant. The amount of refrigerant in your appliance is indicated on the rating plate inside the appliance.
When positioning the appliance, make sure the supply cord is not trapped or damaged.
If the power cord of this appliance is damaged, it must be replaced by the manufacturer, customer service or a similarly qualified person. Improper installations and repairs may put the user at considerable risk.
Repairs may be performed by the manufacturer, customer service or a similarly qualified person only.
Only original parts supplied by the manufacturer may be used. The manufacturer guarantees that only these parts satisfy the safety requirements.
Do not use multiple socket outlets, extension cords or adapters.

Risk of fire
Portable multiple socket outlets or power supplies can overheat and cause a fire.
Do not locate portable multiple socket outlets or portable power supplies at the rear of the appliance.
During use
■ Never use electrical appliances inside the appliance (e.g. heaters, electric ice-makers). Risk of explosion!
■ Never defrost or clean the appliance with a steam-cleaning device. The steam may come into contact with electrical components and cause a short circuit. Risk of electric shock!
en
- Do not take any additional measures to accelerate defrosting other than those specified by the manufacturer. Danger of explosion!
- Do not use pointed or sharp objects to remove layers of ice and frost! You could damage the refrigerant pipes. If refrigerant shoots out, it may ignite or cause eye injuries.
- Do not store products with flammable propellant gases (e.g. spray cans) or explosive substances inside the appliance. Risk of explosion!
- Do not use the base, rails, doors, etc. as a step or support.
For defrosting and cleaning, unplug the appliance from the mains or switch off the circuit-breaker. When unplugging the mains plug, always take hold of the plug itself, never pull on the connecting lead.
■ High-proof alcohol must always be tightly sealed and stored in an upright position. - Do not contaminate plastic parts or door seals with oil or grease. Plastic parts and door seals will otherwise become porous.
■ Never cover or block ventilation openings for the appliance.
This appliance may only be used by persons (including children) with impaired physical, sensory, or mental abilities or insufficient knowledge of the appliance if they are supervised by a person responsible for their safety or have been instructed by such a person on how to use the appliance. - Do not store liquids in bottles or tins in the freezer compartment (in particular carbonated drinks). Bottles and tins may burst.
■ Never eat frozen foods immediately after they have been taken out of the freezer compartment.
Risk of freezer burn!
- Avoid prolonged hand contact with frozen foods, ice, and the evaporator tubes, etc.
Risk of freezer burn!
Avoiding risks to children and other at-risk persons
Persons at risk are:
Children
■ Persons whose powers of perception are physically or psychologically limited
- Persons who do not have sufficient knowledge about how to use the appliance safely.
Action required:
■ Make sure that children and other at-risk persons have understood the dangers.
■ A person responsible for safety must supervise or instruct children and other at-risk persons when they are using the appliance.
- Do not allow children under 8 years old to use the appliance.
■ Supervise children when cleaning and servicing.
■ Never let children play with the appliance.
General requirements
The appliance is suitable for the following tasks:
■ Freezing food,
■ making ice cubes.
This appliance is intended for use in the home and the home environment.
The refrigeration circuit has been checked for leaks.
This appliance complies with the relevant safety regulations for electrical appliances and is fitted with noise suppression.
This appliance is intended for use up to a maximum height of 2000 metres above sea level.
Directions for disposal
Disposing of packaging
The packaging protects your appliance from damage during transport. All the materials used are environmentally friendly and can be recycled. Please help by disposing of the packaging in an environmentally responsible manner.
Information about the available disposal methods and sites can be obtained from your appliance retailer or your local authority.
Disposing of your old appliance
Used appliances are not valueless waste. Valuable raw materials can be recovered through environmentally responsible disposal.

This appliance is labelled in accordance with European Directive 2012/19/EU concerning used electrical and electronic appliances (waste electrical and electronic equipment - WEEE). The Directive determines the framework for the return and recycling of used appliances as applicable throughout the EU.
Warning
Appliances at the end of their useful life:
- Unplug the mains plug.
- Cut the power cord and remove it along with the mains plug.
- Do not remove the shelves and containers. Leaving them intact makes it more difficult for children to climb in.
- Never let children play with a disused appliance. Risk of asphyxiation!
Refrigerators contain refrigerant as well as gases in the insulation material. Refrigerant and gases must be disposed of properly. Do not damage the refrigerant circuit pipes before disposing of them properly.
Scope of delivery
After unpacking the appliance, check all parts for transport damage.
If you wish to make a complaint, please contact the dealer from whom you purchased the appliance or our after-sales service.
The scope of delivery includes the following parts:
■ Free-standing appliance
■ Features (vary depending on the model)
■ Instructions for use
■ After-sales service booklet
- Guarantee slip
■ Information on energy consumption and noise
■ Bag of assembly materials.
Installing the appliance
Transport
The appliance must be manoeuvred by a minimum of 2 persons.
Hold the appliance around its sides or base when moving it. Under no circumstances should it be lifted by holding the edges of the top surface.
Location
The ideal installation location is a dry, well-ventilated room. The installation location should not be subject to direct sunlight or be near a heat source such as a cooker, heating element, etc. If setting up the appliance next to a heat source is unavoidable, use a suitable insulating plate or observe the following minimum distances from the heat source:
■ 3 cm from an electric or gas cooker.
■ 30 cm from oil or solid fuel cookers.
Installation clearances
When installing the appliance, ensure that 25 mm of free space is left at both sides, 50 mm at the rear and 30 mm at the top of the appliance.
Ensure there is adequate space for the door to fully open.
If the appliance is placed under a continuous worktop, a ventilation grille figure 2 of at least 200 cm ^4 should be installed on the worktop above the rear of the appliance to increase ventilation.
Floor surface
The floor at the installation location must not buckle and you may have to reinforce the floor.
Level out any unevenness in the ground using support spacers.
Levelling the appliance
Level out any unevenness in the ground by adjusting the two levelling feet figure 3 at the front of the appliance.
Use a spirit level to align the appliance.
If the appliance is not level, the door and magnetic seal alignments will not be covered properly.
Changing over the door hinges
(If required)
We recommend that 2 people handle the appliance during assembly.

Warning
While changing over the door hinges, ensure that the appliance is not connected to the power supply. Pull out the mains plug beforehand.
Figure 6
Installation in numerical sequence.
Observe the room temperature and ventilation requirements
Room temperature
The appliance is designed for a certain climate class. Depending on the climate class, the appliance can be operated at the following ambient temperatures.
The climate class is specified on the rating plate. Figure 4
| Climate class Permissible ambient temperature |
| SN +10 °C to 32 °C |
| N +16 °C to 32 °C |
| ST +16 °C to 38 °C |
| T +16 °C to 43 °C |
Note
The appliance can function within the ambient temperature limits of the specified climate class.
If an appliance in the SN climate class is operated at lower ambient temperatures, damage to the appliance can be excluded up to a temperature of +5 °C.
Ventilation
Figure 2
The air on the appliance's back panel and side panels heats up. The heated air must be able to escape unimpeded. Otherwise, the refrigerating unit has to work harder, which increases the appliance's power consumption. Therefore: You must never cover or block the ventilation openings!
Connecting the appliance
After setting up the appliance, wait for at least 1 hour before starting the appliance up. The oil contained in the compressor may have been displaced into the refrigeration system during transport.
Before starting the appliance up for the first time, clean its interior (see section "Cleaning the appliance").
en
Electrical connection
The socket must be near to the appliance and easily accessible after the appliance has been installed.
The appliance conforms to protection class I. Connect the appliance to a 220 - 240 V/50 Hz alternating current supply using a socket with protective earthing conductor which has been correctly installed. The socket must be protected by a fuse with a rating of 10 A to 16 A.
In the case of appliances operated outside of Europe, check whether the voltage and type of current specified conform to the values of your electricity grid. You will find this information on the rating plate. Figure 4

Warning
The appliance must never be connected up to an electronic energy-saving socket.
Sinusoidal-commutated and line-commutated inverters can be used with our appliances. Line-commutated inverters are used with photovoltaic systems that are connected directly to the national grid.
Sinusoidal-communicated inverters must be used with standalone applications (e.g. on ships or mountain huts) that do not have a direct connection to the national grid.
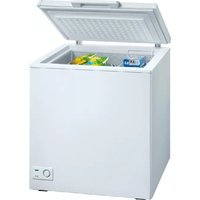
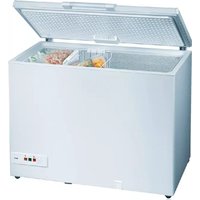
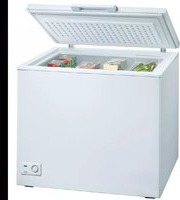
Getting to know the appliance

Fold out the last page that contains the figures. These instructions for use apply for several models.
Deviations between the figures are possible.
Figure 1
1 Thermostat control dial
2 Drawers freezer small
3 Freezer calendar
4 Drawers freezer big
5 Levelling feet
Control panel
Figure 1 /1
Thermostat control dial
The required temperature is set with this button.
Switching on the appliance
Figure 1 /1
■ Once it is connected, the appliance is switched on.
Setting the temperature
The temperature can be set from -12 ^ to -20 ^ .
To change the temperature, turn the temperature selector. Figure 1 /1
Position MIN: Lowest temperature
Position MAX: Highest temperature
Position ●: Normal use
Important: Changes to the temperature take time to come into effect.
Notes on using the appliance
■ Before placing any food in your appliance, turn it on and wait for 24 hours to make sure it is working properly and to allow it time to fall to the correct temperature.
If you cannot open the door immediately after closing the freezer, please wait for two to three minutes until the resulting vacuum has been compensated for.
Usable capacity
You will find information regarding the usable capacity on the rating plate. Figure 4
Fully utilising the freezer volume
The maximum amount of food can be placed in the freezer by removing several fittings. The food can be stacked directly on the freezer shelves.
Note
To comply with the values indicated on the rating plate, the fittings at the very top and bottom should remain in the appliance.
Removing the fittings
■ Pull out the frozen food container all the way, lift at the front and remove. Figure 5
Freezer compartment
Use the freezer compartment for the following:
■ Storing deep frozen food.
■ To make ice cubes.
■ To freeze food.
Note
Ensure that the freezer compartment door has been closed properly. If the door is open, the frozen food will thaw. The freezer compartment will become covered in thick ice. Also: waste of energy due to high power consumption!
Max. freezing capacity
You will find information on the maximum freezing capacity in 24 hours on the rating plate. Figure 4
Prerequisites for max. freezing capacity
■ Remove the drawers. The food can be stacked directly on the shelves and in the bottom of the freezer compartment.
■ Freeze large quantities of food preferably in the very top compartment where food freezes particularly quickly and therefore also gently.
Freezing and storing
Purchasing frozen foods
■ Packaging must not be damaged.
- Observe the best before date.
The temperature in the commercial chest freezer must be -18 °C or colder.
As far as possible, frozen food must be transported in an insulated container and quickly placed in the freezer compartment.
Note when loading products
■ Preferably freeze large quantities of food in the top compartment, where food freezes particularly quickly and therefore also gently.
- Place the food over the whole area of the compartments or the frozen food containers.
Note
Food which is already frozen must not come into contact with the food which is to be frozen. If required, move the frozen food to the frozen food containers.
■ To ensure air circulation in the appliance, insert frozen food container all the way.
Freezing fresh food
Only use fresh, undamaged food for freezing.
In order to retain the nutritional value, aroma and colour of the food as much as possible, blanch vegetables before they are frozen. Blanching is not required for aubergines, peppers, courgettes and asparagus.
You can find literature about freezing and blanching in bookshops.
Note
Food which is already frozen must not come into contact with the food which is to be frozen. If required, move the frozen food to the frozen food containers.
The following are suitable for freezing: Baked goods, fish and seafood, meat, game, poultry, vegetables, fruit, herbs, eggs without their shells, dairy products such as cheese, butter and curd cheese, prepared dishes and leftovers such as soups, stews, cooked meat and fish, potato dishes, baked casseroles and sweet foods.
■ The following are not suitable for freezing:
Types of vegetables that are usually eaten raw – such as green salad or radishes, eggs in their shells, grapes, whole apples, pears and peaches, hard-boiled eggs, yoghurt, soured milk, sour cream, crème fraîche and mayonnaise.
Packaging frozen food
Pack food so that it is airtight to prevent it from losing its flavour or drying out.
- Store food in its packaging.
- Press out any air.
- Close the packaging tightly.
- Label packaging with its contents and date of freezing.
The following are suitable as packaging:
Plastic film, polyethylene hose film, aluminium foil, freezer bags.
You will find these products at your specialist dealer.
The following are not suitable as packaging:
Wrapping paper, greaseproof paper, cellophane, rubbish bags and used shopping bags.
The following are suitable for sealing packaging:
Rubber bands, plastic clips, pack-twines, cold-resistant scotch tape, or similar.
Polyethylene bags and hose film can be fused closed using a bag sealer.
Storage life of frozen foods
The storage life depends on the type of food.
At a temperature of -18 °C:
■ Fish, sausages, prepared dishes, baked goods:
Up to 6 months
- Cheese, poultry, meat:
Up to 8 months
■ Vegetables, fruit:
Up to 12 months
Freezer calendar
Figure 1 / 3
To prevent the quality of the frozen food from deteriorating, do not exceed the storage duration. The storage period depends on the type of produce. The figures next to the symbols indicate the permitted storage period of the produce in months. In the case of commercially available frozen food observe the date of manufacture or use-by date.
Defrosting frozen food
You can decide between the following options, depending on the type of food and its intended use:
■ At room temperature,
■ in the refrigerator,
■ in the electric oven, with/without hot-air ventilator,
■ in the microwave oven.
Note
Do not refreeze defrosted food. It can only be refrozen after it has been processed (cooked or roasted).
Do not continue to use the complete max. storage time for the frozen food.
Switching the appliance off and putting it out of operation
Switch off the appliance
Unplug the appliance from the mains.
Putting the appliance out of service
If you do not use the appliance for long periods:
- Remove all food from the appliance.
- Switch off the appliance.
- Defrost the appliance (see section "Defrosting").
- Clean the inside of the appliance (see section "Cleaning the appliance").
- To prevent odours from forming, leave the appliance lid open.
Defrosting
A layer of frost on the container panels impairs the cooling effect on the frozen food and increases the power consumption. You must regularly remove this layer of frost.

Warning
Never use electrical appliances, defrosting sprays or open flames to defrost the freezer, e.g. heaters, steam-cleaning appliances, candles, oil lamps, etc.

Caution
Do not scrape away the layer of ice using a knife or a sharp object. You could damage the refrigerant pipes. If refrigerant shoots out, it may ignite or cause eye injuries.
Defrosting the appliance
- Place the freezer drawers containing the food in a cool location. Place the ice pack (if enclosed) on the food.
- Unplug the appliance from the mains.
- Leave the door open.
- Place a shallow bowl or pan below the unit. Scrape away the frost using a plastic scraper.
- To accelerate the defrosting process, place two pans of hot water on a trivet in the appliance.
- After defrosting, clean the appliance and wipe the inside dry.
- Connect the appliance and re-arrange the frozen food.
Cleaning the appliance

Caution
■ Never clean the appliance with a steam cleaning appliance.
- Do not use gritty, acidic or chlorine-based cleaning agents or solvents.
- Do not use any abrasive materials or materials that may scratch surfaces. This may lead to corrosion of the metallic surfaces.
■ Never clean the equipment's accessories in the dishwasher. The parts may warp.
Proceed as follows
- Before cleaning the appliance, unplug the mains plug or disconnect the fuse.
- Take out the frozen food and store it in a cool place. Place an ice block (if you have one) on the food.
- Clean the appliance with a soft cloth, lukewarm water, and a little pH-neutral detergent.
- Only wipe the door seal with clean water and then rub it until it is dry.
- After cleaning, reconnect the appliance to the mains.
- Put the frozen food back in.
Saving energy
- Install the appliance in a cool, dry, well-ventilated room. The appliance must be installed out of direct sunlight and away from heat sources (e.g. heating elements, cooker). Use an insulating plate if necessary.
- Allow hot food to cool before placing it in the appliance.
- Place frozen food that is to be defrosted in your cooling compartment. Use the low temperature of the frozen food to cool down food.
- Open the appliance door for as little time as possible.
A layer of frost in the freezer compartment impairs the cooling effect on the frozen food and increases the power consumption. If there is a layer of frost, you must defrost the appliance.
■ Occasionally clean the rear of the appliance to prevent an increased power consumption.
- Do not block the ventilation openings in the appliance.
■ Ensure that the freezer compartment door is always closed properly.
■ To avoid increased power consumption, occasionally clean the back of the appliance.
Operating noises
Completely normal noises
Humming
The refrigeration unit is running.
Bubbling, whirring or gurgling noises
The refrigerant is flowing through the pipes.
Clicking
The motor is switching on or off.
Preventing noises
If the appliance is positioned unevenly
Please align the appliance with a spirit level. Use the height-adjustable feet or place packing underneath them.
The appliance is touching adjacent units or appliances
Move the appliance away from adjacent furniture or appliances.
Containers are wobbling or sticking
Check the removable parts and re-insert them if necessary.
Rectifying minor faults yourself
Before you call the after-sales service:
Check whether you can rectify the fault yourself by using the notes below.
You must bear the costs for consultation with the after-sales services yourself – even during the warranty period.
| Problem Possible cause Remedy | ||
| The temperature deviates considerably from the setting. | In some cases, it is sufficient to switch off the appliance for 5 minutes.If the temperature is too high, wait a few hours and check whether the temperature has aligned with the setting.If the temperature is too low, wait until the next day and check the temperature again. | |
| The refrigerating unit switches on with increasing frequency and for longer periods. | The appliance door is being opened frequently. | Do not open the appliance door unnecessarily. |
| The ventilation openings are covered. Figure 2 | Remove any obstructions. | |
| Freezing larger quantities of fresh food. | Do not exceed the max. freezing capacity. | |
| Increased formation of frost on the upper edge of the appliance. | The appliance door is being opened frequently. | Do not open the appliance door unnecessarily. |
After-sales Service
You can find your local After-sales Service centre in the phone book or the After-sales Service directory. Please quote the product number (E no.) and production number (FD no.) of your appliance.
You will find this information on the rating plate. Figure 4
Please help us to avoid unnecessary journeys by quoting the appliance and production number. By doing so, you will save any associated additional charges.
Booking a repair call-out and advice on faults
The After-sales Service contact details for all countries are listed in the attached After-sales Service directory.

natural_image
Diagram of a kitchen appliance with airflow arrows indicating movement or flow direction (no text or symbols)2

natural_image
Technical diagram showing mechanical assembly with two views of a component, no text or symbols present3

4

natural_image
Line drawing of an open refrigerator with a blue arrow indicating airflow or cooling (no text or symbols)5

natural_image
Diagram of three doors with one open and one closed, showing a blue curved arrow indicating rotation or movement (no text or symbols)

natural_image
Diagram of a mechanical assembly with an open lid and two blue arrows indicating motion or force directions (no text or symbols present)
natural_image
Technical line drawing of an open refrigerator with a close-up inset showing internal components (no text or symbols)
natural_image
Diagram of a refrigerator with a side panel showing airflow direction (no text or symbols)
natural_image
Technical line drawing showing a door frame with a small component and a separate view of the side panel (no text or symbols)
natural_image
Diagram of a refrigerator with an attached shelf and a hanging cylindrical component, showing no text or symbols.
natural_image
Diagram showing a refrigerator with a side panel and its side view, illustrating the change from front to back (no text or symbols present)
natural_image
Technical line drawing of a refrigerator with open doors and internal compartments (no text or symbols)
natural_image
Isometric diagram of a grid-based structure with a blue curved arrow indicating direction, labeled '8.' (no text or symbols on the diagram itself)
natural_image
Diagram of a mechanical assembly with an open lid and a blue arrow indicating force or motion (no text or symbols)

- en Table of contents
- tr İçindekiler
- Safety and warning information
- Before you put the appliance into operation
- Technical safety
- Risk of fire
- During use
- en
- Avoiding risks to children and other at-risk persons
- General requirements
- Directions for disposal
- Disposing of packaging
- Disposing of your old appliance
- Warning
- Scope of delivery
- Installing the appliance
- Transport
- Location
- Installation clearances
- Floor surface
- Levelling the appliance
- Changing over the door hinges
- Observe the room temperature and ventilation requirements
- Room temperature
- Note
- Ventilation
- Connecting the appliance
- Electrical connection
- Getting to know the appliance
- Control panel
- Thermostat control dial
- Switching on the appliance
- Setting the temperature
- Notes on using the appliance
- Usable capacity
- Fully utilising the freezer volume
- Removing the fittings
- Freezer compartment
- Max. freezing capacity
- Prerequisites for max. freezing capacity
- Freezing and storing
- Purchasing frozen foods
- Note when loading products
- Freezing fresh food
- Packaging frozen food
- The following are suitable as packaging:
- The following are not suitable as packaging:
- The following are suitable for sealing packaging:
- Storage life of frozen foods
- Freezer calendar
- Figure 1 / 3
- Defrosting frozen food
- Switching the appliance off and putting it out of operation
- Switch off the appliance
- Putting the appliance out of service
- Defrosting
- Caution
- Defrosting the appliance
- Cleaning the appliance
- Proceed as follows
- Saving energy
- Operating noises
- Completely normal noises
- Humming
- Bubbling, whirring or gurgling noises
- Clicking
- Preventing noises
- If the appliance is positioned unevenly
- The appliance is touching adjacent units or appliances
- Containers are wobbling or sticking
- Rectifying minor faults yourself
- After-sales Service
- Booking a repair call-out and advice on faults
Brand : Profilo
Model : DF1015W3VV
Category : Freezer