ARMSTSL - Office StarTech.com - Free user manual and instructions
Find the device manual for free ARMSTSL StarTech.com in PDF.

User questions about ARMSTSL StarTech.com
0 question about this device. Answer the ones you know or ask your own.
Ask a new question about this device
Download the instructions for your Office in PDF format for free! Find your manual ARMSTSL - StarTech.com and take your electronic device back in hand. On this page are published all the documents necessary for the use of your device. ARMSTSL by StarTech.com.
USER MANUAL ARMSTSL StarTech.com
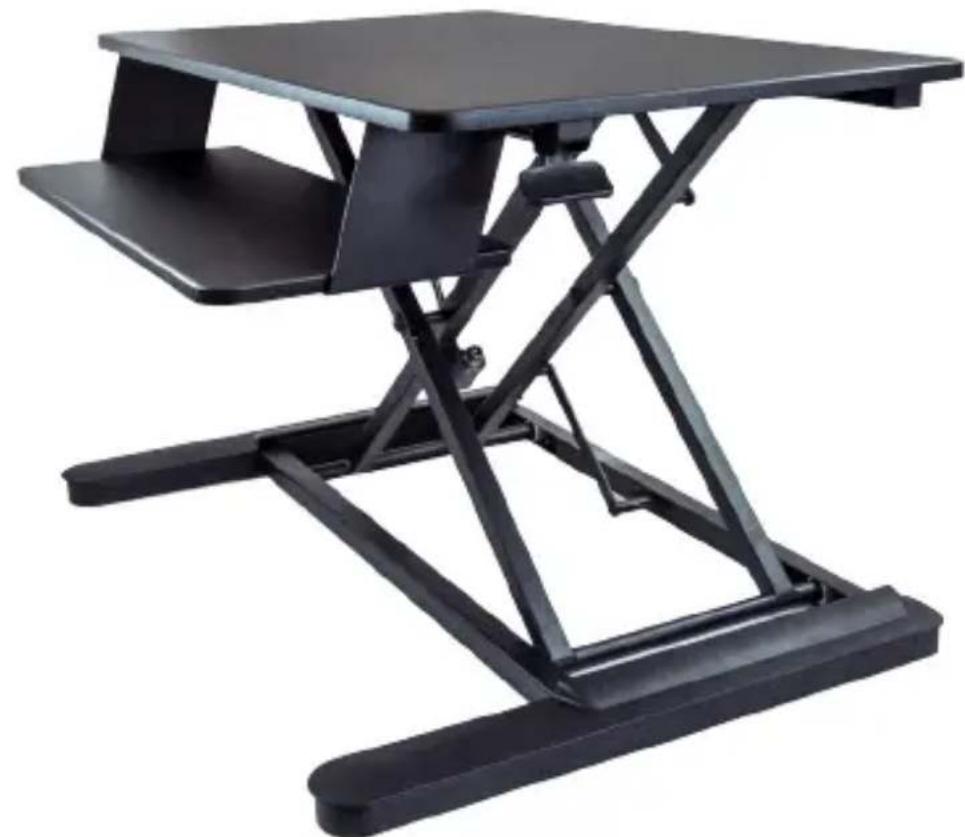
Sit-Stand Desktop Workstation - 35" Work Surface
ARMSTSL
natural_image
Black outdoor seating stand with adjustable arms and a flat top (no text or symbols visible)*actual product may vary from photos
For the latest information, technical specifications, and support for this product, please visit www.StarTech.com/ARMSTSL.
Use of Trademarks, Registered Trademarks, and other Protected Names and Symbols
This manual may make reference to trademarks, registered trademarks, and other protected names and/or symbols of third-party companies not related in any way to StarTech.com. Where they occur these references are for illustrative purposes only and do not represent an endorsement of a product or service by StarTech.com, or an endorsement of the product(s) to which this manual applies by the third-party company in question. Regardless of any direct acknowledgement elsewhere in the body of this document, StarTech.com hereby acknowledges that all trademarks, registered trademarks, service marks, and other protected names and/or symbols contained in this manual and related documents are the property of their respective holders.
Warning statements
Do not exceed the weight capacity of this product. Overloading this product might result in injury or property damage.
Do not allow any part of your component cables to get caught between moveable parts, as it could result in equipment damage.
Caution! To reduce the risk of pinched cables, make sure that you read and follow the instructions on how to route your cables properly.
Pinch hazard! Keep your fingers clear from moving components when you move the workstation up or down.
Make sure that the equipment mounted on the workstation is secure before you move the workstation up or down. If the equipment is not secured, it could fall off the workstation as you move it and the equipment could be damaged.
Varningsmeddelanden
Raise or lower the ARMSTSL....3
Add equipment to the ARMSTSL 4
Adjust the tension of the ARMSTSL......6
Reposition the keyboard tray....7
Technical support....8
Warranty information......8
Product dimensions

text_image
160 mm (6.3") 22 mm (0.9")
text_image
15 mm (0.6") 15 mm (0.6") 560 mm (22.0") 422 mm (16.6")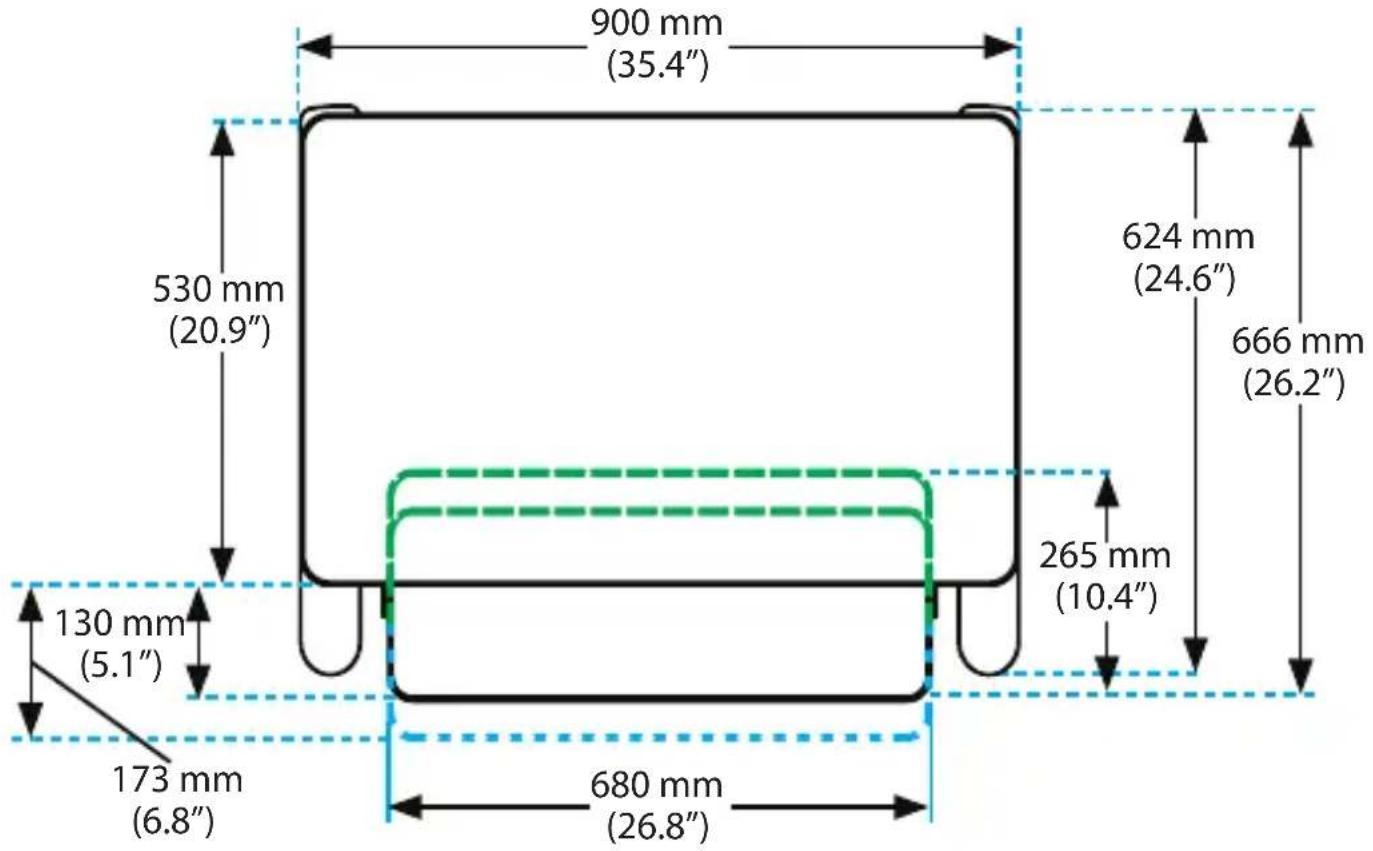
text_image
900 mm (35.4") 530 mm (20.9") 130 mm (5.1") 173 mm (6.8") 680 mm (26.8") 624 mm (24.6") 265 mm (10.4) 666 mm (26.2)Weight capacity

text_image
0 to 12.7 kg (0 to 28 lb.) 0 to 5 kg (0 to 2.3 lb.)Package contents
• 1 x sit-to-stand workstation
- 1 x small hex key
- 1 x large hex key
Raise or lower the ARMSTSL
Warning! Before you move the workstation up or down, make sure that the equipment mounted on the workstation is secure. If your equipment is not stable, it could fall off of the workstation as you move it and the equipment could be damaged.
Pinch hazard! Keep your fingers away from the moving components when you move the workstation up or down.
Caution! Before you raise the workstation, make sure that the cables you're using are long enough.
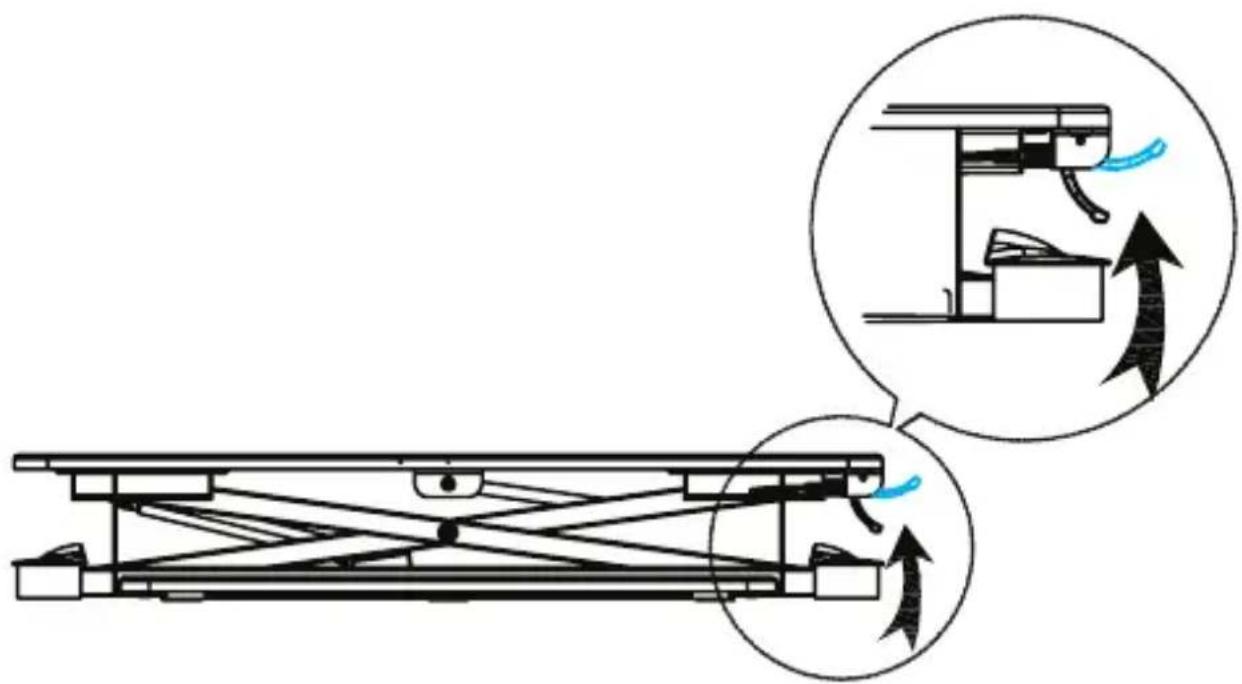
- To move the workstation up or down, squeeze the paddle located on the right side of the ARMSTSL. (figure 1)
- When the workstation is at the desired height, release the paddle to lock the ARMSTSL into position.
figure 1
text_image
Diagram illustrating airflow or ventilation process with labeled components and directional arrowsAdd equipment to the ARMSTSL
Warning! If you use a monitor arm with the ARMSTSL, make sure that you don't position the monitors beyond the edge of the desk surface. If you extend the monitors past the desk surface, you could create a tipping hazard. Make sure that you lower the ARMSTSL to its lowest position before you add equipment to it, distribute the weight across the ARMSTSL evenly, and don't extend the monitors beyond the edge of the adjustable desk surface.
- Move the ARMSTSL to the lowest position.
- Place your equipment (for example, monitors, keyboard, mouse, and so on) onto the workstation. (figure 2)
Warning! Do not exceed the weight capacity of the ARMSTSL. The larger work surface can support up to 28 lb. (12.7 kg) and the keyboard tray can support up to 5 lb. (2.3 kg).
figure 2

text_image
0 to 28 lb. 0 to 5 lb.-
Make sure that your equipment is stable on the workstation before you move the ARMSTSL.
-
Raise the ARMSTSL a short distance. If you can't easily move the ARMSTSL upwards or it begins to move downwards when you squeeze the paddle, you need to adjust the tension. For more information about how to do this, see the "Adjust the tension of the ARMSTSL" section of the manual.
-
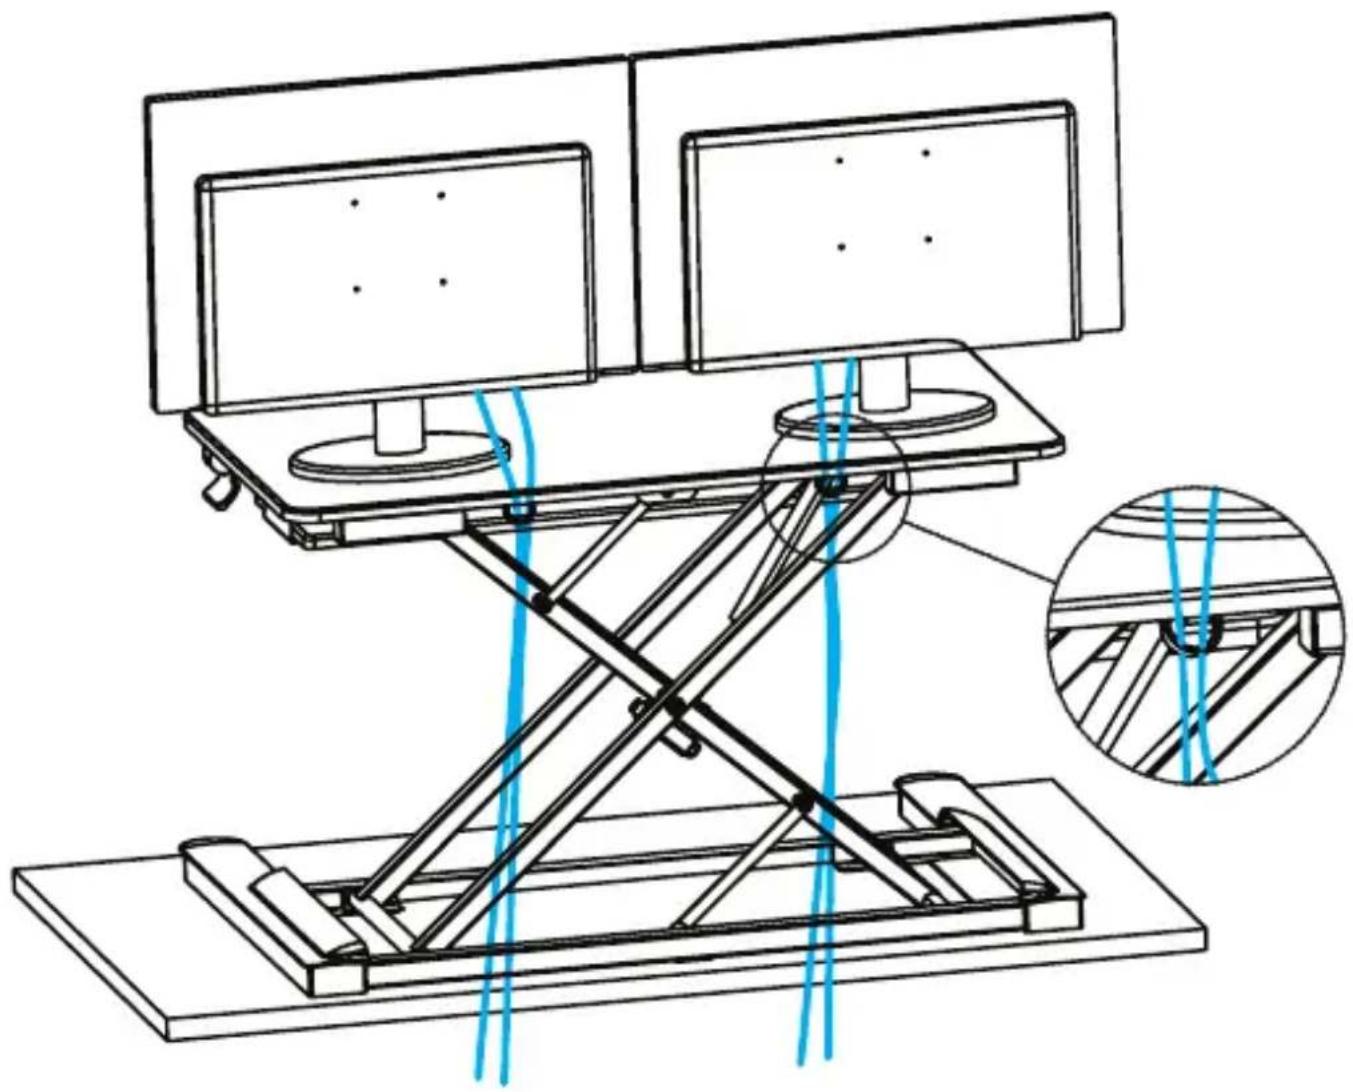
Position your equipment cables so that they run through the loops located at the back of the ARMSTSL. (figure 3)
- If necessary, reposition the keyboard tray. For more information about how to do this, see the "Reposition the keyboard tray" section of the manual.
figure 3
natural_image
Technical line drawing of a mechanical lift or support structure with two monitors and a cross-shaped base, showing structural details (no text or symbols)Adjust the tension of the ARMSTSL
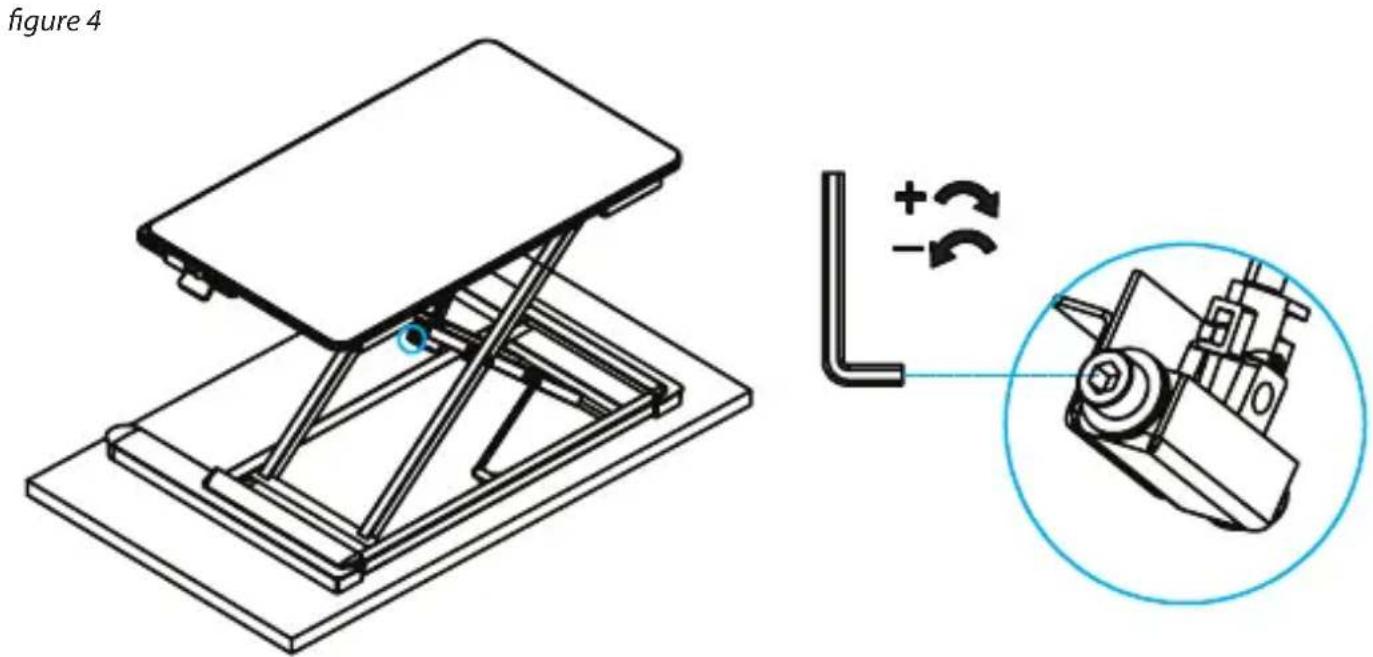
Warning! Remove all of the equipment from the ARMSTSL before you begin to adjust the tension.
- Carefully remove all of the equipment from the ARMSTSL.
- Raise the ARMSTSL to the highest position.
- To adjust the tension of the ARMSTSL, use the large hex key to turn the adjustment screw clockwise or counterclockwise. (figure 4)
- Raise the ARMSTSL a short distance. If you can't easily move the ARMSTSL upwards or it begins to move downwards when you squeeze the paddle, you need to adjust the tension. For more information about how to do this, see the "Adjust the tension of the ARMSTSL" section of the manual.
text_image
figure 4 L +Reposition the keyboard tray
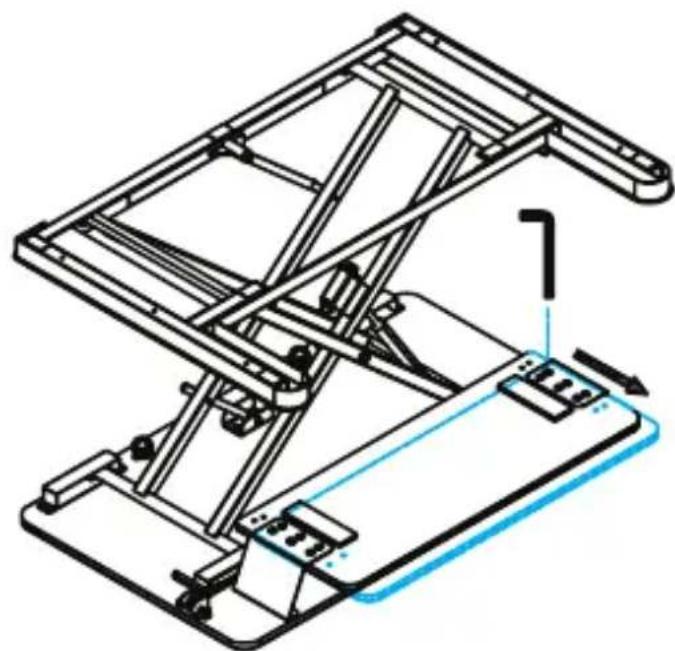
- Remove the equipment from the keyboard tray.
- Raise the ARMSTSL to a position that enables you to access the underside of the keyboard tray.
- Use the small hex key to remove the two sets of six screws from the underside of the keyboard tray. (figure 5)
- Move the keyboard tray, line up the holes, and insert the two sets of six screws.
- Use the small hex key to tighten the screws.
natural_image
Technical line drawing of a mechanical assembly with no visible text or symbolsNote: The ARMSTSL is flipped over in the first drawing to illustrate where the screws are located.

natural_image
Simple diagram showing a rectangular object with a blue horizontal bar and an arrow pointing downward (no text or symbols)Technical support
StarTech.com's lifetime technical support is an integral part of our commitment to provide industry-leading solutions. If you ever need help with your product, visit www.startech.com/support and access our comprehensive selection of online tools, documentation, and downloads.
For the latest drivers/software, please visit www.startech.com/downloads
Warranty information
This product is backed by a two-year warranty.
StarTech.com warrants its products against defects in materials and workmanship for the periods noted, following the initial date of purchase. During this period, the products may be returned for repair, or replacement with equivalent products at our discretion. The warranty covers parts and labor costs only. StarTech.com does not warrant its products from defects or damages arising from misuse, abuse, alteration, or normal wear and tear.
Limitation of Liability
In no event shall the liability of StarTech.com Ltd. and StarTech.com USA LLP (or their officers, directors, employees or agents) for any damages (whether direct or indirect, special, punitive, incidental, consequential, or otherwise), loss of profits, loss of business, or any pecuniary loss, arising out of or related to the use of the product exceed the actual price paid for the product. Some states do not allow the exclusion or limitation of incidental or consequential damages. If such laws apply, the limitations or exclusions contained in this statement may not apply to you.
Hard-to-find made easy. At StarTech.com, that isn't a slogan. It's a promise.
StarTech.com is your one-stop source for every connectivity part you need. From the latest technology to legacy products — and all the parts that bridge the old and new — we can help you find the parts that connect your solutions.
We make it easy to locate the parts, and we quickly deliver them wherever they need to go. Just talk to one of our tech advisors or visit our website. You'll be connected to the products you need in no time.
Visit www.startech.com for complete information on all StarTech.com products and to access exclusive resources and time-saving tools.
StarTech.com is an ISO 9001 Registered manufacturer of connectivity and technology parts. StarTech.com was founded in 1985 and has operations in the United States, Canada, the United Kingdom and Taiwan servicing a worldwide market.