
TD339HSC - Simulator OREGON SCIENTIFIC - Free user manual and instructions
Find the device manual for free TD339HSC OREGON SCIENTIFIC in PDF.


| Product Type | Digital Enhanced Cordless Telecommunications (DECT) cordless handset with charger |
| Model | TD339HSC |
| Brand | Oregon Scientific |
| Handset Dimensions (H x W x D) | 138 x 52 x 27 mm |
| Handset Weight (without battery) | 102 g |
| Charger Power Supply | 220 V / 50 Hz AC |
| Handset Power Supply | 2 rechargeable AAA Ni-MH batteries, 600 mAh |
| Battery Charging Time | Up to 15 hours for first charge |
| Operating Time (standby) | Up to 150 hours |
| Operating Time (talk time) | Up to 10 hours (speakerphone off) |
| Operating Time (speakerphone) | Approximately 1 hour |
| Frequency Range | 1880 – 1990 MHz |
| Communication Range | Up to 300 m (open space) / Up to 50 m (inside building) |
| Display | LCD with blue backlight for caller ID, temperature, and status |
| Temperature Monitoring Range | 0°C to 40°C (indoor/outdoor with sensor) |
| Caller ID | Stores up to 10 call IDs with name and number |
| Phonebook | Stores up to 50 entries (name up to 8 chars, number up to 20 digits) |
| Intercom | Yes, between handsets (max 5 handsets) |
| Additional Features | 3-way conference, call transfer, baby call, keypad lock, games (snake & car), alarm clock |
| Cleaning Instructions | Clean with a damp cloth; do not use benzene, thinner, or similar agents |
| Safety Warnings | Do not use near water; do not open or modify; unplug during severe storms |
| Spare Parts | Rechargeable AAA Ni-MH batteries, belt clip |
Frequently Asked Questions - TD339HSC OREGON SCIENTIFIC
User questions about TD339HSC OREGON SCIENTIFIC
0 question about this device. Answer the ones you know or ask your own.
Ask a new question about this device
Download the instructions for your Simulator in PDF format for free! Find your manual TD339HSC - OREGON SCIENTIFIC and take your electronic device back in hand. On this page are published all the documents necessary for the use of your device. TD339HSC by OREGON SCIENTIFIC.
USER MANUAL TD339HSC OREGON SCIENTIFIC
Cover (size: 105x148.5)

OREGON SCIENTIFIC
ThermoDECT
Handset with Charger User Manual

TD339HSC
| AW (PSD) | TEXT (ENG) | TRANS | MODEL: TD339HSC CU: OSI |
| DATE | DATE | DATE | TITLE: MANUAL |
| AW (CU) | TEXT (P MOR) | AW (SUP) | PREPARED BY: SAMSON |
| DATE | DATE | DATE | DATE: 14/Mar/2003 |
| F/O: PIN 086-002938-014 |
ENG
TABLE OF CONTENTS
Introduction....4
Key features 4
Safety and care instructions.... 5
Caring for your telephone 5
Safety precautions 5
Getting started 5
Unpacking the handset 5
Choosing a location for the charger 6
Connecting the charger 6
Installing the handset batteries 6
Registering the handset 7
Checking the base ID 7
Removing a handset 7
Setting a default base unit (multiple base units only) 8
Clearing all registrations 9
Assigning a name to the handset....9
Charging the handset batteries 10
Replacing the handset batteries.... 10
Attaching the belt clip 10
Using the handset 10
Before you start 10
Making a telephone call 11
Correcting a dialling error 11
Redialing a number 11
Answering a telephone call 11
Returning missed calls 12
Ending a telephone call 12
Using the handset speakerphone 12
Muting the microphone 12
Paging the handset from the base unit 12
Displaying caller ID information 12
Deleting call ID information 13
Using the telephone book 13
Programming the telephone book 13
Recalling an entry from the telephone book 14
Deleting an entry from the telephone book 14
Changing an entry in the telephone book 14
ENG
Changing the handset setting 15
Setting the dial mode (pulse or tone dial) 15
Changing the handset ring tone 15
Changing the handset ring volume level 16
Changing the earpiece volume level 16
Turning the low battery warning signal off or on 16
Turning the out of range warning signal off or on 17
Turning the key tone feature off or on 17
Turning the auto-answer feature off or on 18
Setting the handset display language 18
Using your telephone with a PABX or local telephone network 18
Changing the security PIN 19
Resetting your telephone system.... 20
Setting handset ring priority 20
Making an intercom call 21
Changing the ring tone for an intercom call 21
Making a 3-way conference call 21
Using the call waiting feature 22
Transferring calls between handsets 22
Temperature....22
Setting and using the handset clock 23
Selecting 12- or 24-hour display 23
Changing the date format 23
Changing the date and time 24
Setting the handset alarm 24
Deactivating the alarm.... 25
Using the child-friendly features 25
Locking and unlocking the handset keypad 25
Setting up the baby call (emergency call) feature 25
Playing the snake game 26
Playing the car game 27
Troubleshooting guide 28
Problems turning on the telephone 28
Problems making and answering telephone calls 29
Problems with multi-handset use 31
Problems with programming 31
Additional resources.... 31
Specifications 32
Warnings 33
ENG
INTRODUCTION
Thank you for selecting the Oregon Scientific™ ThermoDECT cordless handset as your personal communications device of choice. Your new handset is designed to give you many years of reliable service, and includes the following conveniences:
- Cool blue LCD backlight for caller ID, temperature display, and in use/battery charging indicators.
• Temperature display in Celsius or Fahrenheit degrees. - Caller ID display for up to ten pre-set numbers.
- An electronic telephone book capable of recalling up to 50 pre-set names and numbers.
- Smooth integration with Oregon Scientific™ ThermoDECT telephone systems, and most DECT telephones.
- Child-friendly baby monitor, emergency dial, keypad lock, and game play options.
- Adjustable ring tones, volume levels, language display, handset IDs, and low battery/out of range warning signals.
- Dual-time clock with alarm.
- Long-life, 10-hour rechargeable batteries for those conversations that go on and on.
Read on to learn how to set up and use your new ThermoDECT cordless handset.
KEY FEATURES
1 Clear / phonebook/mute button
- Press to view the previous menu or clear the last entered digit.
- Press to mute or un-mute the microphone.
- Press to view the phonebook.
2 Down / Caller ID button
- Press to scroll through the Caller ID menu.
- Press to decrease earpiece or speakerphone volume.
- Press to review caller ID information.
3 Phone button
Press to begin and end a telephone call.
4 Speakerphone button
Press to turn the speakerphone off or on.
5 Microphone
6 R button / Flash
- Press to switch to another call.
- Press to access services if you are using a local network (PABX, Centrex, etc.)

ENG
7 Keypad
Keypad 0-9, * and # buttons. Press to dial the number for the call or to enter text for phonebook entries.
8 Intercom button
Press to make and terminate an intercom(handset to handset) call.
9 OK button
Press to select or confirm a menu option.
10Up / redial button
- Press to scroll through the Caller ID menu or recall the last number dialled. - Press to increase earpiece or speakerphone volume.
11Display
12Earpiece
13Headset jack
SAFETY AND CARE INSTRUCTIONS
Caring for your telephone
To ensure you receive the maximum benefit from using your telephone, please observe the following guidelines.
- Do not use benzene, thinner, or similar cleaning agents to clean your ThermoDECT phone, as these may cause permanent damage not covered by the warranty. Use a clean, damp cloth.
- Keep your ThermoDECT phone away from hot, humid conditions and direct sunlight.
- Do not attempt to repair the telephone yourself. Contact the retailer or an electrician if your telephone requires servicing.
Safety precautions
Please observe the following safety precautions when setting up and using your ThermoDECT telephone.
- Do not use your ThermoDECT phone in or near water. Using your telephone with wet hands, while standing in water, or in wet conditions (such as in the rain) can damage the unit and cause injury from electric shock.
- Do not attempt to open or modify your telephone.
GETTING STARTED
Unpacking the handset
When you unpack your ThermoDECT handset, make sure to keep all the packing materials in a safe place, in case you need to later transport the phone or return it for servicing.
In the box, you will find:
ENG
• The ThermoDECT cordless handset
- Two rechargeable batteries for the handset
• A 220-volt AC power cord
• The stand alone charger
- An attachable Belt Clip
Choosing a location for the charger
When selecting a location for the charger, observe the following guidelines:
- Choose a location that provides easy access to a 220-volt AC power source. Never try to lengthen the power cord. Use an appropriate AC power cord for your local power supply.
- Do not place the charger near the sink, bathtub, or shower.
- Do not place the charger near electrical appliance that may cause radio interference, such as large metal objects such a mirror or filing cabinet, an electric stove, washing machine, microwave oven, television, and fluorescent lights.
- Do not place the charger near heat sources such as radiators or air ducts, or in a place subject to direct sunlight.
Connecting the charger
To set up the charger:
-
Plug the small end of the AC power cord into the power socket located at the back of the charger.
-
Plug the other end of the AC power cord into a nearby AC wall outlet.

To AC wall outlet
Installing the handset batteries
Your ThermoDECT hanset is shipped with two rechargeable Ni-MH batteries (AAA size). To install the batteries:
- Open the battery compartment located at the back of the handset.
-
Insert the batteries as shown in the diagram to the right, matching the polarity (+,-).
Note: Reversing the polarity may damage the handset. -
Replace the battery compartment by sliding it in the direction shown by the arrow in the diagram to the right. The lid clicks into place when it is secure.

ENG
Registering the handset
To register a new handset:
- On the base unit, press and hold the PAGE button until the blue In Use light flashes.
- Press the ok button on the handset.
- Press ⚡ to select Registration from the options.
- Press
- Press ⚙ or ⚙ to select a base unit number that does not have a check mark (▼next to it. (Checked numbers have already been registered.)
- Press ok to display the PIN Code? prompt.
- Enter the security PIN for the handset. The default PIN code is "0000". For more information about security PIN codes, refer to page 19.
- Press
Result: The handset display will flash the words Base Search until it locates the base unit. Once it finds the base unit, the base ID number will display on the handset. The base ID number is the unique identifying number for your base unit. You do not need to record or remember this number unless you are trying to register your handset to the base unit of another telephone system.
- Press ☑ to end the registration session.
Checking the base ID
To check the base ID for your handset:
- Press the ok button.
- Press 🔒 to select Setup from the options.
- Press OK
- Press ⬆ to select Base ID from the options.
- Press to view the base ID.
The new handset is now registered to the base unit.
Removing a handset
You may need to do this to replace a handset.
- Press the ok button on a handset that you do not intend to remove.
- Press to select Setup from the options.
- Press ok.
ENG
-
Press 🔒 to select Remove HS from the options.
-
Press OK.
6.Enter the security PIN for the handset. The default PIN code is "0000". For more information about security PIN codes, refer to page 19.
-
Press OK.
-
Press ☐ or ⚙ until the number for the handset you wish to remove is highlighted.
Tip: The handset number is shown on the display when it is in standby mode.
Note: You cannot remove the handset that you are using.
-
Press OK.
-
Press ok again to confirm your selection.
Setting a default base unit (multiple base units only)
If you cross-register your handset with more than one base unit, you can choose which base unit the phone will connect with when making or receiving calls. The default setting is for each handset to connect through the first base station it finds within range. However, if you wish to specify a particular base unit for a handset, you can change the setting using the instructions below.
To set a default base unit for a handset:
-
Press the ok button.
-
Press ⚠ to select Setup from the options.
-
Press .ok
-
Press 🔒 to select Base from the options.
-
Press to display the number of handsets registered with the current base.
-
Press 🧑 or 🏠 to select the base unit with which you wish to associate the handset.
- To choose a specific base unit, place a mark [√] next to the number that corresponds to the base unit through which you wish to connect. For example, if you wish to connect the handset through Base Unit 2, place a mark [√] next to 2.
- To auto-select the first base unit within range, select Automatic.
- Press ☑ to confirm your selection.
Tip: To return to standby mode, press and hold the button.
ENG
Clearing all registrations
If you have registered numerous handsets and base units in your ThermoDECT telephone system, you may experience problems registering new handsets as your system becomes more complex. A single base unit can carry a maximum of 5 handsets. You cannot make intercom, 3-way, baby monitor, or transfer calls between handsets that are registered to two different base units. To clear all registrations and reorganize your telephone system, perform the following procedures. You will have to re-register the handsets and base units after you clear the system (refer to page 7 for instructions).
To reset the registration information for a handset:
- Remove the batteries.
- Press and hold the ok button.
- Insert the batteries and close the battery compartment.
- Release the Ⓞ button. The handset display will flash the word TEST and sound with a melody.
- Press the 5 key. The handset will show the words Not registered on the display.
- Repeat Steps 1-5 to reset all the other handsets.
To reset the registration information for the base unit:
- Unplug the base unit from the AC power source.
- Press and hold the PAGE button
- Plug in the base unit. The blue charge/in use light will flash.
- Release the PAGE button after the blue light flashes three times.
- Reregister all the handsets following the procedure on page 7.
Assigning a name to the handset
You can assign an 8-character name for your new handset. The name you assign will display on the LCD display area for the handset whenever the phone is in standby mode. To assign a name:
- Press the ok button.
- Press ⬆ to select Handset Menu from the options.
- Press
- Press ↓ to select Handset Name from the options.
- Press
- Enter the new name for the handset using the chart on page 13 as a guide. Press the 📄 button to delete the current entry. The maximum length for the name is 8 characters.
- Press ☑ to confirm your selection.
ENG
Note: The handset number will display after the assigned name. For example, if you named handset 2 "Sally", it will appear as "Sally 2". The number cannot be changed.
Tip: To return to standby mode, press and hold the 📄 button.
Charging the handset batteries
The batteries may take up to 15 hours to fully charge the first time you use them.
The battery icon on the handset display becomes progressively empty as the batteries become low. When the batteries are fully charged, the icon looks full and dark, as shown here ■■. When the icon appears empty as shown here □ or if you hear the warning beep during a call, please:
• End the call as soon as possible.
- Don't use the speakerphone mode since this consumes more energy than the normal talk mode.
- Put the handset back on the charger for charging until the battery icon returns to high level.
To charge the handset, put it in the charger with the keypad facing outwards. The blue CHARGE light steadily lights to indicate that the handset is charging. When the battery indicator appears full, and the charge light goes off, the batteries are fully charged.
Replacing the batteries
Rechargeable batteries may need to be replaced from time to time. If you find that you can no longer recharge the batteries, replace them with two new batteries of the same size (AAA) and type (rechargeable Ni-MH) following the instructions on page 6.
Attaching the belt clip
To attach the belt clip to the back of the handset:
- Slide the belt clip over the back of the handset until the ventilation holes are aligned.
- Gently push the belt clip until it clicks into place.
USING THE HANDSET
Before you start
When you first set up your handset, you may hear an out of range beeping tone and see the words Base 1 flashing on the handset display area. This is normal, and means that the handset needs to synchronize with the base unit before you can use it. Hold the handset near the base unit for a few seconds until the handset display stops flashing.
ENG
Making a telephone call
To make a telephone call using the Phone button:
-
Press 📞 to get the dial tone, then dial the number, OR
-
Dial the number then press 📞.
To make a call using the speakerphone:
- Press the 🎨 button to get the dial tone, then dial the number, OR
- Dial the number then press
Note: To switch to speakerphone mode while you are on a call, press the button.

Once you place a call, the display on the handset will begin timing the call length after approximately 15 seconds.
Correcting a dialling error
To correct a dialling error:
- Press the 📄 button to clear the digits one by one, OR
- Continuously press the 📄 button to clear all the digits at once.
Redialing a number
To redial one of the last 10 numbers that you called:
- Press the 🔒 button to view a list of the last 10 numbers you dialed.
- (Optional) To scroll through the list of numbers, press ⚙ or ⚠ to scroll up or down.
- Press the 📞 button to call the selected number.
Answering a telephone call
When you receive an incoming call, the handset will ring and flash External call on the display. If you are already on the line, you will hear a beep to let you know that you have a call waiting. (For more information about call waiting, refer to page 22 of this user manual.)
To answer a call:
- Press 📞, OR
- Press the 🎨 button to use the speakerphone.
Once you answer the call, the display on the handset will begin timing the call length after approximately 15 seconds.
ENG
Returning missed calls
If you subscribe for caller ID sevice through your telephone carrier your ThermoDect telephone can keep track of missed calls information for you. When you miss a call, the handset will display "New Calls" and the number of calls you missed. To review the call history (including caller ID), press the button. To dial the number, press the button.
Ending a telephone call
To end a telephone call, press
Using the handset speakerphone
To use the handset speakerphone during a conversation, press the button. The battery life for speakerphone mode is 1 hour. To turn off the speakerphone, press the button again.
Note: To adjust the speaker volume, press first and then or .
Muting the microphone
You can temporarily mute the microphone on your handset to prevent a caller from hearing a side conversation. To activate or deactivate the mute feature:
- Press ☐ to mute the microphone.
Note: The handset display shows the words Secrecy on while the microphone is muted. You cannot press any digits on the keypad until you return to normal listening mode. - To return the handset to normal listening mode, press 📄 again.
Paging the handset from the base unit
To locate a lost or misplaced handset, press the PAGE button on the base unit. This forces the handset to ring for 30 seconds. Once you locate the handset, press any key to end the page.
Displaying caller ID information
If you have subscribed to caller ID service through your local carrier, the handset can display the name and number of a caller. To be displayed, the name must either be supplied by your network provider or entered in your phonebook. Your phone can track the caller IDs for up to 10 callers, along with the following information:
- Caller number (up to 20 digits).
- Caller name (up to 8 characters) if this is stored in the phonebook or supplied by your telephone network provider.
- The date and time of the last call made from the number.
• The number of calls made to the number.
ENG
To display caller ID information:
- With the handset in standby mode, press the ▼ button to view the list of caller IDs. A No Entry Stored message displays if there are no entries stored in the caller ID bank.
- Press 🚙 or 🔒 to select the name you want to check. If there is no number available for the caller you select, a line (____) displays on the handset. A warning tone sounds when you reach the end of the list.
Tip: To place a call to the number, press the ⏻ button while the number is displayed on the handset.
Deleting caller ID information
To delete call information for a caller ID:
- Repeat Steps 1 - 2 above to select the caller ID for which you wish to delete call information.
- Press the ok button.
- Press the 🔊 button.
- Select Delete from the options.
- Press ☐ to confirm, or ☐ to cancel.
USING THE TELEPHONE BOOK
Your ThermoDECT handset can store up to 50 names and telephone numbers. Names are limited to 8 characters and numbers are limited to 20 digits.
Programming the telephone book
To store an entry in the telephone book:
- Press the ok button.
- Press ☐ to select Phonebook.
- Press OK to select Add Entry.
- Enter the name using the chart below as a guide.
| Key | 1st press | 2nd press | 3rd press | 4th press | 5th press | 6th press | 7th press | 8th press | 9th press |
| 0 0 | $ | & | % | / | / | I | |||
| 1 | space | 1 | - | - | = | ^ | ~ | ||
| 2 A | B | C | a | b | c | @ | 2 | ||
| 3 D | E | F | d | e | f | 3 | |||
| 4 G | H | I | g | h | I | 4 | |||
| 5 J | K | L | J | k | l | 5 | |||
| 6 M | N | O | m | n | o | 6 | |||
| 7 P | Q | R | S | p | q | t | s | ? | |
| 8 T | U | V | t | u | v | 8 | |||
| 9 | W | X | Y | Z | w | x | y | z | 9 |
| * | * | . | . | ; | ; | ? | ! | ||
| ## | < | > | [ | ] | ( ) | [ |
ENG
Tip: Press the 📄 button to go back to the previous character. To scroll to the next character, press the 🔊 button repeatedly.
Example: To enter the name "Anna", you would press 2, 6(x2), 6(x2), and 2.
-
Press ☑ to display the Number prompt.
-
Enter the number using the keypad, including any prefixes or country codes.
-
Press ☑ to display the Stored confirmation report.
Tip: To return to standby mode, press and hold the 📄 button.
Recalling an entry from the telephone book
To make a call to a stored name and number:
-
Press
-
Press or to select the desired entry.
-
(Optional) Press ok to check the number.
-
Press 📞 to place the call.
Deleting an entry from the telephone book
To delete an entry from the telephone book:
-
Press the ok button.
-
Press ☐ to select Phonebook.
-
Press ⚡ to select Delete Entry.
-
Press OK.
-
Press ⚙ or ⚡ to select the entry you wish to delete.
-
Press ☐ to display the entry.
-
Press ☑ again to confirm that you wish to delete the entry.
Result: The display shows the word Deleted to confirm that the name and number have been removed from your telephone book.
Changing an entry in the telephone book
To change an entry in the telephone book:
-
Press the ok button.
-
Press ☐ to select Phonebook.
-
Press ▼ to select Edit Entry.
-
Press
ENG
- Press or to select the entry you wish to edit.
- Press ☐ to display the entry.
- Modify the name using the chart on page 13 as a guide.
- Press ☑ when you are finished to display the entry exactly as it will appear in your phone book.
- Press ok again to confirm the change.
Result: The display shows the word Stored to confirm that the change has been made.
CHANGING THE HANDSET SETTINGS
Setting the dial mode (pulse or tone dial)
The handset is compatible with pulse-dialling (rotary) and tone-dialling (DTMF) systems. The default setting is DTMF mode. To set the dial mode:
- Press the ok button.
- Press ⚫ to select Setup from the options.
- Press
- Press ▼ to select Dialing mode from the options.
- Press
- Press or to select Pulse or DTMF mode.
- Press ☑ to confirm your selection.
Tip: To return to standby mode, press and hold the 📄 button.
Changing the handset ring tone
You have a choice of five ring tones for external incoming calls. To select a ring tone:
- Press the ok button.
- Press to select Handset Menu from the options.
- Press OK.
- Press ⬇ to select Ext. Melody from the options.
- Press OK.
- Press ⚙ or ⬇ to select the desired handset ring tone. You will hear the melody for each tone unless you previously disabled the ring.
- Press ☑ to confirm your selection.
Tip: To return to standby mode, press and hold the 📄 button.
ENG
Changing the handset ring volume level
To change the volume level while the handset is ringing, press the 🔊 or ▼ arrows. To change the volume level while the handset is in standby mode:
- Press the ok button.
- Press ⬇ to select Handset Menu from the options.
- Press OK.
- Press once to select Ring Volume.
- Press OK.
- Press ⚙ or ⬇ to select the desired handset ring volume. The ring volume level is progressively louder from level 1 to 5.
- (Optional) To turn off the handset ringer, select Volume Off.
- Press ☑ to confirm your selection.
Tip: To return to standby mode, press and hold the 📄 button.
Changing the earpiece volume level
To change the volume while you are on a call, press ⬆ or ⬇ until you reach the desired level. To change the volume level while the telephone is in standby mode:
- Press the ok button.
- Press ⬇ to select Handset Menu from the options.
- Press ok.
- Press or to select Ear Volume from the options.
- Press ok.
- Press ☐ or ☑ to adjust the volume up or down. The earpiece volume level is progressively louder from level 1 to 5.
- Press ☑ to confirm your selection.
Tip: To return to standby mode, press and hold the 📄 button.
Turning the low battery warning signal off or on
When the batteries for your handset become low, you will hear a warning tone whenever you use the telephone. To turn the warning signal off or on:
- Press the ok button.
- Press ⬆ to select Handset Menu from the options.
- Press OK.
- Select Warning Tones from the options.
- Press ok.
ENG
-
Press ⬇ to select Low Battery from the options.
-
Press OK.
-
Press ⚠ or ⏻ to select off or on. You will still hear a warning tone if the batteries become low while you are talking on the telephone.
-
Press ☐ to confirm your selection.
Tip: To return to standby mode, press and hold the 📄 button.
Turning the out of range warning signal off or on
You will hear an out of range warning signal whenever you begin moving outside of the range for the base unit. To turn this warning signal off or on:
- Press the ok button.
- Press ⬇ to select Handset Menu from the options.
- Press OK.
- Select Warning Tones from the options.
- Press OK.
- Press 🔒 to select Out of Range from the options.
- Press OK.
- Press or to select off or on.
- Press ☑ to confirm your selection.
Tip: To return to standby mode, press and hold the 📄 button.
Turning the key tone feature off or on
Each time you press a key on your handset, you will hear a tone. To turn this feature off or on:
- Press the ok button.
- Press ▼ to select Handset Menu from the options.
- Press
- Select Warning Tones from the options.
- Press OK.
-
Select Key Press from the options.
-
Press OK.
-
Press or to select off or on.
-
Press ☑ to confirm your selection.
Tip: To return to standby mode, press and hold the 📄 button.
ENG
Turning the auto-answer feature off or on
The auto-answer feature allows you to answer a telephone call as soon as you remove the handset from the cradle. The default for this setting is on. If you would prefer to answer your calls by pressing the button, you can change this setting. To turn the feature off or on:
- Press the ok button.
- Press ⬆ to select Handset Menu from the options.
- Press ok.
- Press ⬇ to select Auto Answer from the options.
- Press to select off or on.
- Press on to confirm your selection.
Setting the handset display language
The default language for the handset display is English. To change the language:
- Press the button.
- Press ▼ to select Handset Menu from the options.
- Press ok.
- Press ⚙ to select Language from the options.
- Press
- Press or to select the preferred language.
- Press ☑ to confirm your selection.
Tip: To return to standby mode, press and hold the 📄 button.
Using your telephone with a PABX or local telephone network
You can use your the handset with a PABX (Private Automatic Branch Exchange) or local telephone network. Use of your telephone with a modern system does not require special adjustment; however, with certain older systems, you may need to insert a pause between the prefix and the rest of the number.
To set up a prefix:
- Press the ok button.
- Press 🔒 to select Setup from the options.
- Press ok.
ENG
- Press ⬇ to select PABX setup from the options.
- Press OK.
- Press 0k again to select Code 1 from the options.
- Enter the security PIN for the base, followed by the prefix. For more information about the security PIN, refer to the next section.
Example: The security PIN for John's ThermoDECT telephone is "0000". To dial an external number in his PABX, he must dial "9", and then the number. John would enter "0000" and "9" for this step.
- Press ☑ to confirm your entry.
- (Optional) Repeat Steps 6 - 8 to set up a second prefix.
Tip: To return to standby mode, press and hold the ☐ button.
To select a pause duration:
- Follow Steps 1 - 5 above to enter the PABX setup menu.
- Press the 🔊 button to select Pause setup from the options.
- Press ☐ to confirm your entry.
Tip: To return to standby mode, press and hold the 📄 button.
Changing the security PIN
The handset is shipped with the security PIN (Personal Identification Number) set to "0000". You can change this to any 1-8 digit PIN you choose. The security PIN is used for resetting the system and identifying the telephone in a PABX (Private Automatic Branch Exchange) or local telephone network.
To change the security PIN:
- Press the button.
- Press ⬇ to select Setup from the options.
- Press
- Press ⬇ to select PIN code from the options.
- Press
-
Press ☐ to confirm the change.
-
Enter the new PIN number. The PIN number will not show on the display for security reasons.
Tip: To return to standby mode, press and hold the 📄 button.
ENG
Resetting your telephone system
Resetting the system clears all information that you have stored on the handset – such as telephone book entries, caller ID history, and the baby call (emergency call) number – and returns your ThermoDECT telephone to its default settings (shown on page 32). There are two ways to reset the system – with a security PIN, and without a security PIN.
To reset the system with a security PIN:
-
Press the ok button.
-
Press ⬇ to select Setup from the options.
-
Press ok.
-
Press to select Default from the options.
-
Press ok.
-
Enter your security PIN number. If you enter the wrong PIN number, an Error message displays.
-
Press ⚙. A confirmation melody sounds from the handset, and the system resets and flashes the word "Base" on the handset. Hold the handset near the base unit for a few seconds until it finds the base.
To reset the system without a security PIN:
-
Slide the battery lid off the back of the unit.
-
Remove the handset batteries.
-
Press and hold the ⓣ button.
-
Insert the batteries into the handset, then release the button. The word Default displays on the handset to confirm the system has been reset.
-
Slide the battery lid back onto the unit until it clicks into place.
-
Press ☑ to reset the system or ☑ cancel.
Setting handset ring priority
Ring priority allows you to set one handset to ring before others start. To turn the handset ring priority off or on:
-
Press the ok button.
-
Press 🔒 to select Setup from the options.
-
Press OK.
-
Press to select Ring Priority from the options.
-
Press ok.
-
Press ⬇ to set the ring priority to off, on, or Def. Priority.
ENG
-
Press
-
(Optional, if you selected Def Priority in Step 6) Press ⚙ or ⚠ to select the handset for which you wish to set ring priority.
-
Press
-
Press ♦ or ⚠ to select the number of rings you want this handset to ring ahead of the other handsets.
-
Press ☑ to confirm your selection.
Tip: To return to standby mode, press and hold the 📄 button.
Making an intercom call
If you have more than one handset registered with the base unit, you can make an intercom call between two handsets. To make an intercom call:
-
Press the 📄 button on your handset.
-
Enter the handset number (1 - 5) that you wish to page.
Result: The handset you selected rings. Your handset number flashes on the LCD display area to let the recipient know it is an internal call.
-
(Optional) To answer the call, press the 📧 button.
-
(Optional) To end the call, press the 📊 or button.
Changing the ring tone for an intercom call
You can change the ring tone for an intercom call to differentiate internal from external calls. To change the ring tone:
-
Press the ok button.
-
Press to select Handset Menu from the options.
-
Press ☑.
-
Press ⚙ to select Int. Melody from the options.
-
Press
-
Press or to select the desired melody.
-
Press ☑ to confirm your selection.
Tip: To return to standby mode, press and hold the ☑ button.
Making a 3-way conference call
If you have more than one handset registered with the base unit, you can make 3-way conference calls between an external call party and two internal handset holders. To make a 3-way conference call:
- Establish contact with the external party by either placing a call to that person, or answering an incoming call.
ENG
- Press to make an intercom call to another handset.
- Enter the handset number that you wish to page.
Result: The handset you paged rings. The internal party can answer the call by pressing the button.
- Press and hold the Ⓞ button for approximately 2 seconds, until you see the word Conference flash on the display and hear a confirmation beep.
Result: All three parties are connected into the call, and can talk together.
Tip: You can end a 3-way conference call exactly as you would any other call. Just press the 📞 button.
Using the call waiting feature
If you receive an external call while you are talking to someone through the intercom, you will hear a call waiting tone. To answer the incoming call:
- Press the 🔒 button to terminate the intercom call.
Result: The external call rings.
- Press 📞 again to answer the external call.
Transferring calls between handsets
You can transfer an external call from one handset to another if you have registered more than one handset with your ThermoDECT telephone. To transfer a call:
- During a telephone conversation, press the ☒ button to place the caller on hold.
- Enter the handset number (1 - 5) to which you wish to transfer the call.
Result: The handset you paged rings, with EXT and INT flashing on the LCD display. The internal party can answer the call by pressing the button.
- (Optional) Hang up the telephone to transfer the call once someone answers. If no one answer, press INT to terminate the page and return to the caller.
TEMPERATURE
The ThermoDECT base unit displays either the indoor temperature (Oregon Scientific Model TD338) or the indoor or outdoor temperature (Oregon Scientific Model TD339)
The handset can display the temperature information for both the built-in and external sensors.
The ThermoDECT handset displays exactly the same temperature reading as shown on the base unit.

ENG
Note: The temperature reading is the current temperature at the base unit (for Indoor) or the current temperature at the remote sensor (for outdoor). It is not the temperature reading at the current location of the handset.
SETTING AND USING THE HANDSET CLOCK
You can change the following time and date settings for the clock display on your handset:
• Time – 12- or 24-hour clock display
- Date – DD/MM (Date/Month) or MM/DD (Month/Date) display
- Current date and time
If you have multiple handsets, you only need to set the time and date on one handset. The alarm can be set for each handset separately.
Selecting 12- or 24-hour display
To change the handset hour display format:
- Press the ok button.
- Press ⬇ to select Setup from the options.
- Press
- Press ☑ again to select Clock Setting from the options.
- Press ↓ to select Hour Format from the options.
- Press
- Press ⚡ to select 12 or 24 hours.
- Press ☑ to confirm your selection.
Tip: To return to standby mode, press and hold the 📄 button.
Changing the date format
To change the handset date display format:
- Press the ok button.
- Press ⚫ to select Setup from the options.
- Press OK.
- Press ☐ again to select Clock Setting from the options.
- Press 🔒 to select Date Format from the options.
- Press OK.
- Press or to select DD/MM (Date/Month) or MM/DD (Month/Date).
- Press ☐ to confirm your selection.
Tip: To return to standby mode, press and hold the 📄 button.
ENG
Changing the date and time
To change the date and time on the system clock (e.g. all handsets):
- Press the ok button.
- Press 🔒 to select Setup from the options.
- Press OK
- Press on again to select Clock Setting from the options.
- Press ☑ again to select Time Setting.
- Press the keypad digits (0-9) to input the date and month.
- Press ☐ to confirm the date and month, and to enter the time setup mode.
- Press the keypad digits (0 - 9) to input the hour and minute.
- Press ☑ to confirm your selection.
Tip: To return to standby mode, press and hold the 📄 button.
Setting the handset alarm
Your ThermoDECT handset comes with two independent alarms that you can set to ring at specified times. To set the alarm:
- Press the ok button.
- Press 🔒 to select Setup from the options.
- Press ok.
-
Press 🔒 to select Alarms from the options.
-
Press OK.
-
Press ⚙ or ⬇ to select Alarm 1 or Alarm 2.
-
Press OK to confirm your selection.
-
Press 🧑 or ⬇ to turn the alarm off or on.
-
Press ☐. If you turned the alarm off in Step 8, you are returned to the Setup menu, and can exit by pressing the ☐ button. If you turned the alarm on, proceed to Steps 10 – 11.
-
Press the keypad digits (0 - 9) to enter the hour and minute at which you want the alarm to sound. The alarm setting is always in 12-hour mode.
11.(Optional) Press the ⚡ or ⚡ keys to switch between AM and PM.
- Press ☑ to confirm when you are finished. A bell-shaped symbol shows on the lower right corner of the handset display when the alarm is set.
ENG
Deactivating the alarm
When one of the alarms activates, the handsets rings with the page tone. To stop the alarm, press any key on the handset or the PAGE key on the base unit.
The handset telephone includes the following child-friendly features:
- Keypad lock – locks the keypad to prevent small children from inadvertently placing calls.
- Baby call – calls a pre-set number (such as to a relative or the police) whenever any key is pressed.
- Baby sit – uses a second handset as a baby monitor to listen to your child's activities from another room.
- Games – converts the handset into a game console for playing the car and snake games.
Locking and unlocking the handset keypad
You can temporarily lock the keypad to prevent small children from inadvertently placing calls. When the keypad is locked, a small key icon will appear in the top right corner of the handset display area.
Note: When the handset keypad is locked, YOU CANNOT MAKE ANY CALLS, EVEN TO EMERGENCY NUMBERS.
To lock the handset keypad:
- Press the ok button.
- Press ⬆ to select Keypad lock from the options that display.
- Press OK.
- Press ⬆ to select Keypad lock on from the options that display.
- Press ☑ to confirm your selection.
To unlock the handset keypad, repeat Steps 1-5 above. In Step 4, select Keypad lock off.
Setting up the baby call (emergency call) feature
With this option, you can program the handset to dial a single, pre-set number whenever any key is pressed. No other calls are allowed, including emergency numbers, unless you program the baby call feature to call an emergency number. There are two steps to using the baby call feature: first, set up the emergency call number, then activate the feature.
To set up the baby call number:
- Press the button.
- Press to select Babycall from the options.
- Press ok.
ENG
- Press ⚡ to select Number from the options.
- Use the keypad digits (0 - 9) to enter the number (including any applicable prefixes or STD codes).
- Press ☑ to confirm when you are finished. Tip: To reset the baby call number, repeat Steps 1 – 5.
- Press the ok button.
- Press ⬇ to select Babycall from the options.
- Press OK.
- Press ⚙ to select Babycall on. The phrase Babycall steadily shows on the handset display.
- Press ☑ to confirm when you are finished.
Toactivate the baby call feature:
To turn off the baby call feature:
- Press the ok button two times.
- Press ⚙ to select off from the options.
- Press ☑ to confirm your selection.
Playing the snake game
The goal of the snake game is to help the snake reach the eggs without running into a wall or turning back on itself. To start the game:
- Press the ok button.
- Press ⬆ to select Games from the options.
- Press OK.
- Press ⚠ to select Snake from the options.
- Press ☐ or ☑ to select the game level. Game levels are progressively difficult from 1 (beginner) to 5 (expert).
- Press ☑ to start the game.
To end game, press the 📄 button.
Press the keys as shown below to move the snake in the desired direction:
Direction
Up ( ) 2 or
Backward/left ( → 4 or
Forward/right ( )→6 or
Down (↓ 8 or
Key

Tip: When the snake is moving, you only need to turn the snake to the left or right. If you move the snake backward, it will turn on itself, and end the game. There is no way to make the snake go faster.
ENG
Snake game description

When the game starts, the snake is moving in the direction of the arrow.

When the snake reaches the same row as the egg, press 4 or 📄 to turn toward the egg.

The snake turns left and is now moving toward the egg.

As the snake passes over the egg, the egg will move to a different location. Press 8 or ⚫ to move the snake down.
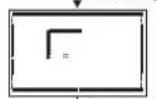
The snake is moving down when it reaches the same row as the egg. Press 6 or ☑ to turn right.

The snake turns right and is moving toward the egg.
Playing the car game
The goal of the car game is to clear all the dots without getting hit by the other car. To start the game:
- Press the OK button.
- Press to select Games from the options.
- Press
- Press ⚡ to select Car from the options.
- Press or to select the game level. Game levels are progressively difficult from 1 (beginner) to 5 (expert).
- Press ☐ to start the game.
ENG
Press the keys as shown below to move the car in the desired direction:
Direction
Up ( ) 2 or
Break (→)
Down (↓) 8 or
Key
6
Tip: You only need to use the (↑) and (↓)
▲ keys to navigate the car between the barriers. The (→) key acts as a break to reduce the car's speed.
Car game description
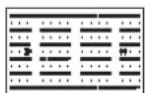


When the game starts, your car is moving to the left; the computer-driven car is moving to the right.
When you reach the gap, press the appropriate key to move to another row and avoid crashing into the computer car.
Press the keys to move between the rows as you try to clear all the dots. The computer car will try to crash into you as you proceed. Press 6 if you need to break.
Continue playing until you clear all the dots.
TROUBLESHOOTING GUIDE
This section includes a list of frequently asked questions for problems you may encounter with your ThermoDECT telephone. If your telephone is not operating as you think it should, check here before arranging for servicing.
Problems turning on the telephone
"I cannot hear a dial tone or get the LCD display to work."
Check to make sure the telephone is properly set up:
- Is the base unit plugged into the telephone line and AC power source? See the base unit manual for instructions.
- Is the AC power source turned on at the socket?
- Are the batteries properly installed in the handset? See page 6 for instructions.
ENG
If the problem persists, please contact our help line following the instructions on our website (www.oregonscientific.com). Never attempt to repair or adjust the telephone yourself. This can cause damage to the unit, electrical shock, and may invalidate your warranty.
Problems making and answering calls
"I cannot make or answer calls."
- Try moving the handset closer to the base unit.
- The battery charge level may be low. The battery life shortens when you use the Speakerphone (handsfree) mode. Check the LCD display for the low battery warning signal ☐. If the battery is low, place the handset in the charging cradle until the battery signal appears full.
- Check the power connection by switching off the power at the main socket, waiting a few seconds, then switching it back on.
"When I press the phone button, I hear the busy tone."
You will hear a busy tone if the line is engaged with another handset that is registered to the same base unit. Check the LCD display area for the EXT symbol. This symbol indicates that someone else is already on the line.
"When I press the keys on my handset, nothing happens. The display is showing the symbol."
The Ⓞ symbol means that the keypad lock feature has been activated. Refer to page 25 for instructions on how to unlock the keypad.
"When I press the keys on my handset, digits appear on the display but I cannot make an outside call."
- You may have inadvertently activated the call barring function on this handset, which prevents calls from being placed.
- The handset may be unable to find the base unit. Try moving closer to the base unit.
- If you have registered additional handsets to the same base unit, make sure they are not already on a call. The LCD display on your handset will display the EXT symbol if the line is engaged.
- The dial mode setting may be incorrect. Refer to page 15 for instructions on how to set the dial mode.
"My call was cut off when I went out of range of the base unit. Now I cannot use my handset."
Please move the handset closer to the base unit.
"I hear a tone while I am using my handset, and the battery symbol on the display looks empty."
The battery needs to be recharged. Put the handset into the charging cradle until the battery symbol looks full 🎯 may take up to 15 hours to fully recharge.
ENG
"I just recharged the batteries, but I still get a warning that they are not charged" The batteries may need to be replaced. Rechargeable batteries gradually lose their ability to be recharged as they get older. Replace the batteries with two rechargeable Ni-MH batteries (AAA size).
"The handset does not ring when a call comes in."
- Check that you have not turned off the ringer volume level. Refer to page 16 for instructions.
- Check that the total REN value of all equipment connected to your telephone line is not more than 4. You may need to disconnect one or more telephones to see if this helps.
"The caller display feature is not working"
You must subscribe for caller ID services through your telephone network provider for the caller ID to display on your ThermoDECT telephone. Please check with your provider.
"The caller display works but the caller's name does not display even when I am sure the caller is using the same number that I entered in the phone book."
If the caller's number does not exactly match what you have entered in your phone book, including the STD code and any prefixes, the phone book cannot match the name to the caller ID. Check the phone book to make sure the full number is stored there.
"I pressed the phone button several times, but keep getting the busy tone.
Your handset may no longer be registered with the base unit. Unplug the AC power source from the bottom of the base unit, then plug it back in. Press and hold the PAGE button until the blue IN USE light flashes. Then, follow the instructions on page 7 to re-register your handset.
"I keep hearing a short beep on my handset, and the display is flashing the word 'Base'."
Your handset may temporarily lose its synchronization with the base unit due to radio interference in your area. When this happens, you will hear a beep and see the word Base while the base unit switches to another channel to overcome the interference. You can move closer to the base unit to help reduce your telephone's susceptibility to radio interference. If you do not wish to hear the beep tone, you can turn it off following the instructions on page 17.
Problems with multi-handset use
"I'm having problems registering a new handset."
- Sometimes it helps to unplug and then reconnect your base unit to its AC power source before you start the registration procedure.
- Make sure you have selected a base number that is not already assigned. Choose a number that does not have a [√] check mark next to it.
ENG
- You may have already registered 5 handsets to the base unit. If so, you will need to remove one or add another base unit before you can register the new handset.
- If you are replacing a faulty handset, make sure you have fully removed the faulty one before registering the new one. Refer to the instructions on page 16 for more information.
- If you are still experiencing problems, you may need to reset all the registrations, then start over. Refer to page 7 for instructions.
"I cannot make a call."
Only one outside call and one intercom call can take place at the same time. Make sure no one else is already using the phone; if so, you will see the EXT symbol on the handset display area, and will hear the busy tone when you try to place a call.
Problems with programming
"I changed the PIN, and I've forgotten the new one."
Please refer to page 19 for instructions on resetting the PIN number.
"I tried to register a new handset, and now all the handsets are flashing "Base" and I can not use the telephone."
Reset your telephone, then try the registration process again. If you are still experiencing problems, reset all your handsets and base units following the instructions on page 9, then re-register the handsets.
ADDITIONAL RESOURCES
Visit our website to learn more about your ThermoDECT telephone and other Oregon Scientific products such as additional handsets and base units. Contact information for our team of customer service representatives is on the website.
Website: www.oregonscientific.com
ENG
SPECIFICATIONS
Weight Dimension
Charger: TBA (without battery) Charger: TBA (HxWxD)
Handset : 102g (without battery) Handset: 138 x 52 x 27mm (HxWxD)
Technical details
Standard Digital Enhanced Cordless
Telecommunications (DECT)
Frequency range 1880 to 1990 MHz (band width = 20 MHz)
Channel band width 1.728 MHz
Modulation GFSK
Speech coding Adaptive Differential Pulse Code Modulation
(ASPCM) at 32 kbit/s
Communication range Up to 300m in open space/ Up to 50m in
building
Base power supply 220V / 50Hz for the charger
Handset power supply 2 rechargeable batteries AAA, Ni-MH 600mAh
Handset battery charging time 15 hours
Operating time Standby: 150 hours
Talking : 10 hours (speakerphone off)
Handsfree about 1 hour
Operating temperature
0° C to 40° C
Storage temperature
-20°C to 60°C
Temperature monitoring range
0° C to 40° C
Default Settings:
| Language | English | INT melody | 1 | PIN CODE | 0000 |
| Handset name | HANDSE | Ring volume | 3 | Dial mode | DTMF |
| Low batt indicator | ON | Ear volume | 2 | Ring priority | none |
| Out of range indicator | ON | Phonebook | empty | PABX codes | none |
| Keyclick | ON | CLID list | empty | ||
| Auto answer | ON | Redlal list | empty |
ENG
WARNINGS
Your ThermoDECT handset has been designed to provide you with many years of reliable service. To ensure that you use the product safely and correctly, observe the following safety warnings:
- Certain types of rechargeable batteries, such as Ni-MH rechargeable batteries, may require special handling and disposal. Check with your local waste disposal authorities for instructions.
- Do not use the handset in or near water, as this can cause damage to the unit and personal injury through electric shock.
- Do not use the handset out-of-doors during a thunderstorm. Unplug the base unit from the telephone line and power source when there are severe storms in your area.
- Do not attempt to open or modify your telephone.
- The product, specifications and contents of this user manual are subject to change without further notice.
- Figures and display examples in this user manual are for reference only, and may differ slightly from the actual product.
© 2003 Oregon Scientific. All rights reserved.
ENG
NOTES
- TABLE OF CONTENTS
- CHANGING THE HANDSET SETTING 15
- TEMPERATURE....22
- SETTING AND USING THE HANDSET CLOCK 23
- USING THE CHILD-FRIENDLY FEATURES 25
- TROUBLESHOOTING GUIDE 28
- ADDITIONAL RESOURCES.... 31
- SPECIFICATIONS 32
- WARNINGS 33
- INTRODUCTION
- KEY FEATURES
- 7 KEYPAD
- 8 INTERCOM BUTTON
- 9 OK BUTTON
- 10UP / REDIAL BUTTON
- 11DISPLAY
- 12EARPIECE
- 13HEADSET JACK
- SAFETY AND CARE INSTRUCTIONS
- CARING FOR YOUR TELEPHONE
- SAFETY PRECAUTIONS
- GETTING STARTED
- UNPACKING THE HANDSET
- ENG
- CHOOSING A LOCATION FOR THE CHARGER
- CONNECTING THE CHARGER
- INSTALLING THE HANDSET BATTERIES
- REGISTERING THE HANDSET
- CHECKING THE BASE ID
- REMOVING A HANDSET
- SETTING A DEFAULT BASE UNIT (MULTIPLE BASE UNITS ONLY)
- CLEARING ALL REGISTRATIONS
- ASSIGNING A NAME TO THE HANDSET
- CHARGING THE HANDSET BATTERIES
- REPLACING THE BATTERIES
- ATTACHING THE BELT CLIP
- USING THE HANDSET
- BEFORE YOU START
- MAKING A TELEPHONE CALL
- CORRECTING A DIALLING ERROR
- REDIALING A NUMBER
- ANSWERING A TELEPHONE CALL
- RETURNING MISSED CALLS
- ENDING A TELEPHONE CALL
- USING THE HANDSET SPEAKERPHONE
- MUTING THE MICROPHONE
- PAGING THE HANDSET FROM THE BASE UNIT
- DISPLAYING CALLER ID INFORMATION
- DELETING CALLER ID INFORMATION
- USING THE TELEPHONE BOOK
- PROGRAMMING THE TELEPHONE BOOK
- RECALLING AN ENTRY FROM THE TELEPHONE BOOK
- DELETING AN ENTRY FROM THE TELEPHONE BOOK
- CHANGING AN ENTRY IN THE TELEPHONE BOOK
- CHANGING THE HANDSET SETTINGS
- SETTING THE DIAL MODE (PULSE OR TONE DIAL)
- CHANGING THE HANDSET RING TONE
- CHANGING THE HANDSET RING VOLUME LEVEL
- CHANGING THE EARPIECE VOLUME LEVEL
- TURNING THE LOW BATTERY WARNING SIGNAL OFF OR ON
- TURNING THE OUT OF RANGE WARNING SIGNAL OFF OR ON
- TURNING THE KEY TONE FEATURE OFF OR ON
- TURNING THE AUTO-ANSWER FEATURE OFF OR ON
- SETTING THE HANDSET DISPLAY LANGUAGE
- USING YOUR TELEPHONE WITH A PABX OR LOCAL TELEPHONE NETWORK
- CHANGING THE SECURITY PIN
- RESETTING YOUR TELEPHONE SYSTEM
- SETTING HANDSET RING PRIORITY
- MAKING AN INTERCOM CALL
- CHANGING THE RING TONE FOR AN INTERCOM CALL
- MAKING A 3-WAY CONFERENCE CALL
- USING THE CALL WAITING FEATURE
- TRANSFERRING CALLS BETWEEN HANDSETS
- TEMPERATURE
- SETTING AND USING THE HANDSET CLOCK
- SELECTING 12- OR 24-HOUR DISPLAY
- CHANGING THE DATE FORMAT
- CHANGING THE DATE AND TIME
- SETTING THE HANDSET ALARM
- DEACTIVATING THE ALARM
- LOCKING AND UNLOCKING THE HANDSET KEYPAD
- SETTING UP THE BABY CALL (EMERGENCY CALL) FEATURE
- TOACTIVATE THE BABY CALL FEATURE
- TO TURN OFF THE BABY CALL FEATURE
- PLAYING THE SNAKE GAME
- SNAKE GAME DESCRIPTION
- PLAYING THE CAR GAME
- CAR GAME DESCRIPTION
- TROUBLESHOOTING GUIDE
- PROBLEMS TURNING ON THE TELEPHONE
- PROBLEMS MAKING AND ANSWERING CALLS
- I CANNOT MAKE OR ANSWER CALLS
- WHEN I PRESS THE PHONE BUTTON, I HEAR THE BUSY TONE
- WHEN I PRESS THE KEYS ON MY HANDSET, NOTHING HAPPENS. THE DISPLAY IS SHOWING THE SYMBOL
- WHEN I PRESS THE KEYS ON MY HANDSET, DIGITS APPEAR ON THE DISPLAY BUT I CANNOT MAKE AN OUTSIDE CALL
- MY CALL WAS CUT OFF WHEN I WENT OUT OF RANGE OF THE BASE UNIT. NOW I CANNOT USE MY HANDSET
- I HEAR A TONE WHILE I AM USING MY HANDSET, AND THE BATTERY SYMBOL ON THE DISPLAY LOOKS EMPTY
- PROBLEMS WITH MULTI-HANDSET USE
- I CANNOT MAKE A CALL
- PROBLEMS WITH PROGRAMMING
- ADDITIONAL RESOURCES
- SPECIFICATIONS
- WEIGHT DIMENSION
- TECHNICAL DETAILS
- WARNINGS
Brand : OREGON SCIENTIFIC
Model : TD339HSC
Category : Simulator