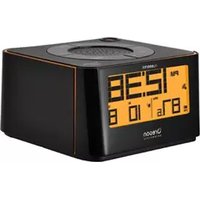
Prysma G RRM222P - Alarm Clock OREGON SCIENTIFIC - Free user manual and instructions
Find the device manual for free Prysma G RRM222P OREGON SCIENTIFIC in PDF.


Pick your language and provide your email: we'll send you a specifically translated version.
| Product Type | Radio Alarm Clock |
| Brand | Oregon Scientific |
| Model | Prysma G RRM222P |
| Display | LCD screen with white backlight |
| Projection | Projects time onto ceiling or wall |
| Radio | FM tuner, 87.5–108 MHz |
| Alarm | Dual independent alarms with wake-up to radio or buzzer |
| Snooze | 5-minute snooze function |
| Power | AC adapter 6V DC, backup batteries 2 x AAA (not included) |
| Dimensions | Approx. 18 x 9 x 6 cm |
| Weight | Approx. 300 g (without batteries) |
| Controls | Top-panel buttons: ALARM, RADIO, SET, +/−, PROJECTION |
| Time Format | 12/24-hour selectable |
| Projection Settings | Projection on/off and 180° rotation |
| Radio Memory | Stores up to 10 preset stations |
| Additional Features | Calendar with month and day |
| Cleaning | Wipe outer surface with a soft, dry cloth |
| Safety | Do not immerse in water; operate in a dry, ventilated area |
| Spare Parts | Only backup batteries are user-replaceable; contact support for other parts |
| Warranty | 1-year limited from date of purchase |
| Package Contents | Clock, AC adapter, instruction booklet |
Frequently Asked Questions - Prysma G RRM222P OREGON SCIENTIFIC
How do I set the time on the Prysma G RRM222P?
To set the time, press and hold the SET button located on the back of the clock until the hour digits start flashing. Use the + or − buttons to adjust the hour, then press SET again to move to the minutes. Repeat the same process to adjust the minute, year, month, and day. Finally, press SET once more to exit the setup mode.
How can I set both alarms?
This model has two independent alarm times. To set the first alarm, press the ALARM button once until the alarm 1 icon appears. Hold the SET button to enter alarm time adjustment. Use + / − to set hours and minutes. Press ALARM again to select between buzzer or radio wake-up. Repeat the same steps with the ALARM button pressed twice for the second alarm.
How do I use the FM radio and set preset stations?
Press the RADIO button to switch to radio mode. Use + / − to tune manually or press and hold RADIO for auto-scan. To store a station as a preset, press and hold the SET button while tuned; the preset number will appear. Use the − and + buttons to choose a preset slot. Up to 10 preset stations can be saved.
How does the projection feature work?
The clock projects the current time onto the ceiling or wall. Press the PROJECTION button to turn the projection on or off. You can rotate the projection head to focus the display at your preferred angle. To change the time format (12/24-hour), adjust it in the setup menu; the projection will reflect that.
What power sources can I use?
The clock can be powered by the supplied AC adapter (6V DC). It also has a battery backup compartment for 2 AAA batteries (not included) to maintain the time and alarm settings during a power failure. If you use only batteries, the display backlight and projection may be reduced.
My clock does not respond; what should I do?
First, check that the AC adapter is securely plugged in. If you use batteries, make sure they are inserted with correct polarity. Press the RESET button (small hole on the bottom) with a paperclip to restart the device. If the issue persists, try removing both the adapter and batteries for a few minutes, then reconnect.
Can I use the alarm to wake up to the radio?
Yes, each alarm can be set to wake you with the FM radio or the built-in buzzer. While adjusting the alarm time, press the ALARM button to alternate between radio and buzzer. When radio is selected, you can adjust the volume separately using the volume buttons.
How do I set the radio volume?
The volume is controlled by the + / − buttons while the radio is playing. The volume level is displayed for a few seconds. Note that there is a separate volume setting for the alarm radio, which you can adjust while in alarm setup mode.
How should I maintain and clean the device?
Always unplug the AC adapter before cleaning. Use a soft, dry cloth to wipe the exterior. Do not use water, harsh chemicals, or abrasive cleaners. Keep the projection lens free of dust to ensure a clear image. Avoid placing the clock in direct sunlight or near heat sources.
Are replacement parts available?
The only user-replaceable part is the backup battery. For any other repair or replacement, contact Oregon Scientific customer support. Do not attempt to open the casing yourself, as this may void the warranty.
User questions about Prysma G RRM222P OREGON SCIENTIFIC
0 question about this device. Answer the ones you know or ask your own.
Ask a new question about this device
No questions yet. Be the first to ask one.
Download the instructions for your Alarm Clock in PDF format for free! Find your manual Prysma G RRM222P - OREGON SCIENTIFIC and take your electronic device back in hand. On this page are published all the documents necessary for the use of your device. Prysma G RRM222P by OREGON SCIENTIFIC.
USER MANUAL Prysma G RRM222P OREGON SCIENTIFIC



Manual assistant
Powered by Anthropic
Waiting for your message
Product information
Brand : OREGON SCIENTIFIC
Model : Prysma G RRM222P
Category : Alarm Clock