
DS-DELL-113 - Computer accessory Havis - Free user manual and instructions
Find the device manual for free DS-DELL-113 Havis in PDF.

| Product Type | Rugged Mobile Docking Station |
| Brand | Havis |
| Model | DS-DELL-113 |
| Compatible Computers | Dell E6400, E6410, E6420 XFR (DS-DELL-110 Series); Dell E6400, E6410, E6420, E6430 ATG (DS-DELL-230 Series) |
| Dimensions (W x D x H) | 13.6" x 12.7" x 3.7" (34.4 cm x 32.3 cm x 9.4 cm) |
| Weight | 6.6 lbs (2.9 kg) |
| Power Supply Input | 20V DC |
| Power Supply (Recommended) | LPS-105 (90W Power Supply with cigarette lighter adapter) |
| Operating Temperature | 0°C to 60°C (32°F to 140°F) |
| Storage Temperature | -40°C to 85°C (-40°F to 185°F) for DS-DELL-110 Series; -60°C to 75°C for DS-DELL-230 Series |
| Port Replication | Rearward and side connectivity; USB 2.0 speed on XFR models |
| Mounting | Includes mounting bracket with 1/4"-20 and M5 screws |
| Locking Mechanism | Key lock for theft deterrence |
| LED Indicators | Blue Port Replication LED (computer seated) and Laptop Power Button LED (system power) |
| Hardware Kit Includes | Zip ties (4), keys (2), 1/4"-20 screws (4), M5 screws (4) |
| Safety Warnings | Do not install in airbag deployment zone; do not use computer while driving; ensure connector access door is fully open before docking |
| Certifications | CE (EMC Directive 2004/108/EC), RoHS (2011/65/EU), FCC Class A |
| Accessories Available | LPS-105 Power Supply, DS-DA-408 Screen Stiffener, DS-DA-102 USB Powered Light, DS-DA-208 Card Reader Mounting Bracket |
| Maintenance | Keep away from water, moisture, dust; do not place metal objects or liquids on top; unplug if malfunction |
| Reparability | Contact Havis for service; no user-serviceable parts mentioned |
Frequently Asked Questions - DS-DELL-113 Havis
User questions about DS-DELL-113 Havis
0 question about this device. Answer the ones you know or ask your own.
Ask a new question about this device
Download the instructions for your Computer accessory in PDF format for free! Find your manual DS-DELL-113 - Havis and take your electronic device back in hand. On this page are published all the documents necessary for the use of your device. DS-DELL-113 by Havis.
USER MANUAL DS-DELL-113 Havis
Havis Rugged Mobile Docking Station
For Dell XFR & ATG Computers
DS-DELL-110 Series / DS-DELL-230 Series
DS-DELL-111
DS-DELL-231
DS-DELL-111-3
DS-DELL-233
DS-DELL-113
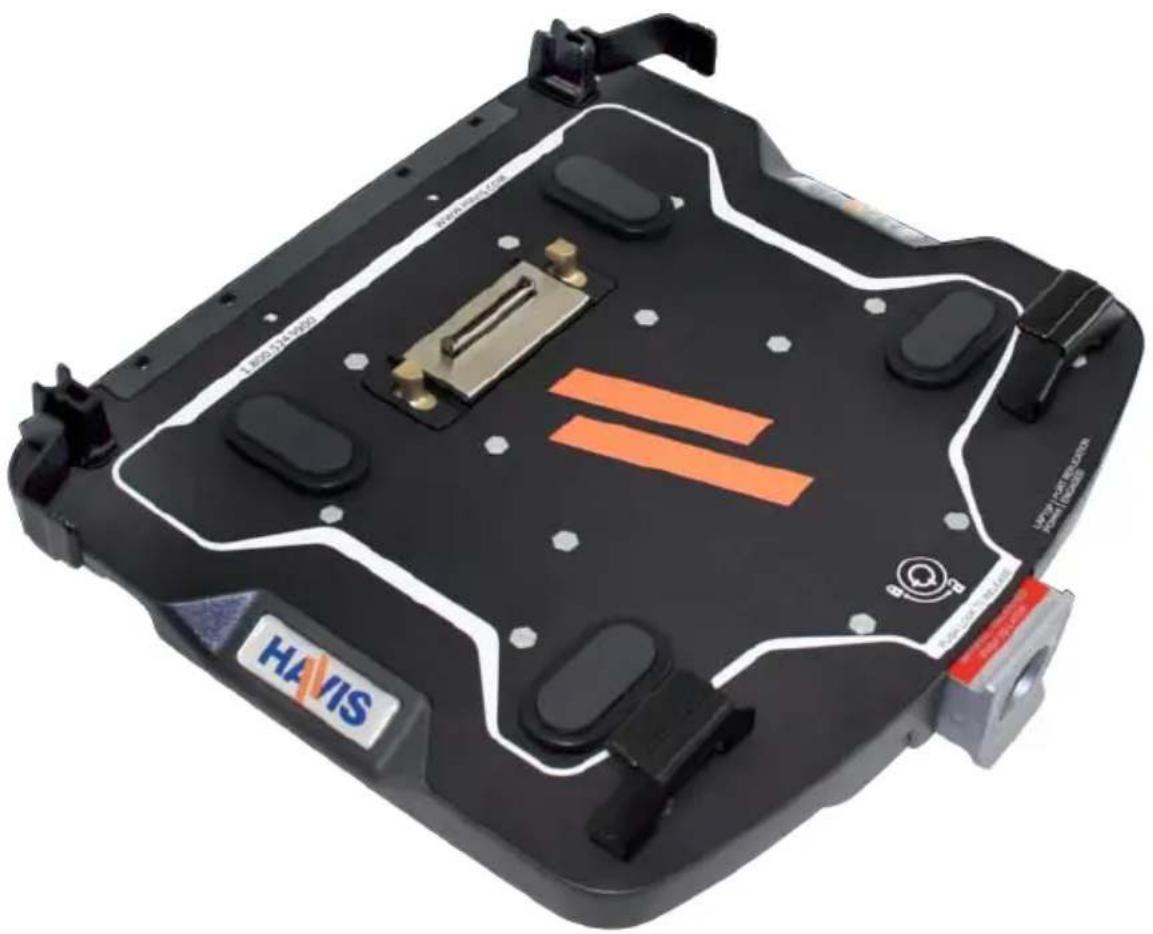
natural_image
Top-down view of a black Havis electronic device casing with orange and beige components, no visible text or symbols on the body itself.Havis is pleased to provide this Owner's Manual to aid in the proper installation and use of the DS-DELL-110 Series/230 Series Docking Station for the Dell XFR & ATG laptop computers.
For questions regarding the set-up of your DS-DELL-110 Series/230 Series Docking Station, please contact Havis at 1-800-524-9900 or visit www.havis.com for additional product support and information.
This Owner's Manual applies to the following Part Numbers:
DS-DELL-111 DS-DELL-231
DS-DELL-111-3 DS-DELL-233
DS-DELL-113
WARNING
- NEVER STOW OR MOUNT THE DOCKING STATION DIRECTLY IN A VEHICLE AIRBAG DEPLOYMENT ZONE.
• DO NOT USE COMPUTER WHILE DRIVING.
CAUTION
- READ ALL INSTRUCTIONS THOROUGHLY BEFORE BEGINNING INSTALLATION.
- DO NOT MATE COMPUTER TO DOCKING STATION UNLESS COMPUTER'S DOCKING CONNECTOR ACCESS DOOR IS FULLY OPEN OR DAMAGE MAY RESULT. (SEE BELOW)
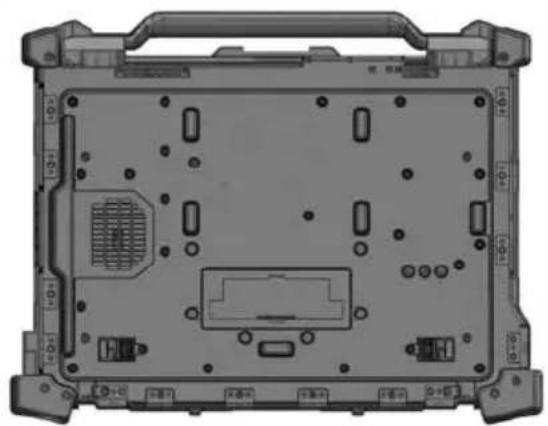
natural_image
Top-down view of a laptop chassis showing internal components and mounting hardware (no text or symbols visible)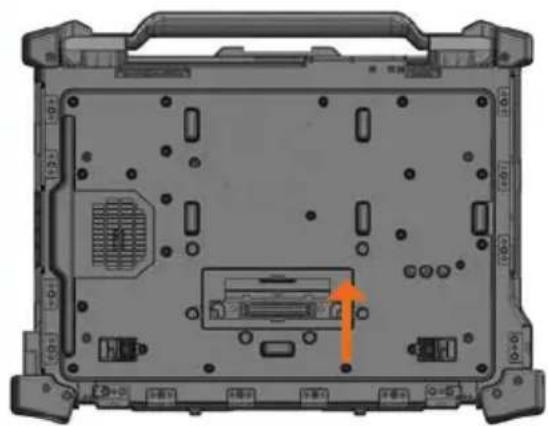
natural_image
Laptop front panel with visible internal components and a highlighted orange arrow pointing to a component (no text or symbols)Dell E6420 XFR shown with Connector Access Door in closed position (left) and open position (right)
CAUTION
- FOR SAFE & PROPER SYSTEM FUNCTION, SPECIFIC DOCKING STATION MODELS MUST BE USED WITH SPECIFIC DELL COMPUTER MODELS.
- DS-DELL-110 SERIES (111, 113, ETC.) DOCKING STATIONS ARE INTENDED FOR USE WITH DELL E6400, E6410 & E6420 XFR COMPUTERS ONLY.
- DS-DELL-230 SERIES (231, 233) DOCKING STATIONS ARE INTENDED FOR USE WITH DELL E6400, E6410, E6420 & E6430 ATG COMPUTERS ONLY.
- THE PORT COVERS SUPPLIED WITH DELL E6400 & E6410 ATG COMPUTERS MUST BE REMOVED PRIOR TO DOCKING.
- THE PORT COVERS SUPPLIED WITH DELL E6420 & E6430 ATG COMPUTERS MAY REMAIN SECURED TO COMPUTER WHILE DOCKING.
• COMPUTER & DOCKING STATION IDENTIFICATION:
| COMPUTER MODEL DOCKING STATION IDENTIFICATION | ||
 E6400/6410/6420 XFR* USB will operate at USB 2.0 speed E6400/6410/6420 XFR* USB will operate at USB 2.0 speed |  DS-DELL-110 Series DS-DELL-110 Series | No Foot Pads on top plate.Low profile Front Hooks. |
 E6400/6410/6420/E6430 ATG DS-DELL-230 Ser ies E6400/6410/6420/E6430 ATG DS-DELL-230 Ser ies | 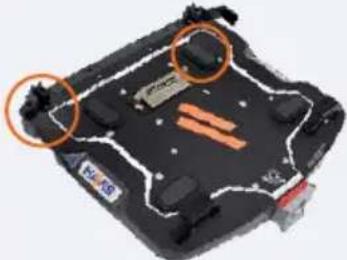 | Foot Pads on top plate.Macro Alignment Brackets attached. |
Precautions
- Do not place metal objects or containers of liquid on top of the Docking Station
- If a malfunction occurs, immediately unplug the Power Supply and remove the laptop
- Use only the specified Power Supply (Part # LPS-105) with this Docking Station
- Do not store the Docking Station where water, moisture, steam, dust, etc. are present
- Do not connect cables into ports other than what they are specified for
- Do not leave the Docking Station in a high temperature environment (greater than 75^ C, 167^ F ) for a long period of time
Table of Contents
Specifications 4
Parts Included 5
Port Replication Capability .... 5
Installation 6
Cable Management 7
Operation - Docking 9
Operation - Undocking ....10
Specifications
| Power Supply Input 20V DC | -In |
| Dimensions 13.6” (34.4 cm) | W x 12.7” (32.3 cm) D x 3.7” (9.4 cm) H |
| Weight 6.6 lbs (2.9 kg) |
| DS-DELL-110 Series Docking Stations for DELL E6400, E6410, E6420 XFR Computers | |
| Operating Environment 0° C to 60° C (32° F to 140°F) | |
| Storage Environment -40° C to 85° C (-40° F to 185° F) |
| DS-DELL-230 Series Docking Stations for DELL E6400, E6410, E6420, E6430 ATG Computers | |
| Operating Environment 0° | C to 60°C (32°F to 140°F) |
| Storage Environment -60°C | C to 75°C (-76°F to 167°F) |
EC DECLARATION OF CONFORMITY in accordance with EN 45014
Manufacturers Name: Havis, Inc.
Manufacturers Address: 47801 Anchor Court, Plymouth Twp, MI 48170 USA
Declares under our sole responsibility that the product:
Product name: Havis Docking Station For Dell E6400/E6410/E6420 XFR & Dell E6400/E6410/E6420/E6430 ATG Model: DS-DELL-11X & DS-DELL-23X, where 'X' may be any alphanumeric character and which describes product options. May be followed by any alphanumeric characters which describe product options. Product Options: This declaration covers all options of the above product which bear the CE Marking.
Is in conformity with the following standards or other normative documents:
EMC Directive 2004/108/EC: EN 55022:2010, Class B, Information technology equipment - Radio disturbance characteristics - Limits and methods of measurement EN 55024:2010, Information technology equipment - Immunity characteristics - Limits and methods of measurement
Directive 2011/65/EU Restriction of the use of certain hazardous substances (RoHS)
Supplementary Information:
The product herewith complies with the requirements of the EMC Directive 2004/108/EC. This product requires the use of the provided e-Marked automotive power supply when used within vehicles.
Plymouth twp, MI, USA August 22, 2012 Bruce Jonik, Director of Engineering, Havis, Inc.
FCC 47CFR, Part 15 compliance: This is an FCC Class A device. Any changes or modifications to the models DS-DELL-11X or DS-DELL-23X not expressly approved by Havis, Inc. could void the user's authority to operate this equipment.
Docking Station
Macro Alignment Brackets
(DS-DELL-230 Series only)
Docking Connector
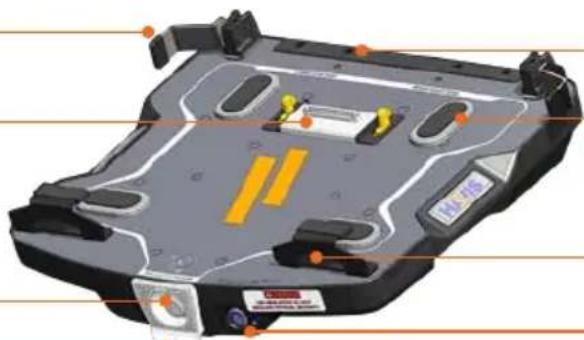
natural_image
3D technical illustration of a battery pack with labeled components and orange connectors (no readable text or symbols)Strain Relief Points
Foot Pads
(DS-DELL-230 Series only)
Front Hooks
Power Button/LED
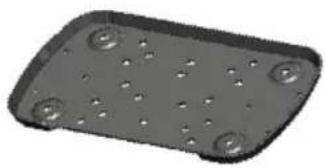
Mounting Bracket
Hardware Kit
This Hardware Kit includes:
- Zip Ties (4)
- Keys (2)
- 1/4"-20 Screws (4)
- M5 Screws (4)
Tools required for installation:
- 3mm Hex Drive
(For attaching Mounting Bracket to Docking Station with M5 Screws)
natural_image
3D rendering of a rectangular metal plate with four circular indentations on its surface (no text or symbols)
natural_image
Four parallel black rods with rounded ends, arranged horizontally (no text or symbols)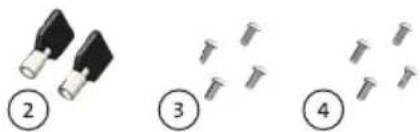
natural_image
Four labeled diagrams showing different types of screw plugs (no text or symbols present)- 5/32" Hex Drive
(For attaching Mounting Bracket to Motion Device with 1/4"-20 Screws)
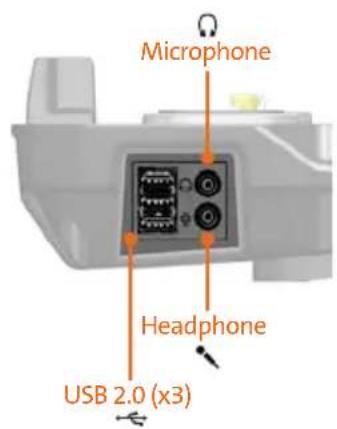
Port Replication Capability
Rearward Connectivity Side Connectivity
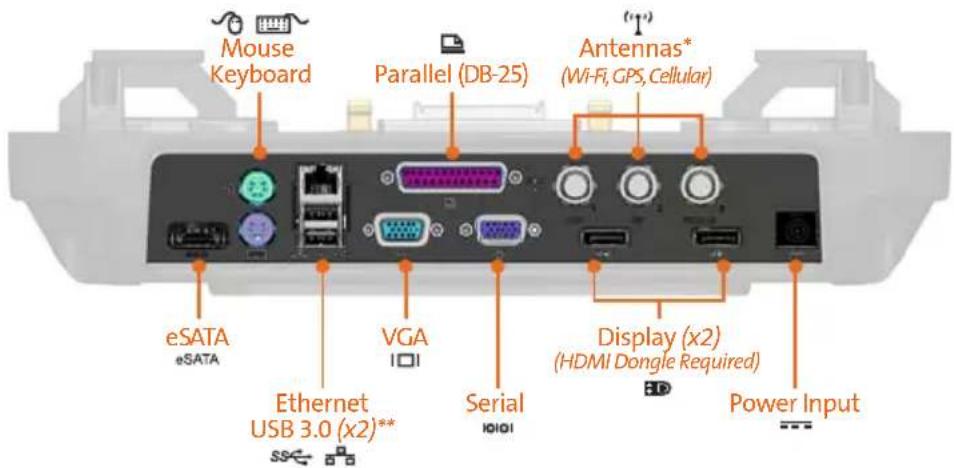
* Antennas for DS-DELL-111-3 only
** XFR Computers for DS-DELL-110 Series will operate at USB 2.0 speed
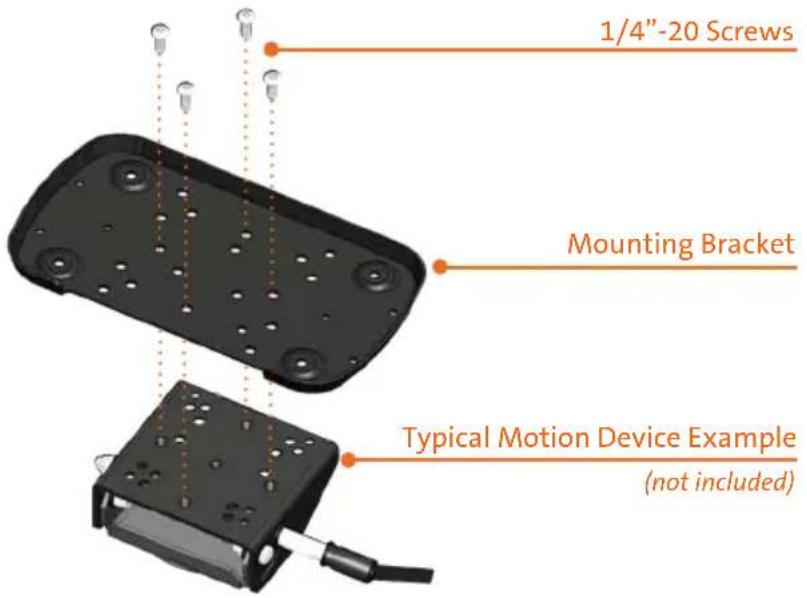
1) Install the Mounting Bracket to the Motion Device using (4) 1/4"-20 screws (Hardware Kit Item 3). Torque screws to 120 in-lbs (13.4Nm) ± 10%.
NOTE: Numerous hole patterns present in Mounting Bracket will accommodate Havis Motion Devices as well as most competitors'.
2) Lower the Docking Station to the Mounting Bracket as shown and secure with (4) M5 screws (Hardware Kit Item 4). Torque screws to 25 in-lbs (2.8 Nm) ± 10%.
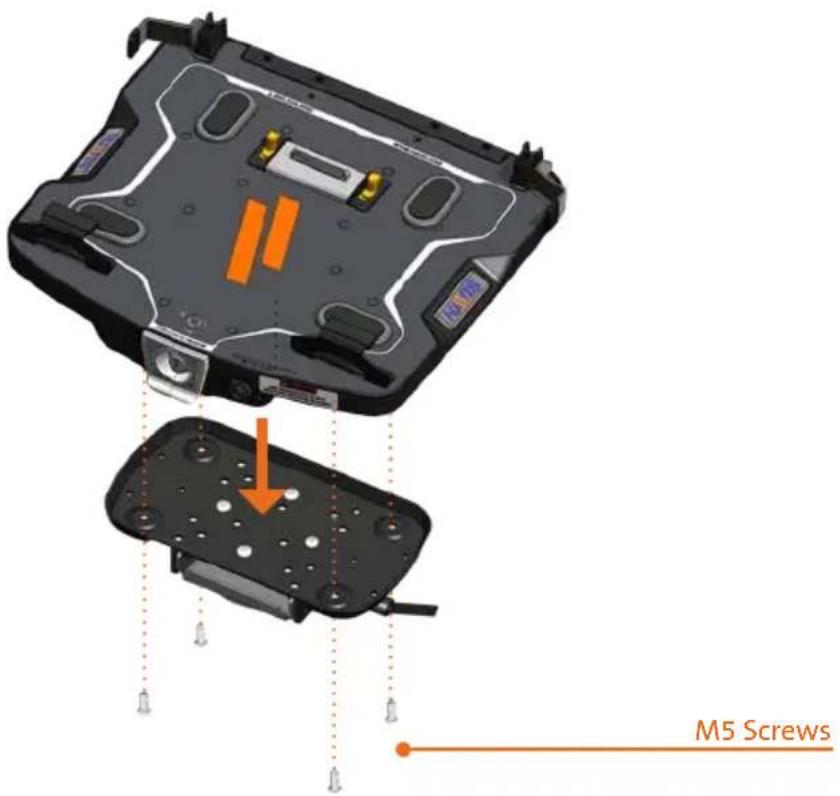
NOTE: We recommend applying a drop of medium strength (blue) thread locking adhesive to the threads of all fasteners.
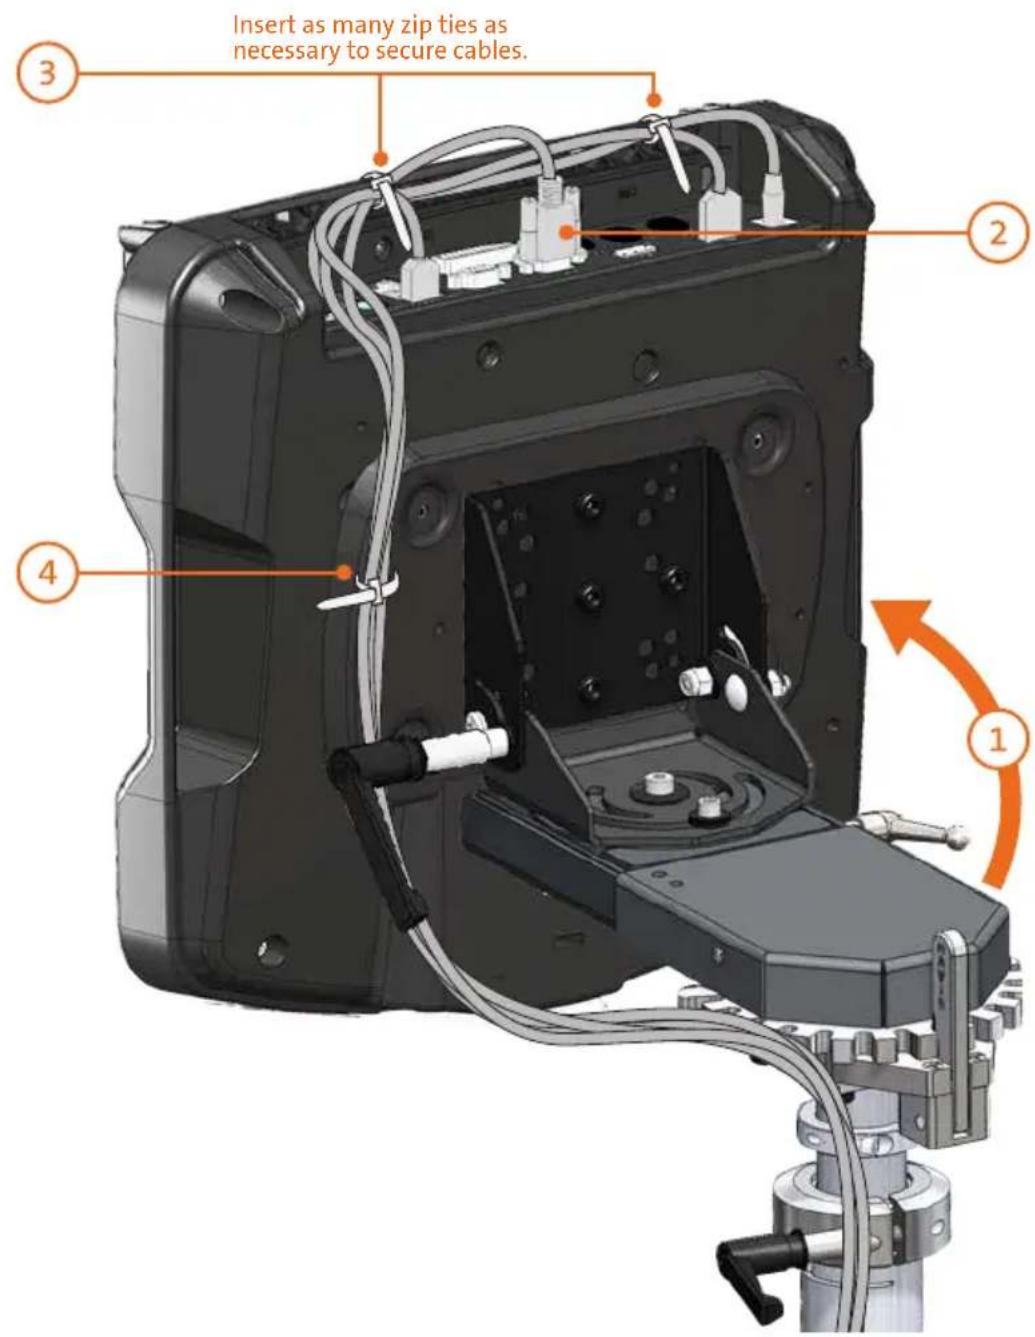
1) Tip the Docking Station forward to a position that is comfortable to work with.
2) Install all cables that are necessary for computing needs.
3) Use Zip Ties (Hardware Kit Item 1) to strain relieve cables to the Strain Relief Points at rear of Docking Station.
4) Gather all cables to one side and tie off to unused holes on underside of Docking Station.
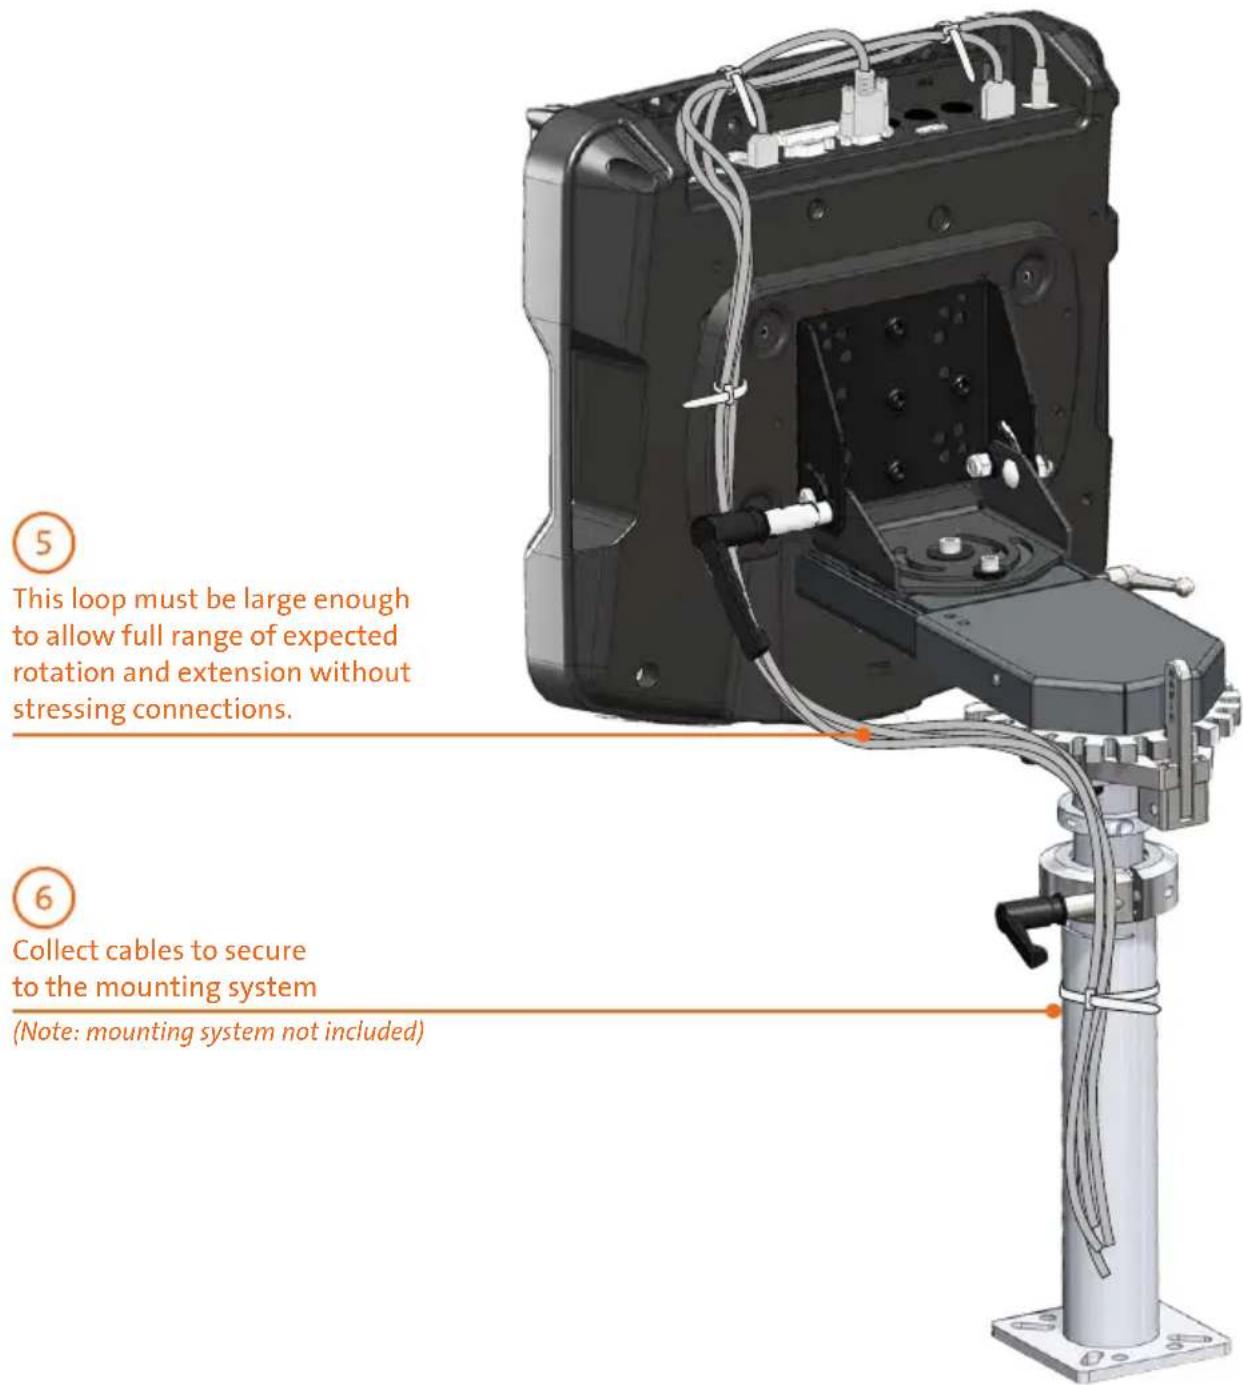
5) Create a service loop with cables to ensure that no tension is on the connectors and to enable intended motion.
6) Tie off cables onto a stationary part of the mounting system. (Mounting system not included with Docking Station)
CAUTION
- DO NOT MATE COMPUTER TO DOCKING STATION UNLESS COMPUTER'S DOCKING CONNECTOR ACCESS DOOR IS FULLY OPEN OR DAMAGE MAY RESULT. - DO NOT FORCE LAPTOP ONTO DOCKING STATION. IF THERE IS RESISTANCE, CHECK ALIGNMENT OF COMPUTER ON DOCKING STATION.
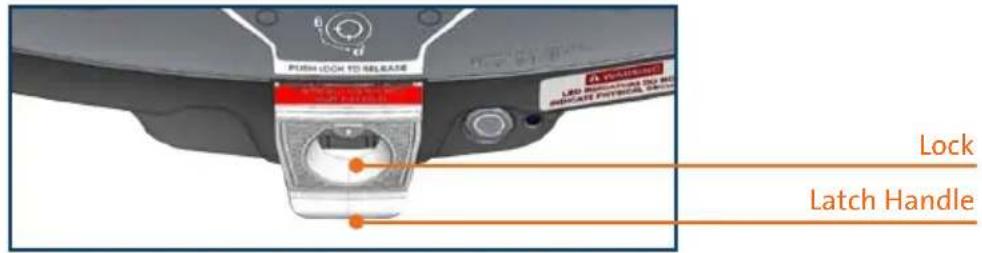
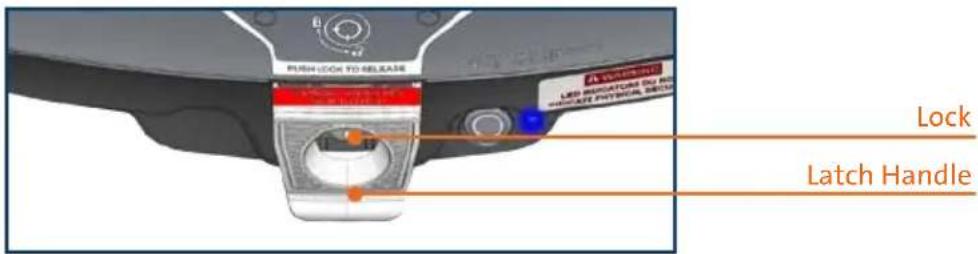
1) To load the computer, first ensure Docking Station is unlatched by pushing the Lock to release the Latch Handle. Once Docking Station unlatches, release pressure on Lock to allow the Latch Handle to extend fully. Note: Red warning label on Latch Handle is visible when fully extended.
2) With rear of computer elevated and laptop screen open, load front of computer into Docking Station by aligning Front Hooks with the appropriate recesses in the computer case.

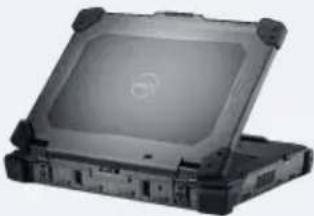
natural_image
3D illustration of a rear front electronic device with visible internal components and ports (no text or symbols on the device itself)3) Lower rear of computer onto Docking Connector. Blue Port Replication LED will illuminate once computer is properly seated.
4) With computer seated on Docking Station, push in the Latch Handle to secure computer to Docking Station.

WARNING
- LED INDICATORS DO NOT INDICATE PHYSICAL SECURITY - DOCKING STATION MUST BE LATCHED AT ALL TIMES WHILE VEHICLE IS IN MOTION
5) For theft deterrence, secure computer by locking Docking Station with supplied key (Hardware Kit Item 2).

6) Power on computer. The Laptop Power Button LED will illuminate blue to indicate proper system function. Once docked, the Laptop Power Button may be used to power computer on/off.

Operation - Undocking
1) If previously locked, unlock Docking Station using supplied key.

2) To release Latch Handle, press in the Lock, and the Latch Handle will spring open to the Unlatched position.
Note: Red warning label on Latch Handle is visible when fully extended. If Latch Handle does not extend fully, pull outward until red warning label is completely visible.
3) Once unlatched, grab both sides of computer and carefully lift out of Docking Station, rear end first.

Havis offers a wide variety of accessory products specifically for use with the DS-DELL-110 & DS-DELL-230 Series Docking Station. For more information or to order, please visit www.havis.com.

natural_image
Black electronic device with two cables, no visible text or symbolsLPS-105
90W Power Supply
External power supply and cable for Dell Laptops with cigarette lighter adaptor.
natural_image
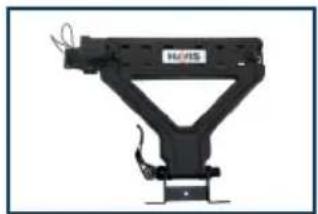
Mechanical assembly component with black frame and attached wires (no visible text or symbols)DS-DA-408
Screen Stiffener
Secure your laptop screen to prevent excess wear and reduce vibration while in use.
natural_image
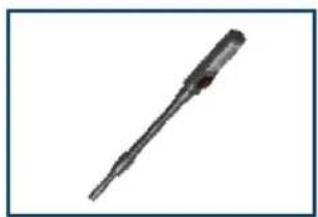
Close-up of a metallic tool or screwdriver with a pointed tip and threaded shaft (no visible text or markings)DS-DA-102
USB Powered Light
Soft red LED light illuminates the laptop keyboard for night viewing.
natural_image
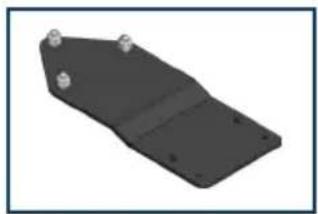
3D rendering of a black metal bracket with mounting holes (no text or symbols)DS-DA-208
Card Reader Mounting Bracket
Mount an E-Seek Model 250 card reader to the side of the Docking Station. (Bracket can be customized for other Card Reader Models)
Interactive Online Catalog
Our interactive catalog is an easy-to-use, full color, online version of our printed catalog.
Visit www.haviscatalog.com for direct access to the Interactive Catalog.


Havis, Inc.
75 Jacksonville Road, PO Box 2099
Warminster, PA 18974
47801 Anchor Court
Plymouth, MI 48170
www.havis.com 1-800-524-9900


- Havis Rugged Mobile Docking Station
- For Dell XFR & ATG Computers
- DS-DELL-110 Series / DS-DELL-230 Series
- WARNING
- CAUTION
- Precautions
- Table of Contents
- Specifications
- EC DECLARATION OF CONFORMITY in accordance with EN 45014
- Docking Station
- Mounting Bracket
- Hardware Kit
- This Hardware Kit includes:
- Tools required for installation:
- Port Replication Capability
- Operation - Undocking
- LPS-105
- 90W Power Supply
- DS-DA-408
- Screen Stiffener
- DS-DA-102
- USB Powered Light
- DS-DA-208
- Card Reader Mounting Bracket
- Interactive Online Catalog
- Havis, Inc.
Brand : Havis
Model : DS-DELL-113
Category : Computer accessory