
CCSUN - Computers and Peripherals Adder - Free user manual and instructions
Find the device manual for free CCSUN Adder in PDF.

| Product Type | Sun Converter Cable |
| Brand | Adder |
| Model | CCSUN |
| Category | Computer Peripherals |
| Primary Function | Software upgrade and keyboard emulation for Sun computers |
| Connectivity | PS/2 to Sun keyboard port (purple connector) |
| Supported Country Codes | US, UK, German, French, Italian, Spanish, Japanese, Chinese, and many more |
| Keyboard Emulation Keys | Stop, Again, Props, Undo, Front, Copy, Open, Paste, Find, Cut, Mute, Volume control, Help, Power |
| Upgrade Requirement | Windows-based PC with 3.5" floppy drive or bootable diskette |
| Upgrade Process | Download files from Adder website, create startup diskette, copy files, edit AUTOEXEC.BAT, connect cable to PC keyboard port, boot from diskette |
| Compatible Systems | Adder MP-type KVM switches and Sun computers |
| Power Source | Powered via PS/2 keyboard port |
| Operating System for Upgrade | Windows 95/98/Me/XP or MS-DOS |
| Dimensions (Approx.) | 1.8 m cable length (estimated) |
| Weight (Approx.) | 100 g (estimated) |
| Color | Not specified (typically black) |
| Country of Origin | United Kingdom (based on manufacturer address) |
| Certifications | Not specified |
Frequently Asked Questions - CCSUN Adder
User questions about CCSUN Adder
0 question about this device. Answer the ones you know or ask your own.
Ask a new question about this device
Download the instructions for your Computers and Peripherals in PDF format for free! Find your manual CCSUN - Adder and take your electronic device back in hand. On this page are published all the documents necessary for the use of your device. CCSUN by Adder.
USER MANUAL CCSUN Adder
natural_image
Blue and white logo featuring a snake on a spiral shape with a triangle at the top (no text or symbols)Sun® Converter Cable
Software upgrade and keyboard emulation guide
natural_image
Line drawing of two connected audio/video cables with connectors (no text or symbols)Software upgrades and keyboard emulations
The internal software of your Sun converter cable can be upgraded to utilize the latest features and functionality. Additionally the converter cable can be made to declare a particular country code to the Sun computer when not used in conjunction with Adder MP-type KVM switches.
This guide covers all of the steps needed to perform such operations, which are arranged into four main stages:
Note: You need to use a Windows ^® -based computer system to carry out the upgrade process.
- Stage one Download upgrade files from the Adder website.
• Stage two Create a startup diskette
• Stage three Copy the files and edit the control file. - Stage four Reconnect the Sun converter cable and reboot.

Stage one - Download the upgrade files
To download the files
1 Access the Adder Technology Ltd website (www. adder.com), enter the Support section. Choose the upgrade option that best suits your requirements and download it to your system.
2 Decompress the downloaded file. Depending on the chosen option, there will be a collection of suitable files. As a minimum, there should be the following files:
- AUTOEXEC.BAT – directs the computer to run the driver update and firmware upgrade programs.
- PS2SUN.EXE – this is the upgrade program that causes upgrade data to be sent to the Sun converter cable from a Windows-based computer.
- SUN103.S19 – this is the Sun keyboard driver file.
Now please follow Stage two.
Stage two - Create a startup diskette
For this stage you will need a Windows-based computer and a 3½ floppy diskette that is either blank or has existing contents that are no longer required. The write protect tab must be moved to the 'unprotected' position. Depending on your operating system, use one of the following to create a startup disk:
To create a startup disk in Windows XP
1 Insert a diskette into the floppy disk drive.
2 Select 'Start' and then 'My Computer'
3 Right mouse click on the '3½ Floppy (A:)' icon and select 'Format'.
4 Check the 'Create an MS-DOS startup disk' box and select 'Start'.
To create a startup disk in Windows 95/98/Me
1 Insert a formatted diskette into the floppy disk drive.
2 Select 'Start', then 'Settings' and then 'Control Panel'.
3 Double click on the 'Add/Remove Programs' icon.
4 Select the 'Startup Disk' tab.
5 Click 'Create Disk' and follow the instructions.
To create a startup disk in Windows 95/98 (alternative method)
1 Insert a diskette into the floppy disk drive.
2 Right mouse click on the '3½ Floppy (A:)' icon and select 'Format'.
3 Select the 'Full format' option and ensure that the 'Copy system files' box is checked.
4 Select 'Start' to format the disk.
To create a startup disk from MS-DOS or a DOS window within Windows 95/98
1 Insert a diskette into the floppy disk drive and check that the drive is configured as drive A (it usually is).
2 At the DOS prompt (C:>) type:
FORMAT A: /S
and follow the instructions given by DOS.
Now please follow Stage three.

Stage three - Copy the files and edit the control file
In order to choose the appropriate upgrade/keyboard emulation options, you now need to copy the downloaded files to the diskette and then edit the AUTOEXEC.BAT control file.
1 Using Windows Explorer or the My Computer option, copy the downloaded and decompressed files from your computer to the floppy diskette.
2 Using a text editor, such as Notepad or Wordpad, open the AUTOEXEC.BAT file on the floppy diskette (A:). The file will contain a command line similar to the one shown here:
PS2SUN SUN103.S19 /C21
The command line relates to the country code that you wish to send to the Sun system.
- The /Cnn suffix optionally sets a country code that will be reported to the Sun system (in this case /C21 relates to the US country code). A full list of country codes is provided opposite.
3 When all required changes have been made, save the AUTOEXEC.BAT file. Do not change the name otherwise it will not be recognized by the system.
Now please follow Stage four.
Keyboard country codes
| Country nn code | Country nn code | ||
| Chinese 3C | Lithuanian 3B | ||
| Czech 35 | Norwegian | 28 | |
| Danish 24 | Poland 34 | ||
| Dutch 27 | Portuguese | 29 | |
| Estonian 3A | Russian | 36 | |
| Finnish 3D | Spanish | 2A | |
| French 23 | Swedish | 2B | |
| French Canadian 32 | Swiss French | 2C | |
| German 25 | Swiss German | 2D | |
| Greek 39 | Taiwanese | 30 | |
| Hungarian 33 | Turkish | 38 | |
| Italian 26 | UK | 2E | |
| Japanese | 31 | UNIX | 22 |
| Korean 2F | US | 21 | |
| Latvian 37 | |||

Stage four - Reconnect Sun converter cable and reboot
1 On the Windows-based computer from which you will run the upgrade, ensure that its BIOS settings will allow it to boot from the floppy diskette drive, rather than booting immediately from the hard drive.
2 Switch off the computer and remove its keyboard connector.
3 Disconnect your Sun converter cable (if connected) from its computer and KVM switch.
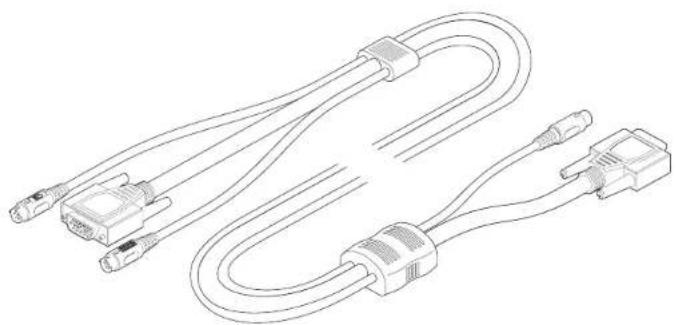
4 At the end of the converter cable that has three plugs, locate the keyboard plug (purple with 📄n) and connect it to the keyboard socket of the Windows-based computer. This is the reverse of the usual connection method and the cable will automatically detect this to prepare itself for the upgrade procedure.

5 With the upgrade diskette installed in the drive, switch on the computer. The computer must boot from the floppy diskette and will then automatically perform the upgrade/apply the keyboard & country code. The upgrade process should take no more than two to three minutes and a progress indicator will be displayed on screen. Once the upgrade is complete, switch off the computer and disconnect the Sun converter cable.
6 Reconnect the Sun converter cable between the Sun computer and the KVM switch.
Sun system keypress equivalents
Once the Sun keyboard emulator has been downloaded, you can emulate the extra keys on a Sun keyboard using the following PS/2 key press combinations.
PS/2 keyboard Sun keyboard
Right-[Ctrl] [F1] Stop
Right-[Ctrl] [F2] Again
Right-[Ctrl] [F3] Props
Right-[Ctrl] [F4] Undo
Right-[Ctrl] [F5] Front
Right-[Ctrl] [F6] Copy
Right-[Ctrl] [F7] Open
Right-[Ctrl] [F8] Paste
Right-[Ctrl] [F9] Find
Right-[Ctrl] [F10] Cut
Right-[Ctrl] [1] Mute
Right-[Ctrl] [2] Volume -
Right-[Ctrl] [3] Volume +
Right-[Ctrl] [4] Power*
Right-[Ctrl] [H] Help
* Certain PS/2 keyboards have a power key which will be mapped to perform the same function for a Sun system.

Adder Technology Limited,
Technology House.
Trafalgar Way,
Cambridge, CB3 8SQ,
United Kingdom
Tel: +44 (0)1954 780044
Fax: +44 (0)1954 780081
Adder Corporation,
29 Water Street,
Newburyport.
MA 01950,
United States of America
Tel: +1-888-932-3337
Fax: +1-888-275-1117
Email: support@adder.com
Web: www.adder.com
[Non-Text]
广力云智慧零售收银系统
a
© 2003 Adder Technology Limited • Release 1.0b • December 2003 All trademarks are acknowledged.

- Sun® Converter Cable
- Software upgrades and keyboard emulations
- Stage one - Download the upgrade files
- To download the files
- Stage two - Create a startup diskette
- To create a startup disk in Windows XP
- To create a startup disk in Windows 95/98/Me
- To create a startup disk in Windows 95/98 (alternative method)
- To create a startup disk from MS-DOS or a DOS window within Windows 95/98
- Stage three - Copy the files and edit the control file
- Stage four - Reconnect Sun converter cable and reboot
- Sun system keypress equivalents
- PS/2 keyboard Sun keyboard
Brand : Adder
Model : CCSUN
Category : Computers and Peripherals