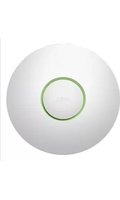
UAPPRO - Access Point Syscom - Free user manual and instructions
Find the device manual for free UAPPRO Syscom in PDF.


| Product Type | Access Point |
| Brand | Syscom |
| Model | UAPPRO (UniFi AP-Pro) |
| Dimensions | Approximately 200 mm diameter, 35 mm height |
| Weight | Approximately 0.5 kg |
| Power Supply | 48V, 0.5A PoE (802.3af compliant) via included PoE adapter or PoE switch |
| Ports | Main/48V Ethernet (PoE in), Secondary Ethernet (bridging), Reset button |
| LED Indicator | Flashing white (initializing), steady white (factory default), alternating white/blue (busy), fast flashing blue (locate), steady blue (integrated), steady blue with occasional flash (isolated) |
| Mounting | Wall or ceiling mount with included bracket and hardware |
| Frequency Band | Dual-band 2.4 GHz and 5 GHz (typical for UniFi AP-Pro) |
| Wireless Standard | 802.11a/b/g/n (802.11ac not mentioned, likely n only) |
| Management Software | UniFi Controller (included on CD, supports on-site or off-site management) |
| System Requirements | Windows XP/7, Mac OS X; Java 1.6+; Web browser (Firefox, Chrome, IE8+) |
| Reset Function | Quick press restarts, hold 5+ seconds resets to factory defaults |
| Package Contents | UniFi AP-Pro, Mounting Bracket, Ceiling Backing Plate, PoE GigE Adapter, Power Cord, Screws (M3x50, M3x20, M2.9x20, M3 Keps Nuts), Anchors, Quick Start Guide, CD with User Guide |
| Warranty | 1-year limited warranty on material and workmanship |
| Compliance | FCC Part 15 Class A, Industry Canada ICES-003, CE, RoHS |
| Safety | Do not use in submerged locations; avoid use during electrical storms; use only specified attachments |
| Cleaning | No specific instructions; typical electronics cleaning with dry cloth recommended |
| Repairability | No user-serviceable parts; service by qualified technician only |
Frequently Asked Questions - UAPPRO Syscom
User questions about UAPPRO Syscom
0 question about this device. Answer the ones you know or ask your own.
Ask a new question about this device
Download the instructions for your Access Point in PDF format for free! Find your manual UAPPRO - Syscom and take your electronic device back in hand. On this page are published all the documents necessary for the use of your device. UAPPRO by Syscom.
USER MANUAL UAPPRO Syscom
natural_image
Circular metallic object with a central star-like symbol, no text or symbols presentIntroduction
Thank you for purchasing the Ubiquiti UniFi Enterprise WiFi System. The UniFi Enterprise WiFi System includes the UniFi Controller software that allows you to manage your wireless network using your Web browser.
This Quick Start Guide is for use with the UniFi AP-Pro.
The UniFi Enterprise WiFi System also includes the necessary hardware for mounting the unit on a wall or a ceiling. The UniFi AP-Pro can be powered by a 48V, 802.3af compliant switch.
Package Contents
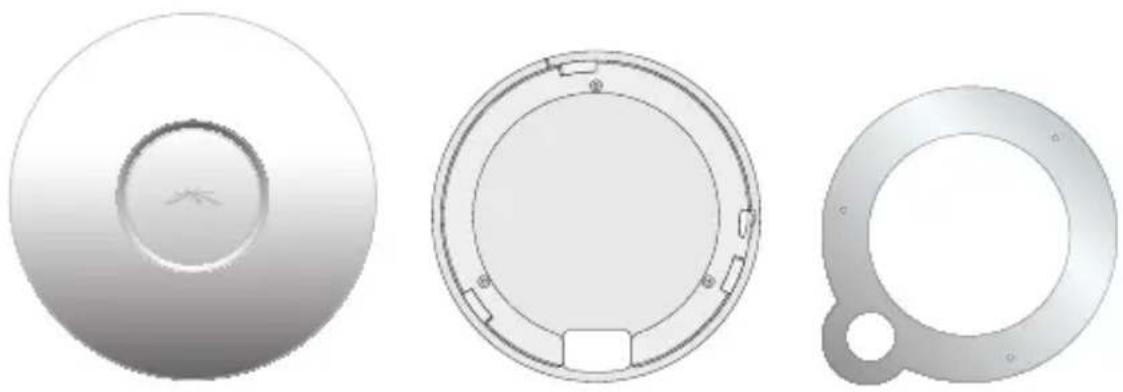
UniFi AP-Pro Mounting Bracket Ceiling Backing Plate
UniFi Controller CD with User Guide

natural_image
Product image of a white circular button with a black control knob, no visible text or symbols.Quick Start Guide
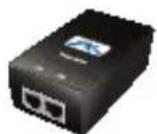
PoE GigE Adapter (48V, 0.5A Gigabit)
Power Cord

M3x50 Flat Head
Screws
(Qty. 3)
M3 Keps Nuts with Tooth Washers (Qty. 3)

M2.9x20 Screws (Qty. 3)

M3x20 Screw
Anchors
(Qty. 3)
System Requirements
• Microsoft Windows XP, Windows Vista, Windows 7, or Mac OS X
• Java Runtime Environment 1.6 (or above)
• Web Browser: Mozilla Firefox, Google Chrome, or Microsoft Internet Explorer 8 (or above)
Network Topology Requirements
• A DHCP-enabled network (for the AP to obtain an IP address as well as for the wireless clients after deployment)
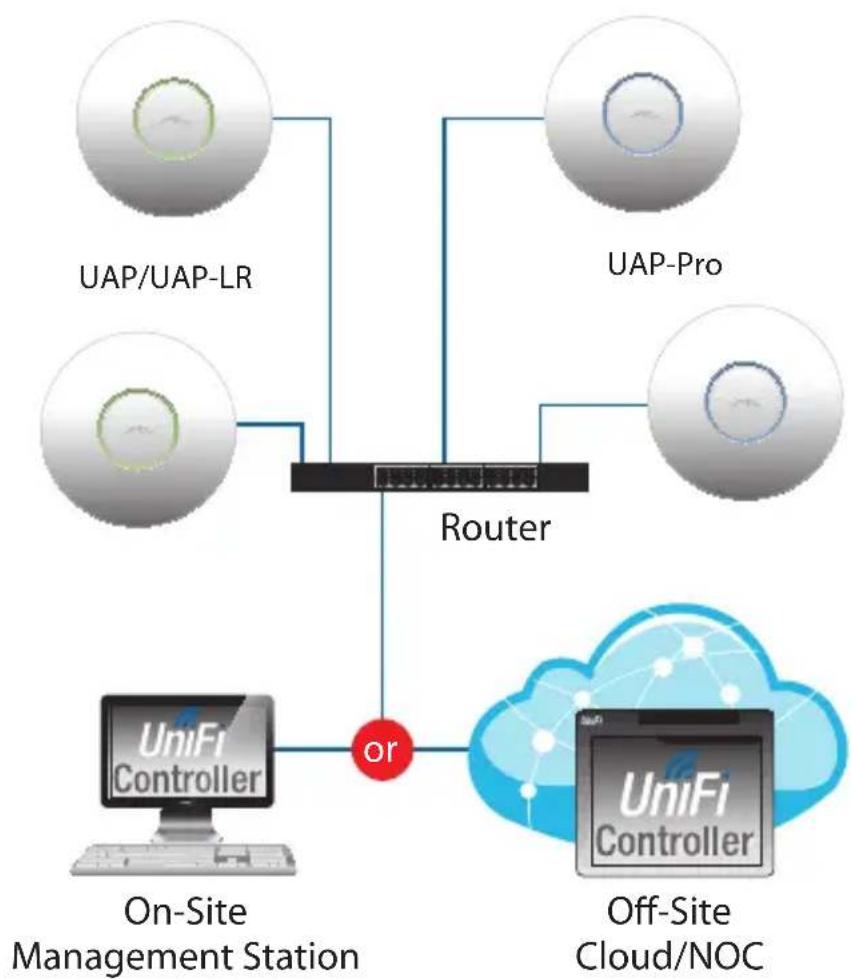
- A management station computer running the UniFi Controller software, located either onsite and connected to the same Layer-2 network, or off-site in a cloud or NOC
flowchart
graph TD
    A["UAP/UAP-LR"] --> B["Router"]
    C["UAP-Pro"] --> B
    D["UniFi Controller"] --> E["or"]
    F["On-Site Management Station"] --> E
    G["Off-Site Cloud/NOC"] --> H["or"]
    B --> I["UAP/UAP-LR"]
    B --> J["UAP-Pro"]
    B --> K["UniFi Controller"]
Sample Network Diagram
All UniFi APs support off-site management controllers. See the User Guide on the CD for setup details.
Hardware Overview
LED
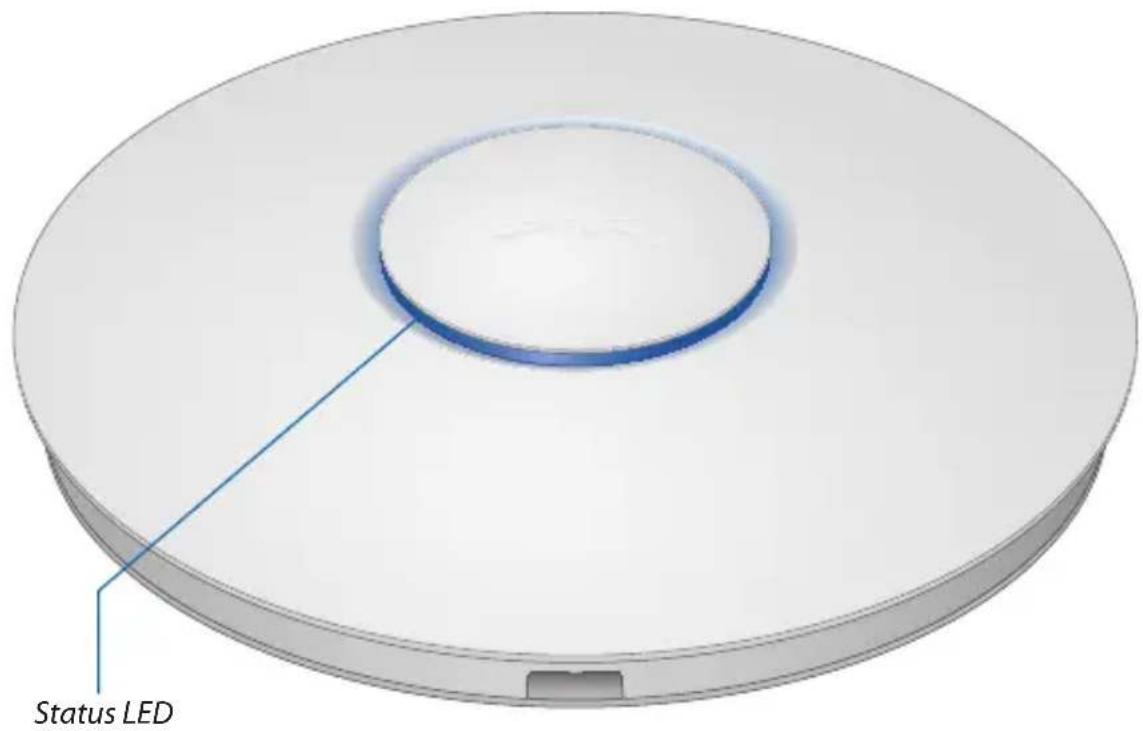
LED Color Status
| Flashing White Initializing. | |
| Steady White Factory default, waiting to be integrated. | |
| Alternating White/Blue | Device is busy; do not touch or unplug it.This usually indicates that a process such as a firmware upgrade is taking place. |
| Quickly Flashing Blue | This is used to locate an AP.When you clickLocatein the UniFi Controller software, the AP will flash. It will also display the location of the AP on the map. |
| Steady Blue Indicates the device has been successfully integrated into a network and is working properly. | |
| Steady Blue with occasional flashing | Indicates the device is in an isolated state (all WLANs are brought down until an uplink is found). |
Ports
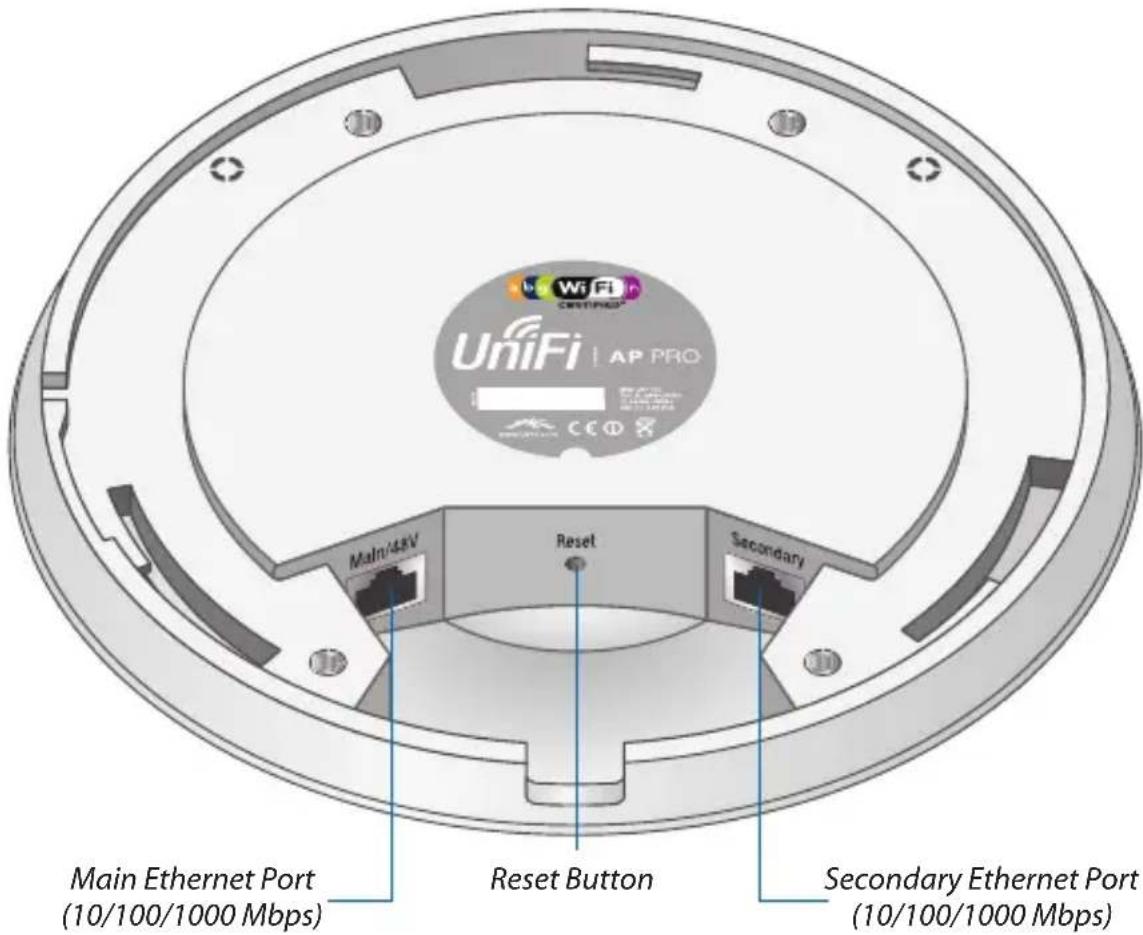
Main/48V The Main/48V Ethernet Port is used to connect the power and should be connected to the LAN and DHCP server. Power can be provided by a 48V 802.3af compliant switch or by the included PoE adapter.
Secondary The Secondary Ethernet Port is used for bridging.
Reset The Reset button serves two functions:
- Restart It will restart the device when you press and release it quickly.
- Restore Factory Defaults When you press and hold it for more then 5 seconds, it will restore the device to the factory default settings.
Hardware Installation
The UniFi AP-Pro can be mounted to the wall or ceiling. Perform the steps for the appropriate installation:
Wall Mount
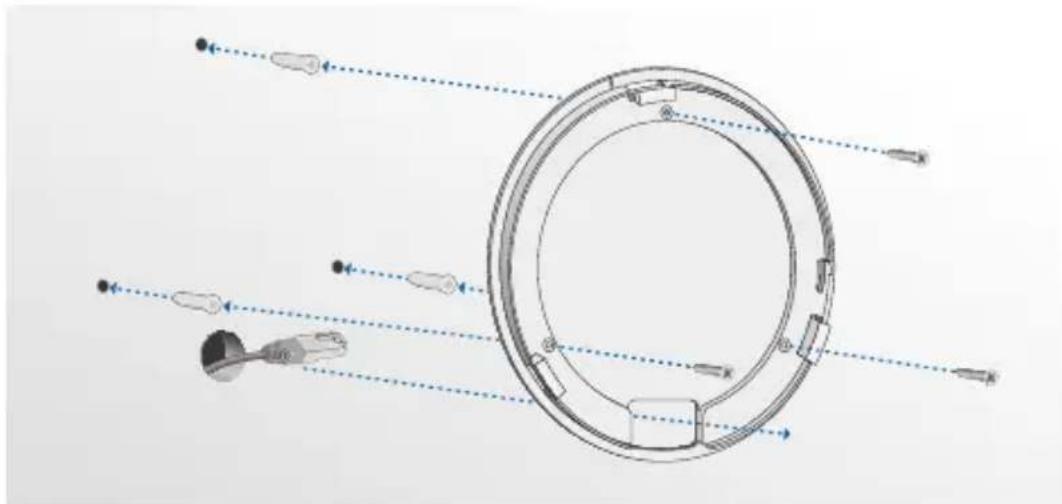
- Position the Mounting Bracket at the desired location on the wall with the cable feed slot pointed towards the floor.
- Use a pencil to mark the three holes on the wall. Use a 6 mm drill bit to drill the holes in the wall.

Optional 25 mm Hole for Ethernet Cable Feed through Wall
-
(Optional) If your Ethernet cable feeds through the wall, cut or drill a circle that is approximately 25 mm in size and lines up with the cable feed slot.
-
Insert the M3x20 Screw Anchors into the 6 mm holes. Secure the Mounting Bracket to the wall by inserting the M2.9x20 Screws into the anchors.
natural_image
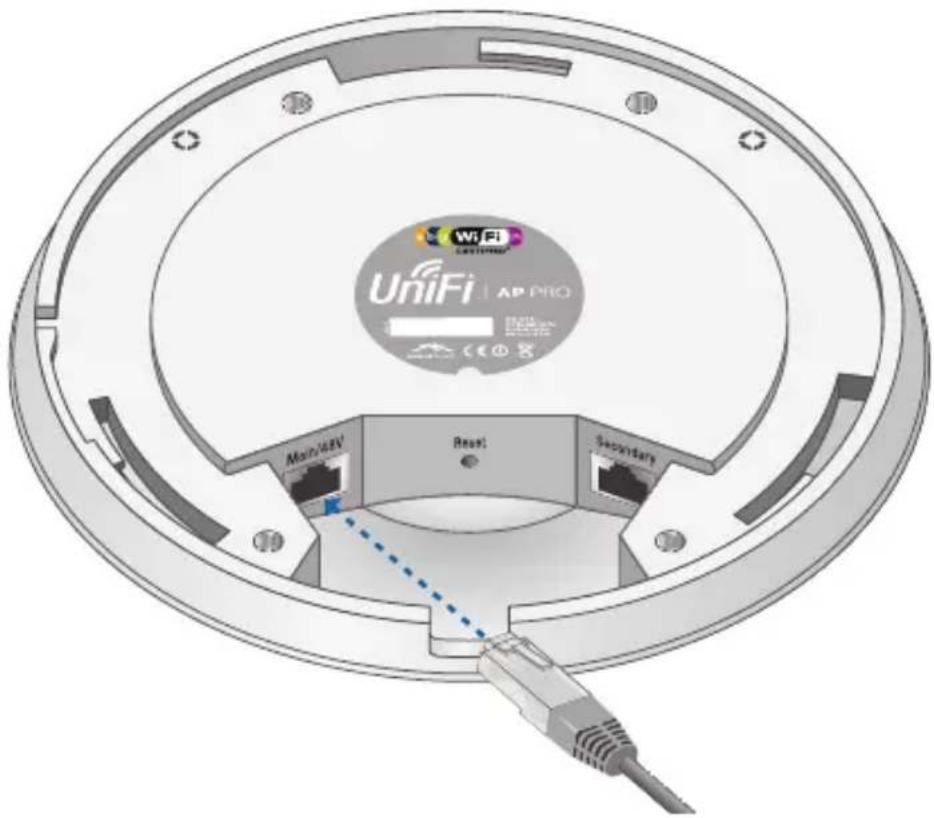
Technical diagram of a circular mechanical component with internal components and directional arrows indicating motion (no text or symbols)- Connect the Ethernet cable to the Main Ethernet Port on the UniFi AP-Pro.
- Align the notch on the UniFi AP-Pro with the notch on the Mounting Bracket.

natural_image
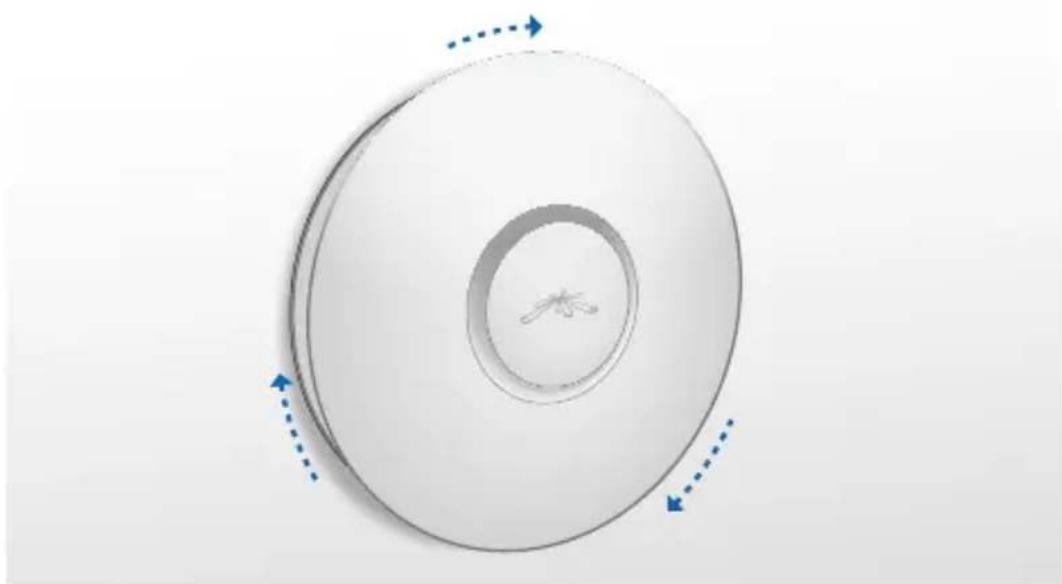
3D CAD model of a mechanical component with two circular inset views showing internal features (no text or symbols)- Turn the UniFi AP-Pro clockwise until it locks into place.
natural_image
Circular mechanical component with concentric rings and directional arrows indicating rotation or flow (no text or symbols)Ceiling Mount
- Remove the ceiling tile.
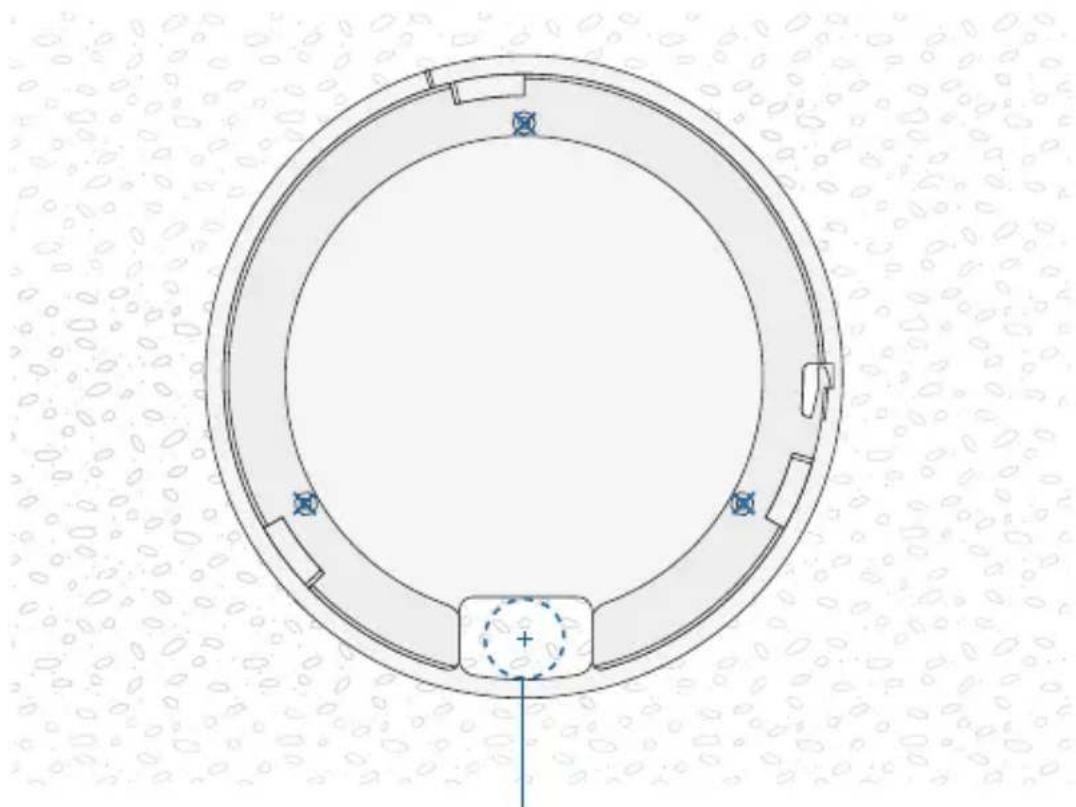
- Place the Mounting Bracket in the center of the ceiling tile. Mark the three mounting screw holes and 25 mm hole for the Ethernet cable.
natural_image
Technical diagram of a circular mechanical component with mounting holes and a central hub (no text or symbols)25 mm Hole for Ethernet Cable Feed
-
Use a 3 mm drill bit to drill the screw holes and cut or drill the 25 mm hole for the Ethernet cable feed.
-
Secure the Mounting Bracket to the ceiling tile using the Ceiling Backing Plate, M3x50 Flathead Screws and M3 Keps Nuts with Tooth Washers.
-
Feed the Ethernet cable through the 25 mm hole.

natural_image
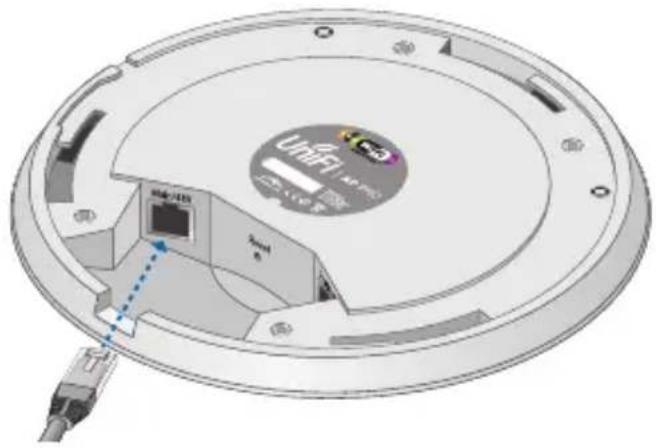
3D diagram of a mechanical assembly with a diamond base, circular components, and wiring (no text or symbols)- Connect the Ethernet cable to the Main Ethernet Port.
natural_image
Technical diagram of a circular electronic device with labeled components and a cable connector (no readable text or symbols)- Align the notch on the UniFi AP-Pro with the notch on the Mounting Bracket.

natural_image
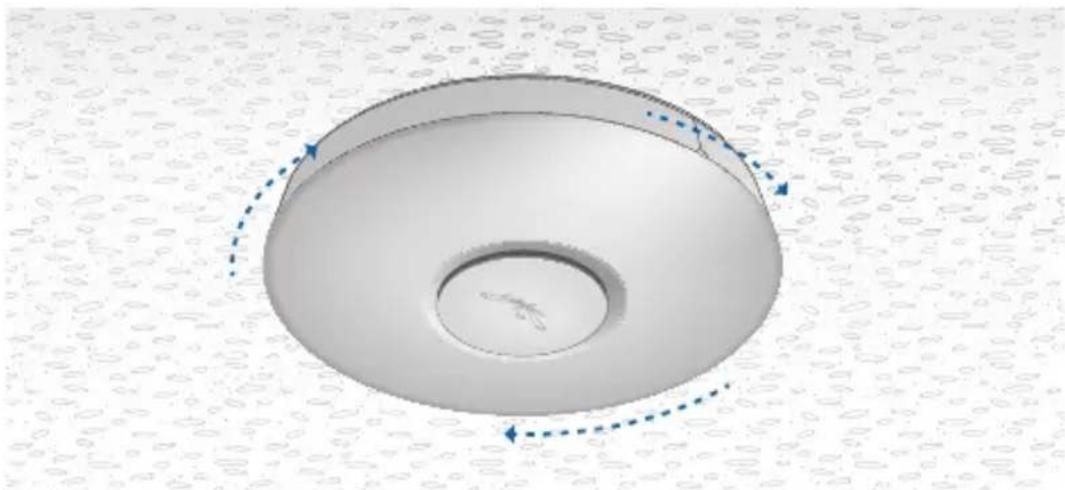
Technical illustration of a mechanical component with cross-sectional view (no text or symbols)- Turn the UniFi AP-Pro clockwise until it locks into place.
natural_image
3D rendering of a circular mechanical component with dashed blue arrows indicating rotational motion (no text or symbols)Powering the UniFi AP-Pro
The UniFi AP Pro can be powered directly by an 802.af compliant switch or with the included PoE GigE Adapter.
Connect to an 802.3af Compliant Switch
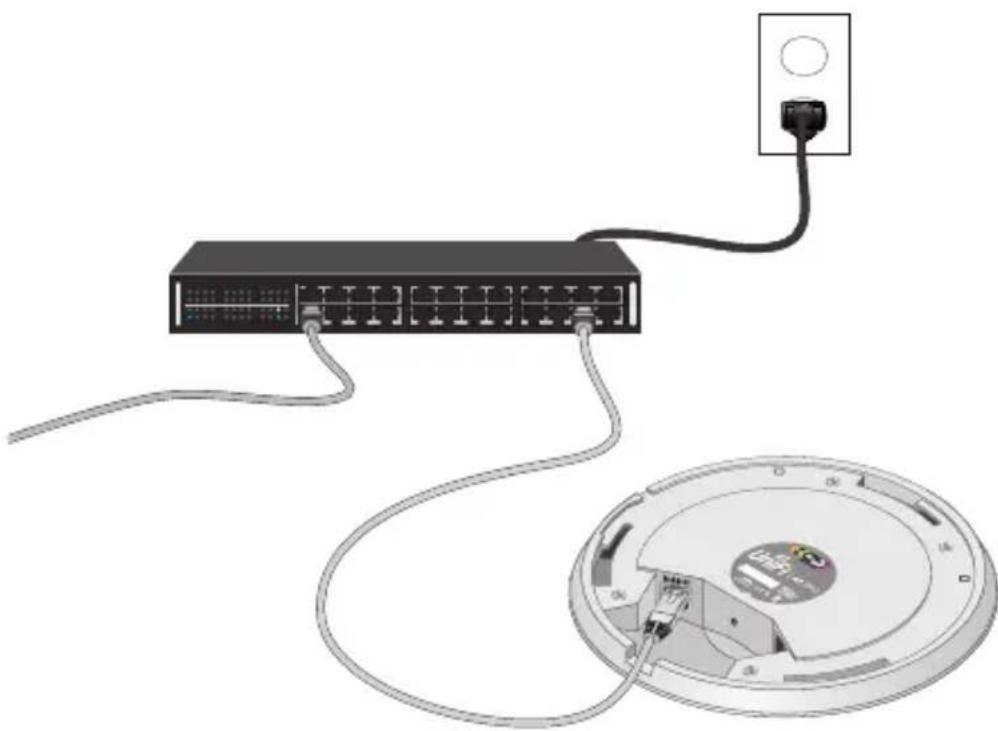
Connect the other end of the Ethernet cable coming from the Main Ethernet Port of the UniFi AP-Pro directly to a PoE port on an 802.3af compliant switch.
natural_image
Diagram of a network switch connected to a CD-ROM drive, showing cable routing and internal components (no text or labels)802.3af Switch Power Connection Diagram
Connect to the PoE GigE Adapter
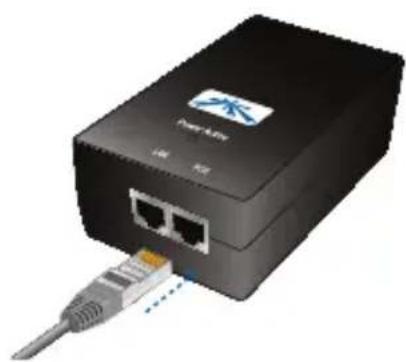
- Connect the other end of the Ethernet cable coming from the Main Ethernet Port of the UniFi AP-Pro to the Ethernet port labeled POE on the PoE GigE Adapter.
natural_image
Black network device with USB cable and port ports, no visible text or symbols on the device itself- Connect an Ethernet cable from your LAN to the Ethernet port labeled LAN on the PoE GigE Adapter.

natural_image
Close-up of a black USB device with two cables connected to a port, showing internal wiring (no text or symbols visible)- Connect the power cord to the power port on the PoE GigE Adapter. Connect the other end to of the power cord to a power outlet.

natural_image
3D rendering of a black electronic device with a plug and cable, showing internal components and a blue warning label (no readable text or symbols)Below is an overview of the PoE connections using the included PoE GigE Adapter.
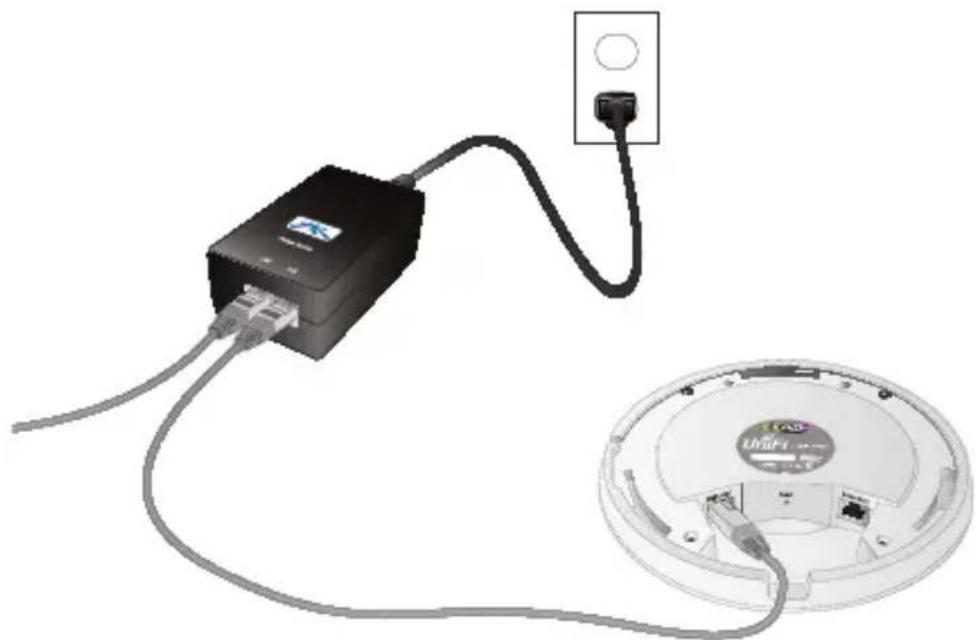
natural_image
Diagram showing a black electronic device connected to a circular device with a power outlet (no text or symbols visible)PoE GigE Adapter Power Connection Diagram
Software Installation
Insert the UniFi Controller software CD into your CD-ROM drive and follow the instructions for your specific computer type.
Mac Users
- Click the Install icon.
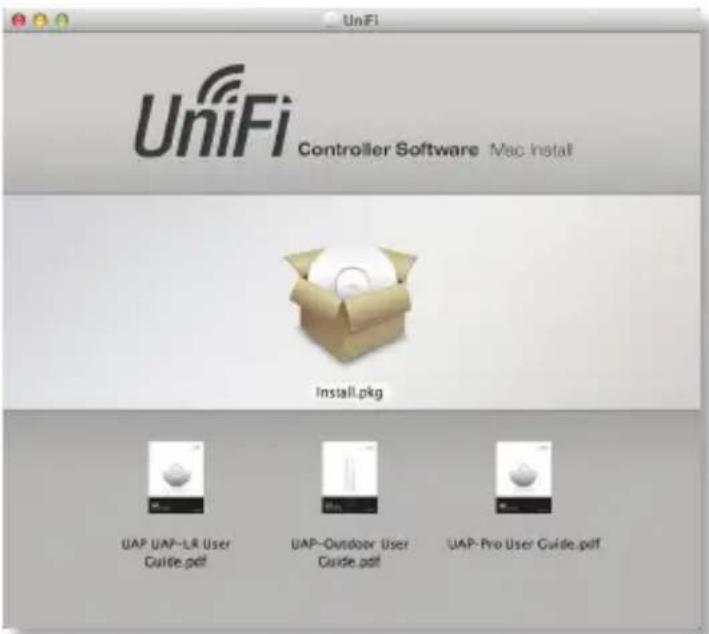
- Click Continue and follow the on-screen instructions to install the software.

- Go to Go > Applications and double-click the UniFi icon.
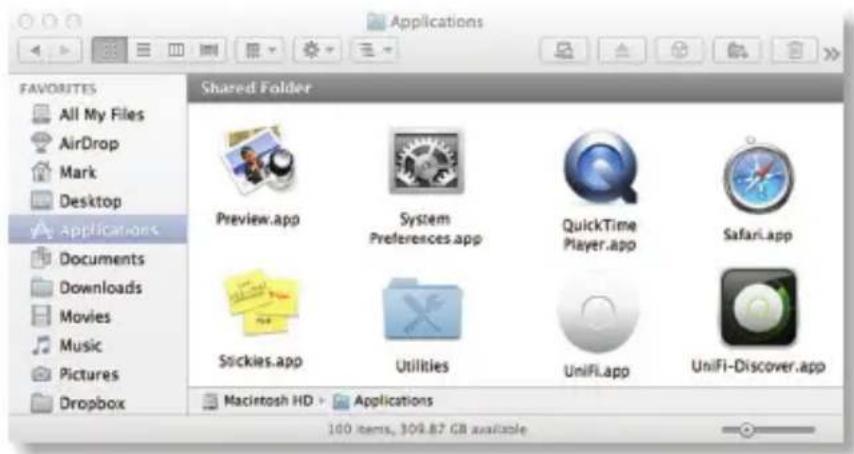
Proceed to Configuring the UniFi Controller Software on page 15.
PC Users
- Launch UniFi-installer.exe.
- Click Install.
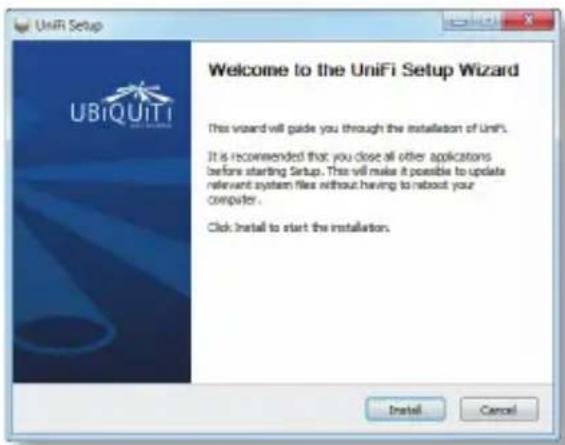
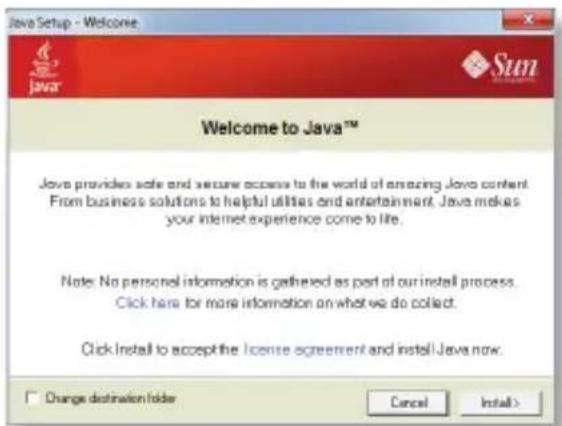
- If your computer doesn't have Java 1.6 or above installed, you will be prompted to install it. Click Install to continue.
4. Click Next.
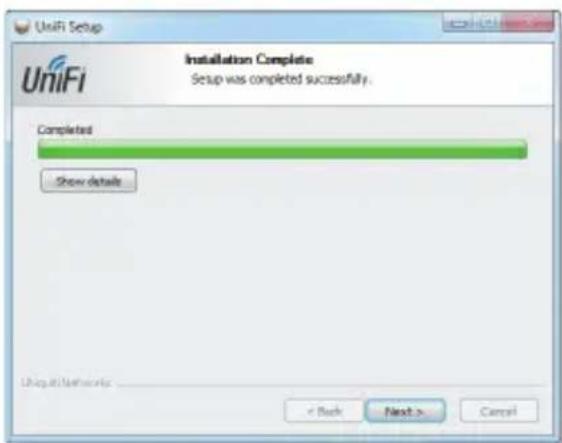
5. Ensure that the Start UniFi Controller after installation option is checked and click Finish.


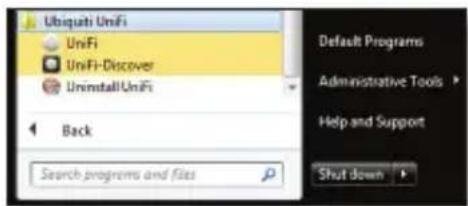
Note: The UniFi Controller software can also be launched from Start > All Programs.
Configuring the UniFi Controller Software
- The UniFi Controller software startup will begin. Click Launch a Browser to Manage Wireless Network.
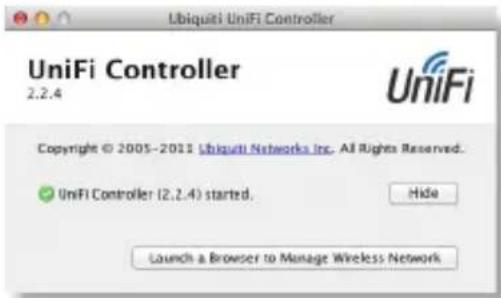
- Select your language and country. Click Next.


Note: U.S. product versions are locked to the U.S. Country Code to ensure compliance with FCC regulations.
- Select the devices that you want to configure and click Next.
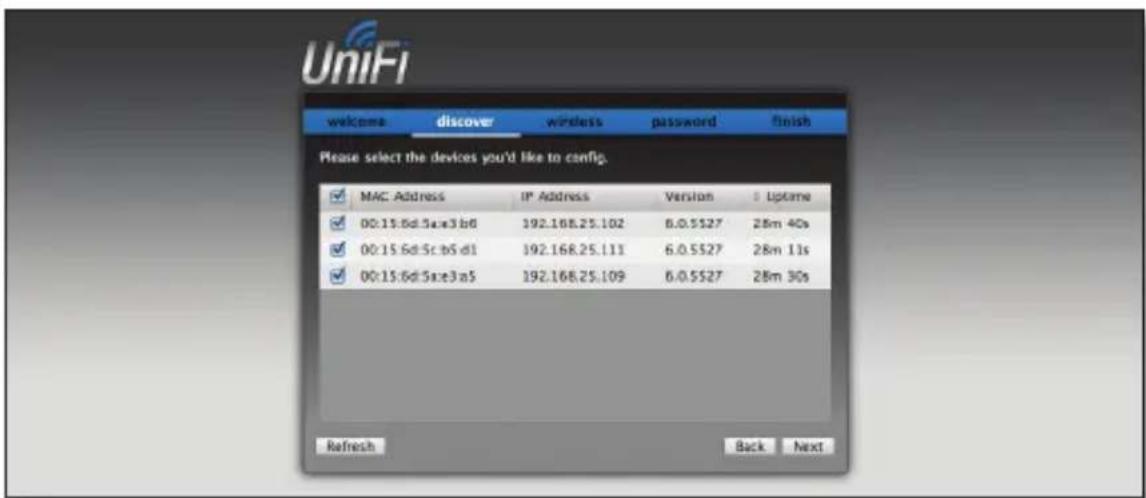
- The UniFi Installation Wizard will create a secure primary wireless network for your devices. Perform the following steps:
a. Enter the wireless network name (SSID) in the Secure SSID field.
b. Enter a passphrase to be used for your primary network.
c. If you want to enable guest access, select Enable Guest Access, and enter a guest network name in the Guest SSID field.
d. Click Next.

- Enter an admin name and password to use when accessing the management interface. Confirm your password in the Confirm field. Click Next.

- Review your settings. Click Back to make changes or Finish to save your settings. Once finished you will be redirected to the management interface via your web browser.
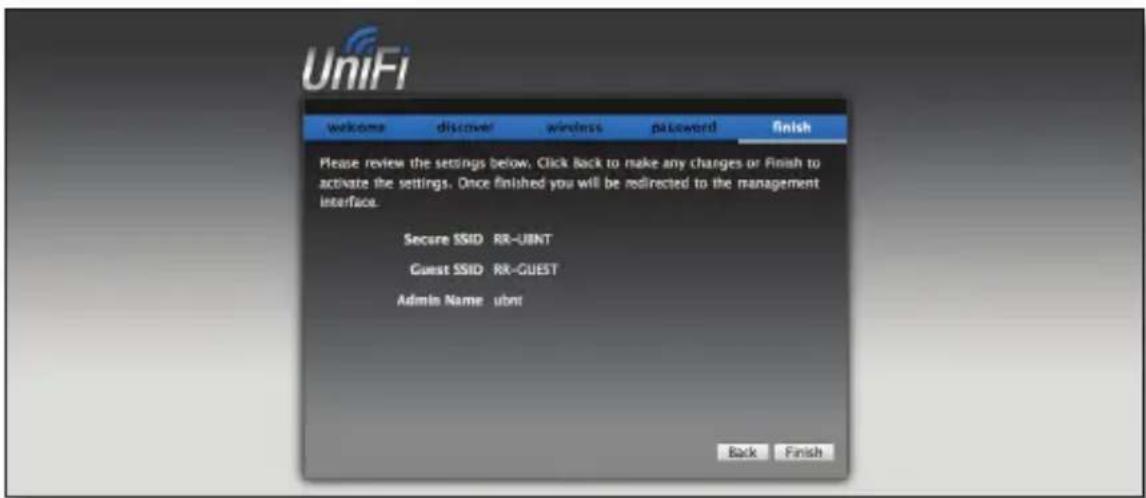
Congratulations, your wireless network is now configured.
A login screen will appear for the UniFi Controller management interface. Enter the Admin Name and Password that you created and click Login.
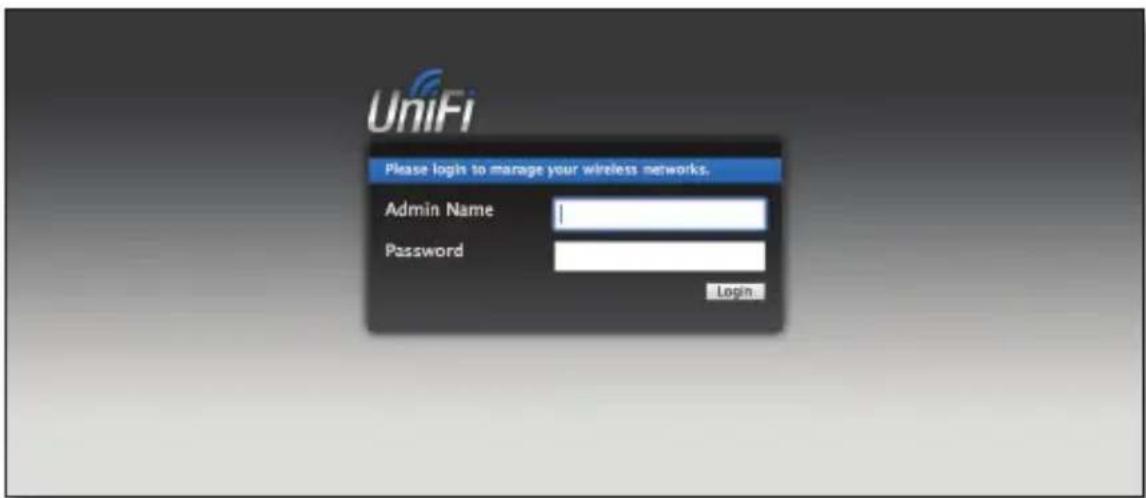
You can manage your wireless network and view network statistics using the UniFi Controller management interface. For information on configuring and using the UniFi Controller software, refer to the User Guide located on the CD.
Safety Notices
- Read, follow, and keep these instructions.
- Heed all warnings.
- Only use attachments/accessories specified by the manufacturer.

WARNING: Do not use this product in location that can be submerged by water.

WARNING: Avoid using this product during an electrical storm. There may be a remote risk of electric shock from lightning.
Electrical Safety Information
- Compliance is required with respect to voltage, frequency, and current requirements indicated on the manufacturer's label. Connection to a different power source than those specified may result in improper operation, damage to the equipment or pose a fire hazard if the limitations are not followed.
- There are no operator serviceable parts inside this equipment. Service should be provided only by a qualified service technician.
- This equipment is provided with a detachable power cord which has an integral safety ground wire intended for connection to a grounded safety outlet.
a. Do not substitute the power cord with one that is not the provided approved type. Never use an adapter plug to connect to a 2-wire outlet as this will defeat the continuity of the grounding wire.
b. The equipment requires the use of the ground wire as a part of the safety certification, modification or misuse can provide a shock hazard that can result in serious injury or death.
c. Contact a qualified electrician or the manufacturer if there are questions about the installation prior to connecting the equipment.
d. Protective earthing is provided by Listed AC adapter. Building installation shall provide appropriate short-circuit backup protection.
e. Protective bonding must be installed in accordance with local national wiring rules and regulations.
General Warranty
UBIQUITI NETWORKS, Inc ("UBIQUITI NETWORKS") represents and warrants that the Products furnished hereunder shall be free from defects in material and workmanship for a period of one (1) year from the date of shipment by UBIQUITI NETWORKS under normal use and operation. UBIQUITI NETWORKS sole and exclusive obligation under the foregoing warranty shall be to repair or replace, at its option, any defective Product that fails during the warranty period. The expense of removal and reinstallation of any item is not included in this warranty.
The foregoing warranty is exclusive and in lieu of all other warranties, express or implied, including the implied warranties of merchantability and fitness for a particular purpose and any warranties arising from a course of dealing, usage or trade practice with respect to the products. Repair or replacement in the manner provided herein shall be the sole and exclusive remedy of Buyer for breach of warranty and shall constitute fulfillment of all liabilities of UBIQUITI NETWORKS with respect to the quality and performance of the Products. UBIQUITI NETWORKS reserves the right to inspect all defective Products (which must be returned by Buyer to UBIQUITI NETWORKS factory freight prepaid).
No Products will be accepted for replacement or repair without obtaining a Return Materials Authorization (RMA) number from UBIQUITI NETWORKS. Products returned without an RMA number will not be processed and will be returned to Buyer freight collect. UBIQUITI NETWORKS shall have no obligation to make repairs or replacement necessitated by catastrophe, fault, negligence, misuse, abuse, or accident by Buyer, Buyer's customers or any other parties. The warranty period of any repaired or replaced. Product shall not extend beyond its original term.
Warranty Conditions
The foregoing warranty shall apply only if:
(I) The Product has not been subjected to misuse, neglect or unusual physical, electrical or electromagnetic stress, or some other type of accident.
(II) No modification, alteration or addition has been made to the Product by persons other than UBIQUITI NETWORKS or UBIQUITI NETWORK'S authorized representatives or otherwise approved by UBIQUITI NETWORKS.
(III) The Product has been properly installed and used at all times in accordance, and in all material respects, with the applicable Product documentation.
(IV) All Ethernet cabling runs use CAT5 (or above) shielded cabling.
Disclaimer: UBIQUITI NETWORKS does not warrant that the operation of the products is error-free or that operation will be uninterrupted. In no event shall UBIQUITI NETWORKS be responsible for damages or claims of any nature or description relating to system performance, including coverage, buyer's selection of products for buyer's application and/or failure of products to meet government or regulatory requirements.
Returns
In the unlikely event a defect occurs, please work through the dealer or distributor from which this product was purchased.
Compliance
FCC
Changes or modifications not expressly approved by the party responsible for compliance could void the user's authority to operate the equipment.
This device complies with Part 15 of the FCC Rules. Operation is subject to the following two conditions:
- This device may not cause harmful interference, and
- This device must accept any interference received, including interference that may cause undesired operation.
NOTE: This equipment has been tested and found to comply with the limits for a Class A digital device, pursuant to part 15 of the FCC Rules. These limits are designed to provide reasonable protection against harmful interference when the equipment is operated in a commercial environment. This equipment generates, uses, and can radiate radio frequency energy and, if not installed and used in accordance with the instruction manual, may cause harmful interference to radio communications. Operations of this equipment in a residential area is likely to cause harmful interference in which case the user will be required to correct the interference at his own expense.
For MPE and antenna usage details, please visit our website at www.ubnt.com/products
Industry Canada
This Class A digital apparatus complies with Canadian ICES-003.
To reduce potential radio interference to other users, the antenna type and its gain should be so chosen that the equivalent isotropically radiated power (e.i.r.p.) is not more than that permitted for successful communication.
This device complies with Industry Canada licence-exempt RSS standard(s). Operation is subject to the following two conditions:
- This device may not cause interference, and
- This device must accept any interference, including interference that may cause undesired operation of the device.
The antennas used for this transmitter must be installed to provide a separation distance of at least 20 cm from all persons and must not be located or operating in conjunction with any other antenna or transmitter, except as listed for this product's certification.
CE marking on this product represents the product is in compliance with all directives that are applicable to it.
Alert Sign (!) Follows CE Marking
Alert sign must be indicated if a restriction on use applied to the product and it must follow the CE marking.

Declaration of Conformity
| Česky[Czech] | UBIQUITI NETWORKS tímto prohla uje, e tento UBIQUITI NETWORKS device, je ve shod se základními po adavky a dal ími píslu n mi ustanoveními sm rnice 1999/5/ES. |
| Dansk[Danish] | Undertegnede UBIQUITI NETWORKS erklærer herved, at følgende udstyr UBIQUITI NETWORKS device, overholder de væsentlige krav og øvrige relevante krav i direktiv 1999/5/EF. |
| Nederlands[Dutch] | Hierbij verklaart UBIQUITI NETWORKS dat het toestel UBIQUITI NETWORKS device, in overeenstemming is met de essentiële eisen en de andere relevante bepalingen van richtlijn 1999/5/EG.Bij deze verklaart UBIQUITI NETWORKS dat deze UBIQUITI NETWORKS device, voldoet aan de essentiële eisen en aan de overige relevante bepalingen van Richtlijn 1999/5/EC. |
| English | Hereby, UBIQUITI NETWORKS, declares that this UBIQUITI NETWORKS device, is in compliance with the essential requirements and other relevant provisions of Directive 1999/5/EC. |
| Eesti[Estonian] | Käesolevaga kinnitab UBIQUITI NETWORKS seadme UBIQUITI NETWORKS device, vastavust direktiivi 1999/5/EÜ põhinõuetele ja nimetatud direktiivist tulenevatele teistele asjakohastele sätetele. |
| Suomi[Finnish] | UBIQUITI NETWORKS vakuuttaa täten että UBIQUITI NETWORKS device, tyyppinen laite on direktiivin 1999/5/EY oleellisten vaatimusten ja sitä koskevien direktiivin muiden ehtojen mukainen. |
| Français[French] | Par la présente UBIQUITI NETWORKS déclare que l'appareil UBIQUITI NETWORKS, device est conforme aux exigences essentielles et aux autres dispositions pertinentes de la directive 1999/5/CE. |
| Deutsch[German] | Hiermit erklärt UBIQUITI NETWORKS, dass sich diese UBIQUITI NETWORKS device, in Übereinstimmung mit den grundlegenden Anforderungen und den anderen relevanten Vorschriften der Richtlinie 1999/5/EG befindet". (BMWi) |
| Ελληνική[Greek] | ME THN ΠΑΡΟΥΣΑ UBIQUITI NETWORKS ΔΗΛΩΝΕΙ OTI UBIQUITI NETWORKS device, ΣΥΜΜΟΡΦΩΝΕΤΑΙ ΠΡΟΣ ΤΙΣ ΟΥΣΙΩΔΕΙΣ ΑΠΑΙΤΗΣΕΙΣ ΚΑΙ ΤΙΣ ΛΟΙΠΕΣ ΣΧΕΤΙΚΕΣ ΔΙΑΤΑΞΕΙΣ ΤΗΣ ΟΔΗΓΙΑΣ 1995/5/EK. |
| Magyar[Hungarian] | Alulírott, UBIQUITI NETWORKS nyilatkozom, hogy a UBIQUITI NETWORKS device, megfelel a vonatkozó alapvető követelményeknek és az 1999/5/EC irányelv egyéb előírásainak. |
| Íslenska[Icelandic] | Hér me I sir UBIQUITI NETWORKS yfir ví a UBIQUITI NETWORKS device, er í samræmi vi grunnkröfur og a rar kröfur, sem ger ar eru í tilskipun 1999/5/EC. |
| Italiano[Italian] | Con la presente UBIQUITI NETWORKS dichiara che questo UBIQUITI NETWORKS device, è conforme ai requisiti essenziali ed alle altre disposizioni pertinenti stabilite dalla direttiva 1999/5/CE. |
| Latviski[Latvian] | Ar o UBIQUITI NETWORKS deklar, ka UBIQUITI NETWORKS device, atbilst Direkt vas 1999/5/EK b tiskaj m pras b m un citiem ar to saist tajiem noteikumiem. |
| Lietuviškai[Lithuanian] | UBIQUITI NETWORKS deklaruoja, kad šis UBIQUITI NETWORKS jrenginys atitinka esminius reikalavimus ir kitas 1999/5/EB Direktyvos nuostatas. |
| Malti[Maltese] | Hawnhekk, UBIQUITI NETWORKS, jiddikjara li dan UBIQUITI NETWORKS device, jikkonforma mal- ti ijiet essenzjali u ma provvedimenti o rajn relevanti li hemm fid-Dirrettiva 1999/5/EC. |
| Norsk[Norwegian] | UBIQUITI NETWORKS erklærer herved at utstyret UBIQUITI NETWORKS device, er i samsvar med de grunnleggende krav og øvrige relevante krav i direktiv 1999/5/EF. |
| Slovensky[Slovak] | UBIQUITI NETWORKS t mto vyhlasuje, e UBIQUITI NETWORKS device, sp a základné po iadavky a v etky príslu né ustanovenia Smernice 1999/5/ES. |
| Svenska[Swedish] | Härmed intygar UBIQUITI NETWORKS att denna UBIQUITI NETWORKS device, står l överensstämmelse med de väsentliga egenskapskrav och övriga relevanta bestämmelser som framgår av direktiv 1999/5/EG. |
| Español[Spanish] | Por medio de la presente UBIQUITI NETWORKS declara que el UBIQUITI NETWORKS device, cumple con los requisitos esenciales y cualesquiera otras disposiciones aplicables o exigibles de la Directiva 1999/5/CE. |
| Polski[Polish] | Niniejszym, firma UBIQUITI NETWORKS o wiadcza, e produkt serii UBIQUITI NETWORKS device, spełnia zasadnicze wymagania i inne istotne postanowienia Dyrektywy 1999/5/EC. |
| Português[Portuguese] | UBIQUITI NETWORKS declara que este UBIQUITI NETWORKS device, está conforme com os requisitos essenciais e outras disposições da Directiva 1999/5/CE. |
| Română[Romanian] | Prin prezenta, UBIQUITI NETWORKS declară că acest dispozitiv UBIQUITI NETWORKS este în conformitate cu cerințele esențiale și alte prevederi relevante ale Directivei 1999/5/CE. |
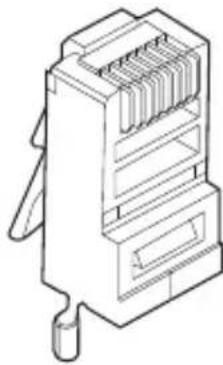
TOUGH Cable™
English
We recommend that you protect your networks from the most brutal environments and devastating ESD attacks with industrial-grade shielded Ethernet cable from Ubiquiti Networks. For more details, visit www.ubnt.com/toughcable
natural_image
Isometric line drawing of a multi-pin electrical connector (no text or symbols)Deutsch
Ubiquiti Networks Support
Email: support@ubnt.com
Phone (9 a.m. - 5 p.m. PST): 408-942-1153
Online Resources
Wiki Page: wiki.ubnt.com
Support Forum: forum.ubnt.com
Downloads: downloads.ubnt.com
- Introduction
- System Requirements
- Network Topology Requirements
- Hardware Overview
- LED
- Ports
- Hardware Installation
- Wall Mount
- Ceiling Mount
- Powering the UniFi AP-Pro
- Connect to an 802.3af Compliant Switch
- Connect to the PoE GigE Adapter
- Software Installation
- Mac Users
- PC Users
- Click Next.
- Ensure that the Start UniFi Controller after installation option is checked and click Finish.
- Configuring the UniFi Controller Software
- Safety Notices
- Electrical Safety Information
- General Warranty
- Warranty Conditions
- Returns
- Compliance
- FCC
- Industry Canada
- Alert Sign (!) Follows CE Marking
- TOUGH Cable™
- English
- Deutsch
- Ubiquiti Networks Support
- Online Resources
Brand : Syscom
Model : UAPPRO
Category : Access Point