GMW-7417 - Microwaves GoldMaster - Free user manual and instructions
Find the device manual for free GMW-7417 GoldMaster in PDF.

| Product Type | Countertop Microwave Oven |
| Model | GMW-7417 |
| Brand | GoldMaster |
| Capacity | 20 L |
| Dimensions (H x W x D) | 26.5 x 45.5 x 35.0 cm |
| Weight | 12.5 kg |
| Power Supply | 230 V, 50 Hz |
| Power Consumption | 1200 W |
| Microwave Output Power | 700 W |
| Power Levels | 10 levels including defrost |
| Defrost Function | Automatic defrost by weight or time |
| Timer | Up to 99 minutes 99 seconds |
| Display | LED digital display |
| Interior Lighting | Yes, inside lamp |
| Turntable | Glass turntable, diameter 27 cm |
| Door Opening | Front pull, with safety interlock |
| Child Lock | Yes, press and hold Stop |
| Signal Ready | Beeps when cooking ends |
| Cleaning | Wipe interior with damp cloth; avoid abrasives |
| Maintenance | Keep vents clear; do not immerse in water |
| Safety Features | Door interlocks, high voltage capacitor discharge |
| Spare Parts | Available through authorized service centers |
| Repairability Index | Not rated |
Frequently Asked Questions - GMW-7417 GoldMaster
User questions about GMW-7417 GoldMaster
0 question about this device. Answer the ones you know or ask your own.
Ask a new question about this device
Download the instructions for your Microwaves in PDF format for free! Find your manual GMW-7417 - GoldMaster and take your electronic device back in hand. On this page are published all the documents necessary for the use of your device. GMW-7417 by GoldMaster.
USER MANUAL GMW-7417 GoldMaster
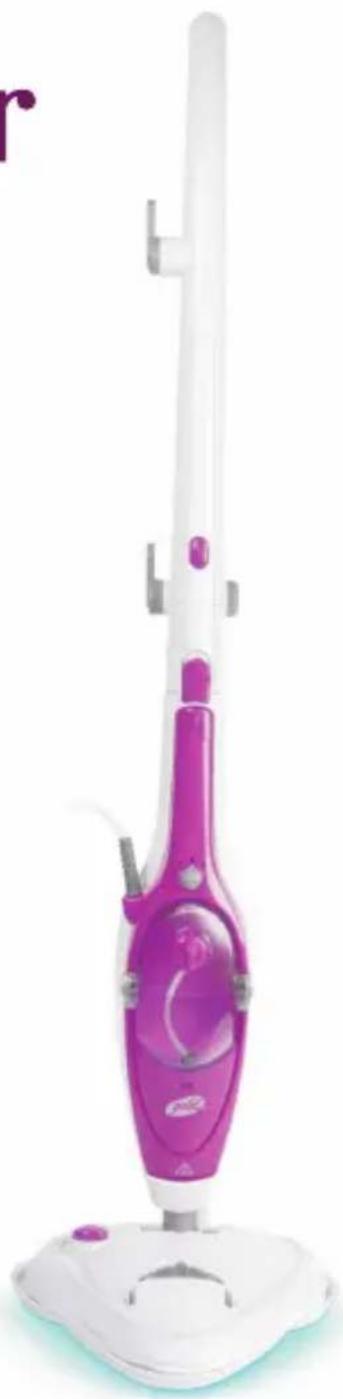
Multimop GSP-7509
natural_image
Product photo of a white and purple hair cleaner with a base mount (no visible text or symbols)www.goldmaster.com.tr
içİNDEKİLER
natural_image
Five different types of hair connectors with numbered labels (23–27), no visible text or symbols on the connectors themselves.natural_image
Close-up of a gray plastic device with a circular button and a curved arrow indicating rotation (no text or symbols visible)natural_image
Close-up of a hand holding a small object, possibly a device or tool, with no visible text or symbols.natural_image
Close-up of a mechanical device with a black arrow pointing downward, no visible text or symbolsnatural_image
Close-up of a white mechanical component with a circular opening and mounting holes (no visible text or symbols)natural_image
Close-up of a small electronic component with a black arrow pointing to a circular button (no visible text or symbols)natural_image
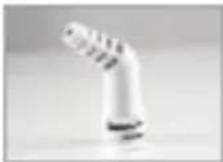
Close-up of a white robotic arm joint with striped pattern (no text or symbols visible)natural_image
Close-up of a white plastic funnel-shaped object with a pointed tip (no text or symbols visible)natural_image
Close-up of a white plastic tool with black textured tip (no visible text or symbols)natural_image
Close-up of a white plastic tool with black metal tips (no text or symbols visible)natural_image
Close-up of a white, textured object resembling a stylized face or mask (no visible text or symbols)natural_image
Close-up of a hand holding a vertical mechanical component with multiple ports (no visible text or symbols)natural_image
Close-up of a hand holding a small mechanical component with arrows indicating motion (no text or symbols visible)natural_image
Close-up of a medical or laboratory device with a black arrow pointing to a component (no visible text or symbols)natural_image
Close-up of a handheld electronic device with internal components and a small component (no visible text or symbols)Web:www.goldmaster.com.tr
E-mail:info@goldmaster.com.tr

Contents
Important Safety Instructions 2
Device Overview and Items Supplied 6
How to Use 7
Cleaning and Storage 11
Troubleshooting.... 12
Technical Specification.... 12
Thank you for purchasing this Steam Mop. Before using this product, it is important to read this instruction manual carefully.
Use the product only as described and for indicated purpose. Keep this manual in a safe place. If you hand this product onto anyone else, ensure to pass on along all the documentation relating to this product.
Important Safety Instructions
? This device is suitable for cleaning heat-resistant surfaces. It is also suitable for cleaning laminate flooring if you following the instructions below:
-
The laminate should be properly laid and have no gaps or cracks into which moisture can penetrate.
-
First test the steam cleaner at an inconspicuous spot and then check the laminate for waves or penetrated moisture.
-
If the surface is unblemished, the device can be used to clean the entire laminate floor.
? The device is not suitable for unsealed wooden flooring, soft plastic, leather, and wooden furniture.
? The UV lamp of the cleaning foot is designed for removing germs and bacteria.
? The device should only be used in closed rooms.
? This device is for personal use only and is not intended for commercial applications. Use the device only as described in the operating instructions. Any other use is deemed to be improper.
Danger of Injury
? Keep children and animals away from the packaging material. There is a danger of suffocation!
? This device should not be used by people (including children) with impaired sensory or mental faculties or who do not have adequate experience and/or knowledge of such devices, unless they are supervised by a person responsible for their safety, or have received instructions from such a person on how to use the device. Children must be supervised in order to ensure that they do not play with the device.
? CAUTION! Avoid exposing yourself to direct or heavily reflected germicidal ultraviolet rays. Germicidal ultraviolet rays are harmful to the eyes and skin!
? Never direct the steam at people, animals or plants. This can cause severe scalding.
? Caution: Danger of scalding! Never touch the cleaning foot/attachment of the device during operation! Maintain a distance of at least 30 cm. Wear shoes when cleaning floors.
? Only hold the device by the handle when you are operating it. There is a danger of scalding!
? Never leave the device unattended when it is connected to the mains.
? Shortly after use, the used attachment/cleaning foot may still be very hot. You should therefore wait for a few minutes until it has completely cooled down before you detachit/the floor cloth.
? Always allow the device to cool down completely before you pour in or remove water, clean the device and/or store it away.
? Store the device out of the reach of children and animals!
? Lav the cable in such a way that it does not pose a risk of tripping!
? Caution! Danger of burns! Improper use can lead to injuries, scalding and electric shock.
? The device should not be used if it is damaged.
? Please take particular care when cleaning stairs.
The Proper Handling of Batteries
? Before inserting the batteries, check whether the contacts in the device and on the batteries are clean; clean them if necessary.
? Use only the battery type specified in the technical data.
? Always replace all the batteries at the same time. Do not use batteries of different types or brands, or batteries with different capacities. When replacing batteries, note the correct polarity (+/-).
? Take the batteries out of the device when they are discharged or if the device is not going to be used for a prolonged period. This will prevent damage that might occur if a battery leaks.
? Remove dead batteries from the device immediately. Clean the contacts before you insert a new battery.
? The batteries must not be recharged or reactivated by other means, dismantled, thrown into a fire, immersed in fluids, or short-circuited.
Danger of Electric Shock and Fire
? The device should only be connected to a properly installed socket with earthing contacts. The socket must also be readily accessible after connection. The mains voltage must be the same as that stated in the technical data of the device. Only use suitable extension cables whose technical data is the same as that of the device.
? Never immerse the device, the cable or the plug in water or other liquids! Ensure that the device, the cable or the plug do not fall into water or become wet. Should the device fall into water, switch off the power supply immediately.
? Never touch the device, the cable or the plug with wet hands.
? Never direct the steam directly at mains cables or parts containing electrical components (e.g. inside ovens, fridges, at switches and lights, microwave ovens).
? Pull out the mains plug after you have finished using the device, before you remove/change an attachment / a floor cloth, top up/empty the water reservoir, clean the device or if you are not using the device.
? Always check the device for damage before operation. If there are any defects, the device must no longer be used until it has been repaired by a specialist.
? Use the device only when it is completely assembled and operational.
? In the event of damage/faults, switch the device off immediately.
? Never try to repair an electrical device or replace parts yourself. Get in touch with your nearest customer service centre/specialist dealer or, in the event of damage, please contact our customer service department
Avoiding Damage to Material, Property and the Device
? Position the cable in such a way that it does not become squashed or bent and does not come into contact with hot surfaces.
? Never pull or carry the device by the cable.
? Always work with sufficient lighting.
? Do not use any other accessories. Only the accessory parts supplied by the manufacturer should be used.
? Never unscrew the cap of the water reservoir during use! Always make sure that the water reservoir is firmly shut before you use the device.
Never use the device without water!
? Only fill the water reservoir with normal or distilled water. Using any other liquids may damage the device.
? Do not pour any cleaning agents into the device. This could destroy the device and safe working is no longer guaranteed.
? Never cover up the steam outlet opening, do not place it on soft surfaces (thus blocking it) and do not push any objects into it.
? Maintain a sufficient distance from heat sources such as hobs or ovens in order not to damage the device.
? Never use the cleaning foot without a floor cloth!
? Check the floor cloth for any signs of wear each time before you use it. Do not use it if it shows any signs of wear or if it is damaged! It could damage your flooring!
? Do not drop the device or allow it to be knocked violently.
? Always try cleaning first at a small, inconspicuous spot.
? Never direct the steam at one spot for too long.
? Never use the device on cold glass surfaces. The hot steam could cause the glass to shatter.
? Do not use any corrosive or abrasive cleaning agents (e. g. vinegar) or cleaning pads to clean the device.
? No liquid must be allowed to get into the device when cleaning the device. This may cause considerable damage to the device.
? Put the device back into its storage position only once it has completely cooled down and there is no more water in the water reservoir.
? Do not wind the mains cable too tightly around the hooks for winding up the cable. It could be damaged.
? Store the device in a dry, clean, cool place that is not accessible to children.
? Do not expose the device to extreme temperatures, strong temperature fluctuations, direct sunlight or moisture.
Device Overview and Items Supplied
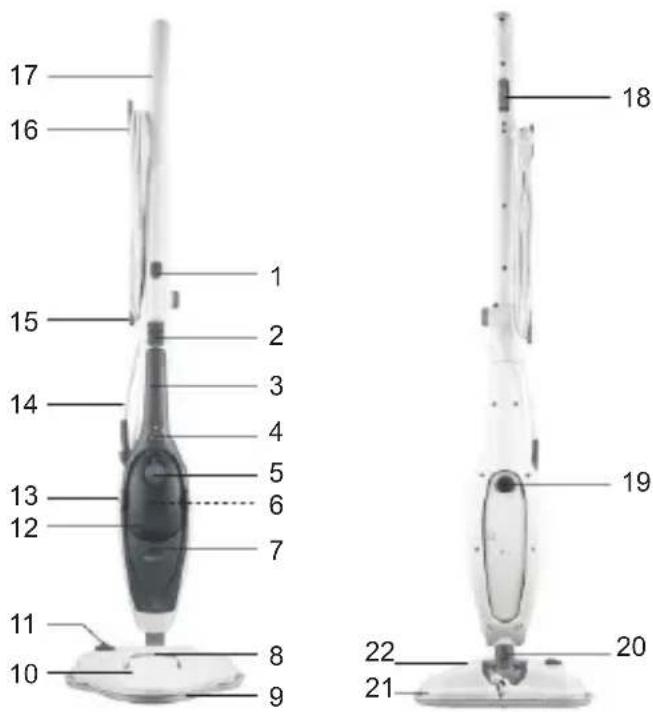
1- Release button for articulated
2- Release button for the basic
3- Basic device
4- Steam power control
5- Water reservoir cap
6- Removable limescale filter
7- Control lamp
8- UV lamp viewing window
9- Carpet glider
10- Battery compartment for UV
11- On/Off switch for UV lamp
12- water reservoir
13- Release buttons for water
14- Mains cable
15- Lower cable winder
16- Upper cable winder
17- Holder for the basic device
18- Steam release button on the frame for floor cleaning; on the basic device the steam release button is situated on the back of the handle
19- On/Off switch for basic device
20- Release lever of the cleaning foot
21- Floor cloth (2x)
22- Cleaning foot
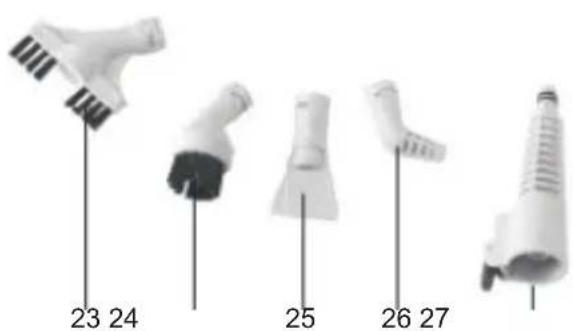
23- Long brush attachment
24- Round brush attachment
25- Spatula attachment
26-Nozzle attachment
27- Connector
Before Initial Use
Before you can use the device, you must:
· unpack the items supplied,
· insert batteries into the battery compartment of the UV lamp,
· fill the water reservoir (see the "Use" chapter, "Filling the Water Reservoir").
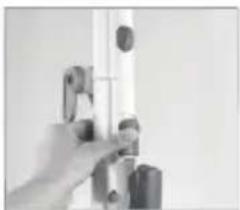
Putting into Operation
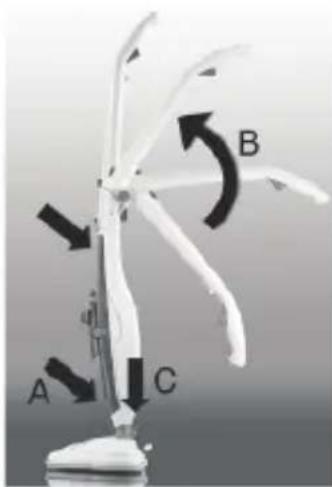
First assemble the device. You require the basic device (3), the tilting handle with the holder for the basic device (17) and the cleaning foot (22).
- Insert the basic device into the holder (A). First place the bottom side of the device into the holder and then press the upper part into the holder until the basic device locks in place.
- Attach the tilting handle perpendicularly (B).
- Insert the holder together with the basic device into the cleaning foot. If you want to remove the cleaning foot, press the release lever (20) on the joint of the cleaning foot and pull it away from the basic device.
HOW TO USE
When the device is first used or if you have not used the device for a prolonged period of time, it may take some time for steam to be generated after it is switched on as the lines of the device are not yet filled with water. Steam will not emerge until the device has reached operating temperature and the corresponding parts of the device have filled with water. To achieve this, press the steam release button a few times.
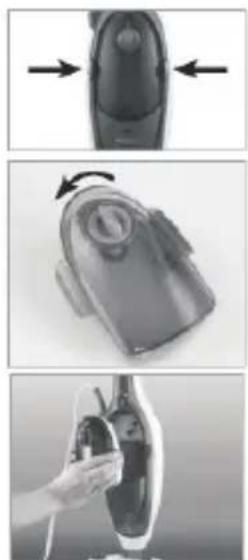
Filling the Water Reservoir
natural_image
Three-step diagram showing a hand holding a small object, with arrows indicating motion or transformation (no text or symbols)-
Press the two release buttons of the water reservoir (13) at the same time and remove the water reservoir from the basic device.
-
Turn the water reservoir cap (5) a little anticlockwise and remove it from the reservoir.
-
Fill the reservoir with distilled water or tap water.
-
Then close the water reservoir by placing the water reservoir cap back on and turning it clockwise to lock it.
-
Insert the water reservoir back into the basic device. Press it in until it sits firmly in place.
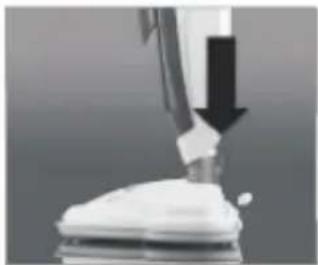
Use As Floor Steam Cleaner
natural_image
Close-up of a mechanical device with a downward arrow indicating compression or disassembly (no visible text or symbols)We recommend that you sweep the floor with a broom or clean it with a vacuum cleaner before using the device.
-
If the basic device (3) is already located in the frame for floor cleaning, you can skip the following steps 1 to 3. If the adapter (27) (with an attachment) is fitted to the basic device, press the release lever of the adapter and remove it from the basic device.
-
Plug the steam outlet nozzle of the basic device into the receptacle in the lower part of the frame.
-
Insert the basic device into the holder. Make sure that the locking mechanism is heard to lock in place.
-
Pull the floor cloth (21) over the cleaning foot and pull the elastic cord tight. When you want to remove the floor cloth again, press the cap on the elastic cord to release it.
-
To unwind the mains cable quickly, turn the upper hook for winding up the cable (16) down and pull off the mains cable.
-
Insert the mains plug into installed mains socket that is easily accessible.
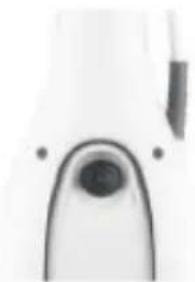
natural_image
Close-up of a white mechanical component with a circular opening and protruding shaft (no visible text or symbols)-
Flip the On/Off switch (19) of the basic device to position 1. The control lamp (7) on the front of the device lights up and the device heats up.
-
Release the standing position by placing one foot on the cleaning foot and tilting the frame.
-
Once the device has reached operating temperature, it emits steam when the steam release button (18) is pressed.
-
You can use the steam power control (4) to individually adjust the amount of steam that is emitted.
-
Start cleaning the floor. Allow the cleaning foot to glide slowly back and forth over the surface which is to be cleaned (do not press down too firmly!) and press the steam release button if necessary.
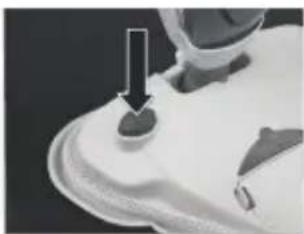
natural_image
Close-up of a small electronic component with a black arrow pointing to a button (no visible text or symbols)- In order to additionally remove germs and bacteria with the power of the UV lamp, press the On/Off switch of the UV lamp (12) on the cleaning foot. You can see through the viewing window (8) in the cleaning foot when the UV lamp is switched on.
Please note: The UV lamp has a safety switch on the cleaning foot.
The UV lamp only switches on when the cleaning foot is placed vertically on the floor!
- For cleaning fitted carpets, place the cleaning foot (with the floor cloth) into the carpet glider (9), and the cleaning foot will then also glide with ease over fitted carpet floors.
- If you want to replace or rinse the floor cloth, switch off the UV lamp by pressing the On/Off switch of the UV lamp (11), move the On/Off switch of the basic device (19) to position 0 and pull the mains plug out of the plug socket. Wait a few minutes so that the device, floor cloth and UV lamp can cool down.
Please note that when you park the device a wet patch can form beneath the cleaning foot. You can then change the floor cloth.
- If the water reservoir is empty and steam is no longer being generated, switch off the device, pull the mains plug out of the plug socket and wait until the device has cooled down. Then remove the water reservoir and top it up with water (see the "Use" chapter, "Filling the Water Reservoir" section).
- Once the cleaning process is completed and the device has fully cooled down, remove the water reservoir, empty it and allow it to dry.
- Turn the upper hook for winding up the cable upwards, and wind up the cable.
- Detach the floor cloth from the cleaning foot and rinse it out (see the "Cleaning and Storage" chapter).
- Store the device upright in a cool, dry place. To park the device away, put it back into its vertical position (standing position). The joint on the cleaning foot engages and the device is locked.
- Before you use the device again, always check the water reservoir for residual water, and completely empty it if necessary.
Use As Hand Steam Cleaner
The hand steam cleaner comes with the following attachments:
Nozzle Attachment
Use the nozzle attachment for example for cleaning places or crevices that are difficult to access.
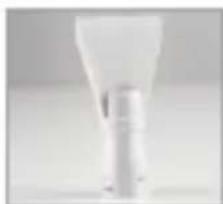
natural_image
Close-up of a white plastic light bulb (no text or symbols visible)Spatula Attachment
Use the spatula attachment for removing stubborn dirt and grime such as limescale and other deposits.
natural_image
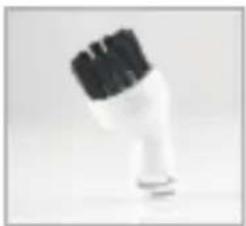
Close-up of a white hairbrush with black bristles (no text or symbols visible)Round Brush Attachment
Use the round brush attachment to remove dirt and grime, e.g. on tiles, wheel rims, mirrors and non-cold glass surfaces.

natural_image
Close-up of a white plastic or plastic container with black bristles (no visible text or symbols)Long Brush Attachment
Use the long brush attachment to remove dirt and grime, e. g. in grooves and crevices.
natural_image
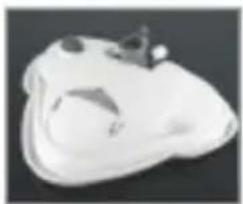
3D rendered object resembling a stylized animal head or mask, with no visible text or symbolsCleaning Foot
The cleaning foot can also be used with the basic device for hand steam cleaning. Use the cleaning foot for cleaning upholstery and mattresses.
natural_image
Close-up of a hand holding a cylindrical device with a metallic handle (no visible text or symbols)-
If the basic device is in the frame for floor cleaning, slide the release button (2) up to release the locking mechanism. Remove the basic device (3) from the frame.
-
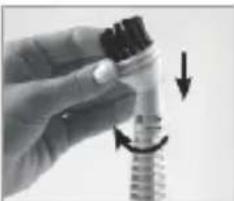
Plug the adapter (27) onto the steam outlet nozzle of the device. It must engage audibly. If you want to remove the adapter
from the basic device, press the release lever of the adapter and pull it away from the basic device.
- Select an attachment and plug it onto the adapter as far as it will go. When you plug it on, the bent end of the attachment (with the exception of the spatula attachment) must point to the left when you hold the basic device in such a way that the water reservoir faces you.
natural_image
Close-up of a hand holding a mechanical component with arrows indicating direction (no visible text or symbols)- Turn the attachment by 90 degrees in order to lock it. To remove an attachment from the adapter, turn it back by 90 degrees and then take it off.
natural_image
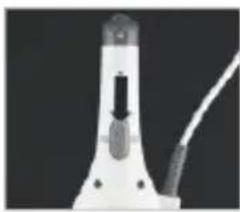
Close-up of a white laboratory pipette with a black arrow pointing to a cap (no visible text or symbols)- Flip the On/Off switch (19) on the back of the device to position 1. The control lamp (7) on the front of the device lights up and the device heats up.
-
Once the device has reached operating temperature, it emits steam when the steam release button is pressed. You can now start cleaning.
-
Allow the attachment to glide slowly back and forth over the surface which is to be cleaned and press the steam release button if necessary. Hold the attachment for around 10 seconds over places which need to be cleaned particularly thoroughly.
CLEANING AND STORAGE
- Remove the mains plug from the socket before cleaning the device.
- Do not immerse the device in water and do not rinse it off under running water.
- Do not use any solvents or aggressive cleaning agents.
- The safety level of the device can only be maintained if it is regularly checked for damage and wear.
- Do not use corrosive or abrasive cleaning agents to clean the device. These could damage the surface.
- If necessary, wipe the device with a damp cloth and a little mild cleaning agent.
- Free the attachments of any contamination (hairs, fiuff etc.).
- You can wash the floor cloth in the washing machine. However, it is NOT suitable for tumble drying!
- Put the device back into its storage position only once it has completely cooled down and it has been emptied of water.
- Store the device in a dry, clean, cool place that is not accessible to children.
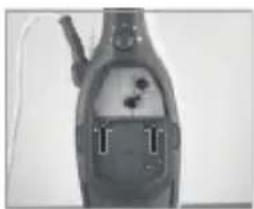
Changing the Limescale Filter
The device has a limescale filter. This should be replaced when its colour has changed completely to blue.
- Press the two release buttons of the water reservoir (13) at the same time and remove the water reservoir from the basic device.
natural_image
Close-up of a handheld electronic device with internal components and connectors (no visible text or symbols)-
The limescale filter (6) is situated behind the water reservoir. Remove it when its colour has changed completely to blue by levering it out with the aid of the two small handles.
-
Then insert the water reservoir back into the device.
TROUBLESHOOTING
If the device should stop working properly, first check whether you are able to correct the problem yourself. Otherwise, contact our customer service department. Do not try to repair a faulty device yourself!
| Problem Possible cause/solution | |
| No steam is emerging.The control lamp does notlight up. | Is the On/Off switch in position 1?Is the plug inserted in the mains socket correctly? |
| No steam is emerging.The control lamp does lightup. | -Has the device reached its operating temperature?-The device needs to heat up for around 30 seconds before steam can emerge.-Is the water reservoir empty? |
TECHNICAL SPECIFICATION
Voltage
UV lamp:
Power:
Steam Temp:
Water tank capacity:
220-240V AC 50/60 Hz
4.5V DC (3 x 1.5 V battery, AA type)
approx. 1600 W
approx. 100°C
approx. 400 m
10 years life time
EN 60335-2-54
natural_image
Simple line drawing of a trash bin with crossed x- and y-axes, no text or symbols present.

WEEE
This product contains recyclable materials. Do not dispose this product as unstorted municipal waste.
Please contact your local municipality for the nearest collection point.