LDD1510B - Television Reflexion - Free user manual and instructions
Find the device manual for free LDD1510B Reflexion in PDF.

User questions about LDD1510B Reflexion
0 question about this device. Answer the ones you know or ask your own.
Ask a new question about this device
Download the instructions for your Television in PDF format for free! Find your manual LDD1510B - Reflexion and take your electronic device back in hand. On this page are published all the documents necessary for the use of your device. LDD1510B by Reflexion.
USER MANUAL LDD1510B Reflexion
natural_image
Modern flat-screen monitor displaying a beach scene with an umbrella and table, next to a CD or DVD (no text or symbols on the main screen)DV3T® DV3C® DV3S® DV3S2®
HDMI ^TM
HIGH DEFINITION MULTIMEDIA INTERFACE


Thank you for purchasing this Reflexion product.
Please read these instructions carefully before operating this product and retain them for future reference.
The images shown in this manual are for illustrative purposes only.
SETUP AND SAFETY 2
GENERAL INFORMATION...... 4
ACCESSORIES....6
WALL MOUNT 7
REMOTE CONTROL BATTERIES INSTALLATION....7
ATTACHING THE PEDESTAL.... 8
TV CONTROLS....9
TV CONNECTORS (SIDE/BACK)......9
REMOTE CONTROL.... 10
POWER CORD / ADAPTER CONNECTIONS.... 11
BASIC CONNECTION 12
SETTINGS.... 16
DVB-S/S2
CHANNEL MENU.... 17
DVB-T
CHANNEL MENU.... 20
DVB-C
CHANNEL MENU.... 22
PICTURE MENU 24
SOUND MENU 25
TIME MENU 27
LOCK MENU 28
SETUP MENU.... 29
SCREEN MENU 31
GUIDE MENU 33
PVR READY 33
MEDIA MENU 34
DISC FORMATS 37
DVD OPERATION.... 38
TROUBLESHOOTING 41
SPECIFICATIONS 43
END OF LIFE DISPOSAL 44
Please note the following instructions when setting up the television set:
■ This television is designed to receive and display video and audio signals.
All other uses are expressly prohibited.
■ The ideal viewing distance is five times the diagonal screen size.
■ Light falling on the screen impairs picture quality.
■ To ensure the device is always adequately ventilated, make sure there is sufficient space between the television set and nearby furniture.
■ The television is designed for use in dry rooms. If you do use it outdoors, make sure it is protected from moisture such as rain or splashing water. Never expose the television set to moisture.
■ Do not place any vessels such as vases on the television, as they may spill liquid, thus presenting a safety risk.
■ Place the television on a hard, level surface.
■ Do not place any objects such as newspapers on the television or put cloth or similar items under it.
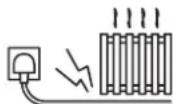
■ Do not place the television close to heating units or in direct sunlight, as this will impair cooling.
■ Heat build-up can be dangerous and shortens the service life of the television. For reasons of safety, have a repairman remove any dirt in the television from time to time.
■ Never open the television under any circumstances. Warranty claims are excluded for damage resulting from improper handling.
■ Make sure the power cord or the power supply unit (if provided) are not damaged.
■ Only operate the television with the power supply/power cord* provided. (*For products with an adaptor only.)
■ Thunderstorms are a danger to all electrical devices. Even when the television is switched off, it can be damaged by a lightning strike to the mains or the antenna. Always disconnect the mains and antenna plugs during a storm.
■ Use a damp, soft cloth to clean the screen. Do not use water with soap or detergent.
■ Only clean the housing of your television set with the cloth provided. Do not use water with soap or detergent.
■ When deciding where to put the device, remember that furniture is often coated with various types of varnish and plastic. Many of these contain chemicals which can corrode the feet of the device, leaving marks on the surface of the furniture which can be difficult or impossible to remove.
■ The screen of your LCD television meets the highest quality standards and has been checked for pixel faults.
Despite the great care taken in manufacturing, technological reasons make it impossible to completely discount the possibility that some pixels may be faulty. Provided they are within the thresholds specified by the DIN norm, pixel faults of this kind cannot be regarded as a defect as defined by the warranty.
■ To ensure fires do not occur, always keep candles and other open flames away from the device.

SETUP AND SAFETY
■ Do not connect any other equipment while the
device is switched on. Also switch off other equipment before connecting it.
- Do not plug in the power cord of the device until you have connected the external equipment and the antenna.
■ Make sure the mains plug is freely accessible
Caution:
■ If you plan on using a wall bracket for your television, make sure you read the assembly manual for the wall bracket or have a specialist assemble it.
■ When purchasing the wall bracket, make sure that all the fastening points on the television are also on the wall bracket and that they are all used when mounting it.
Small object
■ This product contains possibly dangerous parts that can be breathed in or swallowed by young children accidentally. Keep the dangerous parts out of reach of young children.
Radio waves
- Do not use the TV in any medical institutions or locations with medical equipment. Radio waves from the TV may interfere with the medical equipment and cause accidents due to the malfunction.
- Do not use the TV near any automatic control equipment such as automatic doors or fire alarms. Radio waves from the TV may interfere with the automatic control equipment and cause accidents due to the malfunction.
Moving the TV
■ Before moving the TV, disconnect all cables.
When not in use for a long time
This TV will still consume some power even in the Off mode, as long as the mains plug is still connected to a live socket outlet.
■ Remove the mains plug from the wall socket when the TV is not in use for a prolonged period of time.
Excessive volume
Do not expose your ears to excessive volume from the headphones.
Irreversible damage can be caused.


Warning
Mains plug and lead
• To help avoid risk of electrical shock, fire, damage or injury, please follow the warnings below: This TV is designed to operate on AC 110-240 V, 50/60 Hz.
- Insert the mains plug fully into the socket outlet.
- Ensure that the mains plug is easily accessible.
eRemove the mains plug when cleaning the TV.
- Do not touch the mains plug with a wet hand.

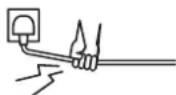
- Do not damage the mains lead.
- Do not place a heavy object on the lead.
- Do not place the lead near a high temperature object.
Do not pull on the lead. Hold onto the mains plug body when disconnecting the plug.

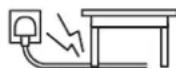


- Do not move the TV with the lead plugged into a socket outlet.
- Do not twist the lead, bend it excessively or stretch it.
- Do not use a damaged mains plug or socket outlet.
- Ensure the TV does not crush the mains lead.
Do not use any mains lead other than that provided with this TV. - Do not place foreign objects inside the TV.
- Do not allow any objects to drop into the TV through the air vents as fire or electrical shock may result.
If you detect anything unusual, immediately switch off the mains supply switch and remove the mains plug.
AC 110-240 V
50/60 Hz
natural_image
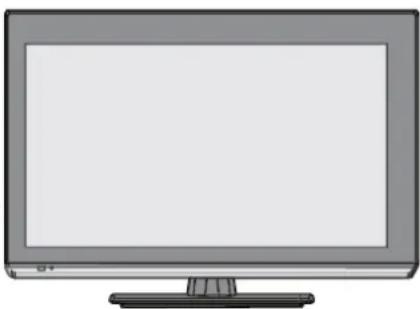
Illustration of a flat-screen computer monitor with blank screen (no text or symbols)Special features of your television set
- You can receive and watch digital TV channels using your television set (via DVB-S 2/S, DVB-T and DVB-C) – including High Definition programmes (HD). However, the reception of digital TV channels in HD is currently limited to a few countries in Europe.
- Although this television set complies with the current DVB-S2/S, DVB-T and DVB-C standards (status: October 2012), the compatibility with future DVB-S2/2 satellite transmissions as well as terrestrial DVB-T and DVB-C cable programmes cannot be guaranteed.
- Your television set can receive and process all non-encrypted digital TV channels.
■ The electronic TV guide (for digital channels only) informs you about any schedule changes at short notice, and provides an overview of all the broadcasters' schedules for the next few days. Detailed information on the individual television programmes are – when provided by the broadcasting station – are also available in the electronic TV guide. - You can connect various data media, such as an external hard drive, a USB memory stick or a digital camera, to the USB socket. Using the file browser, you can then select and play the file formats of your choice (for example, MP4, MP3 or JPEG data).
PVR Ready
This function need to be activated by yourself, please go for our website www.ultramedia.de download PVR ready software into an USB flash, then insert the USB flash into the USB interface on Television set which will implement software upgrade automatically, the process may take a little time, please wait with your patience. Once finish upgrading, the television will restart. After then, PVR is ready for operation.
■ Using the time shift function, you can quickly and easily pause a programme using the remote control and resume it at a later stage. The programme is recorded in an external data medium.
■ You can record any digital TV channels you choose.
The TV channels are converted by the television and saved on an external data medium which is connected to the USB socket.
The saved programmes can be called up and played from the archive on the external data medium at any time.
You can also play a programme from the archive while recording another.
More information on recording and playing TV programmes can be found in the PVR operation manual on our website: www.ultramedia.de.
Receiving digital channels
■ You require a satellite antenna to receive digital satellite channels (DVB-S2/S).
■ You require a digital roof antenna or indoor antenna (passive or active indoor antenna with its own power supply) to receive digital television channels (DVB-T).
■ If you wish to receive digital television channels via your cable system (DVB-C), the antenna cable for your cable operator must be connected to the television set.
■ Unlike analogue broadcasting, not every channel has its own transmission frequency. Instead, several channels are grouped into what are known as bouquets on a regional or national level. You can find the current transmission information on teletext from various broadcasters, or by consulting a current TV guide or the Internet.
- Various digital television channels from private broadcasters are encrypted (DVB-S2/S, DVB-T and DVB-C). Watching these channels and the recording and playback functions are only possible with the appropriate CI module and a SmartCard. Ask your specialist dealer the range of channels available from the public broadcasting institutions are not encrypted and can be received without a SmartCard.
Important notes on environmental protection
- The following information will help you to save resources – and money as well.
■ If you are not using your television set for several days, you should pull out the mains plug for environmental and safety reasons. This way the television does not consume any electricity.
■ If the device is equipped with a power switch, switching it off using this switch will be sufficient. The energy consumed by the television set is reduced to virtually 0 W.
In standby mode, the television set uses very little energy. However, it may be necessary to leave the television set in standby mode for certain functions (for example automatic switch-on and switch-off and for timer functions).
■ The television set uses less energy when the brightness is reduced.
■ This television set is compliance with energy efficiency directive (2009/125/EC) in Europe.
■ This television set is compliance with Low Voltage Directive (2006/95/EC) and Electromagnetic Compatibility Directive (2004/108/EC) in Europe.
■ This television set is compliance with Is RoHS Directive (2002/95/EC), PAHs Directive (2005/69/EC) and Phthalates Directive (2005/85/EC) in Europe.
Remote Control
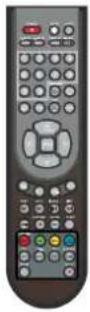
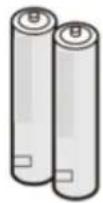
Batteries for the Remote Control
Instruction Manual

Pedestal
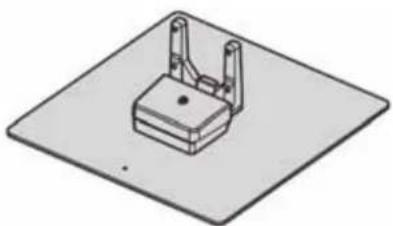
natural_image
Isometric illustration of a mechanical component mounted on a flat base (no text or symbols)Screws

DVB-T Antenna
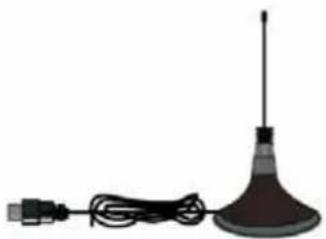
natural_image
Simple illustration of a car head with a antenna, cable, and plug (no text or symbols)Power Cord
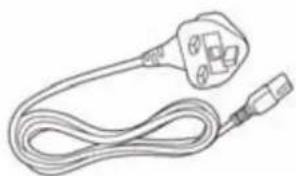
natural_image
Line drawing of a cord with two connectors (no text or symbols)Power Adapter
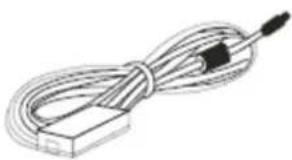
natural_image
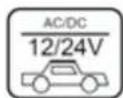
Line drawing of a coiled cable or wire with a black connector (no text or symbols)12/24V Car Adapter

Composite Adapter
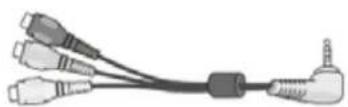
Component Adapter
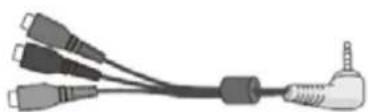
natural_image
Illustration of a USB cable with three connectors and a terminal connector (no text or symbols)AV Cable
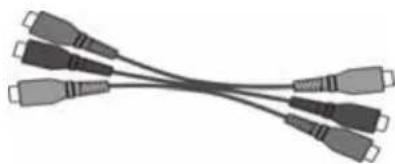
natural_image
Coiled network of USB connectors (no text or symbols visible)Wall Mount
Wall Bracket
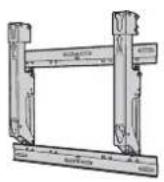
not included
Rear of the TV
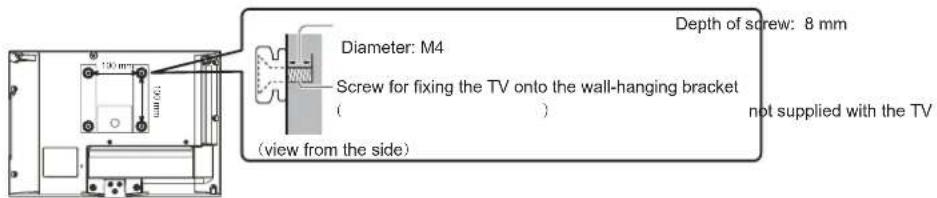
Holes for wall-hanging bracket installation
Warning
- Using other wall-hanging brackets, or installing a wall-hanging bracket by yourself have the risk of personal injury and product damage. In order to maintain the unit's performance and safety, be absolutely sure to ask your dealer or a licensed contractor to secure the wall-hanging brackets. Any damage caused by installing without a qualified installer will void your warranty.
- Carefully read the instructions accompanying optional accessories, and be absolutely sure to take steps to prevent the TV from falling off.
- Handle the TV carefully during installation since subjecting it to impact or other forces may cause product damage.
•Take care when fixing wall brackets to the wall. Always ensure that there are no electrical cables or pipes in the wall before hanging bracket.
• To prevent fall and injury, remove the TV from its fixed wall position when it is no longer in use.
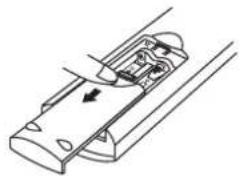
Remote Control Batteries Installation
- Remove the battery compartment cover.
natural_image
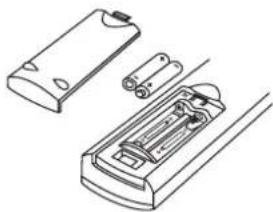
Technical line drawing of a mechanical component with internal parts and an arrow indicating direction (no text or symbols)- Insert two sizes AAA batteries (1.5V) according to “+” and “-” polarity markings inside the battery compartment.
natural_image
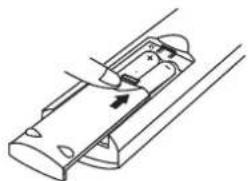
Technical line drawing of a battery pack assembly (no text or symbols)- Close the battery compartment battery.
natural_image
Technical line drawing of a mechanical component with arrows indicating motion or force direction (no text or symbols)Caution
To insure safe operation, please observe the following precautions:
- Replace two batteries at the same time.
- Do not use a new battery with a used battery.
- Avoid contacting with water or liquid.
- Do not expose the Remote Control or Batteries to moisture, or heat such as sunshine, fire or the like.
- Do not drop the Remote Control.
- If a battery has leaked on the Remote Control, carefully wipe case clean and install new batteries.
- Risk of explosion if battery is replaced by an incorrect type.
- Dispose of used batteries according to the instructions.
- Remote control contains AAA battery and must be kept out of reach of small children to avoid accidental ingestion.
- Replace only with same or equivalent type.
- Do not mix different battery types (such as alkaline and manganese batteries).
- Do not use rechargeable (Ni-Cd) batteries.
Attaching the Pedestal
Warning Warning
Do not disassemble or modify the pedestal.
• Otherwise the TV may fall over and become damaged, and personal injury may result.
(Caution)
Do not use any pedestal other than the one provided with this TV.
• Otherwise the TV may fall over and become damaged, and personal injury may result.
Do not use the pedestal if it becomes warped or physically damaged.
- If you use the pedestal while it is physically damaged, personal injury may result. Contact your nearest dealer immediately.
During assembly, use only screws supplied and make sure that all screws are securely tightened.
- If insufficient care is taken to ensure screws are properly tightened during assembly, the pedestal will not be strong enough to support the TV, and it might fall over and become damaged, and personal injury may result.
Ensure that the TV does not fall over.
- If the TV is knocked or children climb onto the pedestal with the TV installed, the TV may fall over and personal injury may result.
Two or more people are required to install and remove the TV.
• If two or more people are not present, the TV may be dropped, and personal injury may result.
When removing the pedestal from the TV, do not remove the pedestal by the methods other than the specified procedure.
• Otherwise the TV and / or pedestal may fall over and become damaged, and personal injury may result
Caution
Small object
This product contains possibly dangerous parts that can be breathed in or swallowed by young children accidentally
- Keep the dangerous parts out of reach of young children..
Installing Pedestal
- Place the LED TV screen facing down on a flat surface place where maintained with soft materials (such as a blanket) for protecting the display screen.
- Adjust the pedestal to the bottom of the TV.
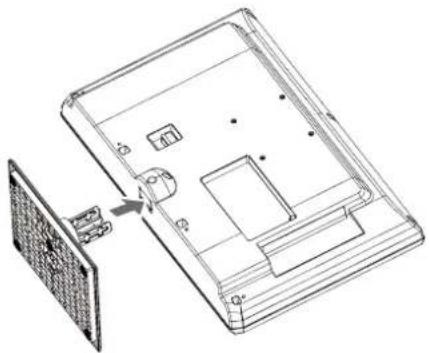
natural_image
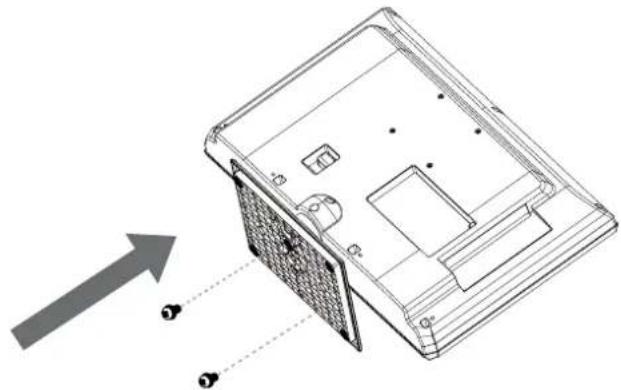
Technical line drawing of a device casing with internal components and an external panel (no text or symbols)- Use only the supplied assembly screws to fasten the pedestal securely to the TV.
natural_image
Technical line drawing of a device casing with internal components and an arrow indicating direction (no text or symbols)Uninstalling Pedestal
- Place the LED TV screen facing down on a flat surface place where maintained with soft materials (such as a blanket) for protecting the display screen.
- Remove screws in three holes with screw driver.

natural_image
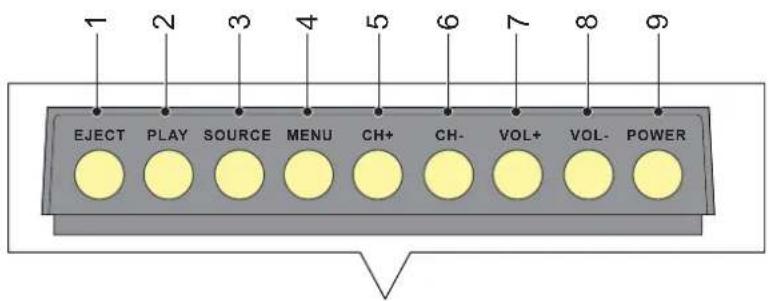
Technical line drawing of a device casing with internal components and an arrow indicating direction (no text or symbols)TV Controls
natural_image
Illustration of a computer monitor with a blank screen and a small labeled component (no text or symbols on the screen itself)1 EJECT
- Eject a disc.
2 PLAY
- Play a disc.
3 SOURCE
• Select an input source.
4 MENU
- Open or close the On-Screen Menu.
5 & 6 CH+ / CH-
• Used to change channels.
• Used to select item on On-Screen Menu.
7 & 8 VOL+ / VOL-
• Used to change volume.
• Used to adjust the value of the selected item on.
9 POWER
• Used to turn the TV On or Off.
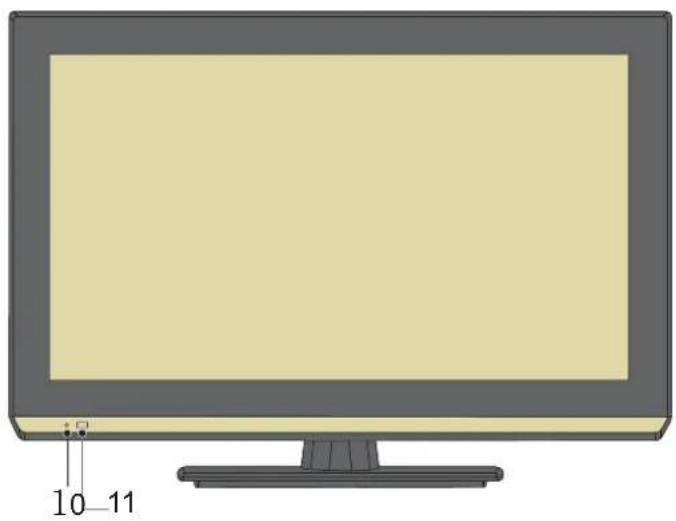
10 Power Indicator
- Red: Standby
- Green: On
- Green blink: Receiving a command from the remote control.
11 Remote Control Signal Receiver
- Do not place any objects between the TV remote control signal receiver and remote control.
TV Connectors (Side/Back)
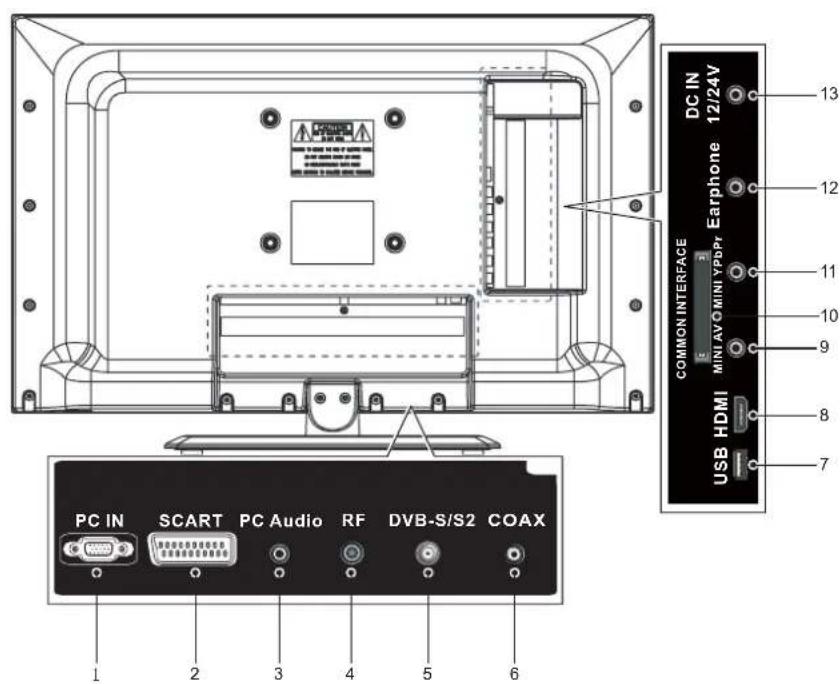
1 PC IN
- Connect computer outputs to this terminal
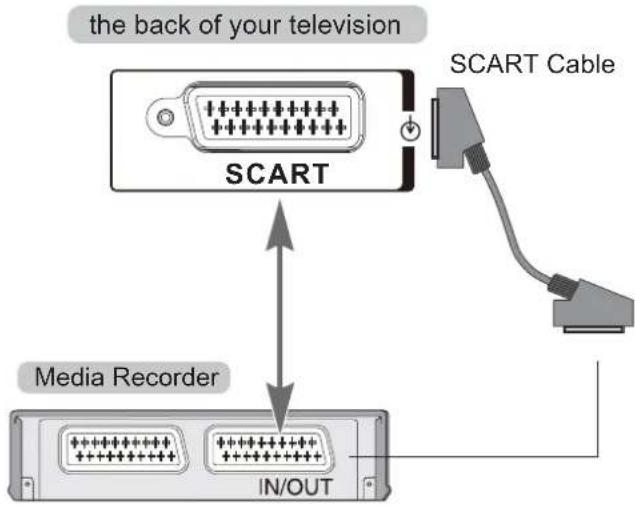
2 SCART
• Full SCART, which transmits RGB, S-Video and CVBS in, and audio/video out.
3 PC Audio
- Connect an audio cable to jacks and audio out jack on the computer.
4 RF
• Receive DVB-T and DVB-C digital TV signals.
5 DVB-S/S2
- Receive DVB-S2/S digital TV signals.
6 COAX
- Connect an audio amplifier to this jack.
7 USB
- Connect USB memory stick to this terminal to play multimedia.
8 HDMI
- Connect all kinds of HDMI output equipment.
9 MINI AV
- Connect video and audio output from video equipment via composite adapter (supplied)
10 COMMON INTERFACE (CI+ available)
- The Common Interface Module menu provides access to software contained on Common Interface (CI) Modules.
11 MINI YPbPr
- Connect video and audio output from video equipment via component adapter (supplied)
12 Earphone
- Connect a headphone (stereo) to this jack and the TV speaker out will be muted.
13 DC IN 12/24V
• DC Power in 12/24V.
Remote Control
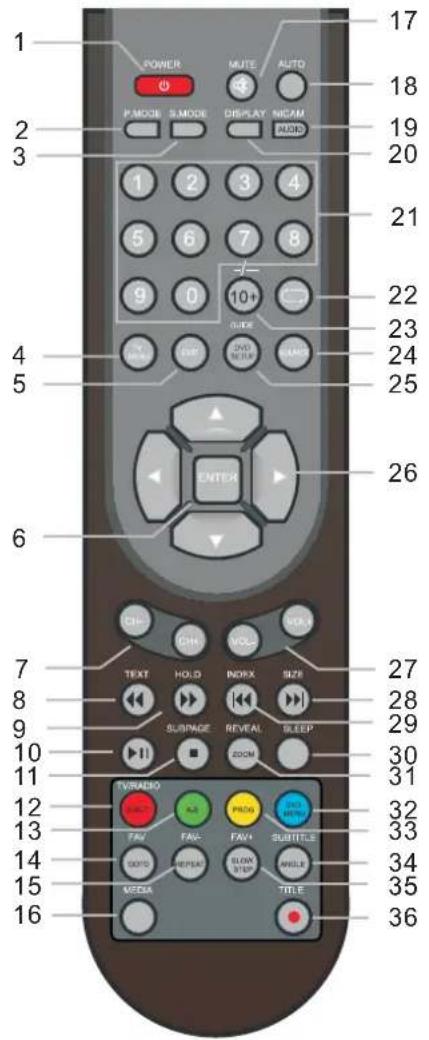
1 POWER
• Switch TV On or Off standby.
2 P.MODE
- Select the picture mode.
3 S.MODE
- Select the sound mode.
4 TV MENU
- Press to access Picture, Sound, Timer and Setup Menus.
5 EXIT
- Return to the normal viewing screen.
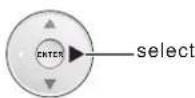
6 ENTER
- Confirm selections and choices.
7 CH+/CH-
- Select channels in sequences.
8 TEXT
- Switch to teletext mode.
9 HOLD
- Hold the current teletext page. (teletext mode)
10 ▶||
- Press to pause the playback; Press again to resume normal playback. (MEDIA and DVD mode) Press to perform Time Shift function; Press again to pause and exit. (DVB mode)
11 SUBPAGE / ■
- Select the subpage when the current page 3 contains subpages. (teletext mode) Press to stop playing. (MEDIA and DVD mode)
12 TV/RADIO / SUB-T
- Switch between TV and Radio mode. Select one of the subtitle languages programmed on a disc/
13 A-B
- Press to perform point-to-point repeat playback on a DVD or CD.
14 GOTO / FAV
- Press to skip directly to a specific location on a disc. Open the favorite channel list.
15 Repeat / FAV-
- Press to repeat a chapter or title of a DVD. Press to repeat a single track or whole CD. Display the favorite program down.
16 MEDIA
• Press to access MEDIA menu.
17 MUTE
- Switch sound mute On or Off.
18 AUTO
- Optimize display performance of screen automatically. (PC mode)
19 AUDIO / NICAM
- Selects multi audio in DVB mode or DVD mode. Select stereo or bilingual transmissions mode.
20 DISPLAY
• Display current source and channel information.
21 NUMERIC BUTTONS
• Changes channel and teletext pages.
22
• Return to the channel viewed previously.
23 10+ / - / --
- Enter a program number for multiple program channel such 2-1. Enter the title, chapter and track selection. (DVD mode)
24 SOURCE
- Switch the source input.
25 DVD SETUP / GUIDE
- Press to enter and exit the SETUP menu of the DVD. Display TV Guide in DVB mode.
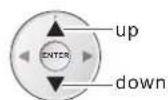
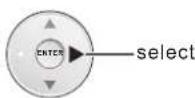
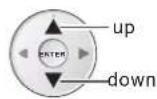
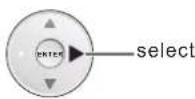
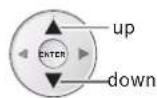
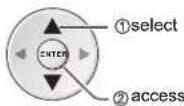
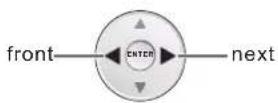
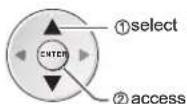
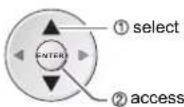
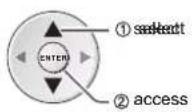
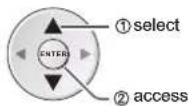
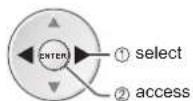
26 Cursor buttons
• Make selections and adjustments.
27 VOL+ / VOL-
- Press to adjust the volume.
28 ▶▶| / SIZE
- Select the previous track/file in the DVD mode and MEDIA Mode. Change aspect ratio.
29 / INDEX
- Select the next track/file in the DVD mode and MEDIA Mode. Return to the teletext index page. (teletext mode)
30 SLEEP
• Press to set up TV standby period.
31 ZOOM / REVEAL
- Enlarge the display size. (DVD mode and MEDIA mode) Reveal concealed text. (teletext mode)
32 DVD MENU
• Display DVD Menu.
33 PROGRAM
• Enter into the favorite list to program the contents in a disc.
34 ANGLE / SUBTITLE
- Switch the camera angle of the video presentation in a disc. Select alternative subtitle languages during view and playback of a DVB program. Display P.100. (teletext mode)
35 SLOW STEP / FAV+
- Slow the speed of playback. (DVD mode) Display the favorite program up.
36 TITLE / ●
- Access the DVD title menu. (e) Record DVB programs. (PVR mode)
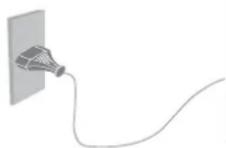
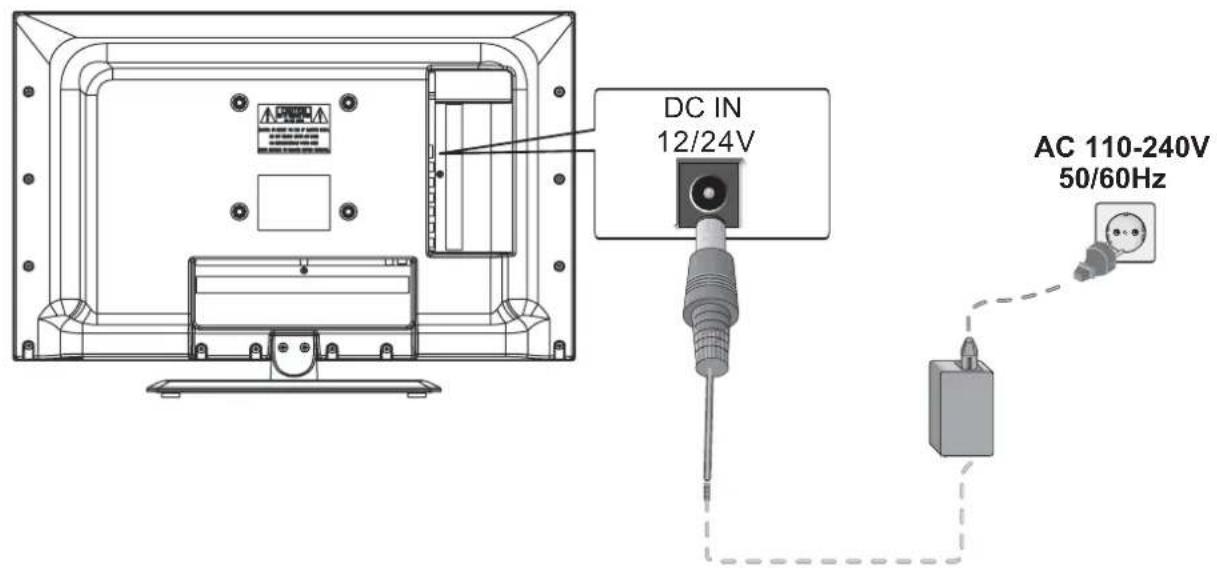
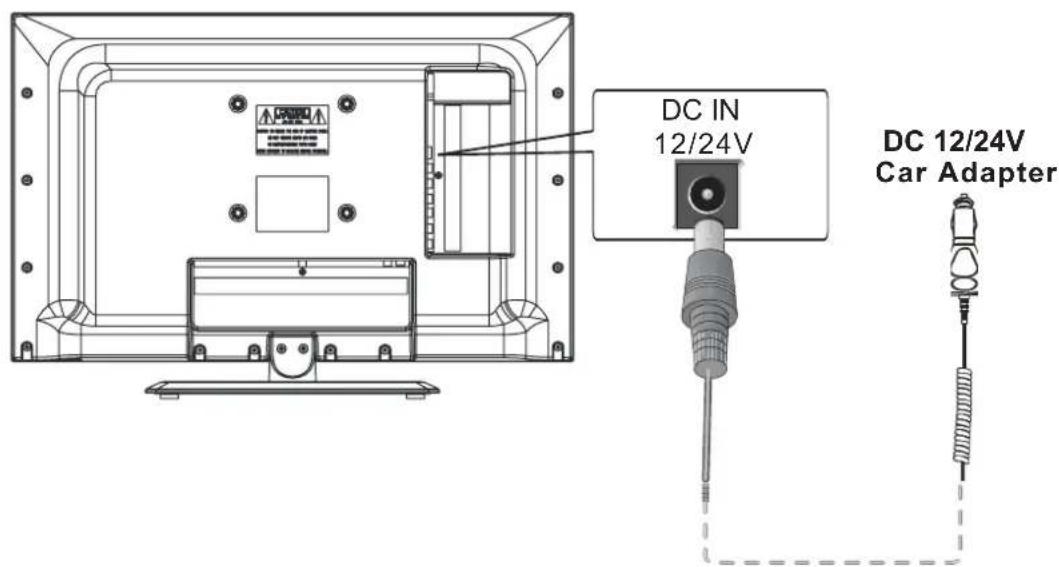
Power Cord / Adapter Connections
This LED TV uses power cord of 110-120V AC 50/60Hz and power adapter of 12/24V DC.
It is designed to work under household, truck, caravans and camper environments.
To reduce risk of electrical shock, do not plug into any other type of power system.
Consult your authorised dealer or service station if you are not sure the type of power being supplied.
Connect the LED TV with all peripheral equipment before turning the LED TV on.
Working under household environments:
Working under environments:truck, caravans and camper
Caution
For safety, unplug AC power cord when the LED TV is not in use.
Basic Connection
External equipment and cables shown are not supplied with this TV.
Please ensure that the unit is disconnected from the mains socket before attaching or disconnecting any leads.
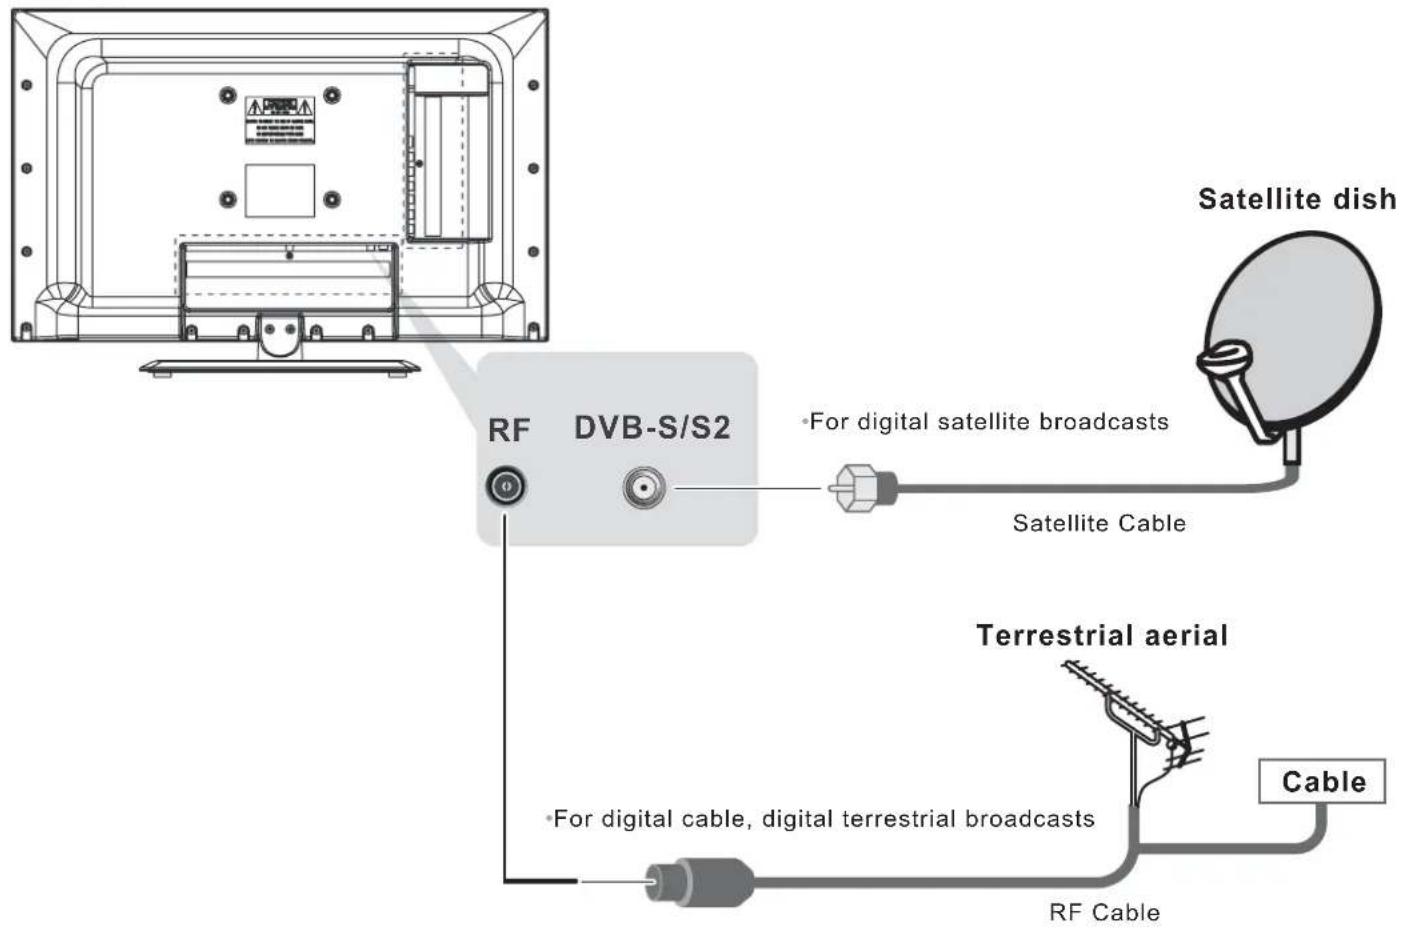
Connecting dish or aerial
Cable used for connection (These cables below are not supplied with this LED TV.)
- Satellite Cable
- RF Cable
- Terrestrial aerial
TV only
To ensure your satellite dish is correctly installed, please consult your local dealer.
- Also please consult the received satellite broadcasting companies for details.
- Selectable satellites and dish alignment to tune DVB-S channels.
Rear of the TV
flowchart
graph TD
    A["Satellite dish"] --> B["DVB-S/S2"]
    B --> C["Satellite Cable"]
    B --> D["Terrestrial aerial"]
    D --> E["Cable"]
    B --> F["RF Cable"]
    B --> G["For digital cable, digital terrestrial broadcasts"]
Basic Connection
Connecting a Computer
With either an PC or an HDMI connection, you can watch your computer's display on the television.
Cables used for connection (These cables are not supplied with this LED TV.)
• PC/VGA Cable (D-SUB 15pin)
• HDMI /DVI Adapter
HDMI Cable
- Audio Cable
To connect an PC to the PC terminal
When connecting a PC to the PC IN terminal on the television, use an analogue RGB (15-pin) computer cable.
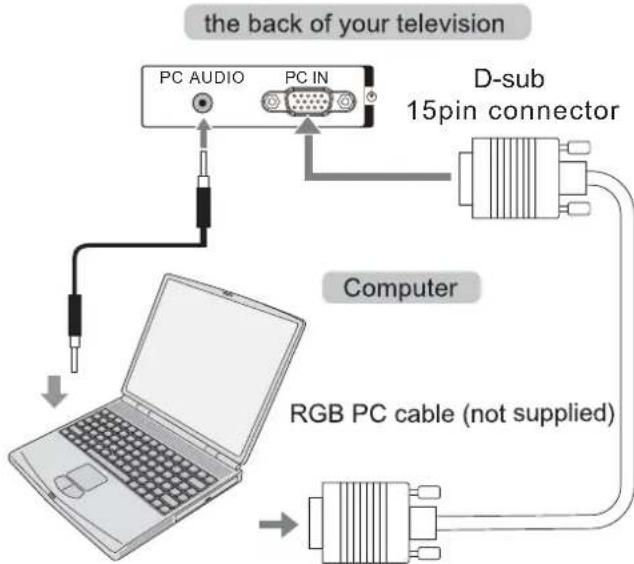
To use a PC, set the monitor output resolution on the PC before connecting it to the television.
To display the optimum picture, use "AUTO" button on remote control.
NOTE:
- Some PC models cannot be connected to this television.
- An adaptor is not needed for computers with a compatible D-sub15-pin terminal.
. Depending on the DVD's title and the specifications of the PC on which you are playing the DVD-Video, some scenes may be skipped or you may not be able to pause during multi-angle scenes.
- A band may appear at the edges of the screen or parts of the picture may be obscured. This is due to scaling of the picture by the set, it is not a malfunction.
- When PC input mode is selected, some of the television's features will be unavailable.
- Some PC models may output unique signals that the television may be unable to detect.
- If connecting a certain PC model with a unique PC signal, the PC signal may not be detected correctly.
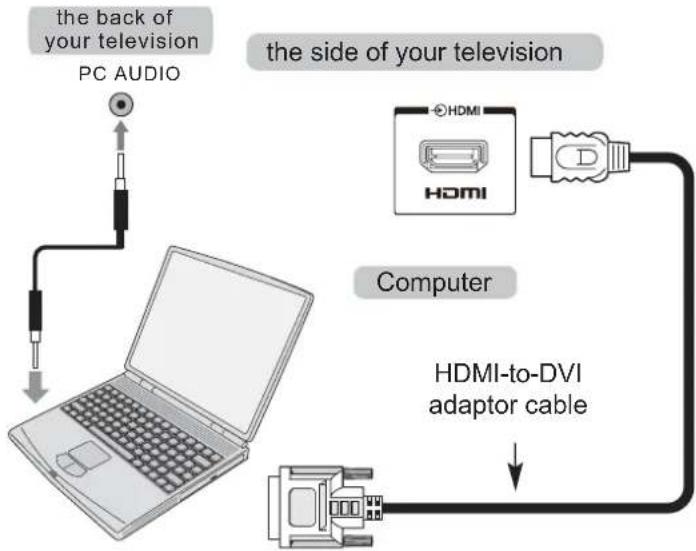
To connect an PC to the HDMI terminal
When connecting a PC to the HDMI terminal on the television, use an HDMI-to-DVI adaptor cable.
If connecting a PC with an HDMI terminal, use an HDMI cable.
flowchart
graph TD
    A["PC AUDIO"] --> B["Laptop"]
    C["HDMI"] --> D["Computer"]
    D --> E["HDMI-to-DVI adaptor cable"]
    style A fill:#f9f,stroke:#333
    style B fill:#ccf,stroke:#333
    style C fill:#cfc,stroke:#333
    style D fill:#fcc,stroke:#333
    style E fill:#cff,stroke:#333
NOTE:
• The edges of the images may be hidden.
- If connecting a certain PC model with a unique PC signal, the PC signal may not be detected correctly.
NOTE:
When connecting the cable, AC Power Cords of both LED TV and external equipment should be disconnected from AC outlet. Turn LED TV and peripheral equipment on before your computer is switched on.
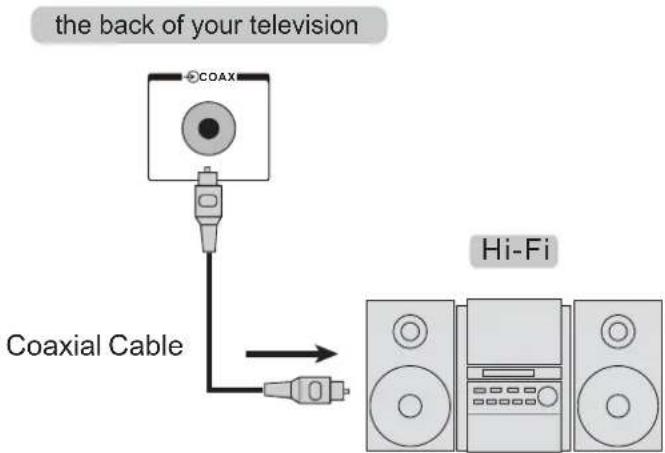
Connecting a Hi-Fi
Cable used for connection (This cable is not supplied with this LED TV.)
- Coaxial Cable
Basic Connection
Connecting AV Equipments
Before connecting any external equipment, turn off all main power switches. If there is no switch, remove the mains plug from the wall socket.
To connect an SCART equipment
Cable used for connection (This cable is not supplied with this LED TV.)
- SCART Cable
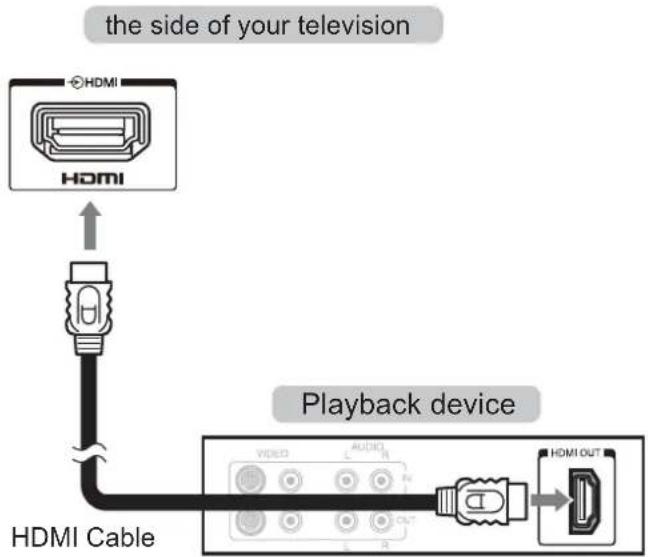
To connect an HDMI equipment
The HDMI input on your television receives digital audio and uncompressed digital video from an HDMI source device.
Cables used for connection (This cable is not supplied with this LED TV.)
- HDMI Cable
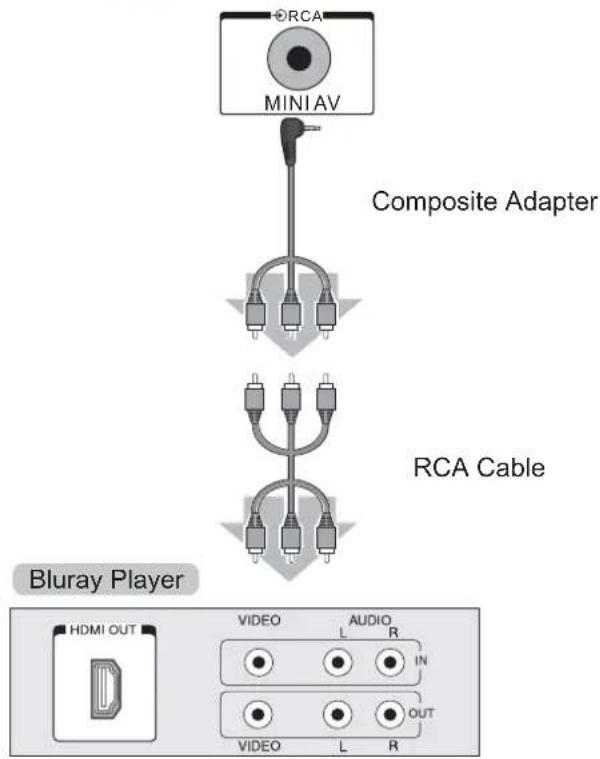
To connect an RCA equipment
Cable used for connection (This cable is not supplied with this LED TV.)
- RCA Cable
the side of your television
flowchart
graph TD
A["MINI AV"] --> B["Composite Adapter"]
B --> C["RCA Cable"]
C --> D["Bluray Player"]
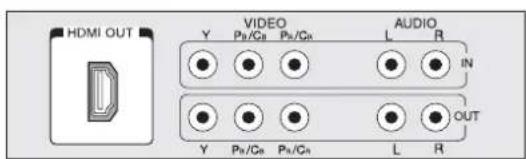
D --> E["HDMI OUT"]
E --> F["VIDEO L AUDIO R IN"]
F --> G["VIDEO L OUT"]
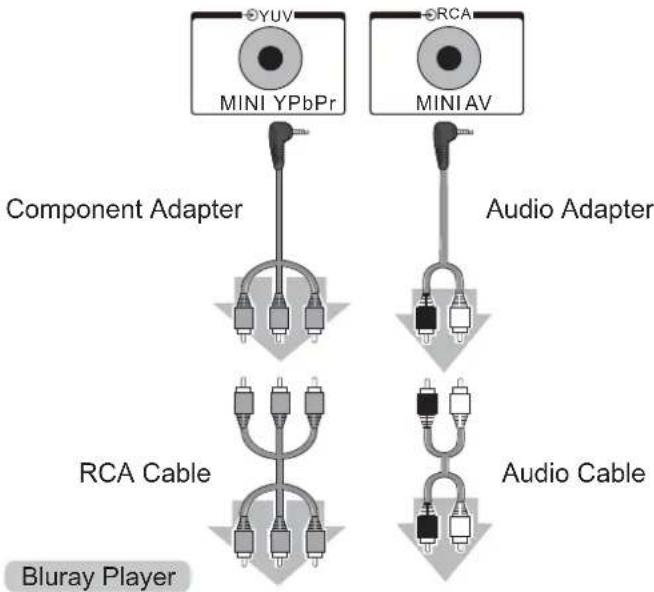
To connect an RCA equipment
Cables used for connection (These cables are not supplied with this LED TV.)
- RCA Cable
- Audio Adapter
- Audio Cable [L/R]
the side of your television
flowchart
graph TD
    A["MINI YPbPr"] --> B["Component Adapter"]
    C["MINI AV"] --> D["Audio Adapter"]
    E["RCA Cable"] --> F["Bluray Player"]
    G["Audio Cable"] --> H["Bluray Player"]
Basic Connection
Connecting an Earphone
Cable used for connection (This cable is not supplied with this LED TV.)
- 3.5mm diameter plug
the side of your television

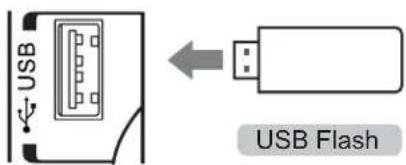
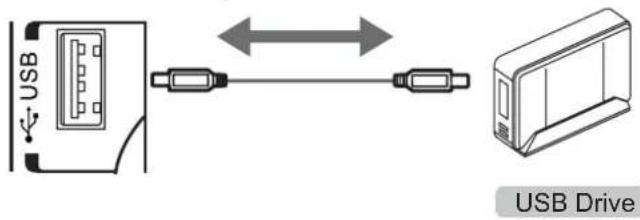
Connecting an USB Device
Cable used for connection (This cable is not supplied with this LED TV.)
- USB Cable
the side of your television
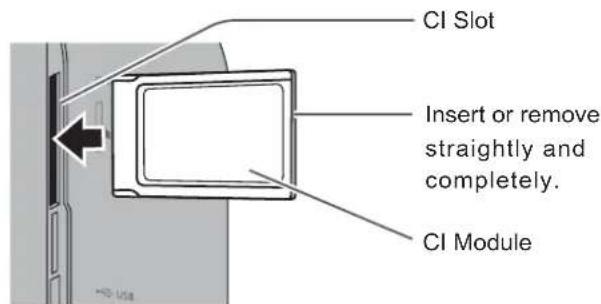
Using Common Interface
This LED TV supports the latest Common Interface standard - Common Interface Plus.
The Common Interface Module menu provides access to software contained on Common Interface (CI) Modules.
- This function may not be available in some countries or regions.
• Video and audio signals may not be output depending on broadcasts or services.
Although CI module may enable you to view some services, this TV does not guarantee all services (e.g. encrypted pay-TV channels).
Please use only the approved CI module by the broadcaster. Consult your local dealer or broadcasters for more information and conditions of the services.
Inserting the Smart Card into the CA module
Push the Smart Card into the CA module as far as it goes so that the side with the gold coloured contact chip is facing the side of the CA module marked with the provider's logo. Note the direction of the arrow printed on the Smart Card.

Caution
- Turn Off Mains power On / Off switch whenever inserting or removing the CI module.
- If a view card and a card reader come as a set, first insert the card reader, then insert the view card into the card reader.
- Insert the module in the correct direction.
the side of your television
SETTINGS
Selecting language, country and source mode
1 Switch on the television set from standby with "POWER"
- During initial set-up, the "Installation Guide" will be displayed.
Help:
If this menu is not displayed, restore the television set to its default settings (see page "Restoring the television to the default settings" on page 43).
2 Select the language.
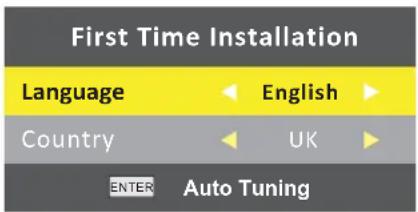

3 Select the country.
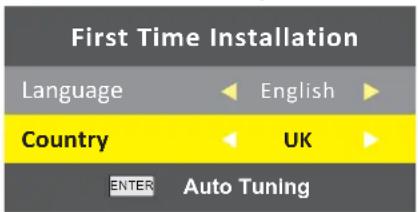
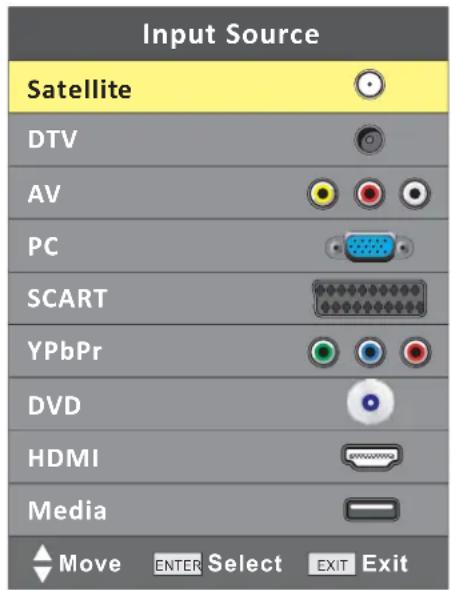
4 Select the source input
→Press "SOURCE" button on the TV control or remote control.

Initial tuning television channels
The television set is equipped with automatic channel search, which searches for satellite channels (DVB-S/2), terrestrial channels (DVB-T), cable channels (DVB-C).
You start the search and the television channels will be stored into the Program Table. Following, you can sort the television channels in the Program Table.
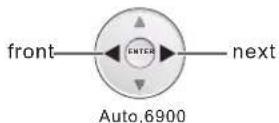
For DVB-S/S2 channels there are 6000 presets available, for DVB-T and DVB-C channels 1000 presets.
The various settings
Depending on the type of antenna connected, you can decide which channels you would like the television to search for.
■ Tunes digital television channels from the satellite, from page "Tuning the television channels from satellite (DVB-S/S2)" on page. You have two options for this search:
- the basic installation which presets a standard selection, e.g. the satellite Astra 19.2° East; you need only start the search;
- the professional installation, which allows you to make all required settings and set parameters for your receiver system.
■ Tunes digital terrestrial television channels, on page "Tuning terrestrial television channels (DVB-T)" on page 17.
■ Tunes digital television channels from the cable provider, on page "Tuning television channels from the cable provider (DVB-C)" on page 17.
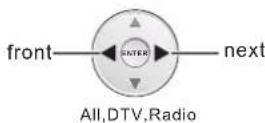
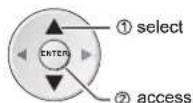
First Tuning
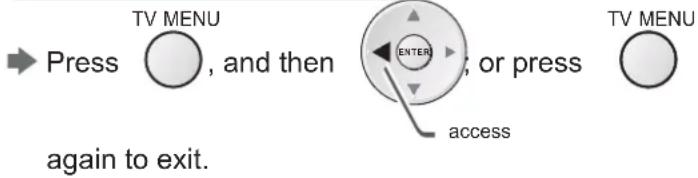
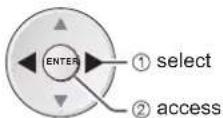
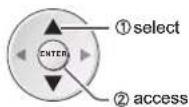
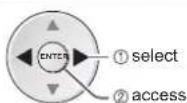
flowchart
graph TD
    A["Press"] --> B["TV MENU, and then"]
    B --> C["ENTER; or press"]
    C --> D["TV MENU"]
    C --> E["access"]
    style C fill:#f9f,stroke:#333
    note right of C again to exit.
SETTINGS
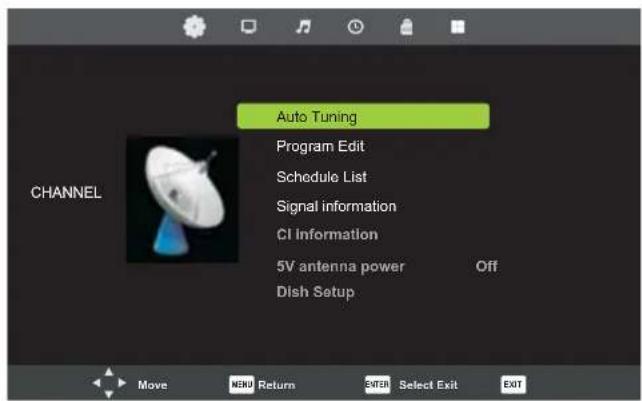
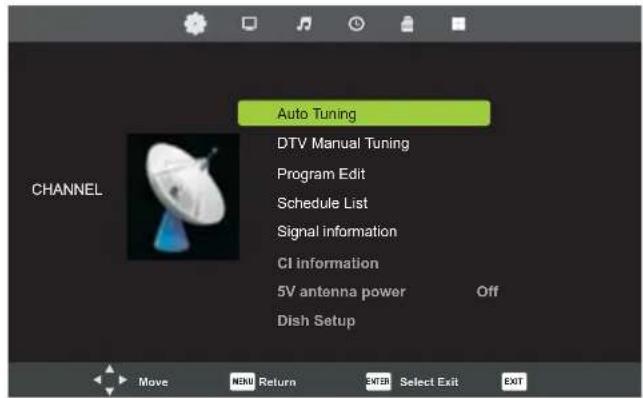
CHANNEL Menu
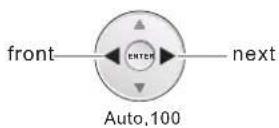
DVB-S/S2 Channels Tuning
1. Display Source
SOURCE

2. Select Satellite
3. Display TV MENU
TV MENU

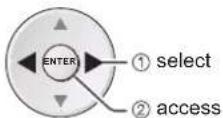
4. Select

5. Select Auto Tuning
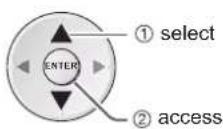
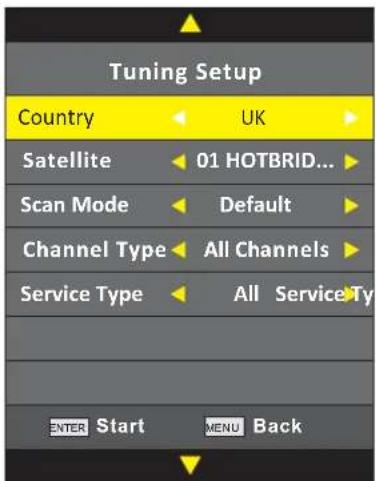
5-1. Select Country

5-2. Select Satellite
5-3. Select Scan Mode
5-4. Select Channel Type
5-5. Select Service Type
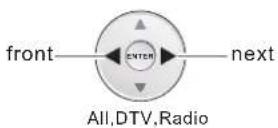
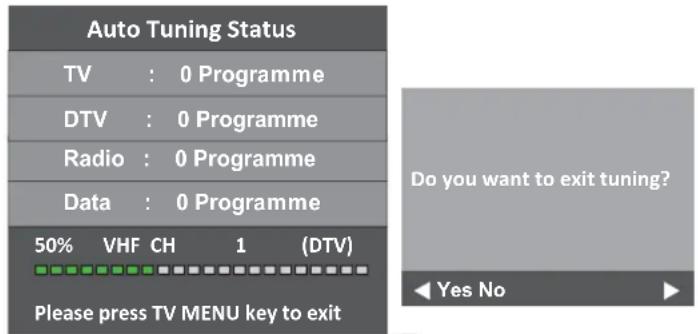
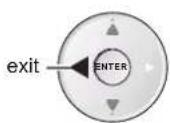
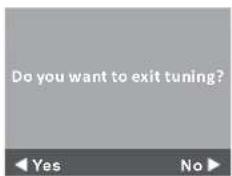
5-6. Access and Exit

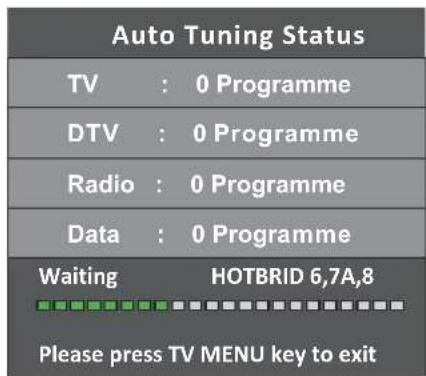
Auto Tuning Status

SETTINGS
CHANNEL Menu
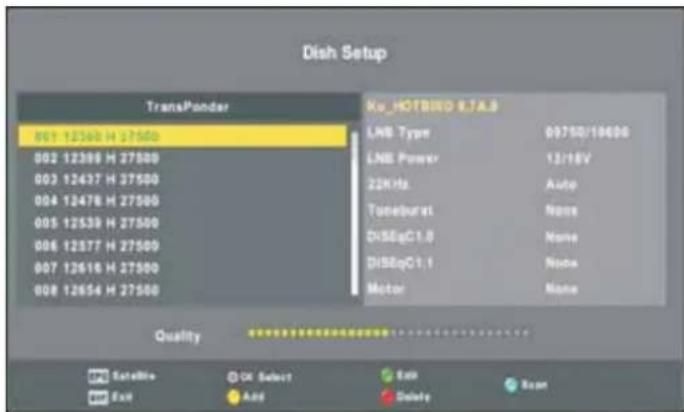
DVB-S/S2 Channels Tuning
- Select Dish Setup
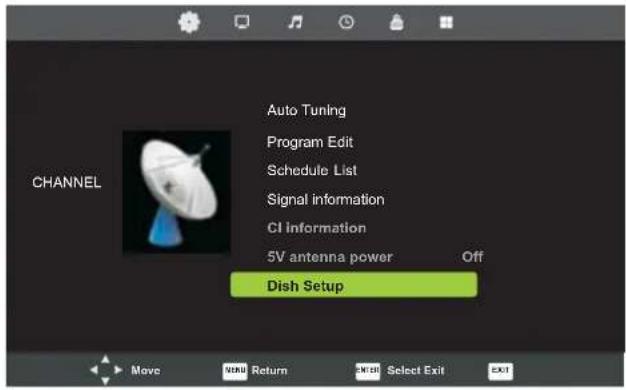

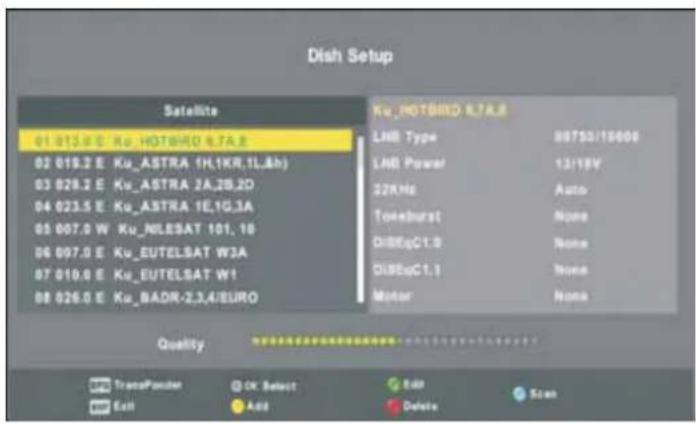
Press ● button to edit the name of longitude of satellite.
Press ● button to add a satellite.
Press ● button to delete a satellite.
Press ● button to scan channels on the selected satellite.
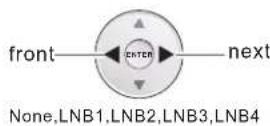
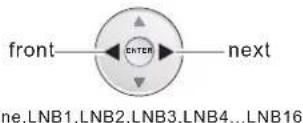
6-1. Select LNB Type


bar
| Category | Value | |---|---| | 9750/10600 | 9750/10600 | | 9750/10750 | 9750/10750 | | 05150 | 05150 | | 05750 | 05750 | | 08750 | 08750 | | 18600 | 18600 | | 10750 | 10750 |
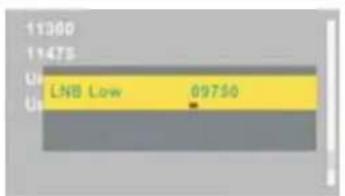
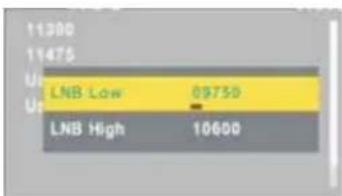
User Single and User Dual are user defined LNB frequency if the working frequency of your LNB doesn't exist within the list above.
6-2. Select LNB Power
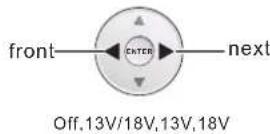
6-3. Select 22KHz
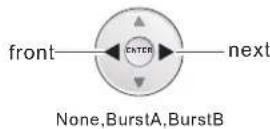
6-4. Select Toneburst
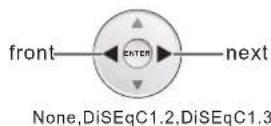
6-5. SelectDiSEqC1.0
6-6. SelectDiSEqC1.1
6-7. Select Motor

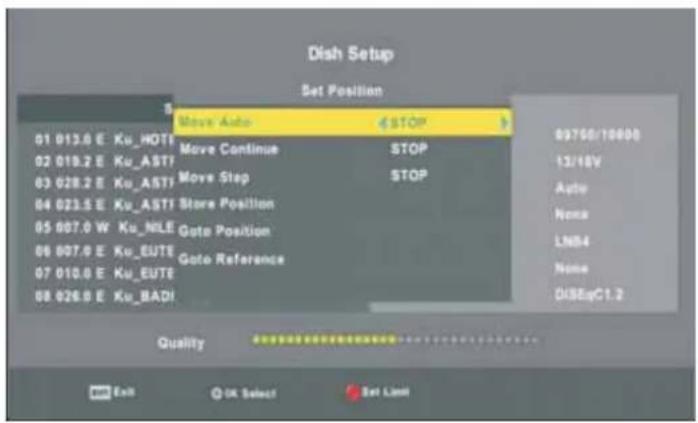
Select Set Position
SETTINGS
CHANNEL Menu
DVB-S/S2 Channels Tuning
6-7-1. SelectMove Auto
6-7-2. SelectMove Continue
6-7-3. SelectMove Step
6-7-4. SelectStore Position

6-7-5. SelectGoto Position

6-7-6. SelectGoto Reference

Note: If DiSEqC1.3 is selected, "GotoX" will be available. Press ENTER to move the dish to right position.
- Select TransPonder
7.1 Display

7.2 Select Transponder
Press ● button to edit transponder.
Press ○ button to add transponder.
Press ● button to delete transponder.
Press ● button to scan channels on the selected transponder.
7.3 Select Channel Search

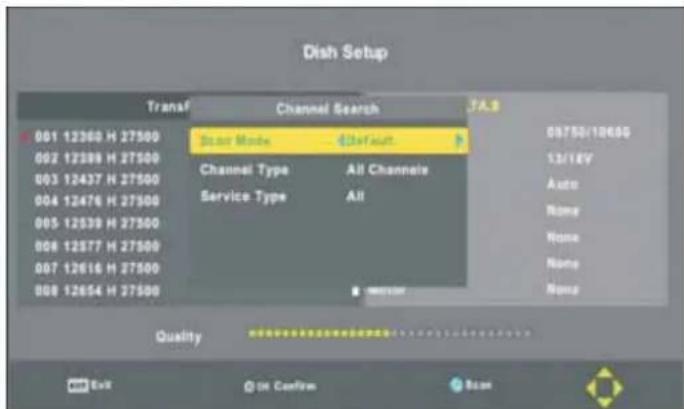
7-3-1. Select Scan Mode
7-3-2. Select Channel Type

7-3-3. Select Service Type

Start channel searching, which is the same as that for Initial Auto Tuning.
SETTINGS
CHANNEL Menu
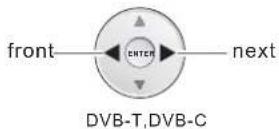
DVB-T Channels Tuning
1. Display Source
SOURCE

2. Select DTV
3. Display TV MENU
TV MENU

4. Select

5. Select Auto Tuning.
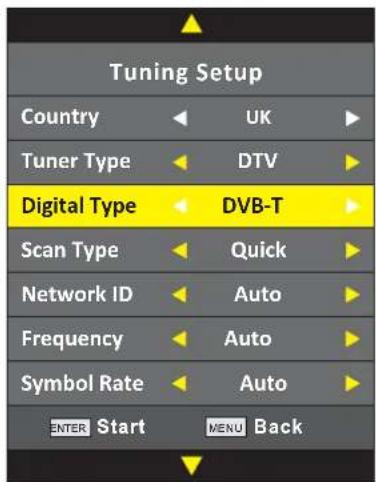
5-1. Select Country
5-2. Select Tuner Type
5-3. Select Digital Type
5-4. Select Scan Type
5-5. Select Network ID
5-6. Select Frequency

5-7. Select Symbol Rate
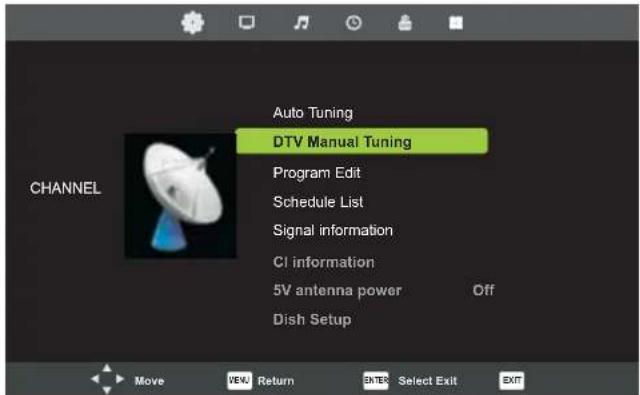
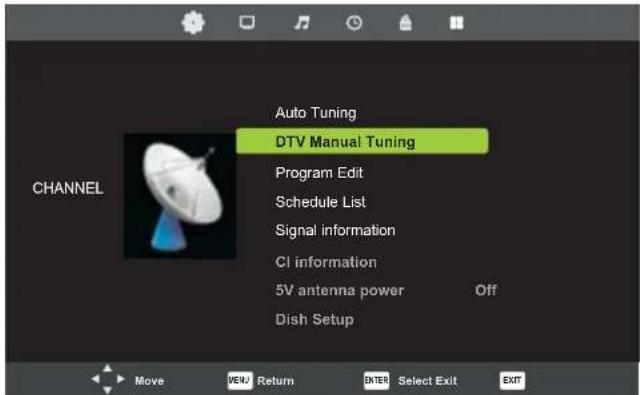
6. Select DTV Manual Tuning.
SETTINGS
CHANNEL Menu
DVB-T Channels Tuning
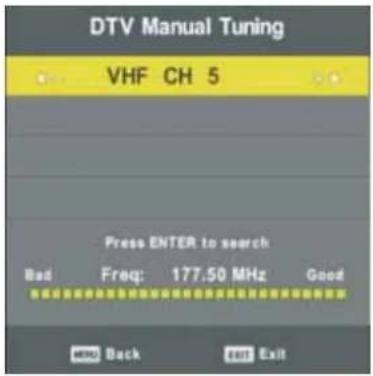
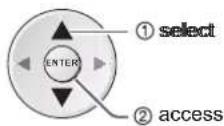
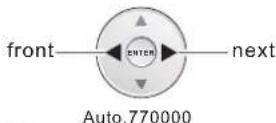
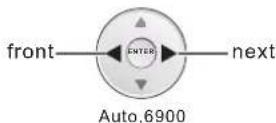
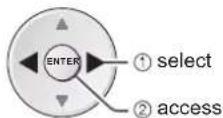
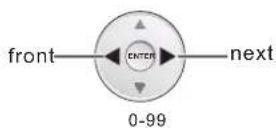
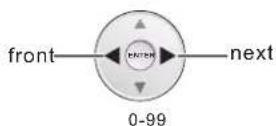
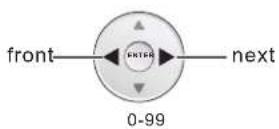
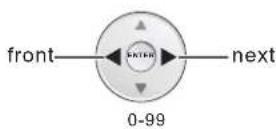
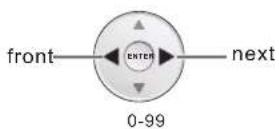
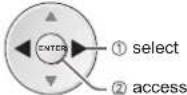
Select previous channel/next channel and search channels
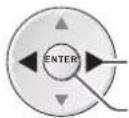
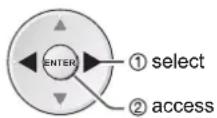
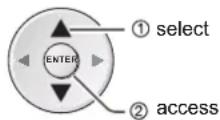
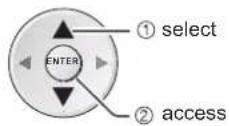
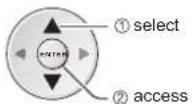
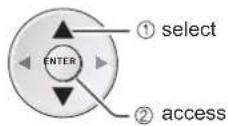
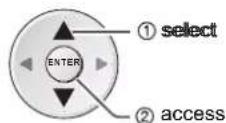
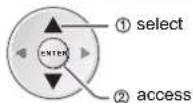
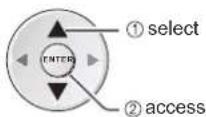
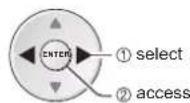
① select
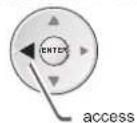
② access
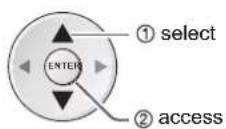
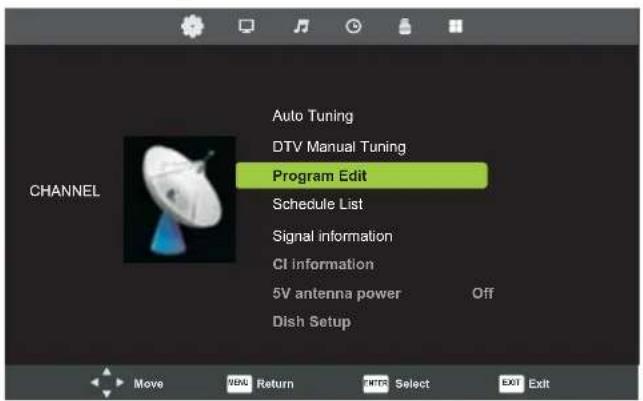
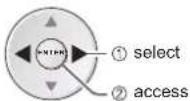
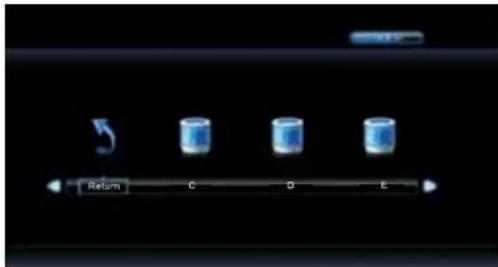
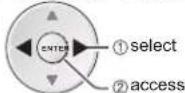
7. Select Program Edit
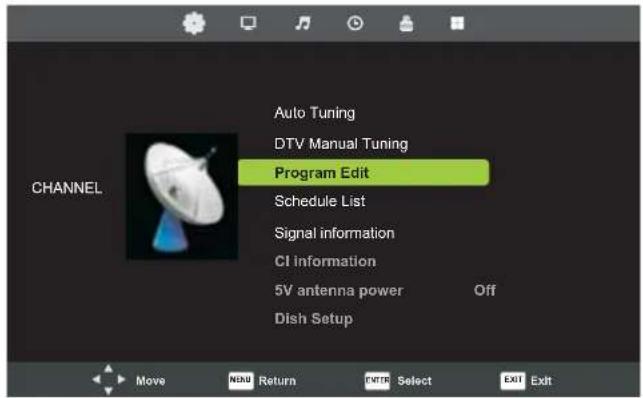
① select
② access
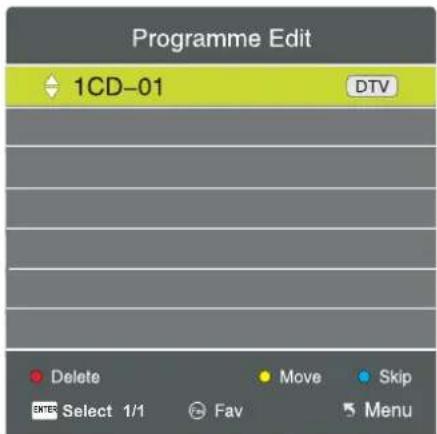
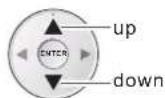
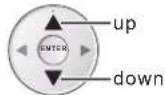
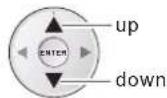
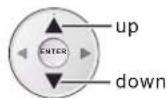
Select Channels
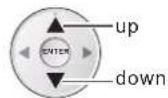
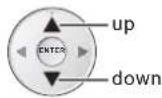
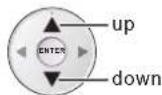
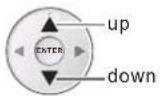
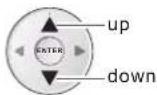
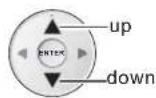
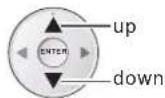
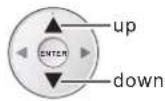
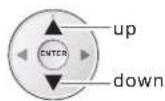
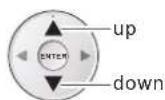
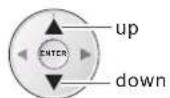
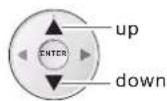
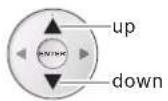
-up
-down
Press ● button to delete the channel.
Press ● button to set the channel move status, then to move the channel to the desired position.
Press ● button to skip the channel selected.
FAV
○ Add or remove the channel from Favorite List.
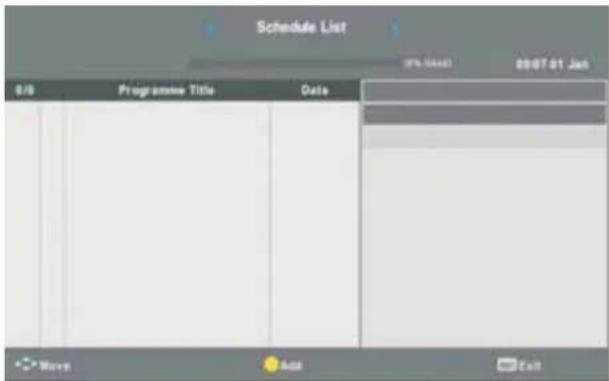
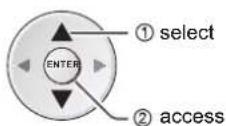
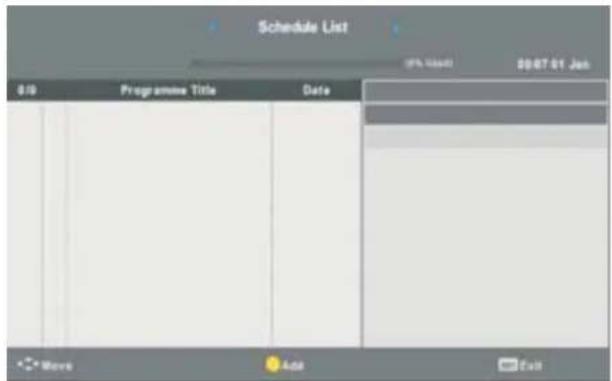
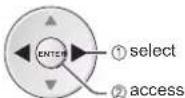
8. Select Schedule List
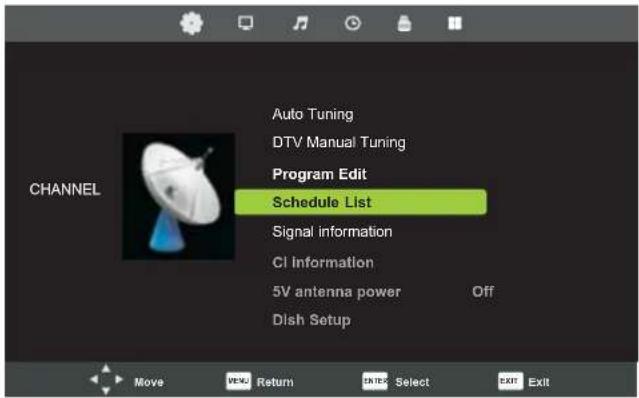

① select
② access
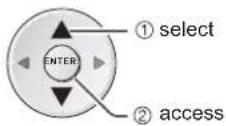
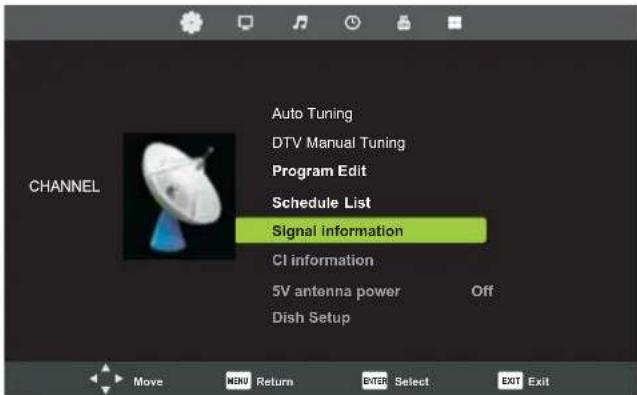
9. Select Signal Information


① select
- ② access
Signal Information
Channel : 5 (177.50MHz)
Quality : 100
Strength: 100
Network : Network TEN
Modulation: 64 QAM
SETTINGS
CHANNEL Menu
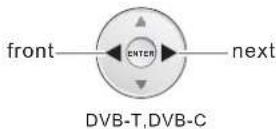
DVB-C Channels Tuning
1. DisplaySOURCE
SOURCE

2. Select DTV
3. Display TV MENU
TV MENU

4. Select

5. Select Auto Tuning.

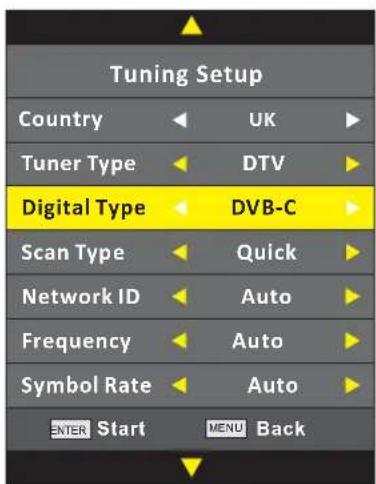
5-1. Select Country
5-2. Select Tuner Type
5-3. Select Digital Type

5-4. Select Scan Type

5-5. Select Network ID
5-6. Select Frequency

5-7. Select Symbol Rate
6. Select CADTV Manual Tuning.
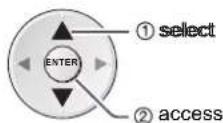
SETTINGS
CHANNEL Menu
DVB-C Channels Tuning
6.1 Select QAMType
16QAM,32QAM,64QAM,128QAM,256QAM
7. Select Program Edit

Select Channels
Press ● button to delete the channel.
Press ● button to set the channel move status, then to move the channel to the desired position.
Press ● button to skip the channel selected.
FAV
Add or remove the channel from Favorite List.
8. Select Schedule List

9. Select Signal Information

| Signal Information |
| Channel : 5 (177.50MHz) |
| Quality : 100 |
| Strength : 100 |
| Network : Network TEN |
| Modulation: 64 QAM |
SETTINGS
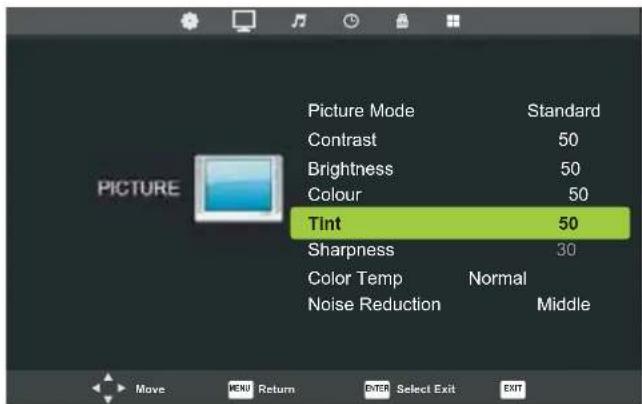
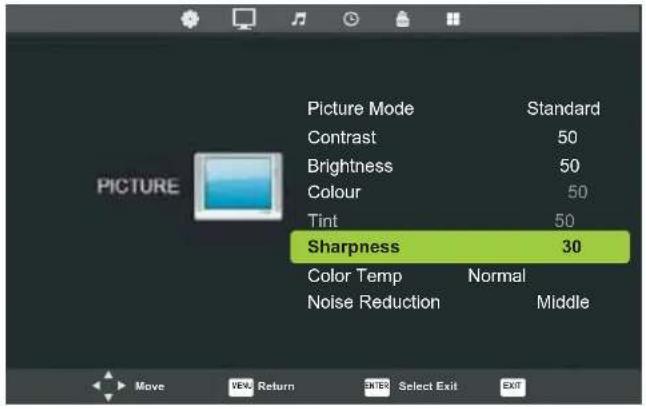
PICTURE Menu
1. Display PICTURE MENU
TV MENU

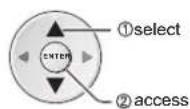
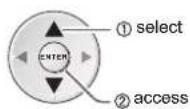
2. Select

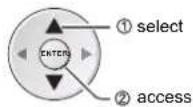
① select
② access
3. Select Picture Mode
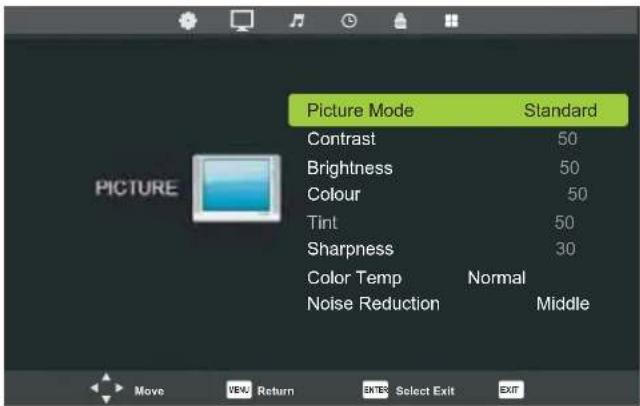
Dynamic, Standard, Mild, Personal

4. Select Contrast
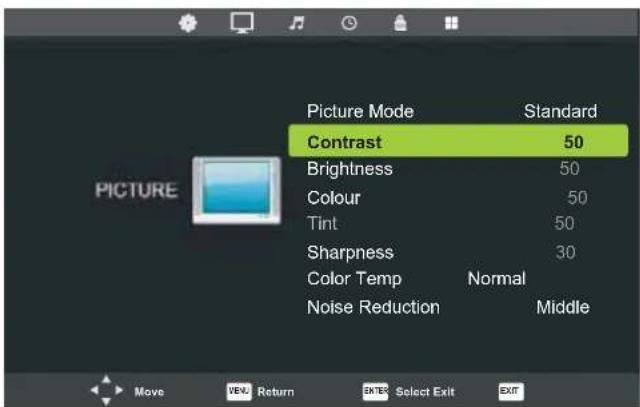
5. Select Brightness
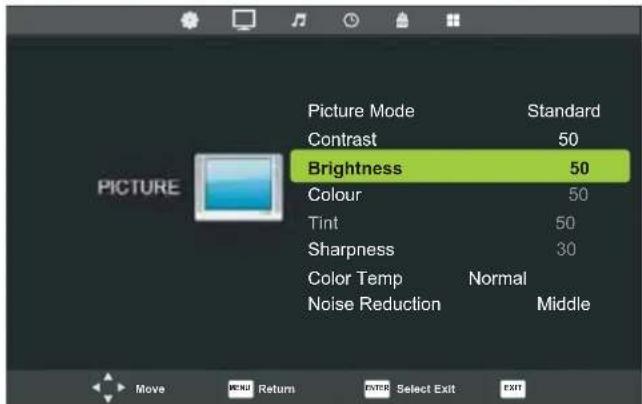
6. Select Colour

7. Select Tint

SETTINGS
PICTURE Menu
- Select Sharpness

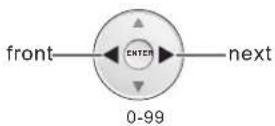
- Select Color Temp
- Select Noise Reduction
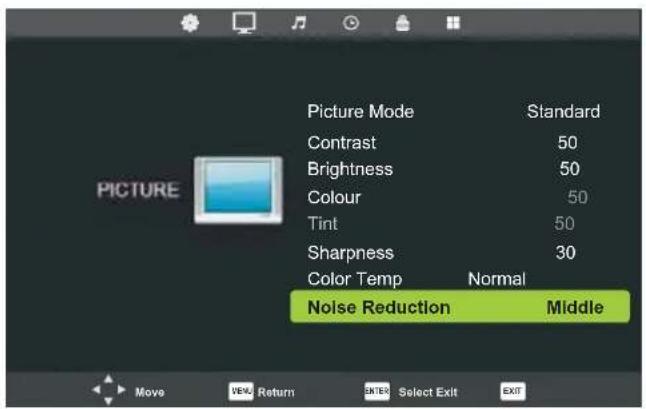
Off, Low, Middle, High
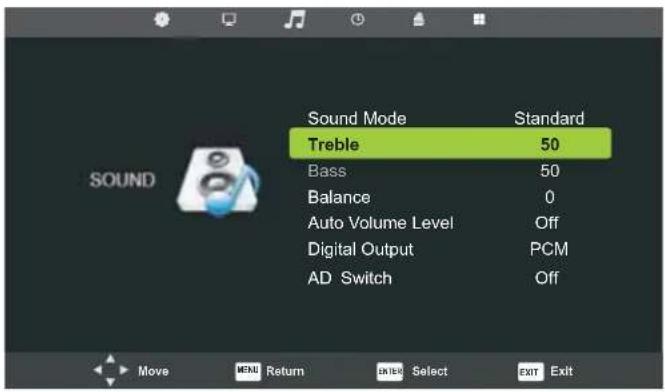
SOUND Menu
- Display SOUND MENU
TV MENU

- Select

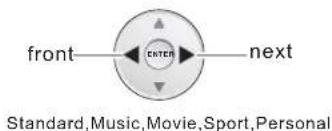
- Select Sound Mode
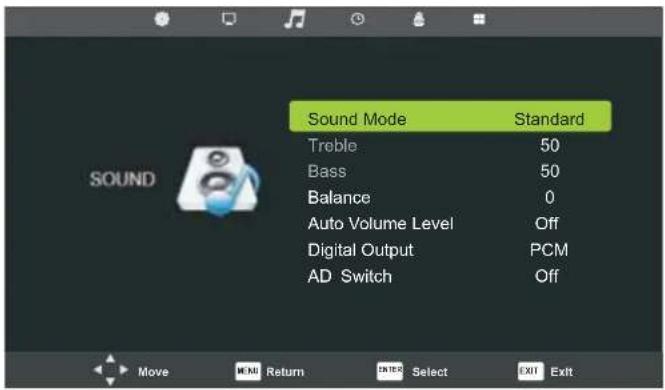

4. Select Treble
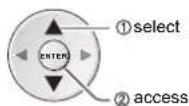
SETTINGS
SOUND Menu
5. Select Bass
6. Select Balance
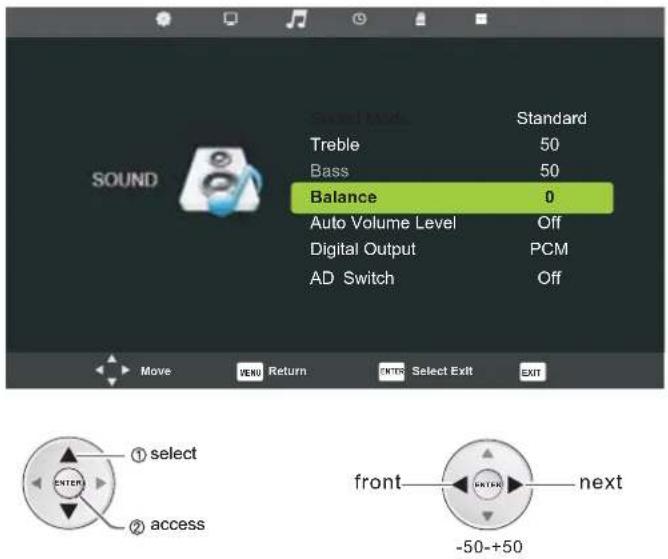
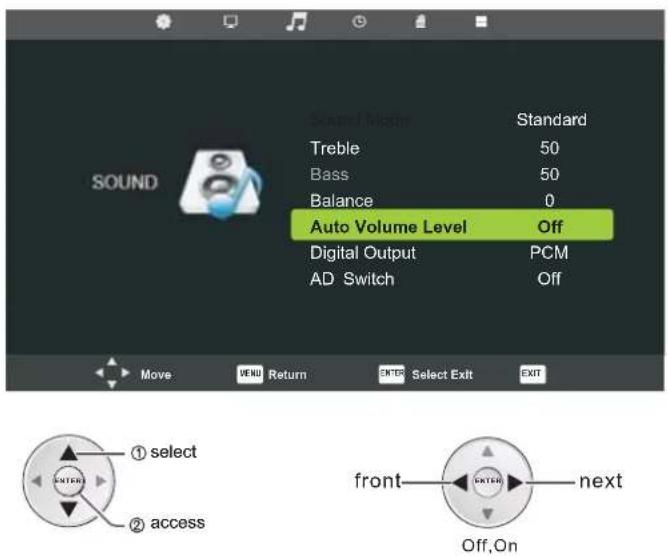
7. Select Auto Volume Level
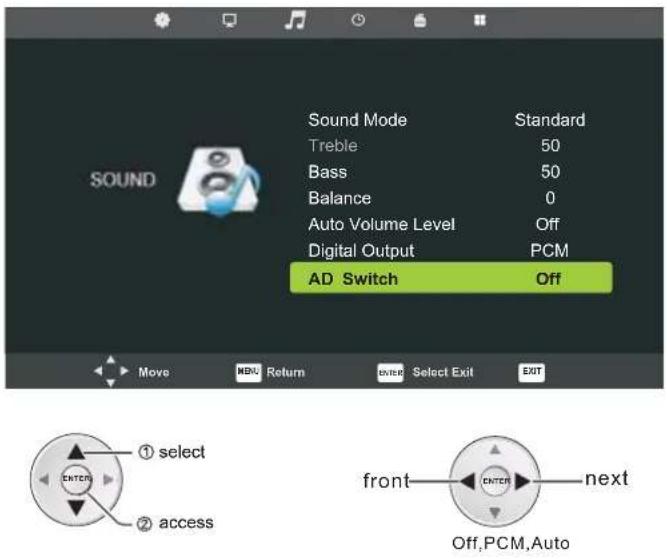
8. Select Digital Output

9. Select AD Switch
SETTINGS
TIME Menu
1. Display TIME MENU
TV MENU

2. Select

3. Clock
Display current time and date.
4. Select Time Zone
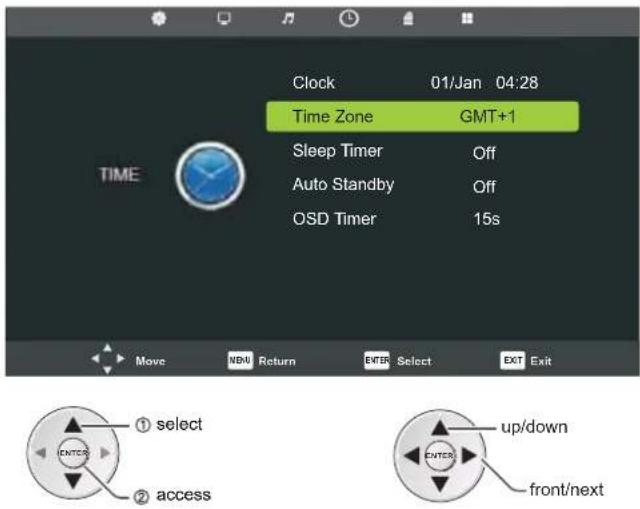
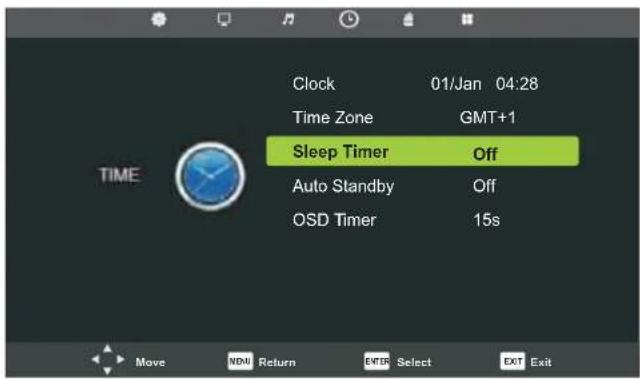
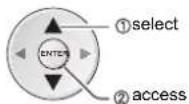
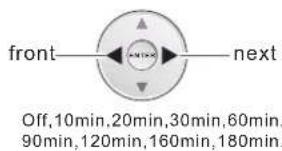
5. Select Sleep Timer
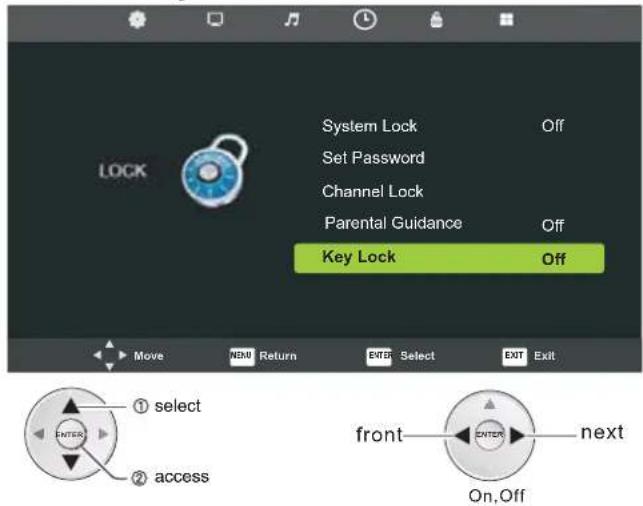
3. Select System Lock
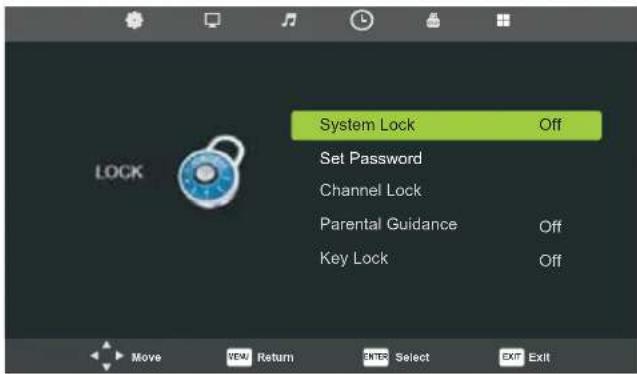
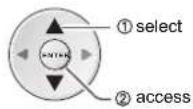
Default Password: 0000
4. SelectSet Password
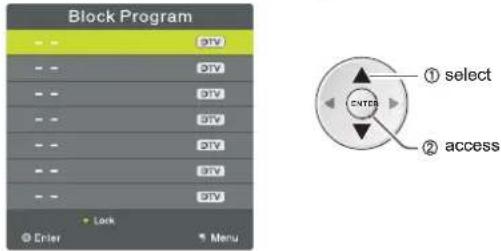
5. Select Channel Lock
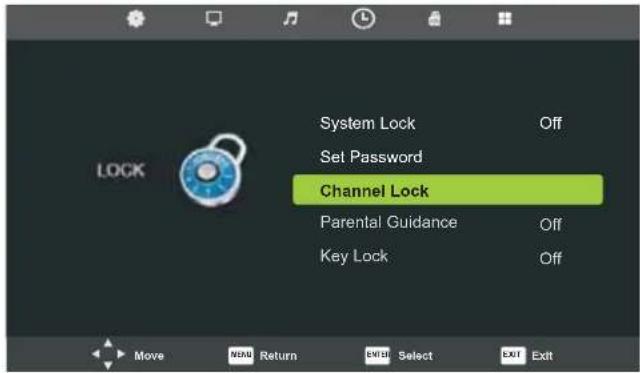
5-1. SelectBlock Program
6. Select Parental Guidance
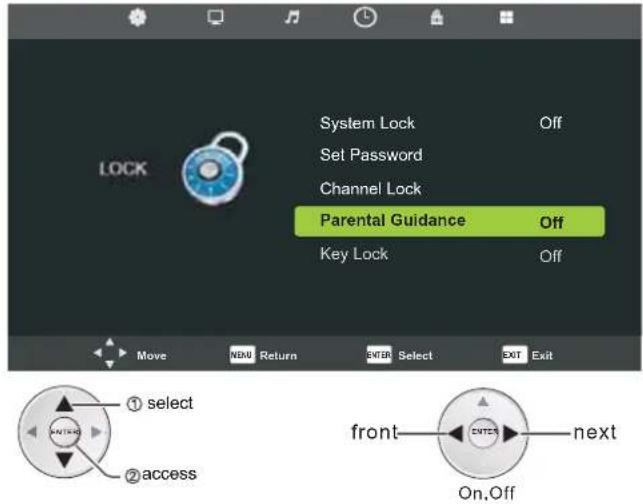
7. Select Key Lock
SETTINGS
SETUP Menu
1. Display SETUP MENU
TV MENU

2. Select

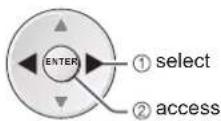
① select
② access
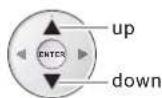
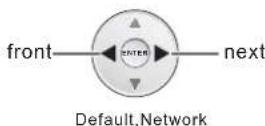
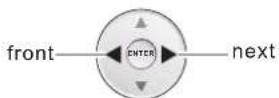
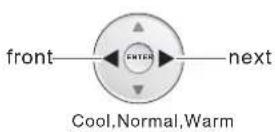
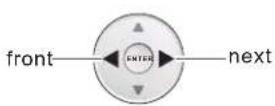
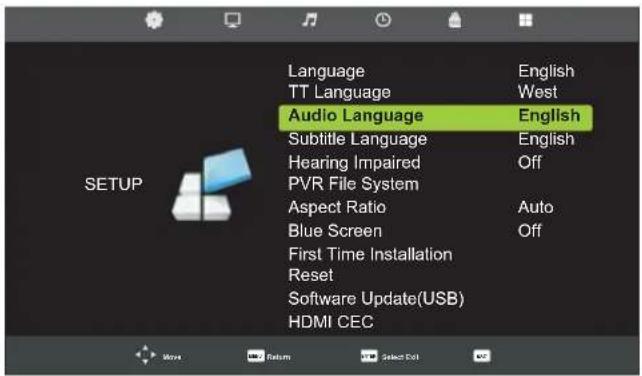
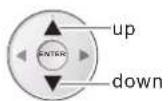
3. Select Language
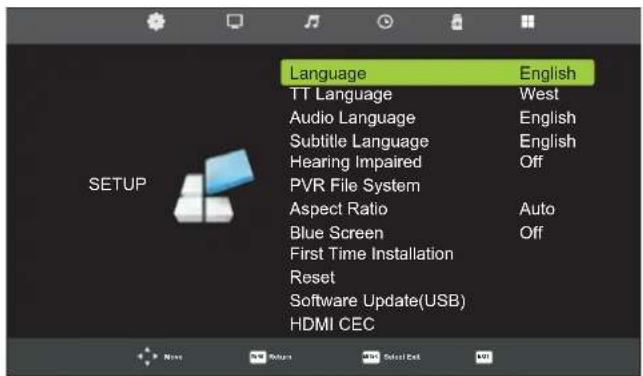
① select
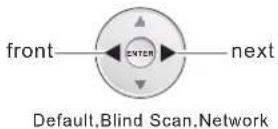
② access

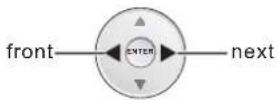
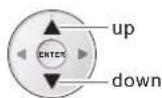
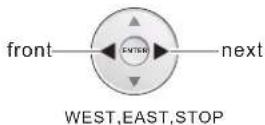
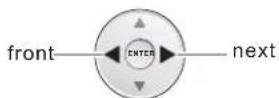
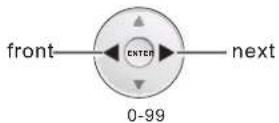
up/down
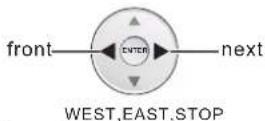
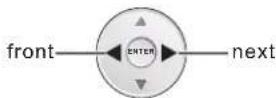
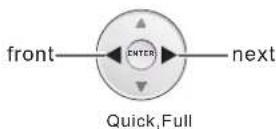
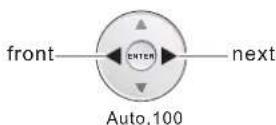
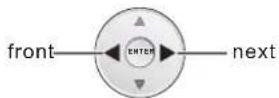
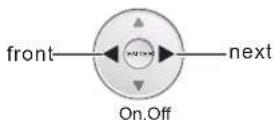
front/next
Default Language: English
4. Select TT Language
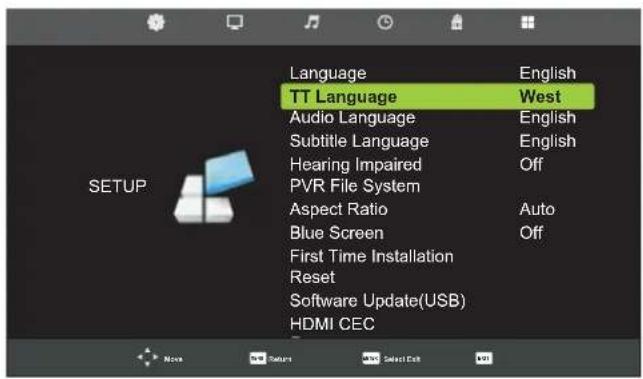
① select
② access
5. Select Audio Language

① sardbott
- 2017年1月1日
[Non-Text]
[Non-Text]
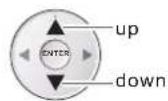
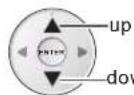
② access
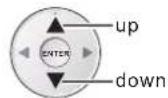
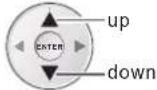
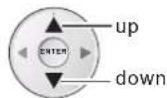
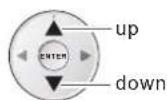
up/down
2、本次股东大会决议的有效期
[Non-Text]
• 2017年1月1日
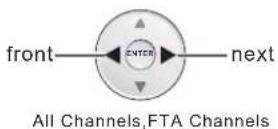
6. Select Subtitle Language
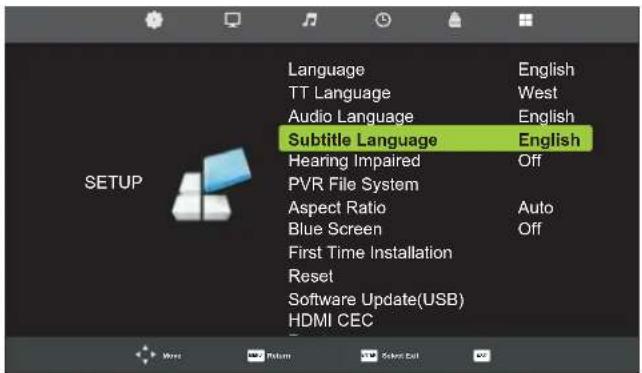

①select
2、本次股东大会决议
[Non-Text]
(二)本说明仅供参考。
② access
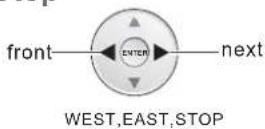
up/down
•
The Ground Truth image displays a single, solid horizontal line. According to Rule 2 (UNDERSCORE & LINE RULES), this is a stylistic or background line, not a placeholder underscore. Therefore, the OCR result must ignore it and output nothing or only meaningful text. The provided OCR content is "____", which consists of four underscores. This is an incorrect interpretation of the line as a placeholder, violating the rule that stylistic lines must be ignored. The OCR has hallucinated placeholder underscores where none exist in the GT. Hence, the OCR result is inconsistent with the Ground Truth.
5.4.1
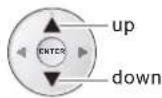
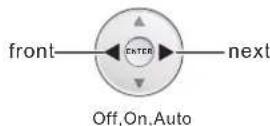
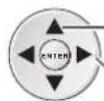
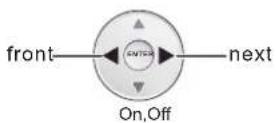
7. Select Hearing Impaired

① select
(1)
[Non-Text]
[Non-Text]
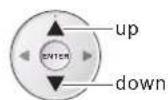
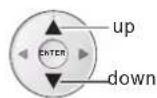
② access
—next
On/Off
SETTINGS
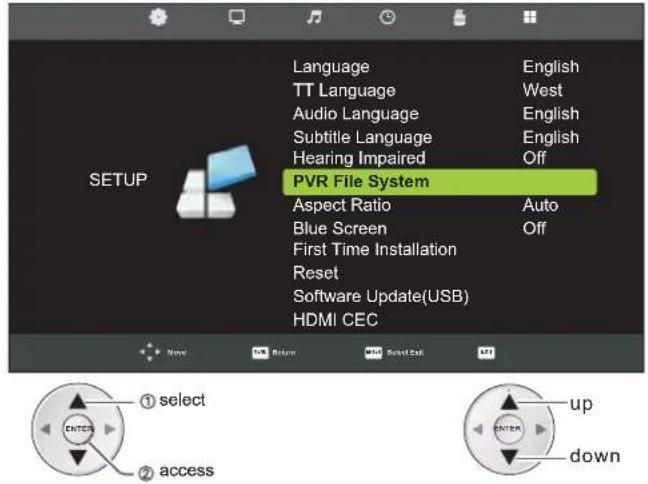
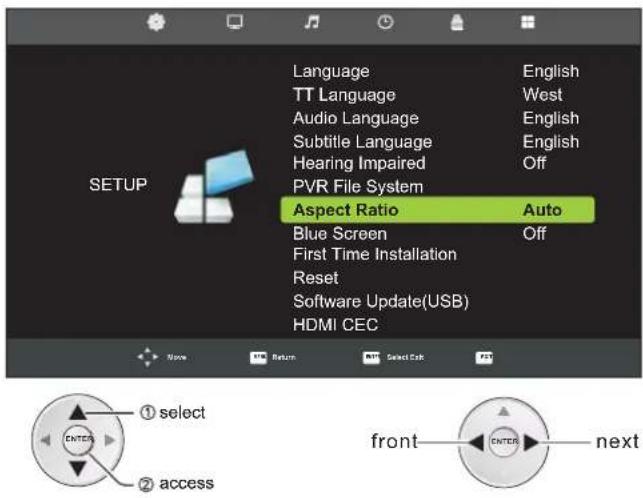
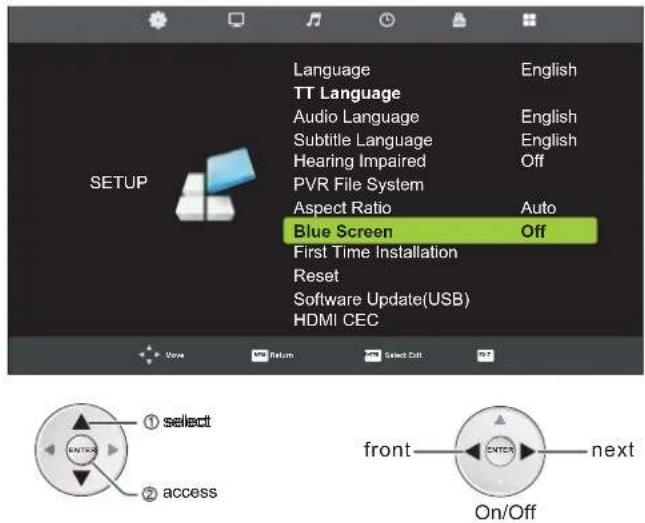
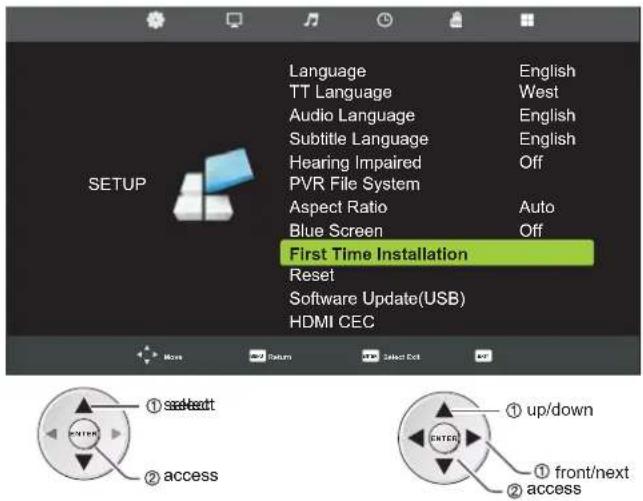
SETUP Menu
- Select PVR File System
- Select Aspect Ration
- SelectBlue Screen
- Select First Time Installation
- SelectReset
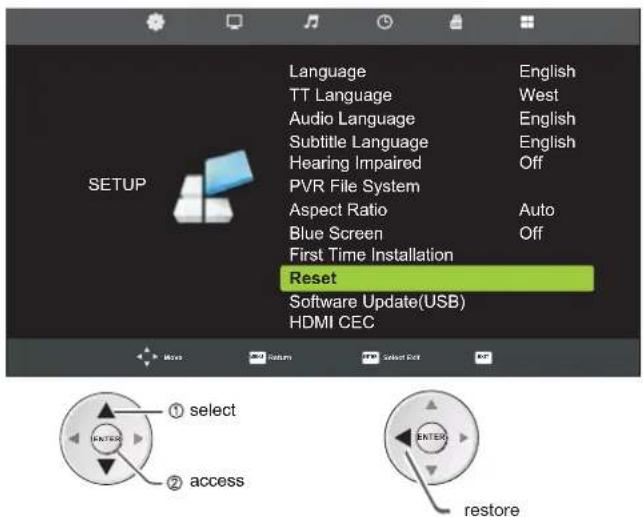
- Select Software Update (USB)

SETTINGS
SETUP Menu
14. Select HDMI CEC
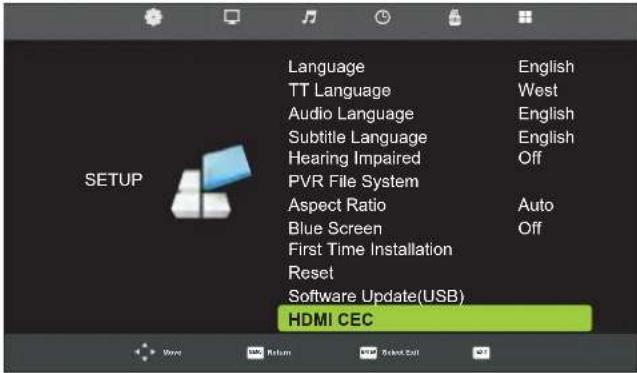

14-1. Select HDMI CEC
14-2. Select Auto Power
14-3. Select Device Menu

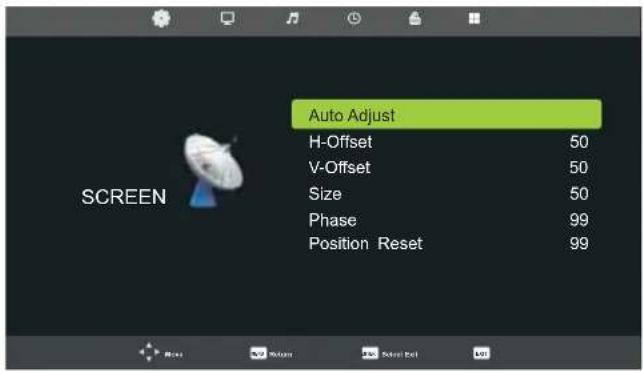
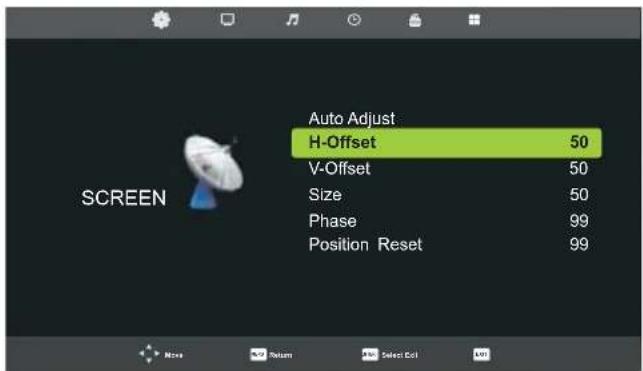
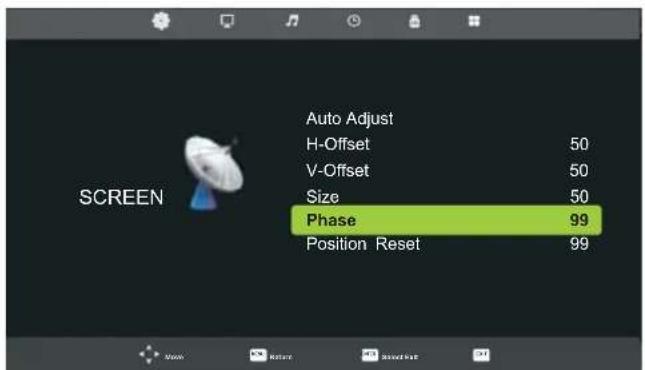
SCREEN Menu (PC Mode only)
1. Display SCREEN MENU
TV MENU


2. Select
3. Select Auto Adjust

or

4. Select H-Offset
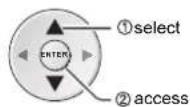
SETTINGS
SCREEN Menu (PC Mode only)
- Select V-Offset
- Select Position Reset
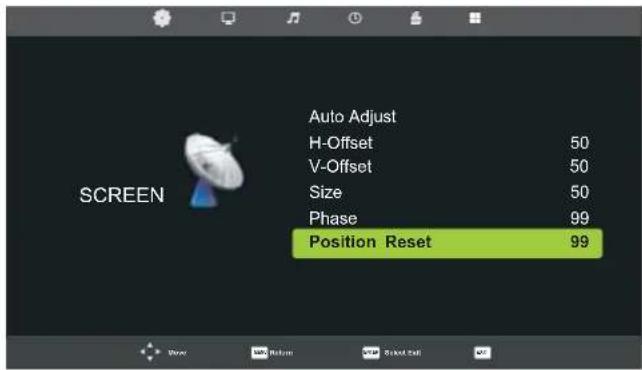

- Select Size
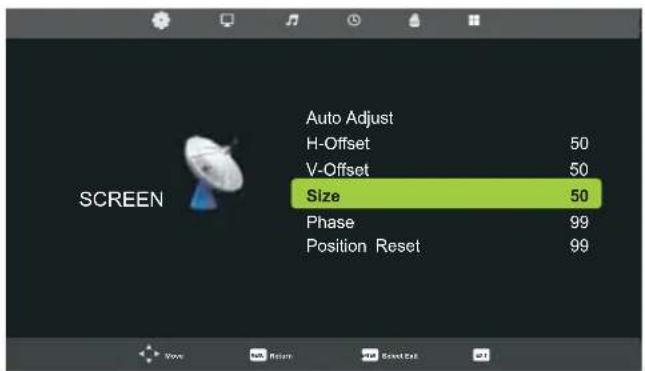
- SelectPhase
SETTINGS
GUIDE Menu
Display GUIDE MENU
GUIDE

![PROGRAMME GUIDE 12:59 - 15:00 05 Nov 2010 Sport The Wallabies ended the 2009 Grand Slam Tour with a solid victory over Wales in front of 74,000 fans at Millennium Stadium. On the ave of the 2010 Spring Tour kicking off in Cardiff, revisit the game. [Program info © Ten] 05 Nov 2010 13:03:29 05 Nov 2010 2008 HD 12:59-15:00 Rugby: Grand Slam Tour 2009 New 2 TEN Digital 15:00-15:30 Sports Tonight Late Next 3 ONE HD 15:30-16:01 MVP 4 ONE Digital 16:01-16:31 Real NBA 16:31-17:01 Omnisport 17:01-20:00 Football: Arsenal TV 20:00-21:00 Football: Bundesliga Weekly Highlights 21:00-23:00 Basketball: NBA Record R Ambind Prev Day Next Day Move View Info Details Last Exit](/content/2026/06/1184788/images/ae65bff230eb8804033e07a406e9d5f3c8954188d084dddb830893126be45675.jpg)
Press ● button to switch to PVR mode.
Press ● button to display the detailed information about the program.
Press ● button to check the past day information.
Press ● button to check the next day information.
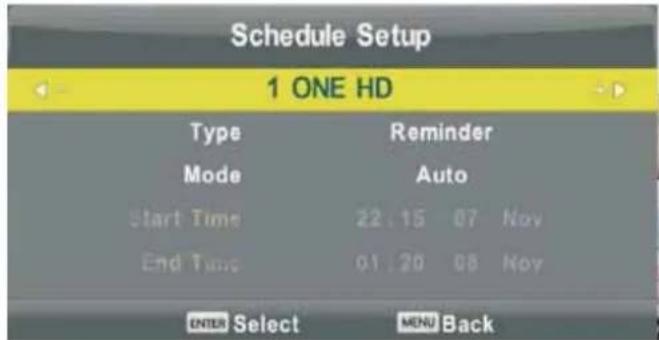
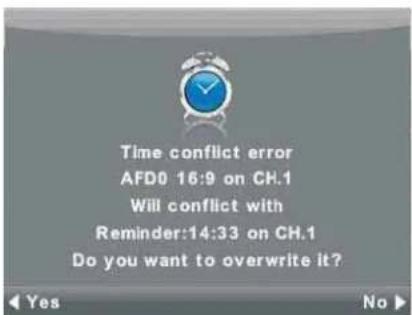
When the time period of recording conflicts with any other time, a warning dialogue will be on screen for your reminder.
PVR Ready
This LED TV is with personal video record (PVR) function which need to be activated by software upgrading, so if you would like to use that function, please abide by the procedures as follows:
- Visit our official website: www.ultramedia.de;
- Download the software of the model on which you're about to watch and store it into an USB device; (not supplied)
- Insert that USB device into USB interface on the side of TV;
- Enter into SOFTWARE UPDATE USB selection under SETUP MENU, then press ENTER button to perform software upgrading;
- After the television is re-powered off and on automatically, PVR function is being activated.
Note: Software upgrading may take some time, please keep patience and do not cut off the power supply during that time, which may cause huge damage for this LED TV and will not be covered by warranty. For more professional operation, please consult your local dealer.
Information on recording and playing television program
■ Recording and playback of television programs are only possible with digital television channels (DVB-S/S2, DVB-T and DVB-C).
The digital television channels (DVB-S/S2, DVB-T and DVB-C) you are able to record and playback also depends on the broadcaster.
Recording and playback of program, as well as the time shift function, can only be carried out using an external data medium (hard drive or USB stick). The data medium should have a minimum storage capacity of 2 GB, the data media requiring its own power supply may not be recognized by this LED TV.
Recordings can be made with most data media on the market. However, we cannot guarantee operation for all data media.
If a program was recorded on an external data medium, it can only be played back on your television set. The playback of these programs are not possible on other devices.
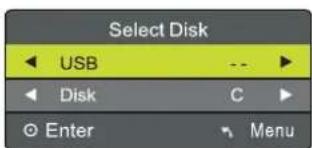
Enter into PVR File System in SETUP MENU
- Select the disc you'd like to use for recording Program
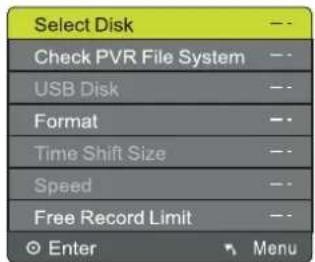

SETTINGS
PVR Ready
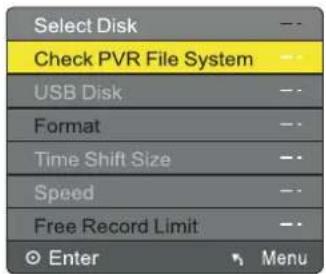
2. Check PVR File System
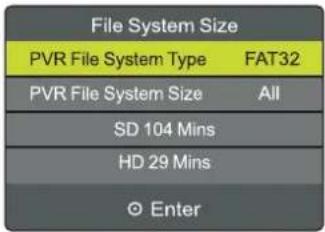
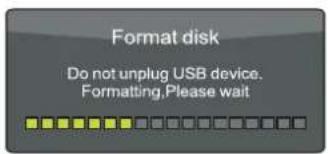
3. Format
Format time is depending on the drive/flash capacity and contents. When it is finished, USB device is ready for recording.
4. Start Recording

5. Stop Recording

Note: When the storage capacity of drive/flash is in shortage, a warning dialogue will be on screen for reminder. After that, recording will 3-be stopped and return to DTV mode automatically.
6. See information of recorded list
INDEX

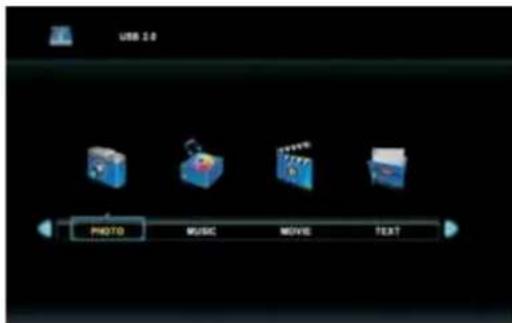
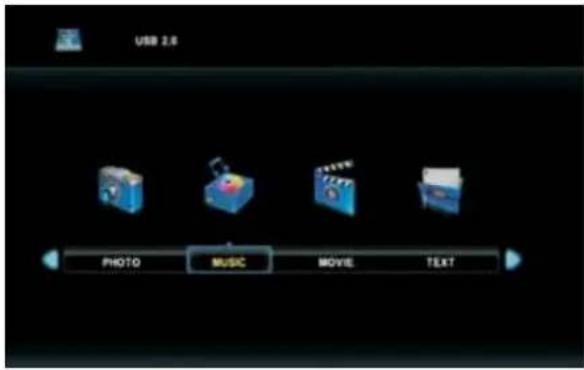
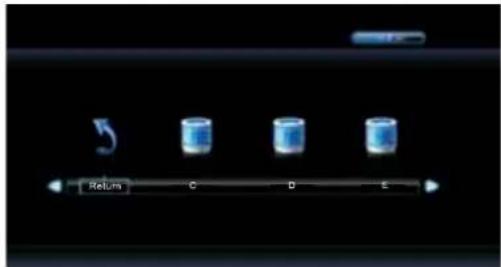
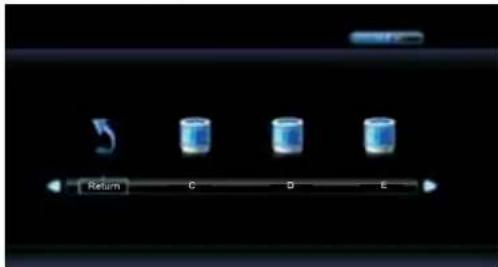
MEDIA MENU
- Display SOURCE SOURCE

- Select Media
- Select PHOTO MENU
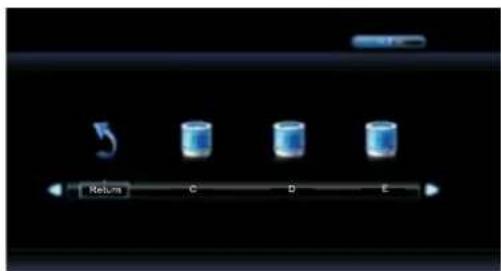
3-1. Select Drive to be used

3-2. Select Return to previous menu
3-3. Select Folders
3-4. Select Pictures
3-5. Delete Files

SETTINGS
MEDIA MENU
4. Select MUSIC MENU
4-1. Select Drive to be used
4-2. Select Return to previous menu

4-3. Select Music files
4-4. Select Playback Setting
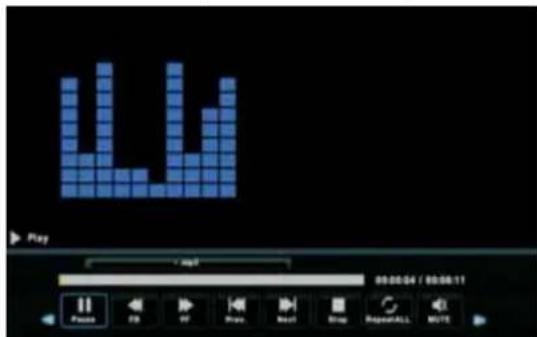
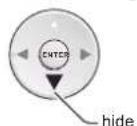
4-5. Hide Playback Setting

MEDIA MENU
5. Select MOVIE MENU
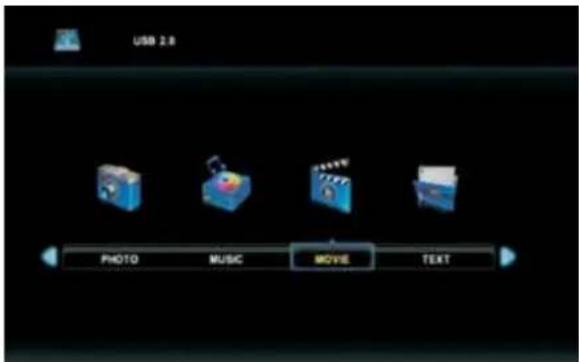
5-1. Select Drive to be used
5-2. Select Return to previous menu
5-3. Select Movie files
5-4. Select Playback Setting
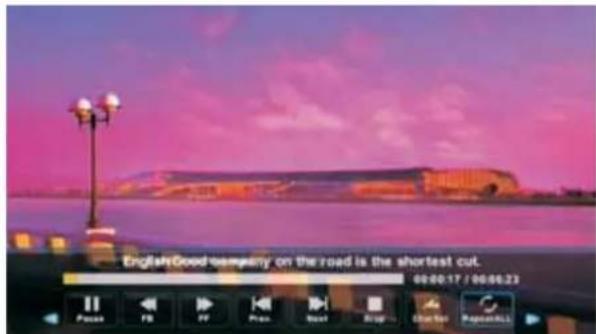
5-5. Hide Playback Setting

SETTINGS
MEDIA MENU
6. Select TEXT MENU
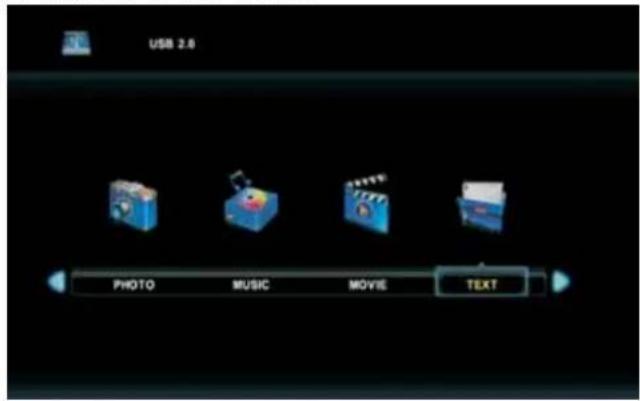
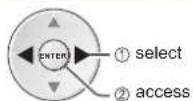
6-1. Select Drive to be used
6-2. Select Return to previous menu
6-3. Select Music files
6-4. Select Playback Setting
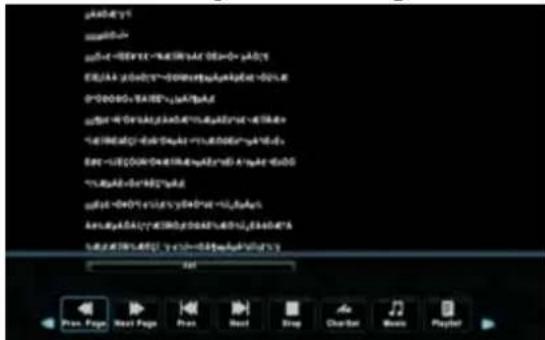

6-5. Hide Playback Setting
CLEAN THE DISCS BEFORE USING
A defective or soiled disc inserted into the unit can cause sound to drop out during playback.
Handle the disc by holding its inner and outer edges.
- Do NOT touch the surface of the unlabeled side of the disc.
- Do NOT stick paper or tape on the surface.
- Do NOT expose the disc to direct sunlight or excessive heat.
- NEVER use solvents such as benzine or alcohol to clean the disc.
- Clean the disc before playback. Wipe the disc from the center outward with a cleaning cloth.
- Do NOT use irregular shaped discs (example: heart shaped, octagonal, etc.). They may cause malfunctions.

natural_image
Line drawing of two hands holding a circular object with a bow (no text or symbols)The unit can play:

DVDs [8cm/12cm disc]

Audio CDs [8cm/12cm disc]

CD-R CD-RW Compatible
REGION MANAGEMENT INFORMATION
Region Management Information: This unit is designed and manufactured to respond to the Region Management Information that is encoded on DVDs. If the region number printed on the DVD does not correspond to the region number of this unit, this unit cannot play that disc.
The region number of this equipment is

When the ⏻symbol appears on the screen, it indicates that the function or operation attempted is not available at that time. This occurs because the DVD manufacturer determines the specific functions.
Certain functions may not be available on some discs. Be sure to read the documentation provided with the DVD.
ICONS USED ON DVDs
Sample Icons

NOTE
When playing back a CD-G (Graphics) or CD EXTRA disc, the audio portion will be played, but the graphic images may not be shown.
TITLES, CHAPTERS AND TRACKS
- DVDs are divided into "TITLES" and "CHAPTERS". If the disc has more than one movie on it, each movie would be a separate "TITLE". "CHAPTERS" are sections of titles.

flowchart
graph TD
    A["DMD VIBIO"] --> B["Title 1"]
    A --> C["Title 2"]
    B --> D["Chapter 1"]
    B --> E["Chapter 2"]
    B --> F["Chapter 3"]
    C --> G["Chapter 1"]
    C --> H["Chapter 2"]
- Audio CDs are divided into "TRACKS". A "TRACK" is usually one song on an Audio CD.

flowchart
graph TD
    A["COMPACT DISC DIGITAL AUDIO"] --> B["Track 1"]
    A --> C["Track 2"]
    A --> D["Track 3"]
    A --> E["Track 4"]
    A --> F["Track 5"]
NOTE
Numbers identify each title, chapter and track on a disc. Most discs have these numbers record on them, but some do not.
NOTES ON UNAUTHORIZED DISCS
You may not be able to playback some DVDs on this equipment if they were purchased from outside your geographic area or made for business purposes.
- Press EJECT button to open the DVD.
- Gently push the DVD inside and the Disc will close and disc playback will start automatically.
(WARNING! Please handle DVD tray with care when opening and loading a Disc. Do not force the tray.)
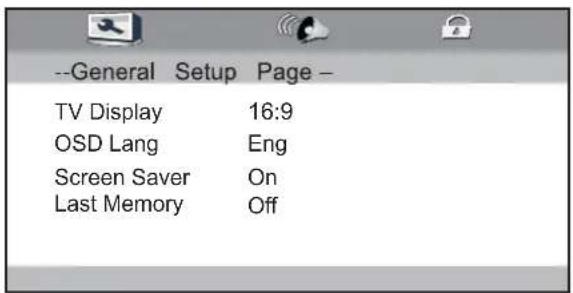
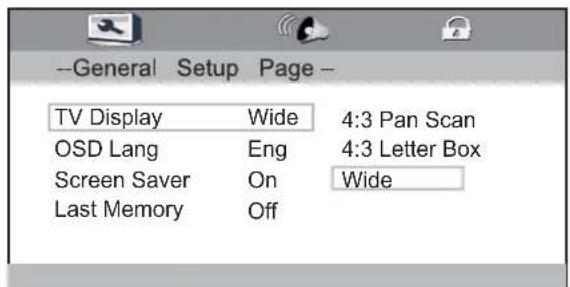
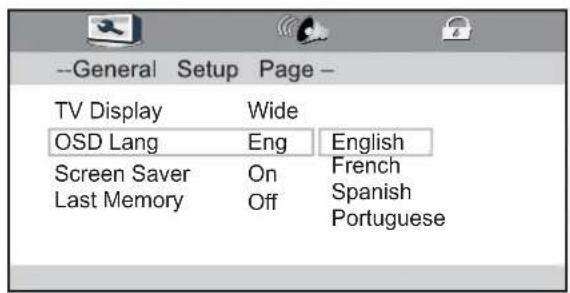
Press SETUP button on the remote the display the setup menu.
Press ◀/▶ button to select General Setup Page.
Press ▲/▼ button to select the desired item.
Press ▶ button to enter sub menu.
Press ◀/▶ button enter upper menu.
General Setup
TV Shape
Press ▶ button to enter sub menu, the press
▲▼ select 4:3 Pan Scan or 4:3 Letter Box and Wide.
OSD Lang
Press select the language, Press OK button to save operation.
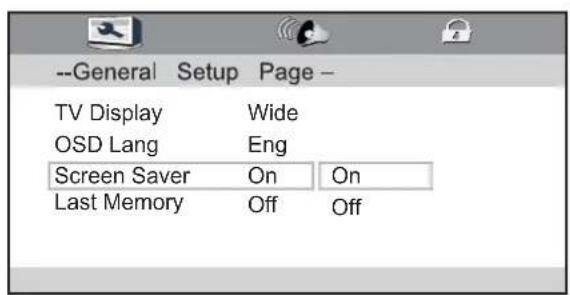
Screen Saver
Press select screen saver mode.
Select "ON" to start the screen saver.
Select "Off" to remove the screen saver.
When choosing "ON" the screen saver image will appear on the screen when the player stops or a pictures is frozen without any operation after few minutes. The screen saver ca keep the screen from being damaged.
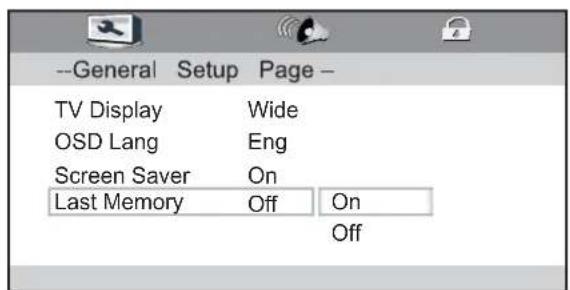
Last Memory
Please select your desired mode.
On: Press open button when you watch a DVD, it can play go on to the broken segment if you close the player.
Off: No memory function.
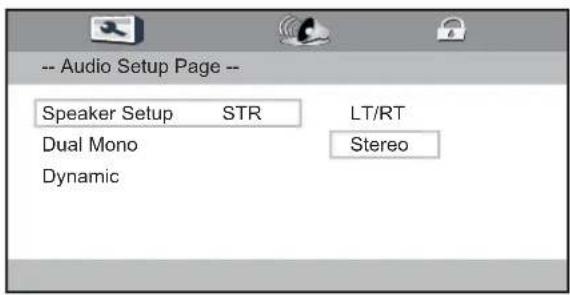
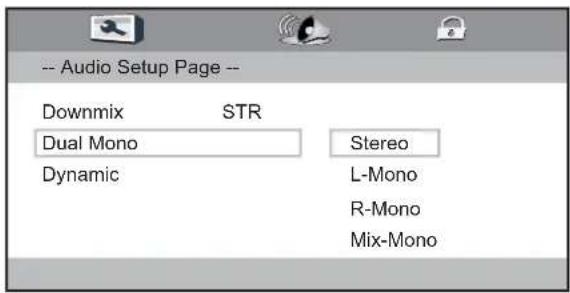
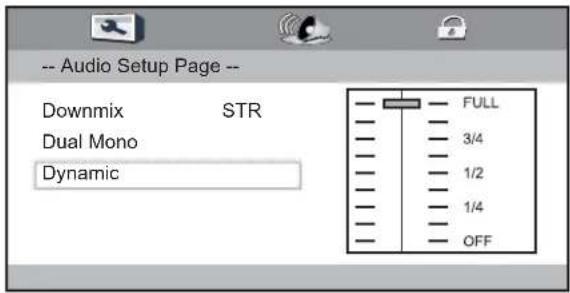
Audio Setup
Speaker Setup
Press ▲button to select the downmix.
You can select: LT/RT
Stereo
Dual Mono
You can select: Stereo
L-Mono
R-Mono
Mix-Mono
Dynamic
You can adjustment.
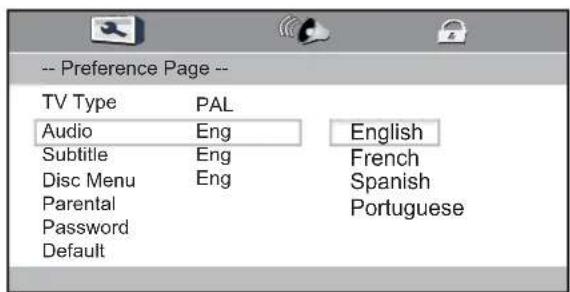
Preference Set
TV Type
Press select the TV Type, Press OK button to save operation.
Audio
Press select the preferred language for DVD audio.
1) The selected language is assigned high priority and can therefore be adopted automatically when the player begins playing a disc.
2) Languages vary between discs, depending on the DVD. You can also select alternative languages by pressing the Audio button on the remoter.

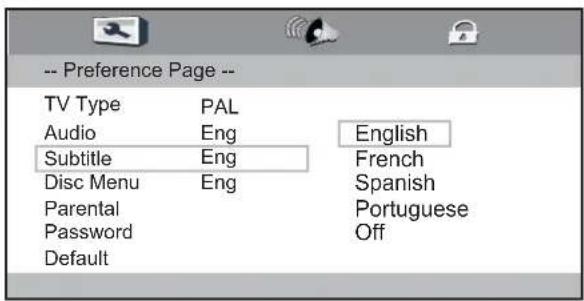
Subtitle
Select the preferred language for subtitles recorded on discs.
1) The selected subtitle language is assigned high priority and can therefore be adopted automatically when the player begins playing a discs.
2) Subtitles vary between discs, depending on the discs. You can also select alternative subtitle language by pressing the Subtitle button on the remoter.
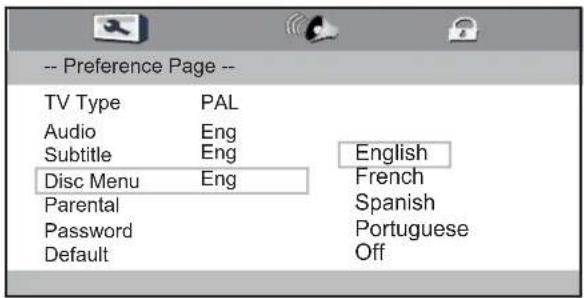
Disc Menu
Select the preferred language for the disc menu recorded on the discs.
The choice varies between discs.
Parental
It is possible to restrict playback of certain discs to a certain level of user, based on their age, for example. Certain scenes can be blocked or replaced with different scenes. The Parental function lets you set the access control level.
This function is password-protected.
Note: If you play discs that do not support the parental function, the DVD player cannot restrict access to the disc.
Password
Change the password to your desired.
The default password is "8888".
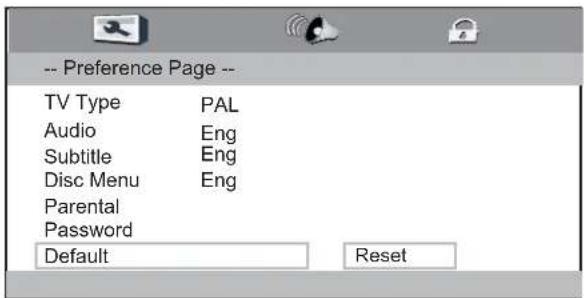
Default
Restore the DVD player's system to factory default settings.


TROUBLESHOOTING
Before calling your dealer or service centre for assistance, check the matters below once again.
- Make sure you have connected LED TV to your equipment.
- Check cable connection. Verify that all external equipment and power cords are properly connected.
- Verify that all power is switched on.
- If LED TV still does not produce an image, re-start the external equipment.
- If the image still does not appear, unplug LED TV from the external equipment and check the external equipment. The problem may be with your graphics controller rather than with LED TV. (When you reconnect LED TV, remember to turn the external equipment and TV off before you power up LED TV. Power the equipment back on in order of LED TV and external equipment.)
- If the problem still exists, check the following chart.
| Problem Try these Solutions | |
| NO POWER | Plug this LED TV into the AC outlet.Press POWER button on side control or on Remote Control to turn on LED TV.Check POWER Indicator. If this indicator no light, this TV has getting trouble. |
| Remote Control does not work | Check the batteries.Make sure nothing is between the Remote Receiver and the Remote Control.Make sure you are not too far from LED TV when using Remote Control.Maximum operating range is (7m and a 30 degree angle of the front of the TV).Is direct sunlight or strong artificial light shining on LED TV's Infrared Remote Receiver? Eliminate the light by closing curtains, pointing the light in a different direction, etc.A dedicated remote control is required for this model. Basically the remote control of other brands (including Panasonic other models) cannot be used. |
| No image | Check the connection between the external equipment and LED TV.When turning LED TV on, it takes a few seconds to display the image.Check the system that you select is corresponding with the external equipment or the video equipment.Make sure the temperature is not out of the Operating Temperature ( 0^ 35^ ).Turn off power, then turn on again, re-start LED TV. |
| Problem Try these Solutions | |
| No sound | Check Audio cable connection from Audio input source.Adjust the Sound System.Press VOLUME (+) button.Press MUTE button. |
| There are tiny black points and/ or bright point on the TV | Dark or bright points of light (red, green, or blue) may appear on the screen. This is a characteristic of the LED panel, not a malfunction of the LED TV.LED panel is produced with very high accuracy technology. There is 99.99% or more dot pixel, but there is also 0.01 % or less of dot pixel lack or dot pixel that is constantly lighted. This is not defect.Regarding LED panel characteristic, it may occur picture remain (look like a mirror) when the screen is changed if it displays same screen for a long time. Changing the picture or turn-off the power supply may recover.Stripe pattern (more, interference stripes) may show up on the screen depends on the reflected picture. |
| Abnormal colour of image | Adjust the value of colour. |
Warning
High voltages are used to operate this LED TV. Do not attempt to open the cabinet.
If the problem still persists after following all operating instructions, contact the sales dealer where you purchased LED TV or the service centre. Give the model number and explain the difficulty. We will advise you how to obtain service.
Information
Before connecting any external equipment, turn off all main power switches. If there is no switch, remove the mains plug from the wall socket.
Signal information for D-sub 15 pin connector
| Pin No. | Signal name Pin No. | Signal name Pin No. | Signal name | ||
| 1 R 6 Ground 11 NC | |||||
| 2 | G | 7 Ground 12 | DDC Data | ||
| 3 B 8 Ground 13 | H-sync | ||||
| 4 | NC* | 9 | +5V | 14 | V-sync |
| 5 Ground 10 Ground | 15 | DDC Clock | |||
* NC = not connected
Acceptable PC signals through the PC terminal
The PC input on this TV only accepts signal formats which are compliant with VESA-DMT as shown in the table below. Since some PCs input signals which are different from the resolution and frequency described in the table below, the following phenomenon may occur; incorrect display, false format detection, picture position failure, blur, or judder. In this case, set the monitor output format on your PC to conform to a signal in the table below.
| Format | Resolution | V. Frequency | H. Frequency | Pixel Clock Frequency | VESA Standard (DMT) |
| VGA | 640 × 480 | 59.940Hz | 31.469kHz | 25.175MHz | ● |
| 72.809Hz | 37.861kHz | 31.500MHz | ● | ||
| 75.000Hz | 37.500kHz | 31.500MHz | ● | ||
| SVGA | 800 × 600 | 56.250Hz | 35.156kHz | 36.000MHz | ● |
| 60.317Hz | 37.879kHz | 40.000MHz | ● | ||
| 72.188Hz | 48.077kHz | 50.000MHz | ● | ||
| 75.000Hz | 46.875kHz | 49.500MHz | ● | ||
| XGA | 1024 × 768 | 60.004Hz | 48.363kHz | 65.000MHz | ● |
| 70.069Hz | 56.476kHz | 75.000MHz | ● | ||
| 75.029Hz | 60.023kHz | 78.750MHz | ● | ||
| WXGA | 1280 × 768 | 59.995Hz | 47.396kHz | 68.250MHz | ● |
| 59.870Hz | 47.776kHz | 79.500MHz | ● | ||
| 74.893Hz | 60.289kHz | 102.250MHz | ● | ||
| 1280 × 800 | 59.810Hz | 49.702kHz | 83.500MHz | ||
| 1360 × 768 | 60.015Hz | 47.712kHz | 85.500MHz | ● | |
| SXGA | 1280 × 1024 | 60.020Hz | 63.981kHz | 108.000MHz | ● |
| 75.025Hz | 79.976kHz | 135.000MHz | ● | ||
| Model | LDD1510 LDD1960 | ||||
| LED Panel | PanelSize | 15.6"Widescreen TFT LED | 18.5"Widescreen TFT LED | ||
| Resolution | 1366x768 Pixel | 1366x768 Pixel | |||
| Brightness | 200 cd/m2 | 220 cd/m2 | |||
| Viewing Angle | 90°/50° | 170°/160° | |||
| Contrast Ratio | 500:1 | 1000:1 | |||
| Power Source | AC100-240V,50/60Hz | AC100-240V,50/60Hz | |||
| Standby Power Dissipa | <0.5W | <0.5W | |||
| Power Consum | <23W | <25W | |||
Design and specifications are subject to change without prior notice.
Weight and dimensions are approximate.

Warning! This logo set on the product means that the recycling of this apparatus comes within the framework of the Directive 2002/96/CE of January 27, 2003 concerning the Waste of Electrical and Electronic Equipment (WEEE).
This symbol means that used electrical and electronic products should not be mixed with general household waste. There is a separate collection system for these products.
If you want to dispose of this equipment, please do not use the ordinary dust bin!
- The presence of dangerous substances in the electrical and electronic equipments can have potential consequences on the environment and human health in the cycle of reprocessing this product.
Therefore, at the end of its lifetime, this product shall not be disposed with other non-recycled waste. Used electrical and electronic equipment must be treated separately and in accordance with legislation that requires proper treatment, recovery and recycling of used electrical and electronic equipment. - Local authorities and resellers have set special procedures for the purpose of collecting and recycling this product (please contact your local authority for further details). You have the obligation to use the selective waste collection systems put in place by your local authority.
- If your used electrical or electronic equipment has batteries or accumulators, please dispose of these separately beforehand according to local requirements.
- By disposing of this product correctly you will help ensure that the waste undergoes the necessary treatment, recovery and recycling and thus prevent potential negative effects on the environment and human health which could otherwise arise due to inappropriate waste handling.

This unit complies with European Council Directive 2006 / 95 CE (Electromagnetic Compatibility & Low Voltage Directives)