
P2426H - Screen DELL - Free user manual and instructions
Find the device manual for free P2426H DELL in PDF.


| Product Type | Monitor |
| Brand | Dell |
| Model | P2426H |
| Screen Size | 24 inches |
| Panel Type | IPS |
| Resolution | 1920 x 1080 (Full HD) |
| Refresh Rate | 60 Hz |
| Response Time | 5 ms (gray-to-gray) |
| Brightness | 250 cd/m² |
| Contrast Ratio | 1000:1 (typical) |
| Viewing Angle | 178° horizontal / 178° vertical |
| Input Connectors | HDMI 1.4, DisplayPort 1.2, VGA, USB-C (upstream) |
| USB Ports | 4 x USB 3.2 Gen 1 downstream |
| VESA Mount | 100 x 100 mm |
| Adjustability | Height, tilt, swivel, pivot |
| Power Supply | Internal; 100-240 VAC, 50/60 Hz |
| Power Consumption (typical) | 20 W (operating), <0.3 W (standby) |
| Dimensions (with stand) | 537.8 x 393.3 x 180.0 mm (W x H x D) |
| Weight (with stand) | 6.35 kg |
| Weight (without stand) | 3.88 kg |
| Box Contents | Monitor, stand, cables (HDMI, DisplayPort, USB-C, power), documentation |
| Warranty | 3 years limited hardware warranty |
Frequently Asked Questions - P2426H DELL
User questions about P2426H DELL
0 question about this device. Answer the ones you know or ask your own.
Ask a new question about this device
Download the instructions for your Screen in PDF format for free! Find your manual P2426H - DELL and take your electronic device back in hand. On this page are published all the documents necessary for the use of your device. P2426H by DELL.
USER MANUAL P2426H DELL
Dell Pro P 22 Monitor
P2226H
Dell Pro P 24 Monitor
P2426H/P2426H WOST
Dell Pro P 24 16:10 Monitor
P2426
Dell Pro P 27 Monitor
P2726H/P2726H WOST
User's Guide
Notes, cautions, and warnings
NOTE: A NOTE indicates important information that helps you make better use of your product.
△ CAUTION: A CAUTION indicates either potential damage to hardware or loss of data and tells you how to avoid the problem.
⚠ WARNING: A WARNING indicates a potential for property damage, personal injury, or death.
Contents
Safety instructions....5
About your monitor 6
Package contents 6
Silent Firmware Update (SFU) 7
Product features....7
Operating system compatibility....10
Identifying parts and controls 10
Front view 10
Back view 11
Bottom view (P2226H) 12
Bottom view (P2426H/P2426H WOST) 13
Bottom view (P2426) 14
Bottom view (P2726H/P2726H WOST) 15
Monitor specifications 16
Dell Display and Peripheral Manager (DDPM) for Windows 19
Resolution specifications....19
Supported video modes.... 19
Preset display modes. 20
Electrical specifications.... 22
Physical characteristics 23
Environmental characteristics 25
Pin assignments 26
DisplayPort 26
HDMI port 27
Universal Serial Bus (USB) interface 28
Plug-and-play capability....29
LCD monitor quality and pixel policy 29
Ergonomics 30
Handling and moving your display....31
Maintenance guidelines 32
Cleaning your monitor 32
Setting up the monitor....33
Attaching the stand....33
Using the tilt, swivel, pivot and height adjustment....36
Tilt and swivel adjustment.... 36
Height adjustment 36
Pivot adjustment 37
Adjusting the rotation display settings of your computer 38
Organizing your cables....39
Connecting your monitor 40
Connecting the DisplayPort (DisplayPort to DisplayPort) cable 40
Connecting the HDMI cable (optional) 40
Securing your monitor using Kensington lock (optional) 41
Removing the monitor stand 42
VESA wall-mounting (optional) 43
Operating the monitor 45
Turn on the monitor 45
Using the joystick control....45
Enable the Menu Voice function (optional)....47
Using the On-Screen Display (OSD) menu. 48
Accessing the Menu Launcher 48
Using the navigation keys 49
Accessing the menu system....49
OSD messages 59
Initial Setup....59
OSD warning message....60
Locking the control buttons 63
Setting the maximum resolution 64
Troubleshooting....65
Self-test....65
Built-in diagnostics....65
Common problems 66
Product-specific problems....68
Universal Serial Bus (USB) specific problems....69
Regulatory information 70
TCO Certified....70
FCC notices (U.S. only) and other regulatory information 70
EU product database for energy label and product information sheet 70
Contacting Dell....71
Revision history 72
Safety instructions
Use the following safety guidelines to protect your monitor from potential damage and to ensure your personal safety. Unless otherwise noted, each procedure included in this document assumes that you have read the safety information that was shipped with your monitor.
NOTE: Before using the monitor, read the safety information that is shipped with your monitor and printed on the product. Keep the documentation at a secure location for future reference.
⚠ WARNING: Use of controls, adjustments, or procedures other than those specified in this documentation may result in exposure to shock, electrical hazards and/or mechanical hazards.
CAUTION: The possible long-term effect of listening to audio at high volume through the headphones (on monitor that supports it) may cause damage to your hearing ability.
- Place the monitor on a solid surface and handle it carefully.
• The screen is fragile and can be damaged if dropped or hit with a sharp object.
- Ensure that your monitor is electrically rated to operate with the AC power available in your location.
- Keep the monitor in room temperature. Excessive cold or hot conditions can have an adverse effect on the liquid crystal of the display.
- Connect the power cable from the monitor to a wall outlet that is near and accessible. See Connecting your monitor.
- Do not place and use the monitor on a wet surface or near water.
- Do not subject the monitor to severe vibration or high impact conditions. For example, do not place the monitor inside a car trunk.
• Unplug the monitor when it is going to be left unused for an extended period.
• To avoid electric shock, do not attempt to remove any cover or touch the inside of the monitor. - Read these instructions carefully. Keep this document for future reference. Follow all warnings and instructions that are marked on the product.
- Certain monitors can be wall-mounted using the VESA mount that is sold separately. Ensure to use the correct VESA specifications as mentioned in the wall-mounting section of the User's Guide.
For information about safety instructions, see the Safety, Environmental, and Regulatory Information (SERI) document that is shipped with your monitor.
About your monitor
Package contents
The following table provides the list of components that are shipped with your monitor. If any component is missing, contact Dell. For more information, see Contacting Dell.
NOTE: Some items may be optional and may not ship with your monitor. Some features may not be available in certain countries.
Table 1. Monitor and accessories inside the box.
| Component image Component description | |
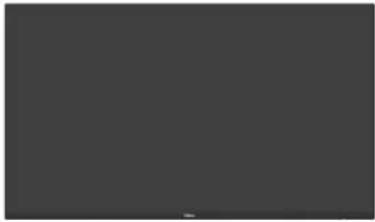 | Display |
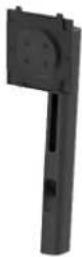 | Stand riser |
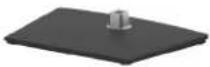 | Stand base |
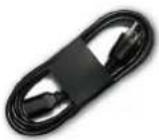 | Power cable (varies by country) |
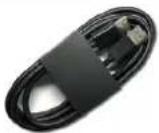 | DisplayPort 1.4 cable (DisplayPort to DisplayPort) (1.80 m) |
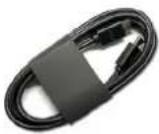 | HDMI 1.4 cable (1.80 m) (for selected countries only)* |
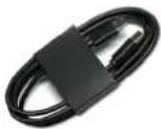 | USB Type-A to Type-B 5Gbps cable (enables the USB ports on the monitor, 1.80 m) |
 | • QR Card• Safety, Environmental, and Regulatory Information |
*Check with the sales representative of the respective country.
Silent Firmware Update (SFU)
Silent Firmware Update (SFU) ensures your workflow stays uninterrupted by downloading updates in the background and installing them only when your system is asleep or when the monitor is disconnected from the PC.
IT admins can trigger the SFU via the IT admin web console Dell Device Management Console (DDMC) or run CLI commands using their existing tools, both needing the Dell Display and Peripheral Manager (DDPM) software on the end user PC.
Once the SFU command is triggered, the firmware will transfer to the monitor and monitor will perform an update in the background and a monitor reboot will occur based on the how the SFU command is triggered, from the below 2 ways:
-
Apply When Monitor Goes to Sleep (Triggered by IT admin)
-
Firmware is downloaded to the display once the display is detected at the end user PC upon device check in after the IT admin schedules the update.
-
The monitor reboot occurs the next time the display enters sleep mode for any reason.
-
Apply on Disconnect (Triggered by IT admin)
-
Firmware is downloaded to the display once the display is detected at the end user PC upon device check in after the IT admin schedules the update.
- The monitor reboot occurs when the monitor is disconnected from the PC (either connected to dock or direct to PC via USB-C/DP/HDMI).
For more details on how to use the IT admin console please go to Support for Dell Device Management Console | Manuals & Documents | Dell US
For more details on the CLI commands please go to DDPM Administrator Guide Support for Dell Display and Peripheral Manager | Manuals & Documents | Dell US
Product features
The Dell P2226H/P2426H/P2426H WOST/P2426/P2726H/P2726H WOST monitor has an active matrix, Thin-Film Transistor (TFT), Liquid Crystal Display (LCD), and LED backlight. The monitor features include:
- P2226H: 546.2 mm (21.5 in.) viewable area (measured diagonally). 1920 x 1080 (16:9) resolution, plus full-screen support for lower resolutions.
- P2426H/P2426H WOST: 604.7 mm (23.8 in.) viewable area (measured diagonally). 1920 x 1080 (16:9) resolution, plus full-screen support for lower resolutions.
- P2426: 611.3 mm (24.1 in.) viewable area (measured diagonally). 1920 x 1200 (16:10) resolution, plus full-screen support for lower resolutions.
- P2726H/P2726H WOST: 686.0 mm (27.0 in.) viewable area (measured diagonally). 1920 x 1080 (16:9) resolution, plus full-screen support for lower resolutions.
- Wide viewing angle to allow viewing from a sitting or standing position.
• Color gamut of 99% sRGB (CIE 1931) (typical) and 99% BT.709 (CIE 1931) (typical).
• Digital connectivity with 1 DisplayPort and 1 HDMI port.
- Tilt, swivel, height, and pivot adjustment capabilities.
- Ultra-thin bezel minimizes the bezel gap in multi-monitor usage, enabling easier setup with an elegant viewing experience.
• Removable stand and Video Electronics Standards Association (VESA) 100 mm mounting holes for flexible mounting solutions.
• P2226H/P2426 is equipped with:
• 1 USB 5Gbps Type-B upstream port
• 3 USB 5Gbps Type-A downstream ports
• 1 USB-C 5Gbps downstream port with power charging (5 V/3 A)
• P2426H/P2426H WOST/P2726H/P2726H WOST is equipped with:
• 1 USB 5Gbps Type-B upstream port
• 2 USB 5Gbps Type-A downstream ports
• 2 USB-C 5Gbps downstream ports with power charging (5 V/3 A)
- Plug-and-play capability if supported by your computer.
- On-Screen Display (OSD) adjustments for ease of set-up and screen optimization.
• Power button and OSD menu lock.
• Security-lock slot for Kensington locks (sold separately).
- Stand lock.
• P2226H/P2426/P2426H/P2426H WOST: ≤ 0.3 W in Standby Mode.
• P2726H/P2726H WOST: ≤ 0.5 W in Standby Mode.
• Supports Dell Display and Peripheral Manager.
- Dell ComfortView Plus is an integrated low blue light screen feature that improves eye comfort by reducing potentially harmful blue light emissions without compromising color. Through ComfortView Plus technology, Dell has reduced harmful blue light exposure from ≤ 50% to ≤ 35%. This monitor is certified with TÜV Rheinland Eye Comfort 3.0 with a 4-star rating. It incorporates key technologies that also deliver a flicker-free screen, up to 100 Hz (P2226H, P2426)/120 Hz (P2426H, P2426H WOST,
P2726H, P2726H WOST) refresh rate, and a color gamut of minimum 99% sRGB. Dell ComfortView Plus feature is enabled by default on your monitor. - This monitor uses a low blue light panel. When the monitor is reset to factory settings or default setting, it is in compliance with TÜV Rheinland's hardware low blue light certification.
Blue light ratio:
The ratio of light in the range from 415nm-455nm compared to 400nm-500nm shall be less than 35%.
Table 2. Blue light ratio.
| Category Blue light ratio | |
| 1 ≤ 20% | |
| 2 20% < R ≤ 35% | |
| 3 35% < R ≤ 50% |
- Decreases the level of hazard blue light emitted from the screen to make viewing more comfortable for your eyes without distortion of color accuracy.
- The monitor adopts Flicker-Free technology, which clears the eye visible flicker, brings comfort viewing experience and helps prevent eye strain and fatigue.
• This monitor is in compliance with TÜV Rheinland hardware low blue light certification under Category 2.
About TÜV Rheinland Eye Comfort 3.0
TÜV Rheinland Eye Comfort 3.0 certification program presents a consumer-friendly star rating scheme to the display industry promoting eye wellness from safety to eye care. Compared to existing certifications, the 5-star-rating program adds rigorous testing requirements on overall eye care attributes such as low blue-light, flicker-free, refresh rate, color gamut, color accuracy and ambient light sensor performance. It lays out requirement metrics and rates the product performance on five levels, and the sophisticated technical assessment process provides consumers and buyers with indicators that are easier to judge.
The eye wellness factors being considered remain constant, however, the standards for the various star ratings are different. The higher the star rating, the more stringent the standards. The table below lists the major eye comfort requirements which apply in addition to the basic eye comfort requirements (such as pixel density, uniformity of luminance and color, and freedom of movement).
For more information around TÜV Eye Comfort certification please refer to: Eye Comfort Certification.
Eye Comfort

www.tuv.com ID 0217009883
Table 3. Eye Comfort 3.0 requirements and star rating scheme for monitors.
| Eye Comfort 3.0 Requirements and Star Rating Scheme for Monitors | ||||
| Category Test item | Star Rating Scheme | |||
| 3-star 4-star 5-star | ||||
| Eye Care | Low Blue Light | TÜV Hardware LBLCategory III (≤50%) orSoftware LBL solution1 | TÜV Hardware LBLCategory II (≤35%) orCategory I (≤20%) | TÜV Hardware LBLCategory II (≤35%) orCategory I (≤20%) |
| Flicker Free | TÜV Flicker Reduced orTÜV Flicker Free | TÜV Flicker Reduced orTÜV Flicker Free | Flicker Free | |
| Ambient Light Management | Ambient Light Sensor performance | No sensor No sensor Ambient light sensor | ||
| Intelligent CCT control No No Yes | ||||
| Intelligent Luminance control | No No Yes | |||
| Image quality | Refresh Rate | ≥60 Hz ≥75 Hz ≥120 Hz | ||
| Luminance uniformity Luminance uniformity ≥ 75% | ||||
| Color Uniformity Color uniformity Δu'v' ≤ 0.02 | ||||
| Freedom of movement | Luminance changes shall decrease less than 50%;The color shift shall be less than 0.01. | |||
| Gamma difference | Gamma difference ≤ ±0.2 Gamma difference ≤ ±0.2 Gamma difference ≤ ±0.2 | |||
| Wide color gamut2 | NTSC3Min.72% (CIE 1931)or sRGB4Min.95%(CIE 1931) | sRGB4Min.95% (CIE 1931) | DCI-P35Min.95%(CIE 1976) & sRGB4Min.95% (CIE 1931) orAdobe RGB6Min.95%(CIE 1931) & sRGB4Min.95% (CIE 1931) | |
| Eye Comfort User Guide | User guide | Yes | Yes | Yes |
| Remark | 1 Software controls the blue light emission by reducing excessive blue light, resulting in a more yellow tone.2 Color gamut describes the availability of colors in the display. Various standards were developed for specific purposes. 100% corresponds to the full color space as defined in the standard.3 NTSC stands for National Television Standards Committee, which developed a color space for the television system that is used in the United States.4 sRGB is a standard red, green, and blue color space that is in use on monitors, printers, and the World Wide Web.5 DCI-P3, short for Digital Cinema Initiatives - Protocol 3, is a color space used in digital cinema that encompasses a wider range of colors than the standard RGB color space.6 Adobe RGB is a color space created by Adobe Systems that encompasses a broader range of colors than the standard RGB color model, particularly in the cyans and greens. | |||
Operating system compatibility
- Windows 10 and later*
*The operating system compatibility on Dell and Alienware branded monitors may vary based on factors such as:
- Specific release date(s) when operating system versions, patches, or updates are available.
- Specific release date(s) when Dell branded monitor firmware, software application, or driver updates are available on the Dell support website.
Identifying parts and controls
Front view
natural_image
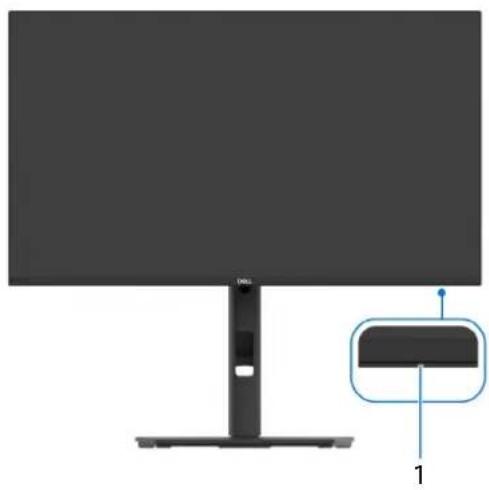
Computer monitor with a stand and a small inset showing a labeled component (no text or symbols visible)Figure 1. Front view with the monitor stand
Table 4. Components and descriptions.
| Label Description Use | |
| 1 Power LED indicator Solid white light indicates that the | monitor is turned on and functioning normally. Blinking white light indicates that the monitor is in Standby Mode. |
Back view
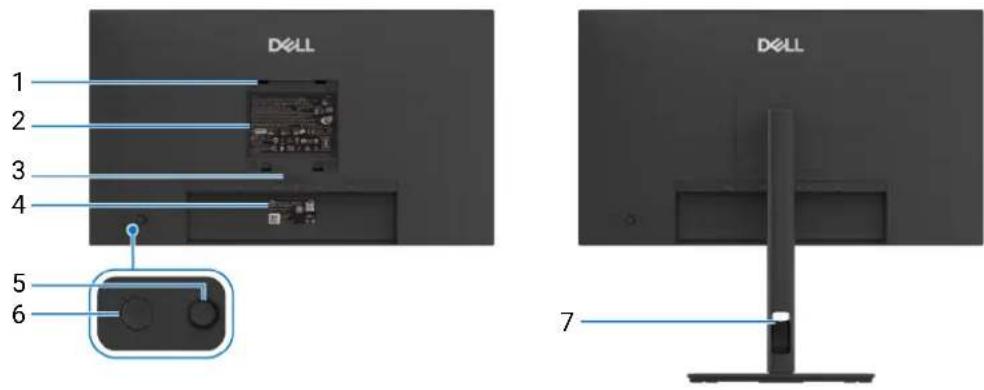
Figure 2. Back view
Table 5. Components and descriptions.
| Label Description Use | ||
| 1 VESA mounting holes (4)(100 mm x 100 mm)- behind attached VESA cover | Wall-mount the monitor using VESA-compatible wall-mount kit (100 mm x 100 mm).i NOTE: Wall-mount kit is not shipped with your monitor and is sold separately. | |
| 2 Regulatory label Lists the regulatory approvals. | ||
| 3 Stand release button Releases the stand from the monitor. | ||
| 4 MyDell QR code, serial number, and Service Tag label | Refer to this label if you must contact Dell for technical support. The Service Tag is a unique alphanumeric identifier that enables Dell service technicians to identify the hardware components in your monitor and access warranty information. | |
| 5 | Joystick | Use to control the OSD menu. (For more information, see Operating the monitor) |
| 6 Power button To turn the monitor on or off. | ||
| 7 Cable-management slot Use to organize cables by inserting them through the slot. | ||
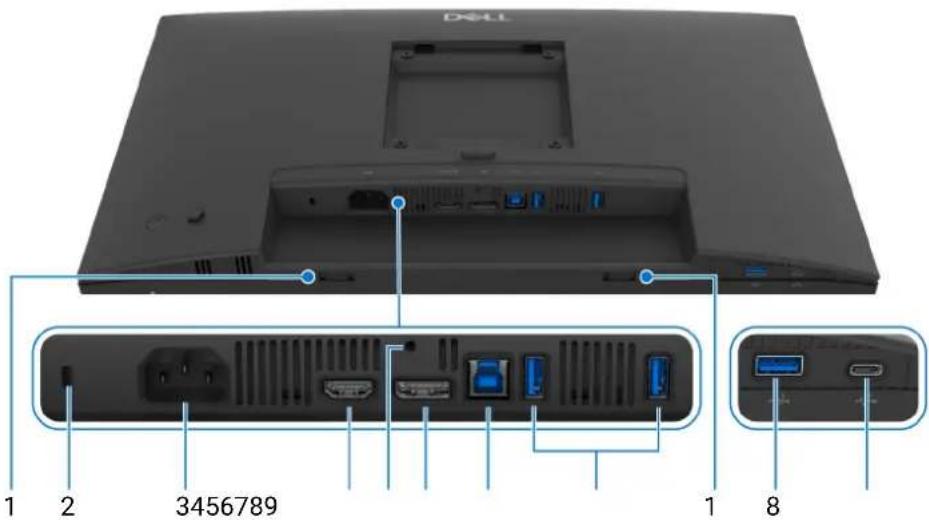
Figure 3. Bottom view without monitor stand
Table 6. Components and descriptions.
| Label Description Use | ||
| 1 Soundbar slots | Attach your external Soundbar (sold separately) to the monitor by aligning the magnetic tabs on the soundbar with the slots on the monitor. | |
| 2 Security-lock slot (based on Kensington Security Slot) | Secures the monitor with a security lock (purchased separately) to prevent unauthorized movement of your monitor. | |
| 3 | ~Power port | Connect the power cable (shipped with your monitor). |
| 4 | HDMI HDMI port | Connect your computer with the HDMI cable shipped with your monitor (for selected countries only). |
| 5 | Stand-lock feature To lock the stand to | the monitor using an M3 x 6 mm screw (screw not included). |
| 6 | D DisplayPort | Connect your computer with the DisplayPort cable. |
| 7 | USB 5Gbps Type-B upstream port | Connect the USB cable that came with your monitor to the computer.Once this cable is connected, you can use the USB connectors on the monitor. |
| 8 | USB 5Gbps Type-A downstream ports (3) | Connect your USB device.*NOTE:To use this port, you must connect the USB cable (shipped with your monitor) to the USB upstream port on the monitor and to your computer. |
| 9 | USB-C 5Gbps downstream port | Connect your USB device.*NOTE:To use this port, you must connect the USB cable (shipped with your monitor) to the USB upstream port on the monitor and to your computer. |
*To prevent signal interference, avoid connecting other USB devices to the adjacent port when using a wireless USB device on a USB downstream port.
Bottom view (P2426H/P2426H WOST)
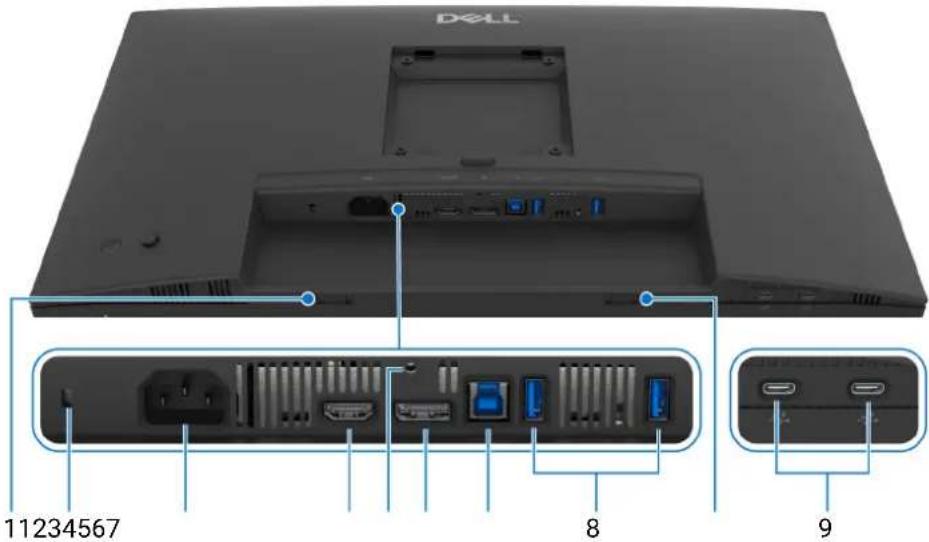
Figure 4. Bottom view without monitor stand
Table 7. Components and descriptions.
| Label Description Use | ||
| 1 Soundbar slots A | ttach your external Soundbar (sold separately) to the monitor by aligning the magnetic tabs on the soundbar with the slots on the monitor. | |
| 2 Security-lock slot (based on Kensington Security Slot) | Secures the monitor with a security lock (purchased separately) to prevent unauthorized movement of your monitor. | |
| 3 | ~Power port | Connect the power cable (shipped with your monitor). |
| 4 | HDMIHDMI port | Connect your computer with the HDMI cable shipped with your monitor (for selected countries only). |
| 5 Stand-lock feature To lock the stand to the monitor using an M3 x 6 mm screw (screw not included). | ||
| 6 | DDisplayPort | Connect your computer with the DisplayPort cable. |
| 7 | USB 5Gbps Type-B upstream port | Connect the USB cable that came with your monitor to the computer.Once this cable is connected, you can use the USB connectors on the monitor. |
| 8 | USB 5Gbps Type-A downstream ports (2) | Connect your USB device.*NOTE:To use this port, you must connect the USB cable (shipped with your monitor) to the USB upstream port on the monitor and to your computer. |
| 9 | USB-C 5Gbps downstream ports (2) | Connect your USB device.*NOTE:To use this port, you must connect the USB cable (shipped with your monitor) to the USB upstream port on the monitor and to your computer. |
*To prevent signal interference, avoid connecting other USB devices to the adjacent port when using a wireless USB device on a USB downstream port.
Bottom view (P2426)
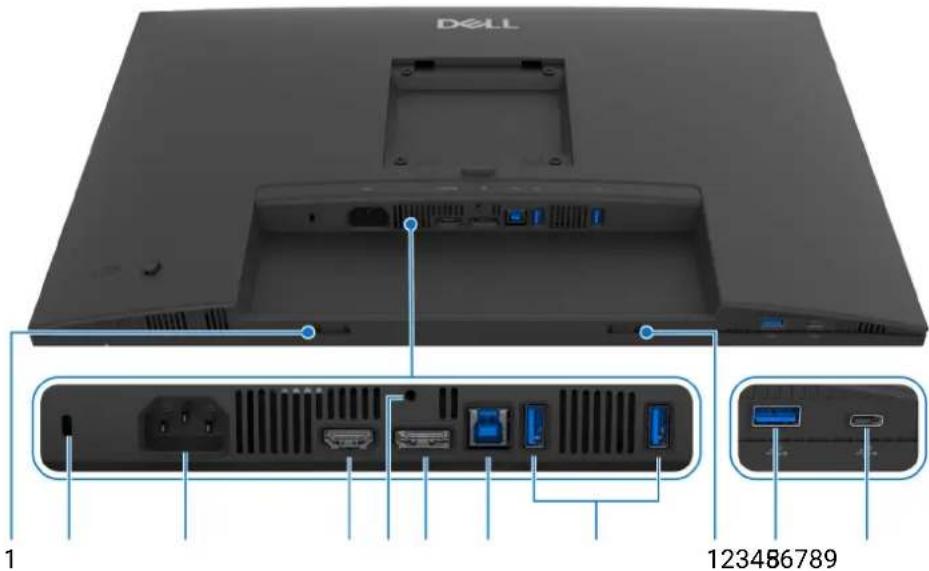
Figure 5. Bottom view without monitor stand
Table 8. Components and descriptions.
| Label Description Use | ||
| 1 Soundbar slots | Attach your external Soundbar (sold separately) to the monitor by aligning the magnetic tabs on the soundbar with the slots on the monitor. | |
| 2 Security-lock slot (based on Kensington Security Slot) | Secures the monitor with a security lock (purchased separately) to prevent unauthorized movement of your monitor. | |
| 3 | ~Power port | Connect the power cable (shipped with your monitor). |
| 4 | HDMI HDMI port | Connect your computer with the HDMI cable shipped with your monitor (for selected countries only). |
| 5 | Stand-lock feature To lock the stand to the monitor using an M3 x 6 mm screw (screw not included). | |
| 6 | D DisplayPort | Connect your computer with the DisplayPort cable. |
| 7 | USB 5Gbps Type-B upstream port | Connect the USB cable that came with your monitor to the computer.Once this cable is connected, you can use the USB connectors on the monitor. |
| 8 | USB 5Gbps Type-A downstream ports (3) | Connect your USB device.*NOTE:To use this port, you must connect the USB cable (shipped with your monitor) to the USB upstream port on the monitor and to your computer. |
| 9 | USB-C 5Gbps downstream port | Connect your USB device.*NOTE:To use this port, you must connect the USB cable (shipped with your monitor) to the USB upstream port on the monitor and to your computer. |
*To prevent signal interference, avoid connecting other USB devices to the adjacent port when using a wireless USB device on a USB downstream port.
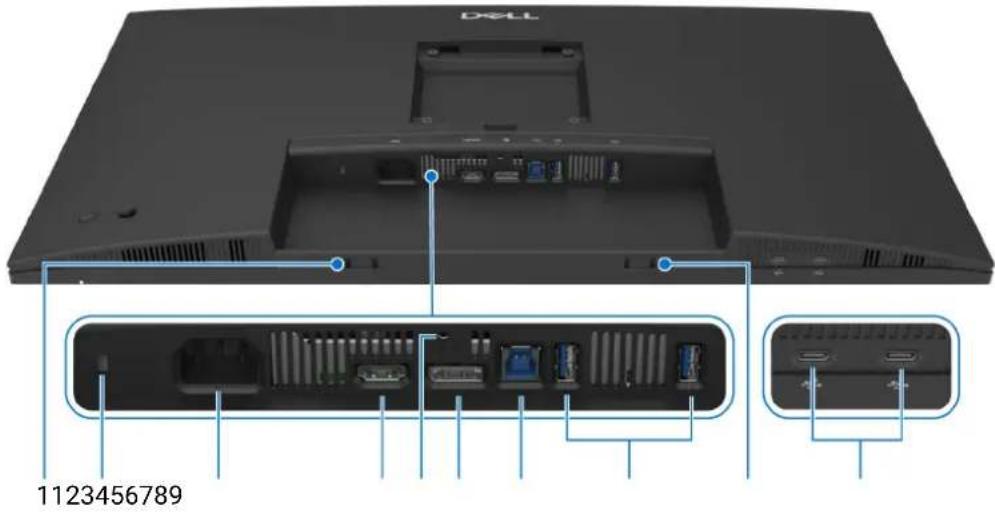
Figure 6. Bottom view without monitor stand
Table 9. Components and descriptions.
| Label Description Use | ||
| 1 Soundbar slots A | ttach your external Soundbar (sold separately) to the monitor by aligning the magnetic tabs on the soundbar with the slots on the monitor. | |
| 2 Security-lock slot (based on Kensington Security Slot) | Secures the monitor with a security lock (purchased separately) to prevent unauthorized movement of your monitor. | |
| 3 | ~Power port | Connect the power cable (shipped with your monitor). |
| 4 | HDMI HDMI port | Connect your computer with the HDMI cable shipped with your monitor (for selected countries only). |
| 5 | Stand-lock feature | To lock the stand to the monitor using an M3 x 6 mm screw (screw not included). |
| 6 | D DisplayPort | Connect your computer with the DisplayPort cable. |
| 7 | USB 5Gbps Type-B upstream port | Connect the USB cable that came with your monitor to the computer.Once this cable is connected, you can use the USB connectors on the monitor. |
| 8 | USB 5Gbps Type-A downstream ports (2) | Connect your USB device.*NOTE: To use this port, you must connect the USB cable (shipped with your monitor) to the USB upstream port on the monitor and to your computer. |
| 9 | USB-C 5Gbps downstream ports (2) | Connect your USB device.*NOTE: To use this port, you must connect the USB cable (shipped with your monitor) to the USB upstream port on the monitor and to your computer. |
*To prevent signal interference, avoid connecting other USB devices to the adjacent port when using a wireless USB device on a USB downstream port.
Monitor specifications
Table 10. Monitor specifications of P2226H and P2426H/P2426H WOST.
| Description Value (P2226H) Value (P2426H/P2426H WOST) | ||
| Screen type Active matrix - TFT LCD | ||
| Panel technology In-Plane Switching (IPS) Technology | ||
| Aspect ratio 16:9 | ||
| Viewable image dimensions | ||
| Diagonal | 546.2 mm (21.5 in.) 604.7 mm (23.8 in.) | |
| Active area | ||
| Horizontal 476.06 mm (18.74 in.) 527.04 mm (20.75 in.) | ||
| Vertical 267.79 mm (10.54 in.) 296.46 mm (11.67 in.) | ||
| Area 127483.27 mm | ^2 (197.60 in. ^2 ) 156246.28 mm | ^2 (242.18 in. ^2 ) |
| Pixel pitch | ||
| Horizontal 0.24795 mm 0.2745 mm | ||
| Vertical 0.24795 mm 0.2745 mm | ||
| Pixel per inch (PPI) 102 93 | ||
| Viewing angle | ||
| Horizontal 178° (typical) | ||
| Vertical 178° (typical) | ||
| Brightness | 300 cd/m ^2 (typical) | |
| Contrast ratio | 1500:1 (typical) | |
| Display screen coating | Anti-glare with hard-coating 3H | |
| Backlight | LED Edgelight System | |
| Response time | ||
| Normal mode | 8 ms gray to gray | |
| Fast mode | 5 ms gray to gray | |
| Color depth | 16.70 million colors | |
| Color gamut | sRGB 99% (CIE 1931) (typical)BT.709 99% (CIE 1931) (typical) | |
| Connectivity | 1 HDMI 1.4 port (HDCP 1.4) (Supports up to FHD 1920 x 1080 100 Hz TMDS as per specified in HDMI 1.4)1 DisplayPort 1.4 (HDCP 1.4) port (Supports up to FHD 1920 x 1080, 100 Hz)1 USB 5Gbps Type-B upstream port2 USB 5Gbps Type-A downstream portsQuick Access1 USB 5Gbps Type-A downstream port1 USB-C 5Gbps downstream port with power charging (5 V/3 A) | 1 HDMI 1.4 port (HDCP 1.4) (Supports up to FHD 1920 x 1080 120 Hz TMDS as per specified in HDMI 1.4)1 DisplayPort 1.4 (HDCP 1.4) port (Supports up to FHD 1920 x 1080, 120 Hz)1 USB 5Gbps Type-B upstream port2 USB 5Gbps Type-A downstream portsQuick Access2 USB-C 5Gbps downstream port with power charging (5 V/3 A) |
| Border width (edge of monitor to active area) | ||
| Top | 6 mm (0.24 in.) | 5.80 mm (0.23 in.) |
| Left/Right | 6 mm (0.24 in.) | 5.80 mm (0.23 in.) |
| Bottom 12 mm (0.47 in.) 12 mm (0.47 in.) | ||
| Adjustability | ||
| Height adjustment up to | 150 mm | |
| Tilt -5° to 21° | ||
| Swivel -45° to 45° | ||
| Pivot -90° to 90° | ||
| Cable management Yes, except P2426H WOST | ||
| Dell Display and Peripheral Manager compatibility | Easy Arrange and other key features | |
| Security Security-lock slot (for Kensington locks, sold separately) | ||
Table 11. Monitor specifications of P2426 and P2726H/P2726H WOST.
| Description Value (P2426) Value (P2726H/P2726H WOST) | ||
| Screen type Active matrix - TFT LCD | ||
| Panel technology In-Plane Switching (IPS) Technology | ||
| Aspect ratio 16:10 16:9 | ||
| Viewable image dimensions | ||
| Diagonal 611.3 mm (24.1 in.) 686.0 mm (27.0 in.) | ||
| Active area | ||
| Horizontal | 518.40 mm (20.41 in.) | 597.89 mm (23.54 in.) |
| Vertical | 324 mm (12.76 in.) | 336.31 mm (13.24 in.) |
| Area | 167961.60 mm^2 (260.34 in. ^2 ) | 201076.39 mm^2 (311.67 in. ^2 ) |
| Pixel pitch | ||
| Horizontal | 0.270 mm | 0.3114 mm |
| Vertical | 0.270 mm | 0.3114 mm |
| Pixel per inch (PPI) | 94 | 82 |
| Viewing angle | ||
| Horizontal | 178° (typical) | |
| Vertical | 178° (typical) | |
| Brightness | 300 cd/ m^2 (typical) | |
| Contrast ratio | 1500:1 (typical) | |
| Display screen coating | Anti-glare with hard-coating 3H | |
| Backlight LED Edgelight System | ||
| Response time | ||
| Normal mode | 8 ms gray to gray | |
| Fast mode | 5 ms gray to gray | |
| Color depth 16.70 million colors | ||
| Color gamut | sRGB 99% (CIE 1931) (typical)BT.709 99% (CIE 1931) (typical) | |
| Connectivity • 1 HDMI 1.4 port (HDCP 1.4) (Supports up to WUXGA 1920 x 1200 100 Hz TMDS as per specified in HDMI 1.4)• 1 DisplayPort 1.4 (HDCP 1.4) port (Supports up to WUXGA 1920 x 1200, 100 Hz)• 1 USB 5Gbps Type-B upstream port• 2 USB 5Gbps Type-A downstream portsQuick Access• 1 USB 5Gbps Type-A downstream port• 1 USB-C 5Gbps downstream port with power charging (5 V/3 A) | • 1 HDMI 1.4 port (HDCP 1.4) (Supports up to FHD 1920 x 1080 120 Hz TMDS as per specified in HDMI 1.4)• 1 DisplayPort 1.4 (HDCP 1.4) port (Supports up to FHD 1920 x 1080, 120 Hz)• 1 USB 5Gbps Type-B upstream port• 2 USB 5Gbps Type-A downstream portsQuick Access• 2 USB-C 5Gbps downstream port with power charging (5 V/3 A) | |
| Border width (edge of monitor to active area) | ||
| Top 6.70 mm (0.26 in.) 6.40 mm (0.25 in.) | ||
| Left/Right 6.70 mm (0.26 in.) 6.40 mm (0.25 in.) | ||
| Bottom 13 mm (0.51 in.) 12 mm (0.47 in.) | ||
| Adjustability | ||
| Height adjustment up to 150 mm | ||
| Tilt -5° to 21° | ||
| Swivel -45° to 45° | ||
| Pivot -90° to 90° | ||
| Cable management Yes, except P2726H WOST | ||
| Dell Display and Peripheral Manager compatibility | Easy Arrange and other key features | |
| Security Security-lock slot (for Kensington locks, sold separately) | ||
Dell Display and Peripheral Manager (DDPM) for Windows
DDPM is a software application that helps you set up and configure the Dell monitors and peripherals. Some of its features include:
- Adjusting the monitor On-Screen Display (OSD) settings such as brightness, contrast, and resolution without needing to use the joystick on the monitor.
- Arrange multiple applications on your screen by placing them into a template of your choice using Easy Arrange.
- Assign applications or files to the partitions of Easy Arrange, save the layout as a profile, and restore the profile automatically with Easy Arrange Memory when needed.
- Connect the Dell Monitor to multiple input sources and manage these video inputs using the Input Source feature.
- Customize each application with its own distinct color mode using the Color Preset feature.
- Replicate software application settings from one monitor to another identical monitor using the Import/Export application settings feature.
- Receive notifications and update the firmware and software.
NOTE: Some features of the DDPM mentioned above are available only on select monitor models. For more information about DDPM, and the recommended computer configuration to install it, go to Dell Display and Peripheral Manager (DDPM).
Resolution specifications
Table 12. Resolution specifications.
| Description Value (P2226H) | Value (P2426H/P2426H WOST/P2726H/P2726H WOST) | Value (P2426) | |
| Horizontal scan range 30 kHz to 114 kHz (automatic) 30 kHz to 135 kHz (automatic) 30 kHz t o 127 kHz (automatic) | |||
| Vertical scan range 48 Hz to 100 Hz (automatic) 48 Hz to 120 Hz (automatic) 48 Hz t o 100 Hz (automatic) | |||
| Maximum preset resolution 1920 x 1080 up to 100 Hz 1920 x 1080 up t o 120 Hz 1920 x 1200 up to 100 Hz | |||
Supported video modes
Table 13. Supported video modes.
| Description | Value (P2226H/P2426H/P2426H WOST/P2726H/P2726H WOST) | Value (P2426) |
| Video display capabilities (HDMI and DisplayPort) | 1080p, 720p, 576p, 480p 1080p, 720p, 576p, 480p |
Preset display modes
P2226H
Table 14. DisplayPort and HDMI display modes.
| Display mode | Horizontal frequency (kHz) | Vertical frequency (Hz) | Pixel clock (MHz) | Sync polarity (Horizontal/Vertical) |
| VESA, 640 x 480 31.47 59.94 25.17 -/- | ||||
| VESA, 640 x 480 37.50 75 31.50 -/- | ||||
| IBM, 720 x 400 31.47 70.08 28.32 -/+ | ||||
| VESA, 800 x 600 37.88 60.32 40 +/+ | ||||
| VESA, 800 x 600 46.88 75 49.50 +/+ | ||||
| VESA, 1024 x 768 48.36 60 65 -/- | ||||
| VESA, 1024 x 768 60.02 75.03 78.75 +/+ | ||||
| VESA, 1152 x 864 67.50 75 108 +/+ | ||||
| VESA, 1280 x 720 45 59.94 74.25 -/+ | ||||
| VESA, 1280 x 720 56.46 74.78 95.75 -/+ | ||||
| VESA, 1280 x 1024 63.98 60.02 108 +/+ | ||||
| VESA, 1280 x 1024 79.98 75.02 135 +/+ | ||||
| VESA, 1600 x 900 60 60 108 +/+ | ||||
| VESA, 1920 x 1080 67.50 60 148.50 +/+ | ||||
| CVT, 1920 x 1080 113.22 99.93 235.50 +/- |
NOTE: The monitor will also support other display resolutions not listed in the preset mode.
P2426H/P2426H WOST/P2726H/P2726H WOST
Table 15. DisplayPort and HDMI display modes.
| Display mode | Horizontal frequency (kHz) | Vertical frequency (Hz) | Pixel clock (MHz) | Sync polarity (Horizontal/Vertical) |
| VESA, 640 x 480 31.47 59.94 25.17 -/- | ||||
| VESA, 640 x 480 37.50 75 31.50 -/- | ||||
| IBM, 720 x 400 31.47 70.08 28.32 -/+ | ||||
| VESA, 800 x 600 37.88 60.32 40 +/+ | ||||
| VESA, 800 x 600 46.88 75 49.50 +/+ | ||||
| VESA, 1024 x 768 48.36 60 65 -/- | ||||
| VESA, 1024 x 768 60.02 75.03 78.75 +/+ | ||||
| VESA, 1152 x 864 67.50 75 108 +/+ | ||||
| VESA, 1280 x 720 45 59.94 74.25 -/+ | ||||
| VESA, 1280 x 720 56.46 74.78 95.75 -/+ | ||||
| VESA, 1280 x 1024 63.98 60.02 108 +/+ | ||||
| VESA, 1280 x 1024 79.98 75.02 135 +/+ | ||||
| VESA, 1600 x 900 60 60 108 +/+ | ||||
| VESA, 1920 x 1080 67.50 60 148.50 +/+ | ||||
| CVT, 1920 x 1080 113.22 99.93 235.50 +/- | ||||
| 1920 x 1080 135 120 297 +/+ |
NOTE: The monitor will also support other display resolutions not listed in the preset mode.
P2426
Table 16. DisplayPort and HDMI display modes.
| Display mode | Horizontal frequency (kHz) | Vertical frequency (Hz) | Pixel clock (MHz) | Sync polarity (Horizontal/Vertical) |
| VESA, 640 x 480 31.47 59.94 25.17 -/- | ||||
| VESA, 640 x 480 37.50 75 31.50 -/- | ||||
| IBM, 720 x 400 31.47 70.08 28.32 -/+ | ||||
| VESA, 800 x 600 37.88 60.32 40 +/+ | ||||
| VESA, 800 x 600 46.88 75 49.50 +/+ | ||||
| VESA, 1024 x 768 48.36 60 65 -/- | ||||
| VESA, 1024 x 768 60.02 75.03 78.75 +/+ | ||||
| VESA, 1152 x 864 67.50 75 108 +/+ | ||||
| VESA, 1280 x 720 45 59.94 74.25 -/+ | ||||
| VESA, 1280 x 720 56.46 74.78 95.75 -/+ | ||||
| VESA, 1280 x 1024 63.98 60.02 108 +/+ | ||||
| VESA, 1280 x 1024 79.98 75.02 135 +/+ | ||||
| VESA, 1600 x 1200 75 60 162 +/+ | ||||
| VESA, 1920 x 1080 67.50 60 148.50 +/+ | ||||
| VESA, 1920 x 1200 74.56 59.89 193.25 -/+ | ||||
| CVT, 1920 x 1200 74.04 59.95 154 +/- | ||||
| CVT, 1920 x 1200 125.72 99.94 261.50 +/- |
NOTE: The monitor will also support other display resolutions not listed in the preset mode.
Electrical specifications
Table 17. Electrical specifications.
| Description Value | |
| Video input signals | HDMI 1.4 (TMDS)*/DisplayPort 1.4, 600 mV for each differential line, 100 ohm input impedance per differential pair |
| AC input voltage/frequency/current 100 VAC to | 240 VAC/50 Hz or 60 Hz ± 3 Hz/1.5 A (typical) |
| Inrush current • 120 V: 30 A (maximum) at 0°C (cold start)• 240 V: 60 A (maximum) at 0°C (cold start) | |
| Power consumption | |
| P2226H • 0.3 W (Off mode) | 1• 0.3 W (Standby mode)• 10.9 W (On mode)• 60 W (Max.)• 10.0 W (Pon)3• 31.8 kWh (TEC) |
| P2426H/P2426H WOST • 0.3 W (Off mode) | 1• 0.3 W (Standby mode)• 11.7 W (On mode)• 74 W (Max.)• 10.3 W (Pon)3• 32.8 kWh (TEC) |
| P2426 • 0.3 W (Off mode) | 1• 0.3 W (Standby mode)• 13.6 W (On mode)• 68 W (Max.)• 12.9 W (Pon)3• 40.7 kWh (TEC) |
| P2726H/P2726H WOST • 0.3 W (Off mode) | 1• 0.5 W (Standby mode)• 13.5 W (On mode)• 74 W (Max.)• 11.6 W (Pon)3• 37.2 kWh (TEC) |
*P2226H: Supports up to FHD 1920 x 1080 100 Hz TMDS as per specified in HDMI 1.4.
*P2426H/P2426H WOST/P2726H/P2726H WOST: Supports up to FHD 1920 x 1080 120 Hz TMDS as per specified in HDMI 1.4.
*P2426: Supports up to WUXGA 1920 x 1200 100 Hz TMDS as per specified in HDMI 1.4.
^1 As defined in EU 2019/2021 and EU 2019/2013.
^2 Maximum brightness and contrast setting with maximum power loading on all USB ports.
^3 P _on : Power consumption of On mode as defined in Energy Star 8.0 version.
TEC: Total energy consumption in kWh as defined in Energy Star 8.0 version.
This document is informational only and reflects laboratory performance. Your product may perform differently, depending on the software, components, and peripherals you ordered and you shall have no obligation to update such information.
Accordingly, the customer should not rely upon this information in making decisions about electrical tolerances or otherwise. No warranty as to accuracy or completeness is expressed or implied.
NOTE: This monitor is ENERGY STAR certified. This product qualifies for ENERGY STAR in the factory default settings which can be restored by "Factory Reset" function in the OSD menu. Changing the factory default settings or enabling other features may increase power consumption that could exceed the ENERGY STAR specified limit.

Physical characteristics
Table 18. Physical characteristics of P2226H, P2426H, and P2426H WOST.
| Description Value | |||
| Signal cable type | Digital: DisplayPort, 20 pinsDigital: HDMI, 19 pins (cable included for selected countries only)* | ||
| NOTE: Dell monitors are designed to work optimally with the video cables that are shipped with your monitor. As Dell does not have control over the different cable suppliers in the market, the type of material, connector and process used to manufacture these cables, Dell does not guarantee video performance on cables that are not shipped with your Dell monitor. | |||
| Dimensions (with stand) P2226H P2426H | |||
| Height (extended) 482.39 mm (18.99 in.) | 496.53 mm (19.55 in.) | ||
| Height (compressed) 364 mm (14.33 in.) | 364 mm (14.33 in.) | ||
| Width 488.06 mm (19.22 in.) 538.64 mm | (21.21 in.) | ||
| Depth 181.75 mm (7.16 in.) 181.75 mm | (7.16 in.) | ||
| Dimensions (without stand) P2226H P2426H/P2426H WOST | |||
| Height 285.79 mm (11.25 in.) 314.23 mm | (12.37 in.) | ||
| Width 488.06 mm (19.22 in.) 538.64 mm | (21.21 in.) | ||
| Depth 50.03 mm (1.97 in.) 50.03 mm (1.97 in.) | |||
| Stand dimensions | P2226H P2426H | ||
| Height (extended) 410.80 mm (16.17 in.) | 410.80 mm (16.17 in.) | ||
| Height (compressed) 364 mm (14.33 in.) | 364 mm (14.33 in.) | ||
| Width 249.80 mm (9.83 in.) 249.80 mm | (9.83 in.) | ||
| Depth 181.75 mm (7.16 in.) 181.75 mm | (7.16 in.) | ||
| Base | 249.80 mm (9.83 in.) x 177 mm (6.97 in.) | 249.80 mm (9.83 in.) x 177 mm (6.97 in.) | |
| Weight | P2226H P2426H P2426H WOST | ||
| Weight with packaging | 6.12 kg (13.50 lb) | 6.66 kg (14.68 lb) | 5.15 kg (11.35 lb) |
| Weight with stand assembly and cables | 4.40 kg (9.70 lb) | 4.87 kg (10.74 lb) | Not applicable |
| Weight without stand assembly and with cables | Not applicable | Not applicable | 3.34 kg (7.36 lb) |
| Weight without stand assembly (For wall-mount or VESA mount considerations - no cables) | 2.58 kg (5.69 lb) | 2.96 kg (6.53 lb) | |
| Weight of stand assembly | 1.50 kg (3.31 lb) | 1.50 kg (3.31 lb) | Not applicable |
*Check with the sales representative of the respective country.
Table 19. Physical characteristics of P2426, P2726H, and P2726H WOST.
| Description Value | |||
| Signal cable type | Digital: DisplayPort, 20 pinsDigital: HDMI, 19 pins (cable included for selected countries only)* | ||
| NOTE:Dell monitors are designed to work optimally with the video cables that are shipped with your monitor. As Dell does not have control over the different cable suppliers in the market, the type of material, connector and process used to manufacture these cables, Dell does not guarantee video performance on cables that are not shipped with your Dell monitor. | |||
| Dimensions (with stand) P2426 P2726H | |||
| Height (extended) 511.20 mm (20.13 in.) | 534.56 mm (21.05 in.) | ||
| Height (compressed) 364 mm (14.33 in.) | 384.56 mm (15.14 in.) | ||
| Width 531.80 mm (20.94 in.) 610.69 mm | (24.04 in.) | ||
| Depth 181.75 mm (7.16 in.) 192.28 mm | (7.57 in.) | ||
| Dimensions (without stand) P2426 P2726H/P2726H WOST | |||
| Height 343.70 mm (13.53 in.) 354.71 mm | (13.97 in.) | ||
| Width 531.80 mm (20.94 in.) 610.69 mm | (24.04 in.) | ||
| Depth 50.03 mm (1.97 in.) | 50.03 mm (1.97 in.) | ||
| Stand dimensions | P2426 P2726H | ||
| Height (extended) 410.80 mm (16.17 in.) | 428.30 mm (16.86 in.) | ||
| Height (compressed) 364 mm (14.33 in.) | 381.50 mm (15.02 in.) | ||
| Width 249.80 mm (9.83 in.) 272.80 mm | (10.74 in.) | ||
| Depth 181.75 mm (7.16 in.) 192.28 mm | (7.57 in.) | ||
| Base | 249.80 mm (9.83 in.) x 177 mm (6.97 in.) | 272.80 mm (10.74 in.) x 189 mm (7.44 in.) | |
| Weight | P2426 P2726H P2726H WOST | ||
| Weight with packaging | 6.74 kg (14.86 lb) | 8.52 kg (18.77 lb) | 6.67 kg (14.71 lb) |
| Weight with stand assembly and cables | 4.89 kg (10.78 lb) | 6.06 kg (13.36 lb) | Not applicable |
| Weight without stand assembly and with cables | Not applicable | Not applicable | 4.36 kg (9.61 lb) |
| Weight without stand assembly (For wall-mount or VESA mount considerations - no cables) | 3.07 kg (6.77 lb) | 3.99 kg (8.79 lb) | |
| Weight of stand assembly | 1.50 kg (3.31 lb) | 1.64 kg (3.61 lb) | Not applicable |
*Check with the sales representative of the respective country.
Environmental characteristics
Table 20. Environmental characteristics.
| Description Value | |
| Compliant standards | |
| ENERGY STAR certified monitorEPEAT registered where applicable. EPEAT registration varies by country. Seewww.epeat.netfor registration status by country.RoHS-compliantTCO Certified & TCO Certified EdgeBFR/PVC free monitor (excluding external cables)Arsenic-free glass and Mercury-free for the panel only | |
| Temperature | |
| Operating 0°C to 40°C (32°F to 104°F) | |
| Non-operatingStorage: -20°C to 60°C (-4°F to 140°F)Shipping: -20°C to 60°C (-4°F to 140°F) | |
| Humidity | |
| Operating 10% to 80% (non-condensing) | |
| Non-operating | Storage: 5% to 90% (non-condensing)Shipping: 5% to 90% (non-condensing) |
| Altitude | |
| Operating 5,000 m (16,404 ft) (maximum) | |
| Non-operating 12,192 m (40,000 ft) (maximum) | |
| Thermal dissipation | |
| P2226H• 205.2 BTU/Hour (maximum) | 37.3 BTU/Hour (On mode) |
| P2426H/P2426H WOST | 253.1 BTU/Hour (maximum)40.0 BTU/Hour (On mode) |
| P2426• 232.6 BTU/Hour (maximum) | 46.5 BTU/Hour (On mode) |
| P2726H/P2726H WOST | 252.5 BTU/Hour (maximum)46.1 BTU/Hour (On mode) |
Pin assignments DisplayPort
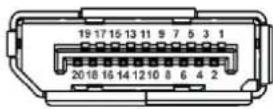
Figure 7. DisplayPort
Table 21. DisplayPort pins and assignments.
| Pin number 20-pin side of the connected signal cable | |
| 1 ML3 (n) | |
| 2 GND | |
| 3 ML3 (p) | |
| 4 ML2 (n) | |
| 5 GND | |
| 6 ML2 (p) | |
| 7 ML1 (n) | |
| 8 GND | |
| 9 ML1 (p) | |
| 10 ML0 (n) | |
| 11 GND | |
| 12 ML0 (p) | |
| 13 GND | |
| 14 GND | |
| 15 AUX (p) | |
| 16 GND | |
| 17 AUX (n) | |
| 18 Hot Plug Detect | |
| 19 Re-PWR | |
| 20 +3.3 V DP_PWR | |
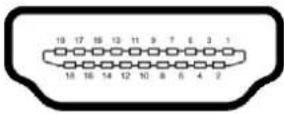
Figure 8. HDMI port
Table 22. HDMI pins and assignments.
| Pin number 19-pin side of the connected signal cable | |
| 1 TMDS DATA 2+ | |
| 2 TMDS DATA 2 SHIELD | |
| 3 TMDS DATA 2- | |
| 4 TMDS DATA 1+ | |
| 5 TMDS DATA 1 SHIELD | |
| 6 TMDS DATA 1- | |
| 7 TMDS DATA 0+ | |
| 8 TMDS DATA 0 SHIELD | |
| 9 TMDS DATA 0- | |
| 10 | TMDS CLOCK+ |
| 11 TMDS CLOCK SHIELD | |
| 12 TMDS CLOCK- | |
| 13 CEC | |
| 14 Reserved (N.C. on device) | |
| 15 | DDC CLOCK (SCL) |
| 16 DDC DATA (SDA) | |
| 17 DDC/CEC Ground | |
| 18 +5 V POWER | |
| 19 HOT PLUG DETECT | |
Universal Serial Bus (USB) interface
This section gives you information about the USB ports that are available on the monitor.
NOTE: This monitor is USB 5Gbps compatible. USB 5Gbps functionality requires a USB 5Gbps-capable computer.
NOTE: Up to 3 A on USB-C downstream port(s) with 5 V/3 A compliance devices at Quick Access. Up to 0.9 A on the other USB downstream ports at the bottom.
Your monitor has the following USB ports:
Table 23. USB ports of P2226H and P2426.
| Port Location | |
| 1 x USB Type-B upstream Bottom | |
| 2 x USB Type-A downstream Bottom | |
| 1 x USB Type-A downstream | Bottom (Quick Access) |
| 1 x USB-C downstream Bottom (Quick Access) |
Table 24. USB ports of P2426H and P2726H.
| Port Location | |
| 1 x USB Type-B upstream Bottom | |
| 2 x USB Type-A downstream Bottom | |
| 2 x USB-C downstream | Bottom (Quick Access) |
NOTE: The USB ports on the monitor work only when the monitor is turned On or in Standby mode. If you turn Off the monitor and then turn it On, the attached peripherals may take a few seconds to resume normal functionality.
Table 25. Transfer speed.
| Transfer speed Data rate Maximum power supported | ||
| SuperSpeed 5 Gbps 4.50 W | ||
| High speed 480 Mbps 4.50 W | ||
| Full speed 12 Mbps 4.50 W |
NOTE: This monitor is USB 5Gbps compatible.
Table 26. USB-C specifications.
| USB-C Description | |
| Data | USB 5Gbps |
| Power charging | Up to 15 W (Quick Access USB-C downstream port) |
USB Type-B upstream connector
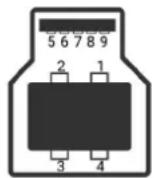
Figure 9. USB Type-B connector
Table 27. USB Type-B pins and assignments.
| Pin number | Signal name | Pin number | Signal name |
| 1 VBUS | 6 | StdB_SSTX+ | |
| 2 D- | 7 | GND_DRAIN | |
| 3 D+ | 8 | StdB_SSRX- | |
| 4 GND | 9 | StdB_SSRX+ | |
| 5 StdB_SSTX- | Shell | Shield |
USB Type-A downstream connector
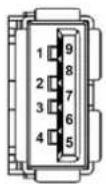
Figure 10. USB Type-A port (bottom)
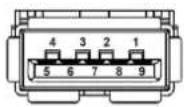
Figure 11. USB Type-A port (Quick Access)
Table 28. USB Type-A pins and assignments.
| Pin number Signal name | Pin number Signal name | ||
| 1 VBUS 6 StdA_SSRX+ | |||
| 2 D- 7 GND_DRAIN | |||
| 3 D+ 8 StdA_SSTX- | |||
| 4 GND 9 StdA_SSTX+ | |||
| 5 StdA_SSRX- Shell Shield |
USB-C port
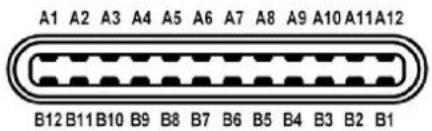
Figure 12. USB-C port
Table 29. USB-C pins and assignments.
| Pin number Signal name Pin number Signal name | |||
| A1 GND B1 GND | |||
| A2 TX1+ B2 TX2+ | |||
| A3 TX1- B3 TX2- | |||
| A4 VBUS B4 VBUS | |||
| A5 CC1 B5 CC2 | |||
| A6 D+ B6 D+ | |||
| A7 D- B7 D- | |||
| A8 SBU1 | B8 SBU2 | ||
| A9 VBUS B9 VBUS | |||
| A10 | RX2- | B10 | RX1- |
| A11 | RX2+ | B11 | RX1+ |
| A12 | GND B12 GND | ||
Plug-and-play capability
You can connect the monitor to any Plug and Play-compatible system. The monitor automatically provides the computer with its Extended Display Identification Data (EDID) using Display Data Channel (DDC) protocols so that the computer can configure itself and optimize the monitor settings. Most monitor installations are automatic; you can select different settings as required. For more information about changing the monitor settings, see Operating the monitor.
LCD monitor quality and pixel policy
During the LCD Monitor manufacturing process, it is not uncommon for one or more pixels to become fixed in an unchanging state which are hard to see and do not affect the display quality or usability. For more information about Dell Monitor Quality and Pixel Policy, see Dell Display Pixel Guidelines.
Ergonomics
△ CAUTION: Improper or prolonged usage of a keyboard may result in injury.
CAUTION: Viewing the monitor screen for extended periods of time may result in eye strain.
For comfort and efficiency, observe the following guidelines when setting up and using your computer workstation:
- Position your computer so that the monitor and keyboard are directly in front of you as you work. Special shelves are commercially available to help you correctly position your keyboard. - To reduce the risk of eye strain and neck, arm, back, or shoulder pain from using the monitor for a long period, we recommend you to:
- Set the distance of the screen between 20 to 28 in. (50 - 70 cm) from your eyes.
- Blink frequently to moisten your eyes or wet your eyes with water after prolonged usage of the monitor.
- Take regular and frequent breaks for 20 minutes every two hours.
- Look away from your monitor and gaze at a distant object that is 20 feet away for at least 20 seconds during the breaks.
-
Perform stretches to relieve tension in the neck, arm, back, and shoulders during the breaks.
-
Ensure that the monitor screen is at eye level or slightly lower when you are sitting in front of the monitor.
- Adjust the tilt of the monitor, its contrast, and brightness settings.
- Adjust the ambient lighting around you (such as overhead lights, desk lamps, and the curtains or blinds on nearby windows) to minimize reflections and glare on the monitor screen.
- Use a chair that provides good lower-back support.
- Keep your forearms horizontal with your wrists in a neutral, comfortable position while using the keyboard or mouse.
• Always leave space to rest your hands while using the keyboard or mouse.
- Let your upper arms rest naturally on both sides.
- Ensure that your feet are resting flat on the floor.
- When sitting, make sure that the weight of your legs is on your feet and not on the front portion of your seat. Adjust your chair's height or use a footrest if necessary, to maintain a proper posture.
- Vary your work activities. Try to organize your work so that you do not have to sit and work for extended periods of time. Try to stand or get up and walk around at regular intervals.
- Keep the area under your desk clear of obstructions and cables or power cords that may interfere with comfortable seating or present a potential trip hazard.
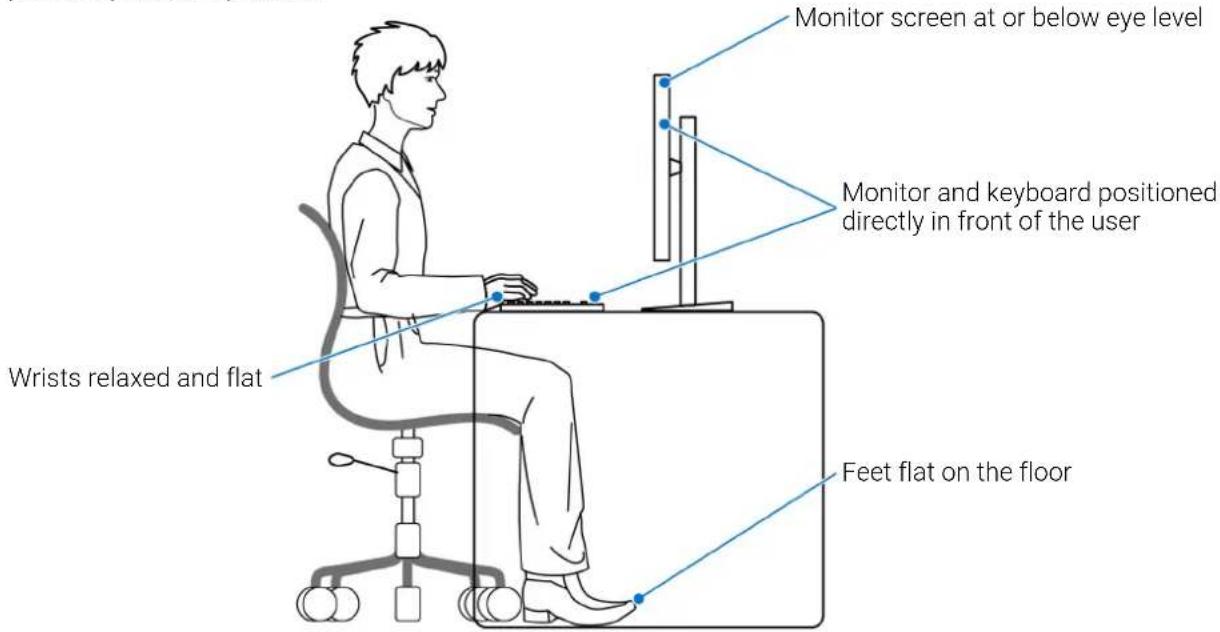
Figure 13. Proper sitting posture while using the monitor
Handling and moving your display
To ensure that the monitor is handled safely when lifting or moving it, follow these guidelines:
• Before moving or lifting the monitor, turn off your computer and the monitor.
- Disconnect all cables from the monitor.
- Place the monitor in the original box with the original packing materials.
- Hold the bottom edge and the side of the monitor firmly without applying excessive pressure when lifting or moving the monitor.
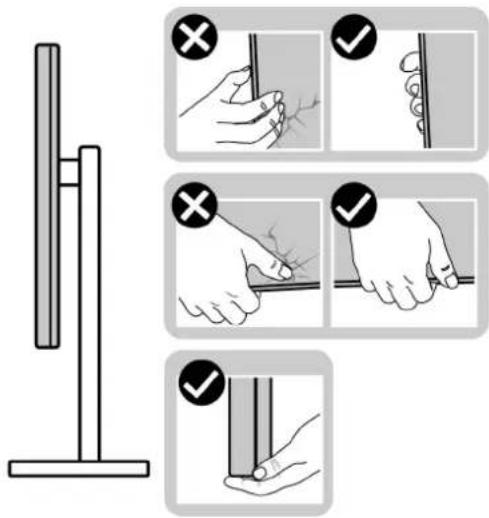
Figure 14. Proper ways of handling and moving the monitor
- When lifting or moving the monitor, ensure the screen is facing away from you and do not press on the display area to avoid any scratches or damage.
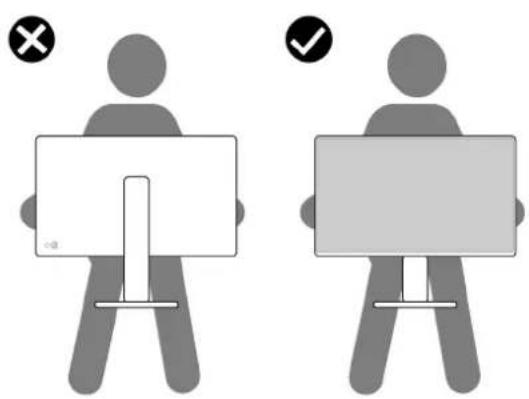
Figure 15. Proper way of lifting the monitor
- When transporting the monitor, avoid any sudden shock or vibration to it.
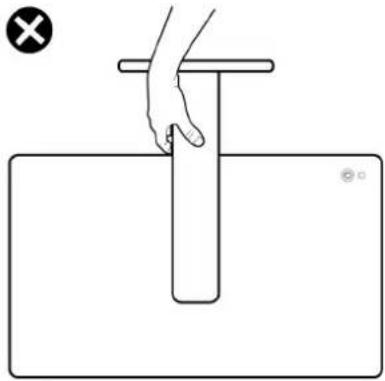
- When lifting or moving the monitor, do not turn the monitor upside down while holding the stand base or stand riser. This may result in accidental damage to the monitor or cause personal injury.
natural_image
Simple line drawing of a hand holding a vertical tube over a rectangular block, with no text or symbols present.Figure 16. Incorrect way of lifting or moving the monitor
Maintenance guidelines
Cleaning your monitor
△ CAUTION: Read and follow the Safety instructions before cleaning the monitor.
⚠ WARNING: Before cleaning the monitor, unplug the monitor power cable from the electrical outlet.
For best practices, follow the instructions in the list below when unpacking, cleaning, or handling your monitor:
- Use a clean cloth that is slightly dampened with water to clean the stand assembly, the screen, and the chassis of your Dell monitor. If available, use a screen-cleaning tissue or solution suitable for cleaning Dell monitors.
- After cleaning the surface of the table, ensure that it is thoroughly dry and free from any moisture or cleaning agent before placing your Dell monitor on it.
△ CAUTION: Do not use detergents or other chemicals such as benzene, thinner, ammonia, abrasive cleaners, alcohol, or compressed air.
△ CAUTION: Using chemicals for cleaning may cause changes in the appearance of the monitor, such as color fading, milky film on the monitor, deformation, uneven dark shade, and peeling of screen area.
WARNING: Do not spray the cleaning solution or even water directly on the surface of the monitor. Doing so will allow liquids to accumulate at the bottom of the display panel and corrode the electronics resulting in permanent damage. Instead, apply the cleaning solution or water to a soft cloth and then clean the monitor.
NOTE: Monitor damage due to improper cleaning methods and the use of benzene, thinner, ammonia, abrasive cleaners, alcohol, compressed air, detergent of any kind will lead to a Customer Induced Damage (CID). CID is not covered under the standard Dell warranty.
• If you notice white residual powder when you unpack your monitor, wipe it off with a cloth.
- Handle your monitor with care as a darker-colored monitor may get scratched and show white scuff marks more than a lighter-colored monitor.
- To help maintain the best image quality on your monitor, use a dynamically changing screen saver and turn off your monitor when not in use.
Setting up the monitor
Attaching the stand
NOTE: The stand assembly is not pre-installed when the monitor is shipped from the factory.
NOTE: The following instructions are applicable only for the stand that was shipped with your monitor. If you are attaching a stand that you purchased from any other source, follow the setup instructions that were included with the stand.
To attach the monitor stand:
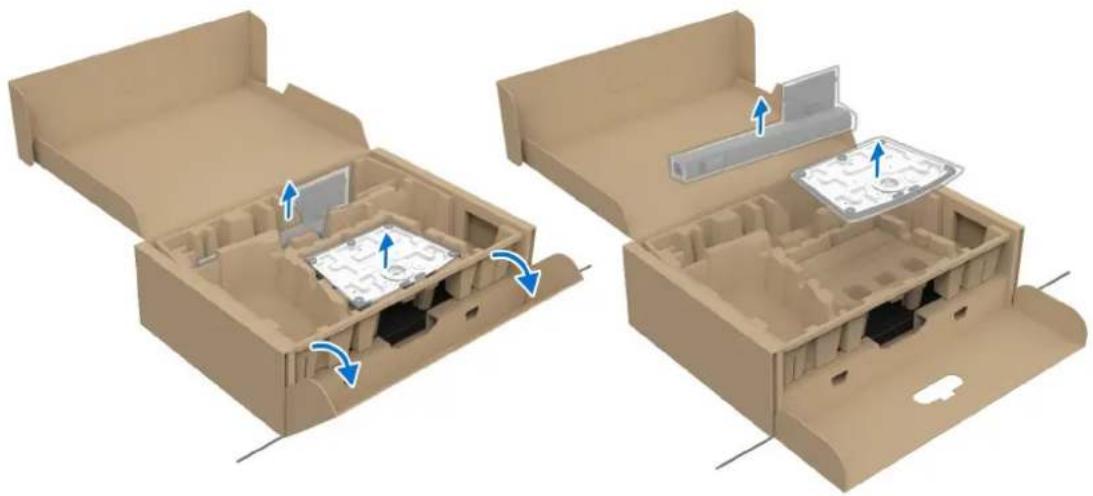
- Remove the stand riser and stand base from the cushion.
natural_image
3D diagram of a beige plastic enclosure with internal components and blue arrows indicating movement or assembly (no text or symbols)Figure 17. Removing the stand parts from the box
NOTE: The images are for the purpose of illustration only. The appearance of the package cushion may vary.
2. Align and place the stand base onto the stand riser.
3. Open the screw handle at the bottom of the stand base and turn it clockwise to secure the stand assembly.
4. Close the screw handle.
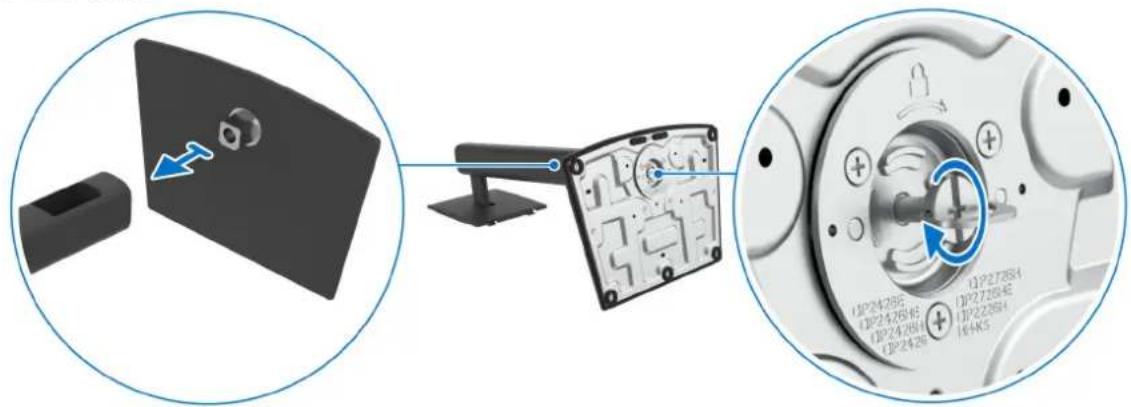
Figure 18. Connecting the stand base with the stand riser
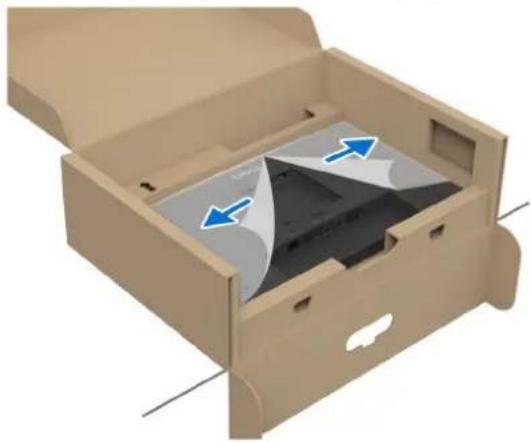
- Open the protective cover on the monitor to access the VESA slot on the display back cover.
natural_image
3D diagram of a beige cardboard box with internal compartments and blue arrows indicating directional flow (no text or symbols)Figure 19. Opening the protective cover
NOTE: Before attaching the stand assembly to the display, ensure that the front plate flap is opened to allow space for assembly.
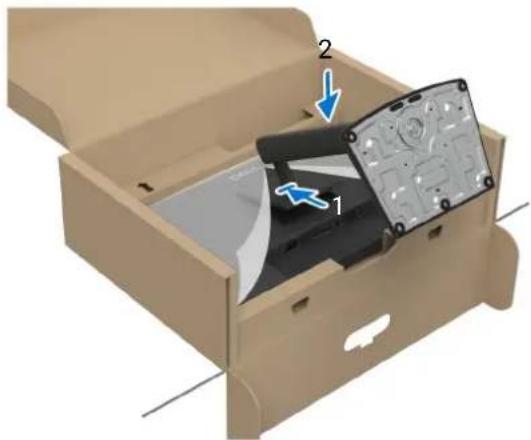
6. Carefully insert the tabs on the stand riser into the slots on the display back cover, and then press down the stand assembly to snap it into place.
natural_image
3D diagram of a beige cardboard box with internal components and arrows indicating parts (no text or symbols)Figure 20. Attaching the stand assembly to the monitor
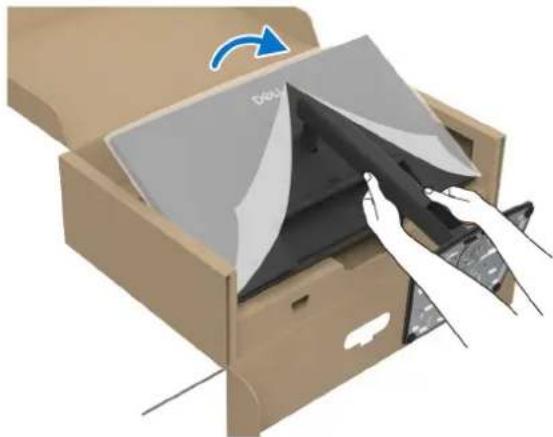
- Hold the stand riser with both hands firmly and lift the monitor. Then place the monitor in an upright position on a flat surface.
natural_image
Illustration of a cardboard box with a paper lid and open drawer, showing internal compartments and a blue arrow indicating rotation (no text or symbols)Figure 21. Removing the monitor from the packaging box
NOTE: Hold the stand riser firmly when lifting the monitor to avoid any accidental damage.
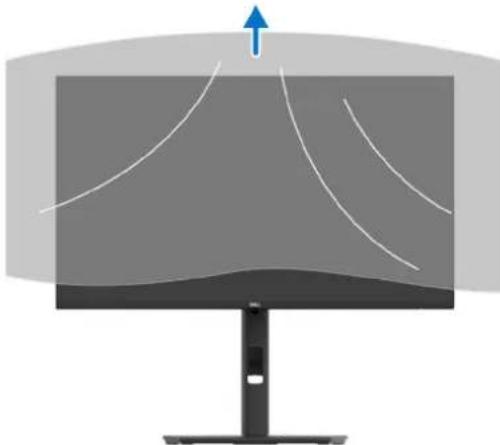
- Lift the protective cover from the monitor.
natural_image
Illustration of a computer monitor with curved white lines and a blue upward arrow, no text or symbols present.Figure 22. Removing the protective cover
Using the tilt, swivel, pivot and height adjustment
NOTE: The following instructions are applicable only for the stand that was shipped with your monitor. If you are attaching a stand that you purchased from any other source, follow the setup instructions that were included with the stand.
Tilt and swivel adjustment
With the stand attached to the monitor, you can tilt and swivel the monitor for the most comfortable viewing angle.
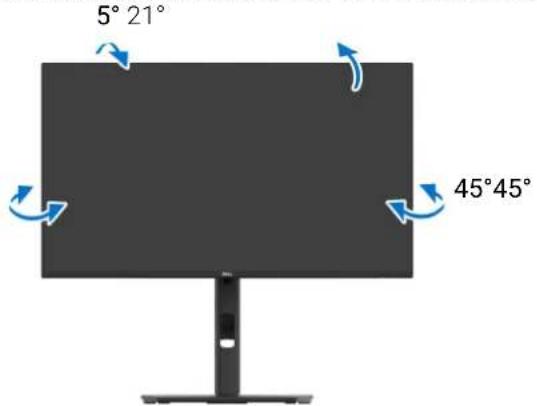
Figure 23. Tilt and swivel adjustment
NOTE: The stand assembly is not pre-installed when the monitor is shipped from the factory.
Height adjustment
NOTE: The stand extends vertically up to 150 mm. The following image illustrates how to extend the stand vertically.
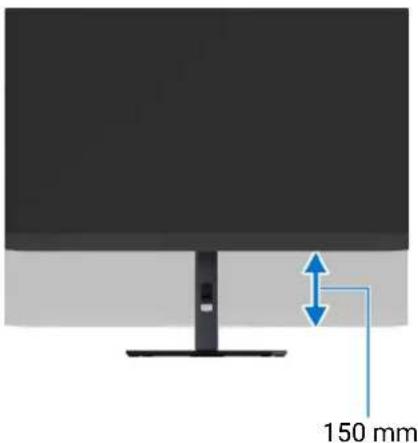
Figure 24. Height adjustment
Pivot adjustment
Before you rotate the display, ensure it is extended vertically and tilted up to avoid hitting the bottom edge of the monitor.
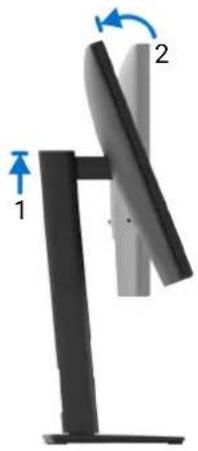
natural_image
Diagram of a mechanical device with two labeled components (1 and 2), showing rotational motion arrows (no text or symbols beyond labels)Figure 25. Pivot adjustment
Rotate clockwise
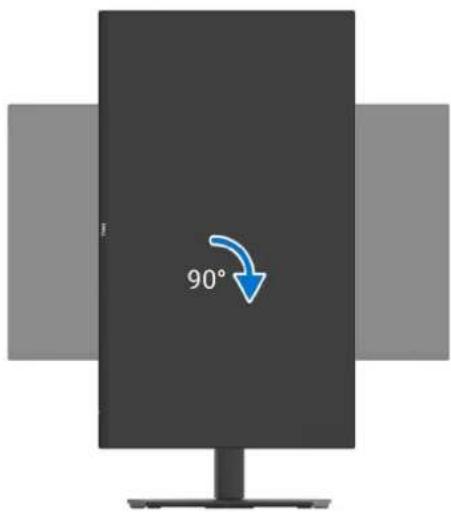
Figure 26. Rotating the display 90 degrees (clockwise)
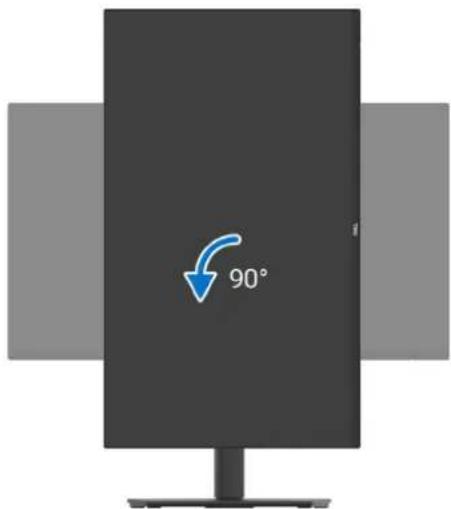
Figure 27. Rotating the display 90 degrees (counterclockwise)
NOTE: To use the Display Rotation function (Landscape compared with Portrait view) with your Dell computer, you require an updated graphics driver that is not included with this monitor. To download the graphics driver, go to Dell Support Site and see the Download section for Video Drivers for latest driver updates.
NOTE: In the Portrait mode, you may experience performance degradation when using graphic-intensive applications such as 3D gaming.
Adjusting the rotation display settings of your computer
After you have rotated your monitor, you need to complete the procedure below to adjust the Rotation Display Settings of your computer.
NOTE If you are using the monitor with a non-Dell computer, you need to go to the graphics driver website or your computer manufacturer's website for information about rotating the 'contents' on your display.
To adjust the Rotation Display Settings:
- Right-click the desktop and click Properties.
- Select the Settings tab and click Advanced.
- If you have an AMD graphics card, select the Rotation tab and set the preferred rotation.
- If you have an NVIDIA graphics card, click the NVIDIA tab, in the left-hand column select NVRotate, and then select the preferred rotation.
- If you have an Intel graphics card, select the Intel graphics tab, click Graphic Properties, select the Rotation tab, and then set the preferred rotation.
NOTE: If you do not see the rotation option or it is not working correctly, go to Dell Support Site and download the latest driver for your graphics card.
Organizing your cables
When connecting the necessary cables (see Connecting your monitor for cable attachment), organize all cables through the cable management slot.
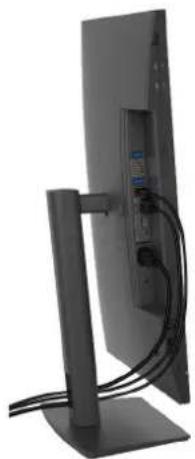
To prevent damage due to insufficient cable length, follow these steps to ensure sufficient cable slack between the connectors and the cable management slot:
- Adjust the monitor head to its highest and most pivoted position, then connect all necessary cables. Move, tilt, and pivot the monitor to check for any cables that appear tight, skewed, or loose.
natural_image
Exterior view of a modern flat-screen monitor with cables attached (no visible text or symbols)Figure 28. Connect the cables at the highest, most pivoted position
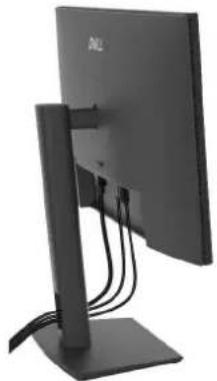
NOTE: The image is for the purpose of illustration only. The appearance of your actual monitor may vary.
- Leave enough cable slack between the connectors and the cable management slot. If your cable is short, connect it directly to the computer without routing through the cable management slot. This ensures sufficient room for all adjustments and prevents stress on the connections.
natural_image
Back view of a desktop computer monitor with visible cables and a logo on the top (no text or symbols on the device itself)Figure 29. Ensure to leave enough cable length for monitor movement
Connecting your monitor
WARNING: Before you begin any of the procedures in this section, follow the Safety instructions.
NOTE: Dell monitors are designed to work optimally with the Dell-supplied cables inside the box. Dell does not guarantee the video quality and performance if non-Dell cables are used.
NOTE: Route the cables through the cable management slot before connecting them.
NOTE: Do not connect all the cables to the computer simultaneously.
NOTE: The images are for the purpose of illustration only. The appearance of the computer may vary.
To connect your monitor to the computer:
- Turn off your computer and disconnect the power cable.
- Connect the DisplayPort cable (shipped with your monitor) or HDMI cable (purchased separately*) from your monitor to the computer.
- Connect the USB Type-B upstream port on the monitor and an appropriate USB port on your computer with the supplied USB cable (see Bottom view (P2226H), Bottom view (P2426H/P2426H WOST), Bottom view (P2426), or Bottom view (P2726H/P2726H WOST) for details).
- Connect the USB peripherals to the USB downstream ports on the monitor.
- Plug the power cables for your computer and monitor into a nearby outlet.
- Turn on the monitor and the computer.
If your monitor displays an image, installation is complete. If it does not display an image, see Common problems.
*HDMI cable is shipped with the monitor in selected countries only. Check with the sales representative of the respective country.
Connecting the DisplayPort (DisplayPort to DisplayPort) cable
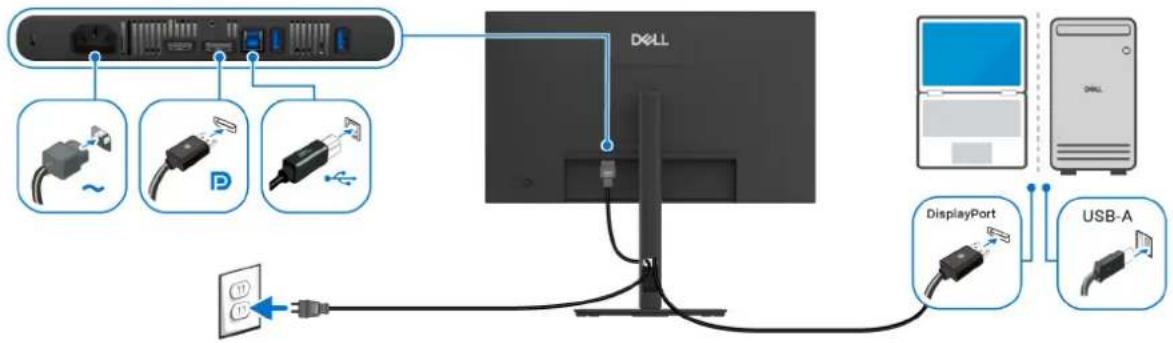
Figure 30. DisplayPort connection
Connecting the HDMI cable (optional)
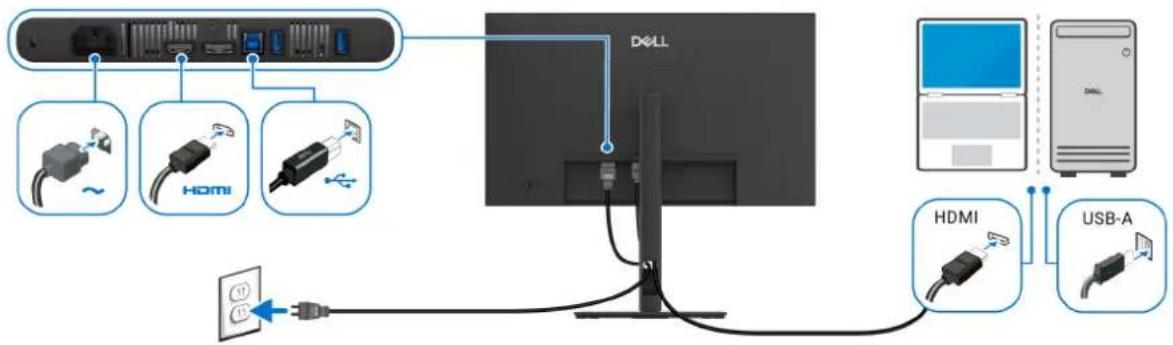
Figure 31. HDMI connection
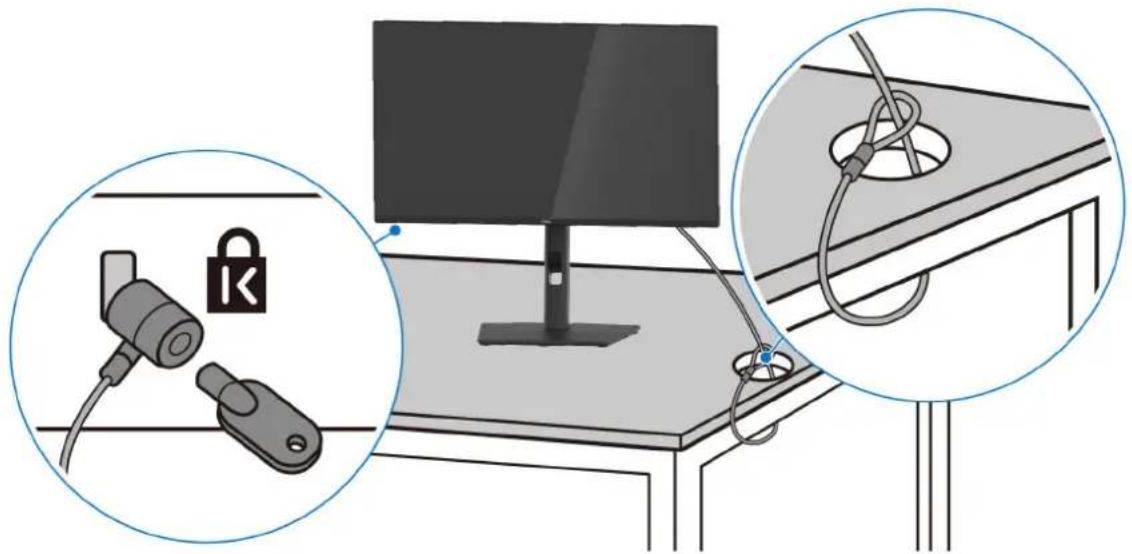
Securing your monitor using Kensington lock (optional)
The security-lock slot is located at the bottom of the monitor (see Security-lock slot). Secure your monitor to a table using the Kensington security lock.
For more information on using the Kensington lock (sold separately), see the documentation that is shipped with the lock.
natural_image
Illustration of a desktop computer setup with two zoomed-in insets showing lock and cord connections (no text or symbols)Figure 32. Using the Kensington lock
NOTE: The image is for the purpose of illustration only. The appearance of the lock may vary.
Removing the monitor stand
NOTE: To prevent scratches on the LCD screen when removing the stand, ensure that the monitor is placed on a soft surface and handle it carefully.
NOTE: The following steps are specifically for removing the stand that is shipped with your monitor. If you are removing a stand that you purchased from any other source, follow the setup instructions that are included with the stand.
To remove the stand, place the monitor on a soft cloth or cushion and follow these steps:
-
Press and hold the stand release button at the back of the display.
-
Lift the stand assembly up and away from the monitor.
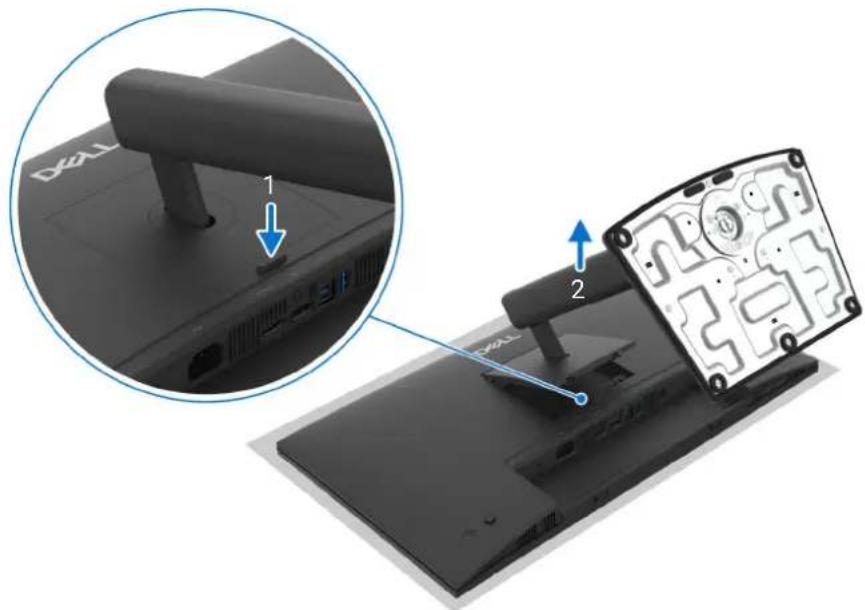
Figure 33. Removing the monitor stand
VESA wall-mounting (optional)
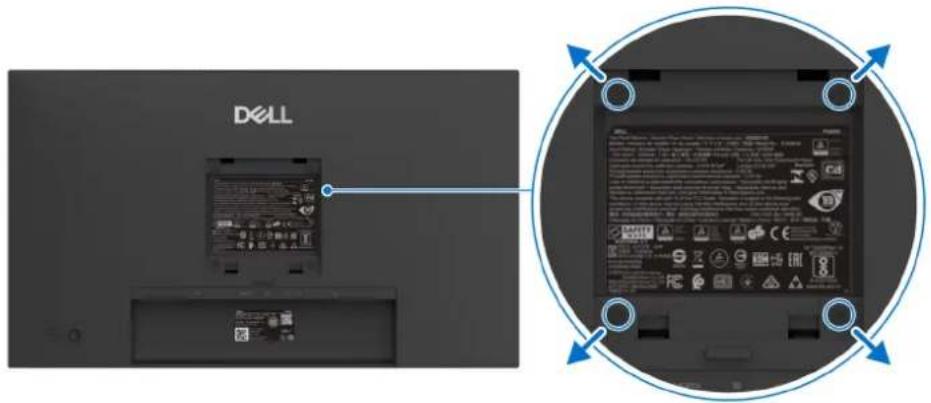
Figure 34. VESA wall-mounting
NOTE: Use M4 x 10 mm screws to connect the monitor to the wall-mounting kit. Refer to the instructions that come with the VESA-compatible wall-mounting kit.
- Place the monitor panel on a soft cloth or cushion on a stable flat table.
- Remove the monitor stand. (See Removing the monitor stand.)
- Use a Phillips crosshead screwdriver to remove the four screws securing the plastic cover.
-
Attach the mounting bracket from the wall-mounting kit to the monitor.
-
Mount the monitor on the wall. For more information, see the documentation that shipped with the wall-mounting kit.
NOTE: For use only with UL or CSA or GS-listed wall-mount bracket with minimum weight or load bearing capacity of 10.32 kg (P2226H)/11.84 kg (P2426H/P2426H WOST)/12.28 kg (P2426)/15.96 kg (P2726H/P2726H WOST).
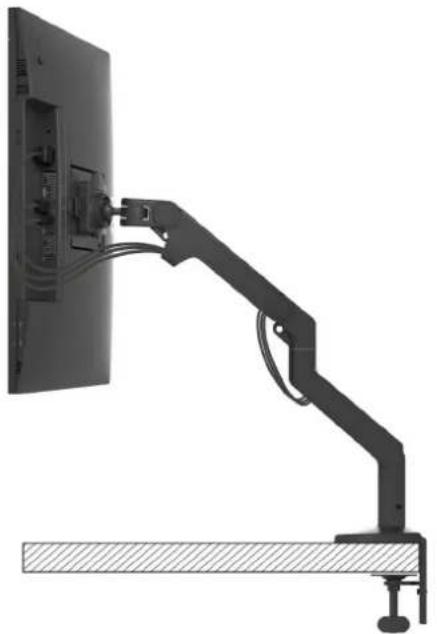
To prevent damage due to insufficient cable length, follow these steps to ensure sufficient cable slack between the connectors and the stand arm channel:
- Adjust the monitor head to its highest and most pivoted position, then connect all necessary cables. Move, tilt, and pivot the monitor to check for any cables that appear tight, skewed, or loose.
natural_image
Mechanical arm mounted on a wall-mounted monitor, showing cable routing and mounting base (no text or symbols visible)Figure 35. Connect the cables at the highest, most pivoted position
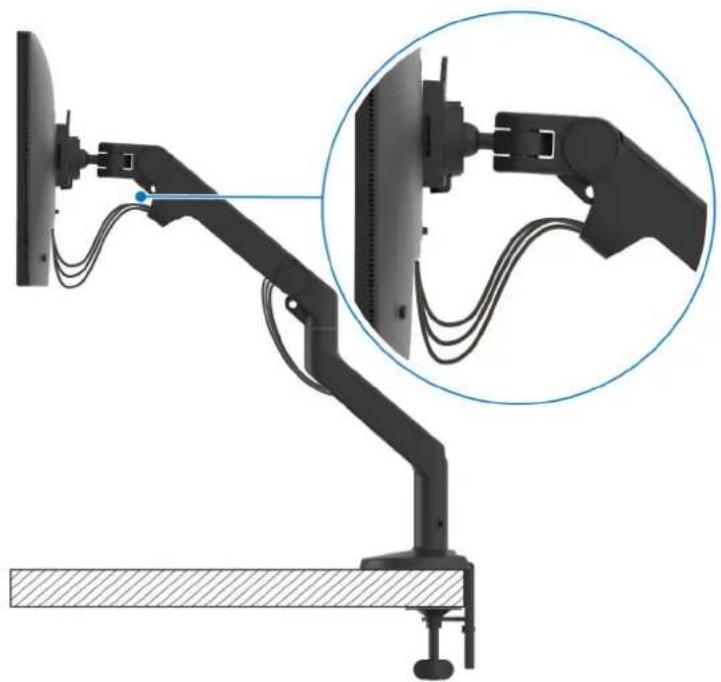
- Leave enough cable slack between the connectors and the stand arm channel. If your cable is short, connect it directly to the computer without routing through the stand arm channel. This ensures sufficient room for all adjustments and prevents stress on the connections.
natural_image
Mechanical arm assembly diagram showing a monitor mounted on a stand with cable routing, and a close-up of the arm joint (no text or symbols visible)Figure 36. Ensure to leave enough cable length for monitor movement
NOTE: The images are for the purpose of illustration only. The appearance of your monitor and stand arm (purchased separately) may vary.
Operating the monitor
Turn on the monitor
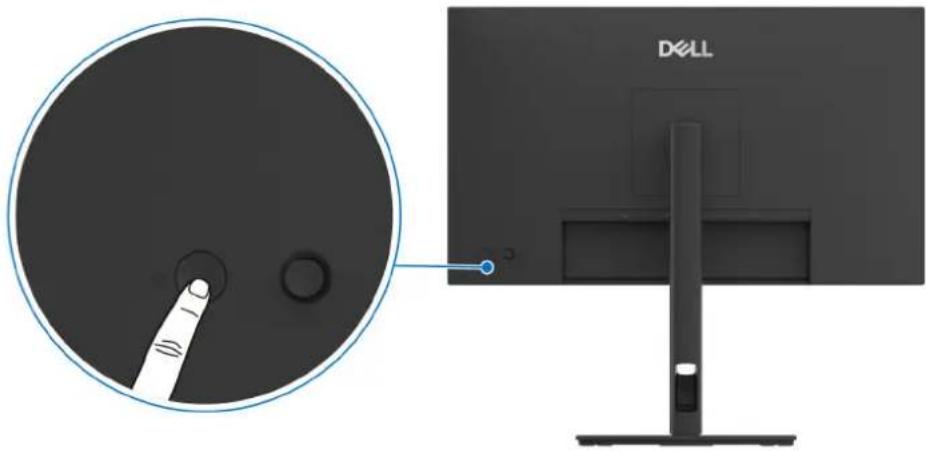
Press the power button to turn on the monitor.
natural_image
Diagram showing a screen with a finger pointing to a circular button, alongside its side view of the Dell monitor (no text or symbols on the screen itself)Figure 37. Turn on the monitor
Using the joystick control
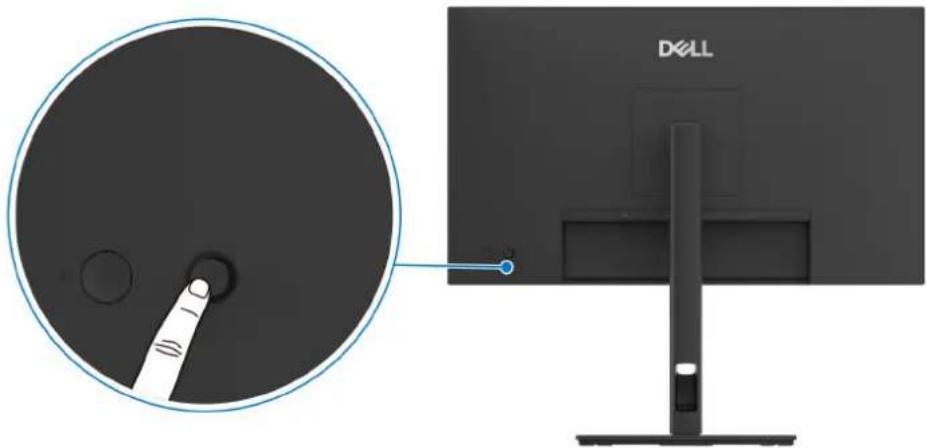
Use the joystick control on the rear of the monitor to make On-Screen Display (OSD) adjustments.
natural_image
Diagram showing a circular device with a finger pointing to its center and a side view of the Dell monitor (no text or symbols on the device itself)Figure 38. Using the joystick control
- Press the joystick to launch the Menu Launcher.
- Move the joystick up or down or left or right to toggle through options.
- Press the joystick again to confirm the selection.
Table 30. Movement of the joystick.
| Joystick Description | |
 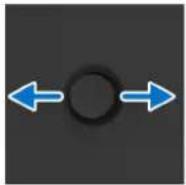 | When there is no OSD on the screen, press the joystick to launch the Menu Launcher. See Accessing the Menu Launcher.When the OSD is displayed, press the joystick to confirm the selection or save the settings.For 2-way (right and left) directional navigation.Move right to enter the submenu.Move left to the upper-level menu or exit from the current menu. |
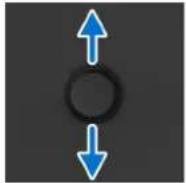 | For 2-way (up and down) directional navigation.Toggles through the menu items.Increases (up) or decreases (down) the parameters of the selected menu item. |
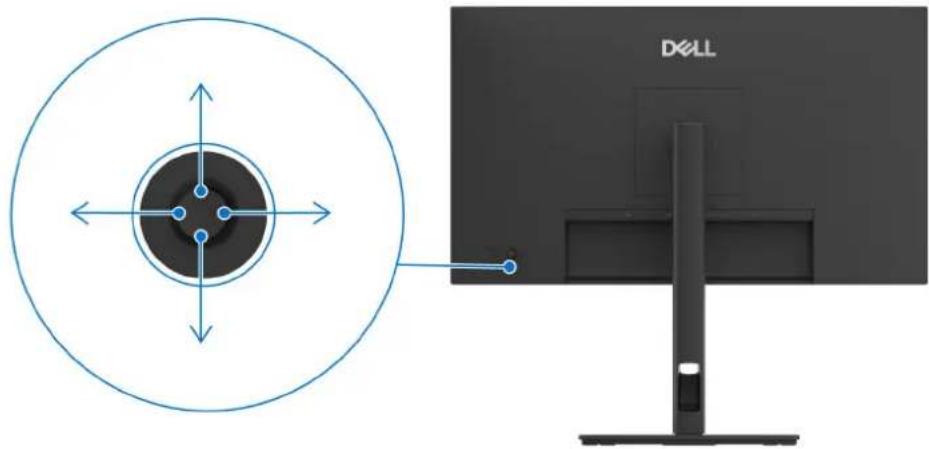
You can assign the four directional movements as Direct Key 1/2/3/4 to access a specific OSD function. For more information, see Direct Key Guide.
natural_image
Technical diagram showing a circular target with crosshair and a monitor labeled 'DXLL' (no text or symbols on the main components)Figure 39. Joystick and Direct Keys (view from the back of the display)
Enable the Menu Voice function (optional)
This is an accessibility feature for people who are visually impaired.
This feature can also be disabled in the Main Menu.
- Power on the monitor by pressing the power button.
- Connect the Dell Monitor Text to Speech User Interface Module-TS23 * to the USB port marked CVAA on the back of the monitor. Upon successful connection to the correct USB port, you will receive an audio feedback saying CVAA connected.
- Use the joystick to activate the On-Screen Display (OSD) menu.
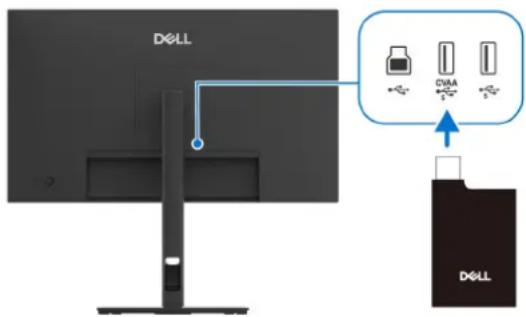
Figure 40. CVAA connected
NOTE: After setup, you may press and hold the joystick for 3 seconds to deactivate or reactivate the Menu Voice.
NOTE: The following functions are disabled when Menu Voice is on:
- Lock (Menu Lock)
- Language
For additional information, please go to: https://www.dell.com/learn/us/en/uscorp1/policies-website-accessibility.
*Compliant with the 21st Century Communications and Video Accessibility Act (CVAA).
NOTE: The Menu Voice function is only available in North America Region on P2426H and P2726H with TS23 (provided separately upon request).
Using the On-Screen Display (OSD) menu
Accessing the Menu Launcher
When you press the joystick, the Menu Launcher appears to let you access the OSD main menu and shortcut functions.
To select a function, move the joystick.
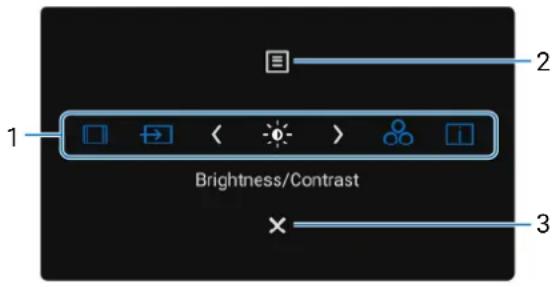
Figure 41. Menu Launcher
The following table describes the Menu Launcher functions:
Table 31. Menu Launcher description.
| Label Icon Description | ||
| When you move the joystick left or right to switch through the shortcut functions, the selected item is shifted to the center position. Press the joystick to enter its submenu and make adjustments by moving the joystick. NOTE: You can set your preferred shortcut keys. For more information, see Personalize. | ||
| 1 |  Shortcut Key 1 Shortcut Key 1 | Aspect Ratio: To choose a preferred aspect ratio from the list. |
 Shortcut Key 2 Shortcut Key 2 | Input Source: To choose an input source from the list of video signals that may be connected to your monitor. | |
 Shortcut Key 3 Shortcut Key 3 | Brightness/Contrast: To access the adjustment sliders of brightness and contrast. | |
 Shortcut Key 4 Shortcut Key 4 | Preset Modes: To choose a preferred color mode from the list of preset modes. | |
 Shortcut Key 5 Shortcut Key 5 | Display Info: To view your monitor's current settings, firmware version, and service tag. | |
| NOTE: After changing the settings, use the navigation keys to confirm the changes before proceeding to another function or exiting. | ||
| 2 |  Menu Menu | To launch the On-Screen Display (OSD) main menu. See Accessing the menu system. |
| 3 |  Exit Exit | To exit the Menu Launcher. |
Using the navigation keys
When the OSD menu is active, adjust the settings by moving the joystick, following the navigation keys at the bottom center of the OSD menu.
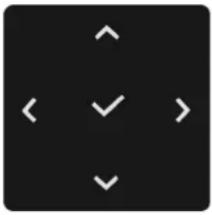
natural_image
Pure black square with white checkmark and arrow symbols (no text or numbers)Figure 42. Navigation keys
NOTE: To exit the current menu item and return to the previous menu, move the joystick to the left until you exit.
Accessing the menu system
NOTE: After changing the settings, use the navigation keys to confirm the changes before proceeding to another function or exiting.
Table 32. OSD menu description.
| Icon Menu and submenu Description | |
Brightness/Contrast Adjusts the brightness and the contrast of the display.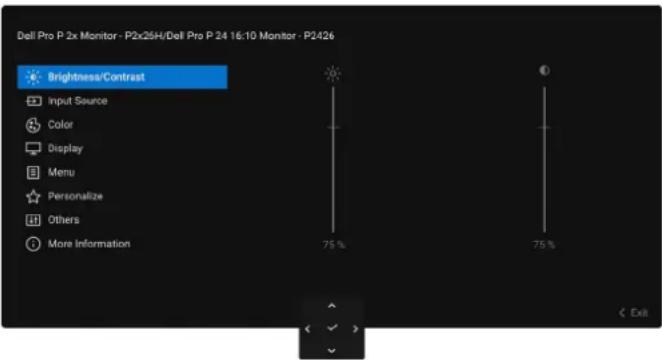 Figure 43. Brightness/Contrast menu Figure 43. Brightness/Contrast menu | |
| Brightness | The Brightness function adjusts the luminance of the backlight.Move the joystick up or down to increase or decrease the brightness level (min. 0/max. 100). |
| Contrast | Adjust Brightness first, and then adjust Contrast only if further adjustment is necessary.The Contrast function adjusts the degree of difference between darkness and lightness on the monitor screen.Move the joystick up or down to increase or decrease the contrast level (min. 0/max. 100). |
| → | Input Source Select from the available video signals connected to your monitor.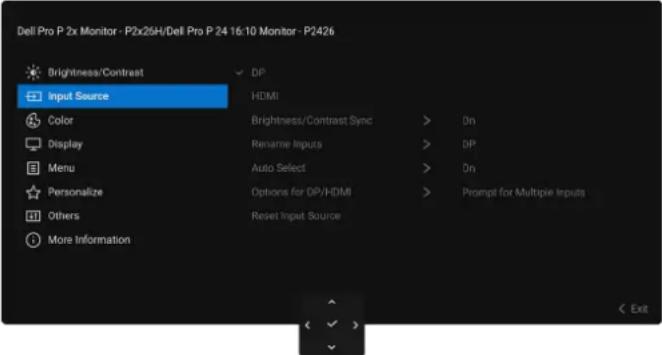 Figure 44. Input Source menu Figure 44. Input Source menu |
| DP Select DP when you are using the DisplayPort (DP) connector. Press the joystick to confirm the selection. | |
| HDMI Select HDMI when you are using the HDMI connector. Press the joystick to confirm the selection. | |
| Brightness/Contrast Sync Select On to apply the same Brightness and Contrast settings across all input sources. Select Off to adjust Brightness and Contrast for each input source. | |
| Rename Inputs Allows you to specify a preset input name for the selected input source. The preset options are PC, PC 1, PC 2, Laptop, Laptop 1, and Laptop 2. The default setting is Off. i NOTE: It is not applicable for the input names that are shown in the warning messages and Display Info. | |
| Auto Select Automatically scans for available input sources. The default is On. Press the joystick to confirm the selection. | |
| Options for DP/HDMI Allows you to set this function to: Prompt for Multiple Inputs: Always displays the "Switch to DP/HDMI Video Input" message for you to choose whether to switch or not. Always Switch: Always switches to DisplayPort/HDMI video input (without asking) when the DisplayPort or HDMI cable is connected. Off: Never automatically switches to DisplayPort/HDMI video input when the DisplayPort or HDMI cable is connected. Press the joystick to confirm the selection. i NOTE: The function is available only when Auto Select is on. | |
| Reset Input Source Resets all settings under the Input Source menu to the factory defaults. |
Icon Menu and submenu Description

Color Adjusts the color setting mode.
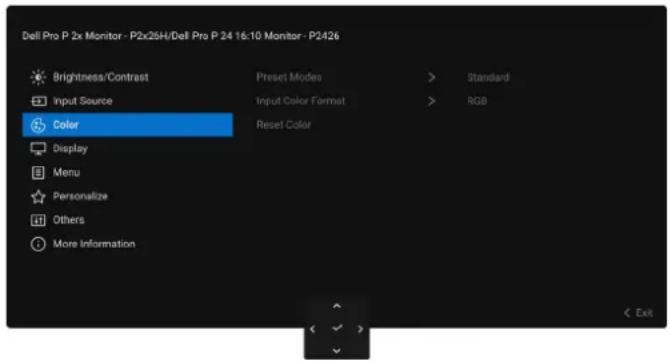
Figure 45. Color menu
Preset Modes Allows you to choose a preset color mode or create your own color modes.
Press the joystick to confirm the selection.
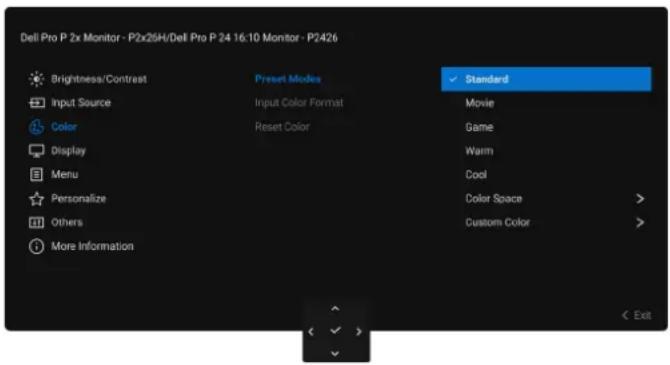
Figure 46. Preset Modes menu
- Standard: This is the default setting. Using a low blue light panel, this monitor is certified by TÜV to reduce blue light output and create more relaxing and less stimulating images.
• Movie: Loads color settings ideal for movies.
• Game: Loads color settings ideal for most gaming applications. - Warm: Presents colors at lower color temperatures. The screen appears warmer with a red/yellow tint.
- Cool: Presents colors at higher color temperatures. The screen appears cooler with a blue tint.
- Color Space: Allows you to set the color space to sRGB (matching 99% sRGB standard) or BT.709 (matching 99% BT.709 standard).
- Custom Color: Allows you to manually adjust the color settings (R/G/B) and create your own preset color mode.
| Icon Menu and submenu Description | |
 | Input Color Format Allows you to set the video input mode to:RGB: Select this option if your monitor is connected to a computer or a media player that supports RGB output.YCbCr: Select this option if your media player supports only YCbCr output. Press the joystick to confirm the selection.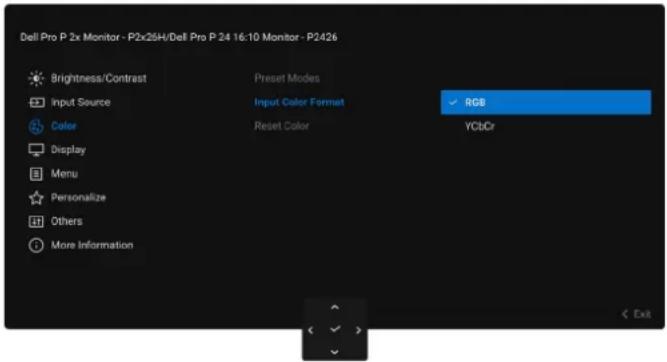 Figure 47. Input Color Format menu Figure 47. Input Color Format menu |
| Hue This function can shift the color of the video image to green or purple. This is used to adjust the desired flesh tone color. Move the joystick to adjust the hue level from '0' to '100'.NOTE: The function is available only when you select Movie or Game preset mode. | |
| SaturationThis function can adjust the color saturation of the video image. Move the joystick to adjust the saturation level from '0' to '100'.NOTE: The function is available only when you select Movie or Game preset mode. | |
| Reset Color Resets all settings under the Color menu to the factory defaults. | |
 | Display Use Display to adjust the images.P2226H/P2426H/P2426H WOST/P2726H/P2726H WOST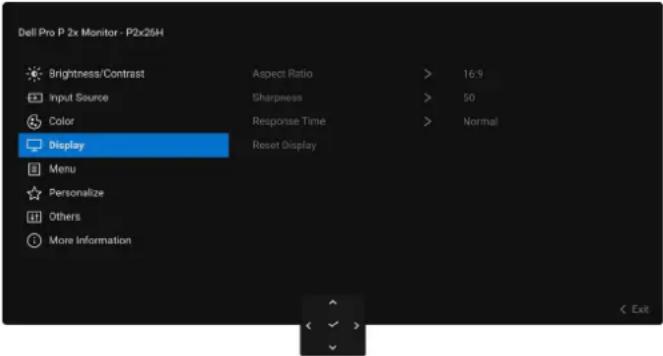 Figure 48. Display menuP2426Dell Pro P 24 16:10 Monitor - P2426Brightness/Contrast Aspect Ratio > 16:10Input Source Sharpness > 50Color Response Time > NormalDisplay Reset DisplayMenuPersonalizeOthersMore InformationFigure 49. Display menu Figure 48. Display menuP2426Dell Pro P 24 16:10 Monitor - P2426Brightness/Contrast Aspect Ratio > 16:10Input Source Sharpness > 50Color Response Time > NormalDisplay Reset DisplayMenuPersonalizeOthersMore InformationFigure 49. Display menu |
| Aspect Ratio Adjusts the image ratio to 16:9 (P2226H/P2426H/P2426H WOST/P2726H/P2726H WOST)/16:10 (P2426), 4:3, or 5:4. | |
| Sharpness This function can make the image look sharper or softer. Move the joystick to adjust the sharpness level from '0' to '100'. | |
| Response Time Allows you to set the response time to Normal or Fast. | |
| Reset Display Resets all settings under the Display menu to the factory defaults. | |
| Menu Adjusts OSD settings, such as the language of the OSD, the duration of menu display, and so on. | 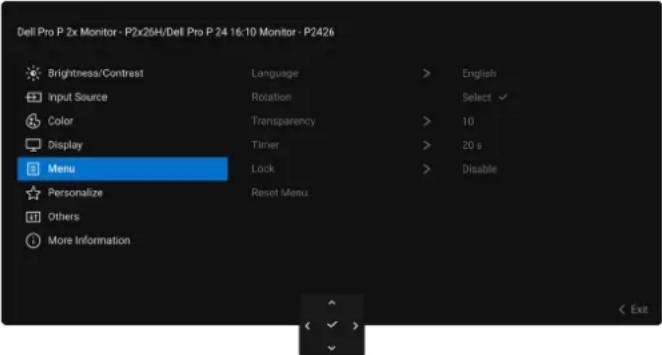 Figure 50. Menu menu Figure 50. Menu menu |
| Language Sets the OSD display to one of the eight languages (English, Spanish, French, German, Brazilian Portuguese, Russian, Simplified Chinese, or Japanese). | |
| Rotation Adjusts the OSD rotation to match your display orientationPress the joystick to rotate the OSD by 0/90/270 degrees. | |
| Transparency Select to change the menu transparency by moving the joystick (min. 0/max. 100). | |
| Timer Sets the duration the OSD remains active after your last operation with the joystick.Move the joystick to adjust the slider in 1 second increments, from 5 to 60 seconds. | |
| Lock With the control buttons on the monitor locked, you can prevent people from accessing the controls. | 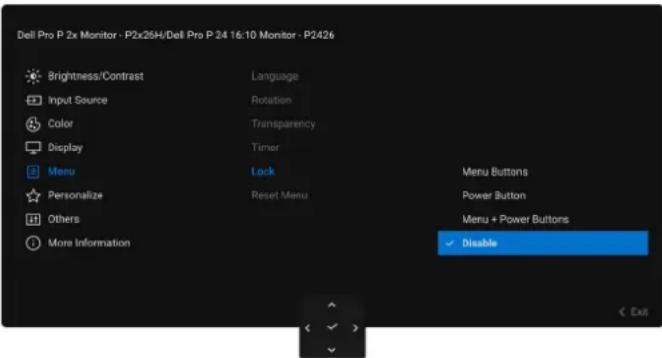 Figure 51. Lock menuMenu Buttons: All joystick functions are locked and not accessible by the user.Power Button: Only the Power button is locked and not accessible by the user.Menu + Power Buttons: Both the joystick and Power button are locked and not accessible by the user.The default setting is Disable.Alternative Lock Method: You can move and hold the joystick up or down or left or right for 4 seconds to set the lock options using the pop-up menu, and then press the joystick to confirm the configuration.1 NOTE: To unlock, move and hold the joystick up or down or left or right for 4 seconds, and then press the joystick to confirm the changes and close the pop-up menu. Figure 51. Lock menuMenu Buttons: All joystick functions are locked and not accessible by the user.Power Button: Only the Power button is locked and not accessible by the user.Menu + Power Buttons: Both the joystick and Power button are locked and not accessible by the user.The default setting is Disable.Alternative Lock Method: You can move and hold the joystick up or down or left or right for 4 seconds to set the lock options using the pop-up menu, and then press the joystick to confirm the configuration.1 NOTE: To unlock, move and hold the joystick up or down or left or right for 4 seconds, and then press the joystick to confirm the changes and close the pop-up menu. |
| Reset Menu | Resets all settings under the Menu menu to the factory defaults. |
| Personalize | 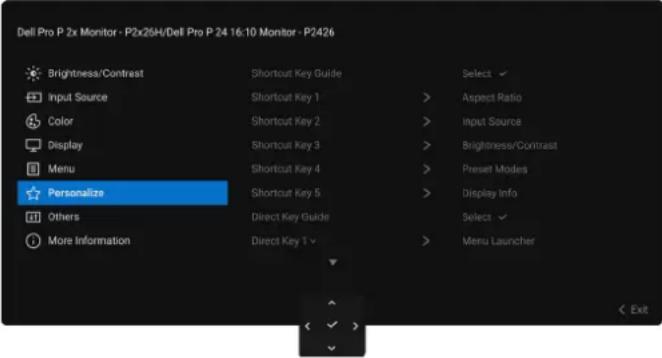 Figure 52. Personalize menu Figure 52. Personalize menu |
| Shortcut Key Guide | Select and follow the on-screen instructions to customize the Shortcut Keys in the Menu Launcher. |
| Shortcut Key 1 | Select a function from Preset Modes, Brightness/Contrast, Input Source, Aspect Ratio, Rotation, or Display Info and set it as a Shortcut Key in the Menu Launcher. |
| Shortcut Key 2 | |
| Shortcut Key 3 | 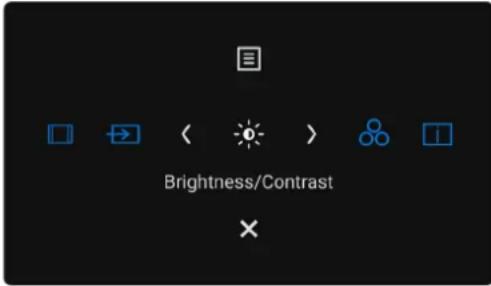 Figure 53. Menu Launcher Figure 53. Menu Launcher |
| Shortcut Key 4 | |
| Shortcut Key 5 | |
| Direct Key Guide | Select and follow the on-screen instructions to assign your preferred functions to the joystick's 4 directional movements. |
| Direct Key 1 √ | Select a function from Menu Launcher, Preset Modes, Brightness, Contrast, Input Source, Aspect Ratio, Rotation, or Display Info and set it as a Direct Key. |
| Direct Key 2 > | The factory default setting is Menu Launcher. |
| Direct Key 3 ∧ | When you set a Direct Key to Off, it returns to the original movement (down, right, up, or left). |
| Direct Key 4 < | i NOTE: When there is no video signal, the Direct Key will not work. |
| Power LED Allows you to set the state of the power light to save energy. | |
| USB Charging | Allows you to enable or disable USB charging function when the monitor is in standby mode.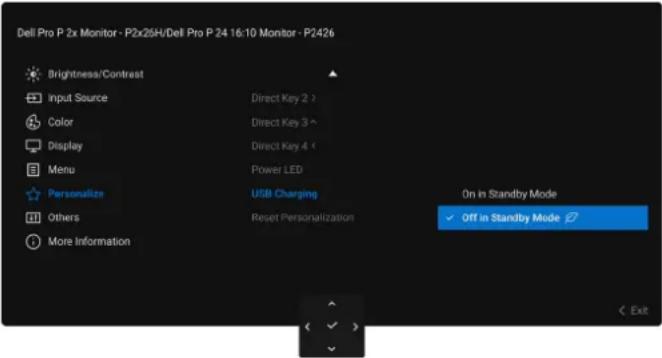 Figure 54. USB Charging menu Figure 54. USB Charging menu |
| Reset Personalization | Resets all settings under the Personalizemenu to the factory defaults. |
| Icon Menu and submenu Description | ||
 | Others | Adjusts the OSD settings, such as DDC/CI, LCD Conditioning, Self-Diagnostic, and so on.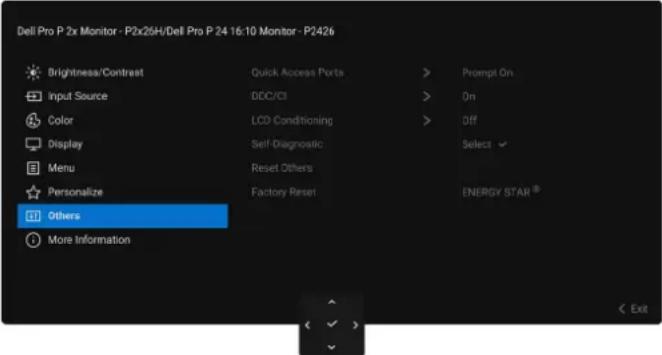 Figure 55. Others menu Figure 55. Others menu |
| Quick Access Ports | You can configure the prompt for the Quick Access Ports notification, which appears in the bottom-left corner of the screen. The default setting is Prompt On.P2226H/P2426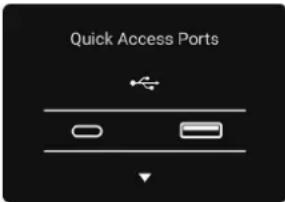 Figure 56. Quick Access Ports notificationP2426H/P2426H WOST/P2726H/P2726H WOST Figure 56. Quick Access Ports notificationP2426H/P2426H WOST/P2726H/P2726H WOST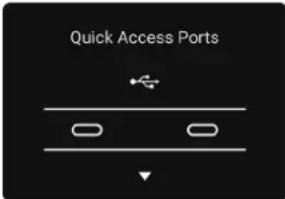 Figure 57. Quick Access Ports notification Figure 57. Quick Access Ports notification | |
| DDC/CI | Display Data Channel/Command Interface (DDC/CI) allows you to adjust the monitor settings using software on your computer. Enable this function for the best user experience and optimum performance of your monitor. You can disable this function by selecting Off.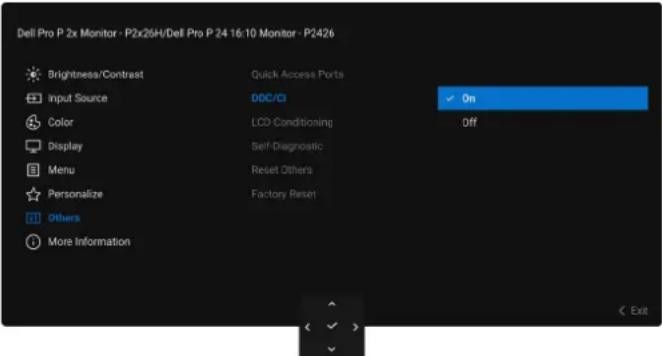 Figure 58. DDC/CI menu Figure 58. DDC/CI menu | |
 | LCD Conditioning | Helps reduce minor cases of image retention. Depending on the degree of image retention, the program may take some time to run. You can enable this function by selecting On.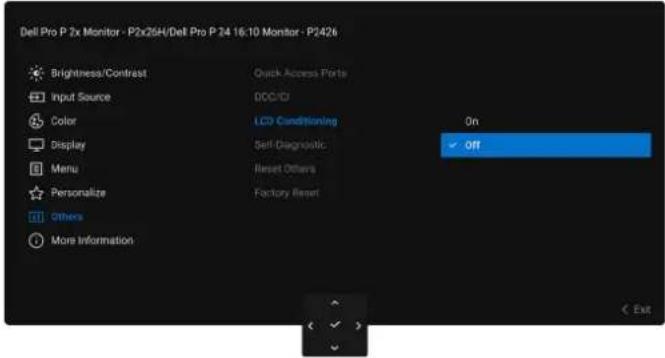 Figure 59. LCD Conditioning menu Figure 59. LCD Conditioning menu |
| Self-Diagnostic | Select this function to run the built-in diagnostics, seeBuilt-in diagnostics. | |
| Reset Others | Resets all settings under theOthersmenu to the factory defaults. | |
| Factory Reset | Restore all preset values to the factory default settings. These are also the settings for ENERGY STAR tests.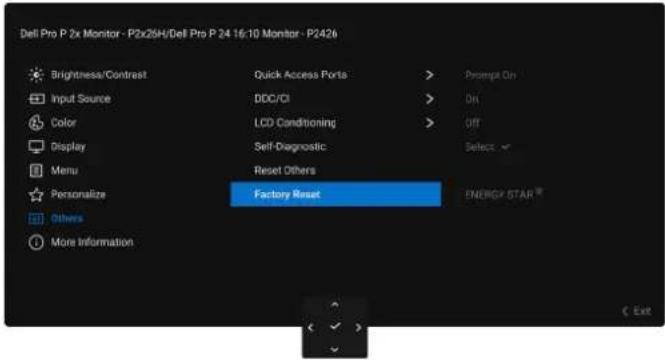 Figure 60. Factory Reset menu Figure 60. Factory Reset menu | |
 More Information Use the menu to view the monitor's information or seek more monitor support. More Information Use the menu to view the monitor's information or seek more monitor support.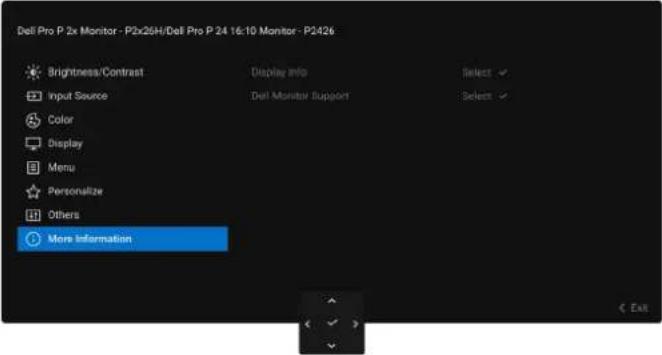 Figure 61. More Information menu Figure 61. More Information menu | ||
| Display Info | Select to display the current settings, firmware version, and service tag of your monitor.P2226H P2426H/P2426H WOST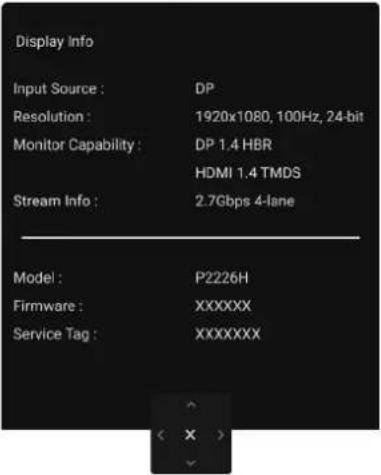 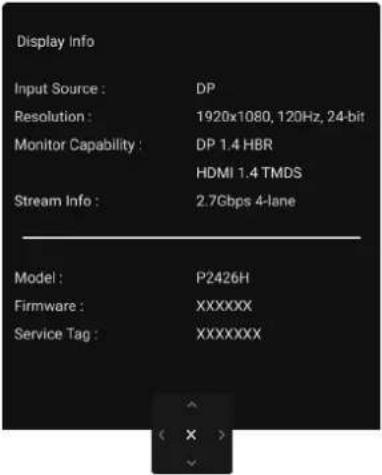 P2426 P2726H/P2726H WOST P2426 P2726H/P2726H WOST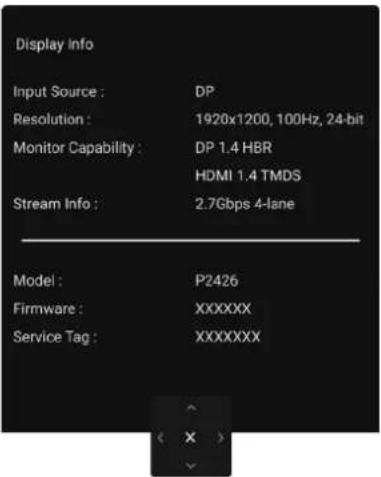 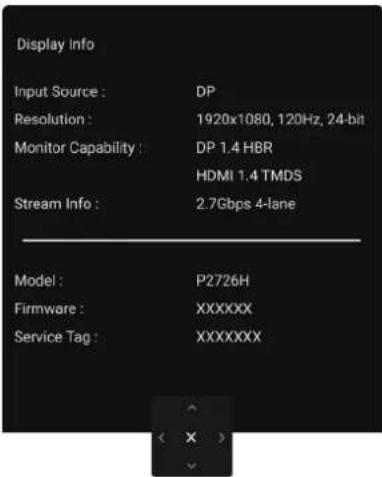 Figure 62. Display Info Figure 62. Display Info | |
| Dell Monitor Support | To access the general monitor support materials for your monitor, use your smartphone to scan the QR code. | |
OSD messages
Initial Setup
When Factory Reset is selected, the following message appears:
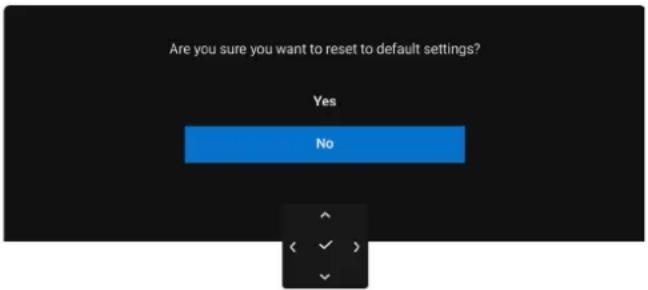
Figure 63. Factory reset warning message
When you select Yes to reset to default settings, the following messages appear:
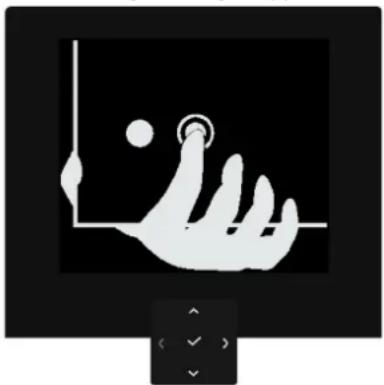
natural_image
Illustration of a hand touching a screen with a circular button, no text or symbols presentFigure 64. Press the joystick button
When you press the joystick, the following message appears:
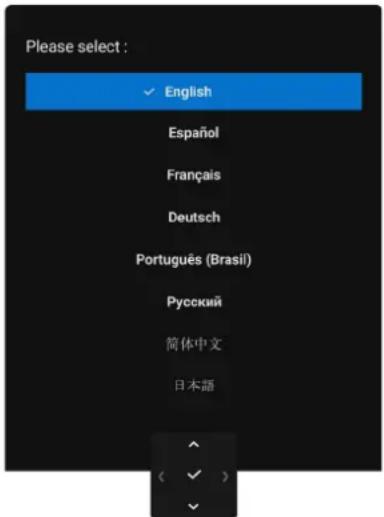
Figure 65. Set the OSD language message
After you select your language, the following message appears:
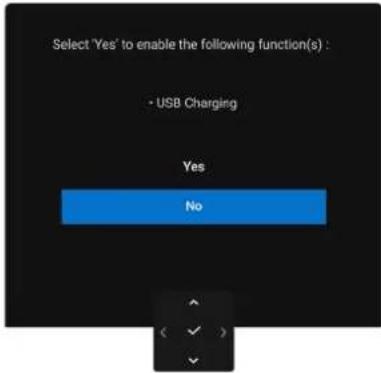
Figure 66. Reset to default settings message
Whether you choose Yes or No, or if the message expires, the following message appears:
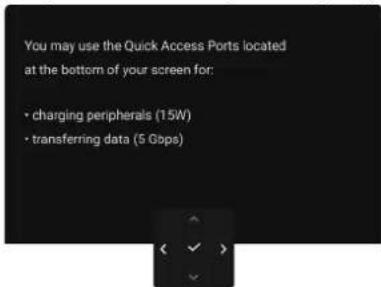
Figure 67. Enabling USB Charging or message timeout
OSD warning message
When the monitor does not support a particular resolution mode, you see the following message:
P2226H/P2426H/P2426H WOST/P2726H/P2726H WOST
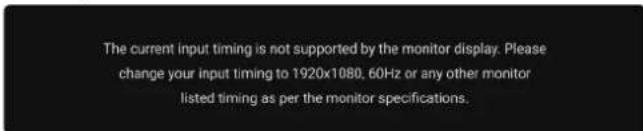
Figure 68. Input timing warning message
P2426
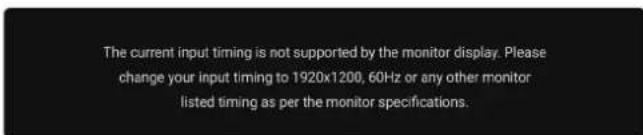
Figure 69. Input timing warning message
This means that the monitor cannot synchronize with the signal that it is receiving from the computer. See Monitor specifications for the Horizontal and Vertical frequency ranges addressable by this monitor. The recommended mode is 1920 x 1080 (P2226H/P2426H/P2426H WOST/P2726H/P2726H WOST)/1920 x 1200 (P2426).
When you adjust the Brightness level above the default level for the first time, the following message appears:
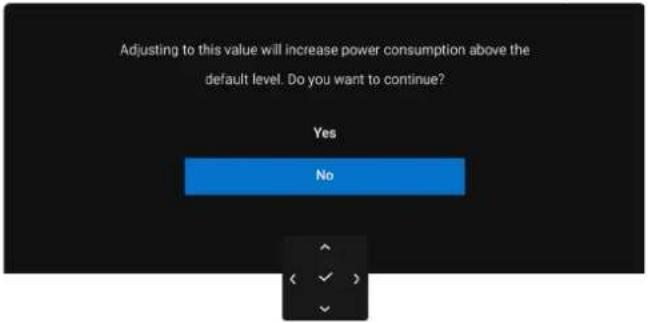
Figure 70. Power warning message
NOTE: If you select Yes, the message will not appear the next time that you change the Brightness setting.
You see the following message before the Lock function is activated:
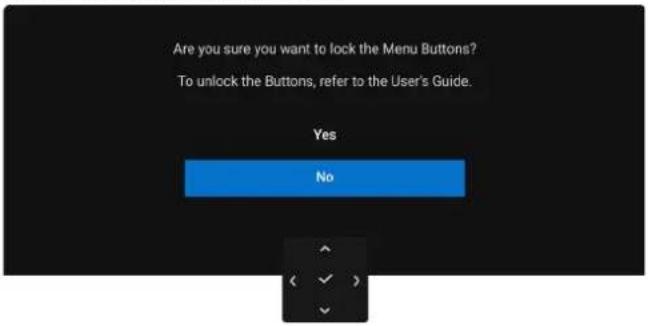
Figure 71. Lock function warning message
NOTE: The message may be slightly different according to the selected settings.
When you change the default setting of USB Charging for the first time, the following message appears:
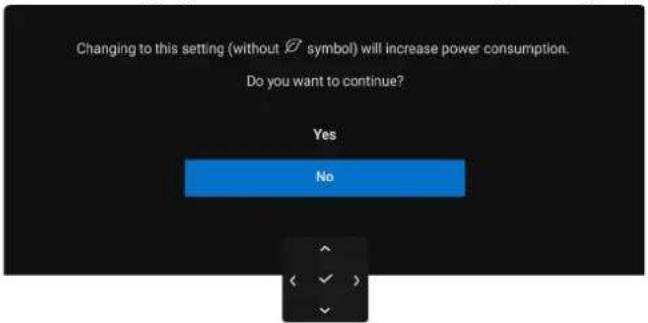
Figure 72. Power warning message
NOTE: Once you select Yes, the message will not appear the next time you change the USB Charging setting. If you perform a factory reset, the message will appear again.
You see the following message before the DDC/CI function is disabled:
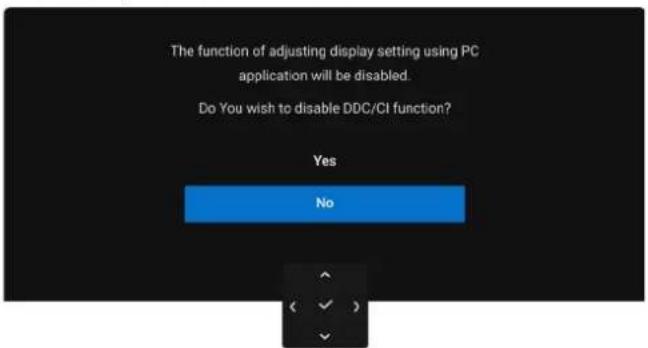
Figure 73. DDC/CI warning message
When the monitor goes into Standby mode, the following message appears:
Going into Standby mode...
Figure 74. Standby mode warning message
Activate the computer and wake up the monitor to gain access to the OSD.
The OSD functions only in the normal operation mode. If you press the joystick during Standby mode, the following message appears depending on the selected input:
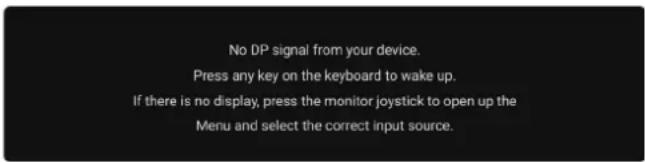
Figure 75. Signal detection warning message
Activate the computer and the monitor to gain access to the OSD.
NOTE: The message may be slightly different according to the connected input signal.
If HDMI or DisplayPort input is selected and the corresponding cable is not connected, the following message appears:
P2226H/P2426H/P2426H WOST/P2726H/P2726H WOST
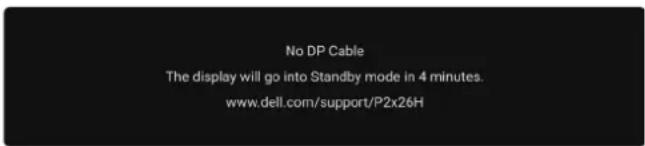
Figure 76. Signal cable disconnected warning message
P2426
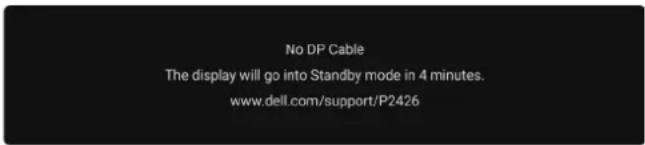
Figure 77. Signal cable disconnected warning message
NOTE: The message may be slightly different according to the selected input signal.
See Troubleshooting for more information.
Locking the control buttons
You can lock the monitor control buttons to prevent access to the OSD menu and/or power button.
- Move and hold the joystick up or down or left or right for about 4 seconds until a pop-up menu appears.
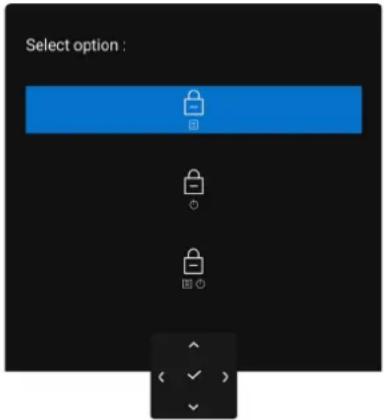
Figure 78. Lock menu
-
Move the joystick to select one of the following options:
-
: The OSD menu settings are locked and not accessible.
• : The power button is locked. -
: The OSD menu settings are not accessible, and the power button is locked.
-
Press the joystick to confirm the configuration.
To unlock, move and hold the joystick up or down or left or right for about 4 seconds until a menu appears, and then select unlock and close the pop-up menu.

to
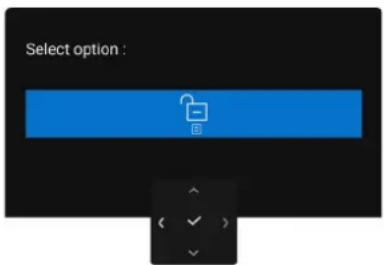
Figure 79. Unlock menu
NOTE: The message may be slightly different according to the selected settings.
Setting the maximum resolution
NOTE: The steps may vary slightly depending on the version of Windows you have.
To set the maximum resolution for the monitor in Windows 10 and Windows 11:
- Right-click the desktop and click Display settings.
- If you have more than one monitor connected, ensure that you select P2226H/P2426H/P2426/P2726H.
- Click the Display Resolution dropdown list and select 1920 x 1080 (P2226H/P2426H/P2726H)/1920 x 1200 (P2426).
- Click Keep changes.
If you do not see 1920 x 1080/1920 x 1200 as an option, you must update your graphics driver to the latest version. Depending on your computer, complete one of the following procedures:
If you have a Dell desktop or laptop:
- Go to Dell Support Site, enter your service tag, and download the latest driver for your graphics card.
If you are using a non-Dell computer (laptop or desktop):
- Go to the support site for your non-Dell computer and download the latest graphics card drivers.
- Go to the graphics card's website and download the latest graphics card drivers.
Troubleshooting
⚠ WARNING: Before you begin any of the procedures in this section, follow the Safety instructions.
Self-test
Your monitor provides a self-test feature that allows you to check whether your monitor is functioning properly. If your monitor and computer are properly connected but the monitor screen remains dark, run the monitor self-test by performing the following steps:
- Turn off both your computer and the monitor.
- Unplug the video cable from the computer.
- Turn on the monitor.
If the monitor cannot sense a video signal and is working correctly, the following message appears:
P2226H/P2426H/P2426H WOST/P2726H/P2726H WOST
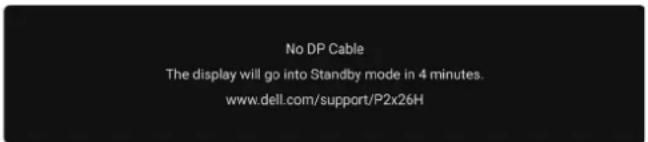
Figure 80. Signal cable disconnected warning message
P2426
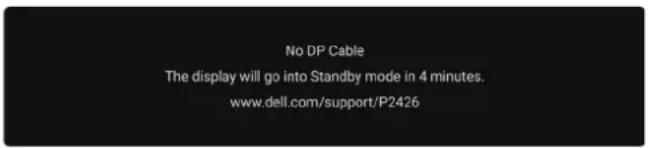
Figure 81. Signal cable disconnected warning message
NOTE: The message may be slightly different according to the connected input signal.
NOTE: While in self-test mode, the power LED remains white.
- This message also appears during normal operation if the video cable is disconnected or damaged.
- Turn off your monitor and reconnect the video cable; then turn on both your computer and the monitor.
If your monitor screen remains blank after you use the previous procedure, check your video controller and computer, because your monitor is functioning properly.
Built-in diagnostics
Your monitor has a built-in diagnostic tool that helps you determine if the screen abnormality you are experiencing is an inherent problem with your monitor, or with your computer and graphics card.
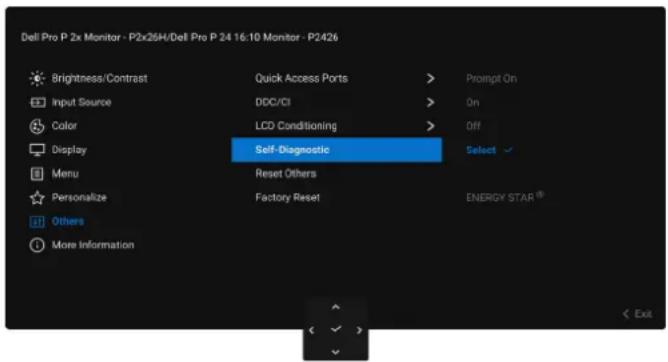
Figure 82. Self-Diagnostic menu
To run the built-in diagnostics:
- Ensure that the screen is clean (no dust particles on the surface of the screen).
- Move or press the joystick to launch the Menu Launcher.
- Move the joystick up to select and open the Main Menu.
- Using the joystick, navigate on the OSD menu and select Others > Self-Diagnostic.
- Press the joystick button to start the diagnostics. A gray screen is displayed.
-
Observe if the screen has any defects or abnormalities.
-
Toggle the joystick once again until a red screen is displayed.
- Observe if the screen has any defects or abnormalities.
- Repeat steps 7 and 8 until the screen displays green, blue, black, and white colors. Note any abnormalities or defects.
The test is completed when a text screen is displayed. To exit, toggle the joystick control again.
If you do not detect any screen abnormalities upon using the built-in diagnostic tool, the monitor is functioning properly. Check the graphics card and computer.
Common problems
The following table contains general information about common monitor problems that you might encounter and the possible solutions:

WARNING: The monitor LCD panel duty cycle is designed for 18 hours a day, 7 days a week. Usage higher than the designed duty cycle may result in premature decrease in panel backlight luminance, which may not be covered under warranty.
Table 33. Common problems and solutions.
| Common symptoms What you experience Possible solutions | ||
| No video/power LED off | No picture | ·Ensure that the video cable connecting the monitor and the computer is properly connected and secure.·Verify that the power outlet is functioning properly using any other electrical equipment.·Ensure that you have pressed the power button properly.·Ensure that the correct input source is selected in the Input Source menu. |
| No video/power LED on No picture or no brightness | ·Ensure that the video cable connecting the monitor and the computer is properly connected and secure.·Increase brightness and contrast controls in the Brightness/Contrast menu.·Perform monitor self-test feature check.·Check for bent or broken pins in the video cable connector.·Run the built-in diagnostics. For more information, see Built-in diagnostics.·Ensure that the correct input source is selected in the Input Source menu. | |
| Poor focus Picture is fuzzy, blurry, or ghosting | ·Eliminate video extension cables.·Reset the monitor to factory settings. For more information, see Factory Reset.·Change the video resolution to the correct aspect ratio. | |
| Shaky/jittery video Wavy picture or fine movement | ·Reset the monitor to factory settings. For more information, see Factory Reset.·Check environmental factors.·Relocate the monitor and test in another room. | |
| Missing pixels LCD screen has spots ·Cycle power On-Off. | ||
| Stuck-on pixels LCD screen has bright spots | ·Cycle power On-Off.·A pixel that is permanently off is a natural defect that can occur in LCD technology.·For more information about Dell Monitor Quality and Pixel Policy, see Dell Display Pixel Guidelines. | |
| Brightness problems Picture too dim or too bright | ·Reset the monitor to factory settings. For more information, see Factory Reset.·Adjust brightness and contrast controls using the OSD. | |
| Geometric distortion The screen is not centered correctly | Reset the monitor to factory settings. For more information, see Factory Reset. | |
| Horizontal/vertical lines The screen has one or more lines | Reset the monitor to factory settings. For more information, see Factory Reset.Perform monitorself-testfeature check and determine if these lines are also in self-test mode.Check for bent or broken pins in the video cable connector.Run the built-in diagnostics. For more information, seeBuilt-in diagnostics. | |
| Synchronization problems | The screen is scrambled or appears torn | Reset the monitor to factory settings. For more information, see Factory Reset.Perform monitorself-testfeature check to determine if the scrambled screen appears in self-test mode.Check for bent or broken pins in the video cable connector.Restart the computer in the safe mode. |
| Safety related issues Visible signs of smok e or sparks | Do not perform any troubleshooting steps.Contact Dell immediately. | |
| Intermittent problems Monit or malfunctions on and off | Ensure that the video cable connecting the monitor to the computer is connected properly and is secure.Reset the monitor to factory settings. For more information, seeFactory Reset.Perform monitorself-testfeature check to determine if the intermittent problem occurs in self-test mode. | |
| Missing color Picture missing color | Perform a monitorself-testfeature check.Ensure that the video cable connecting the monitor to the computer is connected properly and is secure.Check for bent or broken pins in the video cable connector. | |
| Wrong color Pictur | e color is not good | Reset all settings under theColormenu to the factory defaults using Reset Color.Change theInput Color Format to RGB or YCbCr in theColorsettings OSD.Run the built-in diagnostics. For more information, seeBuilt-in diagnostics. |
| Image retention from a static image left on the monitor for a long period of time | A faint shadow from the static image displayed appears on the screen | Set the screen to turn off after a few minutes of screen idle time. These can be adjusted in the Windows Power Options or Mac Energy Saver setting.Alternatively, use a dynamically changing screensaver. |
| Video ghosting or overshooting | Video ghosting, shadows or color smear while scrolling | Change theResponse Timein theDisplaymenu OSD toNormalor Fast, depending on your application and usage. |
Product-specific problems
Table 34. Product-specific problems and solutions.
| Specific symptoms What you experience Possible solutions | ||
| The screen image is too small | The image is centered on the screen, but does not fill the entire viewing area | Check the Aspect Ratio settings in the Display menu OSD.Reset the monitor to factory settings. For more information, see Factory Reset. |
| Cannot adjust the monitor with the joystick | OSD does not appear on the screen | Turn off the monitor, unplug the power cable, plug it back, and then turn on the monitor.Check whether the OSD menu is locked. If yes, move and hold the joystick up/down/left/right for 4 seconds to unlock (see Lock and Locking the control buttons). |
| No input signal when user controls are pressed | No picture, the LED light is white | Check the signal source. Ensure that the computer is not in the power saving mode by moving the mouse or pressing any key on the keyboard.Check whether the signal cable is plugged in properly. Replug the signal cable if necessary.Reset the computer or video player. |
| The picture does not fill the entire screen | The picture cannot fill the height or width of the screen | Due to different video formats (aspect ratio), the monitor may display in full screen.Run the built-in diagnostics. For more information, see Built-in diagnostics. |
| No video at HDMI/DisplayPort port | When connected to some dongle/docking device at the port, there is no video when unplugging/plugging the cable from the laptop | Unplug the HDMI/DisplayPort cable from dongle/docking device, then plug the docking HDMI/DisplayPort cable into the laptop. |
Universal Serial Bus (USB) specific problems
Table 35. USB specific problems and solutions.
| Specific symptoms What you experience Possible solutions | ||
| USB interface is not working | USB peripherals are not working | Check that your monitor is turned on.Reconnect the upstream cable to your computer.Reconnect the USB peripherals (downstream connector).Turn off and then turn on the monitor again.Reboot your computer.Some USB devices like external portable HDD require higher electric current; connect the device directly to the computer system. |
| USB 5Gbps interface is slow | USB 5Gbps peripherals working slowly or not working at all | Check that your computer is USB 5Gbps-compatible.Some computers have USB 3.2, USB 2.0, and USB 1.1 ports. Ensure that the correct USB port is used.Reconnect the upstream cable to your computer.Reconnect the USB peripherals (downstream connector).Reboot the computer. |
| Wireless USB peripherals stop working when a USB 5Gbps device is plugged in | Wireless USB peripherals responding slowly or only working as the distance between themselves and their receiver decreases | Increase the distance between the USB 5Gbps peripherals and the wireless USB receiver.Position your wireless USB receiver as close as possible to the wireless USB peripherals.Use a USB-extender cable to position the wireless USB receiver as far away as possible from the USB 5Gbps port. |
| Wireless USB mouse does not work properly | When plugged into one of the USB ports on the rear side of the monitor, the Wireless USB mouse lags or freezes during use | Unplug the Wireless USB mouse receiver and re-plug it into an appropriate Quick Access USB port at the bottom of the monitor. |
Regulatory information
TCO Certified
Any Dell product bearing a TCO label has been certified to a TCO voluntary environmental certification. TCO certification requirements focus on features that contribute to a healthy work environment such as recyclable design, energy efficiency, ergonomics, emissions, avoidance of hazardous substances, and product take back.
For more information on your Dell product and the TCO certification, see the TCO Certified End User Document.
For more information on TCO's environmental certifications, see the Global Sustainability Certification for IT products.
FCC notices (U.S. only) and other regulatory information
For FCC notices and other regulatory information, see the Dell Regulatory Compliance Home Page.
EU product database for energy label and product information sheet
For more information about the energy labeling regulations, see the following resources:
• Energy Labeling Information for P2226H
• Energy Labeling Information for P2426H
• Energy Labeling Information for P2426H WOST
• Energy Labeling Information for P2426
• Energy Labeling Information for P2726H
• Energy Labeling Information for P2726H WOST
Contacting Dell
To contact Dell for sales, technical support, or customer service issues, see Contact Support at Dell Support Site.
NOTE: Availability varies by country and product, and some services may not be available in your country.
NOTE: If you do not have an active internet connection, you can find contact information on your purchase invoice, packing slip, bill, or Dell product catalog.
Revision history
The following table provides the revision history of this document:
Table 36. Revision history
| Revision Date Description | ||
| A00 March 2026 Original publish date |
- Notes, cautions, and warnings
- Contents
- Safety instructions....5
- About your monitor 6
- Identifying parts and controls 10
- Monitor specifications 16
- Pin assignments 26
- Plug-and-play capability....29
- Setting up the monitor....33
- Using the tilt, swivel, pivot and height adjustment....36
- Organizing your cables....39
- Connecting your monitor 40
- Securing your monitor using Kensington lock (optional) 41
- Operating the monitor 45
- Safety instructions
- About your monitor
- Package contents
- Silent Firmware Update (SFU)
- Product features
- Blue light ratio:
- About TÜV Rheinland Eye Comfort 3.0
- Operating system compatibility
- Identifying parts and controls
- Front view
- Back view
- Bottom view (P2426H/P2426H WOST)
- Bottom view (P2426)
- Monitor specifications
- Dell Display and Peripheral Manager (DDPM) for Windows
- Resolution specifications
- Supported video modes
- Preset display modes
- P2426H/P2426H WOST/P2726H/P2726H WOST
- Electrical specifications
- Physical characteristics
- Environmental characteristics
- Pin assignments DisplayPort
- Universal Serial Bus (USB) interface
- Plug-and-play capability
- LCD monitor quality and pixel policy
- Ergonomics
- Handling and moving your display
- Maintenance guidelines
- Cleaning your monitor
- Setting up the monitor
- Attaching the stand
- Using the tilt, swivel, pivot and height adjustment
- Tilt and swivel adjustment
- Height adjustment
- Pivot adjustment
- Adjusting the rotation display settings of your computer
- Organizing your cables
- Connecting your monitor
- Connecting the DisplayPort (DisplayPort to DisplayPort) cable
- Connecting the HDMI cable (optional)
- Securing your monitor using Kensington lock (optional)
- Removing the monitor stand
- VESA wall-mounting (optional)
- Operating the monitor
- Turn on the monitor
- Using the joystick control
- Enable the Menu Voice function (optional)
- Using the On-Screen Display (OSD) menu
- Accessing the Menu Launcher
- Using the navigation keys
- Accessing the menu system
- Icon Menu and submenu Description
- OSD messages
- Initial Setup
- OSD warning message
- Locking the control buttons
- Setting the maximum resolution
- Troubleshooting
- Self-test
- Built-in diagnostics
- Common problems
- Product-specific problems
- Universal Serial Bus (USB) specific problems
- Regulatory information
- TCO Certified
- FCC notices (U.S. only) and other regulatory information
- EU product database for energy label and product information sheet
- Contacting Dell
- Revision history
Brand : DELL
Model : P2426H
Category : Screen