TS 2190 V TITAN - Tumble drier Cylinda - Free user manual and instructions
Find the device manual for free TS 2190 V TITAN Cylinda in PDF.

User questions about TS 2190 V TITAN Cylinda
0 question about this device. Answer the ones you know or ask your own.
Ask a new question about this device
Download the instructions for your Tumble drier in PDF format for free! Find your manual TS 2190 V TITAN - Cylinda and take your electronic device back in hand. On this page are published all the documents necessary for the use of your device. TS 2190 V TITAN by Cylinda.
USER MANUAL TS 2190 V TITAN Cylinda
natural_image
Product display of various kitchen appliances including a washing machine, refrigerator, oven, and air conditioner against a solid pink background (no text or symbols visible)Torkskåp
Timer
Drying Cabinet
ECO Sensor
Cylinda
år efter år
We simplify your everyday life
As you probably already know, we manufacture products that refrigerate your food, cook your dinner, help you wash the dishes and wash your clothes. Smart, neat, efficient and energy-saving white goods that will make your everyday life simpler and more convenient for many years to come. And we are constantly developing innovative new products that are suited to Swedish homes.
To give you complete reassurance over your purchase, we can stand by with our own service department, which specialises in our particular products. But we hope and believe that they will not have much to do. Our aim is to provide you with reliable products that will help you today and tomorrow. Year after year.
Produktnummer / Product number
Se sidan 27 / See page 57
Description of the drying cabinet 36
Air flow in the drying cabinet 37
Unpacking 38
Packaging materials 38
Assembly kit 39
Rehanging of door 40
Positioning/Attachment 41
Evacuation / Supply air 42
Connection to evacuation 42
Electrical connection 44
Using for the first time 45
Arranging laundry for drying 46
User tips 46
Air flow 46
Operation of ECO Sensor drying cabinet 47
Choice of automatic programme 47
Control panel 48
Start-up of the drying cabinet with automatic time control 50
Starting the drying cabinet with manual time control 51
Door 52
Adjustment of parameters and calibration of sensors 52
Breakdowns 54
Operation Timer drying cabinet 56
Control panel 56
Choice of settings 56
Care 57
Cleaning 57
Service 57
Management of end-of-life drying cabinet 58
Technical data of ECO Sensor drying cabinet 59
Technical data Timer drying cabinet 60
Troubleshooting 61
natural_image
Diagram of a multi-level industrial cabinet with directional arrows indicating flow or movement (no text or symbols)natural_image
Diagram of a curved pipe with internal helical texture and a directional arrow (no text or symbols)Slang, dia. 120 x 1000 mm 1
Stos 1
Skruv TRX 5x70 fzk 2
Bricka NB 5x25 2
Ant.
Plastplugg 2
Distans 8.2x12x15 2
Omhängning av dörr
natural_image
Line drawing of a cabinet with an open door and a rectangular component inside (no text or symbols)Vattenpass
natural_image
Technical line drawing of a stainless steel oven with cooling fins and ventilation slots (no text or symbols)Förborrade hål
natural_image
Diagram of a vertical cabinet with horizontal shelves and directional arrows indicating flow or movement (no text or symbols)natural_image
Pure diagram of a coiled tube or loop without any text, numbers, or symbols
natural_image
Pure diagram of a circular mechanical or electrical component with internal structure and no text or symbolsVÄRME TORKTID
natural_image
Two circular mechanical components with internal oval shapes and mounting holes, no visible text or symbolsnatural_image
Two circular mechanical components with internal oval features, no visible text or symbolsnatural_image
Line drawing of an open industrial oven with control panel and door (no text or symbols)Typskylt (insida)
The contents of this user manual describe the drying cabinet's function and operation and contains instructions for installation and give instructions for maintenance.
NB: Keep this manual so that it is always to hand for future use
Safe operation
This advice on safe operation has been compiled to enable you to avoid incorrect use and unnecessary risks of accidents and should be read before the drying cabinet is installed and used.
CAUTION: This equipment is intended only to be used to dry fabrics washed in water.
□ Applicable to installation in the EU
This drying cabinet can be used by children over the age of 8 and persons (including children) with various disabilities or inadequate experience and knowledge, provided they are kept under supervision or are given instructions on how to use the appliance in a safe way and understand the risks that use entails.
Children must not play with the appliance.
□ Applicable to installation in countries outside the EU
The appliance is not intended for use by persons (including children) with various disabilities or inadequate experience and knowledge.
They may use the appliance only under supervision or if they have received instructions on how to use the appliance from a person who is responsible for their safety.
Children must be supervised to ensure that they do not play with the appliance.
□ Applicable to all installation
CAUTION: To avoid danger due to accidental resetting of the over-heat cut-out this product must not be connected to an external switching device such as a timer or to a circuit that regularly turns the product on and off.
☐ If the power cord is damaged, it must be immediately replaced, and this must be done only by the manufacturer, the manufacturer's service agent or similarly qualified persons in order to avoid danger.
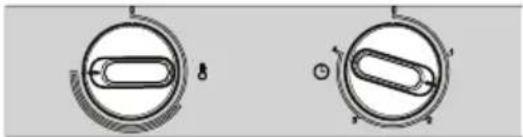
Description of the drying cabinet
The drying cabinet operates with hot air that removes moisture from the laundry. Heating and fan components are combined in the upper part of the drying cabinet behind the control panel.
The drying cabinet exists in two variants.
Timer drying cabinet, where the cabinet is controlled by two knobs, one for setting power modes and the other for regulating drying time.
ECO Sensor drying cabinet, where the cabinet has buttons for both automatic and manual setting of the drying process.
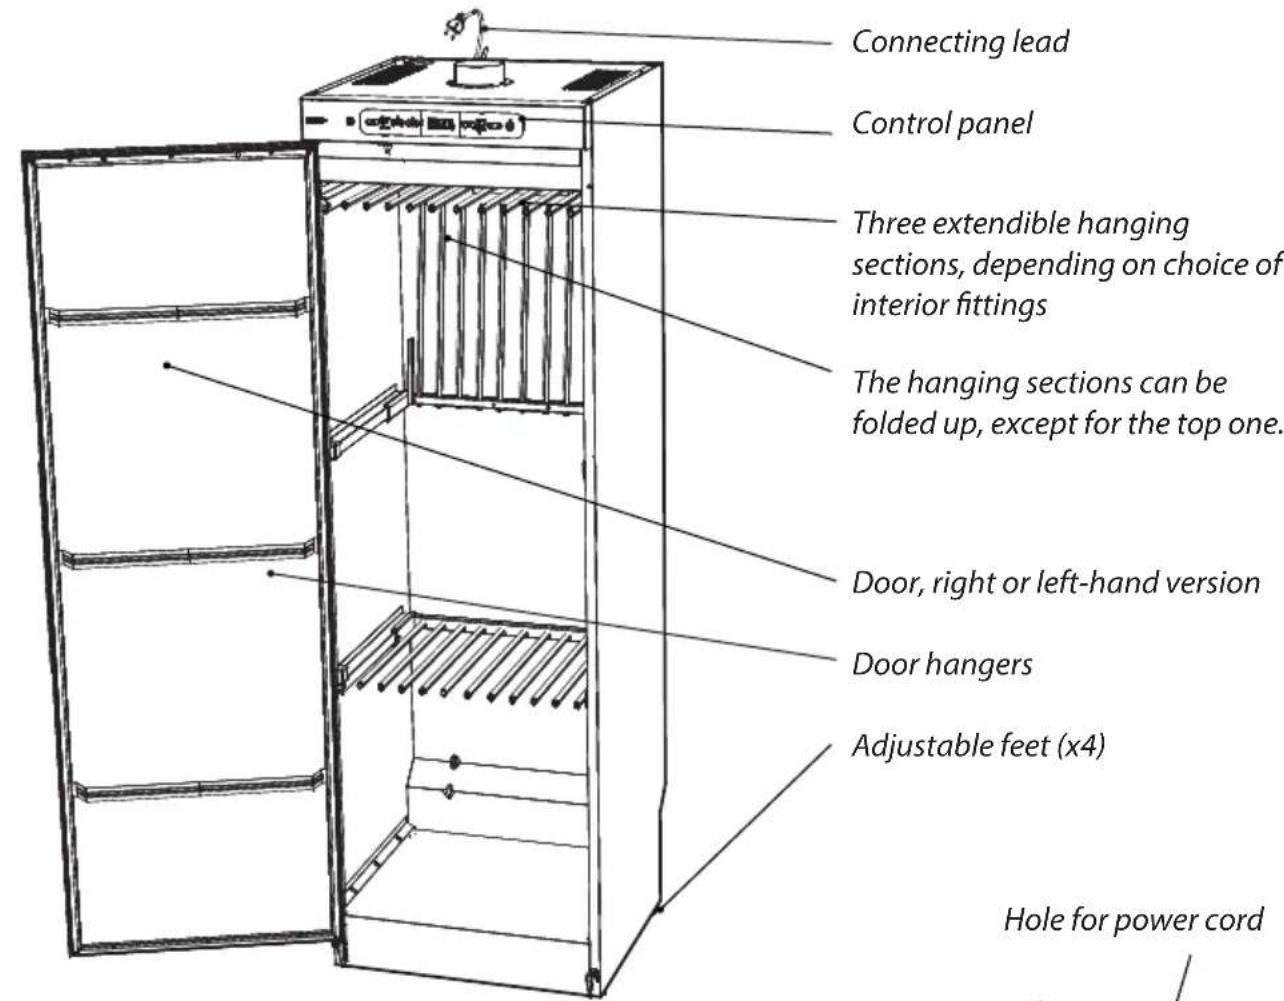
Illustration shows drying cabinet
ECO Sensor
natural_image
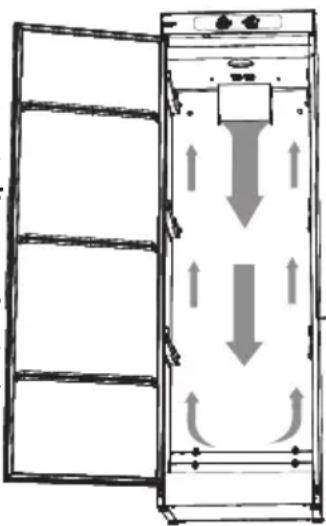
Diagram of a multi-level industrial cabinet with directional arrows indicating flow or movement (no text or symbols)Note the direction of air flow inside the cabinet when positioning laundry. See also this section.
Packaging materials
The packaging that protects the drying cabinet against damage in transit has been chosen with concern for the environment in mind and is therefore recyclable.
Packaging that is returned to the material cycle means reduced consumption of raw materials and a smaller volume of waste.
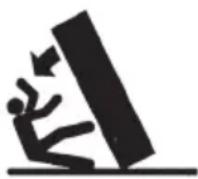
The drying cabinet must be handled carefully if it is standing unsupported on its pallet.
RISK OF TIPPING OVER
Check that the product has not been damaged in transit. Any damage incurred in transit must be reported to the dealer within 7 days.
After unpacking, check that the product is intact. Damage, defects and any missing parts must be reported to the dealer immediately.
The drying cabinet must be installed and kept indoors.
Check that all transport securing devices have been removed before connecting the drying cabinet.
Packaging materials such as plastic and Styrofoam must be kept out of the reach of children.
A complete delivery must include:
□ Cabinet with installed fan unit
□ Assembly kit
□ User manual
Assembly kit

Qty
Draft stabiliser 1
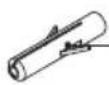
Hose, dia 120 x 1000 mm 1

Spigot 1
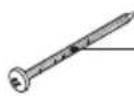
Screw TRX 5x70 fzk 2

Washer NB 5x25 2
Qty
Plastic plug 2

Spacer 8.2x12x15 2
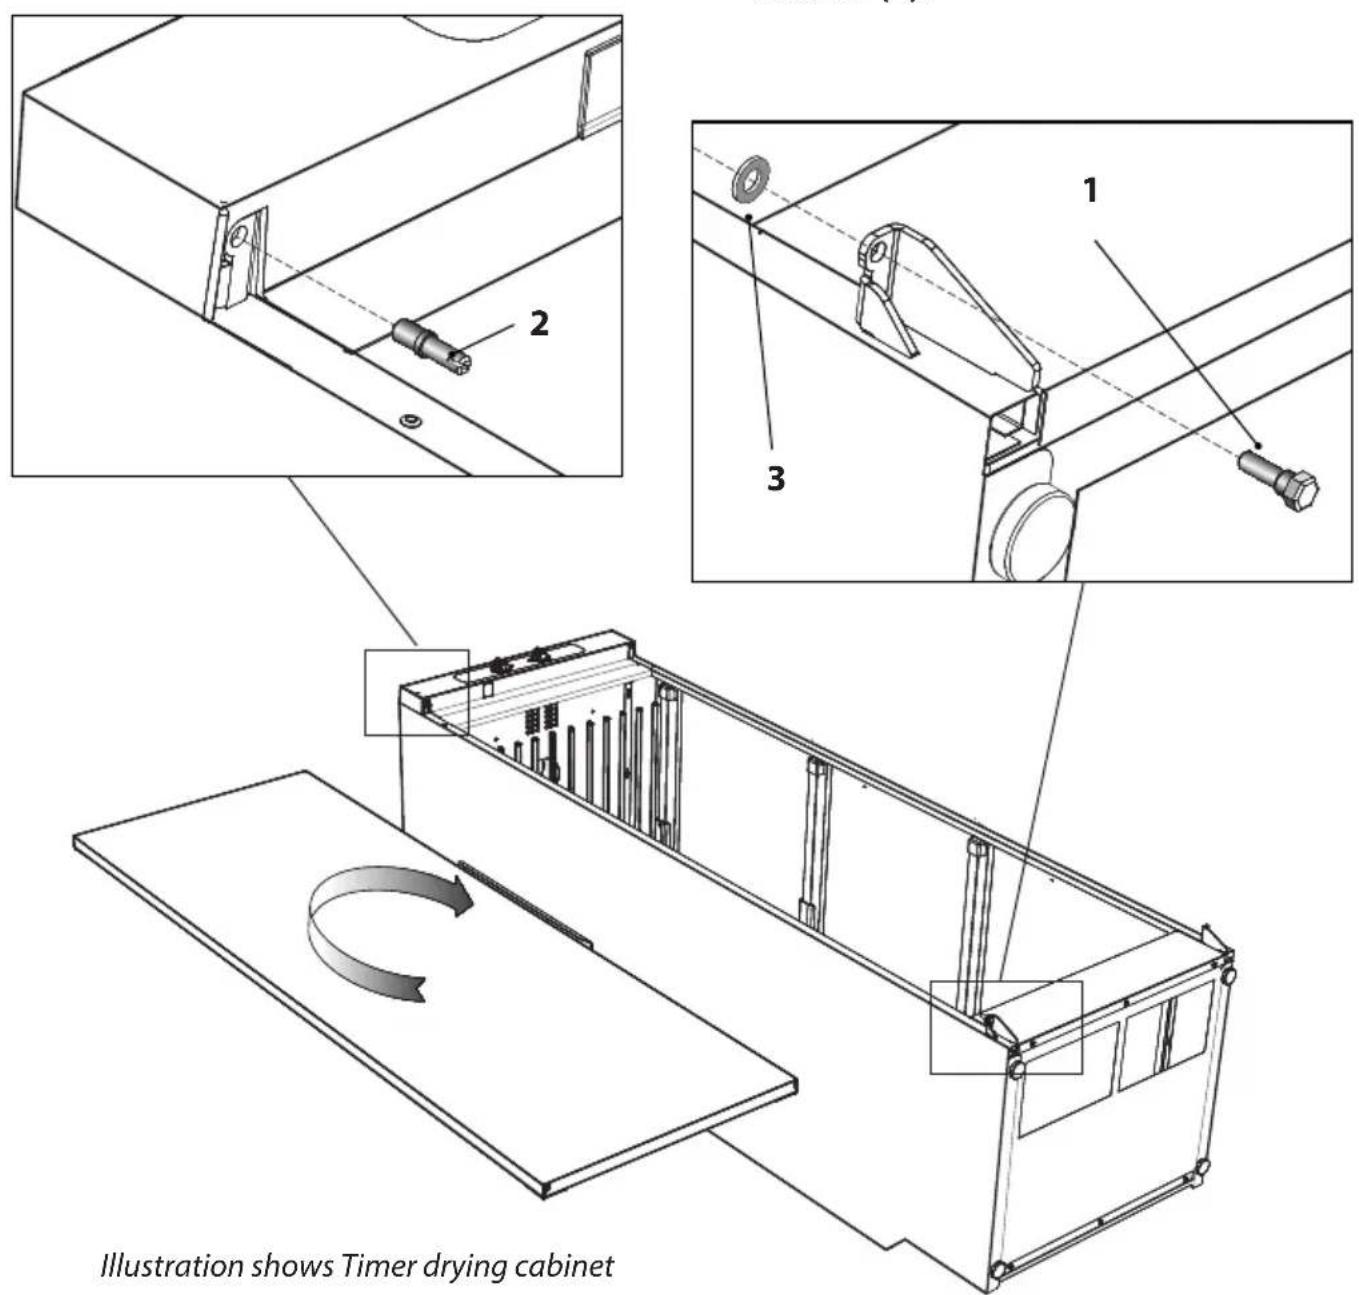
Rehanging of door
The door may be right-hung or left-hung.
1 Lay the drying cabinet down on its side.
2 Detach the hinge pin at the lower hinge (1) and lift off the door. Retain the washer (3).
3 Detach the hinge pin at the upper hinge (2) and install it on the opposite side. The pin has a slot for a screwdriver.
4 Rotate the door, fit and screw in the door with the lower hinge pin (1) and the washer (3).
Positioning/Attachment
The drying cabinet is intended only for location indoors in a dry place and secured to a wall
The drying cabinet must not be placed in an environment in which high-pressure water is used for cleaning.
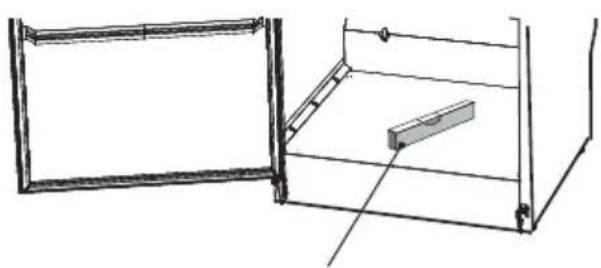
The drying cabinet must be level on a flat surface, resting on all four feet.
If there is a need for adjustment, lean the cabinet and adjust the feet. Check with a spirit level that the cabinet is level.
Bear in mind that the cabinet is top-heavy and there is a risk of it tipping over. This adjustment should be carried out by two people.
natural_image
Line drawing of a cabinet with an open door and a rectangular shelf (no text or symbols)Spirit level
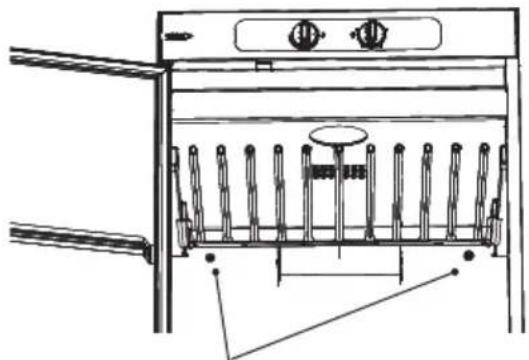
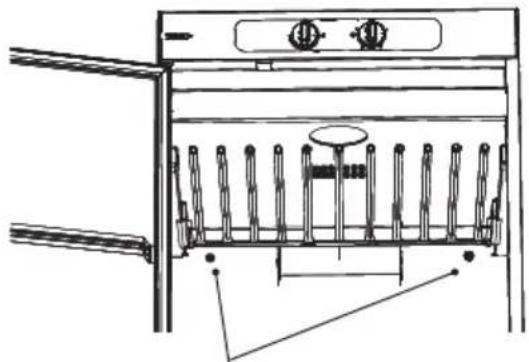
The cabinet must be secured to a wall to prevent tipping over and provide better door sealing
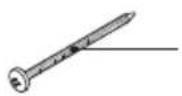
1 Open the door and drill 8 mm holes in the wall through the two pre-drilled holes in the rear of the drying cabinet.
2 Fit the plastic plugs in the wall, thread the spacer onto the screw and fit with washer as illustrated. Screws are contained in the assembly kit.
natural_image
Technical line drawing of a stainless steel oven with cooling fins and ventilation slots (no text or labels)Pre-drilled holes
CAUTION: The drying cabinet must not be used without being secured to a wall owing to the risk of tipping over forward. Wall fixing also results in better door sealing.
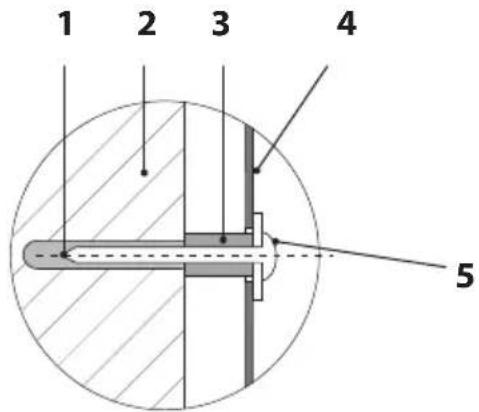
- Plastic plug
- Wall behind drying cabinet
- Spacer
- Rear wall of drying cabinet
- Fixing screw with washer
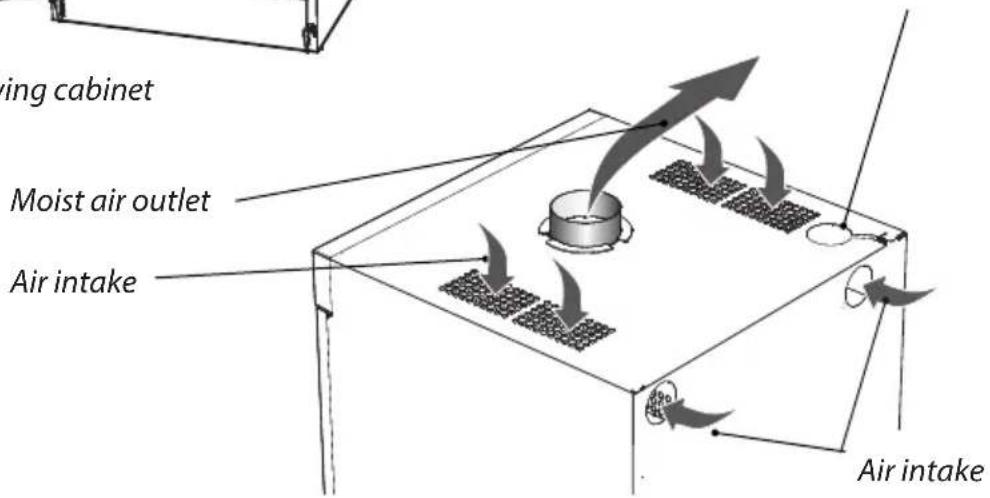
Evacuation / Supply air
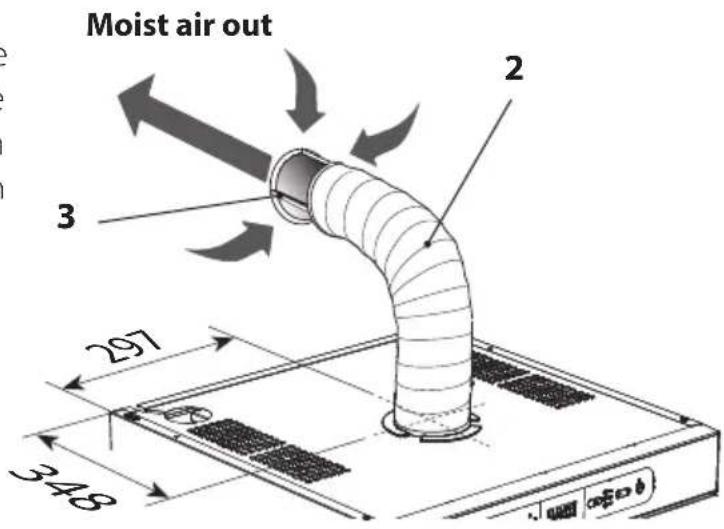
When the cabinet is on, approx. 95 m ^3 moist air per hour is evacuated. It must therefore be ensured that air can enter the room to replace the moist air that is vented out.
Connection to evacuation
The drying cabinet is connected to exhaust air ventilation in accordance with standard.
The drying cabinet can be connected to the evacuation duct in two ways, either with a draft stabiliser or permanently fitted to a mechanical exhaust vent.
If the drying cabinet is to be connected to an existing vent system, a draft stabiliser must always be used, so that the general ventilation in the room is not affected.
Permanent fitting must only be carried out when a separate exhaust-air duct is routed to the drying cabinet, the air flow in the exhaust-air duct being adjusted to 95 m^3 per hour.
The drying cabinet has been tested and factory-set for connection with a draft stabiliser.
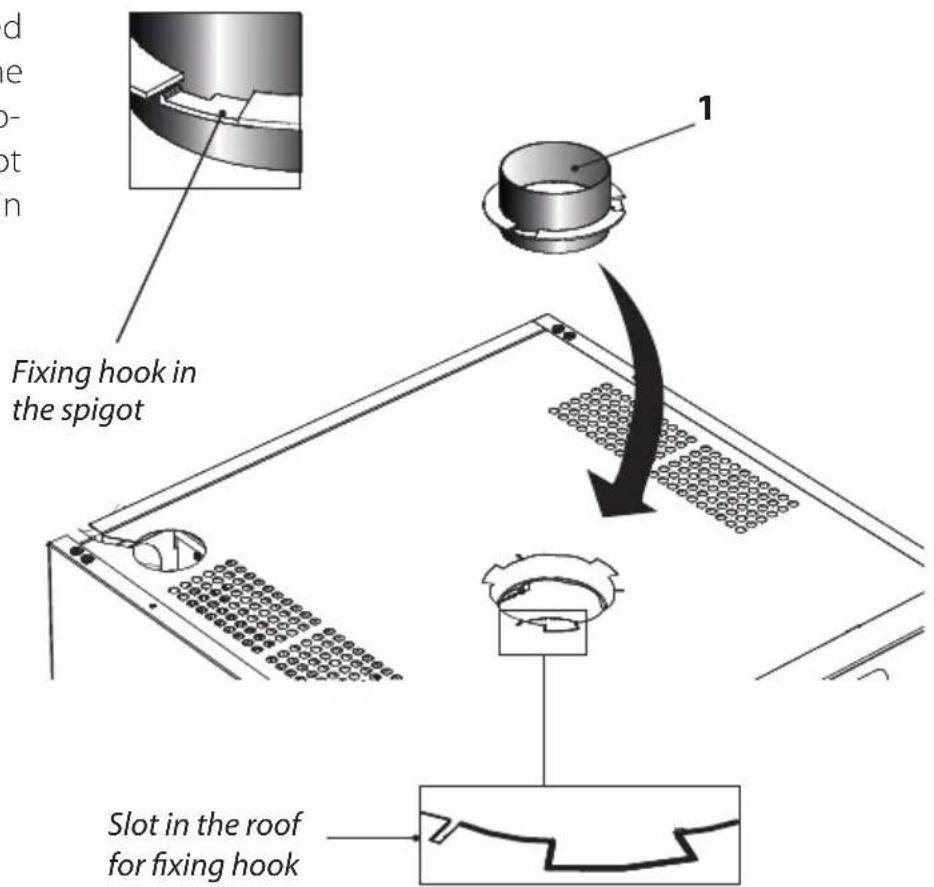
Air connection on the cabinet
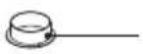
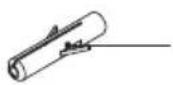
Position and fit the supplied spigot (1) over the hole on the top of the drying cabinet. Rotate clockwise until the spigot clicks into place in the slots in the roof.
Evacuation / Supply air
With draft stabiliser
Connect the flexible hose (2) to the spigot. Connect the other end of the hose to the draft stabiliser and then press this home on the exhaust vent in the room.
The drying cabinet must not be connected to a flue.
The air intake must not be blocked.
Permanently fitted to mechanical exhaust vent
Connect the flexible hose (4) to the spigot. Connect the other end of the hose to the adapter (5) and then press this home on the exhaust vent in the room.
Adapter is not supplied.
The air intake must not be blocked.
- Spigot
- Hose, dia 120 x 1000mm
- Draft stabiliser
- Hose, dia 120 x 1000mm
- Adapter

Electrical connection
The drying cabinet must be connected to a 230 V single-phase 50-60 Hz and protectively earthed wall socket.
Fuse 10A.
The drying cabinet is supplied ready for connection with a cable and an earthed plug.
The drying cabinet should be connected to an earthed wall socket using the connecting cable supplied and must not be permanently wired.
The socket should be located so that the plug can be easily pulled out if necessary.
Check that the connection current agrees with the data on the identification plate and that the power cord is earthed correctly in accordance with applicable standard. We recommend that the power cord be fitted with a residual current device (RCD).
The drying cabinet must be connected to a dedicated circuit.
The manufacturer disclaims all liability if the electrical connection has not been carried out in the way described in this user manual.
If the mains lead for any reason is damaged, it must be replaced. A genuine spare part can be obtained from the dealer who supplied the cabinet.
NB: A replacement cord must only be fitted by a qualified electrician.
Read these operating instructions before using the drying cabinet for the first time.
1 Make sure that the cabinet is secured to the wall. See page 41.
2 Make sure that no packaging material has been left behind.
3 Use a mild detergent with hot water and wash the inside and outside of the drying cabinet. Dry carefully. See also the 'Care' section later in the manual.
CAUTION: Read the safety instructions on page 35 before using the cabinet.
Arranging laundry for drying
There are three sections with hangers in the cabinet, depending on choice of interior fittings. Each section has a number of rails for hanging laundry.
- Hang the items in the drying cabinet according to how much space they require - not according to their weight.
☐ For most efficient drying, do not lay item flat on the upper hanger section.
☐ Position long items closest to the walls of the cabinet and shorter items towards the centre of the cabinet. The most efficient drying results are achieved by hanging the items in this way.
☐ Fold up the two bottom hanger sections if long items are to be dried. - Hang gloves, caps, scarves and similar items on the hanger strips on the inside of the door.
☐ All the hanger sections are extendible to make it easier to hang laundry. The hanger sections must be in their inner position when the door is closed.
☐ Do not overload the drying cabinet. If you do, the laundry will become creased and dry unevenly. Instead, leave a space between the items if possible.
☐ If there is a risk of particular items shedding colour, free space should be left around them.
☐ Avoid drying heavy items of clothing together with lighter items as they have very different drying times.
☐ Do not hang knitted items. These will stretch unnecessarily as they are heavy when wet.
User tips
□ Always following the laundry instructions on the item of clothing if present.
☐ If a fabric conditioner or anti-static agent is used, follow the manufacturer's instructions for use of this product.
☐ Adapt the drying temperature in the cabinet for products that contain foam rubber or similar material. Follow the manufacturer's instructions closely for the washing and drying of such products.
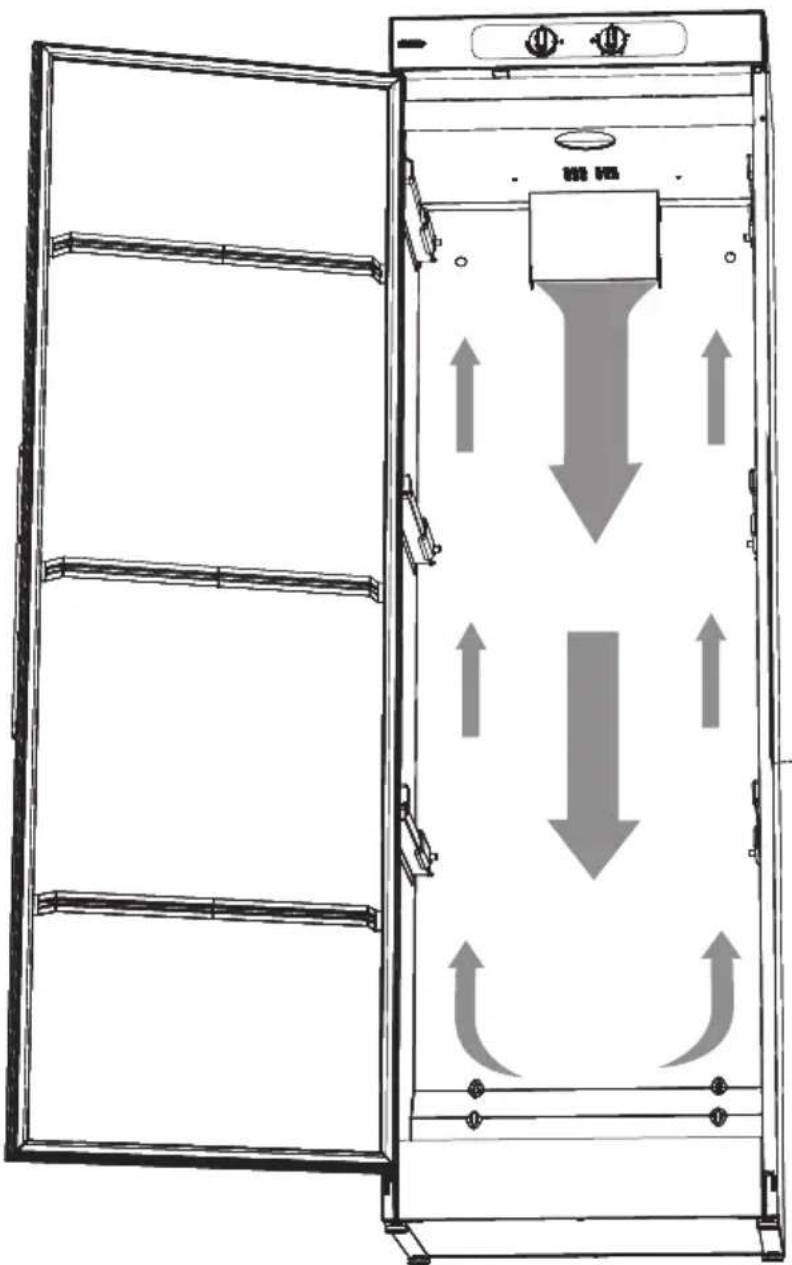
Air flow
The illustration shows the air flow in the drying cabinet.
Keep the area around the evacuation duct clear of dust and dirt.
Make sure that the air intake and exhaust duct are not blocked.
See page 37.
natural_image
Diagram of a vertical cabinet with horizontal shelves and directional arrows indicating flow or movement (no text or symbols)NB: When the cabinet is cold it may happen that the door's sealing strip does not close completely. However, this is fully compensated when the cabinet is operating with heat as the sealing strip expands.
Operation of ECO Sensor drying cabinet
The drying cabinet is equipped with three automatic programmes and three manually time-controlled programmes suited to different types of clothing.
There are also extra functions for the automatic programmes.
The drying process is controlled by sensors or timer and temperature settings.
Choice of drying programme is guided by: - energy efficiency
- gentle treatment of fabrics
- dealing with fabrics that are difficult to dry
- total time for drying process
Choice of automatic programme
When choosing automatic programme for the ECO Sensor drying cabinet, you need to ask some questions
1 WHEN MUST THE LAUNDRY BE DRY?
Can it wait for a long time? Or is it urgent?
Long tine: choose ECO+, which is the cabinet's most energy-efficient programme.
Medium time: Choose between HIGH and LOW with the option ECO.
Short time: choose between HIGH and LOW.
2 WHAT TYPE OF FABRICS ARE THEY?
If they are tough fabrics, such as cotton, choose HIGH.
If they are sensitive fabrics, choose LOW.
If they are fabrics that are difficult to dry, such as children's overalls, choose Extra Dry for either HIGH or LOW.
3 WHY DOES THE CABINET NOT CLOSE BY ITSELF?
The cabinet is adjusted to a particular environment. If the environment in question differs from this reference environment, you may need to make some adjustment to the parameters controlling the drying process.
The procedure for setting is described in "Adjustment of parameters and calibration of sensor" on page 22.
Operation of ECO Sensor drying cabinet
Control panel
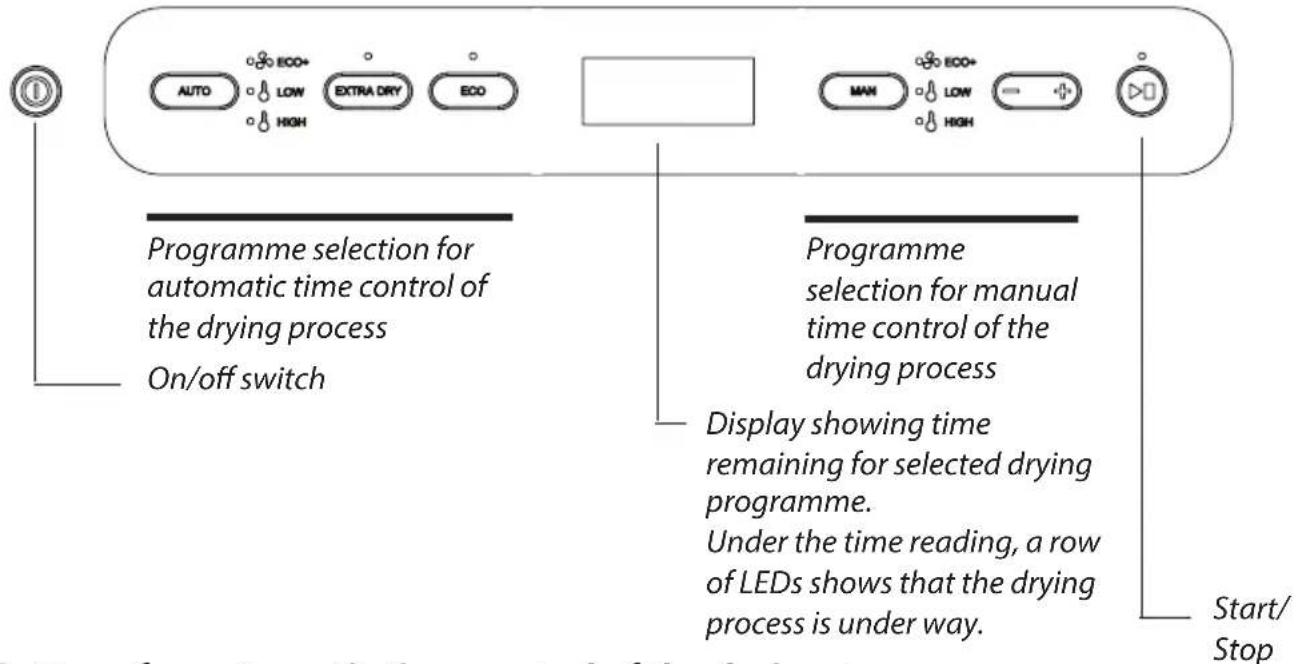
Buttons for automatic time control of the drying process
Button for activation of automatic drying process
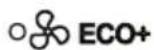
Only the fan is started. This programme selection is highly energy-efficient and very gentle on the laundry. Use this programme when you have plenty of time. LED AUTO ECO+ and LED ECO now light up (see below)
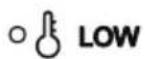
Here both the fan and the element are active but have a limited temperature inside the cabinet. Use this programme when you need to have your sensitive fabrics dry in a shorter time. The AUTO LOW LED now lights up.

Here both the fan and the element are active. The temperature restriction is significantly higher than in AUTO LOW. This programme dries the fabrics quickly. The AUTO HIGH LED now lights up.
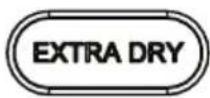
You can choose an optional extra function, EXTRA DRY, for AUTO LOW and AUTO HIGH.
EXTRA DRY is for fabrics that are thicker and more difficult to dry, such as children's overalls, ski suits, etc.
In addition, there is an extra function, ECO, as an option for AUTO HIGH.
ECO is a programme that makes use of the thermal energy where it produces the greatest benefit. This results in a programme that is longer than the normal programme, but consumes less energy. If AUTO ECO+ has been chosen as a drying programme as above, this function is already pre-selected.
Operation of ECO Sensor drying cabinet
Buttons for manual time control of the drying process
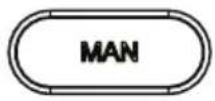
Button for activation of manual time control of drying process
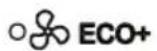
Only the fan is started. This programme selection is highly energy-efficient and very gentle on the laundry. Use this programme when you have plenty of time. The MAN ECO+ LED now lights up.

Here both the fan and the element are active but have a limited temperature inside the cabinet. Use this programme when you need to have your sensitive fabrics dry in a shorter time. The MAN LOW LED now lights up.

Here both the fan and the element are active. The temperature restriction is significantly higher than in MAN LOW. The MAN HIGH LED now lights up.
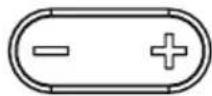
Reduces/Increases the manual drying time.
Operation of ECO Sensor drying cabinet
Start-up of the drying cabinet with automatic time control
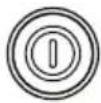
The cabinet is started by pressing the on/off switch.
The cabinet is activated by default with the previous programme selection active. If no programme has been selected previously or if the cabinet has been without power or is completely new, the cabinet is started in AUTO HIGH by default.
LED AUTO HIGH lights up and LED Start/Stop flashes.
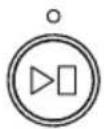
If this is OK, start the cabinet by pressing Start/Stop. The LED at Start/Stop stops flashing and is lit with a steady glow.
The estimated drying time is shown on the display, where the time is counted down. After the time has ended, the process stops automatically.
Selection of other automatic programme
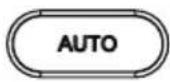
Select automatic programme by pressing the AUTO button.
Step through to the desired programme by pressing AUTO one or more times.
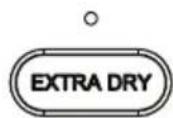
An extra function EXTRA DRY can be chosen in the AUTO LOW programme.

An extra function, EXTRA DRY or ECO, can be chosen in the AUTO HIGH programme.

Press Start/Stop. The LED is lit with a steady glow and shows that the process is under way.
Operation of ECO Sensor drying cabinet
Starting the drying cabinet with manual time control

The cabinet is started by pressing the on/off switch.
The cabinet is activated with the previous programme selection active. If no programme has been selected previously or if the cabinet has been without power or is completely new, the cabinet is started in AUTO ECO+ by default, i.e. an automatic programme.
Selection of manual programme
Select manual programme by pressing the MAN button.
Step through to the desired programme by pressing MAN one or more times.

The display shows a standard drying time which can be reduced or increased with the button.
Press Start/Stop. The LED is lit with a steady glow and shows that the process is under way.
The selected drying time is shown on the display, where the time is counted down. After the time has ended, the process stops automatically.
Operation of ECO Sensor drying cabinet
Door
Avoid opening the door while the drying process is under way as this prolongs the programme time. When the door is opened, the display shows -P-. You have 5 minutes in which to close the door before the cabinet turns the programme off completely and the cabinet has to be restarted.
Adjustment of parameters and calibration of sensors
There are ways of optimising the automatic programmes of the drying cabinet for best possible results.
Adjustments must be made if it is found that:
☐ The laundry is not dried sufficiently.
☐ The laundry is over-dried – long drying time.
The sensors need to be re-calibrated for ECO+ to work optimally.
Calibrating sensors
NB: It is important that the cabinet is at room temperature when calibrating.
To calibrate sensors, turn off the cabinet without any load hung up inside, go to the parameter list, choose parameter P400 and set it to the value 1. A calibration cycle will then start that takes around 5 minutes. When the sensors have been calibrated, the cabinet will re-start automatically.
Operation of ECO Sensor drying cabinet
Parameters to adjust
If the laundry if felt not to be dry, increase the parameter value for the programme-specific parameter
If the laundry is felt to be over-dried, long drying time, reduce the parameter value for the programme-specific parameter
See the table for the parameter of the programme concerned to be adjusted.
| Drying programme | Parameter |
| ECO+ 2165 | |
| LOW 2233 | |
| LOW EXTRA DRY 2243 | |
| LOW ECO 2263 | |
| HIGH 2203 | |
| HIGH EXTRA DRY 2213 | |
| HIGH ECO 2273 |
Access to parameters
1 Turn the cabinet off by pressing the on/off switch.
2 Hold down Start/stop and then press the on/off switch again. Select parameter by stepping up or down using - and +.
Adjusting parameters
1 When the desired parameter has been selected, press Start/stop to go to the parameter concerned.
2 Adjust the parameter value by stepping down or up using - and +.
3 Press Start/stop to leave parameter adjustment.
Leaving the parameter list
1 When you have adjusted the parameters you want, press MAN and Start/stop.
2 If you want to reset the parameters to the factory setting, press AUTO and Start/stop.
Breakdowns
Overheat cut-out:
The cabinet is equipped with an overheat cut-out. This trips when the temperature in the fan unit exceeds 120^ C.
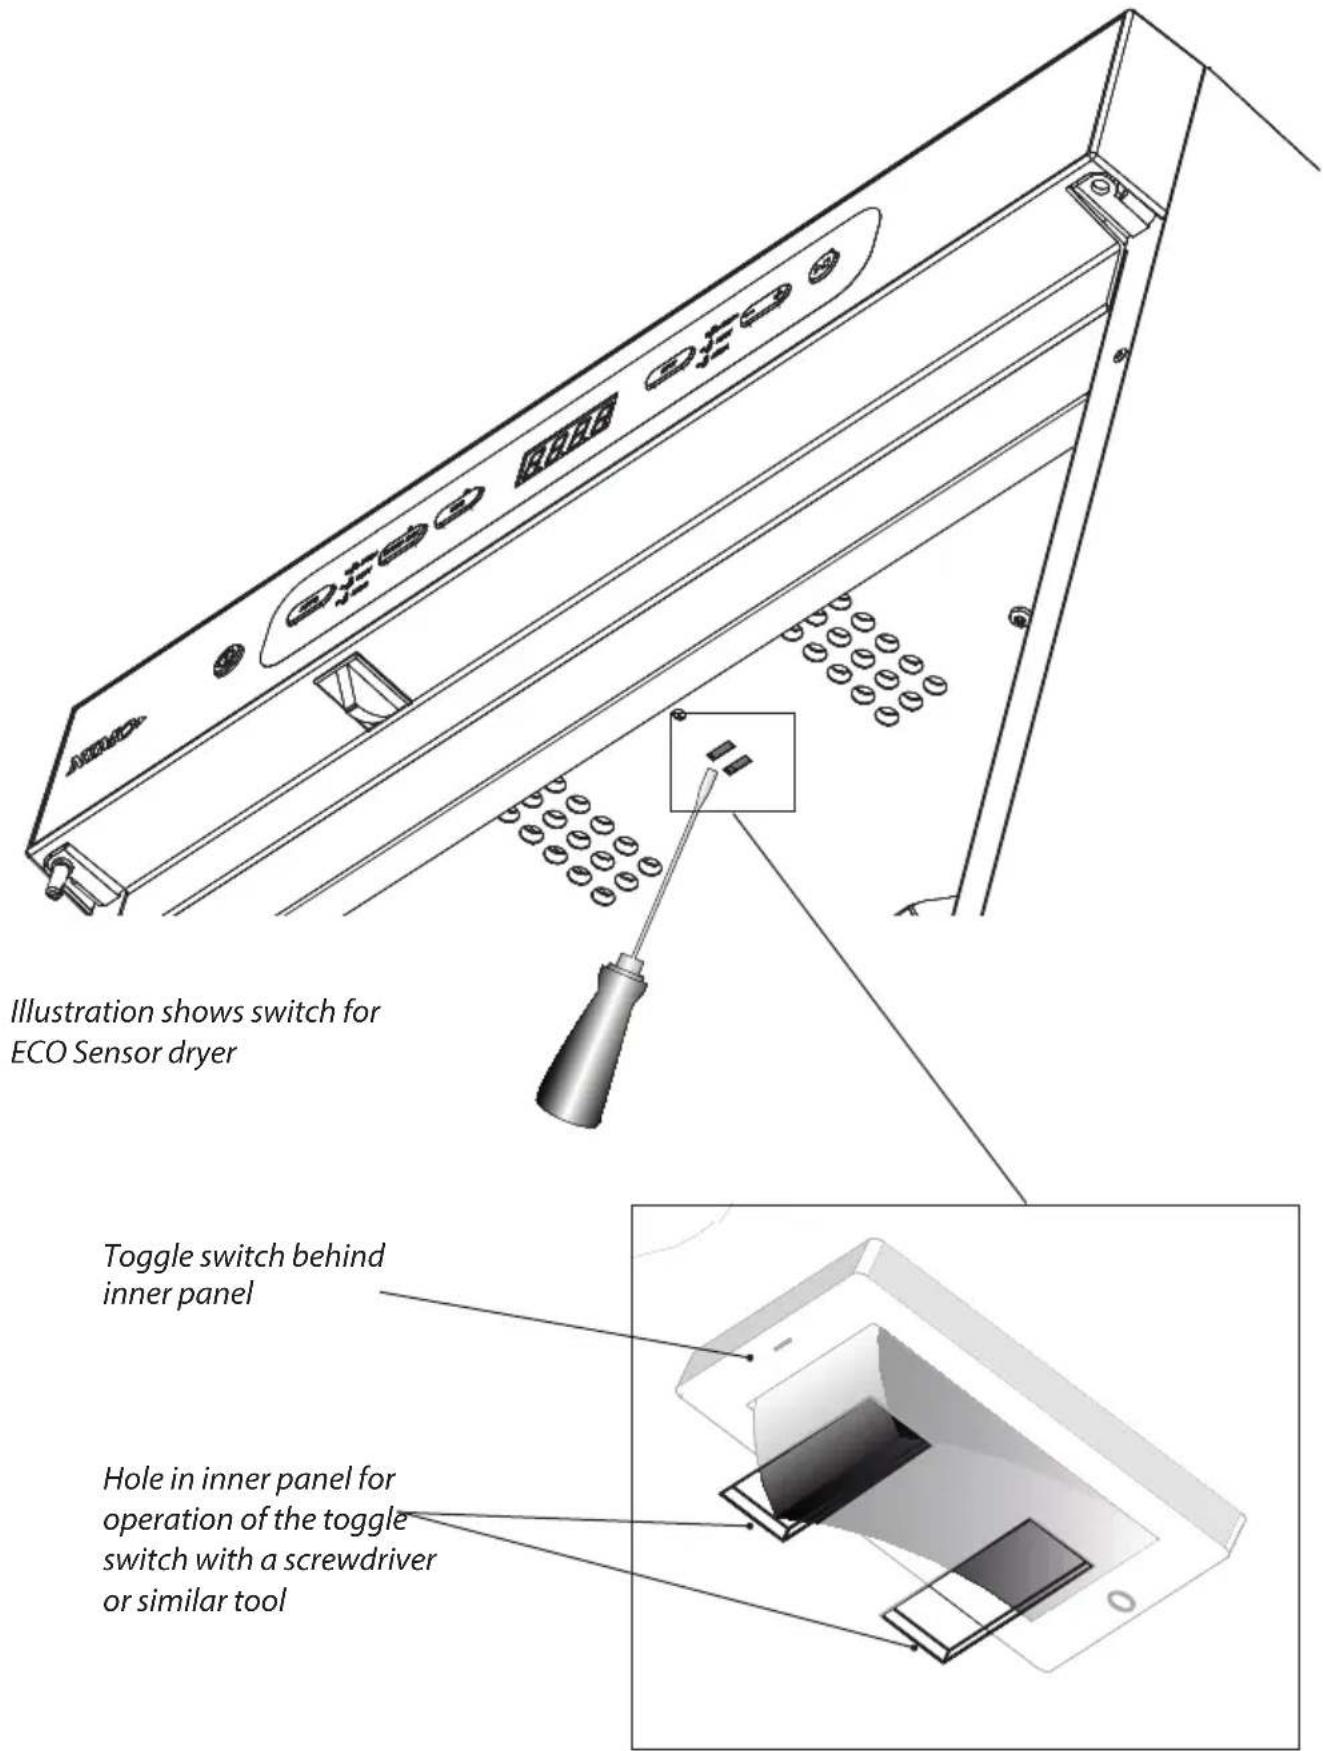
ECO Sensor drying cabinet
When the overheat cut-out has tripped, the display and LEDs flash. The user can now reset the overheat cut-out by turning off the power supply with the switch inside the roof of the cabinet.
See illustration.
The user has to wait for 10 to 15 minutes before the temperature has fallen and the overheat cut-out recloses. The power supply to the cabinet can then be turned back on using the same switch.
Timer drying cabinet
When the overheat cut-out has tripped, the cabinet is closed and the timer stops for example at 2 hours with the laundry wet. The timer is then turned to zero to reset.
The user has to wait for 10 to 15 minutes so that the overheat cut-out has time to reclose. The power supply to the cabinet can then be turned back on again with the timer.
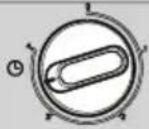
Operation Timer drying cabinet
Control panel
natural_image
Pure electrical circuit lines without any symbols
natural_image
Pure diagram of a circular mechanical or electrical component with internal structure and no text or symbolsHEAT DRYING TIME
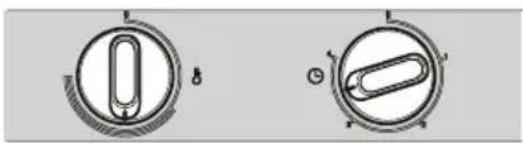
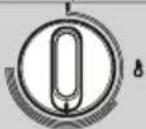
The cabinet is equipped with two knobs for setting different power modes.
The left-hand knob regulates heat with power modes on a stepless scale.
The right-hand knob regulates drying time steplessly up to four hours.
Choice of settings
High heat
natural_image
Two circular mechanical components with internal oval shapes and mounting holes, no visible text or symbolsIf you want a fast drying result, and the item of clothing copes with HIGH heat, turn the heat knob to max and set the drying time at 1.5 to 2 hours.
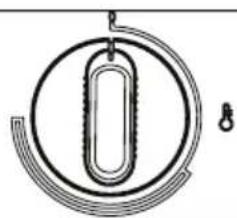
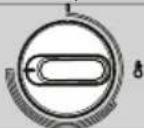
Low heat
natural_image
Two circular mechanical components with internal oval features, no visible text or symbolsTo dry at LOW heat, turn the heat knob to just after the start of the semi-circle and the drying time to between three and four hours.
Cleaning
NB: Do not use high-pressure cleaning.
☐ Clean the walls of the cabinet with a mild soap solution on a damp cloth.
☐ Dust tends to collect around the air intake on the top of the cabinet. This can cause disturbance, in turn leading to breakdowns in operation.
To avoid these problems, the air intake and the roof of the cabinet should be vacuumed at least once a year, or more often depending on the environment the cabinet is located in.
Service
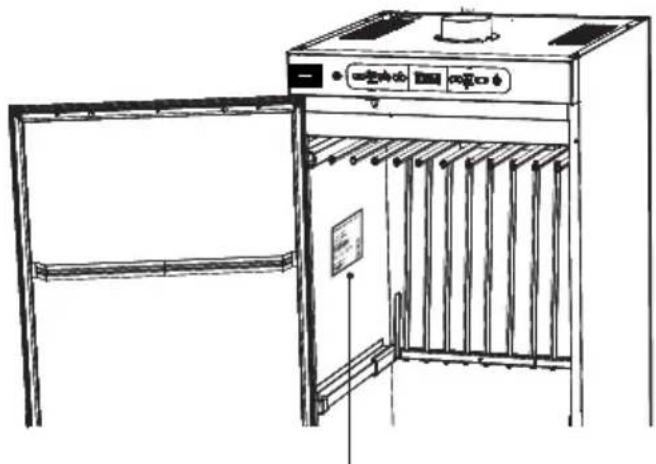
Before contacting Service, you should find out the name, article number and serial number of the drying cabinet.
This information can be found on the drying cabinet located inside the cabinet.
natural_image
Line drawing of an open kitchen oven with control panel and door (no text or symbols)Identification plate (inside) The illustration shows the ECO Sensor drying cabinet
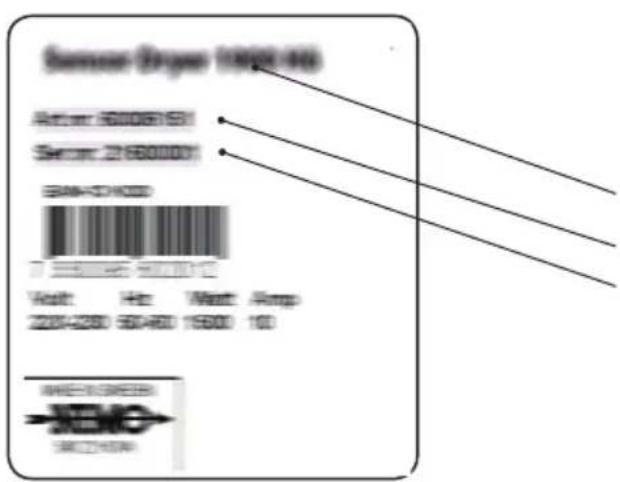
Name of the drying cabinet
Article number
Serial number (12 digits)
Follow Cylinda instructions in repair and replacement of parts.
Management of end-of-life drying cabinet
When the drying cabinet has reached the end of its useful life, it must be taken to a recycling centre for disposal. Many parts of the drying cabinet can be re-used, but it also contains other material that must be dispose of correctly. You should therefore never leave the drying cabinet or parts of the cabinet for collection with household waste, as this may pose risks to health and cause damage to the environment.
The end-of-life drying cabinet should instead be taken to a recycling centre. Check with your dealer if necessary.
All the plastic parts of the drying cabinet are marked with internationally standardised symbols. The parts of the drying cabinet can therefore be recycled in an environmentally sound manner by waste separation.
Technical data of ECO Sensor drying cabinet
| Capacity: Up to 6.0 kg laundry (cotton) | |
| Dewatering capacity: Up to 25 g/min | |
| Electrical connection: | Single-phase 230 V, 50-60 Hz Fuse 10 A |
| Motor: | 38 W |
| Heating element: | 2,000 W |
| Overheat cut-out: | Yes |
| Fan capacity: | 184 m3/hour |
| Hanging length: | 16 metres, depending on choice of interior fittings |
| Dimensions: | Height: 1700 / 1900 mmWidth 595 mmDepth 610 mm |
| Weight: | ECO Sensor 1700, 56 kgECO Sensor 1900, 60 kg |
| Sound level: | max 55 dB(A) |
| Evacuated quantity of air: | 95 m3 moist air per hour |
Energy consumption and drying times in drying of 4 kg of spun laundry *)
| Programme Energy consumption | per kg dry laundry [kWh/kg] | Drying time *) [min] | Temp. max [°C] |
| AUTO ECO+ 0.09 720 Room temp. | |||
| AUTO LOW 0.71 150 45 | |||
| AUTO LOW EXTRA DRY 0.75 176 45 | |||
| AUTO HIGH 0.66 85 70 | |||
| AUTO HIGH EXTRA DRY 0.73 100 70 | |||
| AUTO HIGH ECO 0.55 240 70 |
MANUFACTURING STANDARDS
See cabinet identification plate.
WIRING DIAGRAM
Wiring diagram can be ordered from the manufacturer.
Technical data Timer drying cabinet
| Capacity: Up to 6.0 kg laundry (cotton) | |
| Dewatering capacity: Up to 25 g/min | |
| Electrical connection: Single-phase 230 V, 50-60 Hz Fuse 10 A | |
| Motor: 38 W | |
| Heating element output: 2,000 W | |
| Overheat cut-out: Yes | |
| Fan capacity: 184 m3/hour | |
| Hanging length: 16 metres, depending on choice of interior fittings | |
| Dimensions: Height: 1700 / 1900 mmWidth 595 mm.Depth 610 mm | |
| Weight: Timer drying cabinet 1700, 56 kgTimer drying cabinet 1900, 60 kg | |
| Sound level: | max 55 dB(A) |
| Evacuated quantity of air: | 95 m3 moist air per hour |
Energy consumption and drying times in drying of 4 kg of spun laundry \*)
| Programme | Energy consumption per kg dry laundry [kWh/kg] | Drying time *) [min] | Temp. max [°C] | ||
| Low temp. | 0.67 | 220 | 35 | ||
 |  | ||||
| High temp. | 0.69 | 90 | 65 | ||
 |  | ||||
MANUFACTURING STANDARDS
See cabinet identification plate
WIRING DIAGRAM
Wiring diagram can be ordered from the manufacturer.
Dealing with minor faults yourself
| Questions What you can do | |
| The drying cabinet is not working. | 1. Check that the power lead is connected to a power socket.2. Check that no fuse has blown3. Have you pressed the start button?4. Is the door closed? |
| The display shows an alarm/error code (Er1, Er2, Er3) | This should not normally happen, but if an alarm or error code is shown, try first to reset the alarm.See section headed “Error code list”If the problem persists, a service technician most be called in. |
| Drying takes a long time. | 1. Check that the correct programme has been selected for the type of laundry.2. Check that the laundry is not very wet (poorly spun).3. Check that too much laundry has not been hung. |
| The washing does not become dry. | 1. Check that the correct programme has been selected for the type of laundry.2. Check that too much laundry has not been hung.3. Adjust the parameters according to the section headed “Parameters to adjust”. |
| The sealing strip does not close tightly/the door is ajar | Check that the cabinet is level and attached to a wall. Check with a spirit level, adjust if necessary with the adjusting feet. |
Troubleshooting
Error code list
| Error code Cause | |
| Er 1 | Error 1Regulator sensor. Error in the sensor at the element.The error is either a discontinuity or short-circuit in the sensor.Reset by disconnecting the power supply. |
| Er 2 | Error 2Outlet sensor. Error in the sensor in the outlet duct.This error is the same as Error 1.Reset by disconnecting the power supply. |
| Er 3 | Error 3MAX hours. The programme has not moved on to temperature, but has been turned off because of MAX timer.Reset by pressing the play/stop button. |
?
service
• Nationwide service
- Visit www.cylinda.se
• Call 0771-25 25 00
service
• Ví har service i hela landet
• Gå in på www.cylinda, se eller
• Ring 0771-25 25 0 0 (endast lokalt axa)
declare
- Model code
- Problem description
- Serial number - Name and address
• Purchase date • Phonenumber