Vanquish R Wave Twin Core P 5115 - Mp3 player Pentagram - Free user manual and instructions
Find the device manual for free Vanquish R Wave Twin Core P 5115 Pentagram in PDF.

User questions about Vanquish R Wave Twin Core P 5115 Pentagram
0 question about this device. Answer the ones you know or ask your own.
Ask a new question about this device
Download the instructions for your Mp3 player in PDF format for free! Find your manual Vanquish R Wave Twin Core P 5115 - Pentagram and take your electronic device back in hand. On this page are published all the documents necessary for the use of your device. Vanquish R Wave Twin Core P 5115 by Pentagram.
USER MANUAL Vanquish R Wave Twin Core P 5115 Pentagram
The latest versions of the manual, software and applications are available at www.pentagram.eu
2007-10-26
Vanquish R Wave (P 5115)
INDEX
INTRODUCTION 3
GETTING STARTED 4
USAGE 7
NAVIGATION 9
CONNECTING TO COMPUTER....17
TROUBLESHOOTING....19
SPECIFICATION 20
NOTE! Any information and technical data are subject to change without prior notification and/or indication in this manual.
Copyright © 2007 PENTAGRAM
All rights reserved; copying and reproduction is strictly forbidden.
Introduction
Thank you for purchasing PENTAGRAM Vanquish R Wave. This player is a new type of portable digital multimedia player equipped with a dual chipset (Twin Core). It perfectly combines high quality digital audio (MP3, WMA, APE, FLAC) & video playback (AVI and directly FLV from YouTube.com® and VideoGoogle®), voice recording, FM tuner, FM recording, photo/EBook browsing, games, PlayFX™ sound enhancement and the innovative G Sensor technology.
System Requirements
- IBM PC, notebook or Mac with available USB port;
• Operating system: Windows Me / 2000 / XP / Vista, MacOS 10 or newer, Linux 2.4.2 or newer.
Box Content
• PENTAGRAM Vanquish R Wave (P 5115)
• In-Ear Earphones
• 3 pairs of soft, silicon earbuds (S, M, L)
- USB cable
• CD with applications
• Instruction Manual
- Neckstrap
• Power adapter
- Velvet carrying pouch
Getting started
Safety precautions
- Don't use too much strength when using Touch buttons, you can damage touch panel;
- Please avoid placing player directly in the sunshine or dusty, humid place or place with extremely low or high temperatures (i.e. car with closed windows in summer);
- Please avoid dropping or impact upon player;
- Don't let liquid or objects into player;
• Don't use chemicals, such as gasoline or other diluents, upon player's surface; - Clean player only with soft cloth;
- Before cleaning, disconnect player from computer or other power source;
- When start using the unit, please fully charge and discharge the battery for about 2 - 3 times to ensure maximum battery life and power capacity;
- Please do not disassemble any part of the unit, any unauthorized disassembling will cause termination of PENTAGRAM official warranty;
- Please don't use wet hand to plug/unplug or contact player for preventing shock or damage;
• Please don't unplug player while data is transferring with the computer, otherwise the data may be lost; - Please don't judder, otherwise player may be damaged;
- Files or data stored in player cannot completely avoid being destroyed or lost due to improper use or other reasons. Please backup files and data when necessary;
Battery charging
When you start using the unit, please fully charge and discharge the battery about 2 - 3 times to ensure maximum battery life and power capacity.
In the top right corner of the display (in most modes), a battery charge indicator is visible. If the indicator is filled with bars – the battery is fully charged, if it's empty – battery is almost discharged and must be charged as soon as possible. During the charging process the indicator changes its colour.


To charge the battery:
- connect the player to computer's USB port, or
- connect the player to a power outlet via attached power adapter, or
- connect the player to a car lighter socket via car USB charger (not included).
G Sensor
The G Sensor is an innovative navigation solution providing easy player navigation. In most player work modes, the G Sensor acts as ◀ and ▶ buttons and allows you to navigate through the menus, skip songs, pictures or films. In this manual the usage of the G Sensor will be marked as GS. You can disable the G Sensor anytime in Settings menu.

GS left – lift the right side of the player with a firm move and return to normal position. You can also wave the player to the left.

GS right – lift the right side of the player with a firm move and slowly return to normal position. You can also wave the player to the right.
Usage
Player's appearance
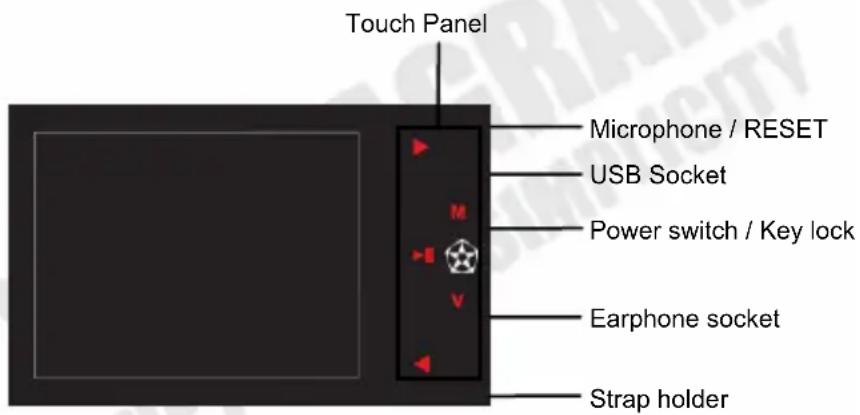
Buttons
Player's Touch Panel is very sensitive and it's not recommended to use too much pressure while using it. A slight touch is enough for the player to register button pressure. Familiarization with the Touch Panel and the sufficient pressure is easy.
All buttons have main function available at all times and functions which depend on the selected mode.
General
Power switch – power on/off and key lock. In this manual the Power switch term will refer to moving the power switch over the red field and letting it go.
M – hold for 3s – return to main menu.
Main Menu:
◀ and ▶ and GS – select main menu option.
M - confirm selection.
Submenu / file list
◀ and ▶ and GS – select submenu/list option.
M - confirm selection.
V – return to previous menu / parent folder.
V – on file list – hold for 2 seconds, to delete selected file.
Turning the player on
To turn on/off the player, you must move the power switch over red field and hold it in this position for 5 seconds.
Buttons lock
To lock player's buttons and G Sensor, please move the power switch over the black field. When the key lock is active, a padlock icon appears in the upper left corner of the display.
To unlock player's buttons and G Sensor move the power switch to neutral (center) position.
Resetting the player
Under specific conditions (i.e. running a game with the G Sensor enabled) the player's buttons may stuck and stop responding. In such cases, please press the RESET button (i.e. with the tip of a paper clip). The player will be turned off immediately. In most cases this operation will not erase the player settings to default.
Navigation
Main Menu
Use ◀ and ▶ buttons or GS to navigate through the main menu and press M to confirm selection. You can return to the Main menu anytime by holding M button for 2-3 seconds.
Music Menu
In this mode you can listen to music in MP3, WMA, APE and FLAC formats. Buttons functions in this mode are:
▶ II – pause / unpause.
◀ / ▶ and GS- previous / next audio file.
V – enter / exit volume control mode (use ◀ / ▶ and GS, to turn up or down the volume). If enabled, volume icon in the top left corner will be flashing.
M – audio files list.
M in volume control mode - A-B repeat:
- enter the volume control mode, by pressing V button (volume icon will be flashing)
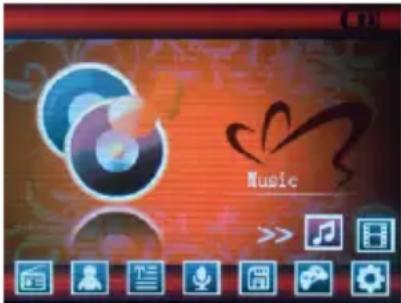
- press M button, to select the start point (A), A- icon will appear on the display.
- press M button, to select the end point (B). A- icon will change to A-B and the player will repeat continuously the selected fragment. To disable A-B repeat press M button again (in the volume control mode).
The player supports lyrics files In LRC format. All you need to do is to copy lyrics file to the folder with music file and ensure that both filenames are identical (i.e. "vanquish.mp3" and "vanquish.lrc"). Lyrics will be displayed automatically when a particular music file is being played.
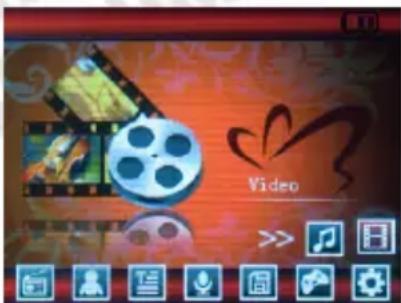
Video Menu
This mode is used for playing video files. Supported file formats are AVI format (320x240) compressed with Xvid codec or directly FLV files used at YouTube.com® and VideoGoogle®. If the video file is not supported by the player, you can use AviConverter application to convert it to a supported video format. Buttons functions in this mode are:
▶ II – pause / unpause.
◀ / ▶ and GS – previous / next video file.
V – enable/disable the volume control mode (use ◀ / ▶ and GS, to turn up or down the volume). If enabled, the volume icon in top left corner will be flashing.
M – video files list.
Radio Menu
This mode is FM tuner. In this mode the earphones are used as antenna and they should be connected before the station tuning. Buttons functions in this mode are:
M - Radio mode submenu:
- Manual – manual tuning.
- Preset – saved channels.
- Mem – save the current station on selected position.
- Del – delete the station from selected position
• Auto – automatic scanning and saving.

◀ / ▶ and GS (Manual) – change the frequency by 0,1MHz, hold to scan for nearest the station.
◀ / ▶ and GS (Preset) – previous / next saved station.
V – enable / disable the volume control mode (use ◀ / ▶ and GS, to turn up or down the volume). If enabled, the volume icon in the top left corner will be flashing.
Power switch – FM recording, see Record for details.
When exiting the Radio mode (hold M) you can select if you want the radio to stay turned on.
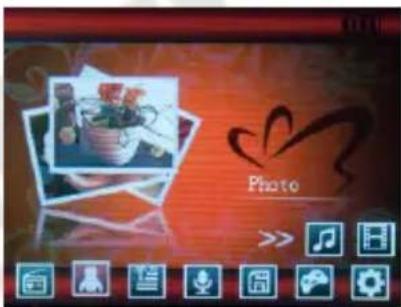
Photo Menu
This mode is a photo (JPG, BMP and GIF format) browser. Buttons functions in this mode are:
M - graphic files list.
◀ / ▶ and GS – previous / next file.
▶ II (hold) – enable / disable slideshow.
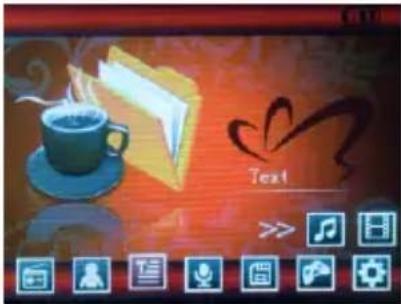
Text Menu
This menu is EBook (TXT text files) browser. Buttons functions in this mode are:
M - text files list.
◀ / ▶ and GS- scroll up / down one page.
▶ II (hold) – auto-scroll.
V (press) – save bookmark menu.
V (hold) – load bookmark menu.
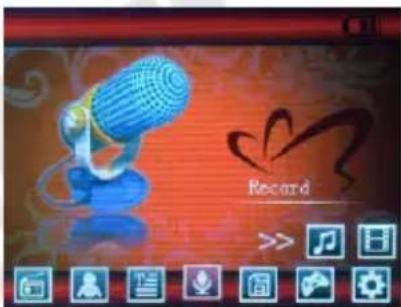
Record Menu
This mode can be used to record voice via a built-in microphone (select Record from main menu) or from FM (use the power switch in Radio mode). Buttons functions in this mode are:
M – save the recording file and return to main menu / Radio mode. Power switch – start / pause recording.
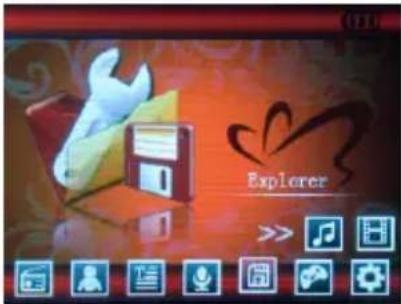
Explorer Menu
This mode is a file browser. Select a file to be played automatically in appropriate mode (i.e. MP3 file will be automatically played in Music mode). Buttons functions in this mode are:
◀ / ▶ and GS – file / folder selection.
M - confirm selection.
V (press) – level up.
V (hold) – delete file.
Tools Menu
In this mode you can find games and other applications. Select the desired mode (using ◀ / ▶ and GS) from the menu and confirm your selection by pressing M button.
Games
WARNING! Before running any game, we recommend that you disable the G Sensor in Settings menu! If the G Sensor is enabled when running game, player buttons may stop responding and player may stuck. If that happens, the only way to turn off the player is to use RESET button.
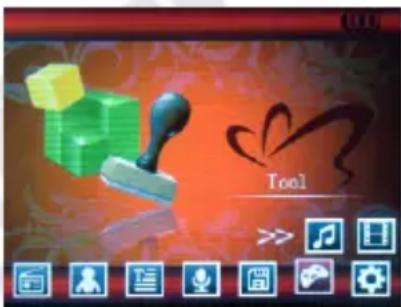
In each game, player buttons have different functions. To terminate game during playing, use the power switch for the pause menu to appear, then select QUIT and confirm selection with the power switch.
Plane Angle
Show player's plane angle. Press V button, to return to Tools menu.
Play Dice
The dice reacts to waving the player (GS). Wave the player to throw the dice. Press V button, to return to Tools menu.
Pedometer
First, you need to configure pedometer parameters. Select (using ◀ / ▶ and GS) the field to edit and press M. Then use ◀ / ▶ buttons or GS to set your height and weight values and press M button, to save. Select Walk Mode or Run Mode and press V, to display the statistics.
Settings Menu
Settings Menu is used to configure various player functions.
Music – settings for Music mode:
- Repeat mode – select repeat mode:
Once – plays selected file once.
Repeat One – repeats selected file continuously.
Folder Once – plays allfiles in current folder once.
Folder Repeat – repeats files in current folder continuously.
All Once – plays all files once.
All Repeat – repeats all files continuously.
Intro – plays first 10 seconds of each file.
• Play Mode – select play mode:
Order – normal order.
Shuffle – random order.
• Stone-3D – Stone 3D effect configuration.
- Hardware Bass Set – Hardware Bass Boost configuration.
- Hardware Treble Set – Hardware Treble Boost configuration.
Normal, MS PlayFX™, Rock, Pop, Classic, Bass, Jazz, User EQ.
Vanquish R Wave (P 5115)
MS PlayFX Set – MS PlayFX™ configuration (3D Headphone, Pure Bass and AutoVolume functions).
- User EQ Set – change the parameters of User EQ. Use V button to select frequency and modify it using ▲ and ▼ buttons. Select Yes and press M, to save settings or No, to return to previous settings.
Radio – settings for Radio mode:
- Stereo Switch – select Yes, to enable stereo or No, to disable it.
• FM Region – select FM region for FM tuner.
Record – settings for Record mode:
• REC Quality – select the quality of recorded files: High Quality or Low Quality.
• REC Volume – change the volume of recorded file.
Display – display settings:
- Bright Time – change idle time, after which the backlight or the display will be turned off.
- Brightness – select display brightness.
- Bright Mode – select whether the backlight or the whole display will we turned off after idle time.
Auto Play Set – settings for slideshow / auto scroll in Text and Photo modes:
- Text – time interval for auto scroll in Text mode.
• Pictures – time interval for slideshow in Photo mode.
System – system settings:
• Languages – language selection.
- About – information regarding the player – firmware version (Ver) and date (Date) and used / total player memory (FlashMem).
- Upgrade – firmware upgrade. See Firmware upgrade chapter for more details.
PowerOff Time – select idle time, after which the player will be turned off.
Default Set – select to restore all settings to default values.
Connecting to computer
The player has a high-speed USB 2.0 port with the transmission speed of 5M/S, and is a standard USB disc, supports operating systems including Windows Me/2000 and above, Mac OS 10.3 and above, Linux 2.4.2 and above. It supports USB power supply and can be played without battery. After connecting to the PC (several seconds later), the player will display the Online mode.
Video files conversion
This player can convert the avi, rm, rmvb, mpg, mpeg, mp4, asf, wmv, mkv, dat or vob into avi video format via the attached video converting software.
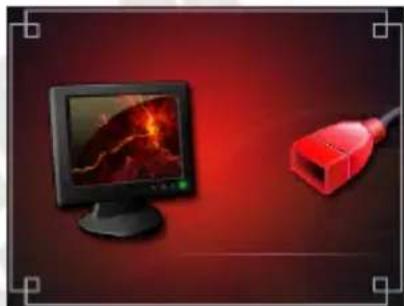
natural_image
Computer monitor displaying a red fire-damaged image next to a red USB cable against a dark red background (no text or symbols)- Double-click on the AVIConverter icon to run the program.
- Click Add, to open Conversion Setting dialog box;
- Select and set your desired parameters, select your input video/audio file and AVI video file process to be generated, click Start to Convert button to begin converting to AVI file.
Firmware Upgrade
NOTE:
- The firmware upgrade is meant to improve and optimize the performance of the player. The normal work of the player will not be affected even if the firmware isn't upgraded. The wrong operation of upgrading firmware
Vanquish R Wave (P 5115)
would cause the device not to work normally! The firmware upgrade software of this player does not apply to other series of players.
- Before firmware upgrade we recommend you to backup the files stored inside the player's flash memory. All files are likely to be erased during the upgrade procedure. PENTAGRAM Europe cannot be held responsible for any data loss.
• Make sure that you use only the genuine PENTAGRAM firmware for upgrading Vanquish R Wave. You can download the latest firmware from www.pentargam.eu
- Do not detach the player from your computer while the firmware upgrade procedure is in progress. This may casue a critical malfunction.
The player can upgrade or resume the damaged player driver via the tool software from the attached CD disc.
-
For the first upgrading of computer, insert the drive disk into the CD-ROM of computer, then connect the MP4 player with computer (it requires you to press and hold the M key), till it appears the program Installation Interface.
-
Implement the next step according to the Dialog box prompt, and select the "Upgrading Tool" folder in the attached disk in the "Browse" option of the fourth Dialog box, then click Confirm.
-
Operate as per the prompt in dialog box till the accomplishment
-
When the installation of programs required by computer is OK, you can begin the upgrading; select and run the firmware upgrading tool Consumer.exe (can be found in attached disk), then open the option and select *.rfw file.
-
Connect the player to PC via USB cable (press and hold the M key before the On-line operation), then click [Burnt Firmware] till the Auto Upgrading is achieved.
Troubleshooting
If you experience any of the following difficulties in using player, use the following guide for help. Should any problem persist, please visit www.pentagram.eu site and eventually contact PENTAGRAM Customer Service.
| Symptoms Possible cause | Solution | |
| Fail to power on | Low battery Charge the battery | |
| Power off shortly after power on | ||
| No sound output | The volume is set to 0 Turn up the volume | |
| Earphones not connected properly Connect earphone correctly | ||
| Player is stuck | Use Power switch to turn of and turn on player or use RESET button Buttons doesn't work | |
| Button lock enabled Disable button lock | ||
| Fail to connect with the computer | USB Cable doesn't connected correctly | Connect USB Cable correctly |
| Your system doesn't meet player's requirements | Upgrade your system to meet the requirements Fail to copy files | |
| Flash memory error Format player's | memory and try again | |
| Can't recording | Low battery Charge battery | |
| Space insufficient Delete some files | ||
| Can't play video Format error | Convert video file | |
Specification
| Function Description | ||
| Chipset Twin Core: Rockchip 2608A + Wolfston 8750BG | ||
| Dimensions 88 × 55 × 7.9mm (W x H x D) | ||
| Weight | ~ 54g | |
| Display TFT LCD 2,8" QVGA 320x240 – 262k colors | ||
| Navigation 2nd generation touch panel and G Sensor | ||
| Power supply built-in Li-Poly, charged via USB port or power adapter | ||
| Working time Music (power saving) / Video (power saving) ~10h / ~4h | ||
| Radio FM | Frequency:China, Europe, U.S.AJapan | 87MHz – 108MHz76MHz – 90MHz |
| Preset stations 30 | ||
| Supported files | Music MP3, WMA, FLAC, APE | |
| Video AVI (Xvid 320x200), FLV | ||
| Text | TXT | |
| Photo | JPG | |
| Sound enhancements | PlayFXTM, Stone 3D, Hardware Bass Boost, Hardware Treble Boost, Equalizer (6 predefined modes + 1 custom) | |
| Max. output power 10mW in left and right | ||
| SNR | 90dB | |
| Working temperature 5°C~40°C | ||
| Data transfer PC, notebook or Mac with USB port | ||
| Operating system | Windows Me/2000/XP/Server2003/Vista, MacOS 10.3 and above, Linux 2.4.2 and above. | |
* specification may be changed without prior notice