
MFC-L6720DW - Fax BROTHER - Free user manual and instructions
Find the device manual for free MFC-L6720DW BROTHER in PDF.

| Product Type | Monochrome Laser Multifunction Center (Fax, Print, Copy, Scan) |
| Model | Brother MFC-L6720DW |
| Dimensions (W x D x H) | 410 x 398 x 319 mm |
| Weight | 10.4 kg |
| Power Supply | 220-240V AC, 50/60Hz |
| Power Consumption | Approx. 510 W (Printing), 65 W (Ready), 1.6 W (Deep Sleep) |
| Fax Functions | Super G3 Fax, 33.6 kbps, Color Fax, PC-Fax, Fax Forwarding, Fax Security |
| Print Functions | Duplex (Automatic), Up to 30 ppm (A4), Resolution up to 1200 x 1200 dpi |
| Copy Functions | Up to 30 cpm, N-in-1, Duplex Copy, Sort Copy, Reduce/Enlarge |
| Scan Functions | Scan to Email, Image, OCR, FTP, USB, Network; Resolution up to 19200 x 19200 dpi (Interpolated) |
| Paper Handling | 250-sheet Input Tray, 50-sheet Automatic Document Feeder (ADF), Output 120 sheets |
| Connectivity | USB 2.0, 10/100 Base-TX Ethernet, Wi-Fi 802.11b/g/n |
| Mobile Printing | AirPrint, Brother iPrint&Scan, Google Cloud Print, Mopria |
| Maintenance | Clean scanner glass and white roller periodically; replace toner (TN-2410/2480) and drum (DR-2410) as needed |
| Safety | UL, cUL, FCC Class B, Energy Star; use only specified power cord; avoid water and heat sources |
| Spare Parts & Repairability | Consumables: TN-2410 (Standard), TN-2480 (High Yield), DR-2410 Drum; user replaceable; service by authorized dealer |
| General Information | Display: 2.7" LCD Touchscreen; Languages: English, French, Spanish; Recommended Monthly Volume: 250-2,000 pages |
Frequently Asked Questions - MFC-L6720DW BROTHER
User questions about MFC-L6720DW BROTHER
0 question about this device. Answer the ones you know or ask your own.
Ask a new question about this device
Download the instructions for your Fax in PDF format for free! Find your manual MFC-L6720DW - BROTHER and take your electronic device back in hand. On this page are published all the documents necessary for the use of your device. MFC-L6720DW by BROTHER.
USER MANUAL MFC-L6720DW BROTHER
D02EEJ001-00 OCE/ASA/SAF/GLF/TWN Version 0
EN
Quick Setup Guide
brother
DCP-L5510DN / DCP-L5510DW / DCP-L5660DN / MFC-L5710DN / MFC-L5710DW / MFC-L5715DW / MFC-L5915DW / MFC-L6710DW / MFC-L6720DW / MFC-L6910DN / MFC-L6915DW
Read the Product Safety Guide first, then read this Quick Setup Guide for the correct installation procedure. Not all models are available in all countries.

Video setup instructions: support.brother.com/videos

The latest manuals are available at the Brother support website: support.brother.com/manuals
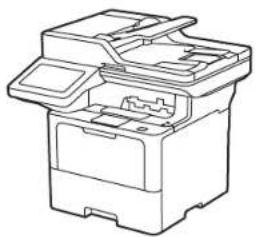
Unpack the machine and check the components
natural_image
Line drawing of a printer or scanner device with no visible text or symbols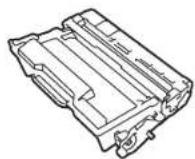
Toner Cartridge and Drum Unit Assembly (Installed in the machine)
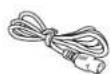
AC Power Cord

USB Port Cover (Not included in all models)
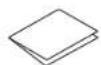
Quick Setup Guide Product Safety Guide
NOTE:
- The components included in the box may differ depending on your country.
- The available connection interfaces vary depending on the model. You must purchase the correct interface cable if you require one.
- USB cable
We recommend using a USB 2.0 cable (Type A/B) that is no more than 2 metres long.
• Network cable
Use a straight-through Category 5 (or greater) twisted-pair cable.
• The screens and images in this Quick Setup Guide show the MFC-L6915DW.
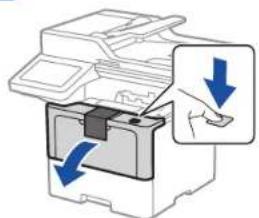
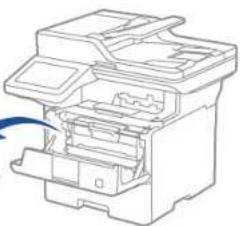
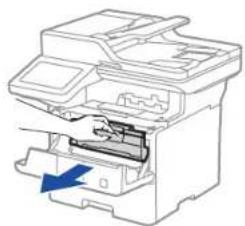
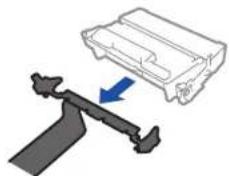
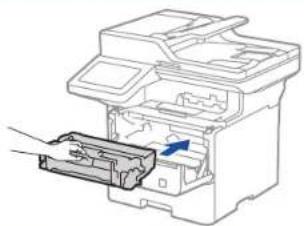
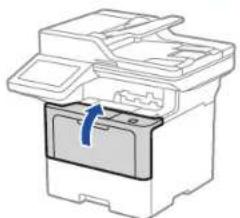
1 Remove the packing materials and re-install the toner cartridge and drum unit assembly
natural_image
Diagram of a printer with blue arrows indicating process flow, no text or symbols present
Discard the silica gel pack.
natural_image
Line drawing of a printer internal structure (no text or symbols)
natural_image
Line drawing of a printer with a blue arrow indicating compression or disassembly (no text or symbols present)

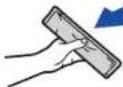
Remove the orange part.
natural_image
Diagram showing a mechanical component being lifted by an arrow, with no visible text or symbols.
natural_image
Diagram of a printer with an open slot and a blue arrow indicating a process (no text or symbols present)
natural_image
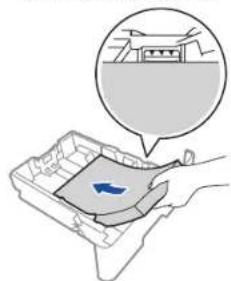
Diagram of a printer with a blue arrow indicating a process or operation (no text or symbols present)2 Load paper in the paper tray
natural_image
Diagram of a printer with a hand inserting a card into the base (no text or symbols visible)
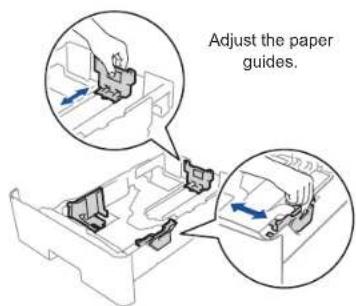

Do not exceed this mark.
natural_image
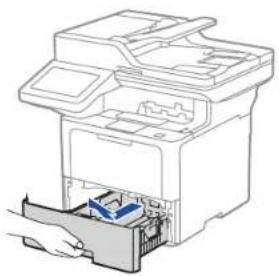
Illustration of a hand holding a tray with a blue arrow, no text or symbols present
natural_image
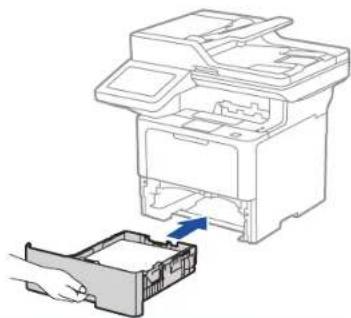
Diagram showing a printer's internal structure being inserted into a plastic tray (no text or symbols present)3 Connect the power cord and turn the machine on
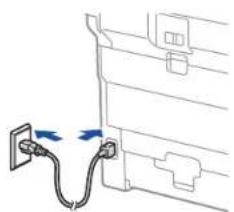
natural_image
Line drawing of a cable being inserted into a device (no text or symbols present)Back Front

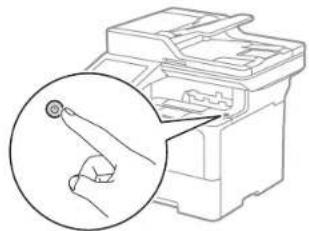
natural_image
Diagram of a hand holding a screwdriver inside a computer case, with an inset magnified view showing the tool (no text or symbols present)4 Select your country/language (Initial setup only)
After turning the machine on, you may be required to set your country or language (depending on your machine).
If required, follow the on-screen instructions.

Select your language (if needed)
Connect the telephone line cord (For MFC models)
-
On the machine's touchscreen, press [Settings]* >
[All Settings] >
[Initial Setup] >
[Local Language]. -
Press your language.
-
Press.
* If your machine displays the [All Settings] menu on the Home screen, start from [All Settings].
If you do not plan to use the fax feature on this machine, go to step .
Connect your computer or mobile device to your machine
Follow these steps to complete the setup using one of the connection types available on your machine.
Visit setup.brother.com to download and install Brother software.
setup.brother.com
Follow the on-screen instructions and prompts.
You can now print and scan using your machine.
To check for the latest firmware, visit support.brother.com/up7.
Important Notice for Network Security:
The default password to manage this machine's settings is located on the back of the machine and marked "Pwd".
We recommend immediately changing the default password to protect your machine from unauthorised access.
NOTE:
For Windows only, CD installation is also available (for some countries).
Can't Connect? Check the following:
| Wireless network* | Restart your wireless access point/ router (if possible). | If still not successful, go to . | |
| Restart your machine and computer, and then go to . | |||
| Wired network | Disconnect the cable. | If still not successful, visit support.brother.com for FAQs and Troubleshooting. | |
| USB connection |
* For certain models, the wireless network connection can be used only when the optional Wireless Module is installed.
Manual wireless setup (Wireless models)
If the wireless setup is not successful, try to set up the connection manually.
For certain models, the wireless network connection can be used only when the optional Wireless Module is installed.
Find your SSID (Network Name) and Network Key (Password) on your wireless access point/router and write them in the table provided below.
SSID (Network Name)
Network Key (Password)
Press >
[Find Wi-Fi Network].
Follow the LCD instructions.
Select the SSID (Network Name)
for your access point/router and enter the Network Key (Password).
When the wireless setup is successful, the touchscreen displays [Connected].
Go to to install software.
SSID: XXXXXXXX
Network Key: XXXX
If you cannot find this information, ask your network administrator or wireless access point/router manufacturer.
If setup is not successful, restart
your Brother machine and your wireless access point/router, and repeat .
If still not successful, visit support.brother.com.
- Quick Setup Guide
- brother
- Unpack the machine and check the components
- NOTE:
- Remove the packing materials and re-install the toner cartridge and drum unit assembly
- Load paper in the paper tray
- Connect the power cord and turn the machine on
- Select your country/language (Initial setup only)
- Select your language (if needed)
- Connect the telephone line cord (For MFC models)
- Connect your computer or mobile device to your machine
- Manual wireless setup (Wireless models)
Brand : BROTHER
Model : MFC-L6720DW
Category : Fax