CG219 - Video accessory Proaim - Free user manual and instructions
Find the device manual for free CG219 Proaim in PDF.

| Product Type | Camera Cage |
| Brand | Proaim |
| Model | CG219 |
| Material | Aluminum Alloy |
| Dimensions (L x W x H) | 250 x 150 x 80 mm |
| Weight | 350 g |
| Camera Compatibility | DSLR and Mirrorless Cameras |
| Mounting Threads | Multiple 1/4"-20 and 3/8"-16 Threads |
| Rail Support | 15mm Rod Compatible |
| Shoe Mounts | Cold Shoe on Top |
| Interface | Arca-Swiss Compatible Base |
| Power Input | None (Passive) |
| Key Features | Full Cage, Multiple Mounting Points, Ergonomic Grip |
| Included Accessories | Hex Wrench, Screw Kit |
| Maintenance | Wipe with Dry Cloth; Avoid Solvents |
| Safety | Ensure Screws Tightened; Do Not Overload |
| Spare Parts Availability | Replacement Screws and Hex Keys Available |
| Repair | User-Replaceable Screws; No Serviceable Parts Inside |
| Warranty | 1 Year Limited |
| Country of Origin | China |
Frequently Asked Questions - CG219 Proaim
User questions about CG219 Proaim
0 question about this device. Answer the ones you know or ask your own.
Ask a new question about this device
Download the instructions for your Video accessory in PDF format for free! Find your manual CG219 - Proaim and take your electronic device back in hand. On this page are published all the documents necessary for the use of your device. CG219 by Proaim.
USER MANUAL CG219 Proaim
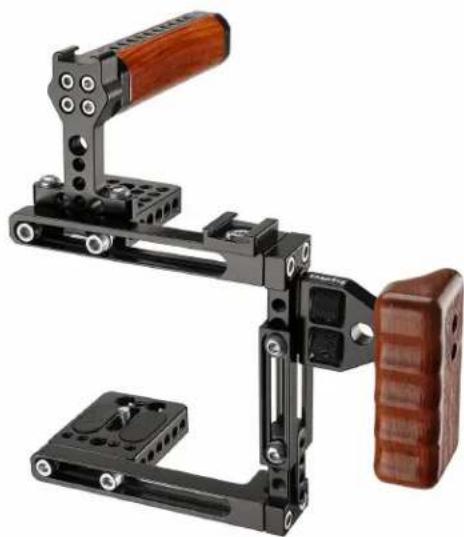
PROAIM SnapRig Universal DSLR Camera Cage (CG219)
Assembly Manual
natural_image
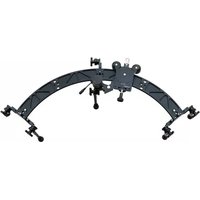
Black-and-white photo of a mechanical clamp device with wooden handle and grip, no visible text or symbolsWhat's In The Box
Please inspect the contents of your shipped package to ensure you have received everything that is listed below.

natural_image
Black mechanical clamp bracket with mounting holes and a U-shaped top (no text or symbols)Camera Cage with slide bars
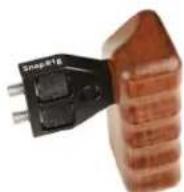
Wooden Side Handle
natural_image
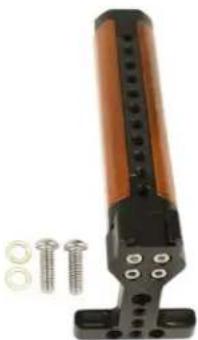
Close-up of a mechanical clamp with bolts and screw base (no text or symbols visible)Top Handle
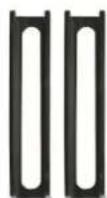
2 x Slide Bars

Top Plate
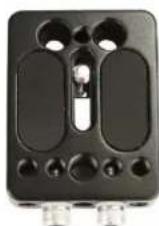
Camera Plate

3 x Allen Keys Sizes:
(3/16mm,4mm & 3mm)
All rights reserved.
No part of this document may be reproduced, stored in a retrieval system, or transmitted by any form or by any means, electronic, mechanical, photo-copying, recording, or otherwise, except as may be expressly permitted by the applicable copyright statutes or in writing by the Publisher.
DSLM Camera Cage Setup
- Remove both the Allen bolts on the top plate with a 3/16mm Allen key.
- Then Align the top plate with the camera cage and secure it properly with the help of a 3/16mm Allen Key by inserting both the Allen bolts on the top plate.
- Remove both the Allen bolts of the camera plate with the help of a 3/16mm Allen key and attach it to the bottom part of the camera cage.
- Then secure it with the help of a 3/16mm allen key.
NOTE: You can adjust both the top and base plates to your requirements by loosening the bolt and sliding it in.

natural_image
Two hands holding a black electrical connector with a cable, shown from different angles (no text or symbols visible)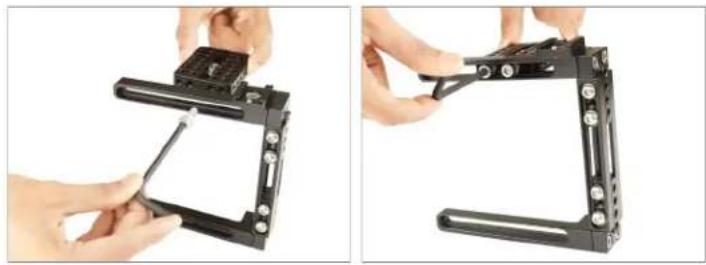
natural_image
Two views of a black mechanical frame with a tool inserted, shown from different angles (no text or symbols visible)
natural_image
Two-panel image showing hands connecting a small mechanical component to a black frame (no text or symbols visible)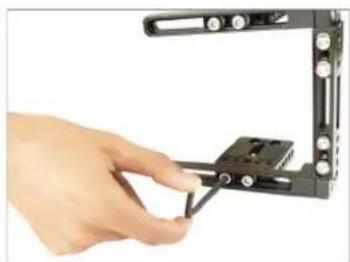
natural_image
Hand holding a small object next to a black mechanical bracket (no text or symbols visible)Top Handle
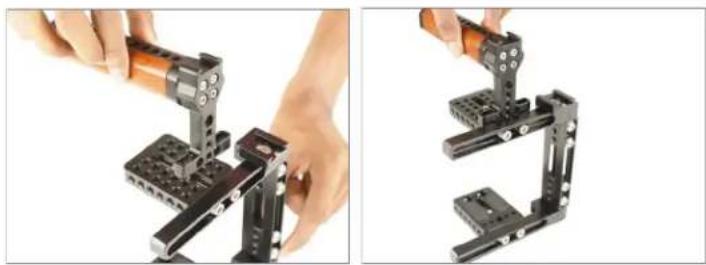
- Place the top handle above the top plate. NOTE: The provided multiple threads of the top plate allow you to mount the top handle anywhere according to your requirement.
- After placing the top handle on the top plate, match the bolt with the side threads of the handle, insert the button head, and tight it with the help of a 4mm Allen key.
natural_image
Two views of a mechanical clamp or bracket assembly with hands operating the component (no text or symbols visible)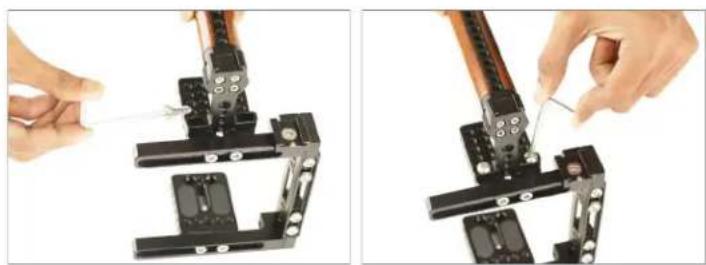
natural_image
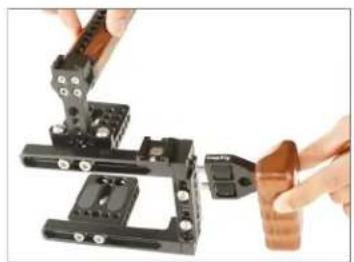
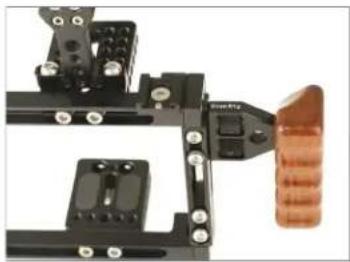
Two-step mechanical assembly procedure showing tool application on a bracket (no text or symbols visible)Side Handle
- Match the wooden side handle with the side thread of the camera cage and insert the side handle and tighten it properly with its knob.
NOTE: You can hold the handle anywhere on the provided multiple threads of the Camera Cage according to your requirement.
- The wooden side handle is now properly tight.
natural_image
Close-up of hands assembling a mechanical component with a copper-colored clip (no visible text or symbols)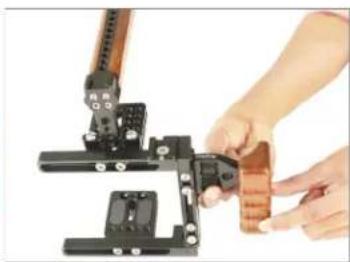
natural_image
Close-up of hands operating a mechanical clamp or clamp device with a wooden clamp (no visible text or symbols)- Attach the Camera (Not Included) into the Camera cage properly by sliding it onto the shoe mount on the top plate.
- Match the provided screw hole on the bottom of the camera plate with the camera (Not Included) hole and screw it tightly with the help of a screwdriver.
natural_image
Mechanical assembly with black frame, orange sensor, and connector (no visible text or symbols)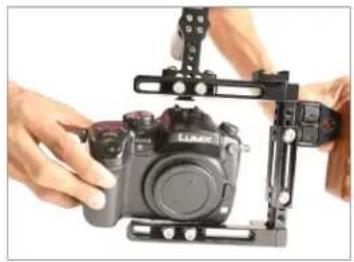
natural_image
Close-up of hands operating a DSLR camera frame with a mounted bracket (no visible text or symbols)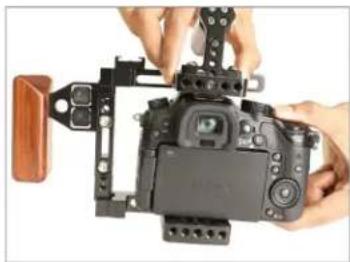
natural_image
Close-up of hands assembling a DSLR camera frame with no visible text or symbols
natural_image
Close-up of a hand inserting a red plastic component into a black camera module (no visible text or symbols)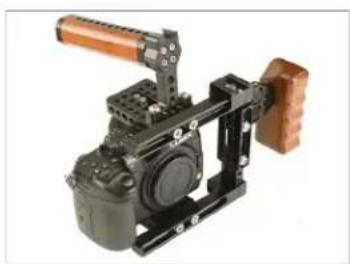
natural_image
Black-and-white photo of a video camera with a wooden handle and control frame (no visible text or symbols)Interchange Slide Bars
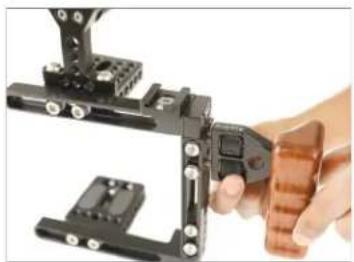
- Loosen the knob of the wooden side handle and remove the handle.
- Then remove the button head from both sides of the camera cage with the help of a 4mm Allen key.
natural_image
Close-up of a hand holding a black mechanical clamp or bracket with a wooden object nearby (no visible text or symbols)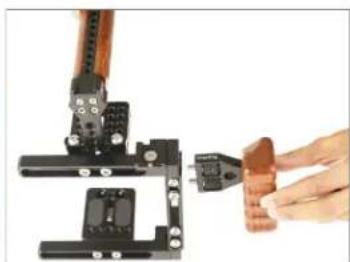
natural_image
Close-up of a hand holding a small brown electronic component next to a black mechanical clamp or bracket (no visible text or symbols)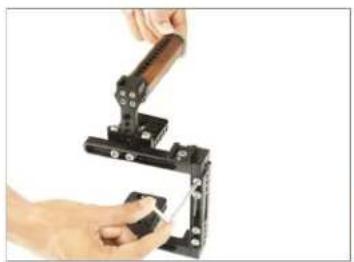
natural_image
Close-up of hands using a mechanical clamp or clamp device to adjust a component (no visible text or symbols)
natural_image
Close-up of hands using a mechanical clamp or clamp device to adjust a tool (no visible text or symbols)- The button heads have been properly removed from both sides of the camera cage and remove the camera cage's existing side sliding bar.
NOTE: The existing slide bar is comparatively larger than the given slide bar; you can use them according to your size requirements.
- Insert the slide bars from both sides by sliding them on the camera cage.
- By aligning the slide bars properly, insert the Allen bolt matching the thread of the sliding bars.
- Tighten the button head properly (front and back) using a 4mm Allen key.
- Match the wooden side handle with the side thread of the camera cage and insert the wooden side handle and tighten it properly with its knob.
- Adjust the height of the camera cage according to your camera's height.

natural_image
Black mechanical bracket with multiple mounting holes and a few metallic fasteners (no text or symbols visible)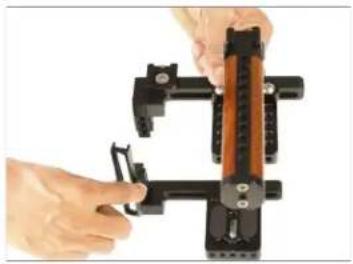
natural_image
Close-up of hands operating a mechanical clamp or bracket assembly (no visible text or symbols)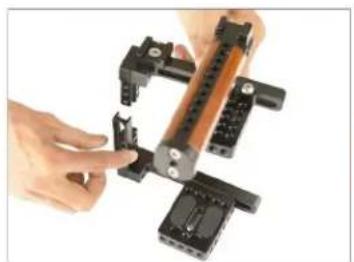
natural_image
Close-up of hands operating a mechanical clamp or bracket assembly (no visible text or symbols)
natural_image
Close-up of hands operating a mechanical clamp or bracket assembly (no visible text or symbols)
natural_image
Close-up of hands holding a black mechanical clamp with a ruler inserted, no visible text or symbols
natural_image
Close-up of hands using a tool to adjust a cylindrical component with a screwdriver (no visible text or symbols)
natural_image
Close-up of a hand using a tool to adjust or install a mechanical component (no visible text or symbols)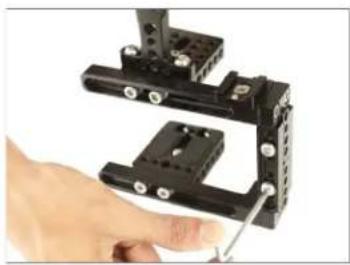
natural_image
Close-up of a hand using a tool to adjust or install a black mechanical clamp (no text or symbols visible)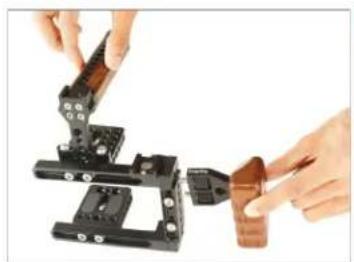
natural_image
Close-up of hands assembling a copper-colored mechanical component (no text or symbols visible)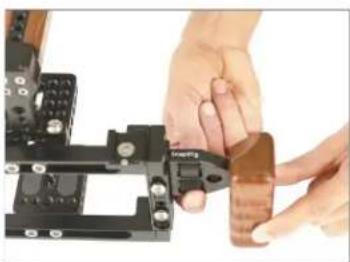
natural_image
Close-up of hands interacting with a mechanical device (no visible text or symbols)
natural_image
Close-up of a hand adjusting a mechanical clamp or bracket component (no visible text or symbols)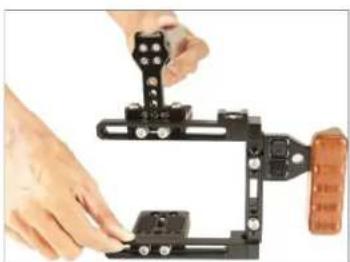
natural_image
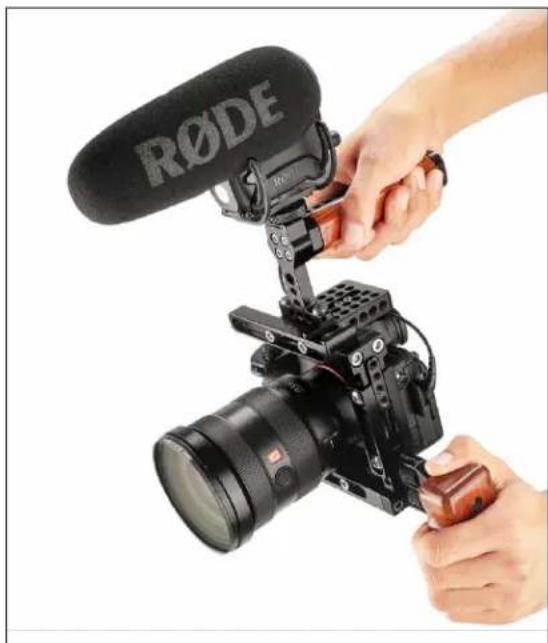
Close-up of hands operating a black mechanical clamp or frame device with a small component, no visible text or symbols.YOUR PROAIM SNAPRIG UNIVERSAL DSLR CAMERA CAGE ALL DRESSED UP AND READY TO GO!
natural_image
Person operating a RODE DSLR camera with a microphone and lens, no visible text or symbols on the device itself.(SHOWN WITH OPTIONAL ACCESSORIES)
Warranty: We offer one year warranty for our products from date of purchase. Within this period of time, we will repair it without charge for labor or parts. Warranty doesn't cover transportation costs nor does it cover a product subjected to misuse or accidental damage. Warranty repairs are subjected to inspection and evaluation by us.
Liability: We are not liable for damage caused by products that we do not supply or from mishandling in transit, accident, misuse, neglect, lack of care of the product, or service by anyone other than our company.
Contact Us: In case of any kind of dissatisfaction, please Contact us immediately and we promise our utmost support and care until you use our product.


Brand : Proaim
Model : CG219
Category : Video accessory