1325 - Dishwasher ASKO - Free user manual and instructions
Find the device manual for free 1325 ASKO in PDF.

User questions about 1325 ASKO
0 question about this device. Answer the ones you know or ask your own.
Ask a new question about this device
Download the instructions for your Dishwasher in PDF format for free! Find your manual 1325 - ASKO and take your electronic device back in hand. On this page are published all the documents necessary for the use of your device. 1325 by ASKO.
USER MANUAL 1325 ASKO
How to use your dishwasher
1325
1355
Important!
Read all operating instructions before using your dishwasher for the first time, in order to obtain the best performance from it.
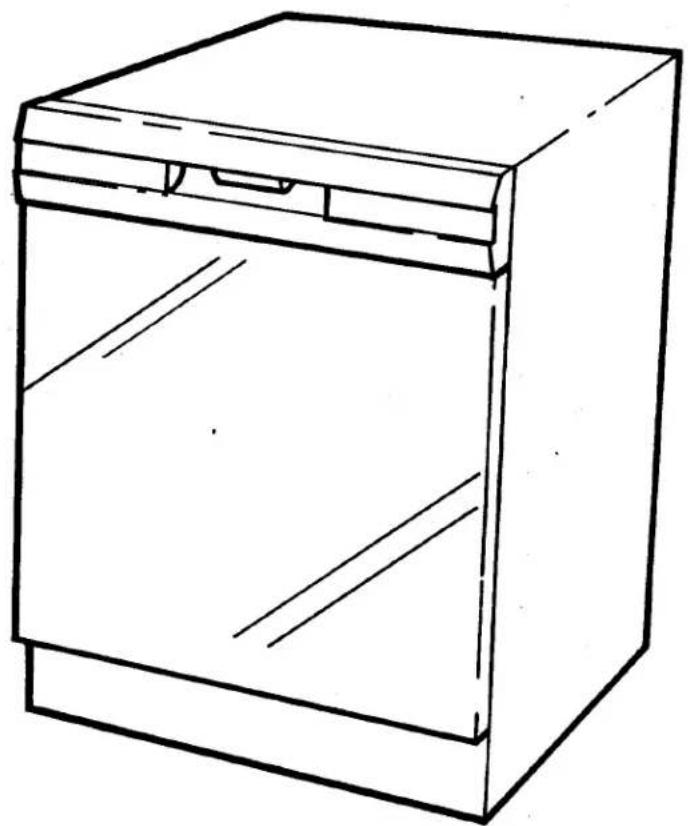
natural_image
Line drawing of a simple kitchen appliance with lid and front panel (no text or symbols)Contents
| How to use the machine | 2 |
| The parts of the machine | 3 |
| Loading the baskets | 5 |
| Detergent | 6 |
| Technical data | 6 |
| Wash these items with care | 7 |
| How to use the Model 1325/1355 | 8-9 |
| Which program should I use? | 8-9 |
| Energy saving | 9 |
| Care of the machine | 10 |
| Filling with rinse aid | 10 |
| Adjusting the rinse aid dispenser | 10 |
| Safety | 11 |
| If performance is poor | 12-14 |
| Product warranty | 15 |
| Instructions summary | 16 |
Before using the machine for the first time manual right through
Read this entire these instructions. Certain materials should not be washed in dishwashers (see page 7). Use only dishwasher detergent.
Important Safety Instructions
WARNING: When using your dishwasher, follow basic precautions, including the following:
- Read all instructions before using the dishwasher.
- This dishwasher must be properly grounded: see installation instructions for details.
- Use the dishwasher only for its intended purpose.
- Use only detergents or rinse aids recommended for use in a dishwasher, and then keep them out of reach of children.
- When loading items to be washed: a. Locate sharp items, so that they are not likely to damage the door seal. b. Load sharp knives with the sharp points down to reduce risk of cut-type injuries.
- Do not wash plastic items unless marked "dish washer safe": or the equivellant. For plastic items not so marked, check the manufacturer's recommendations.
- Do not touch the heating element during or immediately after use.
- Do not operate your dishwasher unless all enclosure panels are properly in place.
More about SAFETY on page 11
- Do not tamper with controls.
- Do not abuse, sit on or stand on the door or dish rack of the dishwasher.
- To reduce the risk of injury, do not allow children to play in or on a dishwasher.
- Under certain conditions, hydrogen gas may be produced in a hot water system that has not been used for two weeks or more. Hydrogen gas is explosive. If the hot water system has not been used for such a period, turn on all hot water faucets and let the water flow from each for several minutes. This will release any accumulated hydrogen gas. Since the gas is flammable, do not smoke or use an open flame during this process.
- Remove the door to the washing compartment when removing an old dishwasher from service or discarding it.
More about SAFETY on page 11
Save These Instructions
How to use your new dishwasher
Follow the steps in the strip along the top of each page for a brief summary of the instructions.
Further details and advice are on the page below the strip.
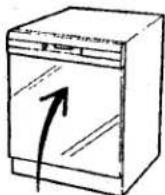
The parts of the machine
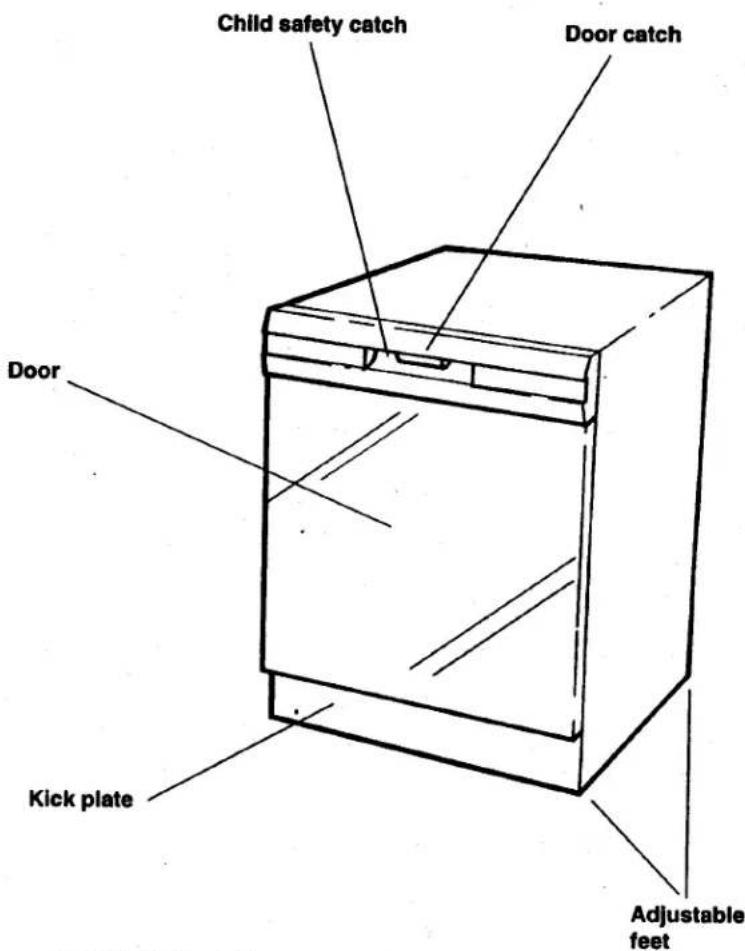
text_image
Child safety catch Door catch Door Kick plate Adjustable feetThe kick plate can be adjusted inwards and outwards to match the depth of kitchen toe kick (see Installation Book)
The kick plate can be adjusted vertically to match the height of kitchen cabinets (see Installation Book)
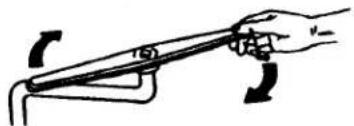
① Open the door by pulling the handle forwards and upwards.
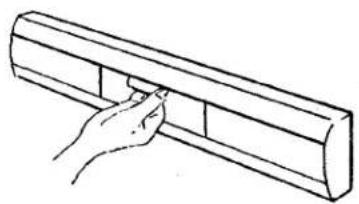
natural_image
Hand holding a rectangular object with a tab, no text or symbols visibleHow to open the door if the child safety catch is engaged:
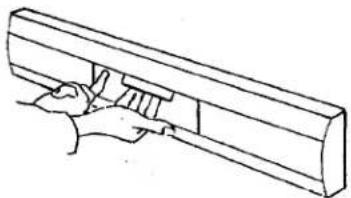
natural_image
Line drawing of a hand holding a rectangular object with internal parallel lines (no text or symbols)Slide the safety catch to the left and then lift the handle upwards.
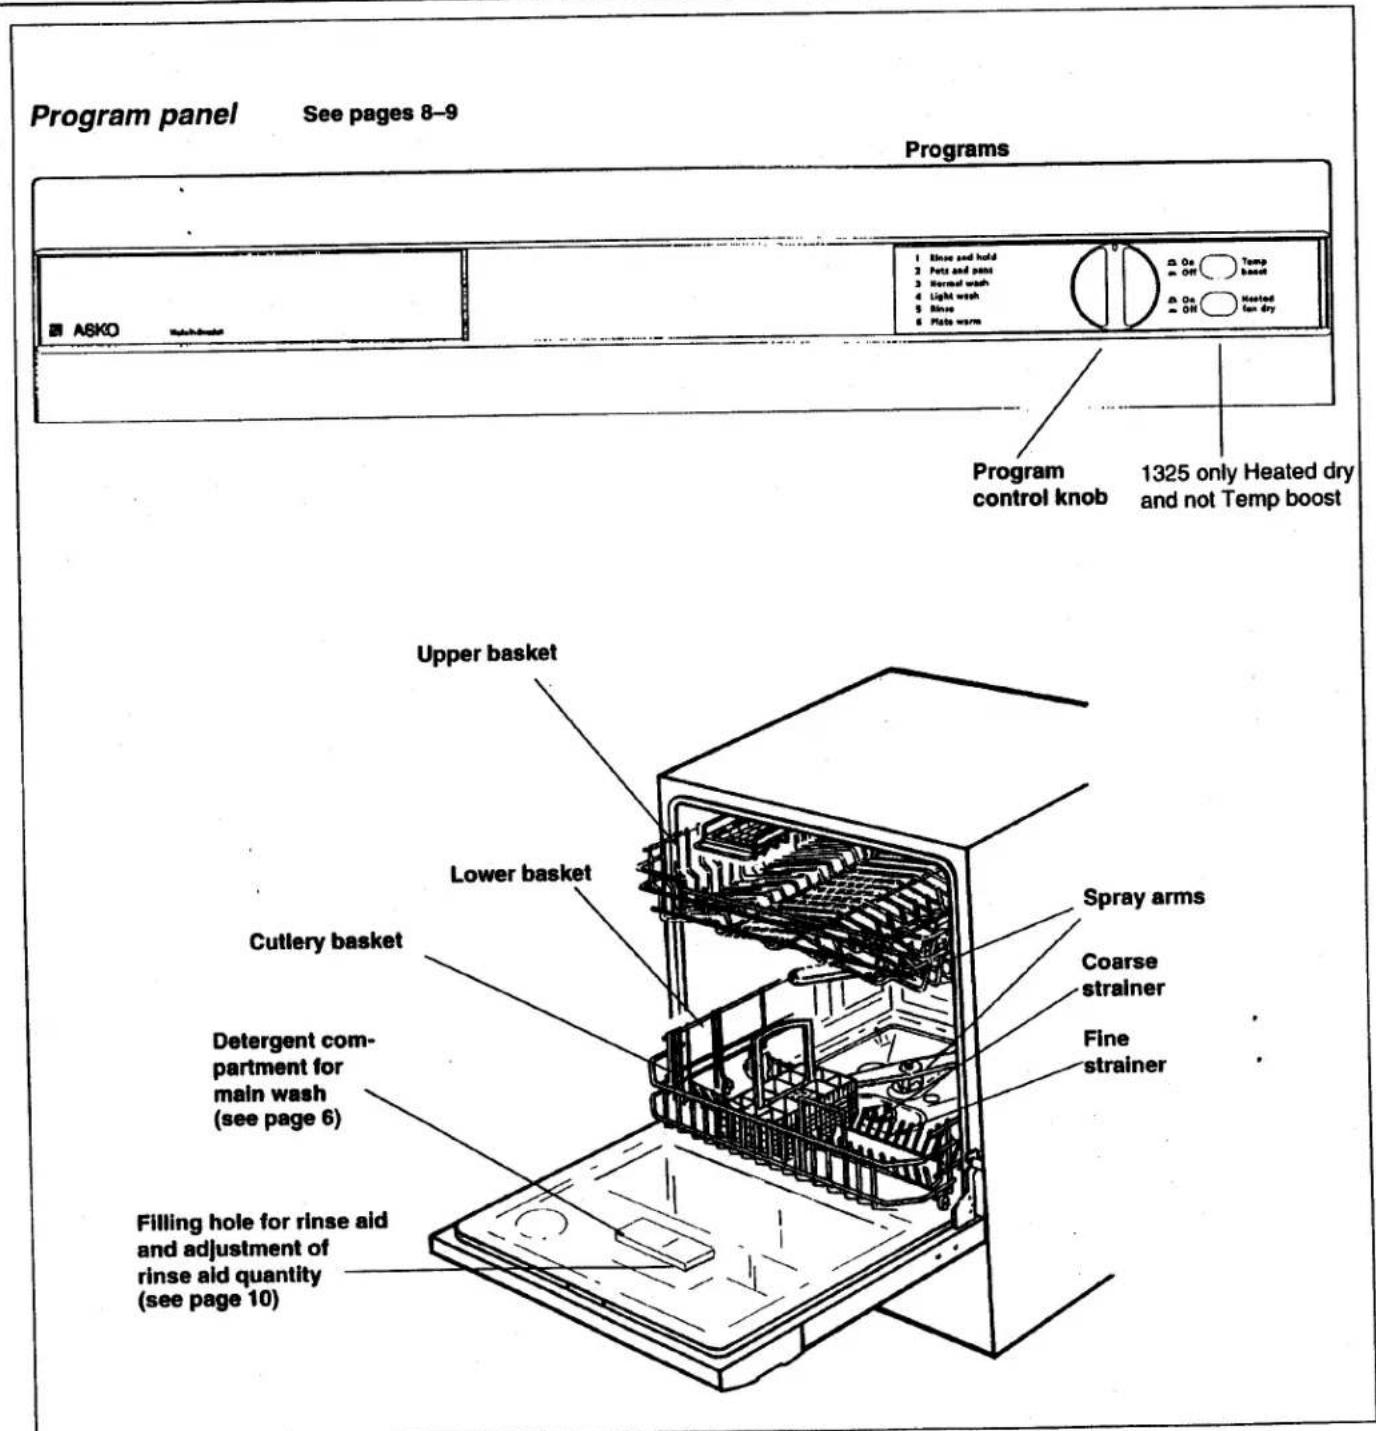
text_image
Program panel See pages 8-9 AsKO Watchbox Programs 1. Thin and hold 2. Puts and paint 3. Normal wash 4. Light wash 5. Rinse 6. Plate worm Dr On Off Temp based Dr On Off Heated for dry Program control knob 1325 only Heated dry and not Temp boost Upper basket Lower basket Cutlery basket Detergent compartment for main wash (see page 6) Filling hole for rinse aid and adjustment of rinse aid quantity (see page 10) Spray arms Coarse strainer Fine strainer② Load the baskets
Be careful when washing items made of certain materials (see page 7).

natural_image
Line drawing of hands operating a rack-mounted appliance with multiple fans (no text or symbols)③ Add detergent
Pre-wash: on the inside of the door
Main wash: in the detergent com- partment
Close the door after you have added the detergent.

natural_image
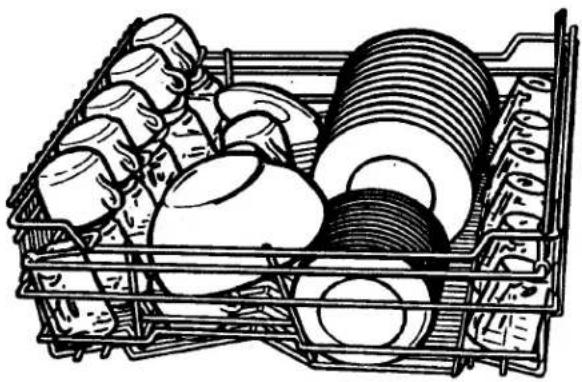
Hand pouring granular material into a small electronic device on a wooden surface (no text or symbols visible)Upper basket
Load glasses, cups, bowls, small plates, saucers, long items of cutlery and carving knives into the upper basket. (Take care that sharp edges do not damage the coating of the baskets.)
The upper basket has a hinged rack, on the left side. (Not 1325.)
When the hinged rack is folded down, cups can be placed on it and under it. There is space for tall glasses with the rack folded up.
There is no need to rinse items before you load the machine, although larger food particles should be removed.
natural_image
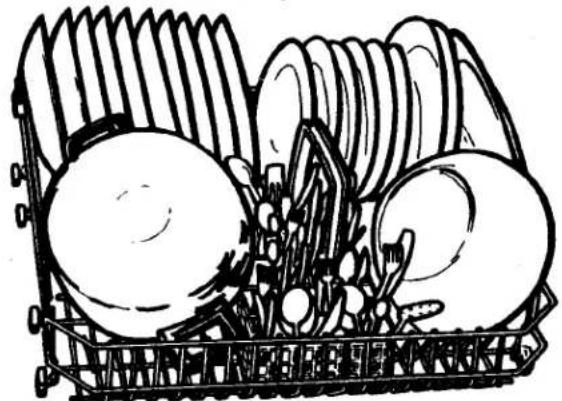
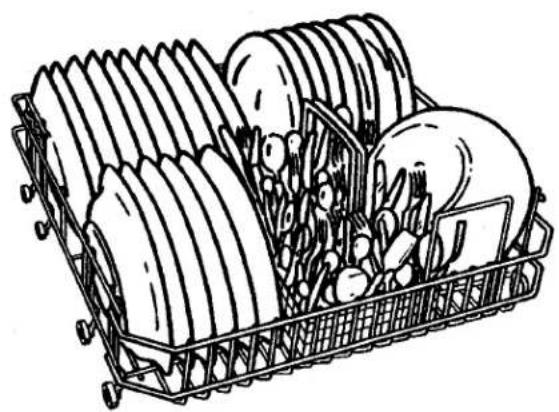
Illustration of a wooden crate containing various items including spools, candles, and shells (no text or symbols)Lower basket
Load large and small plates, serving dishes and cutlery (in the cutlery basket) into the lower tray.
natural_image
Line drawing of a basket filled with various items including eggs, tomatoes, and vegetables (no text or symbols)All used surfaces must face downwards.
natural_image
Line drawing of a basket filled with various items including eggs, rabbits, and vegetables (no text or symbols)④ Check that the spray arms can rotate freely.
natural_image
Simple line drawing of a hand gripping a mechanical component with directional arrows (no text or symbols)⑤ Check that the water supply is turned on.
⑥ Close the door. Close the door fully: if not, the machine will not start.
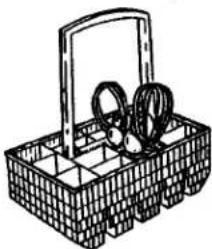
Cutlery basket
Load cutlery with the handles downwards and as spread out as possible. Make sure that spoons do not 'nest' with each other. Avoid placing cutlery of different metals – e.g. silver and stainless steel – in the same compartment. It is also unsuitable to place different grades of stainless steel (check by the surface colour) in contact.
natural_image
Line drawing of a woven basket with handles and a handle (no text or symbols)The cutlery basket has a folding cover in the middle. It can be used to protect small items, but you can also put thin handles as electric whisks through the oflded cover.
How much detergent?
The amount of detergent required depends on the program used and the water hardness (see below).
Pots and pans, normal wash
Pre-wash (1-2 T-spoons) Main wash (1-3 TBS)
Light wash
Main wash (1-3 TBS)
Use only dishwasher detergent
for both pre-wash and main wash. Ordinary hand dish-washing detergent must not be used, as the foam will interfere with proper operation of the machine.
The amount of detergent depends on the hardness of the water
Water hardness varies from place to place, and is measured in degrees of hardness (°dH). Your water company should be able to tell you the hardness of water in your area. The harder the water, the more detergent you will need. Follow the instructions on the packet.
In hard water areas, both the dishes and the machine can develop a grey film after a while. This can be removed by using the machine with the pre-wash detergent replaced by two tablespoonsful of citric acid. Use the pots and pans program.
If the water is very hard, use a rinse aid that contains citric acid (acid rinse aid).
Filling of rinse aid see page 10.
Technical details
Height 32 1/4-35"
Width 24"
Depth 22"
Weight 100 lbs.
Capacity 12 IEC place settings
Water pressure 15-147 PSI
Voltage 120 Volt, 60 Hz
Max power 1650 W
Heater 1400 W

Warning!
Dishwasher detergent is corrosive – take care to keep it out of the reach of children.
Make sure that children cannot get hold of dishwasher detergent. If any is accidentally swallowed, give plenty to drink: one or two glasses of milk or water. Do not try to induce vomiting. Seek medical advice without delay. If dish-washer detergent gets in the eyes, rinse with plenty of water.
| What can be washed in the dishwasher?Most household goods such as plates, saucepans and flatware can be machine washed. If you are unsure, check with the manufacturer or, if this is not possible, wash one set over an extended period of time and then compare it with the rest of the set.The user is responsible for what he or she washes in the dishwasher. | ||
| Material | Dishwasher safe? | Information |
| Aluminum | Yes | Anodized aluminum may fade or darken. Patches and discoloration may appear but these can be removed with wire wool. Remember not to position aluminum utensils so that they come in direct contact with the dishwasher detergent since this may result in black spots and small erosion holes. |
| Cast Iron | No | The seasoning is lost and the iron rusts. Hand wash. |
| China Stoneware | Yes | China without decor or with decor protected by glaze is dishwasher safe. Remember however to place the objects so that they are not in contact with each other, otherwise they can be damaged.China with a pattern on top of the glaze, or with gold leaf decor may fade. Check with the manufacturer. If this is not possible, try with one of the items over an extended period. Then compare its colors and patterns with the rest of the set. |
| Crystal | NoYes | Antiques and very delicate china should not be washed in the dishwasher.Place the items so that they cannot fall over or knock against each other while being washed.Certain types of lead crystal may etch if they are machine washed. Check with your supplier.Refer to china above for colored patterns or gold leaf decor. Antiques and very delicate items should not be machine washed.Use a low wash temperature. |
| Dirilyte | No | Gold-colored flatware can become discolored. |
| Glass | Yes | Milk glass may become yellowed. |
| Flatware with bonded handles | No | Certain types of adhesives cannot stand machine washing and may loosen. |
| Pewter | No | Pewter tarnishes. |
| Disposable plastic item | No | Cannot withstand machine washing. |
| Plastic | Yes | If the item is not marked "Dishwasher safe", test one of the items before the whole set is washed.Place plastic items in the top basket. Use drying without heat. |
| Stainless steel | Yes | Rinse the items if they are not going to be washed immediately. Salty or acidic foods can stain if left on. Dry, dishwasher detergent can also produce black marks which are difficult to remove.Do not let copper items come in contact with stainless steel. Do not mix different types of stainless steel. |
| Silver and silver plate | Yes | Rinse the items if they are not going to be washed immediately. Food which contains a lot of salt or acids produces marks. Dry dishwasher detergent can also produce black marks which are difficult to remove.Do not put in same silverware basket with stainless steel. Contact between the metals can damage silver.Do not wash copper utensils with the same load. Silver may get a brown film. Adhesive used to attach some hollow-handle knives can loosen. |
| Non-stick coatings | Yes | After washing, wipe the non-stick coating area with vegetable oil to keep it from loosing its non-stick quality. |
| Tin | No | Can rust. |
| Wood | No | Check the manufacturer's recommendation before washing. Wood can warp, crack or lose its shape with any kind of washing. |
| Non-dishware items-such as electronic air cleaner filters, furnace filters, paint brush, etc. | No | Do not wash in dishwasher. Damage to dishwasher may result. |
| Sharp kitchen (carving) knives | No | May become dull if washed in very hot water or allowed to contact other items during the washing process.Wood handles may also warp, crack or loosen. Check manufacturer's washing instructions. |
How to use your
Model 1325/1355
Your Model 1325/1355 is a dishwasher which is convenient to use.
- Select the Temp boost On/Off (Not 1325)
- Select Dry On/Off
Which program should I use?
Just turn the program knob to the required program. Then you can select temperature (not 1325), 131° or 150° F and drying.
1. Rinse and Hold
Use this program to rinse the dishes if you are going to wash later or on the next day.
2. Pots and Pans
Use the Pots and Pans program for dirty dishes, such as pots, pans, casseroles and gratin forms. If the dishwasher still has some place left, fill up with plates, cups etc.
3. Normal wash
Use this program for normal washing. It is made for plates, cups and saucers and one or two not so dirty pans.
4. Light wash
If the wash is not particularly heavily soiled, use the Light wash program. It is provided for glasses and china, which are washed immediately after being used and therefore don't need a stronger program.
Delicate items
Delicate items can be washed with the Light wash program. Omit heating if you want to be extra careful. See also page 7: Wash these items with care.
5. Rinse
The rinse program consists of a rinse with heat and drying. If say, you are making jam and want to rinse and warm previously washed jam jars, this is a suitable program.
6. Plate warming
Is used to heat plates.
Temp Boost
Releasing this button will insure 140°F water for washing.
1 Rinse and hold
2 Pots and pans
3 Normal wash
4 Light wash
5 Rinse
6 Plate warm
Dishwashing programs
| Programs | Number | |
| Rinse & Hold | 1 | |
| Pots and Pans | 2 | |
| Normal wash | 3 | |
| Light wash | 4 | |
| Rinse | 5 | |
| Plate heating | 6 |
- Select the program and the machine will start
- Want to change your mind?
If you want to change program after you have started the machine, select a new program by turning the program control.
- If there is a power failure
before the program has finished, the program will continue when power is restored.
• After washing
When the machine has stopped, it consumes only an extremely low power.
The indicating lamp remains on as long as the switch is in the On position. It is a good rule never to leave a switched-on machine unattended.
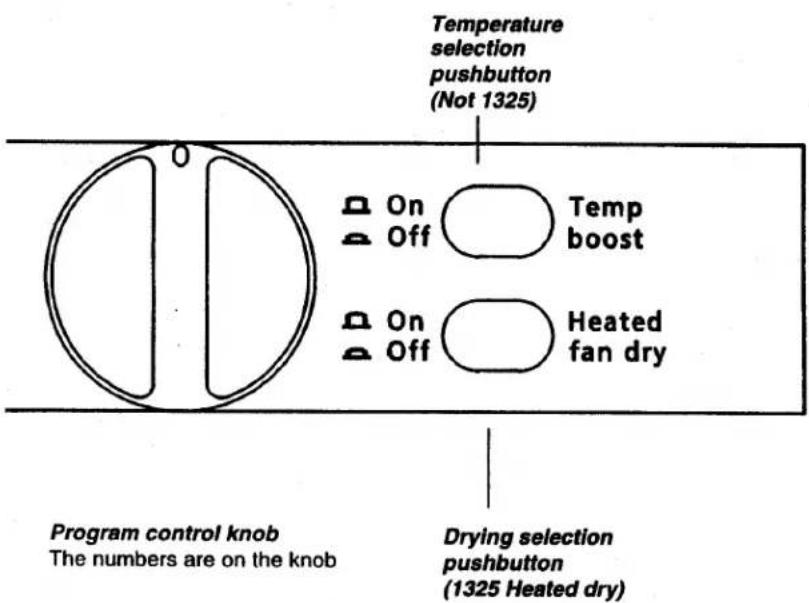
flowchart
graph TD
    A["Program control knob<br>The numbers are on the knob"] --> B["On Off"]
    B --> C["Temp boost"]
    B --> D["On Off"]
    D --> E["Heated fan dry"]
    F["Drying selection pushbutton<br>(1325 Heated dry)"] --> G["Temperature selection pushbutton<br>(Not 1325)"]
| Program featuresThe dirty rinse water is emptied and the next period starts with clean water (SCS= Super Cleaning System) | Consumption figuresHot fillat 120° F | ||||
| Pre-wash | Main wash | Rinses | Drying | Cycle time,approx. min.* | Water consump.in gallons |
| 4 | .9 | ||||
| 110 | 5.8 | ||||
| 90 | 4.6 | ||||
| 85 | 3.7 | ||||
| 60 | .9 | ||||
| 10 | - | ||||
How to save energy:
Wash only full loads
Save energy by not using the machine until it is full.
Wash at lower temperatures
You can select the temperature in main wash and rinse in any programme. Choose 55°C instead of 65°C (not 1325) for reduced energy consumption.
Is the machine connected to a cold water supply?
If the machine is connected to a cold water supply, running time will be longer, as the machine must heat the water. However, the longer washing time means that you can run the program at a lower temperature and still get the same wash performance. You also save electricity.
Long programs with low temperature is suitable for detergents with emzyms.
Select no drying
If you select no drying, the dishes will dry a little more slowly. You can speed up drying by opening the door a little to allow the moist air to escape.
* The program times shown in the table are rounded-off values from actual tests. In practice, times may vary some-what due to the temperature of the water supply, voltage variations etc.
Care of the machine
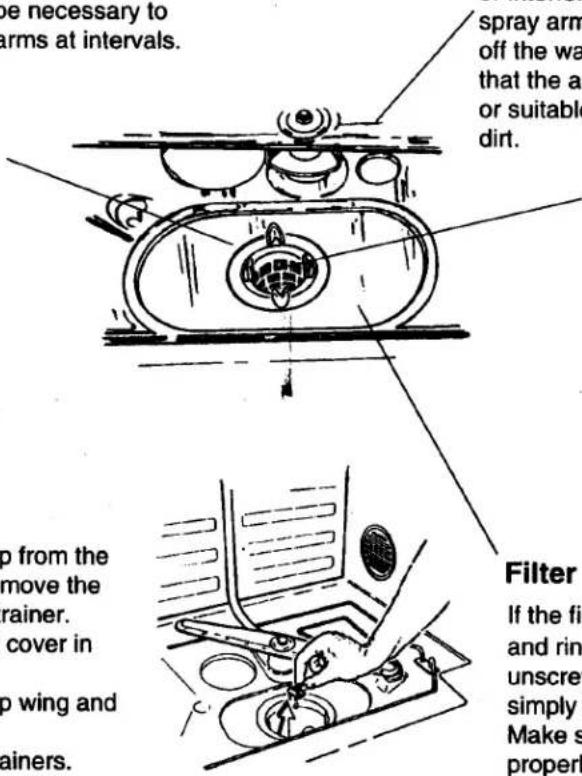
The interior of the machine is manufactured from stainless steel, which is kept clean through normal use. It may, however, be necessary to clean the strainers and spray arms at intervals.
Fine filter
Food residues caught by the fine strainer are flushed away automatically each time the machine is used.
Unscrew the fine strainer sometimes and clean it with a brush.
When replacing the strainer, make sure that its edges seal properly against the bottom of the machine.
Outlet pump
You can reach the outlet pump from the inside of the machine. First remove the coarse strainer and the fine strainer.
Then you can remove a small cover in the bottom of the hole.
There you can reach the pump wing and remove eventual dirt.
Replace the cover and the strainers.
text_image
be necessary to arms at intervals. spray arm off the wa that the a or suitable dirt. up from the move the rainer. cover in up wing and rainers. Filter If the fil and ring unscre simply Make s properlSpray arm jets and bearings
Pieces of dirt can block the spray arm jets or interfere with smooth running of the spray arm bearings. Undo the nut and lift off the washer on top of the spray arm so that the arm can be lifted off. Use a brush or suitable pointed object to get rid of any dirt.
Coarse strainer
The coarse strainer catches larger particles of food that would otherwise clog the outlet pump. Squeeze the lugs gently toward each other, lift out the strainer and clean it when necessary. Replace it in the reverse manner. In the bottom the coarse strainer has openings, which let peas and macaronis out. Toothpicks, however, will stay in the strainer.
Filter
If the filter is dirty, it can be removed and rinsed clean. It can be removed by unscrewing the fine strainer and then simply pulling it straight upwards. Make sure that it clicks into position properly when you put it back.
text_image
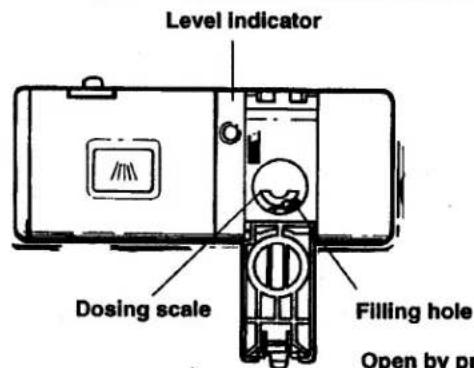
Level Indicator Dosing scale Filling hole Open by prFilling up with rinse aid
Drying will be faster if you use a rinse aid. An indicator next to the rinse aid container shows whether it is empty. If the indicator appears completely black, there is sufficient rinse aid. If the size of the black spot is reduced, the container requires filling.
The first filling of rinse aid (Jet Dry) is included in the machine when it is delivered from the factory.
Adjusting rinse aid metering
Rinse aid is metered automatically: the setting is adjusted before the machine leaves the factory.
It may be necessary to alter the setting, to adjust the amount of rinse aid metered, depending on the hardness of the water supply. This can be done by opening the right cover. Then you can see the setting. This is normally set at 1. If the water in your area contains lime (over 10–12 °dH), an acid rinse aid containing citric acid should be used if the machine is not fitted with its own water softener. The metering setting should be adjusted to 1–6, depending on the hardness of the water.
Excessive use of the rinse aid can result in foam formation. This could cause poor washing results.
If the water in your area is very soft, you can dilute the concentrated rinse aid with an equal quantity of water.
Safety
WARNING!
Wooden items and some plastics are a fire risk if they should fall on to the heating element.
Door switch
The machine has a door switch which turns off the power and stops the machine if the door should be opened while the machine is in use. The program will continue when the door is closed.
The machine also has a child safety catch to prevent the door being opened.
Overfill protection
The machine incorporates an overfill protection device, which automatically starts the outlet pump and closes the inlet valve if the water level in the machine should rise to a higher level than normal.
This protection operates only if the machine is switched on. It is therefore backed up by a further, mechanical protective device in the bottom of the machine. The bottom of the machine is made in the form of a tray, in which water from any leak will collect, lifting a float which electrically turns off the inlet valve and the circulation pump. It also starts the outlet pump. If this safety device has operated, turn off the water at the main supply tap and send for service.
Anti-tip guard
If the machine is installed completely free-standing, it must be fitted with an anti-tip guard.
Child safety catch
The machine incorporates a child safety catch, preventing small children from opening the door and being scalded by hot water or steam. The catch also prevents children from getting at the corrosive detergent.

text_image
at the cEngaged

Disengaged

To engage the child safety catch
Slide the catch to the left and turn the trace horizontal with a screwdriver. To open the door, hold the catch with your left hand and pull the main catch with your right hand in the usual way.
To disengage the child safety catch Slide the catch to the left and turn the trace vertical with a screwdriver.
| Poor dishwashing resultsBefore calling for service, try the following remedies:Poor results may not always be caused by the machine. Read through the chart below before contacting your servicer. | ||
| Problem | Possible Cause | Suggested Remedy |
| Spotting and filming | Hard water | Use the maximum recommended amount (3 tablespoons) dishwasher detergent.You may need a home water softener.To remove hard water spots, try a vinegar rinse:Wash and rinse load as usual.Remove all metal items from dishwasher.Do not add detergent.Pour two cups of vinegar into a bowl and set it on the bottom rack of the dishwasher.Run the dishes through an entire wash program.If the vinegar rinse doesn't work, repeat the above process substituting 1/4 cup citric acid crystals (available at most drug stores) for the vinegar.Wiping with a damp cloth should remove spots from metal items. For sterling and silver plated flatware, rub with a towel, or use a good cream silver polish. |
| Filter systemNo rinse aid | Check filter system to be sure it is clean and properly installed.Does the rinse aid dispenser need to be filled?( Note: Used only in hard water areas.) | |
| Water not hot enough | Use the Temp Boost for best results when washing heavily soiled or greasy items, except for fine china and delicate crystal. | |
| Too little water | Check that the water valve is fully open. Make sure that the water pressure is between 18 and 176 PSI. | |
| Dishwasher detergent | Check the filter in the inlet valve.Use only the correct amount of dishwasher detergent according to the hardness of the water and the wash program you have selected. Do not use old or caked detergent. Store the dishwasher detergent in a dry place and in a closed container. Change the dishwasher detergent, if the result is still unsatisfactory. | |
| Items not loaded properly | Check that you have loaded the items according to the instruction on pages 5 and 6.Do not overload. Make sure spray can reach all soiled surfaces. | |
| Spray arms rotate poorly or stand still | Check that both spray arms can rotate freely and that items do not obstruct the movement of the spray arms. Lift the arms and make sure that no grains of dirt etc. retard the rotation of the spray arms. If necessary, clear the obstruction, refit the arms and check that they rotate freely. | |
| Strainer blocked | Make sure that the holes in the spray arms are not blocked by dirt. If necessary, clear the holes with a pointed object. | |
| Excessive foam in the machine | Check the strainer. Clean if necessary. See the instructions on page 10.Use only dishwasher detergent. Too much rinse aid in final rinse cycle. | |
| Flatware incorrectly loaded | Pay particular attention to spoons so that they do not nest in each other and prevent water penetration. | |
| Small particles deposited on items | Spray arm or arms not rotating freely | Be sure a utensil or handle has not prevented their turning. |
| Detergent | Use only fresh detergent, stored in a tightly closed container in a cool dry place. Fill dispenser only when ready to start the dishwasher. Use the recommended amount of detergent, especially with hard water. | |
| Low water pressure | Check that the water valve is fully open. Make sure that the water pressure is between 18 and 176 PSI. | |
| Improper loading of dishes | Load dishes to prevent water and detergent from being trapped in or between items. Water should circulate freely. | |
| Marks and discoloration | Aluminum utensils rubbing against items during washing | Be sure aluminum utensils, especially light weight foil-type pans, do not touch dishes.To remove spots, use a non-abrasive cleaner. |
| Yellow or brown marks | Iron or manganese in waterCopper with sterling silverTea or coffee (tannic acid) | Temporary solution: Pour 1 teaspoon to 1 tablespoon of citric acid crystals in instead of the prewash detergent directly on the inside of the door. Follow this prewash with a full detergent wash. Use the heavy wash program.Permanent solution: Install an iron removal system in the water supply.Yellow film on sterling silver results when you wash copper utensils in the same load. Silver polish will usually remove this stain.Tea or coffee can stain cups. Remove stains by hand, using a solution of 1/2 cup bleach and 3 cups warm water. (Do not use on sterling silver or silver plate.) |
| Discoloration of stainless steel, silver plate or sterling silverDistortion of plastics | Allowing salty or acidic foods to remain on flatwareStainless steel contacting silverPlastic item has low heat tolerance | Rinse flatware that is to stand several hours before washing.Do not put stainless steel and silver flatware in the same silverware basket compartment. Direct contact between these metals can cause permanent damage to silver.Clean stained items with silver polish.Do not use abrasives on stainless steel or silver.Plastics vary in their ability to tolerate heat. Check washing instructions for all plastic items to be sure they are dishwasher safe. If they are, place in top rack, away from the heating element. |
| Marks on mela-mine and plasticsCloudy film on glassware-etching of glass | Porous materialToo much deter-gent, especially in soft waterRinse aid used with soft water | Use a special cleaner for plastic.DO NOT use bleach or scouring powder on these materials.If vinegar or citric acid rinse doesn't remove film, the cloudiness is "etching". This is permanent. To prevent etching, use the least amount (one teaspoon) of recommended dishwasher detergent if you have soft water.Use a good quality dishwasher detergent and rinse aid. Do not overload the machine. Water should circulate freely to assure adequate rinsing and draining.Use drying without heat.Use rinse aid in hard water areas only. |
| Dishes not dry | Non-heated dryingNo rinse aidPlastic itemsImproper loading or unloadingWater not hot enoughDry cycle interrupted (Door opened too soon) | Be sure to select heated drying for the driest results. Allow more drying time when using non-heated drying.Fill rinse aid dispenser. Rinse aids help dishes to dry faster.(Note: Used only in hard water areas).Certain plastic materials are difficult to dry. Plastics may need towel drying.Do not overload or nest items. Be sure all surfaces drain well. Load items with concave bases so as much water as possible can run off. Unload the bottom rack first. Water from dishes in the top rack may be spilling into the bottom rack.Dishes washed with the HI water temperature setting will dry the fastest.If the door is opened during the heated dry cycle, the heating element does not come back on after the door is re-closed. Also, if dishwasher door is opened immediately after the dry cycle is completed and then shut again, the damper invent is closed, trapping warm humid air. It is best then to leave door open slightly. |
| Problem | Possible Cause | Suggested Remedy |
| Detergent left in detergent compartment (Detergent compartment will not open) | Compartment cover blockedLight cycle usedOld detergent | The cover may not be opening because of improperly loaded items. Move dishes that may be blocking it.Detergent compartment door does not open during light cycle. Place detergent directly near bottom of inside surface of door.If detergent is hard or caked in the box, throw it away. Use only fresh detergent.Add detergent to dishwasher right before starting it. |
| Chipping or breaking of glassware | Improper loading | Do not overload. Load between prongs, not over them. Glasses loaded over prongs will not be supported and may chip or break. Make sure glassware is secure and can't come loose. Always use the top rack for delicate items. Use the delicate program for fine china. |
| Unusual noise | Improper loading | Utensils may not be secure or something small may have dropped from the rack. Water may cause utensils to rattle. Make sure everything is securely placed in the dishwasher. |
| Water left in bottom of dish-washer near filters | Dishwashingcycle not completeSome is normal | Allow dishwasher to complete cycle.Water left in removable coarse filter is normal. |
| Dishwasher will not drain | Air GapDrain hoseFilter system | Be sure air gap is not blocked or plugged.Check for kink in drain hose.Be sure there is no blockage in filter system. Remove, clean and place back in dishwasher before starting dishwasher. |
| Dishwasher will not start | Blown fuse or tripped circuit breakerDoor not completely closedPlugged in incorrectly | Replace fuse or reset circuit breaker. Remove any other appliances from the circuit.Close tightly until you hear a click.Make sure plug-in contact is inserted in the wall socket or wired correctly. |
| Dishwasher will not fill | Door openControlsWater feed lineWater supply | Check that door is firmly closed.Check that dishwasher is on. (See "Dishwasher will not start")Check to see that the water feed line to dishwasher is not crimped.Be sure water is available and turned on. |
| Water backs up in sink when dishwasher drains | Garbage disposer and trap | Check garbage disposer and trap at sink for blockage or food particles. |
For Residential Installations
| Length of warranty | ASKO will pay for: |
| ONE YEAR FULL WARRANTYFrom date of purchase | ASKO replacement parts and/or repair labor to correct defect in materials or workmanship. Service must be provided by an authorized ASKO service outlet. |
| FIVE YEAR LIMITED WARRANTYOne year full plus second through fifth year limited from date of purchase. | ASKO replacement parts (repair labor costs not included) for any defective solid state controls, timers, motors, pumps or dishwasher racks. |
| TWENTY-FIVE YEAR LIMITEDWARRANTYOne year full plus second through twnety-five year limited from date of purchase. | ASKO replacement parts (replacement labor cost not included) of the stainless steel tank or stainless steel inner door panel if it fails to hold water due to a manufacturing defect such as cracking or rusting. |
For Non-Residential Installations
| SIX MONTH FULL WARRANTYFrom date of purchase. | ASKO replacement parts and/or repair labor to correct defect in materials or workmanship. Service must be performed by an authorized ASKO service outlet. |
ASKO will not pay for:
A. Service calls to:
- Correct the installation of the dishwasher
- Instruct how to use the dishwasher
- Replace house fuses or correct house wiring
- Correct house plumbing
- Cleaning or servicing of all device in drain line
B. Repair and/or parts for failure of product if dishwasher is used in other than normal home use.
C. Damage resulting from accident, fire, floods, acts of God, alteration, misuse abuse, improper installation or installation not in accordance with local electrical or plumbing codes.
D. Any labor or shipping costs for parts during the limited warranty.
E. Replacement parts or repair labor costs for units operated outside the Continental United States.
F. Pick-up and delivery. ASKO dishwashers are designed to be repaired in the home.
IN NO EVENT SHALL ASKO USA INC. BE RESPONSIBLE FOR ANY INCIDENTAL OR CONSEQUENTIAL DAMAGES.
Some states will not allow the exclusion or limitation of incidental or consequential damages, so this exclusion or limitation may not apply to you. This warranty gives you specific legal rights and you may also have other rights which vary from state to state.
For warranty service, contact the dealer from whom you purchased the unit or an authorized ASKO service outlet. Service will be provided during normal business hours. Should you have a service problem that is not resolved locally write:
ASKO USA INC.
P O Box 851805
Richardson, TX 75085-1805
Do as follows
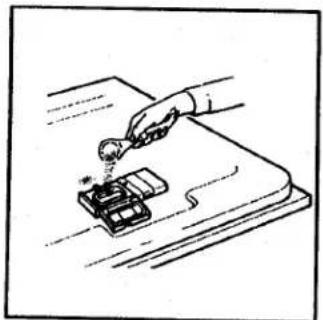
natural_image
Hand using a tool to press or brush on a surface, no text or symbols visible①
Load the baskets and fill with deter- gent.
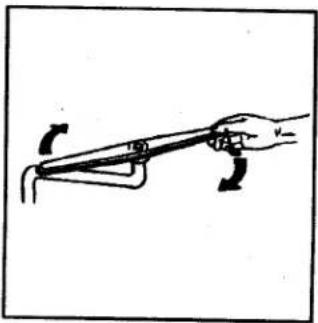
natural_image
Simple line drawing of a hand holding a tool or device (no text or symbols)②
Check that the spray arms can rotate freely ...
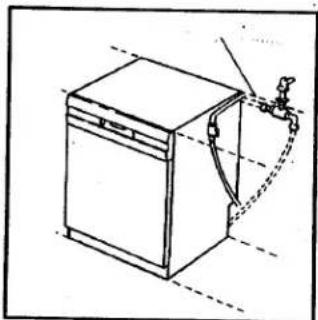
natural_image
Line drawing of a washing machine with a curved arm and faucet attached (no text or symbols)... and that the water is turned on.
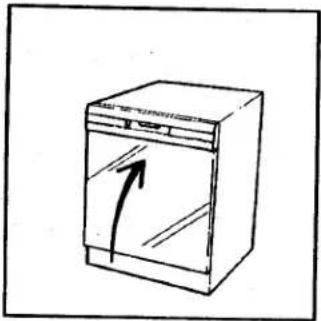
natural_image
Simple line drawing of a washing machine with an arrow indicating direction (no text or symbols)③
Close the door and select the program. Start the machine.
Choose the right program
| Programs | Number |
| Rinse & Hold | 1 |
| Pots and Pans | 2 |
| Normal wash | 3 |
| Light wash | 4 |
| Rinse | 5 |
| Plate heating | 6 |
We reserve the right to make changes.
It is not permitted to make any changes to the specifications of the machine without the written permission of the manufacturer.
Art nr 80 705 54