
KX-THA14 - Cordless phone PANASONIC - Free user manual and instructions
Find the device manual for free KX-THA14 PANASONIC in PDF.
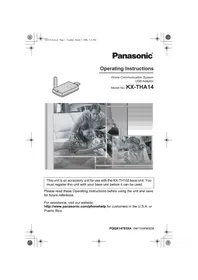


| Product Type | Cordless Phone |
| Brand | Panasonic |
| Model | KX-THA14 |
| Color | Black/Silver |
| Display | Backlit LCD with 1.8-inch screen |
| Keypad | Illuminated keypad |
| Technology | DECT 6.0 |
| Frequency | 1.9 GHz |
| Range (Indoor) | Up to 50 meters |
| Range (Outdoor) | Up to 300 meters |
| Phonebook Capacity | Up to 100 entries |
| Caller ID | Yes |
| Speakerphone | Yes (handset) |
| Voicemail | Compatible with network voicemail |
| Number of Handsets Supported | Up to 6 handsets (base station) |
| Intercom | Between handsets |
| Handset Dimensions | 160 x 48 x 27 mm |
| Handset Weight | 130 g |
| Power Supply | Ni-MH rechargeable batteries (2x AAA) |
| Standby Time | Up to 200 hours |
| Talk Time | Up to 10 hours |
| Charging Time | Approx. 7 hours |
| Cleaning Instructions | Wipe with dry cloth; do not use liquids |
| Safety | Do not expose to water or extreme temperatures |
| Spare Parts & Repairability | Batteries and charger available; consult manual for service |
Frequently Asked Questions - KX-THA14 PANASONIC
User questions about KX-THA14 PANASONIC
0 question about this device. Answer the ones you know or ask your own.
Ask a new question about this device
Download the instructions for your Cordless phone in PDF format for free! Find your manual KX-THA14 - PANASONIC and take your electronic device back in hand. On this page are published all the documents necessary for the use of your device. KX-THA14 by PANASONIC.
USER MANUAL KX-THA14 PANASONIC
Operating Instructions
Home Communication System
USB Adaptor
Model No. KX-THA14


This unit is an accessory unit for use with the KX-TH102 base unit. You must register this unit with your base unit before it can be used.
Please read these Operating Instructions before using the unit and save for future reference.
For assistance, visit our website:
http://www.panasonic.com/phonehelp for customers in the U.S.A. or Puerto Rico.

PQQX14793XA DM1105PM3036


Table of Contents
Introduction
Feature highlights....3
Accessory information 4
Expanding your phone system ..... 5
For best performance 8
Preparation
Controls 9
Icons 9
Symbols used in these operating instructions 10
System requirements for your computer 11
Installation 12
Connections 13
Connecting to the Base Unit or to another Computer
Registering the USB adaptor ..... 14
Setting the USB adaptor options ..... 15
Establishing a wireless connection with the base unit or another computer ..... 17
Registering the USB adaptor ..... 14
Setting the USB adaptor options ..... 15
Establishing a wireless connection with the
base unit or another computer ..... 17
Useful Information
Troubleshooting 18
FCC and other information ..... 19
Specifications 21
Customer services 22
Warranty....23
Feature highlights
Thank you for purchasing the Panasonic Home Communication System USB Adaptor.
Important:
- For information about other compatible Panasonic units, see page 5.
Using the USB adaptor features
By connecting the USB adaptor to your computer you can access the Internet or another computer using the MULTI TALK V software included with your base unit. Refer to the "Installation Guide for MULTI TALK V Software" for installation and base unit connection details.
Wireless connection to the Internet
You can use the USB adaptor to connect to your base unit wirelessly and access the Internet. There are 2 connection methods, called "services": PAN and DUN.
- PAN: Personal Area Network. This service allows you to access the Internet or another computer using your base unit's LAN jack. To use this feature you must establish LAN network and subscribe a high-speed Internet service. Up to 3 wireless connections can be established with a base unit simultaneously. – DUN: Dial Up Network. This service allows you to access the Internet using one of your base unit's analog telephone line jacks. To use this feature you must subscribe a dial up Internet service. Only 1 wireless connection can be established with a base unit.
Wireless connection to another computer or Bluetooth® devices
It is possible to establish a wireless connection to another computer or Bluetooth device using the USB adaptor with the PAN service. A wireless connection to another computer can be established as follows:
- You can connect to another computer that is also using a USB adaptor.
- Through the base unit, you can connect to another computer connected to the base unit via LAN network.
Introduction
Accessory information
□Extension cable
(Order No. PQJA10173Z)

Note:
- You can expand your phone system by registering additional compatible Panasonic units (page 5).
Sales and support information
● To order these accessories, call 1-800-332-5368. - TTY users (hearing or speech impaired users) can call 1-866-605-1277.


Expanding your phone system
You can expand the phone system by registering the following units to a single base unit: max. 18
| Handsets: max. 8 Other devices: max. 10 | |
Cordless handsetKX-THA11(Monochrome display type)  | Cordless cameraKX-THA13: max. 2(For monitoring) |
Cordless video camera handsetKX-THA12(Color display type)  | USB adaptorKX-THA14(For data link) |
Cordless video camera stationKX-THA16(Large color display type)  | OtherBluetoothcompatibledevices(Optional) HeadsetCellularphone:max. 5 |
Cordless video camera handset with A/V outputKX-THA17(Color display type with audio/video output jack)  | |
Note:
- Headset and cellular phone must have Bluetooth capability and must be compatible with the home communication system. For more details and the list of compatible cellular phones, please visit: www.panasonic.com/MultiTalkV
Introduction
Various features using the optional units
Video phone

Your home
This feature allows you and the person you are talking to to see each other in real time for an outside call using the handsets. If you have additional units (1,
②), you can also make a video call during an intercom call.
①KX-THA12/KX-THA17
②KX-THA16
Video monitor

This feature allows you to monitor the room where the cordless camera (①) is located from the units (②, ③). You can also monitor the room between the units (②, ③).
①KX-THA13
②KX-THA12/KX-THA17
③KX-THA16
Cellular connection (Bluetooth compatible)
Your cellular phone

This feature allows you to make or answer cellular calls using your unit (1, 2, 3, and the base unit), if you have Bluetooth compatible cellular phones.
①KX-THA11
②KX-THA12/KX-THA17
③KX-THA16
3


Introduction
Data link feature

This feature allows you to access the Internet or another computer by connecting the units (1, 2,
③, and the base unit) with the USB cable or a USB adaptor (④) to your computer.
①KX-THA11
②KX-THA12/KX-THA17
③KX-THA16
④KX-THA14
Video phone using TV

Your home
This feature allows you to use your TV to see the other person during a video call.
①KX-THA17


Introduction
For best performance
Location
This unit communicates using radio waves.
For maximum distance and noise-free operation, we recommend the following:
- Placing the product away from electrical appliances. ●Raising the antenna vertically.
Environment
- Keep the product away from electrical noise generating devices, such as fluorescent lamps and motors. ●The product should be kept free from excessive smoke, dust, high temperature, and vibration. ●The product should not be exposed to direct sunlight.
- Do not place heavy objects on top of the product.
- When you leave the product unused for a long period of time, disconnect the product from the computer. ●The product should be kept away from heat sources such as heaters, kitchen stoves, etc. It should not be placed in rooms where the temperature is less than 5 °C (41 °F) or greater than 40 °C (104 °F). Damp basements should also be avoided. ●The maximum data transferring distance may be shortened when the product is used in the following places: Near obstacles such as hills, tunnels, underground, near metal objects such as wire fences, etc.
- Operating near 2.4 GHz electrical appliances may cause interference. Move away from the electrical appliances.
Connections
- Use only the included extension cable. Other extension cables may damage the USB adaptor and your computer.
- Connect the USB adaptor to a USB port on your computer. For optimum performance, do not connect more than one USB adaptor to a single computer or the USB adaptor to your computer via a hub.
- The USB adaptor may not turn off and may consume electricity regardless of whether your computer is turned off or in sleep mode. By connecting/disconnecting the USB adaptor or extension cable from an active computer, the USB adaptor will turn on/off. We recommend when you are not using the USB adaptor or computer, that you disconnect the USB adaptor or extension cable from your computer.
Routine care
- Wipe the outer surface of the product with a soft moist cloth. Do not use benzine, thinner, or any abrasive powder.
Controls
①Antenna ②Status indicator ③USB plug
Status indicator
The status indicator indicates the USB adaptor status.
| Indicator Status | |
| Light on Adaptor | is on.(Receiving power) |
| Light off Adaptor | is off. (Not receiving power) |
| Flashing Transfer | rring data |
Icons
The following icons displayed in the Data Link Manager window or system tray indicate the device, service, or the status of the USB adaptor.
Data Link Manager: Device List
| Icons Device | |
| Base unit | |
| Computer with another USB adaptor | |
| Other Bluetooth devices | |
| Access point*1 | |
*1 A device that connects your LAN and the USB adaptor with wireless network.
Data Link Manager: Service List
| Icons Service | |
| PAN service | |
| DUN service | |
System tray
| Icons Status | |
| MULTI TALK V USB Utility is running but the USB adaptor is not connected to the computer. | |
| MULTI TALK V USB Utility is running and the USB adaptor is connected to the computer. | |
| A wireless connection is established with the base unit or another computer by the PAN service. | |
| A wireless connection is established with the base unit by the DUN service. | |


Preparation
Symbols used in these operating instructions
Symbols used for operations
| Symbol Meaning | |
| Example: "Deregistration" | Press the base unit navigator key up or down to select the words in quotations shown on the display. |
| Press the navigator key of the base unit up, down, left, or right to select that menu icon shown on the display. | |
| →Proceed to the next operation. | |
| Example: [MENU] | The words in the brackets show button names on your base unit. |
| Example: [OK] | The words in the brackets show button names on your computer. |
System requirements for your computer
The following system requirements must be met in order to use the MULTI TALK V software.
| Item Description | |
| Operating System | Microsoft® Windows® 98SE, Microsoft Windows Me, Microsoft Windows 2000, or Microsoft Windows XP |
| CPU For Windows | 98SE and Windows Me: Pentium ® 166 MHz or fasterFor Windows 2000: Pentium 200 MHz or fasterFor Windows XP: Pentium 300 MHz or faster |
| RAM For Windows | 98SE and Windows Me: 64 MB (128 MB or more recommended)For Windows 2000 and Windows XP: 128 MB |
| HDD 50 MB available disk space | |
| Resolution 800 x 600 or higher resolution display | |
| Others USB interface: 1.1Video adaptor with high color (16 bit) or higher CD-ROM driveBrowser: Internet Explorer 5.0 or later (necessary when monitoring the cordless camera) | |
Trademarks
- Microsoft and Windows are either registered trademarks or trademarks of Microsoft Corporation in the United States and/or other countries.
- Pentium is a trademark or registered trademark of Intel Corporation or its subsidiaries in the United States and/or other countries.
- Screen shots are reprinted with permission from Microsoft Corporation.
- All other trademarks identified herein are the property of their respective owners.
Preparation
Installation
Before you connect the USB adaptor, you must install the MULTI TALK V USB driver and MULTI TALK V Utility software included with your base unit. Refer to the "Installation Guide for MULTI TALK V Software" for details.
Important:
- The USB adaptor should not be connected to the computer when you start installing. If it is already connected, disconnect it. During installation, the installation wizard will prompt you to connect the USB adaptor.
- While connecting the USB adaptor to your computer, you cannot use any of the other USB utilities (Phonebook Utility, Picture Utility, etc.).
Connections
Connect the USB adaptor to the USB port of your computer.
●The USB adaptor receives power from the USB port.
Connecting the USB adaptor to your computer

Connecting the USB adaptor to your computer using the included USB extension cable


Connecting to the Base Unit or to another Computer
Registering the USB adaptor
Before you use the USB adaptor you must first register it to the base unit, another USB adaptor, or another Bluetooth device.
1 Your computer:
Connect the USB adaptor to your computer.
- The MULTI TALK V USB Utility starts. If the software does not start, refer to the troubleshooting section (page 18).
2 Click the Data Link Manager icon in the MULTI TALK V USB Utility-Main Menu window.
● Data Link Manager window is open.

3 Click [Find Device].
- All connectable devices are listed in the Device List. ● A maximum of 10 devices can be found.
4 Select the device you would like to connect to, then click [Find Service].
- All available services are listed in the Service List.
- When you connect to another computer's USB adaptor or a Bluetooth device, skip to step 6.
5 Base unit:
Press and hold [INTERCOM] until it starts flashing and a beep sounds.
- After [INTERCOM] starts flashing, the rest of the procedure must be completed within 2 minutes.
6 Your computer:
Select the desired service, then click [Connect].
7 Enter the device's PIN. (Refer to the operating instructions provided with the device.)
- When you access to the base unit or another USB adaptor, enter the current 4-digit PIN (default: "7262").
- Depending on the Bluetooth device, the PIN for the device is not required.
8 Click [OK].
●The animation in the lower left corner of the Data Link Manager screen indicates that the connection is established. - If you close the Data Link Manager window, the current connection is disconnected.
Note:
- The screen shots in these instructions are for Windows XP and are included for reference only. ● The screen shots in these instructions may differ slightly from the screen shown on your computer.
Connecting to the Base Unit or to another Computer
Deregistering a USB adaptor
Base unit
The base unit can cancel a registered USB adaptor.
1 [MENU] → ↘ → [SET] 2 "Deregistration" → [SET] 3 Select the desired USB adaptor. → [SET] 4 [3][3][5] → [SET] → [STOP]
Setting the USB adaptor options
You can erase unnecessary devices from the History List, change the USB adaptor's name, and show or hide the USB adaptor from other Bluetooth device from the Data Link Manager options screen.
Opening the Data Link Manager options screen
1 Connect the USB adaptor to your computer. ●The MULTI TALK V USB Utility starts. If the software does not start, refer to the troubleshooting section (page 18). 2 Click the Data Link Manager icon in the MULTI TALK V USB Utility-Main Menu window.
3 Click [Options].
● The Data Link Manager options screen is open.

- To erase the unnecessary devices from the History List, see page 16.


Connecting to the Base Unit or to another Computer
- To change the device name, see page 16.
- To show or hide the USB adaptor from other Bluetooth devices, see page 16.
Erasing a device from the History List You can erase devices from the History List for privacy.
1 Select the device you want to erase. 2 Click [Erase]. 3 Click [OK] when prompted. - The device is erased from the History List box. 4 Click [OK] to return to the Data Link Manager screen, or change other settings as desired. - When you connect to the erased device, you need to register the device again (page 14).
Changing the USB adaptor's name
You can change the USB adaptor's name, useful if you have multiple USB adaptors.
1 Enter the desired name (10 characters max.) (Default: "USB THA14") under [Device Name].
2 Click [OK] to save the new name and return to the Data Link Manager screen, or change other settings as desired. Click [Cancel] to return to the Data Link Manager screen without saving your new settings.
Showing/hiding the USB adaptor
When Discoverable Mode is turned on (checked), the USB adaptor may be seen by other Bluetooth devices. To hide the USB adaptor from other Bluetooth devices, make sure Discoverable Mode is turned off (unchecked). The default setting is off.
1 Check or uncheck [Discoverable Mode] as desired.
2 Click [OK] to save the new setting and return to the Data Link Manager screen, or change other settings as desired. Click [Cancel] to return to the Data Link Manager screen without saving your new settings.
Connecting to the Base Unit or to another Computer
Establishing a wireless connection with the base unit or another computer
By connecting with the base unit, you can:
- access the Internet via the base unit using the PAN or DUN service.
- Establish a wireless connection with your LAN network via the base unit using the PAN service.
By connecting with another computer using an additional USB adaptor or a Bluetooth device, you can share the computer files using the PAN service.
1. Connect the USB adaptor to your computer.
- The MULTI TALK V USB Utility starts. If the software does not start, refer to the troubleshooting section (page 18).
2. Click the Data Link Manager icon in the MULTI TALK V USB Utility - Main Menu window.
● The Data Link Manager window opens. - All registered devices are listed in the Device List.
3. Select the device you would like to connect to.
- All available services are listed in the Service List.
4. Select the desired service, then click [Connect].
● The animation in the lower left corner of the Data Link Manager screen indicates that the connection is established. - If you close the Data Link Manager window, the current connection is disconnected.
Disconnecting a wireless connection
1. Open the Data Link Manager. - If the MULTI TALK V USB Utility is minimized, click the MULTI TALK V USB Utility icon in the system tray. 2. Click [Disconnect]. 3. Click [Yes] when prompted.


Useful Information
Troubleshooting
| Problem Cause & solution | |
| The USB adaptor does not work. | ●The USB adaptor may not work properly depending on the power supply of your computer's USB port. If this is the case and your computer has multiple USB ports, we recommend that you try other USB ports. |
| The MULTI TALK V USB Utility does not start when I connect the USB adaptor to my computer. | ● Start the software manually. Click the [Start], then select [Programs]-[Panasonic]-[MULTI TALK V]-[MULTI TALK V USB Utility]. (For Windows XP, click [All Programs] instead of [Programs].)● After you have started the MULTI TALK V USB Utility, you can enable the Auto Startup feature to make sure the MULTI TALK V USB Utility starts each time your computer is started up. To enable Auto Startup, right-click on the MULTI TALK V USB Utility icon in the system tray and insert a check mark next to [Auto Startup]. |
| I cannot connect to the base unit. | ● The USB adaptor is too far from the base unit. Move closer to the base unit.● The registration may be canceled from the base unit. Register the USB adaptor to the base unit again (page 14). |
| I cannot read the language displayed by the MULTI TALK V USB Utility. | ● You can change the application's display language to English, French, or Spanish. Right-click the MULTI TALK V USB Utility icon in the system tray, then click the desired language. |
| Multiple base units are listed in the Device List and I do not know which is my base unit. | ● Change your base unit's name and click [Find Device]. The new base unit's name will be displayed in the Device List. To change your base unit's name, see the operating instructions included with the base unit. |


FCC and other information
This device complies with Part 15 of the FCC Rules. Operation is subject to the following two conditions:
(1) This device may not cause harmful interference, and (2) this device must accept any interference received, including interference that may cause undesired operation.
CAUTION:
Any changes or modifications not expressly approved by the party responsible for compliance could void the user's authority to operate this device.
NOTE:
This equipment has been tested and found to comply with the limits for a Class B digital device, pursuant to Part 15 of the FCC Rules. These limits are designed to provide reasonable protection against harmful interference in a residential installation. This equipment generates, uses, and can radiate radio frequency energy and, if not installed and used in accordance with the instructions, may cause harmful interference to radio communications. However, there is no guarantee that interference will not occur in a particular installation. If this equipment does cause harmful interference to radio or television reception, which can be determined by turning the equipment off and on, the user is encouraged to try to correct the interference by one or more of the following measures:
- Reorient or relocate the receiving antenna. — Increase the separation between the equipment and receiver.
- Connect the equipment into an outlet on a circuit different from that to which the receiver is connected.
- Consult the dealer or an experienced radio/TV technician for help.
FCC RF Exposure Warning:
The product complies with FCC radiation exposure limits set forth for an uncontrolled environment.
The product must not be collocated or operated in conjunction with any other antenna or transmitter.
Responsible party:
Panasonic Corporation of North America One Panasonic Way,
Secaucus, New Jersey 07094
Phone number: 1-800-211-PANA (1-800-211-7262)
Medical
- Consult the manufacturer of any personal medical devices, such as pacemakers or hearing aids, to determine if they are adequately shielded from external RF (radio frequency) energy. (The product operates in the frequency range of 2.402 GHz to 2.48 GHz, and the power output is 51 mW (max.).) Do not use the product in health care facilities if any regulations posted in the area instruct you not to do so. Hospitals or health care facilities may be using equipment that could be sensitive to external RF energy.
Useful Information
Notice
- This product is designed for use in the United States of America. Sale or use of this product in other countries may violate local laws.
- This device is designed for use in the United States of America. Sale or use of this device in certain other countries may constitute a violation of local legislation.
- This product is designed for use in the United States of America. Sale or use of this product in certain countries may constitute a violation of local legislation.
- This product is designed for use outside of Japan, and its use within Japan is a violation of the law. Therefore, our company generally cannot provide services such as repairs within Japan.
Specifications
| Operating environment 5 °C – 40 °C (41 °F – 104 °F) | |
| Frequency 2.402 GHz – 2.48 GHz | |
| Bluetooth compliance Bluetooth wireless technology 1.2 | |
| Dimensions Approx. height | 15 mm x width 42 mm x depth 74 mm( 19/32 inch x 121/32 inches x 229/32 inches) |
| Mass (Weight) | Approx. 30 g (0.07 lb.) |
| Power consumption Standby: Approx. 0.002 WMaximum: Approx. 0.88 W | |
| Power output 51 mW (max.) | |
| Power supply 5 V DC (USB powered) | |
| Interface USB: 1.1 | |
Note:
- Design and specifications are subject to change without notice.
- The illustrations in these instructions may vary slightly from the actual product.
Trademarks
●The Bluetooth word mark and logos are owned by the Bluetooth SIG, Inc. and any use of such marks by Panasonic is under license.


Useful Information
Customer services
Customer Services Directory
Obtain Product Information and Operating Assistance; locate your nearest Dealer or Servicenter; purchase Parts and Accessories; or make Customer Service and Literature requests by visiting our Web Site at:
http://www.panasonic.com/consumersupport
or, contact us via the web at:
http://www.panasonic.com/contactinfo
You may also contact us directly at:
1-800-211-PANA (1-800-211-7262),
Monday-Friday 9 am-9 pm; Saturday-Sunday 10 am-7 pm, EST.
TTY users (hearing or speech impaired users) can call 1-877-833-8855.
Accessory Purchases
Purchase Parts, Accessories and Instruction Books online for all Panasonic Products by visiting our Web Site at:
http://www.pasc.panasonic.com
or, send your request by E-mail to:
npcparts@us.panasonic.com
You may also contact us directly at:
1-800-332-5368 (Phone) 1-800-237-9080 (Fax Only)
(Monday - Friday 9 am to 8 pm, EST.)
Panasonic Services Company
20421 84th Avenue South, Kent, WA 98032
(We Accept Visa, MasterCard, Discover Card, American Express, and Personal Checks)
TTY users (hearing or speech impaired users) can call 1-866-605-1277.
Service in Puerto Rico
Panasonic Puerto Rico, Inc.
San Gabriel Industrial Park,
Panasonic Telephone Products Limited Warranty
Limited Warranty Coverage
If your product does not work properly because of a defect in materials or workmanship, Panasonic Consumer Electronics Company or Panasonic Puerto Rico, Inc. (collectively referred to as "the warrantor") will, for the length of the period indicated on the chart below, which starts with the date of original purchase ("Limited Warranty period"), at its option either (a) repair your product with new or refurbished parts, or (b) replace it with a new or a refurbished product. The decision to repair or replace will be made by the warrantor.
Parts
Labor
One (1) Year One (1) Year
During the "Labor" Limited Warranty period there will be no charge for labor. During the "Parts" Limited Warranty period, there will be no charge for parts. You must mail-in your product prepaid during the Limited Warranty period. This Limited Warranty excludes both parts and labor for batteries, antennas, and cosmetic parts (cabinet). This Limited Warranty only applies to products purchased and serviced in the United States or Puerto Rico. This Limited Warranty is extended only to the original purchaser and only covers products purchased as new.
Mail-In Service
For assistance in the continental U.S.A. in obtaining repairs please ship the product prepaid to:
Panasonic Services Company Customer Servicenter
4900 George McVay Drive Suite B Door #12 McAllen, TX 78503
For assistance in Puerto Rico call Panasonic Puerto Rico, Inc. (787)-750-4300 or fax (787)-768-2910.
For Limited Warranty service for headsets if a headset is included with this product please call Panasonic Call Center at 1-800-211-PANA (1-800-211-7262).
When shipping the unit carefully pack, include all accessories, and send it prepaid, adequately insured and preferably in the original carton. Include a letter detailing the complaint and provide a day time phone number where you can be reached.
IF REPAIR IS NEEDED DURING THE LIMITED WARRANTY PERIOD THE PURCHASER WILL BE REQUIRED TO FURNISH A SALES RECEIPT/PROOF OF PURCHASE INDICATING DATE OF PURCHASE, AMOUNT PAID AND PLACE OF PURCHASE. CUSTOMER WILL BE CHARGED FOR THE REPAIR OF ANY UNIT RECEIVED WITHOUT SUCH PROOF OF PURCHASE.


Useful Information
Limited Warranty Limits And Exclusions
This Limited Warranty ONLY COVERS failures due to defects in materials or workmanship, and DOES NOT COVER normal wear and tear or cosmetic damage. The Limited Warranty ALSO DOES NOT COVER damages which occurred in shipment, or failures which are caused by products not supplied by the warrantor, or failures which result from accidents, misuse, abuse, neglect, bug infestation, mishandling, misapplication, alteration, faulty installation, set-up adjustments, misadjustment of consumer controls, improper maintenance, power line surge, lightning damage, modification, introduction of sand, humidity or liquids, commercial use such as hotel, office, restaurant, or other business or rental use of the product, or service by anyone other than a Factory Servicenter or other Authorized Servicer, or damage that is attributable to acts of God.
THERE ARE NO EXPRESS WARRANTIES EXCEPT AS LISTED UNDER "LIMITED WARRANTY COVERAGE". THE WARRANTOR IS NOT LIABLE FOR INCIDENTAL OR CONSEQUENTIAL DAMAGES RESULTING FROM THE USE OF THIS PRODUCT, OR ARISING OUT OF ANY BREACH OF THIS LIMITED WARRANTY. (As examples, this excludes damages for lost time, lost calls or messages, cost of having someone remove or re-install an installed unit if applicable, travel to and from the servicer. The items listed are not exclusive, but are for illustration only.) ALL EXPRESS AND IMPLIED WARRANTIES, INCLUDING THE WARRANTY OF MERCHANTABILITY, ARE LIMITED TO THE PERIOD OF THE LIMITED WARRANTY.
Some states do not allow the exclusion or limitation of incidental or consequential damages, or limitations on how long an implied warranty lasts, so the exclusions may not apply to you.
This Limited Warranty gives you specific legal rights and you may also have other rights which vary from state to state. If a problem with this product develops during or after the Limited Warranty period, you may contact your dealer or Servicenter. If the problem is not handled to your satisfaction, then write to the warrantor's Consumer Affairs Department at the addresses listed for the warrantor.
PARTS AND SERVICE, WHICH ARE NOT COVERED BY THIS LIMITED WARRANTY, ARE YOUR RESPONSIBILITY.


If you need assistance with setup or operation
1 Visit our website: http://www.panasonic.com/phonehelp 2 Contact us via the web at: http://www.panasonic.com/contactinfo 3 Call us at: 1-800-211-PANA (1-800-211-7262) TTY users (hearing or speech impaired users) can call 1-877-833-8855.
When you ship the product
- Carefully pack your unit, preferably in the original carton.
- Attach a letter, detailing the symptom, to the outside of the carton.
- Send the unit to Panasonic Services Company Customer Servicenter, prepaid and adequately insured.
- Do not send your unit to Panasonic Consumer Electronics Company listed below or to executive or regional sales offices. These locations do not repair consumer products.
We recommend keeping a record of the following information for future reference.
Serial No. Date of purchase (found on the bottom of the unit)
Name and address of dealer

Attach your purchase receipt here.
Panasonic Consumer Electronics Company, Division of Panasonic Corporation of North America
One Panasonic Way, Secaucus, New Jersey 07094
Panasonic Puerto Rico, Inc. San Gabriel Industrial Park, Ave. 65 de Infantería, Km. 9.5, Carolina, Puerto Rico 00985
Copyright:
This material is copyrighted by Panasonic Communications Co., Ltd., and may be reproduced for internal use only. All other reproduction, in whole or in part, is prohibited without the written consent of Panasonic Communications Co., Ltd.
© 2005 Panasonic Communications Co., Ltd. All Rights Reserved.


Panasonic®


Table of Contents
Introduction
Your Home

Your Home
Controls


Connections



- OPERATING INSTRUCTIONS
- TABLE OF CONTENTS
- INTRODUCTION
- PREPARATION
- SETTING THE USB ADAPTOR OPTIONS
- ESTABLISHING A WIRELESS CONNECTION WITH THE BASE UNIT OR ANOTHER COMPUTER
- USEFUL INFORMATION
- FEATURE HIGHLIGHTS
- IMPORTANT
- USING THE USB ADAPTOR FEATURES
- WIRELESS CONNECTION TO THE INTERNET
- WIRELESS CONNECTION TO ANOTHER COMPUTER OR BLUETOOTH® DEVICES
- ACCESSORY INFORMATION
- NOTE
- SALES AND SUPPORT INFORMATION
- EXPANDING YOUR PHONE SYSTEM
- VARIOUS FEATURES USING THE OPTIONAL UNITS
- VIDEO PHONE
- VIDEO MONITOR
- CELLULAR CONNECTION (BLUETOOTH COMPATIBLE)
- YOUR CELLULAR PHONE
- DATA LINK FEATURE
- VIDEO PHONE USING TV
- FOR BEST PERFORMANCE
- LOCATION
- ENVIRONMENT
- CONNECTIONS
- ROUTINE CARE
- STATUS INDICATOR
- ICONS
- SYMBOLS USED IN THESE OPERATING INSTRUCTIONS
- SYSTEM REQUIREMENTS FOR YOUR COMPUTER
- TRADEMARKS
- INSTALLATION
- CONNECTING TO THE BASE UNIT OR TO ANOTHER COMPUTER
- REGISTERING THE USB ADAPTOR
- YOUR COMPUTER
- CLICK [FIND DEVICE]
- BASE UNIT
- CLICK [OK]
- DEREGISTERING A USB ADAPTOR
- OPENING THE DATA LINK MANAGER OPTIONS SCREEN
- ERASING A DEVICE FROM THE HISTORY LIST YOU CAN ERASE DEVICES FROM THE HISTORY LIST FOR PRIVACY
- CHANGING THE USB ADAPTOR'S NAME
- SHOWING/HIDING THE USB ADAPTOR
- DISCONNECTING A WIRELESS CONNECTION
- FCC AND OTHER INFORMATION
- CAUTION
- FCC RF EXPOSURE WARNING
- RESPONSIBLE PARTY
- MEDICAL
- NOTICE
- CUSTOMER SERVICES
- CUSTOMER SERVICES DIRECTORY
- ACCESSORY PURCHASES
- SERVICE IN PUERTO RICO
- PANASONIC TELEPHONE PRODUCTS LIMITED WARRANTY
- LIMITED WARRANTY COVERAGE
- MAIL-IN SERVICE
- LIMITED WARRANTY LIMITS AND EXCLUSIONS
- IF YOU NEED ASSISTANCE WITH SETUP OR OPERATION
- WHEN YOU SHIP THE PRODUCT
- COPYRIGHT
- PANASONIC®
Brand : PANASONIC
Model : KX-THA14
Category : Cordless phone