S-692 - Speaker RetroSound - Free user manual and instructions
Find the device manual for free S-692 RetroSound in PDF.

User questions about S-692 RetroSound
0 question about this device. Answer the ones you know or ask your own.
Ask a new question about this device
Download the instructions for your Speaker in PDF format for free! Find your manual S-692 - RetroSound and take your electronic device back in hand. On this page are published all the documents necessary for the use of your device. S-692 by RetroSound.
USER MANUAL S-692 RetroSound
Standard Series Full-Range Speakers Owner's Manual
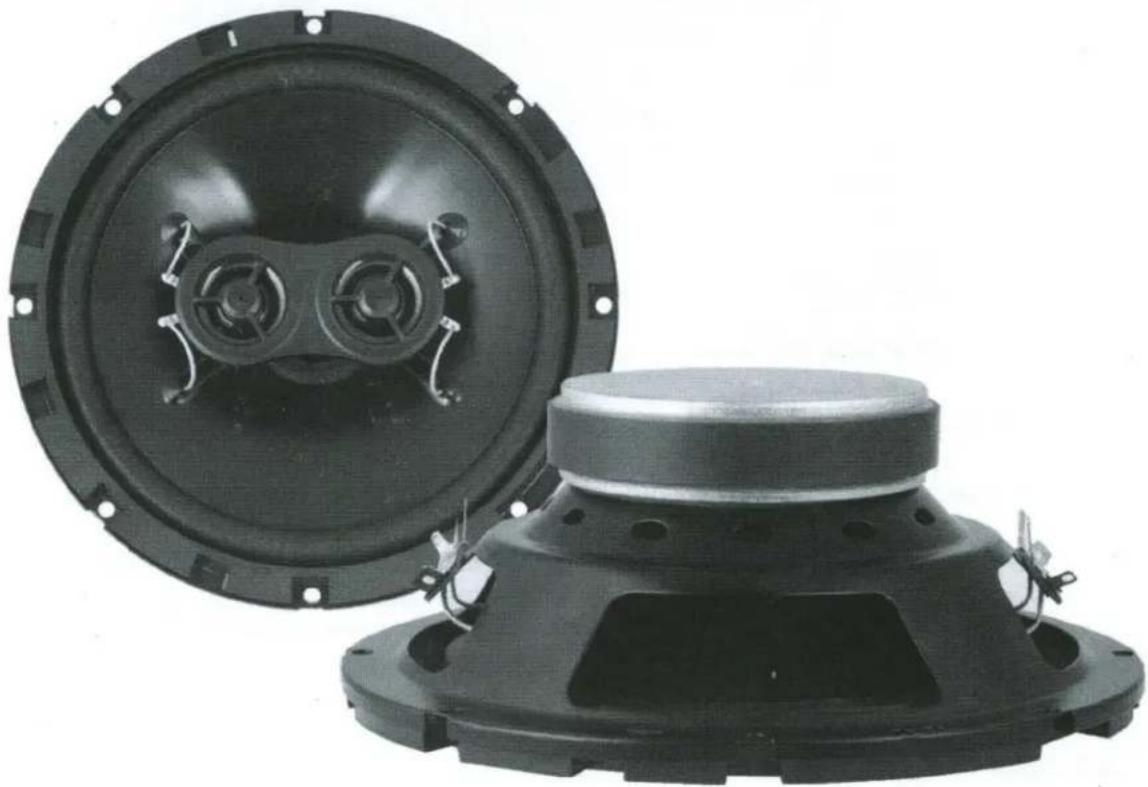
natural_image
Two black speaker components with visible sound waves and mounting holes, shown from different angles (no text or symbols)The information enclosed in this installation guide is to be used as merely an outline to assist you during the process of installation. This guide does not cover every installation possibility, vehicle, or every aspect of the installation process.
Retro Manufacturing, LLC, RetroSound ^® , or its subsidiaries, assume no responsibility for a proper or improper installation. Every attempt has been made to make this installation guide as informative as possible, and therefore it may be updated from time to time. Please check our website for the latest update. (www.retrosound.com).
Thank you for your purchase of this RetroSound® product.
Enclosed is some useful information that will maximize performance. If you have any questions about the use or features of this product, email us at: support@retrosound.com or phone us at 702-483-2222.
INSTALLATION:
The following is a list of tools needed for installation:
2 Phillips screwdriver / Battery post wrench /Hand held drill w/assorted bits/ Wire strippers/Wire crimpers/Wire cutters.
Since some of these speakers are most often used as direct replacements for stock speakers, they are shipped without grilles.
For custom installations see a professional installer for help with your install.
CAUTION: If you feel unsure about installing this system yourself, have it installed by a qualified professional installer.
CAUTION: Before installation, disconnect the battery negative (-) terminal to prevent damage to the unit, fire and/or possible injury.
Before beginning any installation, follow these simple rules:
-
Be sure to carefully read and understand the instructions before attempting to install the unit.
-
For safety, disconnect the negative lead from the battery prior to beginning the installation.
-
For easier assembly, we suggest you run all wires prior to mounting your unit in place.
-
Use high quality connectors for a reliable installation and to minimize signal or power loss.
-
Think before you drill! Be careful not to cut or drill into gas tanks, fuel lines, brake or hydraulic lines, vacuum lines or electrical wiring when working on any vehicle.
-
Never run wires underneath the vehicle. Running the wires inside the vehicle provides the best protection.
-
Avoid running wires over or through sharp edges. Use rubber or plastic grommets to protect any wires routed through metal, especially the firewall.
MOUNTING
-
Determine where the speakers will be mounted. Ensure an area large enough for the speaker to mount evenly. Be sure that the mounting location is deep enough for the speaker to fit; if mounting in a door, operate all functions (windows, locks, etc.) through their entire operating range to ensure there is no obstruction.
-
Refer to the specification chart to determine the proper diameter hole to cut for your speaker model.
-
Using the grille or speaker gasket (not included in most models) as a template, mark the locations for the mounting screws. Drill the holes with a 1/8" bit.
-
Feed the speaker wires through the cutout and connect to the speaker terminals. Be sure to observe proper polarity when connecting the wires. The speaker's positive terminal is indicated with a "+".
-
Fit the speaker to the cutout. Fit the grille over the speaker (Where applicable). Mount them using the enclosed screws.
-
Tighten the screws until the speaker and is snug in place to prevent rattling. Do not overtighten the screws.
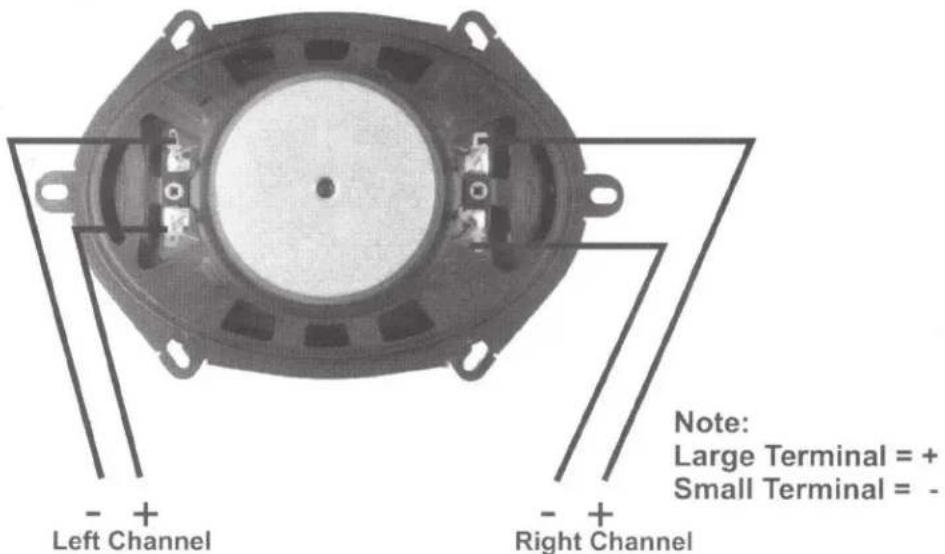
Dual Voice Coil Speaker Wiring
Wiring our 4 ohm Dual Voice Coil Speaker for 2 channel connection:
Note, the following speaker models from Retrosound (D-52,D-572,D-62 and D-412) feature Dual Voice Coils, this allows you to connect left and right speaker channels to one speaker, this will give you a fuller, richer sound for vehicles that only have one single speaker mounted in the dash or the rear deck area.
text_image
- + Left Channel Note: Large Terminal = + Small Terminal = - - + Right ChannelWiring our 4 ohm Dual Voice Coil Speaker in series so the amplifier sees an 8 ohm impedance:
Note: The following speaker models from RetroSound® (D-52,D-572,D-62 and D-412)) feature Dual Voice Coils, Wiring the voice coils in series allows the unit's amplifier to see an 8 ohm nominal load. This is an advanced wiring concept and should only be done by experienced and knowledgeable installers. For other configurations or general questions, please email us at: support@retrosound.com.
A note about nominal impedance:
Nominal Impedance is the manufacturer's specification given for the speaker. It is meant to represent the average impedance a speaker presents to an amp. Resistance fluctuates constantly on the speaker while it is playing, so if you try to measure DC resistance on a speaker with a multi meter while it is just sitting on a bench, you will most likely not get a reading consistent with the ohm value stamped on the back of the speaker's magnet.

text_image
m. LEFT CHANNEL RIGHT CHANNEL + - + - 8 OhmUniversal Speaker Bracket Kit (UB-1)
Available Separately, This 14" bracket combined with the rear threaded mounting point of our new standard series versions of our Dual Voice Coil 5.25", 5x7", 6x9" & 4x10" speakers allows you to make your own speaker bracket.
You can modify the bracket to solve those challenging installs where there are no other options available. This mounting system is THE answer to classic car speaker installation problems.
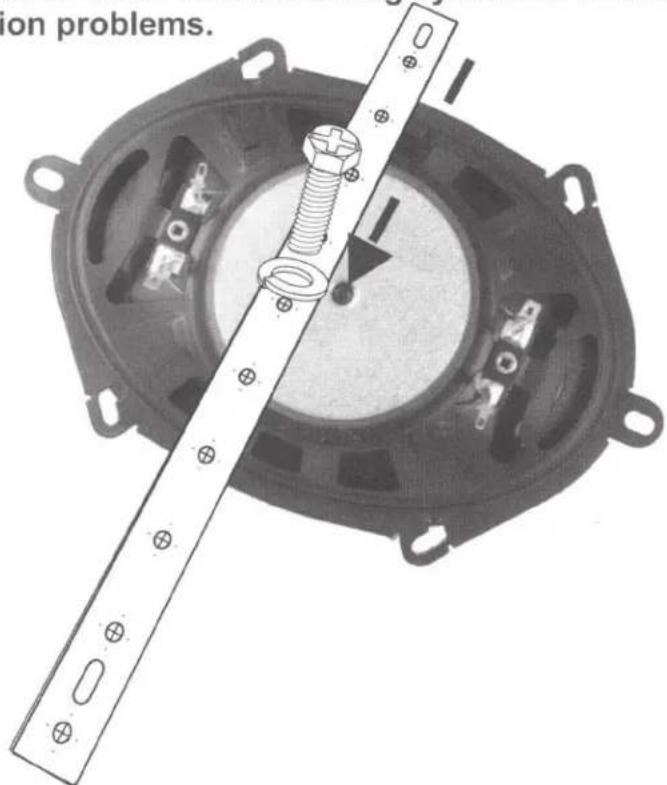
text_image
ion problems.The Optional UB-1 Speaker bracket mounts to the threaded input on the back of our Standard Series Dual Voice coil speakers. This bracket can be bent or trimmed, in virtually any shape necessary to accomplish your desired installation goals. Some vehicles, like mid-late GM cars require a speaker bracket to install a speaker in the original mono dash location. The combination of this kit and our speaker will allow you to use the UB-1 bracket to allow you to affix the speaker to the original mounting location, or in some cases to multiple locations.
UB-1 Mounting Bracket Configurations
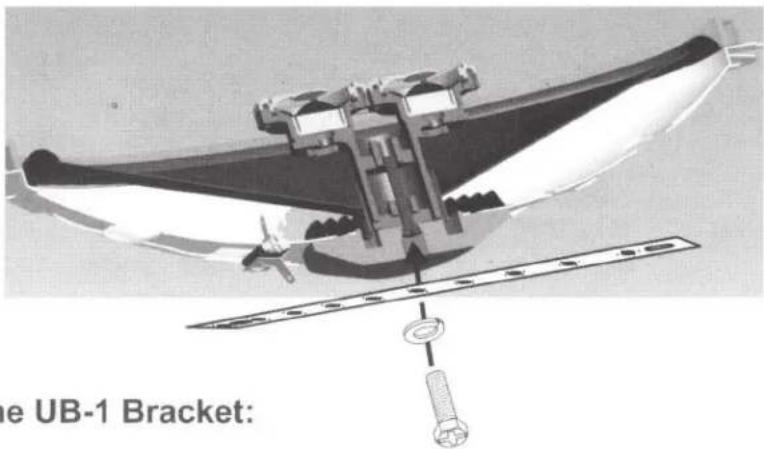
text_image
the UB-1 Bracket:Using the UB-1 Bracket:
This bracket can be bent in many directions to accomplish the desired results, below are some shapes you can bend the bracket to, which will help you mount our speaker into your dash. In some cases, you may need two brackets to help mount the speaker to your original dash mount, please review your needs carefully prior to installation. Please email us at support@retrosound.com or call us at: 702-483-2222

text_image
L Bracket style
text_image
Here's a great example of a solid horizontal mount
natural_image
Diagram of a speaker component with mounting holes and wiring, showing no text or symbolsThis mount is good for a rear deck application
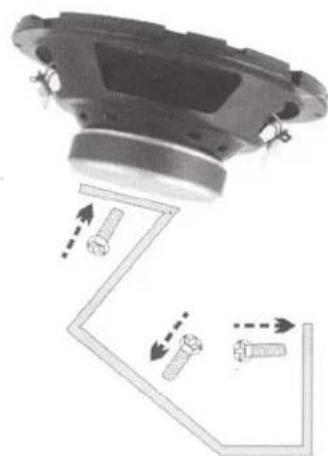
natural_image
Mechanical component diagram showing a flanged housing with bolted components and directional arrows indicating motion (no text or symbols)Bend to your own custom style to mount virtually anywhere!
Specifications
| Model | D-52 | D-62 | D-572 | D-412 |
| Nominal Diameter (inch) | 5.25" | 6.5" | 5X7" | 4X10" |
| Description | 2-Way | 2-Way | 2-Way | 2-Way |
| Nominal Impedance (ohms) | 4+4 DVC | 4+4 DVC | 4+4 DVC | 4+4 DVC |
| Frequency Response | 60z-21kHz | 50z-21kHz | 48Hz-21kHz | 43Hz-21kHz |
| Sensitivity (SPL@1w/1m) | 87db | 87db | 87dB | 87dB |
| Power Handling(Watts RMS/Peak) | 15/30 | 15/30 | 15/30 | 15/30 |
| Installation | ||||
| Speaker Grilles — | NO | NO | NO | NO |
| Mounting Depth (inch) | 1.7 | 2 | 2 | 2.3 |
| Mounting Depth (mm) | 44 | 51 | 51 | 59 |
| Model | S-42 | S-52 | S-412 | S-692 |
| Nominal Diameter (inch) | 4.5" | 5.25" | 4X10" | 6X9" |
| Description | 2-Way | 2-Way | 2-Way | 3-Way |
| Nominal Impedance (ohms) | 4 (SVC) | 4 (SVC) | 4 (SVC) | 4 (SVC) |
| Frequency Response | 65Hz-21kHz | 50z-21kHz | 43Hz-21kHz | 40Hz-21kHz |
| Sensitivity (SPL@1w/1m) | 88 | 87db | 87dB | 90dB |
| Power Handling(Watts RMS/Peak) | 25/50 | 25/50 | 25/50 | 50/100 |
| Installation | ||||
| Speaker Grilles — | NO | NO | NO | YES |
| Mounting Depth (inch) | 1.43 | 1.7 | 2.3 | 2.75 |
| Mounting Depth (mm) | 36 | 44 | 59 | 70 |
Note:
The above specifications are subject to change without notice.
Please email us at: support@retrosound.com or visit us on the web at retrosound.com for any specification updates.
If your product does not work properly because of defects in materials and workmanship RetroSound®, a division of Retro Manufacturing, LLC (collectively referred to as "the warrantor") will, for the length of the period indicated in the chart below, which starts with the date of original purchase ("warranty period"), at its option either (a) repair your product with new or refurbished parts, or (b) replace it with a new or refurbished product. The decision to repair or replace will be made by the warrantor.
| ITEM | PARTS | LABOR |
| Standard Series Speakers | One Year | One Year |
During the "Labor" warranty period, there will be no charge for labor. During the "Parts" warranty period, there will be no charge for parts. You may return your product prepaid during the warranty period. If batteries are included, they are not warranted. This warranty only applies to products purchased and serviced in the United States, Alaska, Hawaii or Puerto Rico. This warranty is extended only to the original purchaser of a new product which was not sold "as is". A purchase receipt or other proof of the original purchase date is required for warranty service.
To handle a warranty issue, email us at support@retrosound.com or phone us at 702-483-2222 and get a Return Authorization number. All returns and warranty issues must receive a Return Authorization (RA) number. Any product received without a RA number will be refused. Once a number is issued, send the product to this address:
Retro Manufacturing
7390 Eastgate Rd, Suite 140
Henderson, Nevada 89011
Phone: 702-483-2222
Fax: 702-483-2229

text_image
RetroSound®Modern Sound for your Classic
retrosound.com