NAVIO 705CAM - Gps GOCLEVER - Free user manual and instructions
Find the device manual for free NAVIO 705CAM GOCLEVER in PDF.

| Product Type | GPS Navigator with Camera |
| Brand | GoClever |
| Model | NAVIO 705CAM |
| Display Size | 7 inches |
| Display Resolution | 800 x 480 pixels |
| Dimensions | 17.5 x 10.5 x 1.5 cm |
| Weight | 210 g |
| Power Source | Built-in rechargeable battery |
| Battery Capacity | 1500 mAh |
| Charging Voltage | 5V DC via USB |
| Main Functions | GPS navigation, camera recording, speed camera alerts, multimedia playback |
| Camera Resolution | 1080p Full HD |
| Storage | MicroSD card up to 32 GB |
| Connectivity | USB, FM transmitter (optional) |
| GPS Chipset | MediaTek MTK |
| Maps Pre-loaded | Europe maps |
| Maintenance | Clean with dry cloth; avoid liquids |
| Safety | Use windshield mount; do not obstruct driver view |
| Spare Parts Available | Charger, mount, stylus (if applicable) |
| General Information | Multilingual interface; firmware updates via PC |
Frequently Asked Questions - NAVIO 705CAM GOCLEVER
User questions about NAVIO 705CAM GOCLEVER
0 question about this device. Answer the ones you know or ask your own.
Ask a new question about this device
Download the instructions for your Gps in PDF format for free! Find your manual NAVIO 705CAM - GOCLEVER and take your electronic device back in hand. On this page are published all the documents necessary for the use of your device. NAVIO 705CAM by GOCLEVER.
USER MANUAL NAVIO 705CAM GOCLEVER
| DECLARATION | 4 |
| PRECAUTIONS | 5 |
| PACKING LIST | 7 |
| INTRODUCTION | 8 |
| Product Appearance 8 | |
| Power Supply and Charging of a Navigator 12 | |
| Basic Operation 14 | |
| Connecting to a Computer 16 | |
| Description of the Main Interface and Main Functions 17 | |
| Maintaining the GPS Navigator 18 | |
| MUSIC PLAY FUNCTION 19 | |
| PHOTO VIEWING FUNCTION 22 | |
| EBOOK READING FUNCTION 25 | |
| MOVIE PLAYING FUNCTION 27 | |
| SYSTEM SETTINGS 30 | |
| Screen Calibration | 33 |
| FM Transmitter | 33 |
| BLUETOOTH FUNCTIONS (WITH DUN FUNCTION) | 34 |
| TOOLS | 50 |
| REAR CAMERA SETTING | 51 |
Declaration
The product is subject to change without prior notice. We apologize for any inconvenience caused.
Our company assumes no liability for data missing caused by users who did not backup the important information.
This manual has been checked with thorough care, but we do not exclude the possibility of a few unintended errors. If you spot an error, please contact our customer service center.
Please read the operations and instructions in this User Manual carefully and use accessories provided by the original manufacturer only, avoiding unexpected damages. Implementing the system without conforming to proper programs or connecting incompatible accessories may result in the invalidity of a warranty and even endanger the safety of you and others. The company assumes no liability for the result.
The development of the traffic construction may lead to the in conformity of the data of the navigable electronic map with actual traffic instructions. Please drive according to current traffic regulations, including current road conditions and current marks. Viewing or operating a navigator while driving may cause serious traffic accidents. The company assumes no liability for the accidents or any corresponding losses.
In case there is any divergence between the pictures in this manual and the real products, the real products will prevail.
Precautions
- Do not shake or knock the device. Rough handling may lead to damage or missing of the data and failures to play files.
- Keep the device away from direct sunlight or high temperature, to prevent overheating of the batteries and device body which may cause failures or dangers.
- Keep the device away from moisture and raindrops. If water gets inside, the wet condition may cause the device to break down or even render it beyond repair.
- Do not disconnect the device by self.
- Keep the device away from sand dusts or environment of dusts.
- Operating the device near strong radio wave or radioactive rays may affect the performance of the device.
- Insert the plug fully into the electrical outlet to prevent static electricity.
- Ensure that all cables are connected to the device safely and orderly, to prevent falling and damages of the device caused by the messy arrangement.
- Do not press the LCD screen hard; keep the LCD screen away from sunlight, or failures to the device may occur. Clean up dusts on the screen surface with soft cloth.
- If the device fails, please send it to an authorized mountaineer for repair.
- Backup the data on the SD/MMC card to a computer regularly, to prevent the risk of data missing.
- Pay attention to the compatibility of media files. Only files conforming to the design rules of the device can be played.
- Films, music, and images may be copyrighted. Playing those files without permission would violate the copyright law
- Do not use metal objects to short-circuit a charger or device input. This may result in device failures.
-
Keep the device away from heat source.
-
Operate the device by placing it on a level desk. Operating by placing it on a blanket, pillow, or carpet will render working temperature too high for the device, and may damage it.
- When the system executes the read-write operation for the memory card, do not take it out, or data in the card may be destroyed or missing. This may even cause the system to break down.
- Do not power off when you are navigating, playing films and music, and viewing pictures.
- Do not store the batteries or charge the batteries in cold or hot areas, or the performance of the batteries may be damaged.
- Keep the battery or charger out of the reach of children.
- Mistakes in changing batteries may cause an explosion. Dispose the old batteries according to instructions.
- Use the battery specified by the original manufacturer on changing batteries.
- Keep the device out of reach of children when it is being charged.
- Violent collision or drop may damage the device or spoil its appearance. Please take care.
- Do not use an earplug with over high volume, or it will hurt your hearing and even cause permanent hearing impairment.
- Please do not set the volume of an external loudspeaker too high for a long time. Longstanding use may cause an output distortion of the loudspeaker.
- While watching videos, repetitive actions may result in discomfort in hands, arms, shoulders or other parts of your body.
Packing List
Make sure all the items are included in the package of the navigator:
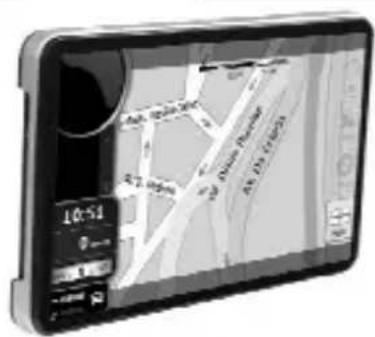
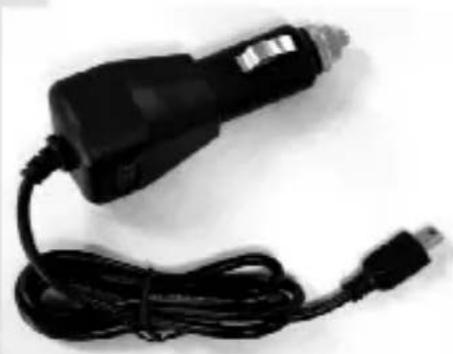
Car navigation
natural_image
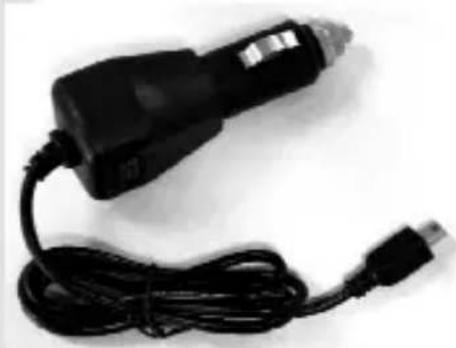
Black handheld electric shaver with attached cable (no visible text or symbols)Car chrager
natural_image
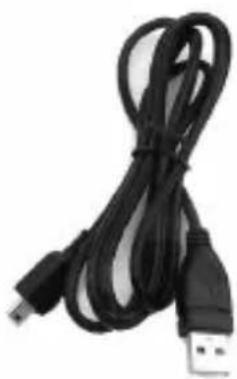
Black USB cable with two connectors, no text or symbols visibleUSB cable
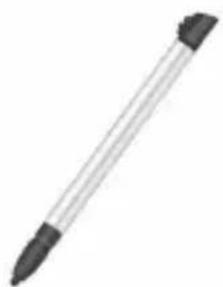
natural_image
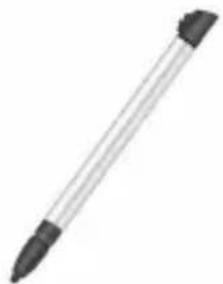
Simple illustration of a pen with black tip (no text or symbols)Stylus
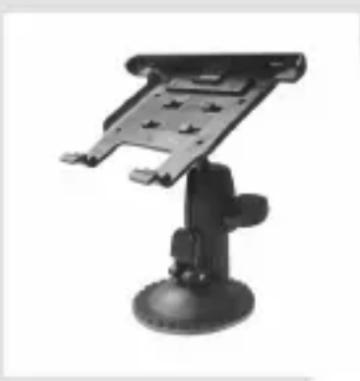
natural_image
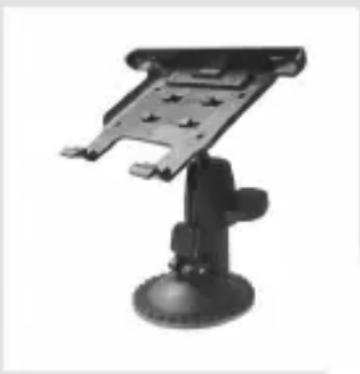
Black-and-white photo of a mounted tablet device with a dome base and mounting bracket (no visible text or symbols)Car holder
In case there is any divergence between the above and the real products, the real products will prevail. For any defective items, please contact your dealer or agent who sold you the product as soon as possible.
Introduction
This chapter provides information on the external elements and basic instructions, allowing you to get familiar with the basic operations.
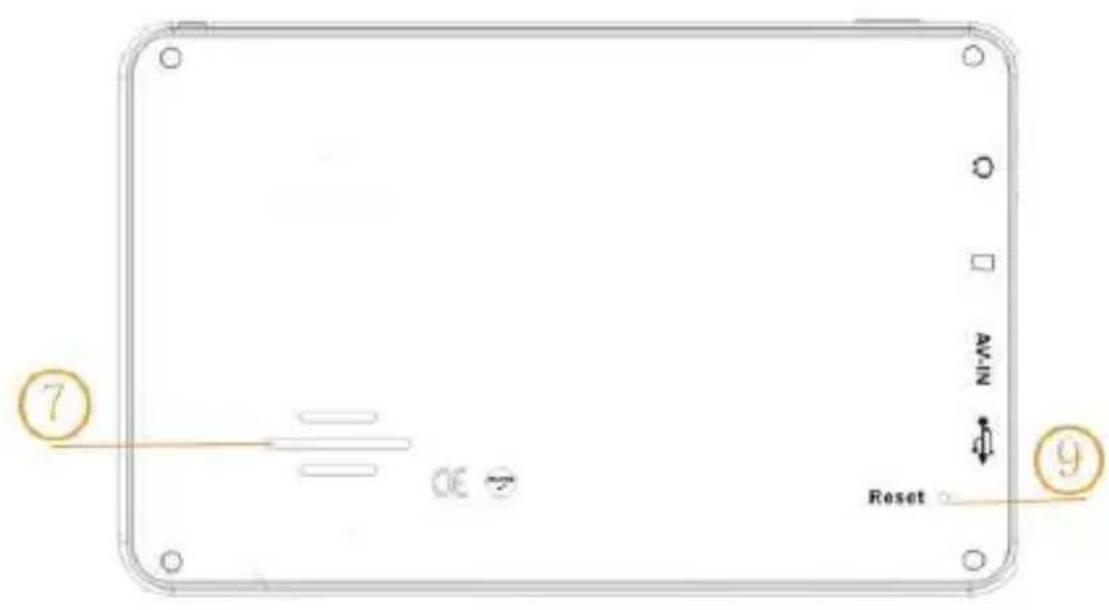
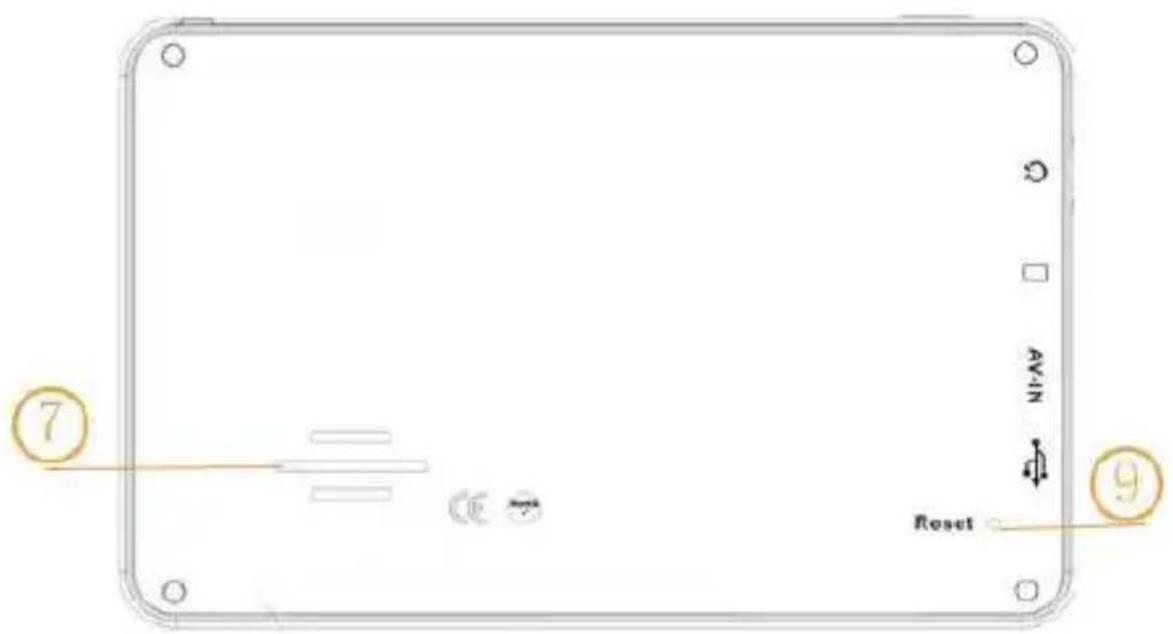
Product Appearance
Navio 705CAM & Navio 705V Plus:
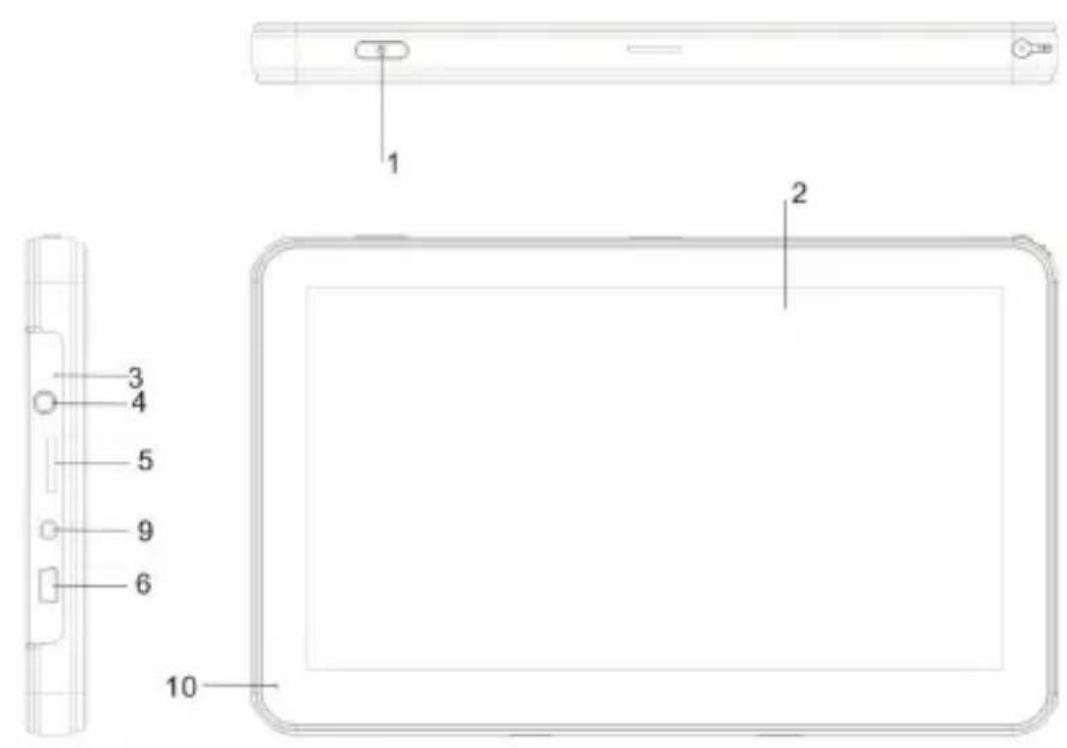
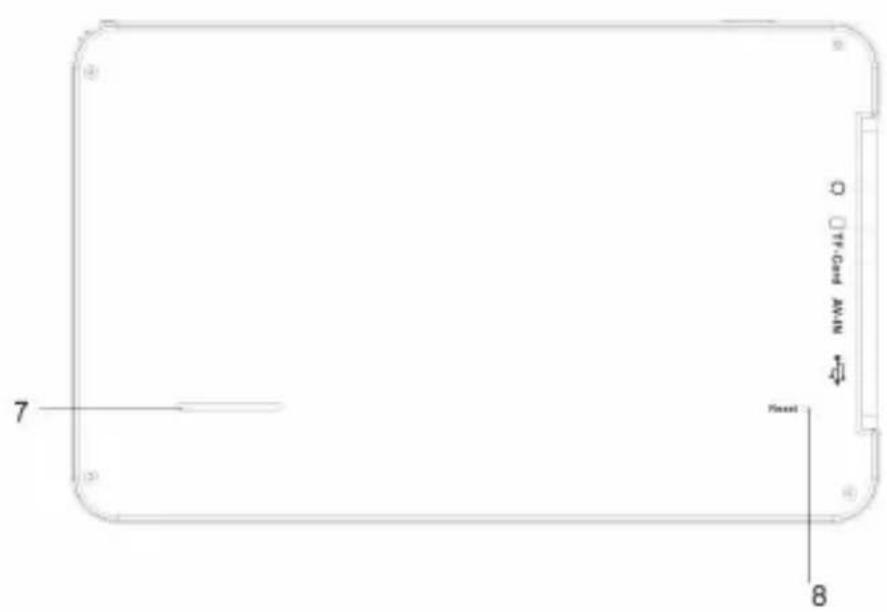
| 1 | Power switch System on/off |
| 2 | Touch screen Operation by click display/Show the contents |
| 3 | Indicator light Power supply indicator |
| 4 | Earphone jack Connect to stereo earphone |
| 5 | microSD slot Can be inserted 1 microSD card |
| 6 | MINI USB interface Connect GPS with PC and charging |
| 7 | Loud-speaker Playback navigation prompt sound and music. |
| 8 | Reset Restart system after light press |
| 9 | AV-IN Outside audio/video line-in, connect to rearview system |
| 10 | MIC Microphone for blue tooth hand-free system |
Navio 500 Plus:
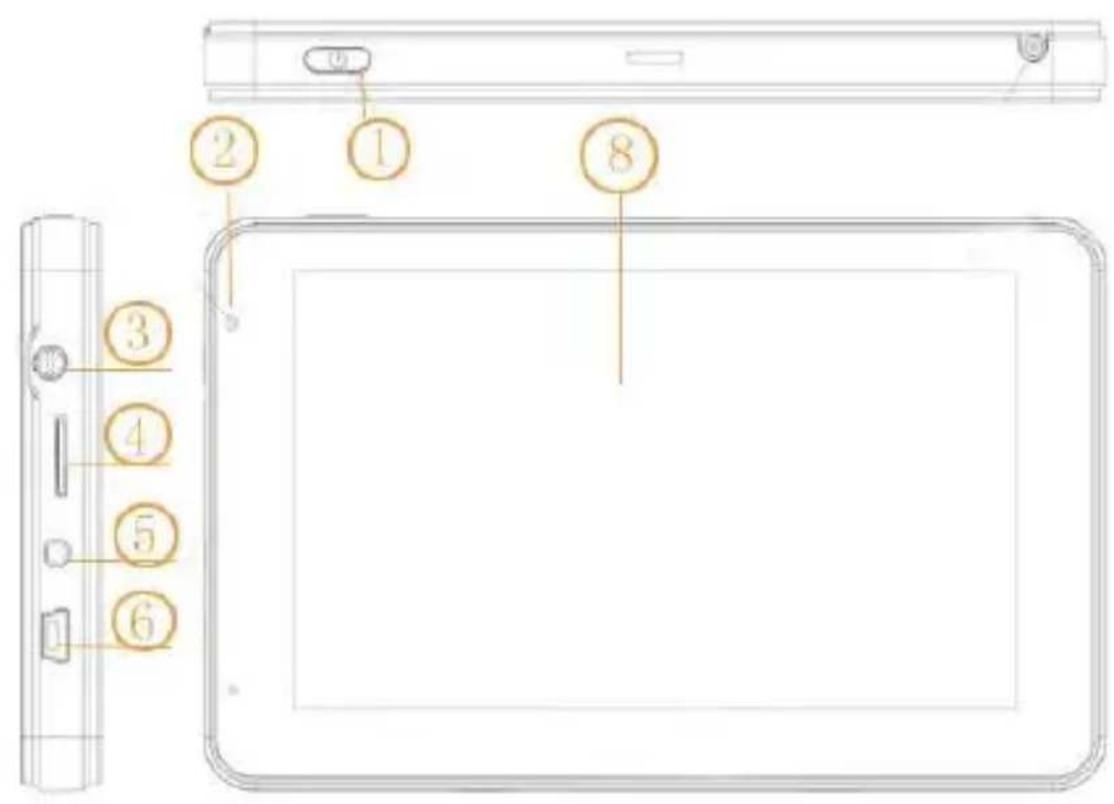
| 1 | Power switch System on/off |
| 2 | Indicator light Power supply indicator |
| 3 | Earphone jack Connect to stereo earphone |
| 4 | microSD slot Can be inserted 1 microSD card |
| 5 | AV-IN Outside audio/video line-in, connect to rearview system (optional) |
| 6 | MINI USB interface Connect GPS with PC and charging |
| 7 | Loud-speaker Playback navigation prompt sound and music. |
| 8 | Touch screen Operation by click display/Show the contents |
| 9 | Reset Restart system after light press |
Power Supply and Charging of a Navigator
When the GPS navigator is used for the first time or no used for a long time, the batteries must be completely charged with a MINI USB cable.
Power supply
The navigator can be powered in two ways, i.e. batteries and MINI USB supply.
When not connected to the charger adapter, the GPS navigator is powered by the lithium batteries. The power icon on the top right corner of the system interface or the power bar in the power-setting interface indicates the remaining battery power.

Power icon

Power bar
When connected to the MINI USB charger adapter (or via MINI USB to connect computer), the GPS navigator is powered by the external power.
[Note] This navigator uses built-in, not the removable lithium polymer battery power supply. Generally (for example, backlight brightness setting is low), completely fills the electricity, the battery can supply power continually about for 3 hours. It regards you to use the GPS to decide, battery's actual supply time will be different. Some functions (audio, video, high luminance back light) must consume the massive electrical energies, will obviously reduce power supply time.
[Caution] This unit uses built-in, not the removable lithium battery. In order to avoid being on fire or the burn danger, please do not disassemble, pierce, collide or discard the battery in the fire or water. The battery can burst, blast, or release danger chemical substance.
Charging with a power adapter
Used for the first time or no used for a long time, the GPS navigator must be completely charged by a MINI USB charger adaptor.
- Connect the DC terminal of the adapter to the power terminal on the bottom side of a GPS navigator.
- Connect the other terminal to the power socket (or computer) to charge and power the navigator at the same time.
[Note] If the charging indicator flashes in red, it indicates the navigator is charging. Please wait until the device is completely charged. Do not remove the adapter during charging. The indicator will flash in green when the device is completely charged. Please charge the battery in time when the power is insufficient or exhausted in the future.
Charging with a vehicle power adaptor
- Connect one end of the vehicle adapter to the MINI USB interface of the GPS navigator.
- Connect the other end to vehicle cigarette lighter to power and charge the GPS navigators at the same time.
[Caution] Please plug the vehicle adapter after the car is started, avoiding damages to the navigator caused the instant current at start time.
Basic Operation
Switching on/off
Please press power key on the top of the navigator to switch off when you finish application. The system enters state of dormancy. When you switch on again, the device will maintain the operation status last time you switch off.

Power key
[Note] If you want to save battery energy, you may switch downward the switch to cut off the main power supply.
Restarting the system
When the system have no response, press power switch key to shut the system and restart the system.
[Reference] The following cases may cause system failure:
- Delay and stagnation occur while switching over images;
- Overlong running time fails to activate the click function;
- Pressing the power key fails to switch on/off the device.
[Caution] If the system fails, you will miss the system information not yet saved by restarting the system. Please backup the data regularly.
Using the vehicle bracket to fix a navigator
A vehicle bracket is composed of a bracket and a support. Please fix the device using the vehicle bracket onto the front windshield or dashboard while using the GPS navigator in vehicle.
[Caution] Place the vehicle bracket carefully. Ensure the GPS navigator would not block your driving vision. Ensure the navigator is fixed instead of being placed randomly. Do not fix it where the air bag is placed. Do not place it within the bag's inflation range.
Using a touch pen
The touch pen is used to operate the GPS navigator. Please keep it well.
- Click: Click the screen once with the nib.
- Double click: Click the screen twice quickly with the nib.
- Dragging: Click one place with the nib, then, moves the nib.
[Caution] The touch pen with a broken nib, ballpoint pen, as well as any sharp and rough objects may scratch and damage the LCD screen. Please use a touch pen with a nib in good condition. Do not use the touch pen if the nib is broken.
Using microSD Memory card
Required map software, map data and media files are stored in the provided microSD card. Insert the card properly into the slot.
[Caution] Do not take out the card at random when the system is running navigation program or playing a media file.
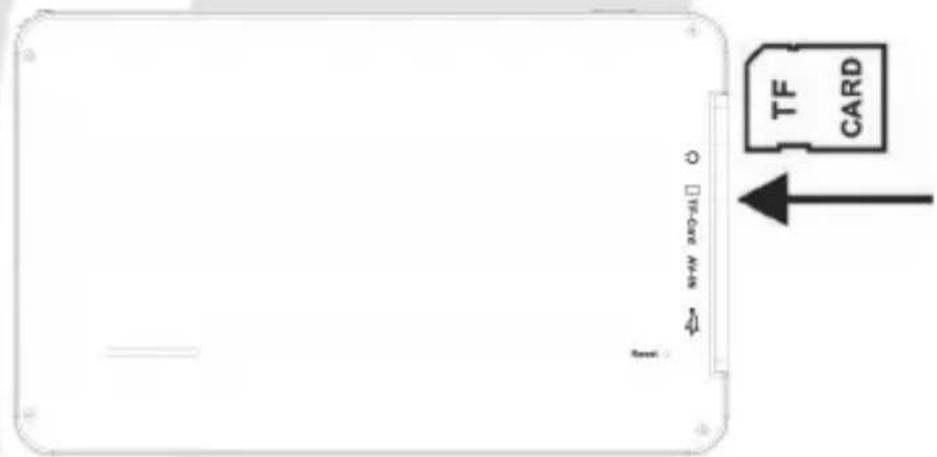
- Do not press hard or bent the microSD card. Prevent micorSD card from falling and bumping.
- Do not store the card in hot or high-humidity areas. Keep the card away from high temperature and direct sunlight. Keep the card away from liquid and corrosive materials.
- Pay attention to the slot position for inserting the card. Inserting randomly may cause damages to the slot and the card.
Connecting to a Computer
Access a computer via the mini USB interface on the right side of the navigator, and you can copy files from the navigator to the computer and vice versa or backup the data in the navigator to the computer for future use.
- Ensure the navigator is on;
- Ensure the mini USB end is connected to the mini USB interface on the left side of the device and the standard USB end is connected to the USB host interface of the computer;

Mini USB end
Standard USB end

-
On completing connection, the computer will automatically identify the new hardware unit.
-
On completing communication, remove the mini USB cable and the navigator returns to run like before.
[Caution] Data security: Please backup the system data to an external storing device before updating. The company assumes no responsibility for damages or missing of the data.
[Caution] While accessing a computer, the following operations will interrupt the communication between the system and the computer. Then, the unfinished transmission data will be missing. A) Unplug the mini USB cable; B) Press the power key to switch off; C) Restart the system via the power switch.
Description of the Main Interface and Main Functions
System interface:
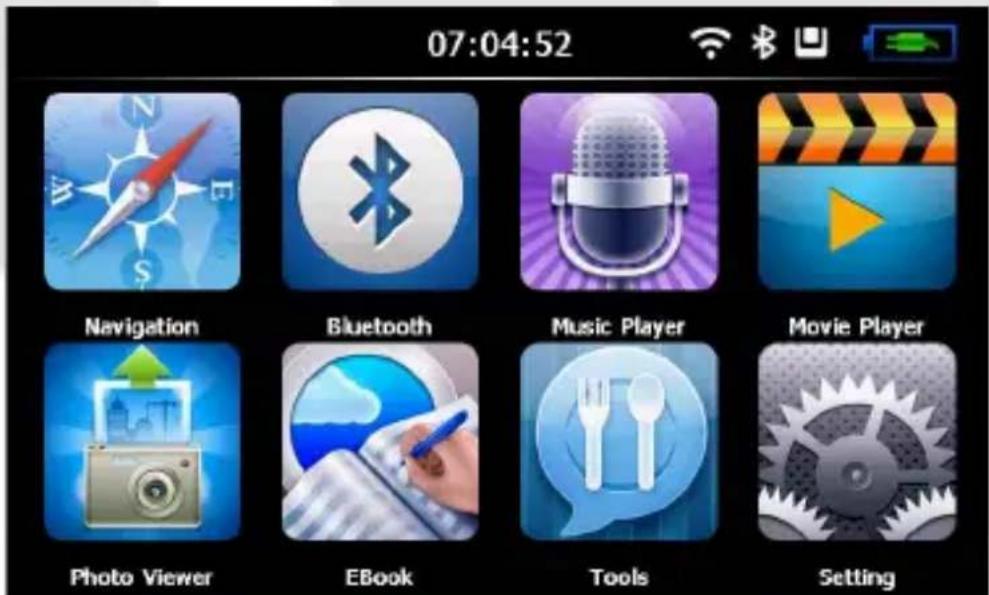
| Navigation Open navigation map | |
| Movie Player | This is to play wmv/mpeg/mpg/mp4/3gp/asf and avi format video files; this supports progress adjustment, pause, and full-screen play function |
| Music Player | This supports WMA9 and WAV format audio files and random play, orderly play and cycling play. |
| Photo Viewer | This is to view JPG, JPEG, BMP and PNG format files; this allows you to rotate, scale up/down and automatically display images |
| Bluetooth This allows you to enter hand-free system | |
| Tools Support Tools | |
| EBook This allows you to read TXT-format files; this allows you to select pages | |
| Setting | This is to set the volume, power supply, back light, date and time, languages as well as system information |
Maintaining the GPS Navigator
Every time you update your data make backup copies on an external storage mediums. The supplier does not assume liability for data loss or damage to data storage units, and no claims can be accepted for damages resulting from the loss of data or for consequential damages.
Keep your navigation system and all connected devices away from moisture and avoid dust, heat and direct sunlight, especially in the car.
Make sure you protect your appliance from getting wet. (e.g. from rain and hail, at all times.)
Please pay attention that moisture can even build up in a protective pouch because of condensation.
Avoid heavy vibrations and shaking.
Avoid the device from releasing itself from its holder, for example when braking. Install the device as vertically as possible.
The appliance if most reliably operated at an ambient temperature of between 41°F to 104°F (5 °C to 40°C) and at a relative humidity of between 10% to 90%.
In the powered down state the appliance can be stored at between 32°F to 140°F (0 °C to 60°C).
Store the appliance in a safe location to avoid high temperatures (e.g. when parking or from direct sunlight).
When connecting additional or other components the “Electromagnetic Compatibility Directive”(EMC) must be adhered to. Please also note that only screened cable (maximum 10ft) should be used with this appliance.
For optimal performance, maintain a distance of at least 10ft. from sources of high-frequency and magnetic interference (televisions, loudspeaker systems, mobile telephones and so on.) This will help avoid malfunctions and loss of data.
Music Play Function
This chapter describes how to use the audio player of the GPS navigator to play your favorite music, making it your mobile MP3 player.
Features
The audio player supports WMA and WAV format files. You can set the play order at random. Please copy your audio files to any folder in the memory card before playing.
Interfaces and Operations

Click this icon; click the selected song to activate the audio player, as shown in Figure 1.
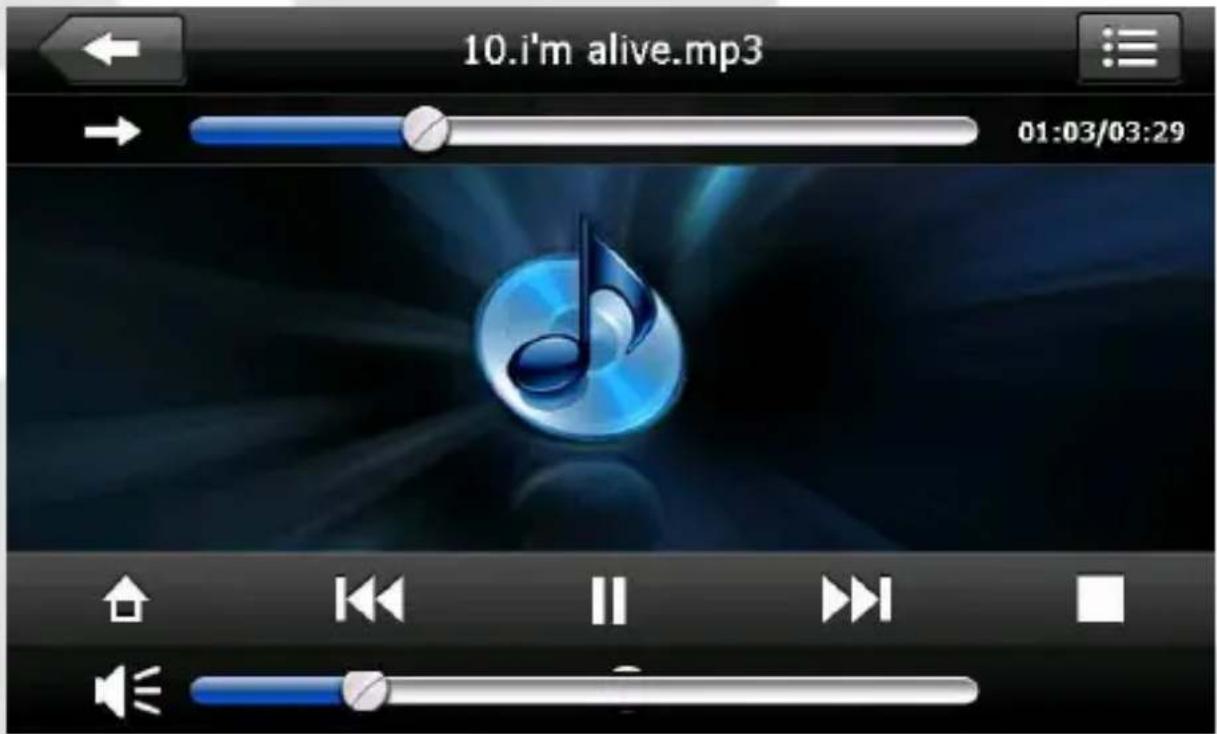
Figure 1, music player
 | Close Click to close the audio player |
 | Play This indicates that a song has been paused or stopped playing; click to continue |
 | Pause This indicates a song is being played; click to pause |
| [wgxg] | Stop Click to stop playing |
 | Last Click to play the last file |
| [wg4G] | Next Click to play the next file |
 | Volume adjustment Drag the nib of the touch pen on the screen leftward/rightward to adjust the volume. Drag leftward to decrease and rightward to increase |
 | Progress adjustment Drag the nib of the touch pen on the screen leftward/rightward to adjust the progress. Drag leftward to back to a certain time and rightward to advance to a certain time to play |
 | Back Click to show files of a folder |
 | Elapsed time Click to show the elapsed time |
 | Home Click to back to the main interface |
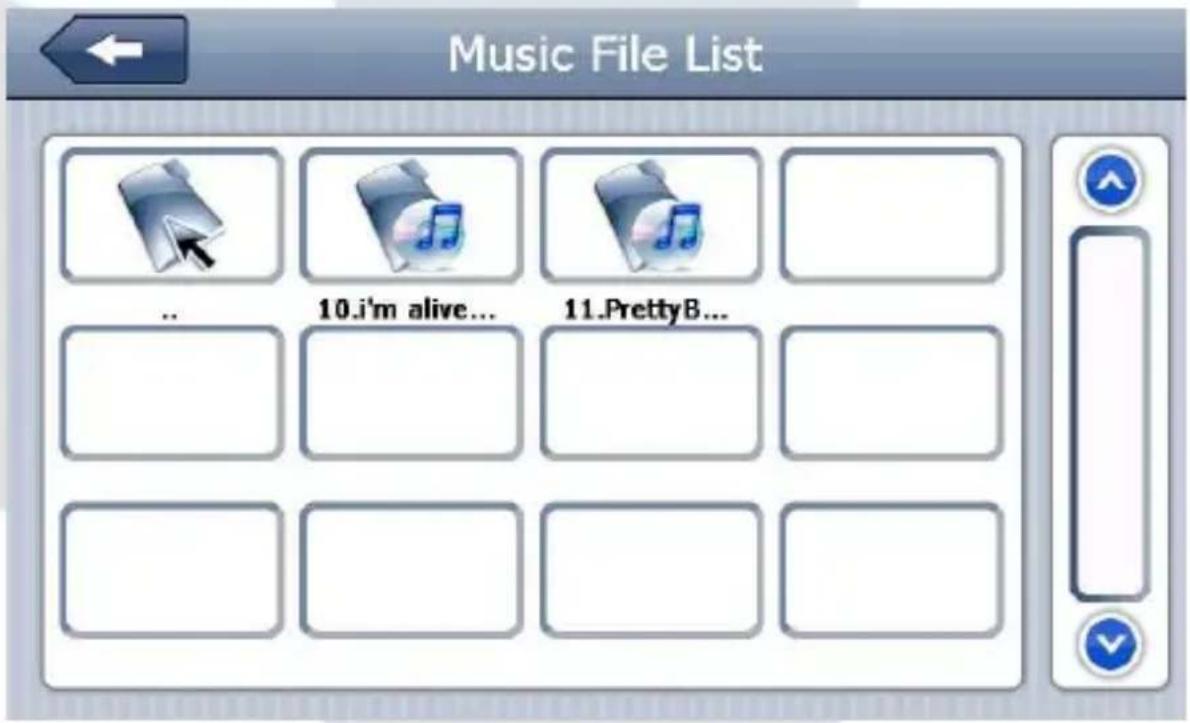
Figure 2, music file folder
Photo Viewing Function
This chapter provides information on how to view images with the image viewer of the GPS navigator.
Features
- Support images featuring formats like JPG, JPEG, BMP and PNG.
- Allow you to rotate, full screen display and automatically display all images.
Please copy your image files to any folder in the memory card before viewing.
Interfaces and Operations

Click this icon in the main interface, selected image to activate the viewer, as shown in Figure 3.

Figure 3, photo viewer
 | Close Click to close the image viewer |
 | Hide Click to hide the tool bar |
 | Rotate counterclockwise Click to rotate the current picture counterclockwise of 90° |
 | Last Click to view the last picture in the same folder |
 | Next Click to view the next picture in the same folder |
 | Zoom in Click to zoom in the picture |
 | Zoom out Click to zoom out the picture |
 | Full screen Click to show the picture in for screen |
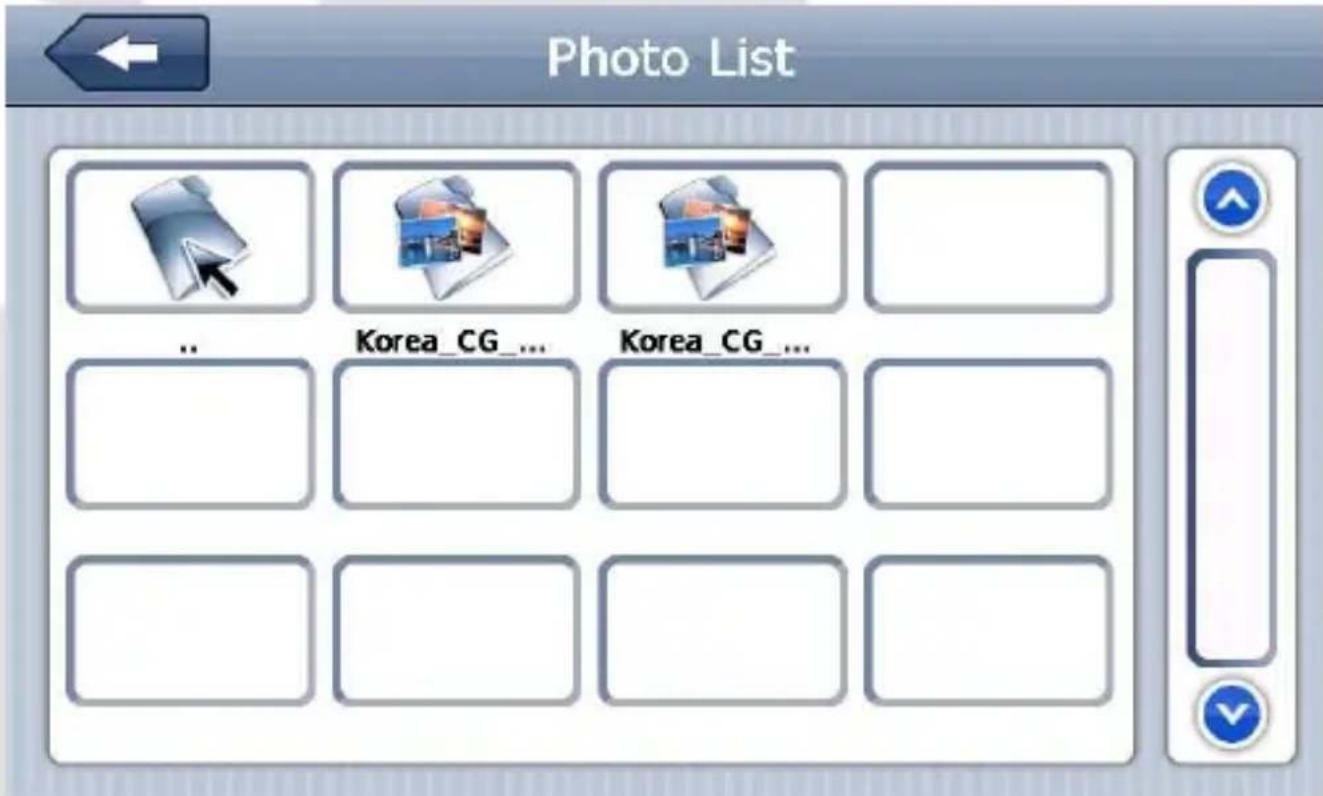
Figure 4, interface of photo list
EBook Reading Function
This chapter provides information on how to use the GPS navigator as an Ebook reader.
Features
- Support file. TXT;
- Support scrolling, skipping and folder selection
Please copy your txt. file to any folder in the memory card before reading.
Interfaces and Operations

Click this icon; click the selected txt to activate the viewer, as shown in Figure 5.

Figure 5, EBook viewer
 | Close Click it to close the e-Reader. | |
 | Last Click it to read the last page | |
 | Next Click it to read the next page | |
 | Font Click it to set the font | |
 | Color Click it to set the color | |
 | Save bookmark | Click it to save the bookmark |
 | View the bookmark | Click it to view the bookmarks |

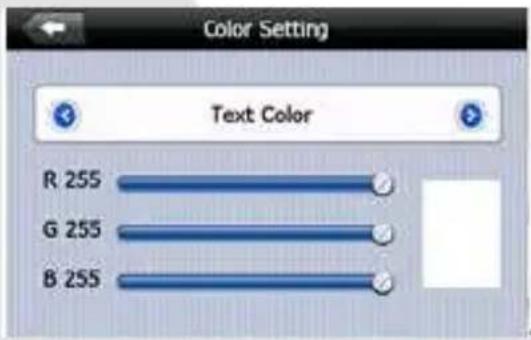
Figure 6, font settings Figure 7, color settings
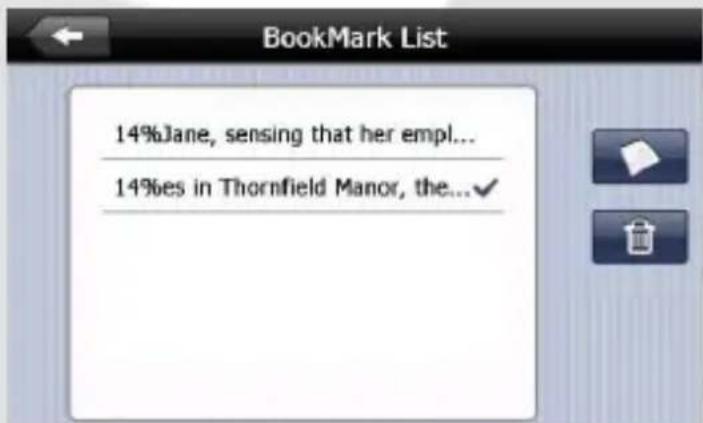
Figure 8, bookmark settings
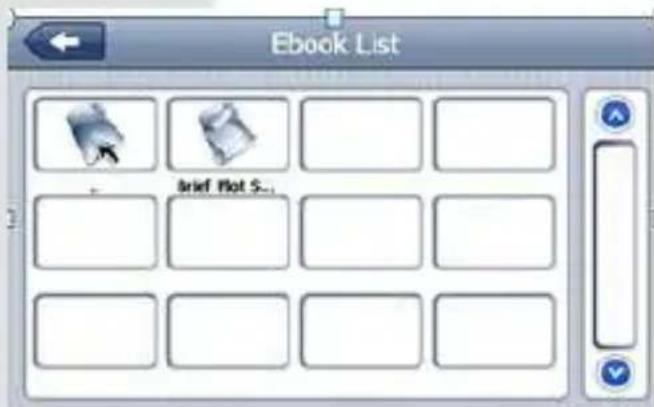
Figure 9, text file folder interface
Movie Playing Function
This chapter provides information on how to use the GPS navigator to play video.
Features
-
Support wmv, mpeg, mpg, mp4, 3gp, asf and avi files;
-
Support full-screen play, progress selection and file selection
Please copy your video files to any folder in the memory card before playing.
Interfaces and Operations

Click the icon; click the selected image to activate the player, as shown in Figure 10.
![[Divx 3] 梁祝 (352x288-25fps-563kbps).avi 00:01:14/00:02:50](/content/2026/05/1129178/images/6ab1b4f4b8fd101256ae5e67b04f7e5219f210208bbaa3e46e3c70167b867a8e.jpg)
Figure 10, media player interface
 | Close Click to close the video list; |
 | Play It shows stop playing. Single click will continue to play. |
 | Next Play next video. |
 | File list Single click and shift to video file list, and then choose your favorite video. |
 | Volume | Single click volume. It shows volume is decreased when it shift toward left. While volume is increase when it is shifted toward right. |
 | Playing progress | Adjust the progress by slide the progress-displaying bar; go left for backwards, go right for forwards; |
 | Brightness adjust | Adjust brightness with stylus while moving toward left and right. Turn right means turn brighter. |
 | Play interface | Full screen play. Double click to return normal play status. |
 | Video name Show current Video name | |
 | Time Show the time consumed / The total time of the video |
![Video File List [WOLF][Na...](/content/2026/05/1129178/images/6ceebfab335292608cdedfdd3ac887295d506ae8c9b0a277fd5ffc6da5c1c0f3.jpg)
Figure 11, video folder interface
System Settings

Click the "Setting" icon to enter the settings menu; then, you can implement relevant settings. The settings cover "volume", "backlight", "data time", "language" and "system
information" etc, as shown in Figure 12.
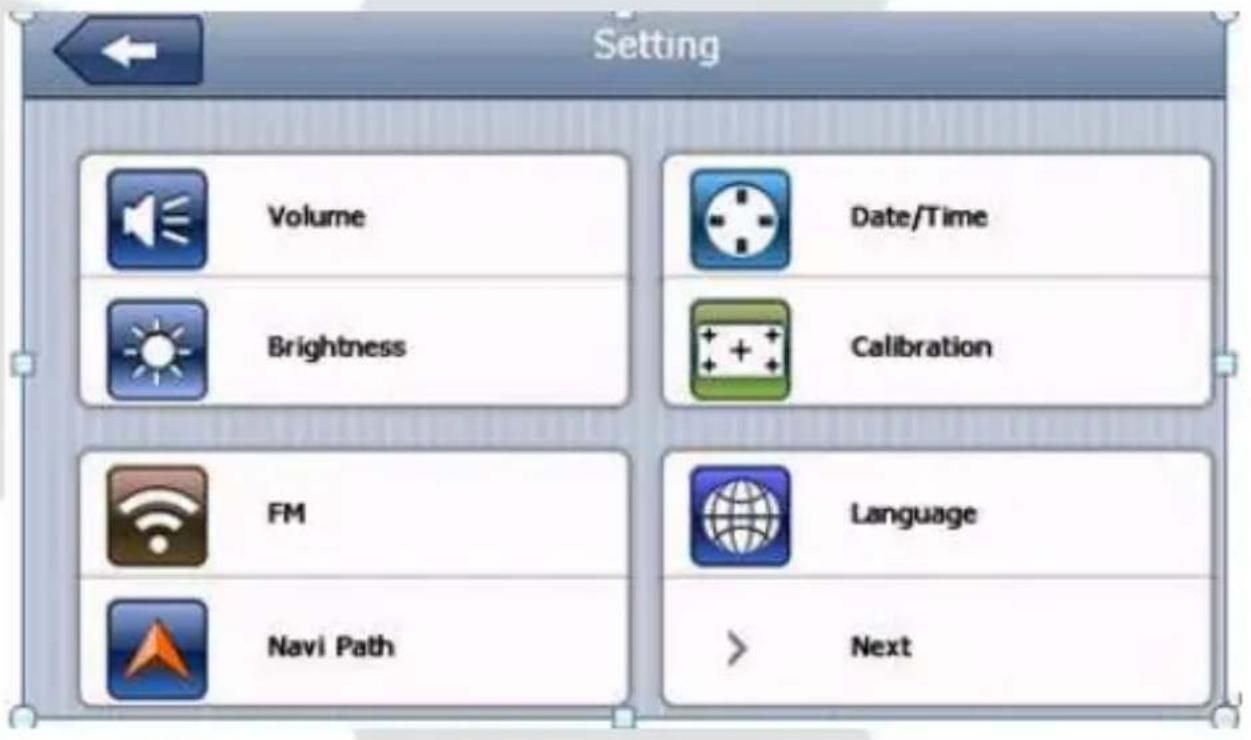
Figure 12, settings interface
 | Volume | Adjust the volume;Turn on / off “screen click tone” |
 | Backlight | Adjust the screen backlight;Backlight turn off time interval under battery power supplyBacklight turn off time interval under external power supply |
 | Time and date Time set, date set, time zone set | |
 | Calibrate the screen | Calibrate the screen |
 | FM Transmitter | Turn on/off FM function. Set the received frequency |
 | System info Show the system version and serial number etc. | |
 | Language Select the language for the system | |
 | Navigation path Set navigation path | |
 | Default set Return the default settings | |
 | GPS info Display GPS receiving signals data | |
 | Office Office system (optional) | |
 | USB And computer synchronous even | |
 | Wince Wince Operating system | |
Screen Calibration

Click this icon to enter screen calibration interface. Then click "Yes" button on the dialog box. Calibrate the screen by clicking crosses. Tap anywhere to save and exit when finish. If you don't want to calibrate the screen, wait 30 seconds to automatically exit this interface.
Press and briefly hold stylus on the center of the target. Repeat as the target moves around the screen.

FM Transmitter

Click this icon to enter FM Settings interface. FM Transmitter will send out the audio signal to the radio devices. Take 86.7MHZ frequency for example, both the GPS transmitting frequency and the received frequency of the radio should be 86.7MHZ, then all the sounds of the GPS will be input through the amplifier system
of the radio.
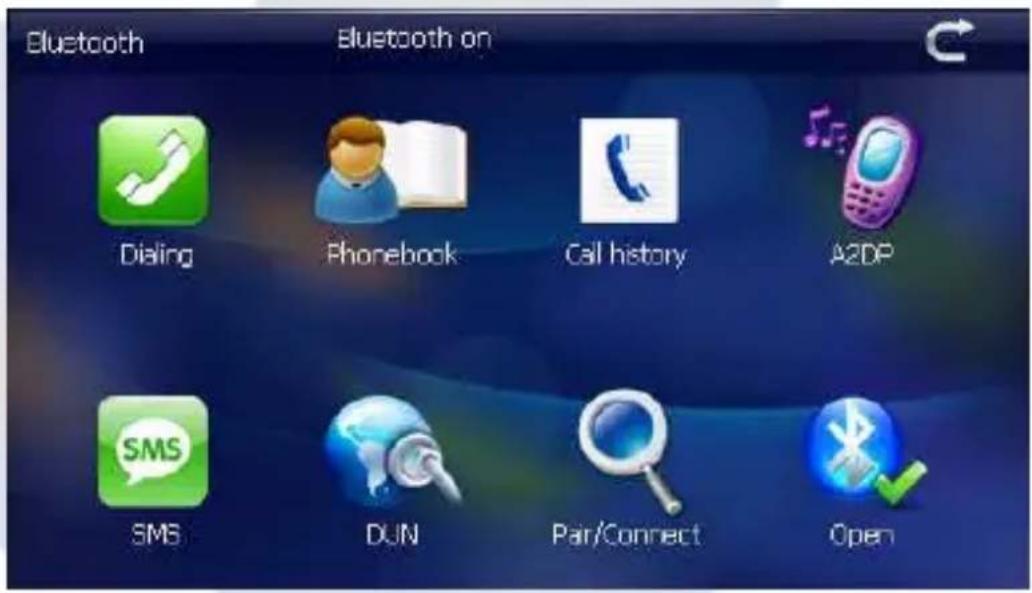
Bluetooth Functions (With DUN function)

Click this icon to enter the Bluetooth interface. This chapter introduces how to use this navigator's Bluetooth to connect with cell phone for call making and answering.
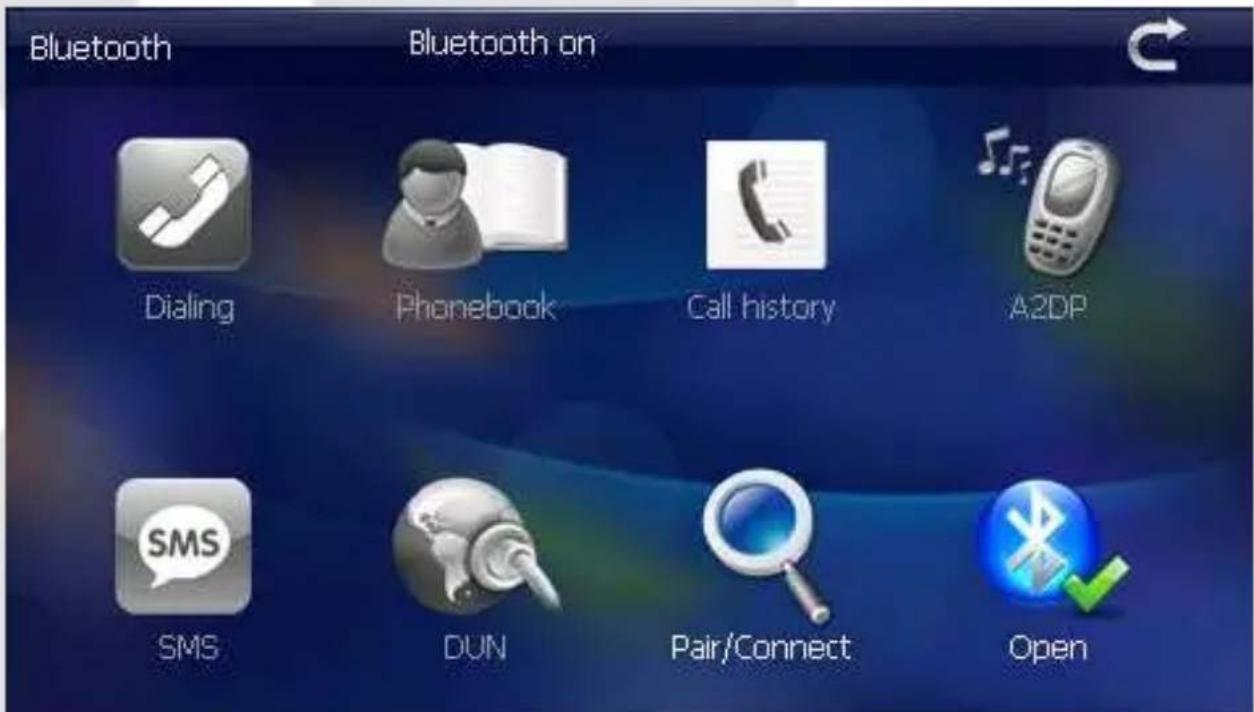
| Close Single click to close the current interface | |
| Dial pad Phone number dialing | |
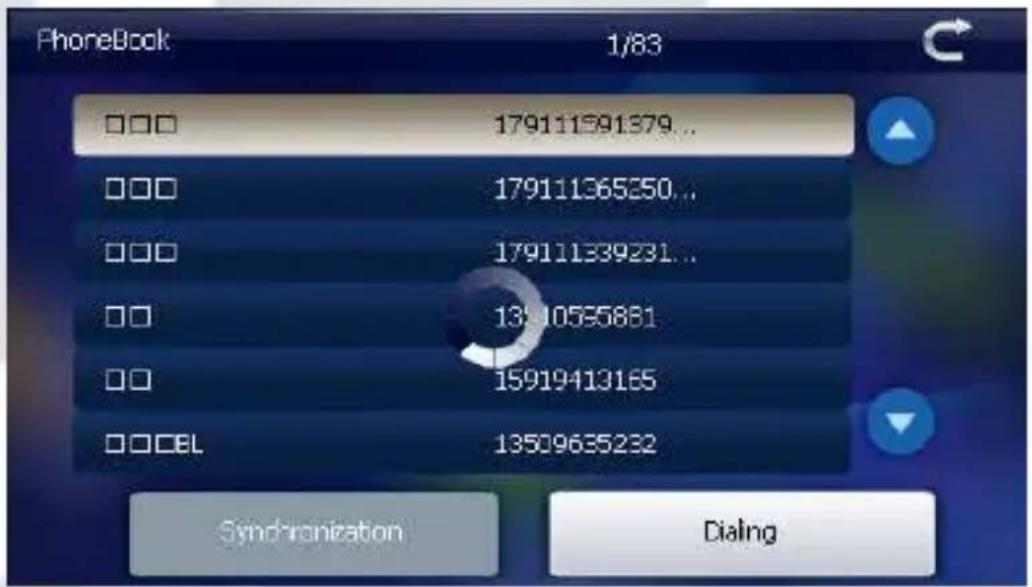
| Phone book Display contact list of paired cell phone |
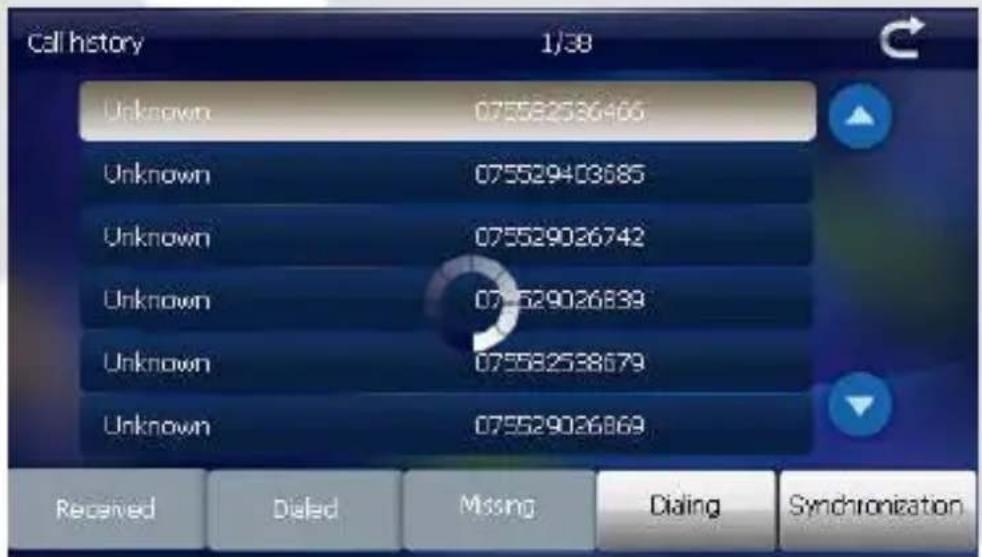
 | Call history Display current call history | ||
 | A2DP Advanced Audio Distribution Profile | ||
 | Message Download SMS of paired phone | ||
 | DUN See DUN Description | ||
 | Bluetooth setting Cell phone searching, profile management, Bluetooth switched on and disconnect | ||
 | Bluetooth on/off Bluetooth on/off |

Bluetooth Settings: click this button to enter the Bluetooth Settings interface.
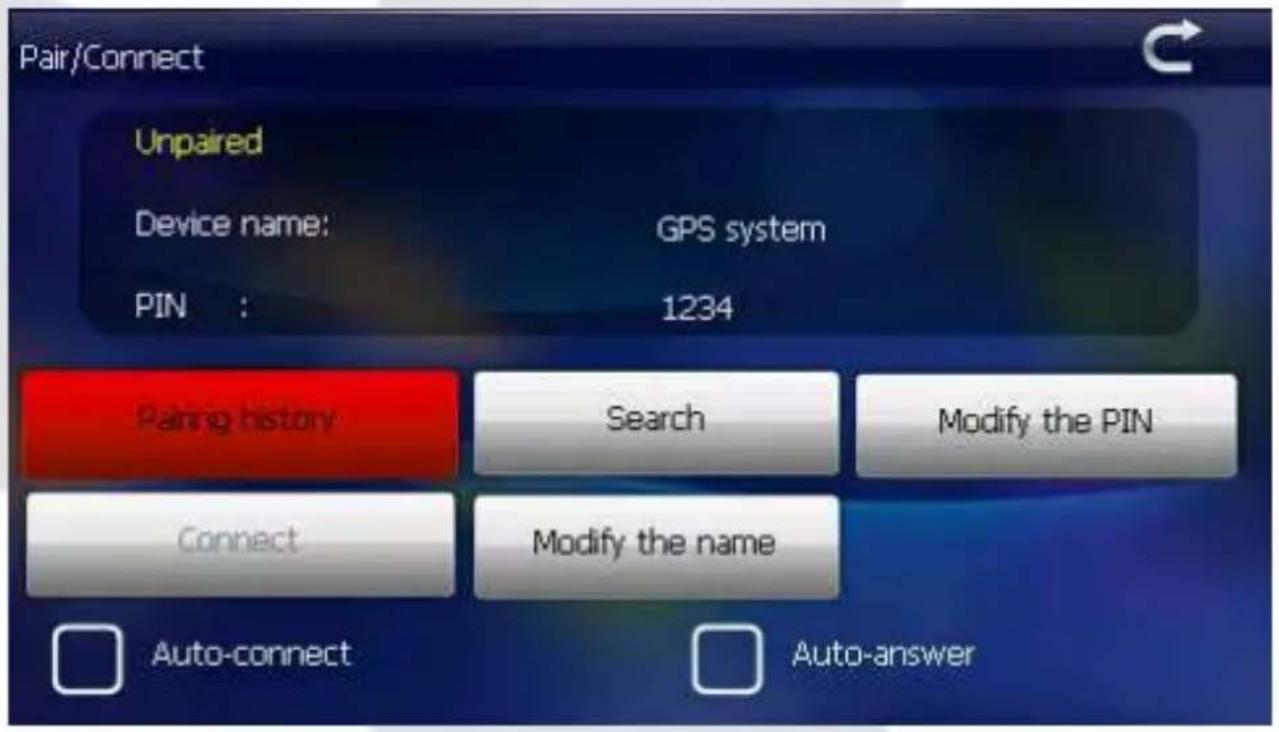
| Close | Single click to close current interface | |
| Unpaired | No Bluetooth phone connect at this moment | |
| Device name: | Device name | |
| PIN | PIN code | |
| Connect | Connect/ Disconnect Connect/Disconnect Bluetooth | |
| Modify the n... | Modify the name Modify the name of the device | |
| Modify the PIN | Modify the PIN Modify the PIN code | |
| Pairing history | pairing history pairing history for mobile phone | |
| Search | Searching Search for Bluetooth devices | |
 | Auto-connect | Auto connect |
 | Auto-answer | Auto answer |

Single click the button to show pairing history as the following pictures.

 | Single click to Disconnect Bluetooth device |
 | Single click to connect Bluetooth device |
| Delete | Single click to delete current selected Bluetooth device |
| Clear up | Single click to clear up all history Bluetooth device |

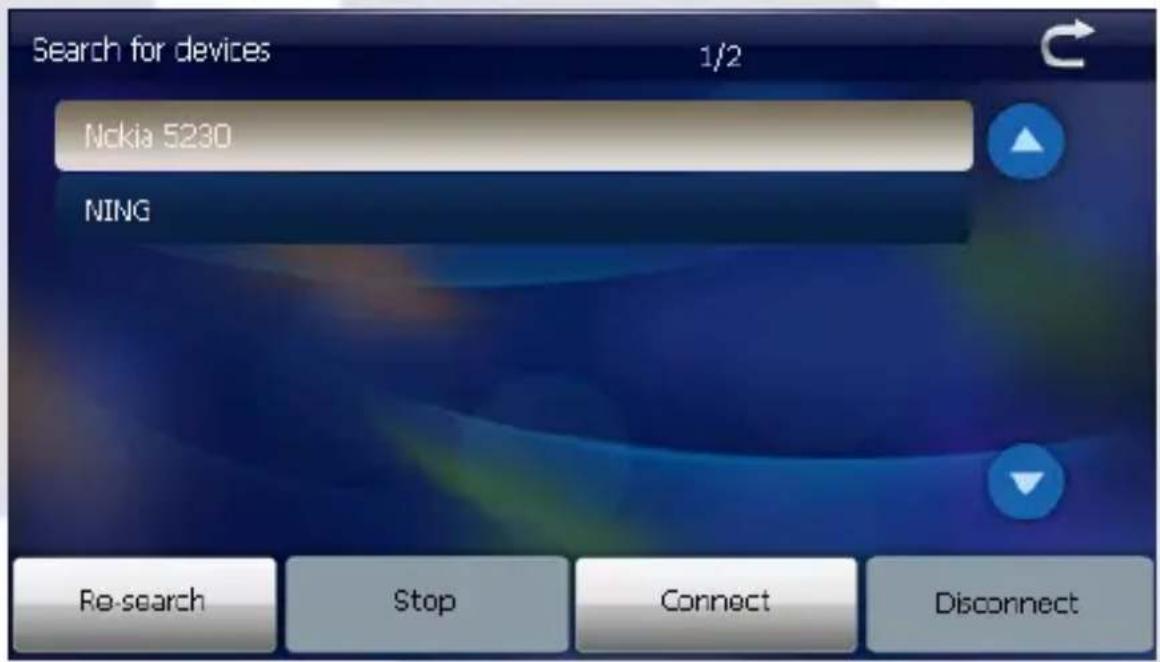
Single click button. You will get the following two pictures: searching and searching results.
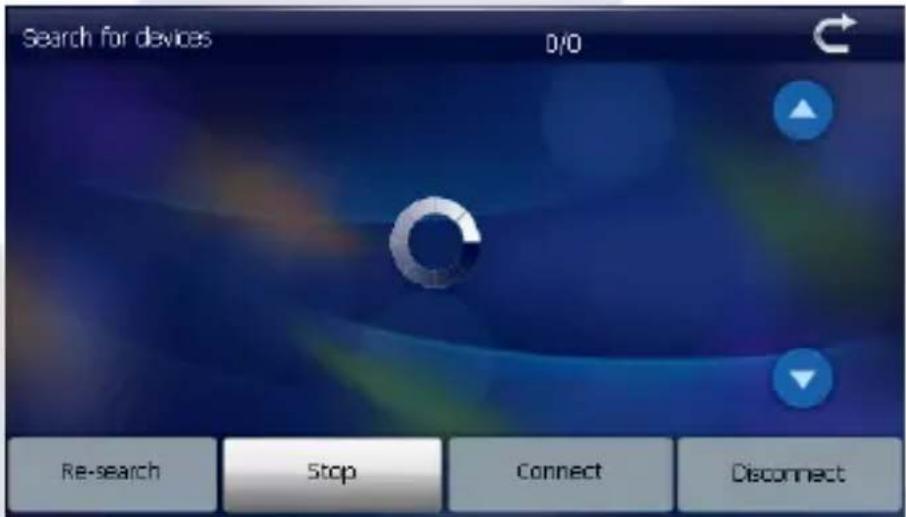

 | Close | Single click to exit current interface |
| Re-search | Search cell phone Search for Bluetooth device | |
| Stop | Stop To stop Bluetooth searching | |
| Connect | Connect Connect Bluetooth | |
| Disconnect | Disconnect Disconnect Bluetooth |
Connect
Single click button.
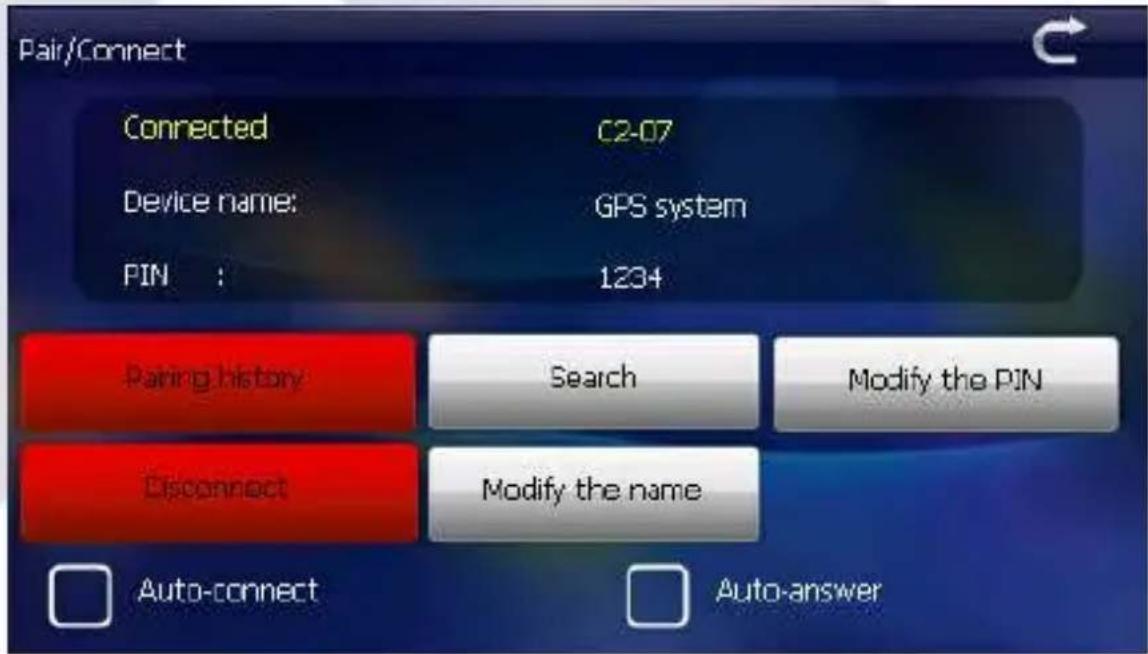
Close current interface to enter following interface. All buttons will show as color design, that means pairing successfully.
| Close Single click to close the current interface | ||
 | Dial pad Phone number dialing | |
 | Phone book Display contact list of paired cell phone | |
 | Call history Display current call history |
 | A2DP Advanced Audio Distribution Profile | ||
 | Message Download SMS of paired phone | ||
 | DUN See DUN Description | ||
 | Bluetooth setting Cell phone searching, profile management, Bluetooth switched on and disconnect | ||
 | Bluetooth on/off Bluetooth on/off |

Single click the button to open the dial pad.
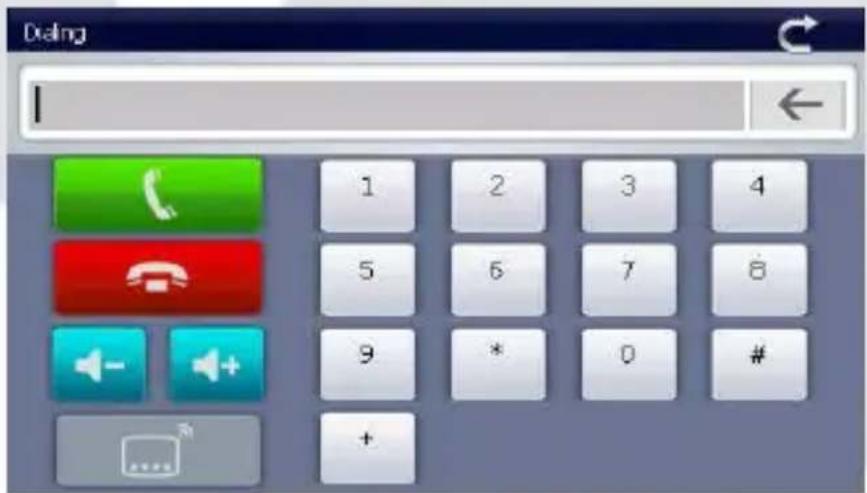
 | Close | Single click to close the current interface |
 | Number display Display current number input | |
 | Keyboard | It made up of 10 numbers from 0 to 9 and “*”, “#” |
 | Backspace | Single click will delete the last number |
 | Volume -/Volume + | Single click to decrease/increase the volume gradually |
 | Switch speechKeep calling | Switch audio output |
 | Hang up Click this button to hang up | |
 | Dial phone Single click to make call | |
If there is an incoming call, it will show the caller ID and its number. You can answer the call or hang up.

If you answer the call, you will see the following screen.

| GPS/Cell phone audio | You can switch audio output between GPS device and cell phone. |

Phone Book: click this button to enter the Phone Book interface.

Call History: click this button to enter the Call History interface.

A2DP: click this button to enter the A2DP interface.
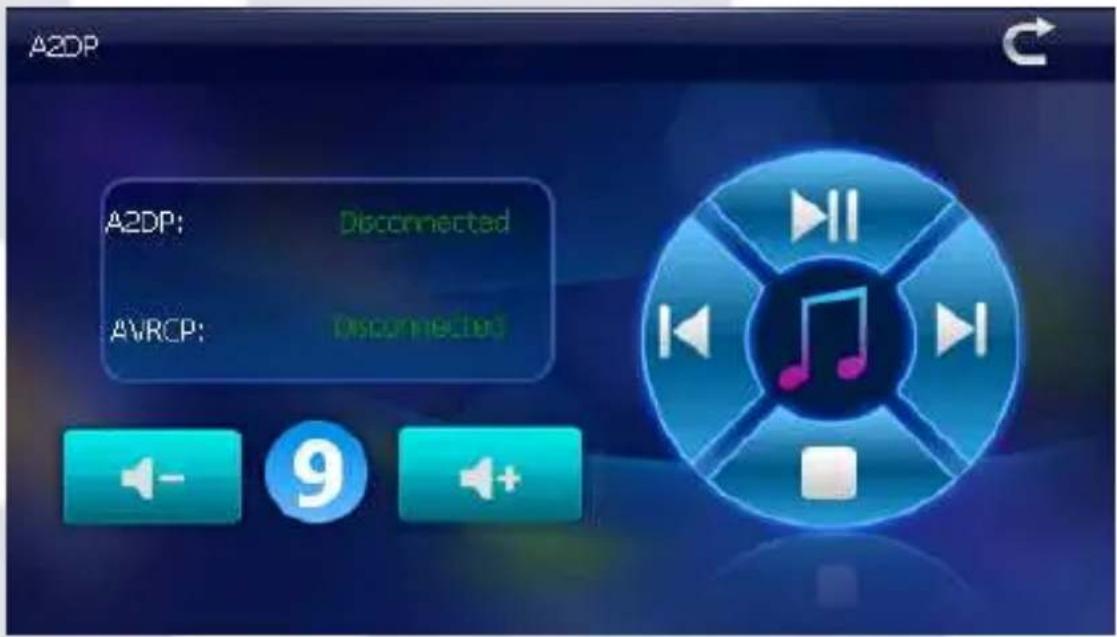
 | Bluetooth Stereo Audio / Video Remote control connection | |
 | Volume - | Single click to decrease the volume gradually |
 | Volume instruction | Volume by the number 1-9 levels |
 | Volume + | Single click to increase the volume gradually |
 | Playing/Pause | To play and pause, single click to pause, click again to play continuously |
 | Previous song | Play the previous song |
 | Next song Play the next song | |
 | Stop | Single click to stop playing |

SMS: click this button to download SMS of paired phone.
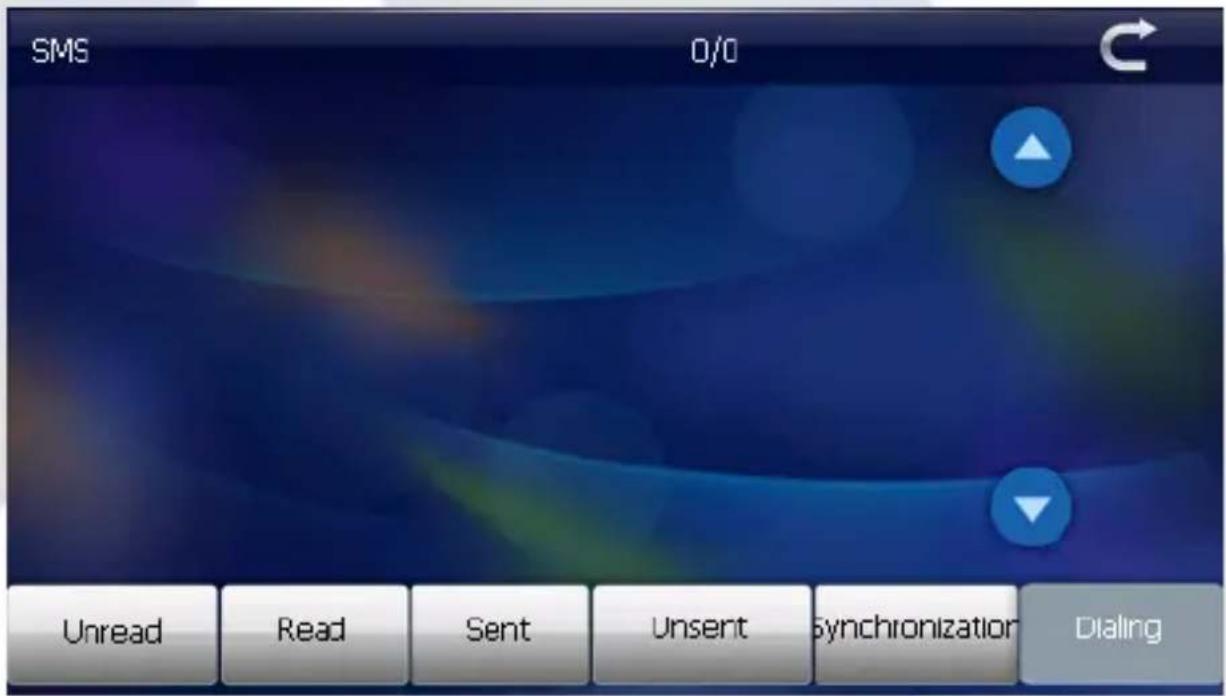
 | Click to view unread SMS |
 | Click to view text messages have been read |
 | Click to view sent text messages |
 | Click to view the short message was not sent |
 | Click synchronization with mobile information |
 | Click to select numbers to dial |
DUN interface

After establishing a good match, click into the Dun interface to enter.
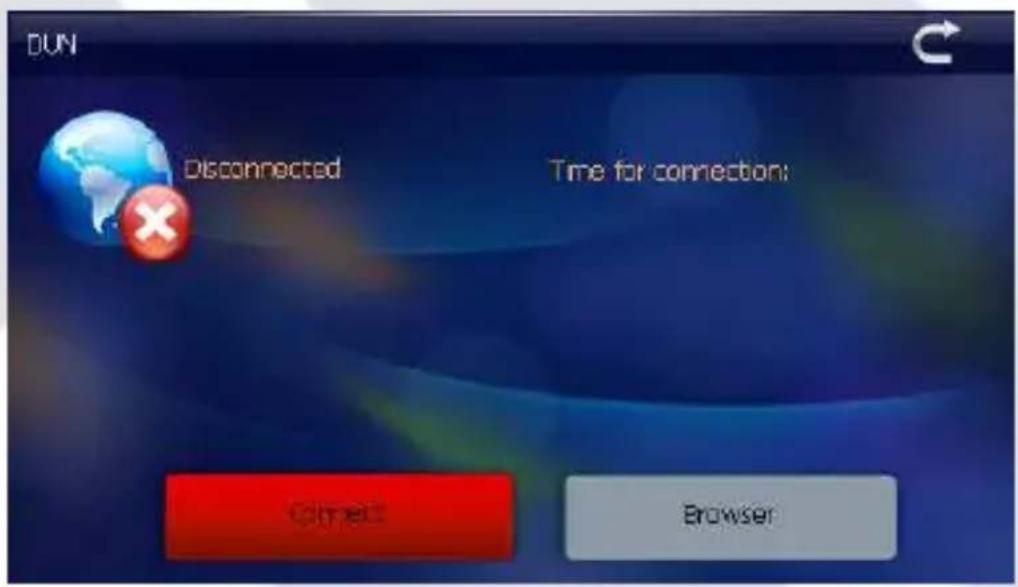

Single click into the connection state, shown in figure:
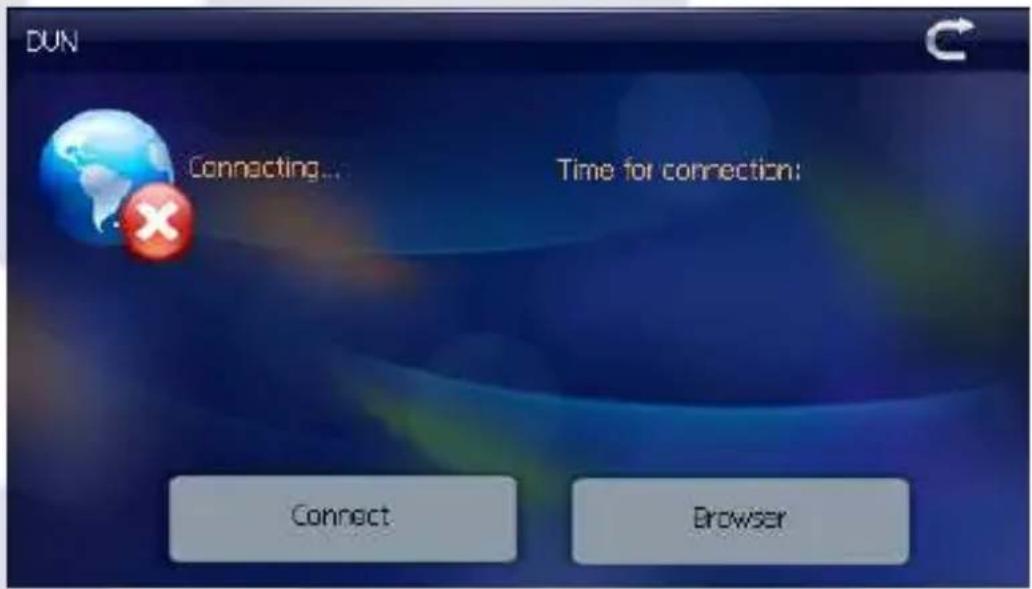
After a successful connection you will see the following screen.


Single click on the Browser button to run a browser program.
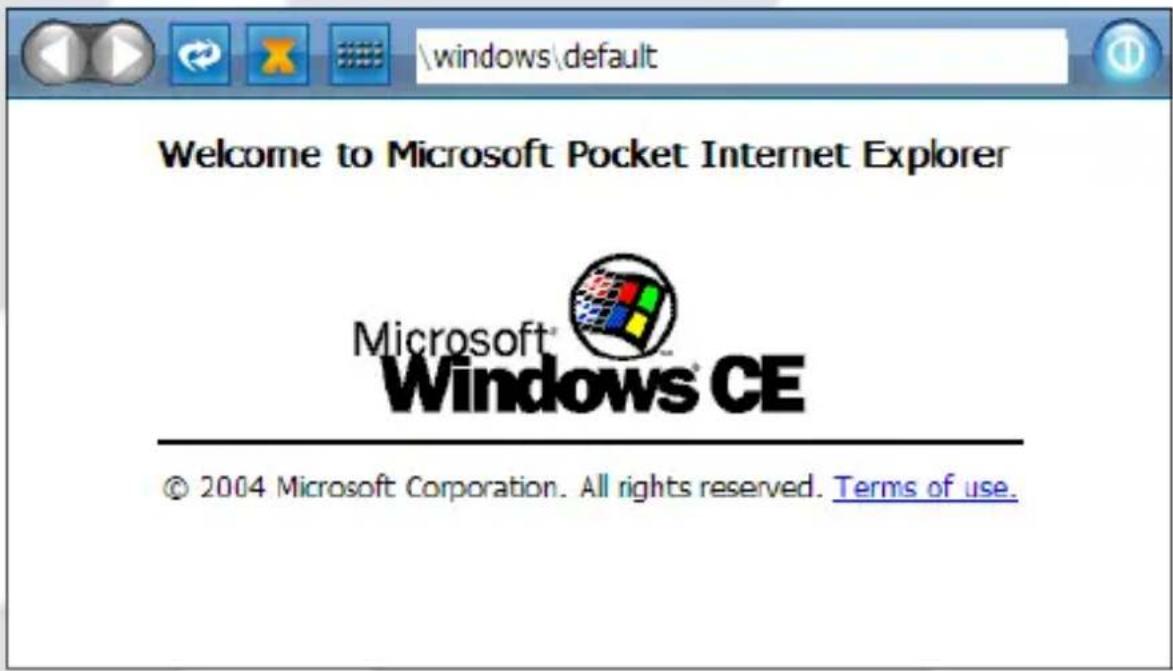
 | Back Back to previous page |
 | Next To the next page |
 | Refresh Refresh current page |
 | Stop Stop opening page |
 | Small keyboard Bring a keyboard for character input |
| \windows\default Address Bar Website address field | |
| Close Click to exit the current interface | |
![http://home.mobile.msn.com/en-us/default.aspx msn. Input Panel ` 1 2 3 4 5 6 7 8 9 0 - = BS Tab q w e r t y u i o p [ ] \ Caps Lock a s d f g h j k l ; ' Enter Shit z x c v b n m , . / ↑ pgup ctrl Alt ins del ← ↓ → pgdn](/content/2026/05/1129178/images/4922211ea5317c1369dc34b7b04eb3137319662e7ac15032e6dcc7ccb6e45a4e.jpg)
Tools

Click on this icon to enter tools applications menu.
Rear Camera Setting
Optional function, only for Navio 705 CAM
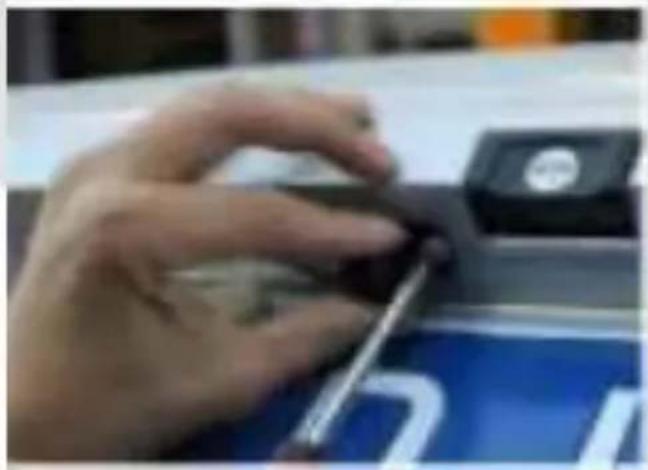
natural_image
Close-up of a hand pressing down on a blue electronic device (no visible text or symbols)- Take the license plate down
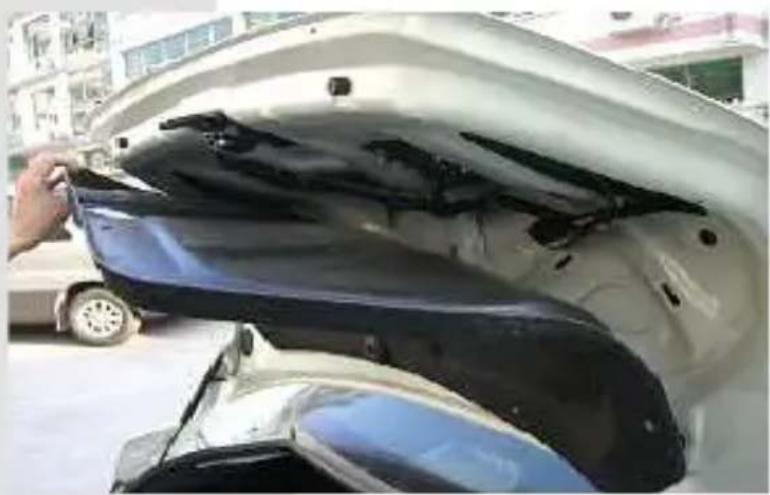
natural_image
Exterior view of a white car trunk with blue and black plastic panels being cleaned, no visible text or symbols- Take the plastic from the trunk

natural_image
Close-up of a hand using a tool to clean or store white car door trim, no visible text or symbols- Open plate lamp cover and put the electric al wire of the camera into hole.
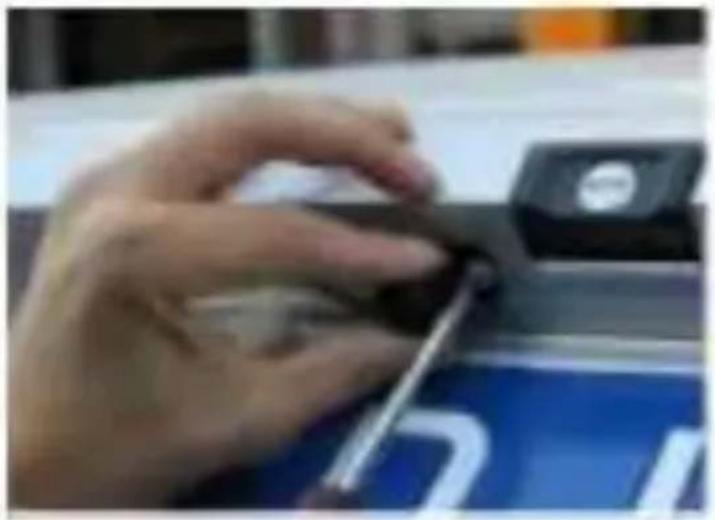
natural_image
Close-up of a hand holding a small black object, with no visible text or symbols- Fix camera on plate bracket.
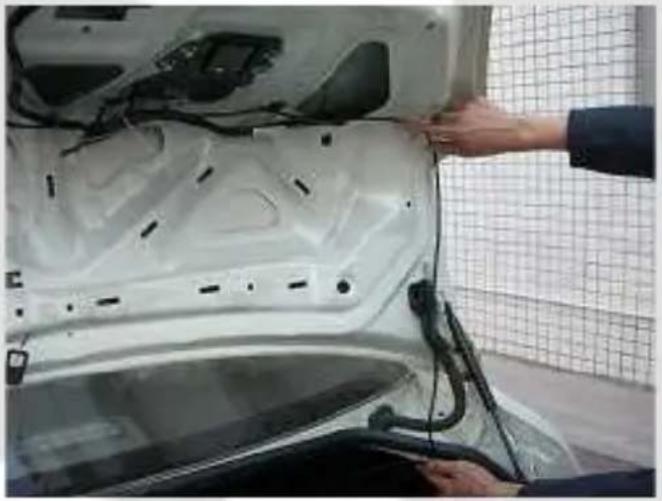
natural_image
Person installing or adjusting a white car hood on a lift, with visible wiring and components (no text or symbols)- Run the wire of the camera to the position of rear lamp and connect the wire to Power supply of the rear lamp according to anode and cathode.
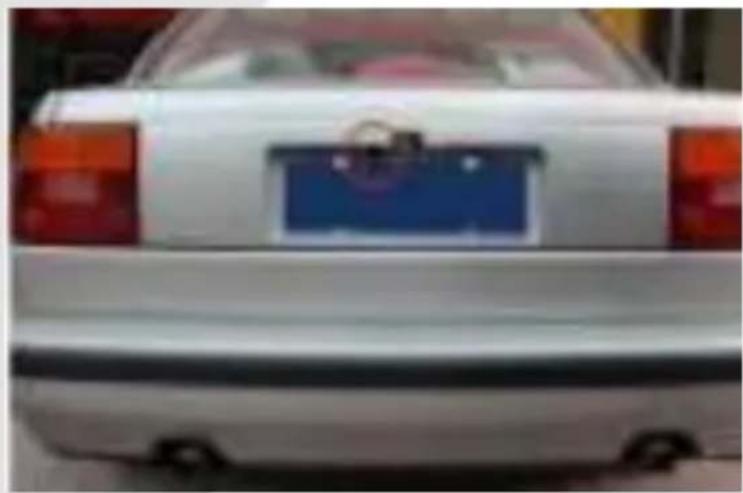
natural_image
Rear view of a white sedan with a blue license plate (no visible text or symbols)- Put the plastic and license plate back. The installation of camera is finished. In the end, run the M5 cable from the rear of your car to the GPS.
∞
GOCLEVER
INFINITE INVENTION
NAVIO 500 Plus, 705V Plus, 705CAM
INSTRUKCJA OBSŁUGI
ODWIEDŹ NASZĄ STRONĘ
WWW.GOCLEVER.COM
ABY ZOBACZYĆ WIĘCEJ PRODUKTÓW TAB, NAVIO, DVR, DVB-T
FUNKCJE BLUETOOTH (WRAZ Z FUNKCJA DUN) 83
NARZĘDZIA 100
USTAWIENIA T YLNEJ KAMERY 100
WARUNKI GWARANCJI 102
Informacja
Nawigacja
natural_image
Black electric shaver with attached cable and connector (no visible text or symbols)natural_image
Black USB cable with two connectors, no text or symbols visibleKabel USB
natural_image
Simple illustration of a pen with black tips (no text or symbols)Rysik
natural_image
Black-and-white photo of a mounted tablet device with a dome base and mounting bracket (no visible text or symbols)Uchwyt samochodowy
Press and briefly hold stylus on the center of the target. Repeat as the target moves around the screen.

Nadajnik FM


natural_image
Close-up of a hand holding a small object, possibly a tool or device, with no visible text or symbols.natural_image
Close-up of a car trunk with open lid and visible internal components, being handled by hand (no text or symbols)natural_image
Close-up of a hand adjusting a car's hood panel with a tool, outdoors (no visible text or symbols)natural_image
Close-up of a hand pressing down on a blue electronic device (no visible text or symbols)natural_image
Person installing or adjusting a white car hood with visible wiring and components, next to a grid-patterned wall (no text or symbols)natural_image
Rear view of a white sedan with a blue license plate on the side (no visible text or symbols)www.AUTORMA.GOCLEVER.com
67531 Jemnice, Czech Republic
servis@goclever.cz
Ukraina
Service Center "KROK-TTC"
S.C. Cordon Electronics S.R.L.
Str. Spataru Preda nr. 12, sector 5
Bucuresti, Romania
+40 372324762, +40 213009905,
+40 721909190, +40 740209932
office@cordongroup.ro
www.cordongroup.ro
Serbia
ET Servis d.o.o. Beograd
Member of Logo d.o.o.
Group Bulevar kralja Aleksandra 261
11000 Beograd. Srbija
+381 11 2042 109,+381 11 2042 101
www.etservis.rs
servis@etseivis.rs
Chorwacja
PlayCom
Ulica grada Vukovara 249,10000 Zagreb
+385 01 5618 433,+385 01 6184 115,
+385 01 6184 115
Skype : PlayCom - HR
info@play.com.hr
www.playcom.hr
Słowenia
TopTime d.o.o.,