007-442 - Household Fan Anslut - Free user manual and instructions
Find the device manual for free 007-442 Anslut in PDF.


| Product Type | Household Floor Fan |
| Brand | Anslut |
| Model | 007-442 |
| Dimensions (H x W x D) | 1230 x 470 x 130 mm (with 400 mm fan diameter) |
| Rated Voltage | 230 V ~ 50 Hz |
| Power Consumption (Operating) | 60 W |
| Standby Power Consumption | 0.349 W |
| Maximum Air Flow | 91.23 m³/min |
| Maximum Air Velocity | 3.28 m/s |
| Service Value | 1.59 (m³/min)/W |
| Sound Power Level | 65.6 dB(A) |
| Seasonal Electricity Consumption | 18.70 kWh/a |
| Protection Rating | IPX0 |
| Safety Class | II |
| Power Cord Length | 160 cm |
| Number of Speeds | 3 (Low, Medium, High) |
| Oscillation | 90° (via remote control) |
| Timer | 1, 2, 4, or 8 hours |
| Modes | Rhythm (variable airflow) and Sleep (gradual reduction) |
| Remote Control Range | At least 10 meters |
| Tilt Adjustment | Yes (manual tilt) |
| Cleaning | Wipe with damp cloth; do not immerse in water |
| Assembly Required | Yes (base, tubes, grilles, blade) |
| Warranty | Refer to manufacturer (Jula) |
Frequently Asked Questions - 007-442 Anslut
User questions about 007-442 Anslut
0 question about this device. Answer the ones you know or ask your own.
Ask a new question about this device
Download the instructions for your Household Fan in PDF format for free! Find your manual 007-442 - Anslut and take your electronic device back in hand. On this page are published all the documents necessary for the use of your device. 007-442 by Anslut.
USER MANUAL 007-442 Anslut

SE GOLVFLÄKT
Operating instructions (Translation of the original instructions) Important! Read the user instructions carefully before use. Save them for future reference.
Värna om miljön!
Care for the environment!
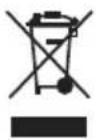
Must not be discarded with household waste! This product contains electrical or electronic components that should be recycled. Leave the product for recycling at the designated station e.g. the local authority's recycling station.
Jula reserves the right to make changes. In the event of problems, please contact our service department.
www.jula.com
Tillverkare/ Produsent/ Producenci/ Manufacturer
Jula AB, Box 363, 532 24 SKARA
Distributör/ Distributør/ Dystrybutor/ Distributor
Jula Poland Sp. z o.o., ul.
- Unpack the product and check that no parts are missing or damaged.
- Keep the packaging material out of the reach of children and pets – risk of suffocation.
- Do not touch the product with wet hands.
- Do not carry or pull the product by the power cord. Do not pull the power cord to pull out the plug.
- Check that the mains voltage corresponds to the rated voltage.
- Do not use the product with a speed controller – risk of electric shock.
- The product is not intended to be used by persons (children or adults) with any form of functional disorders, or by persons who do not have sufficient experience or knowledge on how to use it, unless they have received instructions concerning the use of the product from
someone who is responsible for their safety.
- Keep children under supervision to make sure they do not play with the product. Do not allow children to use, clean or maintain the product without supervision.
Never leave the product unattended when switched on.
- Do not use the product if it is damaged or not working properly, or if the power cord or plug are damaged. Take the product to an authorised service centre to be checked, repaired or adjusted.
- Do not attempt to repair the product yourself. Take it to an authorised electrician or service centre.
- Do not expose the product, power cord or plug to water or any other liquid – risk of electric shock.
- Do not use the product near a bath, shower, wash basin or swimming pool.
- Do not install the product near sources of heat, such as a radiator, cooker or other equipment that produces heat.
- Do not expose the product to high temperatures or direct sunlight.
- Do not subject the product to knocks or vibration.
- Do not expose the product to dusty conditions.
- Do not place the product so that it does not receive sufficient ventilation (for example, in a cupboard or on a shelf).
- Do not place the product on an uneven surface.
- Switch off the product and pull out the plug when the product is not in use.
- Do not start the product until it is fully assembled.
-
Avoid contact with moving parts. Never poke any objects or parts of your body in the openings on the product.
-
Do not cover the product or place it near curtains or furniture – fire risk.
- The product is only intended for household use.
- Switch off the product, unplug the power cord and wait until all moving parts have completely stopped before moving, cleaning and/or maintenance.
- Do not use accessories other than those recommended or sold by the appliance manufacturer. The use of other accessories can result in fire, electric shock or personal injury.
- Check that the product is stable before starting it.
- Do not immerse the product in water or any other liquid.
SYMBOLS
| Read the instructions. | |
| Safety class II. | |
| CE | Approved in accordance with the relevant directives. |
| Recycle discarded product as electrical waste. |
TECHNICAL DATA
| Rated voltage 230 V | ~50 Hz |
| Cord length 160 cm | |
| Service value (SV) 1.59 (m3/min)/W | |
| Output | 60 W |
| Power consumption in standby mode (Psb) 0.349 W | |
| maximum air velocity (c) 3.28 m/s | |
| Seasonal electricity consumption(Q) 18.70 kWh/a | |
| Fan power input(P) 57.23 W | |
| Sound power level (Lwa) 65.6 dB(A) | |
| Max fan flow rate(F) 91.23 m3/min | |
| Operating value standard IEC 60879:1986 (corr. 1992) | |
| Protection rating IPXO | |
| Safety class | II |
| Size | 470x1230x130x∅400 mm |
DESCRIPTION
| 1. | Front grille |
| 2. | Dome nut |
| 3. | Fan blade |
| 4. | Lock nut for rear grille |
| 5. | Rear grille |
| 6. | Motor unit |
| 7. | Motor casing |
- Bracket
- Electrical box
- Locking screw A
- Power cord
- Top tube
- Locking screw B
- Main tube
- Base plate
- Base nut
- Remote control
- Locking screw for grille
- Oscillation button
FIG. 1
ASSEMBLY
- Loosen the lock nut (16) from the main tube (14) and insert the main tube (14) into the base plate (15). Tighten the base nut (16).
- Unscrew the locking screw B (13) and adjust to an appropriate height. Tighten the locking screw B (13).
- Fit the junction box (9) on the upper tube (12) and tighten the locking screw A (10).
- Loosen the lock nut (4) for the back grille from the motor unit (6) and fit the back grille (5) on the motor unit (6) by aligning the three pins. Refit and tighten the lock nut (4).
- Fit the fan blade (3) on the motor shaft and lock with the dome nut (2).
- Position the front grille (1) against the back grille (5), align and lock the clamp and tighten the grille locking screw (18).
USE
USING WITH THE REMOTE CONTROL
Plug the plug (14) into a power point.
ON/SPEED
Start the product by pressing the ON/SPEED button. Press the button repeatedly to switch between low, medium and high speed. The status light for the set speed comes on.
OFF-TIMER
Press the OFF-TIMER button to set the shut-off delay to 1, 2, 4 or 8 hours. The status light for the set delay comes on.
OFF
Switch off the product by pressing the OFF button.
MODE
- Press the MODE button to set the required mode. The status light switches between red and green each time the button is pressed.
- When the status light is red the product is in RHYTHM mode. The product switches between small, medium and large airflow, and then back to the small airflow. The function starts from the mode the product was in when the function was enabled. When the function is disabled the product returns to the mode it was in before the function was enabled.
- When the status light is green the product is in SLEEP mode. The airflow automatically decreases 1 step at 30-minute intervals, down to small airflow. The product switches off when the set switch-off delay has elapsed.
NOTE:
- The remote control has a range of at least 10 metres. The functions can also be controlled by using the buttons on the product.
- 90° oscillation can be set with the remote control. The motor unit can be tilted upwards or downwards to the desired airflow direction. Press the button to set the required angle.
MAINTENANCE
CLEANING
- Switch off the floor fan, pull out the plug and wait until all moving parts have completely stopped before cleaning.
- Dismantle the floor fan by following the assembly instructions in the reverse order.
- Clean the floor fan with a soft cloth moistened with a mild detergent.
NOTE:
- Never immerse the floor fan in water or any other liquid.
- Clean the floor fan before putting it away, and store it in a dry place in its box or other suitable packaging.
Brand : Anslut
Model : 007-442
Category : Household Fan