
TAB 8 C4 - Tablet Trevi - Free user manual and instructions
Find the device manual for free TAB 8 C4 Trevi in PDF.


| Product Type | Tablet |
| Display | 8-inch TFT LCD Capacitive Touchscreen |
| Resolution | 800 x 480 pixels |
| CPU | ARM Cortex A8, 1.2 GHz |
| RAM | 512 MB DDR3 |
| Internal Memory | 4 GB |
| Operating System | Android 4.0 |
| Wireless Connectivity | Wi-Fi 802.11 b/g/n |
| Audio Formats Supported | MP3, WMA, MP2, FLAC, APE, WAV |
| Video Formats Supported | AVI, MP4, MPG, RMVB, MOV, FLV, WMV, MKV |
| Photo Formats Supported | JPEG, BMP, GIF |
| Cameras | Frontal camera and Back camera |
| Ports | Micro USB (OTG), 3.5mm Earphone Jack, Micro SD Card Slot |
| Battery Type | Built-in polymer battery |
| Charging | 5V DC via included charger |
| Power Button | Press and hold to turn on/off; short press to lock/unlock screen |
| Reset | Reset hole available |
| Maintenance | Do not use alcohol, thinner or benzene for cleaning. Keep away from moisture. |
| Safety | Do not disassemble; avoid dropping; use only specified charger; charge regularly to prevent deep discharge. |
| Manufacturer | Trevi S.p.A., Italy |
Frequently Asked Questions - TAB 8 C4 Trevi
User questions about TAB 8 C4 Trevi
0 question about this device. Answer the ones you know or ask your own.
Ask a new question about this device
Download the instructions for your Tablet in PDF format for free! Find your manual TAB 8 C4 - Trevi and take your electronic device back in hand. On this page are published all the documents necessary for the use of your device. TAB 8 C4 by Trevi.
USER MANUAL TAB 8 C4 Trevi
natural_image
Black-and-white composite image showing a globe, airplane, and bottle (no readable text or symbols)
Tab8 ^C4
TO SET YOUR LANGUAGE DEVICE:
- Swicth on the appliance
- Go to the page with all applications
- Select the "IMPOSTAZIONI" icon
- Scroll through the list and select the icon
- Select "LINGUA" and find their own language from those available.
Note: For information and updates of this product: www.trevi.it

- LINGUA
POUR CONFIGURER LANGUE DE VOTRE APPAREIL:
natural_image
Simple line drawing of a finger pointing at a horizontal bar (no text or symbols)natural_image
Simple line drawing of a plug and cable with a separate empty rectangular panel (no text or symbols)Note:
natural_image
Simple diagram with a blank rectangular area and a small folder icon (no text or symbols)natural_image
Abstract grayscale image with fragmented geometric shapes and a central inset showing a mechanical component (no text or symbols)natural_image
Black and white landscape photo of a calm lake with distant hills and small boats (no text or symbols visible)
natural_image
Black and white photo of a hand pointing at two large arrows, with no visible text or symbols.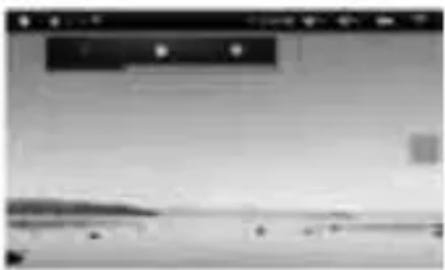
natural_image
Blurred grayscale image with no discernible text, numbers, or symbolsVideo
Immagini
natural_image
Black-and-white collage of various scenes including butterfly, fruit, and nature scenes (no visible text or symbols)DISPLAY....8-inch TFT LCD, Capacitive
RESOLUTION 800X 480
CPU ...... ARM Cortex A8, 1.2GHz
RAM 512MB DDR3
SISTEMA OPERATIVO .... Android 4.0
MEMORIA INTERNA . 4 GB
WIRELESS NETWORK . Wi-Fi (802.11 b/g/n)
FORMATI AUDIO ...... MP3, WMA, MP2, FLAC, APE, WAV
FORMATI VIDEO ......AVI, MP4, MPG, RMVB, MOV, FLV, WMV, MKV
FORMATI FOTO . JPEG, BMP, GIF
WELCOME
Thank you for purchasing this tablet.
It brings you much convenience for your business (supports Word, Excel, send & receive e-mails...) and entertainment (supports 3D game, chatting, movie playback, eBooks.....). Running on Android 4.0, with a 1.2 GHz processor and highly responsive capacitive touch screen, it brings you wonderful user experience.
Before beginning, please refer to this user manual carefully.
IMPORTANT NOTICES
- The new battery will be in its best condition after 2-3 times full charge and discharge.
- While using the earphone, if the volume is excessively high it may cause hearing damage. So please adjust the volume of the player to a moderate level and balance the time of using.
- Do not disconnect the tablet suddenly when formatting or uploading and downloading, which can lead to program errors.
- Do not dismantle the tablet by yourself, and do not use alcohol, thinner or benzene to clean its surface.
- The tablet is not moisture and water resistant. Please do not use it in a damp environment.
- Do not drop or hit it to hard surface, or the screen may get damaged.
- Do not upgrade the firmware by yourself. This would cause damage to your tablet.
KEYS AND FUNCTIONS

- Frontal Camera.
- Power button and ON/OFF Display.
- Earphone Socket 3.5mm.
- Micro USB/Host Socket: connect the unit to external devices or PC.
-
DC Socket: 5V.
-
Reset hole.
- Slot Micro SD CARD
- Return button function
- Vol+/Vol- button.
- Speaker.
- Back Camera.
BATTERY MANAGEMENT AND CHARGING
Before using this device, please charge it fully. Put the charger adapter into the DC jack, the device will start to charge.
TIPS:
- This device adopts built-in polymer battery. Only the specified charger should be used when it is charging, the icon of battery will be rolling. when the charging finish, the battery icon will turn green and stop rolling.
If you do not use this device for a long time, please charge/release it once per month to avoid deep discharge.
- When it is power off because of low battery, connect to the charger, the device will indicate “low power” or “charging”, please wait for a second until the machine can turn to the main interface once the power is enough.
- The built-in polymer battery should be charged regularly. The damage caused by battery over-consuming is not included in the warranty.
BOOT AND SHOUTDOWN
Boot: Press and hold the power button, the system will enter the boot process System has been started, entering the Android system.
The system enters the default home interface.
Shutdown: Press the power button, pop-up device options, select Power off, Click OK, you can safely shut down.
CONNECT WITH PC
By mini USB (OTG) interface of the device, you can connect with PC by mini USB cable attached with the device. USB Data transferring is available. You can operate the
files through the PC.
When your device is connected successfully, to pull up the notification area of the status bar, can see the USB icon.
Then click
to enter the next step
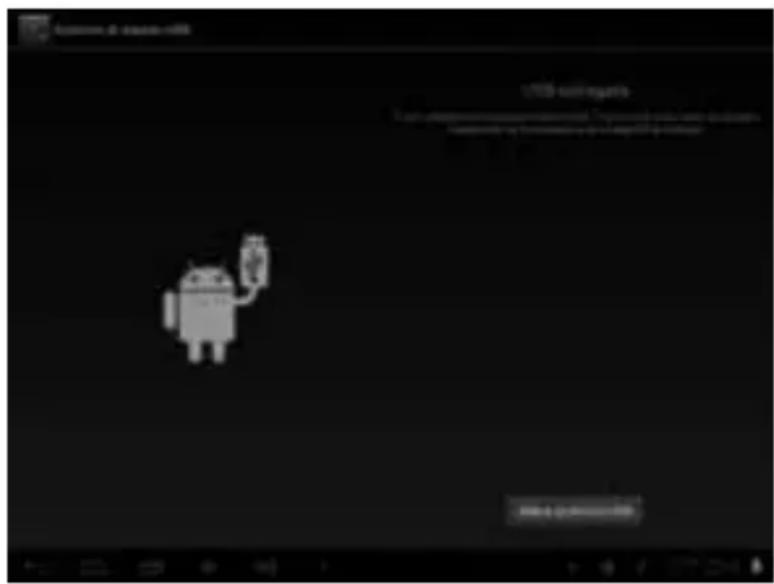
Click , Then the device can transmission data with PC.
Note: The device also supports the FAT32 format for external devices, for example U disk, Micro SD card to Transfer data.
BOTTOM BAR OF THE INTERFACE

A. WIFI signal status icon: If connected to the WIFI wireless network, the icon will be displayed
B. OTG connect icon: If the device connected to the PC, will show the OTG connected icon.
C. Time display: Display the time of the current system, which has been set.
D. Battery status icon: Displays the current battery level and the charging status. E. Menu, Home, Back, virtual buttons
The HOME Screen menu
Press the menu icon on the device, it will display a home screen menu.
Wallpaper: Users can replace the wallpaper with you wishes. Manage apps: It can quickly open a list of all applications.
System Settings: Fast access to system settings, user can choose “Wireless & networks”, “Display”, “Date & time” etc, for personalized settings.
Desktop
When sliding around with your finger to switch the main screen, the desktop fixed on the main screen, will not move. User could drag the application icon placed on the desktop area in the main screen.
BASIC OPERATION
Click the “Settings” icon in the main applications area, you can open the system setting interface.
Select the appropriate operation of the relevant items, such as: wireless and network Display, date and time settings, about Device, etc.
Date and time settings:
Click "Date & time" to enter the Date and time settings interface:
Select to set the date, select the time zone, set the time, time format, date format and other information.
Select +: that the increase of 1 unit.
Select - : that the reduction of 1 unit.
Also you can choose the number, enter the input mode. Directly entering the desired number, then click “Done” to set the Date.
Display settings
In the settings interface choose “Display” to enter the display settings interface, select “Brightness”, Pull the progress bar to adjust the brightness.

Click Sleep, adjust the inactivity time of the device. You can press power key to activate the device. When display “Screen locked” interface, follow the prompts to unlock it.
WIRELESS CONNECTION
Click the main menu “Settings” icon, go to “Settings” screen, click on “Wireless and networks” into the “Wireless and networks settings” interface. Turn on Wi-Fi switch, the Wi-Fi module built-in the device will search AP lists automatic, click the searched AP can be used, will pop up settings dialog, please follow the prompts to complete the WIFI network links. Some encrypted network, need to enter a valid key.
According to the above method to connected Wi-Fi, as shown below,

APPLICATIONS INSTALL AND UNINSTALL
Install applications
- First you should select the Unknown sources which allow installation of non-Market apps
- Copy the APK installer software to Micro SD or NAND FLASH.
- Click Apk Installer to find the app directory, then Select applications to install. Users can "Android market" online installation, or download via the computer, or online through the machine built-in browser to download and install.
Uninstall applications
Click on the item “Settings – Apps – Downloaded,” select the appropriate application has been installed, click the applications which you need to uninstall
BROWSER
When the network connected, open the Web browser enter the URL, you can quickly Browse the Web or through the main desktop search bar enter the URL, open the web page.
VIDEO PLAYER
Online video: The product supports HTML5 online video playback.
Local video: Click the Video Icon. The Player can loading new albums and photos automatically which stored in local disk or micro SD card, then select the videos to playback
MUSIC PLAYER
Click the music icon you can enter the music player interface.
Click the music files you will enter the player to play music
| Click “ Play the previous music, long press to fast reverse. |
| Click “ Click it to suspend, the icon turn to |
| Click “ click and return to the normal playing again. |
| Click “ To play the next song, long press to do function. |
| Click “ To display the present playing list. |
| Click “ To select the random playing mode |
| Click “ To select the repeat playing mode. |
PHOTO BROWSER
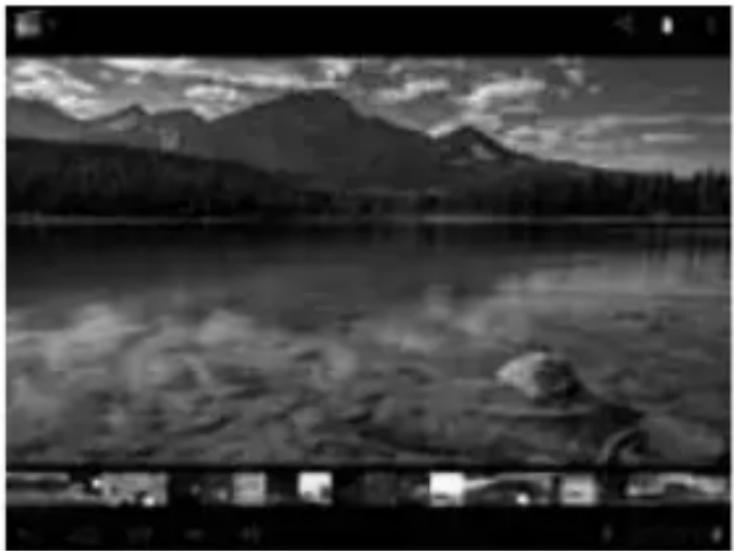
Click "Gallery" to get into Photo Browser directly, there will list all the picture files and video files.
Select a picture file and enter the picture playback interface, as shown below.
Can select "Zoom", "narrow" "set" and "delete" etc operation.
natural_image
Black-and-white landscape photo of a lake with mountains reflected in the water, no visible text or symbolsCAMERA
Click the Camera icon in the applications menu, as shown below
Click the camera shutter to take photos or videos
SOUND RECORDER
Click the recorder icon with applications menu.
Note: Select "Record" Button ☐ to record when it is completed select "Stop" button ☐. At this point you can find the recordings folder in the file browser, which saved the recordings.
MARKET
Click the icon into the "Market" interface. If have no Gmail account, should create a Gmail account
Frequently Asked Questions
Android
Q: What Android OS version is on my Device?
A: 4.0
APK
Q: What is APK?
A: APK is Android Package acronym that Android installation package.
Q: How to obtain the APK?
A: You can download via PC-side installation, you can also “Android market” online to download and install.
Q: Can I use any of my personal email addresses to send/receive email
A: The device supports POP3 and SMTP accounts. Some free email accounts are not supported on mobile devices. Check with your email provider to see if you account is supported.
Q: Which media cards are compatible with my Device?
A: micro SD cards or TF cards.
Music
Q: What type of music files can I play on my device?
A: MP3, WMA, MP2, AAC, M4A, FLAC, APE, WAV Photos
Q: What type of photo files can I view on my device?
A: JPG, JPEG, BMP, JPG and PNG.
Video
Q: What type of video files can I play on my device?
A: AVI, 3GP, MP4, MPG, RM, RMVB, MOV, FLV, WMV, MKV(max 1080p full HD video)
Q: Can I play YouTube videos on my device?
A: Yes, you can. Tap the YouTube application icon to quick access videos.
Wi-Fi
Q: Do I need a Wi-Fi adapter to connect to the Internet?
A: No. The Wi-Fi adapter is built-in to the device.
SETTING
Tap the “Settings” icon to go to settings. You can check and set wireless networks, sound, display, storage, Battery, Accounts&sync, security, language, date time, about tablet, etc.

Wi-Fi
Tap “Settings” • “Wireless & networks” to turn on wifi and scan. It will show a list of Wi-Fi networks scanned in range. Choose a strong Wi-Fi network to connect. (You may need to input the password).
Using data
a diagram showing the flow of data used.
More...
List of networks that can be used to connect the TAB 9 C4 unlike the Wi-Fi network. By selecting “3G Support Information” window appears with a list of keys 3G compatible with your device.
Audio
Control to adjust the volumes, choose the ringtone notifications and enable sounds or sound pressure lock screen.
Display
Control to adjust the brightness, the background, adjust the sleep time panel and select the font size.
Storage
Check internal storage here. If you insert a Micro SD card, or USB disk, you can check the total and available space for your Micro SD card or USB disk. Please unmount it to safely remove it.
NOTE: The pre-installed applications and the operating system Android OS occupy a considerable part of the capacity of the internal memory of the device, then it is normal to have a difference between “Available memory space” and “Total capacity”.
Battery
Check the Battery status here.
Application
Selecting this item allows you to manage the various applications on the device. To delete an application, select it and touch the “Uninstall”.
Account e sync
To check the account managed by the device, activate / deactivate them and add new on
Location Based Services
To allow or disallow the sending of your location data for Google search results and other Google services.
Security
Settings to enter a screen lock or information about the administrator.
Language & input
Selecting this item allows you to set the desired language, spell checking, set some functions of the virtual keyboard, voice commands and set the pointer speed.
Backup and Restore
Selecting this item allows you to make a backup of your data or restore the device with the factory records.
Date and Time
Selecting this item allows you to set the date and time of the device, the time zone, the format and display of the day / month / year.
Accessibility
Selecting this item allows you to set some parameters such as: Talk Back (which provides voice prompts to help users who are blind or visually impaired), Large Text, Auto Rotate, pronunciation of the password, touch delay and improves web accessibility.
Options developer
Selecting this item allows you to set / adjust the more advanced features of your device.
About Tablet
Selecting this item allows you to view all the information about the device.
TECHNICAL SPECIFICATION
| DISPLAY....9-inch TFT LCD, Capacitive (Multi Touch) | |
| RESOLUTION....800X 480 (16:9) | |
| CPU....ARM Cortex A8, 1.2GHz | |
| RAM....512MB DDR3 | |
| OPERATIVE SISTEM....Android 4.0 | |
| MEMORY BUILT-IN....4 GB | |
| WIRELESS NETWORK....Wi-Fi (802.11 b/g/n) | |
| AUDIO FORMAT....MP3, WMA, MP2, M4A, FLAC, APE, WAV | |
| VIDEO FORMAT....AVI, 3GP, MP4, MPG, RM, RMVB, MOV, FLV, WMV, MKV | |
| PICTURES FORMAT....JPEG, BMP, GIF |
BIENVENIDOS
natural_image
Black-and-white composite image showing a planet, a ring, and a cloud against a cloudy sky (no text or symbols)natural_image
Microscopic view of a textured surface with parallel white lines and scattered bright spots, no visible text or symbols.natural_image
Black and white landscape photo of a calm lake with distant hills and small boats (no text or symbols visible)
natural_image
Black and white photo of a hand pointing at two large arrows on a screen (no text or symbols visible)
natural_image
Grayscale image of a landscape with distant hills and a window (no visible text or symbols)DISPLAY....9-inch TFT LCD, Capacitive (Multi Touch)
RESOLUTION 800X 480 (16:9)
CPU ...... ARM Cortex A8, 1.2GHz
RAM 512MB DDR3
OPERATIVE SISTEM Android 4.0
MEMORY BUILT-IN 4 GB
WIRELESS NETWORK . Wi-Fi (802.11 b/g/n)
AUDIO FORMAT ...... MP3, WMA, MP2, M4A, FLAC, APE, WAV
VIDEO FORMAT ......AVI, 3GP, MP4, MPG, RM, RMVB, MOV, FLV, WMV, MKY
PICTURES FORMAT . JPEG, BMP, GIF
Note
AVVERTENZE CORRETTO SMALTIMENTO - CORRECT DISPOSAL WARNING

Precautions for correct disposal of the product.
The symbol shown on the equipment indicates that waste must be disposed of in “separate collection” and so the product must not be disposed of together with urban waste.
The user must take the product to special “separate waste collection centres” provided by local government, or deliver it to the retailer against the purchase of a new product.
Separate collection of waste and subsequent treatment, recycling and disposal operations promotes the production of equipment with recycled materials and limits negative effects on the environment and on health caused by improper handling of waste.
Illegal disposal of the product leads to the enforcement of administrative penalties.

natural_image
Blurred grayscale image with indistinct shapes and no visible text or symbolsTab8 ^4

natural_image
Black-and-white photo of a laptop and tablet displaying app icons on a keyboard (no readable text or symbols)
Trevi S.p.A.
Strada Consolare Rimini-San Marino, 62
47924 RIMINI (RN) Italy
Tel. 0541/756420 - Fax 0541/756430
www.trevi.it - E-mail: info@trevi.it


- Tab8 C4
- TO SET YOUR LANGUAGE DEVICE:
- POUR CONFIGURER LANGUE DE VOTRE APPAREIL:
- Note:
- Video
- Immagini
- WELCOME
- IMPORTANT NOTICES
- BATTERY MANAGEMENT AND CHARGING
- TIPS:
- BOOT AND SHOUTDOWN
- CONNECT WITH PC
- BOTTOM BAR OF THE INTERFACE
- The HOME Screen menu
- Desktop
- BASIC OPERATION
- Date and time settings:
- Display settings
- WIRELESS CONNECTION
- APPLICATIONS INSTALL AND UNINSTALL
- Install applications
- Uninstall applications
- BROWSER
- VIDEO PLAYER
- MUSIC PLAYER
- PHOTO BROWSER
- CAMERA
- SOUND RECORDER
- MARKET
- Frequently Asked Questions
- Android
- APK
- Music
- Wi-Fi
- SETTING
- Using data
- More...
- Audio
- Display
- Storage
- Battery
- Application
- Account e sync
- Location Based Services
- Security
- Language & input
- Backup and Restore
- Date and Time
- Accessibility
- Options developer
- About Tablet
- BIENVENIDOS
- Note
- AVVERTENZE CORRETTO SMALTIMENTO - CORRECT DISPOSAL WARNING
- Precautions for correct disposal of the product.
- Tab8 4
Brand : Trevi
Model : TAB 8 C4
Category : Tablet