
VC-800EE - Vacuum Cleaner Vivax - Free user manual and instructions
Find the device manual for free VC-800EE Vivax in PDF.


| Product Type | Canister Vacuum Cleaner |
| Brand | Vivax |
| Model | VC-800EE |
| Power Source | Mains powered (corded) |
| Variable Suction Control | Yes, slider on handle |
| Dust Bag Type | Replaceable dust bag |
| Filter System | Pre-motor sponge filter and air outlet filter |
| Filter Cleaning | Rinse sponge filter every 6 months or when suction reduces; dry 24 hours |
| Safety Valve | Internal safety valve to prevent excessive vacuum and protect motor |
| Cord Rewind | Automatic cord rewind with button |
| Carry Handles | Top handle and front handle for vertical transport |
| Included Attachments | Floor brush, crevice tool, curved wand/hose extension |
| Usage | Household use only, dry indoor surfaces |
| Weight | Approx. 4.5 kg (estimated) |
| Dimensions (LxWxH) | Approx. 35 x 25 x 28 cm (estimated) |
| Cord Length | Approx. 5 m (estimated from yellow mark indication) |
| Dust Bag Capacity | Approx. 3 L (estimated typical) |
| Warranty | 12 months for small home appliances (as per manual) |
Frequently Asked Questions - VC-800EE Vivax
User questions about VC-800EE Vivax
0 question about this device. Answer the ones you know or ask your own.
Ask a new question about this device
Download the instructions for your Vacuum Cleaner in PDF format for free! Find your manual VC-800EE - Vivax and take your electronic device back in hand. On this page are published all the documents necessary for the use of your device. VC-800EE by Vivax.
USER MANUAL VC-800EE Vivax
natural_image
Close-up of a red and black computer mouse with silver bezel (no visible text or symbols)natural_image
Close-up of a red computer mouse with silver buttons and black casing (no visible text or symbols)1

natural_image
Red and black robotic device with open lid and internal components (no visible text or symbols)2
natural_image
Close-up of a red and black robotic vacuum cleaner (no visible text or symbols)Uklanjanje i čišćenje filtra motora i izlaza za zrak
Upozorenje:
natural_image
Close-up of a red computer mouse with silver buttons and black body (no visible text or symbols)1
natural_image
Red and black robotic vacuum cleaner with visible internal components (no text or symbols)2
Filtar motora
natural_image
Red and silver robotic vacuum cleaner with control panel and ventilation grilles (no visible text or symbols)1

natural_image
Red and black robotic vacuum cleaner with control panel and display case (no visible text or symbols)2
Napomene:
Spužveni filtar u usisavaču će nakon nekog vremena postati prašnjav. To je normalno i ne utječe na učinkovitost filtra. Ukoliko je spužveni filtar toliko prašnjav da uređaj ne usisava sa 100% snage preporučamo da ga uklonite iz usisavača te isperete pod vodom i prije vraćanja u usisavač ostavite na 24 sata da se osuši na zraku, podalje od vatre i vrućih predmeta. To bi trebalo činiti jednom u šest mjeseci ili kada primijetite da se smanjila snaga usisavanja.
Važno:
natural_image
Close-up of a red and black computer mouse with silver buttons (no visible text or symbols)-
Pričvršćivanje cevi na dodatak za usisavanje uskih prostora. Gurnite crevo u dodatak za usisavanje uskih prostora.
-
Pričvršćivanje podne četke na cev. Gurnite cev u podnu četku. Podesite cev na željenu dužinu.
Varijabilna snaga usisavanja
Napomena:
Posle spajanja svih dodataka odvijte dovoljnu dužinu kabla i uključite ga u strujnu utičnicu. Žuta oznaka na kablu označava idealnu dužinu. Ne izvlačite strujni kabl dalje od crvene oznake.
- Uključite uređaj u strujnu utičnicu.
- Kako biste uključili usisavač pritisnite glavni prekidač na uređaju.
- Za namotavanje strujnog kabla jednom rukom pritisnite taster za namotavanje a drugom rukom navodite strujni kabl, kako biste osigurali da ne kovitla i nekoga povredi ili se ošteti.
- Za podešavanje snage usisavanja koristite taster za podešavanje snage usisavanja smešten na dršci creva.

natural_image
Close-up of a red and black computer mouse with silver buttons (no visible text or symbols)1
natural_image
Red and black robotic device with open lid and internal compartments (no visible text or symbols)2
Nošenje i pomeranje usisavača:
Napomena:
Ovaj usisavač na gornjoj strani ima dršku za nošenje. Dodatno, s prednje strane, se nalazi još jedna drška za nošenje. Možete je koristiti za praktično nošenje usisavača u uspravnom položaju

natural_image
Red and black robotic vacuum cleaner with visible wheels and handlebars (no text or symbols)natural_image
Close-up of a red and black computer mouse with silver buttons (no visible text or symbols)1

natural_image
Red and black robotic vacuum cleaner with visible internal components (no text or symbols)2
Filtar motora
natural_image
Red vacuum cleaner with silver handle and black grille (no visible text or symbols)1
natural_image
Red and black robotic device with control panel and display (no visible text or symbols)2
Napomene:
Sunderasti filtar u usisavaču će posle nekog vremena postati prašnjav. To je normalno i ne utiče na efikasnost filtra. Ukoliko je sunderasti filtar toliko prašnjav da uređaj ne usisava sa 100% snage, preporučujemo da ga uklonite iz usisavača, isperete pod vodom i pre vraćanja u usisavač ostavite na 24 sata da se osuši na vazduhu, dalje od izvora toplote. To bi trebalo činiti jednom u šest meseci ili kad primetite da se smanjila snaga usisavanja.
Važno:
natural_image
Close-up of a red computer mouse with black and silver casing (no visible text or symbols)natural_image
Close-up of a red computer mouse with silver buttons and black body (no visible text or symbols)1

natural_image
Red and black robotic vacuum cleaner with open lid and internal components (no visible text or symbols)2
natural_image
Red and black robotic vacuum cleaner with four wheels (no visible text or symbols)natural_image
Close-up of a red computer mouse with silver scroll wheel and black body (no visible text or symbols)1
natural_image
Red and black robotic vacuum cleaner with visible internal components (no text or symbols)2
Филтер на моторот
natural_image
Red vacuum cleaner with silver handle and black grille (no visible text or symbols)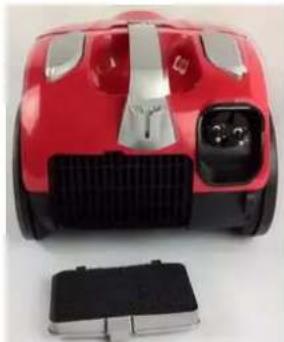
natural_image
Red and black robotic vacuum cleaner with visible sensor array and control box (no text or symbols)1
2
Забелешки:
natural_image
Close-up of a red and black computer mouse with silver buttons (no visible text or symbols)natural_image
Close-up of a red and black computer mouse with silver buttons (no visible text or symbols)1
natural_image
Red and black robotic device with open lid and internal components (no visible text or symbols)2
natural_image
Close-up of a red and black robotic vacuum cleaner (no visible text or symbols)natural_image
Close-up of a red computer mouse with silver buttons and black body (no visible text or symbols)1

natural_image
Red and black robotic vacuum cleaner with visible internal components (no text or symbols)2
Filtri i
motorit
natural_image
Red and silver robotic vacuum cleaner with control panel and ventilation grille (no visible text or symbols)1
natural_image
Red and black robotic vacuum cleaner with control panel and display case (no visible text or symbols)2
Shënim:
For household use only!
When using your vacuum, basic safety precautions should always be observed, including the following
-
Do not leave vacuum cleaner unattended when it is plugged in. Unplug from outlet when not in use and before pulling filters out.
-
To reduce the risk of electric shock-do not use outdoors or on wet surfaces.
-
Do not allow children to use as a toy. Close attention is necessary when used near children.
-
Use only as described in this manual. Use only manufacturer's recommended attachments.
-
Do not use with damaged cord or plug. Do not use vacuum cleaner if it has been dropped, damaged, left outdoor, or dropped into water. Return appliance to the appliance customer service for examination repair or adjustment.
-
Do not pull or carry by cord. Do not use cord as a handle. Close a door on cord, or pull cord around sharp edges or corners. Do not run appliance over cord. Keep cord away from heated surfaces.
-
Do not unplug by pulling on cord. To unplug, grasp the plug, not the cord.
-
Do not handle plug or vacuum cleaner with wet hands. Dot not use outdoors or on wet surfaces.
-
Do not put any objects into openings. Do not use with any openings blocked and do not restrict airflow. Keep all opening free of dust, lint, hair, and anything that may reduce airflow.
-
Keep hair, loose clothing, fingers, and all parts of body away from openings and moving parts.
-
Do not pick up hard or sharp objects such as glass nails, screws, coins, etc.
-
Do not pick up hot coals, cigarette, matches or any hot, smoking, or burning objects.
-
Do not use without filters in place.
-
Turn off all controls before plugging or unplugging vacuum cleaner.
-
Use extra care when vacuuming on stairs.
-
Do not pick up flammable or combustible materials (lighter fluid, gasoline, etc.) or use in the presence of explosive liquids or vapor.
-
Do not pick up toxic material (chlorine bleach, ammonia, drain cleaner, etc.)
-
Do not in an enclosed space filled with vapors given off by oil based paints, paint thinner, moth proofing, flammable dust, or other explosive or toxic vapors.
-
Always unplug this appliance before connecting or disconnecting vacuum hose. Do not allow plug to whip when rewinding.
-
Use only on dry, indoor surfaces.
-
Do not use for any purpose other than described in this user's guide.
-
Store your appliance indoor in a cool, dry area.
-
Keep your work area well dry.
-
Do not immerse the hand vacuum into water or other liquids.
-
Keep end of hose, wands and other openings away from your face and body.
-
Do not use the cleaner to clean your pets or any animal.
-
Keep the head (eyes, ear, mouth, etc.) away from the openings, when the cleaner is working or plugging.
WARNING:
Important:
If the suction opening of the unit, the hose or the tube is blocked, switch off the vacuum cleaner and remove the blocking substance before you start the unit again.
- Do not operate the vacuum cleaner too close to heater or radiators.
- Before inserting the power plug into the wall outlet, make sure that your hands are dry.
- Before you start the unit, make sure to remove large or sharp objects that might damage the dust tank and hose.
- When pulling out the power plug from the wall outlet, pull the plug not the power cord.
- Do not use without all filters in place.
- When using, if you learn of squeak from the cleaner, it must be suction appears to be reduced, so you must stop (make sure the cleaner is not plugging), then clean the all air filter.
Note:
If the supply cord is damaged, it must be replaced by manufacture, service agent or similarly qualified person in order to avoid a hazard.
WARNING:
Hold the plug when rewinding the cord. Do not allow the cord to whip when rewinding.
Use and function
Assembling vacuum cleaner
Note:
Always remove the power plug from the wall outlet before assembling or removing accessories.
- Attaching the Flexible Hose into the vacuum connect the flexible hose into the air intake duct, push in until you hear a "click", indicating it is in its locked position.

natural_image
Close-up of a red and black computer mouse with silver buttons (no visible text or symbols)-
Fitting the tube to the curved wand/hose extension. Push the tube into the curved wand/hose extension.
-
Fitting the Floor Brush to the tube. Push the tube into the floor brush. Adjust the tube to the desired length.
Variable suction control
Note:
Once all attachments are in place, unwind a sufficient length of cable and insert the plug into the wall outlet. A yellow mark on the power cord shows the ideal cable length. Do not pull the power cord beyond the red mark.
- Insert the power plug into the wall outlet.
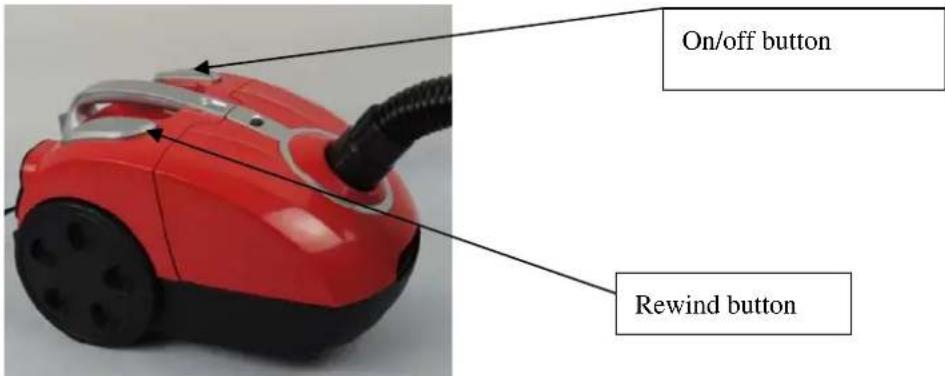
- Press the power on/off button located the unit to turn the vacuum cleaner "on".
- To rewind the power cord, press the cord rewind button with one hand and guide the power cord with the other hand to ensure that it dose not whip causing damage or injury.
- To adjust the suction, slide the speed control button on the suction hand to control the suction power of the vacuum cleaner.
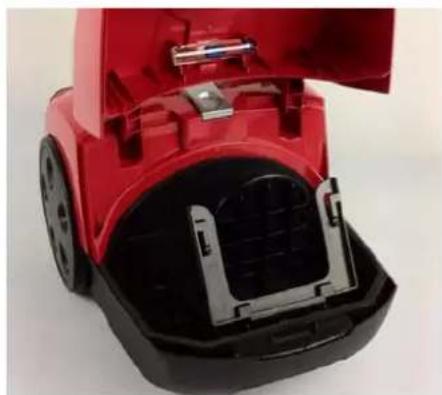
Change dust bag.
- Open the front cover.
- Change dust bag.

natural_image
Close-up of a red computer mouse with silver buttons and black body (no visible text or symbols)1

natural_image
Red and black robotic device with open lid and internal components (no visible text or symbols)2
Carry and move away the cleaner:
Note:
This cleaner have a special feature for handle. There is a handle on the top. In addition, another carry-handle is in front. You can use it to conveniently carry the cleaner when the cleaner is in vertical

natural_image
Close-up of a red and black robotic vacuum cleaner with visible wheels and control buttons (no text or symbols)Removing & cleaning pre-motor filter and air outlet filter
Warning:
Always unplug the unit from electrical outlet before getting out the dust barrel.
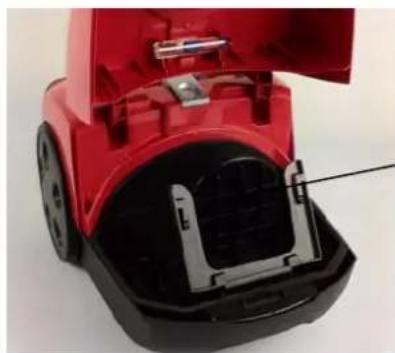
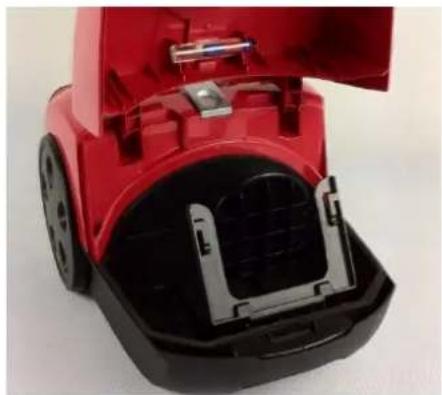
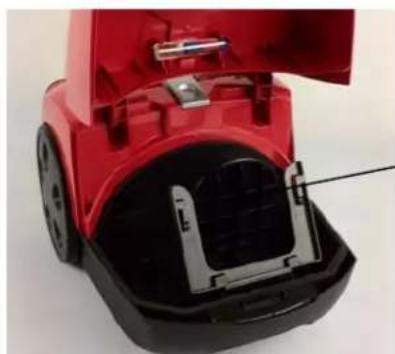
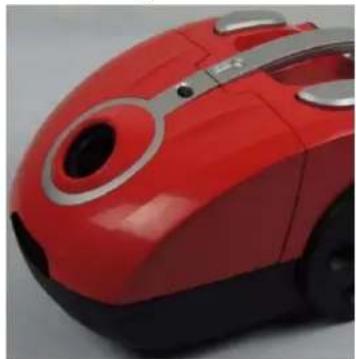
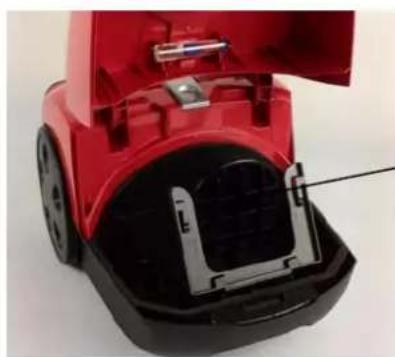
a. Pre-motor filter
-
Open the front cover.
-
Clean or change filter.
natural_image
Close-up of a red computer mouse with silver buttons and black body (no visible text or symbols)1
natural_image
Red and black robotic vacuum cleaner with visible internal components (no text or symbols)2
Pre-motor filter
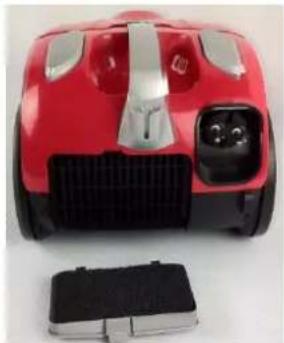
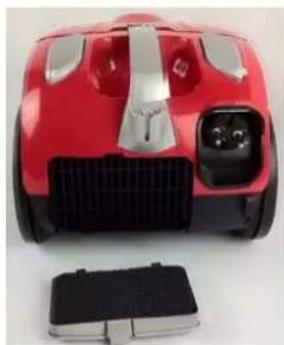
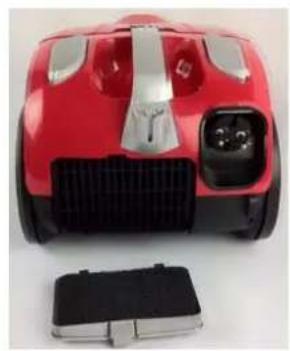
b. Air outlet filter
-
Press the air outlet grid knob to open
-
Take out the air outlet filter for clean and change.

natural_image
Red and silver robotic vacuum cleaner with ventilation grilles (no visible text or symbols)1
natural_image
Red and black robotic vehicle with visible engine compartment and battery pack (no text or symbols)2
Please note:
The sponge filter material in the cleaner will become dusty over time. This is normal and will not affect the performance of the filter. If the sponge filter is so dusty that suction does not return to 100%, then we suggest that the filter be removed then rinsed under the faucet and allowed to dry for 24 hours by airing not near the fire or some high temperature objects before refitting into the vacuum. This should be done once six months or when suction appears to be reduced obviously.
Important:
Please note that there is a safety valve inside the vacuum to prevent the unit from being run with high vacuum rate. If the vacuum is too high, the safety valve will be turned on. In this case, it can diminish the vacuum rate and protect the motor from being broken.
Note:
The suction hole must be open, free of any obstructions at all times. Otherwise, the motor will overheat and could become damaged.
Important:
All filters should be checked regularly for signs of damage, preferably after each cleaning task. The filters must be replaced immediately if they become damaged. Always disconnect the vacuum from the electrical outlet when checking the filters.
POŠTOVANI!
Zahvaljujemo na kupnji Vivax uređaja i nadamo se da ćete biti zadovoljni odabirom. Ako u jamstvenom periodu bude potreban popravak proizvoda, molim savjetujte se sa ovlaštenim prodavačem koji Vam je proizvod prodo ili nas kontaktirajte na dolje navedene brojeve i adrese. MOLIMO VAS DA PRIJE UPOTREBE PROIZVODA PAŽLIVO PROČITATE TEHNIČKU DOKUMENTACIJU I UPUTE KOJI SU PRILOŽENI UZ PROIZVOD!
JAMSTVENI LIST
VIVAX
HR
MODEL UREĐAJA
SERIJSKI BROJ
DATUM PRODAJE
BROJ RAČUNA PRODAVATELJA
POTPIS I PEČAT PRODAVATELJA
- Ovim jamstvom jamči proizvođač proizvoda, preko M SAN GRUPA d.d, kao uvoznika i davatelja jamstva u Republici Hrvatskoj besplatan popravak istog u skladu s važećim propisima i u skladu s uvjetima opisanim u ovom jamstvenom listu. Ovim jamstvom jamčimo da će predmet ovog jamstva raditi bez greške uzrokovane eventualnom lošom izradom i lošim materijalom izrade. Svi eventualno nastali kvarovi biti će besplatno otklonjeni u ovlaštenom servisu u jamstvenom roku.
- UVJETI JAMSTVA Jamstveni rok počinje teći od dana kupnje proizvoda i traje 24 mjeseca za Vivax Home velike kućanske aprate (perilice rublja, hladnjake, perilice posuđa, štednjake, ugradbenu tehniku), a 12 mjeseci za Vlvax home male kućanske aparate (uključujući mikrovalne pećnice, grijalice I radijatore).
- Ú slučaju kvara na proizvodu koji je predmet ovog jamstva, obavezujemo se da ćemo isti popraviti u najkraćem mogućem roku, a najkasnije u roku od 45 dana. Ako se proizvod ne može popraviti ili se ne popravi u roku od 45 dana, biti će zamijenjen novim. Jamstvo na uređaj se produžuje za ono vrijeme koliko traje popravak uređaja.
- Jamstvo se priznaje samo uz račun o kupnji, te uz ovaj jamstveni list koji mora biti ispravno popunjen odnosno mora sadržavati datum prodaje, pečat i potpis prodavatelja.
- JAMSTVO NE OBUHVAĆA
POTPIS I PEČAT PRODAVATELJA
- Ovom garancijom garantira
BROJ RAČUNA PRODAVAOCA
POTPIS I PEČAT PRODAVAOCA
- Ovom garancijom
garantuje proizvođač proizvoda, preko KIM TEC CG d.o.o., kao uvoznika i davaoca garancije u Republici Crnoj Gori besplatan popravak istog u skladu s važećim propisima i u skladu s uslovima opisanim u ovom garantnom listu. Ovom garancijom garantujemo da će predmet ove garancije raditi bez greške uzrokovane eventualnom lošom izradom i lošim materijalom izrade. Svi eventualno nastali kvarovi biti će besplatno otklonjeni u ovlaštenom servisu u garantnom roku. - USLOVI GARANCIJE Garantni rok počinje teći od dana kupovine proizvoda i traje 24 mjeseca, za Vivax Home velike kućne aparate (mašine za veš , frižidere, mašine za suđe, štednjake, ugradbenu tehniku) , a 12 mjeseci za Vivax home male kućanske aparate (uključujući mikrotalasne pećnice, grijalice I radijatore)
- U slučaju kvara na proizvodu koji je predmet ove garancije, obavezujemo se da ćemo isti popraviti u najkraćem mogućem roku, a najkasnije u roku od 45 dana. Ako se proizvod ne može popraviti ili se ne popravi u roku od 45 dana, biti će zamijenjen novim. Ako popravak proizvoda traje duže od 10 dana, garancija će se produžiti za vrijeme trajanja popravke.
- Garancija se priznaje samo uz fiskalni račun o kupovini, te uz ovaj garantni list koji mora biti ispravno popunjen odnosno mora sadržati datum prodaje, pečat i potpis prodavaoca.
- Davalac garancije osigurava servis i rezervne dijelove 7 godina od datuma kupovine.
- GARANCIJA NE OBUHVATA
Kosova Electronic Service Center
Kosova Electronic Service Center
-VIVAX Air Conditions; White Goods and Small Home Appliances
VIVAX
- Uklanjanje i čišćenje filtra motora i izlaza za zrak
- Upozorenje:
- Napomene:
- Varijabilna snaga usisavanja
- Napomena:
- Nošenje i pomeranje usisavača:
- Забелешки:
- Shënim:
- For household use only!
- WARNING:
- Important:
- Note:
- Use and function
- Assembling vacuum cleaner
- Variable suction control
- Change dust bag.
- Please note:
- POŠTOVANI!
- JAMSTVENI LIST
- VIVAX
- HR
- MODEL UREĐAJA
- POTPIS I PEČAT PRODAVATELJA
- BROJ RAČUNA PRODAVAOCA
- POTPIS I PEČAT PRODAVAOCA
- Kosova Electronic Service Center
Brand : Vivax
Model : VC-800EE
Category : Vacuum Cleaner