422-205 - Lighting Anslut - Free user manual and instructions
Find the device manual for free 422-205 Anslut in PDF.


| Product Type | Decorative Street Lamp |
| Brand | Anslut |
| Model | 422-205 |
| Mounting Options | Wall, Post, Standing, Suspended |
| Power Supply | Mains power (230 V AC typical) |
| Voltage | 230 V AC |
| Frequency | 50/60 Hz |
| Bulb Socket | E27 (screw base) |
| Max Bulb Wattage | 40 W (typical) |
| Protection Class | Class I (requires earth) |
| Color | Black |
| Material | Metal and plastic |
| Included Components | Lamp body, plastic expanders, screws, terminal block |
| Safety Warnings | Disconnect power before installation; bulb gets hot; replace broken glass immediately |
| Maintenance | Replace bulb with same type; clean with dry cloth |
| Environmental Disposal | Do not discard with household waste; recycle at designated station |
| Wiring Colors | Brown (live), Blue (neutral), Green/Yellow (earth) |
Frequently Asked Questions - 422-205 Anslut
User questions about 422-205 Anslut
0 question about this device. Answer the ones you know or ask your own.
Ask a new question about this device
Download the instructions for your Lighting in PDF format for free! Find your manual 422-205 - Anslut and take your electronic device back in hand. On this page are published all the documents necessary for the use of your device. 422-205 by Anslut.
USER MANUAL 422-205 Anslut
Installation Instructions for Lamps
422-205 - 422-210
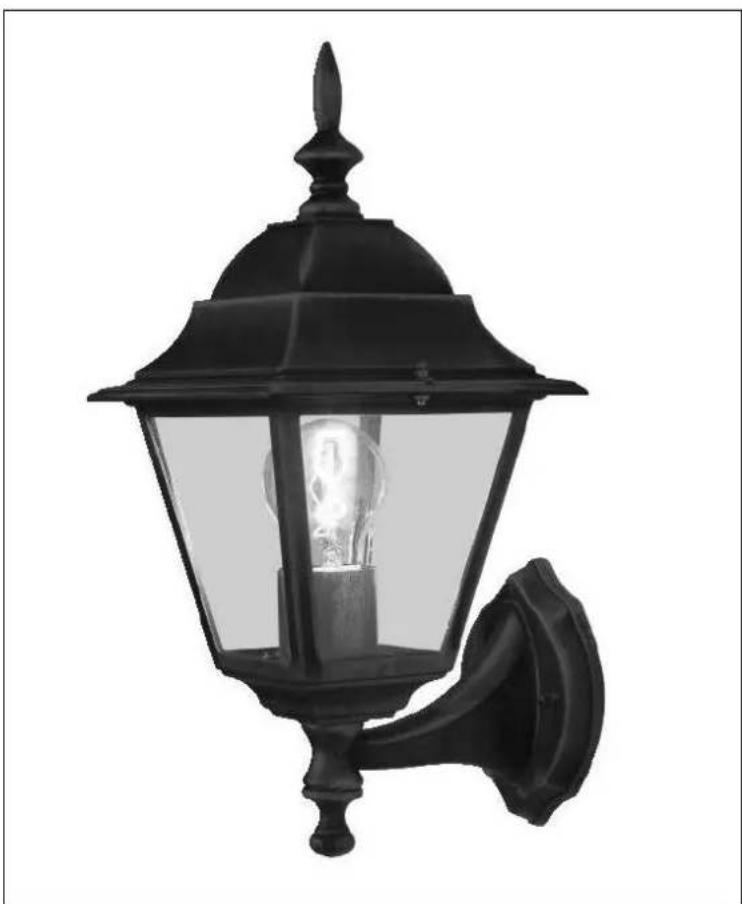
SV Bruksanvisning i original
NO Bruksanvisning i original
EN Installation instructions in original
SÄKERHETSANVISNINGAR
Figur 5
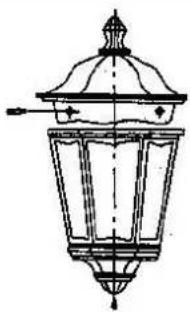
Figur 6
MONTERING
Rysunek 5

Rysunek 6
Read these instructions carefully before use!
- Disconnect from the mains power supply before starting installation.
• The bulb gets very hot when it is switched on. Do not touch the bulb until it has cooled sufficiently. - The bulb must not exceed the stated maximum output.
- Any lamp glass which breaks must be replaced immediately. Do not use the lamp when the lamp glass is broken.
- Do not look directly into the bulb when it is switched on.
- Note that the fitting must be connected to an earthed power outlet.
- Do not use the lamp if the power cord and/or plug are damaged in any way. For safety reasons, the power cord must only be replaced or repaired by an authorised service centre. Consult your dealer.
DESCRIPTION
| Figure 1 | Figure 2 |
| Figure 3 | Figure 4 |
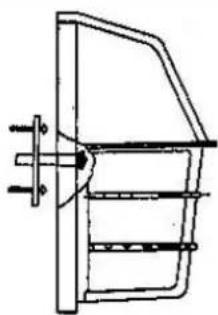
Figure 5
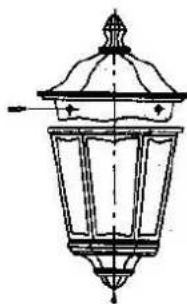
Figure 6
INSTALLATION
Installation of wall lamp (figure 1)
- First, mount the plastic expander on the wall where the lamp is to be.
- Insert two screws in the plastic panel.
- Fit the plastic panel in the expander using self-tapping screws.
- Connect the power cord to the terminal block: a brown wire (L = live) to a brown wire, a blue wire (N = neutral) to a blue wire and a green/yellow wire (earth) to a green/yellow wire (see earth symbol).
- Insert the terminal block in the plastic panel.
- Mount the lamp on the fixed screws and tighten using domed screws.
- Screw a new bulb into the bulb holder. Do not exceed the maximum output (see type plate on fitting).
Installation of lamp post (figure 2)
- Mount the post in the ground.
- Connect the power cord to the terminal block: a brown wire (L = live) to a brown wire, a blue wire (N = neutral) to a blue wire and a green/yellow wire (earth) to a green/yellow wire (see earth symbol).
- Insert the terminal block in the post.
- Mount the lamp on the post using crosshead screws.
- Screw a new bulb into the bulb holder. Do not exceed the maximum output (see type plate on fitting).
Installation of standing lamp (figure 3)
- First, mount the plastic expander on the surface where the lamp is to be.
- Connect the power cord to the terminal block: a brown wire (L = live) to a brown wire, a blue wire (N = neutral) to a blue wire and a green/yellow wire (earth) to a green/yellow wire (see earth symbol).
- Fit the lamp on the expander using self-tapping screws.
- Screw a new bulb into the bulb holder. Do not exceed the maximum output (see type plate on fitting).
Installation of suspended lamp (figure 4)
- Pull the power cord through the chain loop.
- Secure both ends of the chain loop to the lamp and the fixed panel.
- Fit the plastic expander on the ceiling-mounted lamp.
- Insert two screws in the plastic panel.
- Attach the plastic panel to the ceiling using self-tapping screws.
- Connect the power cord to the terminal block: a brown wire (L = live) to a brown wire, a blue wire (N = neutral) to a blue wire and a green/yellow wire (earth) to a green/yellow wire (see earth symbol).
- Insert the terminal block in the plastic panel.
- Mount the lamp on the fixed screws and tighten using domed screws.
- Screw a new bulb into the bulb holder. Do not exceed the maximum output (see type plate on fitting).
MAINTENANCE
Replacing the bulb
- Disconnect from the mains power supply.
- Open the lamp cover.
- Unscrew the bulb when it has cooled.
- Do not touch the bulb with your bare hands.
- Carefully screw a new bulb into the bulb holder.
- Put the lamp cover back before switching on the lamp.
Subject to printing errors and design changes over which we have no control. In the event of problems, please contact our service department. www.jula.com

Care for the environment!
Must not be discarded with household waste!
This product contains electrical or electronic components that should be recycled.
Leave the product for recycling at the designated station e.g. the local authority's recycling station.
- INSTALLATION INSTRUCTIONS FOR LAMPS
- SÄKERHETSANVISNINGAR
- MONTERING
- READ THESE INSTRUCTIONS CAREFULLY BEFORE USE
- DESCRIPTION
- INSTALLATION
- INSTALLATION OF WALL LAMP (FIGURE 1)
- INSTALLATION OF LAMP POST (FIGURE 2)
- INSTALLATION OF STANDING LAMP (FIGURE 3)
- INSTALLATION OF SUSPENDED LAMP (FIGURE 4)
- MAINTENANCE
- REPLACING THE BULB
- CARE FOR THE ENVIRONMENT
Brand : Anslut
Model : 422-205
Category : Lighting