
CM922B - Washing machine Clas Ohlson - Free user manual and instructions
Find the device manual for free CM922B Clas Ohlson in PDF.


| Product Type | Washing Machine |
| Brand | Clas Ohlson |
| Model | CM922B |
| Rated Capacity | 7 kg |
| Maximum Spin Speed | 1200 rpm |
| Energy Efficiency Class | A |
| Dimensions (H x W x D) | 850 x 600 x 600 mm |
| Net Weight | 65 kg |
| Power Consumption per Cycle | 2.3 kWh |
| Water Consumption per Cycle | 52 L |
| Noise Level (Wash/Spin) | 56 dB / 76 dB |
| Wash Programs | Cotton, Synthetics, Delicates, Quick 15', Wool, Hand Wash, Spin & Drain, Rinse & Spin, Drum Clean |
| Display Type | LED |
| Door Opening Angle | 180° |
| Safety Features | Child Lock, Unbalanced Load Detection, Overflow Protection |
| Maintenance | Clean lint filter, drain hose cleaning, descaling |
| Spare Parts Availability | From Clas Ohlson |
| Warranty | 2 years |
| Installation Type | Free-standing |
| Power Supply | 230 V, 50 Hz |
| Plug Type | Type F (Schuko) |
Frequently Asked Questions - CM922B Clas Ohlson
User questions about CM922B Clas Ohlson
0 question about this device. Answer the ones you know or ask your own.
Ask a new question about this device
Download the instructions for your Washing machine in PDF format for free! Find your manual CM922B - Clas Ohlson and take your electronic device back in hand. On this page are published all the documents necessary for the use of your device. CM922B by Clas Ohlson.
USER MANUAL CM922B Clas Ohlson
Model: CM922B
Rowing Machine
Article number: 34-8118
Model: RO-400
Please read the entire instruction manual before using the product and save it for future reference. We apologise for any text or photographic errors and any changes of technical data. If you have any questions concerning technical problems please contact our Customer Service Department (see address on reverse).
Important information: Read the instruction manual carefully and make sure that you understand its contents before you use the product, save it for future use.

Table of Contents
-
Product Description 3
-
Safety 3
-
Contents 4
-
Assembly 5
-
Computer Functions 9
-
Workout tips 10
-
Operating Instructions 11
-
Pulse Chart 11
-
Exploded view 12
-
Read these instructions carefully before beginning any exercise.
- Save these instructions for possible repair and spare parts needs.
1. Product Description
- Rowing machine with computer and adjustable 8 tension settings.
- Foldable – takes up less space when storing and transporting.
- Training computer included.
- Suitable for users up to 120 kg.
2. Safety
- The workout machine is intended for household use only. Maximum user weight is 120 kg.
- Follow the assembly instructions carefully. Do not start exercising before the rowing machine is properly assembled and checked.
- Regularly check that all screws and nuts are tight.
- Check that all parts are available before assembly is started, see “The package contains”.
- Only use suitable tools and ask for help when necessary.
- Place the rowing machine on an even, non-slip surface. It should not be used or stored outdoors or in high humidity locations.
- Check before the first training session and then at 1-2 months intervals that all parts are tight and in good condition. Replace damaged parts immediately and/or do not use the machine before it is repaired. Only use original spare parts for repairs.
- Do not use strong detergents or solvents when cleaning the rowing machine.
- Note the highest /lowest settings/tightening limits when it comes to adjustable parts.
- The rowing machine is intended for adults. Only allow children to use the rowing machine when supervised by an adult.
- Make sure that everyone who uses the rowing machine is aware of possible dangers that moving parts may cause during exercise.
- Consult your physician before starting with any exercise programme. He can advise on the kind and level of training that is suitable.
- Warning: Incorrect or excessive exercise may damage your health!
- Follow the instruction manual's training guidelines carefully to ensure proper exercise.
3. Contents
 | 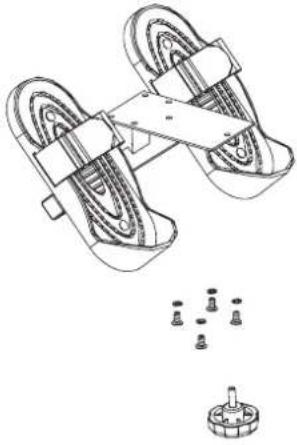 |
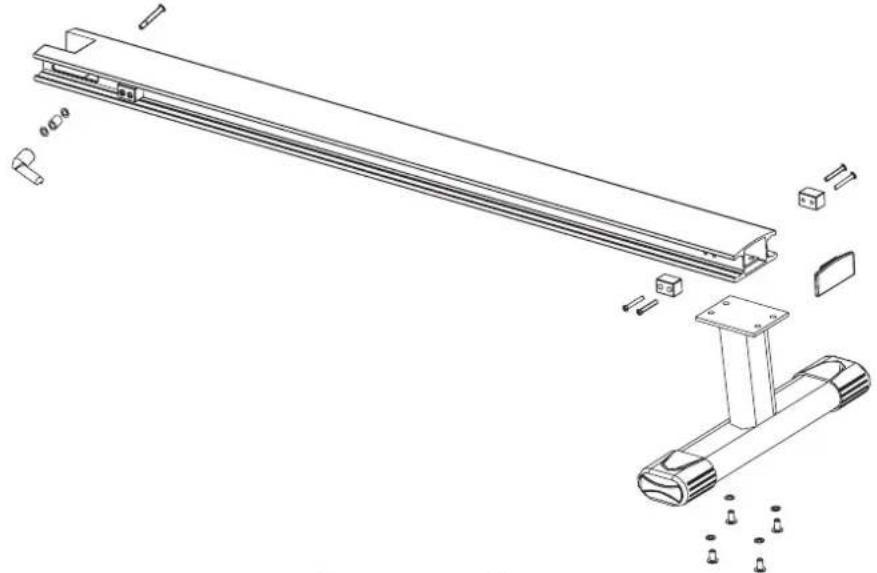 | |
 | 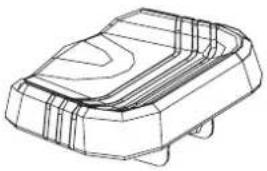 |
 | 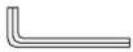 6 mm hex key 6 mm hex key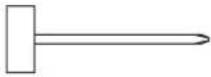 Combination screwdriver Combination screwdriver |
4. Assembly

Step 1
Mounting the front foot
Attach the front foot (2) to the frame with two (M8 x 50) bolts (16), two washers (17) and two nuts (18). See the figure below.

Step 2
Mounting the rear foot
Attach the rear support (22) on the aluminium track (21) with four (M8 x 16) screws (23) and four washers (17). See the figure below.

Step 3
Mount the aluminium track to the frame
Attach the aluminium track (21) to the frame (1) with a bolt (29), a spacer (64), a spring washer (65), and an L-shaped handle (66). See the figure below.

Step 4
Attaching the pedals
Attach the pedals (32) to the aluminium track (21) with four (M8 x 16) screws (23), four washers (17), and a locking knob. See the figure below.
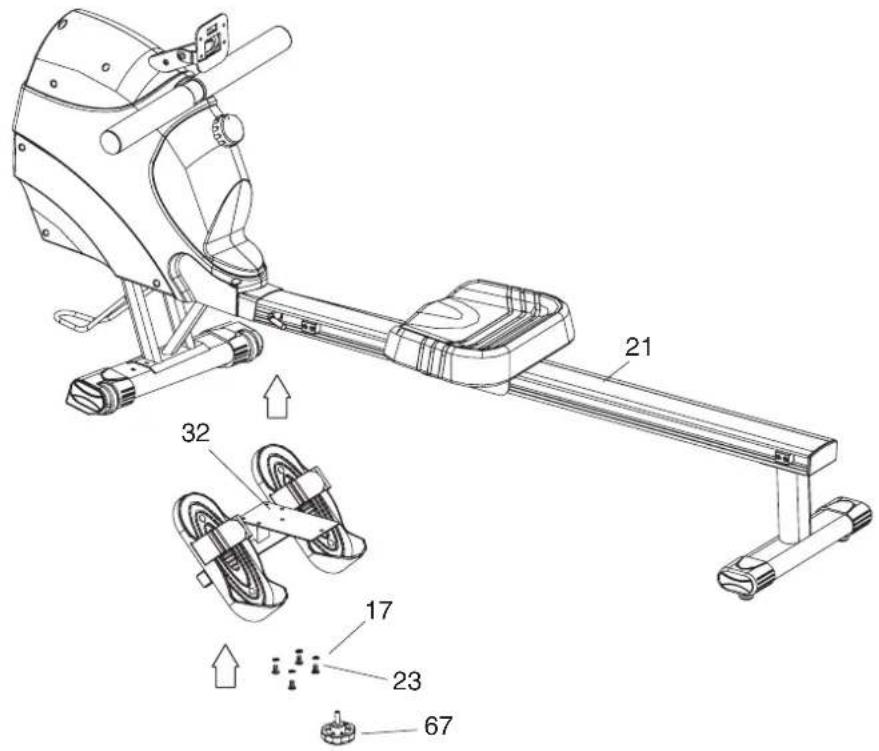
Step 5
Attach the training computer (52) with two screws (53) to the mounting position above the handles. See the figure.

Step 6
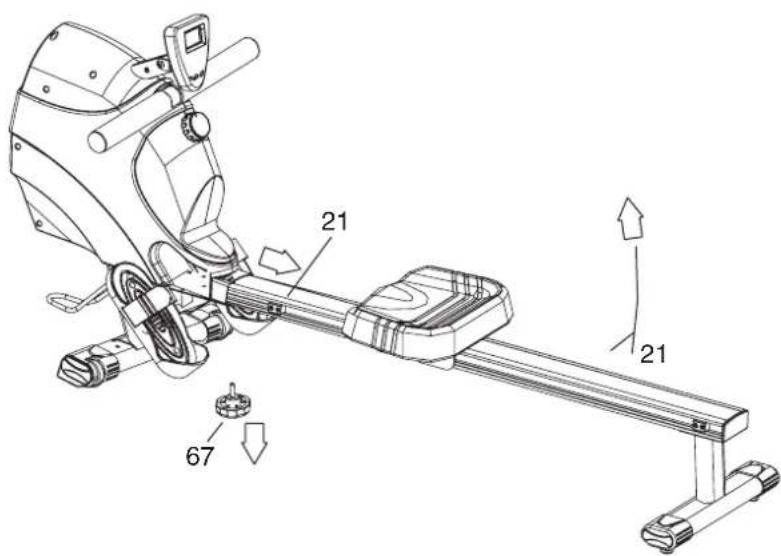
Folding the rowing machine for storing or transporting.
- Open the L-shaped handle (60) and unscrew the locking knob (67). Pull out the aluminium track (21) from the frame.
- Fold the aluminium track up 90° to an upright position and make sure the track's front fits within the frame.
- Secure the track to the frame with the locking knob (67).
Step 7
Transport and storage
Grab the rear support and lift the back of the rowing machine if you wish to move it.

5. Computer Functions
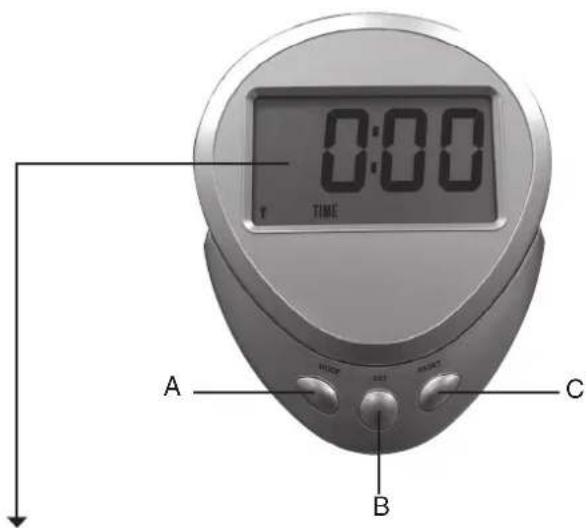
The display reading
-
SCAN Displays each training value in the LCD window for 4 seconds.
-
TIME Displays the elapsed time.
-
CPM Displays amount of strokes per minute.
-
COUNT Displays total amount of strokes.
-
CAL Displays amount burned calories
-
PULSE Displays your heart's pulse value (only with the pulse belt, not included)
The MODE button: Used during function selection.
A. MODE (Functions)
N.B. 9999 is the largest value for all settings.
- SCAN: Push the SCAN button until SCAN is shown on the display. The monitor will then search through all the functions (CPM, COUNT and CAL).
The functions rotate on the display with a minute interval.
-
TIME: Saves the total exercise time. You can set a target value for your training session by pushing the SET button. Each press equals one minute. The alarm sounds for 15 seconds when the preset time is reached. After this the countdown starts over again.
-
CPM (strokes/minute): Counts the number of strokes. The count starts from zero every time a training session is started.
-
COUNT: Counts total training time. Each training value adds to the previously saved training times and creates a total value. Push the SET button if you want to set a target time for your training.
-
CALORIES: Displays burned calories. You can set a target value for the amount of burned calories by pushing the SET button. Each press is equivalent to 10 calories. The alarm sounds for 15 seconds when the preset value is reached and the calorie count starts over again.
-
PULSE: This function can only be used with a pulse belt (not included).
- Follow these training guidelines to find your highest and lowest pulse value. Consult a doctor when necessary.
- The display shuts off automatically if the training computer does not receive any information for 8 minutes.
B. RESET
- RESET button: Is used for resetting the training data.
C. SET (Settings)
- SET button: Is used for setting training data.
Function buttons
A. MODE Used to switch between 6 different functions. The selected function is shown on the display.
B. SET Used for time and timer setting.
C. RESET Erases the selected function's values.
6. Workout tips
Follow the guidelines below for an efficient training regime with the goal of improving your stamina and health considerably.
Consult your physician before starting with any exercise programme. He can recommend the kind and level of training that is most suitable.
Max Pulse Value
To reach the best results you should train at an appropriate level using your pulse value as a reference. A rule of thumb is:
Max pulse value = 220 - your age
Your pulse should be kept at 70%-85% of the max pulse value during training. When starting your training: Keep your pulse at 70% of the max pulse value the first two weeks. When your stamina improves you can slowly increase the pulse to 85% of the max pulse value.
Burning Fat
The body starts burning fat at 60% of your maximum pulse. The optimal fat burning will be at 60 to 70% of your maximum pulse. You will achieve the best results if you normally do three 30 minute workouts per week.
Example:
You are 52 years old and are starting an exercise and calorie burning programme.
Maximum pulse rate = 220 - 52 (age) = 168 pulse/min.
Lowest pulse rate = 168 x 0.6 = 101 beats/min.
Maximum workout pulse rate = 168 x 0.7 = 117 beats/min.
Using the formula, a workout pulse between 101 and 117 during training gives the best calorie burning results in this example.
Warming up
Warm up for 5 to 10 minutes before starting your training session with e.g. stretching.
Training routines
Training at a rate of 60 to 85% of the maximum pulse rate is appropriate. The training session's length can be calculated using the following as a guide.
• Daily training session = Approx.10 minutes per session.
- Training 2-3 times per week = Approx. 20 minutes per session
- Training 1-2 times per week = Approx. 60 minutes per session
Cooling down
Let your muscles cool down after a training session, decrease the pace and intensity for the last the last 5-10 minutes. Spend some time stretching also since this is helpful in preventing muscle stiffness.
The path to success
Already after a short period of regular training you will discover that you have to increase the tension to reach your ideal training pulse. Training feels easier and your conditioning improves. Keep up your motivation and train regularly. Plan set training times each week and do not start out too intensely.
Think about it; "The hardest part is just getting started".
We wish you best of luck and success with your new rowing machine.
7. Operating Instructions
Adjustable load
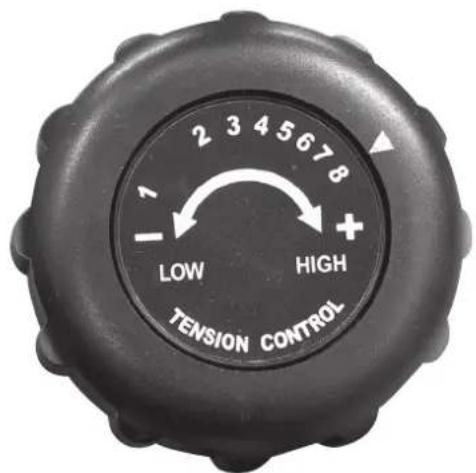
There are a total of 8 tension levels. Turn the adjustment knob clockwise or anticlockwise to change the tension.
8. Protecting the Environment
Sort and recycle products where possible, instead of disposing of them. All machines, hoses and packing material should be sorted and handled according to local environmental regulations.
9. Exploded view

| Part | Explanation Quantity | |
| 1 Frame 1 | ||
| 2 Front foot 1 | ||
| 3 Flywheel assembly 1 | ||
| 4 Spring assembly 1 | ||
| 5 Handle 1 | ||
| 6 Rubber foam grips 2 | ||
| 7 End cap 2 | ||
| 8 Guide wheel ø 50 mm 1 | ||
| 9 Guide wheel ø 30 mm 1 | ||
| 10 Bolt 2 | ||
| 11 Washer 2 | ||
| 12 Nut 2 | ||
| 13 Magnetic brake assembly 1 | ||
| 14 Tension control knob, 8 settings 1 | ||
| 15 Tension control knob bolt 1 | ||
| 16 Front foot bolt 2 | ||
| 17 Washer M8 14 | ||
| 17A Washer M8 | 2 | |
| 18 Cap nut M8 2 | ||
| 19 End cap for front foot (left) 1 | ||
| 20 End cap for front foot (right) | 1 | |
| 21 Aluminium track | 1 | |
| 22 Rear foot 1 | ||
| 23 Bolt M8 | 14 | |
| 24 Adjuster | 2 | |
| 25 End cap for rear foot | 2 | |
| 26 End cap for track | 1 | |
| 27 Rubber stopper | 4 | |
| 28 Bolt M5 | 8 | |
| 29 Bolt M8 | 1 | |
| 30 Protective connector cover 1 | ||
| 31 Screw 6 | ||
| 32 Pedal support plate | 1 | |
| 33 Pedal 2 | ||
| 34 Pedal bolt 4 | ||
| 35 Washer M6 4 | ||
| 36 Nut M6 4 | ||
| 37 Pedal end cap 2 | ||
| 38 Foot strap 2 | ||
| 39 Saddle 1 | ||
| 40 Saddle frame 1 | ||
| 41 PU-wheel plug 6 | ||
| 42 PU-wheel | 6 | |
| Part | Explanation | Quantity |
| 43 PU-wheel washer | 6 | |
| 44 Washer 12 | ||
| 45 Nut 6 | ||
| 46 Elliptical end cap (training computer) | 1 | |
| 47 Screw M5 | 2 | |
| 48 Computer mounting plate | 1 | |
| 49 Washer 2 | ||
| 50 Bolt M6 | 1 | |
| 51 Nut M6 | 1 | |
| 52 Training computer | 1 | |
| 53 Bolt M5 | 2 | |
| 53A Washer M5 | 4 | |
| 54 Wheel casing (left) | 1 | |
| 55 Wheel casing (right) | 1 | |
| 56 Bolt M4 | 5 | |
| 57 Screw M4 | 8 | |
| 58 Spacer 1 | ||
| 59 Washer M8 | 3 | |
| 61 Bolt 2 | ||
| 62 Alarm | 1 | |
| 66 L-shaped handle | 1 | |
| 67 Locking knob | 1 |
Roddmaskin
Artikelnummer: 34-8118
Modell: RO-400
Steg 1
Steg 2
Steg 5
5. Datorns funktioner

Visning på displayen
Innholdsfortegnelse
Trinn 1
Trinn 2
Trinn 5
Fest treningscomputeren (52) med to skruer (53) på festejernet ovenfor håndtaket. Se bildet.

Trinn 6
B. RESET (Tilbakestilling)
C. SET (Innstillinger)
| Del | Forklaring Mengde | |
| 1 Ramme 1 | ||
| 2 Fremre gulvstøtte 1 | ||
| 3 Hastighetshjulsserie 1 | ||
| 4 Fjærserie 1 | ||
| 5 Håndtak 1 | ||
| 6 Skumplastbeskyttelse 2 | ||
| 7 Dekkbrikke 2 | ||
| 8 Melomhjul ∅50 mm 1 | ||
| 9 Melomhjul ∅30 mm 1 | ||
| 10 Bolt 2 | ||
| 11 Skive 2 | ||
| 12 | Mutter | 2 |
| 13 Magnetserie | 1 | |
| 14 Motstandsregulering, 8 hastigheter | 1 | |
| 15 Bolt for motstandsregulering | 1 | |
| 16 Fremre gulvstøttebolt | 2 | |
| 17 Skive M8 | 14 | |
| 17A | Skive M8 | 2 |
| 18 Kuppelmutter M8 | 2 | |
| 19 Dekkbrikke for fremre gulvstøtte (venstre) | 1 | |
| 20 | Dekkbrikke for fremre gulvstøtte (høyre) | 1 |
| 21 | Aluminiumsskinne | 1 |
| 22 Bakre gulvstøtte | 1 | |
| 23 | Bolt M8 | 14 |
| 24 | Justeringsknapp | 2 |
| 25 | Dekkbrikke for bakre gulvstøtte | 2 |
| 26 | Dekkbrikke for seteskinne | 1 |
| 27 | Gummidemper | 4 |
| 28 | Bolt M5 | 8 |
| 29 | Bolt M8 | 1 |
| 30 Beskyttelse for tilkoblingsdel | 1 | |
| 31 Skrue | 6 | |
| 32 | Støtteplate for pedal | 1 |
| 33 Pedal | 2 | |
| 34 Pedalbolt | 4 | |
| 35 Skive M6 | 4 | |
| 36 Mutter M6 | 4 | |
| 37 Firkantet plugg | 2 | |
| 38 Remserie | 2 | |
| 39 Sete | 1 | |
| 40 Festejern for sete | 1 | |
| 41 PU-hjultapp | 6 | |
| 42 | PU-hjul | 6 |
| Del | Forklaring | Mengde |
| 43 PU | -hjulskive 6 | |
| 44 Skive 12 | ||
| 45 Mutter | 6 | |
| 46 Elliptisk Dekkbrikke (treningscomputer) | 1 | |
| 47 Skrue M5 | 2 | |
| 48 Festejern for treningscomputer | 1 | |
| 49 Skive 2 | ||
| 50 Bolt M6 | 1 | |
| 51 Mutter M6 | 1 | |
| 52 | Treningscomputer | 1 |
| 53 Bolt M5 | 2 | |
| 53A | Skive M5 | 4 |
| 54 Beskyttelseslokk for fartshjul (venstre) | 1 | |
| 55 Beskyttelseslokk for fartshjul (høyre) | 1 | |
| 56 Bolt M4 | 5 | |
| 57 Skrue M4 | 8 | |
| 58 Mellomstykke | 1 | |
| 59 Skive M8 | 3 | |
| 61 Bolt 2 | ||
| 62 | Signalgiver 1 | |
| 66 L-format håndtak | 1 | |
| 67 Låsratt | 1 |
Soutulaite
Tuotenumero: 34-8118
Malli: RO-400
Sisällysluettelo
1. askel
Asenna etummainen lattiatuki
2. askel
Asenna taaempi lattiatuki
5. askel
For consumer contact, please visit www.clasohlson.co.uk and click on customer service.
INTERNET www.clasohlson.co.uk
- ROWING MACHINE
- TABLE OF CONTENTS
- PRODUCT DESCRIPTION
- SAFETY
- CONTENTS
- ASSEMBLY
- STEP 1
- MOUNTING THE FRONT FOOT
- STEP 2
- MOUNTING THE REAR FOOT
- STEP 3
- MOUNT THE ALUMINIUM TRACK TO THE FRAME
- STEP 4
- ATTACHING THE PEDALS
- STEP 5
- STEP 6
- FOLDING THE ROWING MACHINE FOR STORING OR TRANSPORTING
- STEP 7
- TRANSPORT AND STORAGE
- COMPUTER FUNCTIONS
- THE DISPLAY READING
- MODE (FUNCTIONS)
- RESET
- SET (SETTINGS)
- FUNCTION BUTTONS
- WORKOUT TIPS
- MAX PULSE VALUE
- BURNING FAT
- EXAMPLE
- WARMING UP
- TRAINING ROUTINES
- COOLING DOWN
- THE PATH TO SUCCESS
- OPERATING INSTRUCTIONS
- ADJUSTABLE LOAD
- PROTECTING THE ENVIRONMENT
- EXPLODED VIEW
- RODDMASKIN
- ARTIKELNUMMER: 34-8118
- MODELL: RO-400
- STEG 1
- STEG 2
- STEG 5
- DATORNS FUNKTIONER
- VISNING PÅ DISPLAYEN
- INNHOLDSFORTEGNELSE
- TRINN 1
- TRINN 2
- TRINN 5
- TRINN 6
- RESET (TILBAKESTILLING)
- SET (INNSTILLINGER)
- SOUTULAITE
- TUOTENUMERO: 34-8118
- MALLI: RO-400
- SISÄLLYSLUETTELO
- ASKEL
- ASENNA ETUMMAINEN LATTIATUKI
- ASENNA TAAEMPI LATTIATUKI
Brand : Clas Ohlson
Model : CM922B
Category : Washing machine