L12FCB12 - Coffee maker Logik - Free user manual and instructions
Find the device manual for free L12FCB12 Logik in PDF.
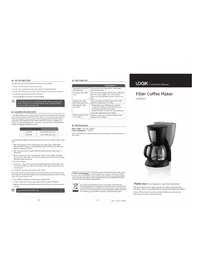


| Product Type | Filter Coffee Maker |
| Brand | Logik |
| Model | L12FCB12 |
| Power Supply | 220-240 V ~ 50/60 Hz |
| Power Consumption | 730-870 W |
| Capacity | 10 cups (max.) |
| Brewing Time | Approx. 7-8 minutes for full load |
| Warming Plate | Yes, keeps coffee warm |
| Filter Type | Permanent filter (included) |
| Jug Material | Glass |
| Jug Capacity | 1.25 L (approx., 10 cups) |
| Dishwasher Safe Parts | Jug and filter holder |
| Descaling | White vinegar recommended |
| Cleaning Frequency | Every 80 cycles (soft water) / 40 cycles (hard water) |
| Auto Shut-off | Not specified, manual switch off |
| Safety Features | Boil-dry protection (jug discard if boiled dry), do not immerse |
| Spare Parts Available | Jug (L12FCB12-JUG), Filter (L12FCB12-FT), Funnel (L12FCB12-FL) |
| User Serviceable Parts | None; repairs by qualified personnel only |
| Warranty | Not specified |
| Certifications | CE marked (implied), WEEE disposal |
Frequently Asked Questions - L12FCB12 Logik
User questions about L12FCB12 Logik
0 question about this device. Answer the ones you know or ask your own.
Ask a new question about this device
Download the instructions for your Coffee maker in PDF format for free! Find your manual L12FCB12 - Logik and take your electronic device back in hand. On this page are published all the documents necessary for the use of your device. L12FCB12 by Logik.
USER MANUAL L12FCB12 Logik
The jug may break if the following instructions are not followed:
- Do not set a hot jug on a wet or cold surface.
- Do not use a cracked jug or a jug with a loose or weakened handle.
- Do not clean the jug with cleaners, steel wool pads or other abrasive materials.
- Discard the jug immediately if it has boiled dry.
- Avoid sharp blows, scratches or rough handling.

To reduce the risk of fire or electrical shock, do not remove any service covers. There are no user serviceable parts inside. Repairs should be done by qualified personnel only.

CLEANING INSTRUCTIONS
Your coffee maker must be cleaned when you notice any excessive steaming or the brewing time increases considerably. This condition is caused by a build-up of lime and mineral deposits from your water. If the pumping action stops before all the water has been pumped out of the coffee maker, then it requires cleaning. The frequency of cleaning depends on the hardness of the water used. The following table gives suggested cleaning intervals.
| Cleaning FrequencyType of | |
| Soft Water | Every 80 Brewing Cycles |
| Hard Water | Every 40 Brewing Cycles |
Pour one litre of undiluted white household vinegar into your coffee maker's water tank.
- Place the empty jug on the warming plate and switch on the coffee maker. When half of the vinegar has flowed through, switch off the coffee maker and allow it to stand for 1/2 hour.
- After 1/2 hour, pour the vinegar inside the jug back into the coffee maker's water tank.
- Place the empty jug on the warming plate. Switch on the coffee maker again and allow the coffee maker to complete its brewing cycle with all of the vinegar flowing through into the jug.
- Discard the vinegar.
- To remove all traces of vinegar, pour a jug full of tap water into the water tank of the coffee maker, then switch on the coffee maker again and allow the water to go through.
- Discard the water and switch off the coffee maker.
Hard water can leave a whitish mineral deposit inside the jug. Coffee can discolour these deposits, sometimes leaving a brownish stain inside the jug. To remove these stains, follow these simple steps:
- Use a solution of equal parts white vinegar and hot water.
- Let the solution stand in the jug for about 20 minutes and then discard.
- Wash and rinse the jug thoroughly using a soft cloth. Do not use harsh abrasive cleaners.

Jug and filter are dishwasher safe.

HINTS AND TIPS
| AnswerQuestion | |
| Why doesn't the ON/OFF switch light up? | Check that you have plugged your coffee maker into the mains socket. |
| Why doesn't the coffee brew? | Check the unit is plugged into the mains socket and there is no power outage. Also check the filter holder is properly inserted and there is water in the tank. |
| Why does the coffee maker only brew water? | There is no coffee in the filter, check that you have added the desired amount of coffee. |
| Why does the coffee taste bad? | Maybe the incorrect coffee grind for automatic drip coffee makers was used. Check you have used the recommended coffee grind.The ground coffee-to-water ratio was unbalanced.The coffee maker needs to be cleaned. |
| Why do grounds appear in the coffee? | The filter is not properly seated in the filter holder or the filter has collapsed. |

SPECIFICATIONS
Mains supply: 220-240V, 50/60Hz
Power consumption: 730-870
We continually strive to improve our products. Specifications may change without prior notice.

Visit Partmaster.co.uk today for the easiest way to buy
electrical spares and accessories. With over 1 million spares and accessories available we can deliver direct
Visit www.partmaster.co.uk or call 0844 800 3456 [UK]
at National Rate.


This symbol on the product or in the instructions means that your electrical and electronic equipment should be disposed at the end of its life separately from your household waste. There are separate collection systems for recycling in the EU. For more information, please contact the local authority or your retailer where you purchased the product.
GB 5
QSG-L12FCB12-130723V2
LOGIK
Instruction Manual
Filter Coffee Maker
L12FCB12
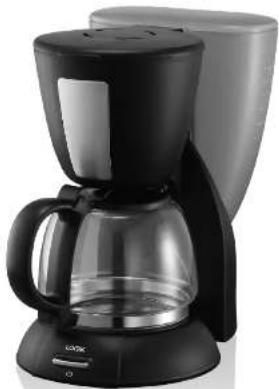
Thank you for purchasing your Logik Filter Coffee Maker.
We recommend that you spend some time reading this instruction manual in order to fully understand all the operational features it offers. Read all the safety instructions carefully before use and keep this instruction manual for future reference.
SAFETY FIRST!
For your continued safety and to reduce the risk of injury or electric shock, please follow all the safety precautions listed below.
- Read all the instructions carefully before using this appliance and keep them for future reference.
- Retain this manual. If you pass the appliance on to a third party, make sure to include this manual.
- Make sure that your mains voltage corresponds to the voltage stated on the rating label of the appliance.
- Unplug the appliance from the mains socket when not in use, or before cleaning any part of the appliance.
- Do not touch hot surfaces. Always use the handle(s) when operating the appliance.
• To protect against electric shock, do not immerse the mains cable, plug or the appliance in water or other liquids.
- This appliance has not been designed for use by children. Children should be closely supervised at all times when they are near any electrical appliance.
- This appliance is not intended for use by persons (including children) with reduced physical, sensory or mental capabilities, or lack of experience and knowledge unless they have been given supervision or instruction concerning the use of the appliance by a person responsible for their safety.
• Children should be supervised to ensure that they do not play with the appliance.
- Do not operate any appliance with a damaged mains cable or mains plug or in an abnormal state. If the mains cable is damaged it must be replaced by the manufacturer, its service agent, or similarly qualified persons in order to avoid a hazard.
- Always ensure that hands are dry before operating or adjusting any switch on the appliance or touching the mains plug and mains supply connections.
• To disconnect, remove the mains plug from the mains socket.
- Do not use the appliance for other uses than its intended use. - The appliance must be placed on a flat stable surface and should not be subjected to vibrations.
- Do not let the mains cable overhang the edge of the work surface or allow it to touch hot surfaces or sources of heat or flame.
• This appliance is for indoor, household, domestic use only.
UNPACKING
Remove all packaging from the unit. Retain the packaging. If you dispose of it, please do so according to local regulations.
The following items are included:
• The Main Unit
• Jug
(P.N.: L12FCB12-JUG)
- Filter
(P.N.: L12FCB12-FT) • Funnel
(P.N.: L12FCB12-FL) - Instruction Manual (P.N.: L12FCB12-002)
If items are missing or damaged, please contact Partmaster (UK only). Tel: 0844 800 3456 for assistance.
PRODUCT OVERVIEW
Remove all packaging from the unit. Retain the packaging. If you dispose of it, please do so according to local regulations.
The following items are included:

GB 2
- Wash the jug, the lid, the filter holder and the filter in mild detergent and hot water. Rinse them thoroughly and dry.
- Fit the filter into the filter holder and close the filter holder.
- To clean the inside of the coffee maker, fill the water tank of your coffee maker with water, and follow Steps 3 to 6 in the OPERATION section.
- For the perfect taste, boil fresh water (without coffee) 2-3 times.
- Once all the water has passed through, switch off the appliance and let it cool for 5 mins.
- Repeat the process with more fresh water.
- Once the initial cleaning cycle is complete, switch off the coffee maker and discard the water in the jug.
- Your coffee maker is now ready to use.
INSTANT COFFEE USAGE
| Amount of Water | Amount of Instant Coffee Regular Brew | Amount of Instant Coffee Strong Brew |
| 1 serving (125ml) | 1 rounded teaspoon | 2 rounded teaspoons |
| 6 servings (750ml) | 6 rounded teaspoons | 12 rounded teaspoons |
OPERATION
- Open the filter holder.
- Add the desired amount of coffee into the filter (follow the measurement tables shown above). Shake lightly to level the coffee. Close the filter holder.
- Fill the jug with tap water to the desired capacity.
- Pour the water from the jug into the water tank. Place the empty jug onto the warming plate.
- Switch your coffee maker on with the ON/OFF switch.
- When the coffee stops dripping, the brewing cycle is complete (this usually takes about 7-8 minutes for a 10 cup (max.) load). Your coffee is ready to drink, and will be kept warm on the heated warming plate.
- Carefully open the filter holder and discard the used ground coffee from the filter. Rinse the filter holder and filter after use and then refit them.
- To make another pot of coffee, repeat the above Steps 1 to 7.
- Switch off your coffee maker when the jug is empty or when you are not using it. Unplug the mains cable when not using the coffee maker for a long period of time.
To avoid the risk of personal injury or damage to property as a result of overflow, be sure that the jug is squarely centred under the filter holder during the brewing cycle.
- The brewed coffee in the jug and the grounds in the filter are very hot. Handle them with care to avoid scalding.
If the coffee fails to drain into the jug during the brewing cycle causing overflows, do not open or touch the filter holder. Unplug the coffee maker, and wait for it to cool down before handling.
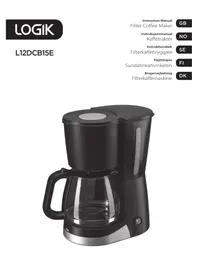
Brand : Logik
Model : L12FCB12
Category : Coffee maker