
SMG9075NE - Splashback SMEG - Free user manual and instructions
Find the device manual for free SMG9075NE SMEG in PDF.


| Brand | Smeg |
| Model | SMG9075NE |
| Product Type | Glass Splashback / Upstand |
| Material | Toughened glass |
| Dimensions (Approx.) | Custom fit; typical height 600 mm, width up to 900 mm |
| Thickness | 4 mm (typical for glass splashbacks) |
| Weight (Estimated) | Approx. 5 - 8 kg depending on size |
| Color Options | White, black, and custom colors (specify at order) |
| Installation Method | Adhesive mounting with silicone sealant and spacers |
| Tools Required (Not Included) | Tape measure, sealant gun, silicone sealant (BS 5889 A), 2 mm spacers |
| Surface Preparation | Surface must be flat, non-porous, dry, and dust-free |
| Silicone Sealant Specification | Low Modular Neutral Cure Silicone (BS 5889 A) |
| Gap Requirement | 2 mm gap between splashback and all surfaces, filled with silicone |
| Installation Notes | Do not place glass on hard surfaces; use spacers; avoid fitting directly onto hob or worktop |
| Handling Safety | Wear eye protection and gloves; corners are vulnerable to impact |
| Aftercare | Clean with hot water and mild soap; do not use abrasive cleaners |
| Repairability | Glass cannot be repaired; replace if cracked or chipped |
| Spare Parts Availability | Contact Smeg authorized service centers for replacements |
| Warranty | Standard Smeg warranty; check documentation for details |
| Certification | Complies with relevant EU/UK safety standards |
Frequently Asked Questions - SMG9075NE SMEG
User questions about SMG9075NE SMEG
0 question about this device. Answer the ones you know or ask your own.
Ask a new question about this device
Download the instructions for your Splashback in PDF format for free! Find your manual SMG9075NE - SMEG and take your electronic device back in hand. On this page are published all the documents necessary for the use of your device. SMG9075NE by SMEG.
USER MANUAL SMG9075NE SMEG
natural_image
Modern kitchen interior with black oven, stainless steel pan, and vases (no visible text or symbols)BEFORE STARTING:
- Read the checklist at the back of these instructions.
- Read the assembly guide overleaf.
- Check that you have all the tools needed (see overleaf).
FITTING STEPS – SPLASHBACKS / UPSTANDS

natural_image
Isometric line drawing of a kitchen setup with ovens and cabinetry (no text or symbols)First check the dimensions.
natural_image
Isometric line drawing of a kitchen appliance with stove and oven (no text or symbols)Ensure the surface being fixed to is flat, non-porous, dry and dust free.

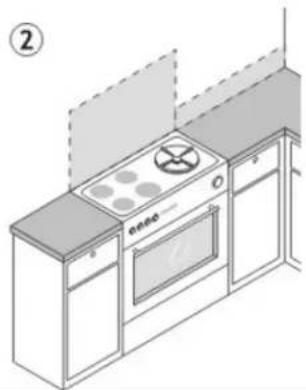
Hold up the back of the splashback/upstand to the worktop/ wall to check fit. Use the spacers to achieve a good fit.

natural_image
Two technical diagrams showing a monitor and a rack with a triangular panel, no text or symbols present.Take the splashback/ upstands away making sure to keep all corners safe from hard surfaces and then remove the covering from self adhesive backing. Fit the splashback on top of the spacers.
Place the bottom edge of the splashback/ upstand on the spacers, then push the splashback/ upstand to the wall and apply firm pressure evenly over the whole surface area. Ensure that a 2mm space is left. Finally (2-3 hours) remove spacers.

Seal the edges of the splashback/upstand with a bead of silicone sealant not less than 2.5 mm in thickness.

natural_image
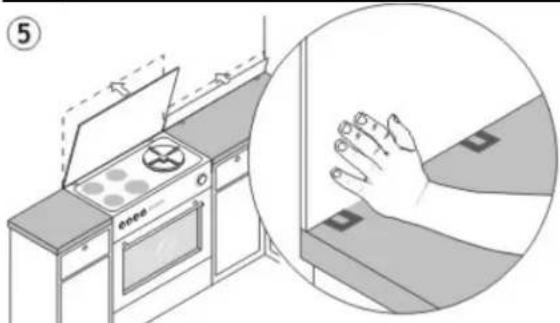
Isometric illustration of a kitchen interior with ovens and appliances, showing a hand holding a hand near stairs (no text or symbols)Complete the surrounding wall covering.
ASSEMBLY GUIDE - SPLASHBACKS / UPSTANDS
IMPORTANT
Unfitted glass is fragile. Do not place on hard surfaces prior to fitting. Special care should be taken with the corners of the product as impact will cause the product to crack.
CHECK LIST
- Do you have everything you need to start the job?
- Check that the splashback / upstands fits.
• Is it the right colour? - Ensure that your worktop is fitted securely.
- Check that your worktop is level.
- Clear all dust from the worktop.
- Ensure that your hob is fitted in accordance with the manufacturer's instructions.
- Make sure that your extractor is securely fitted in accordance with the manufacturer's instructions.
DO NOT
- Fit the splashback / upstands directly onto a hob or work surface - use spacers.
- Place the splashback / upstands on its edge or on any hard surface during the fitting process.
- Use the product until the silicone has cured (follow the manufacturer's instructions).
To prevent product failures ensure that:
- All fitting steps are completed.
- A space of 2mm is left between the product and all surfaces. The gaps must be filled with silicone.
- The surface to which the product is applied is flat, variations in level in excess of 5mm should be packed with silicone prior to fitting.
- You do not use any form of adhesive other than silicone as certain adhesives will degrade the finish of the glass.
SAFE HANDLING OF GLASS
All products are supplied with a safety packing but we recommend that glass is handled with care and in particular eye protection and suitable gloves should be worn.
AFTER CARE
Do not use abrasive cleaners. For the best results use hot water with a mild soap detergent.
BEFORE YOU START
- Check that all components are present.
- Ensure that you have all tools to hand.
TOOLS (NOT INCLUDED)
- Tape measure
- Sealant gun
- Silicone sealant
Only use Low Modular Neutral Cure Silicone (BS 5889 A)
- Packing shim (spacers) 2mm thick

natural_image
Line drawing of a syringe with three different components (no text or symbols)
natural_image
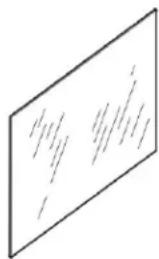
Pure geometric diagram of a parallelogram with internal lines and dots, no text or symbols presentGlass Splashbacks
natural_image
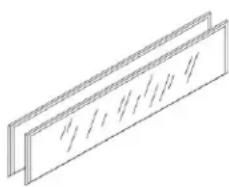
Pure technical line drawing of two stacked rectangular panels without any text, numbers, or symbolsGlass Upstands
Drilling should only be undertaken by a suitably trained person with the correct machinery.


Brand : SMEG
Model : SMG9075NE
Category : Splashback